what is assembly?
let’s break down assembly, ribbons, wax seals and more!
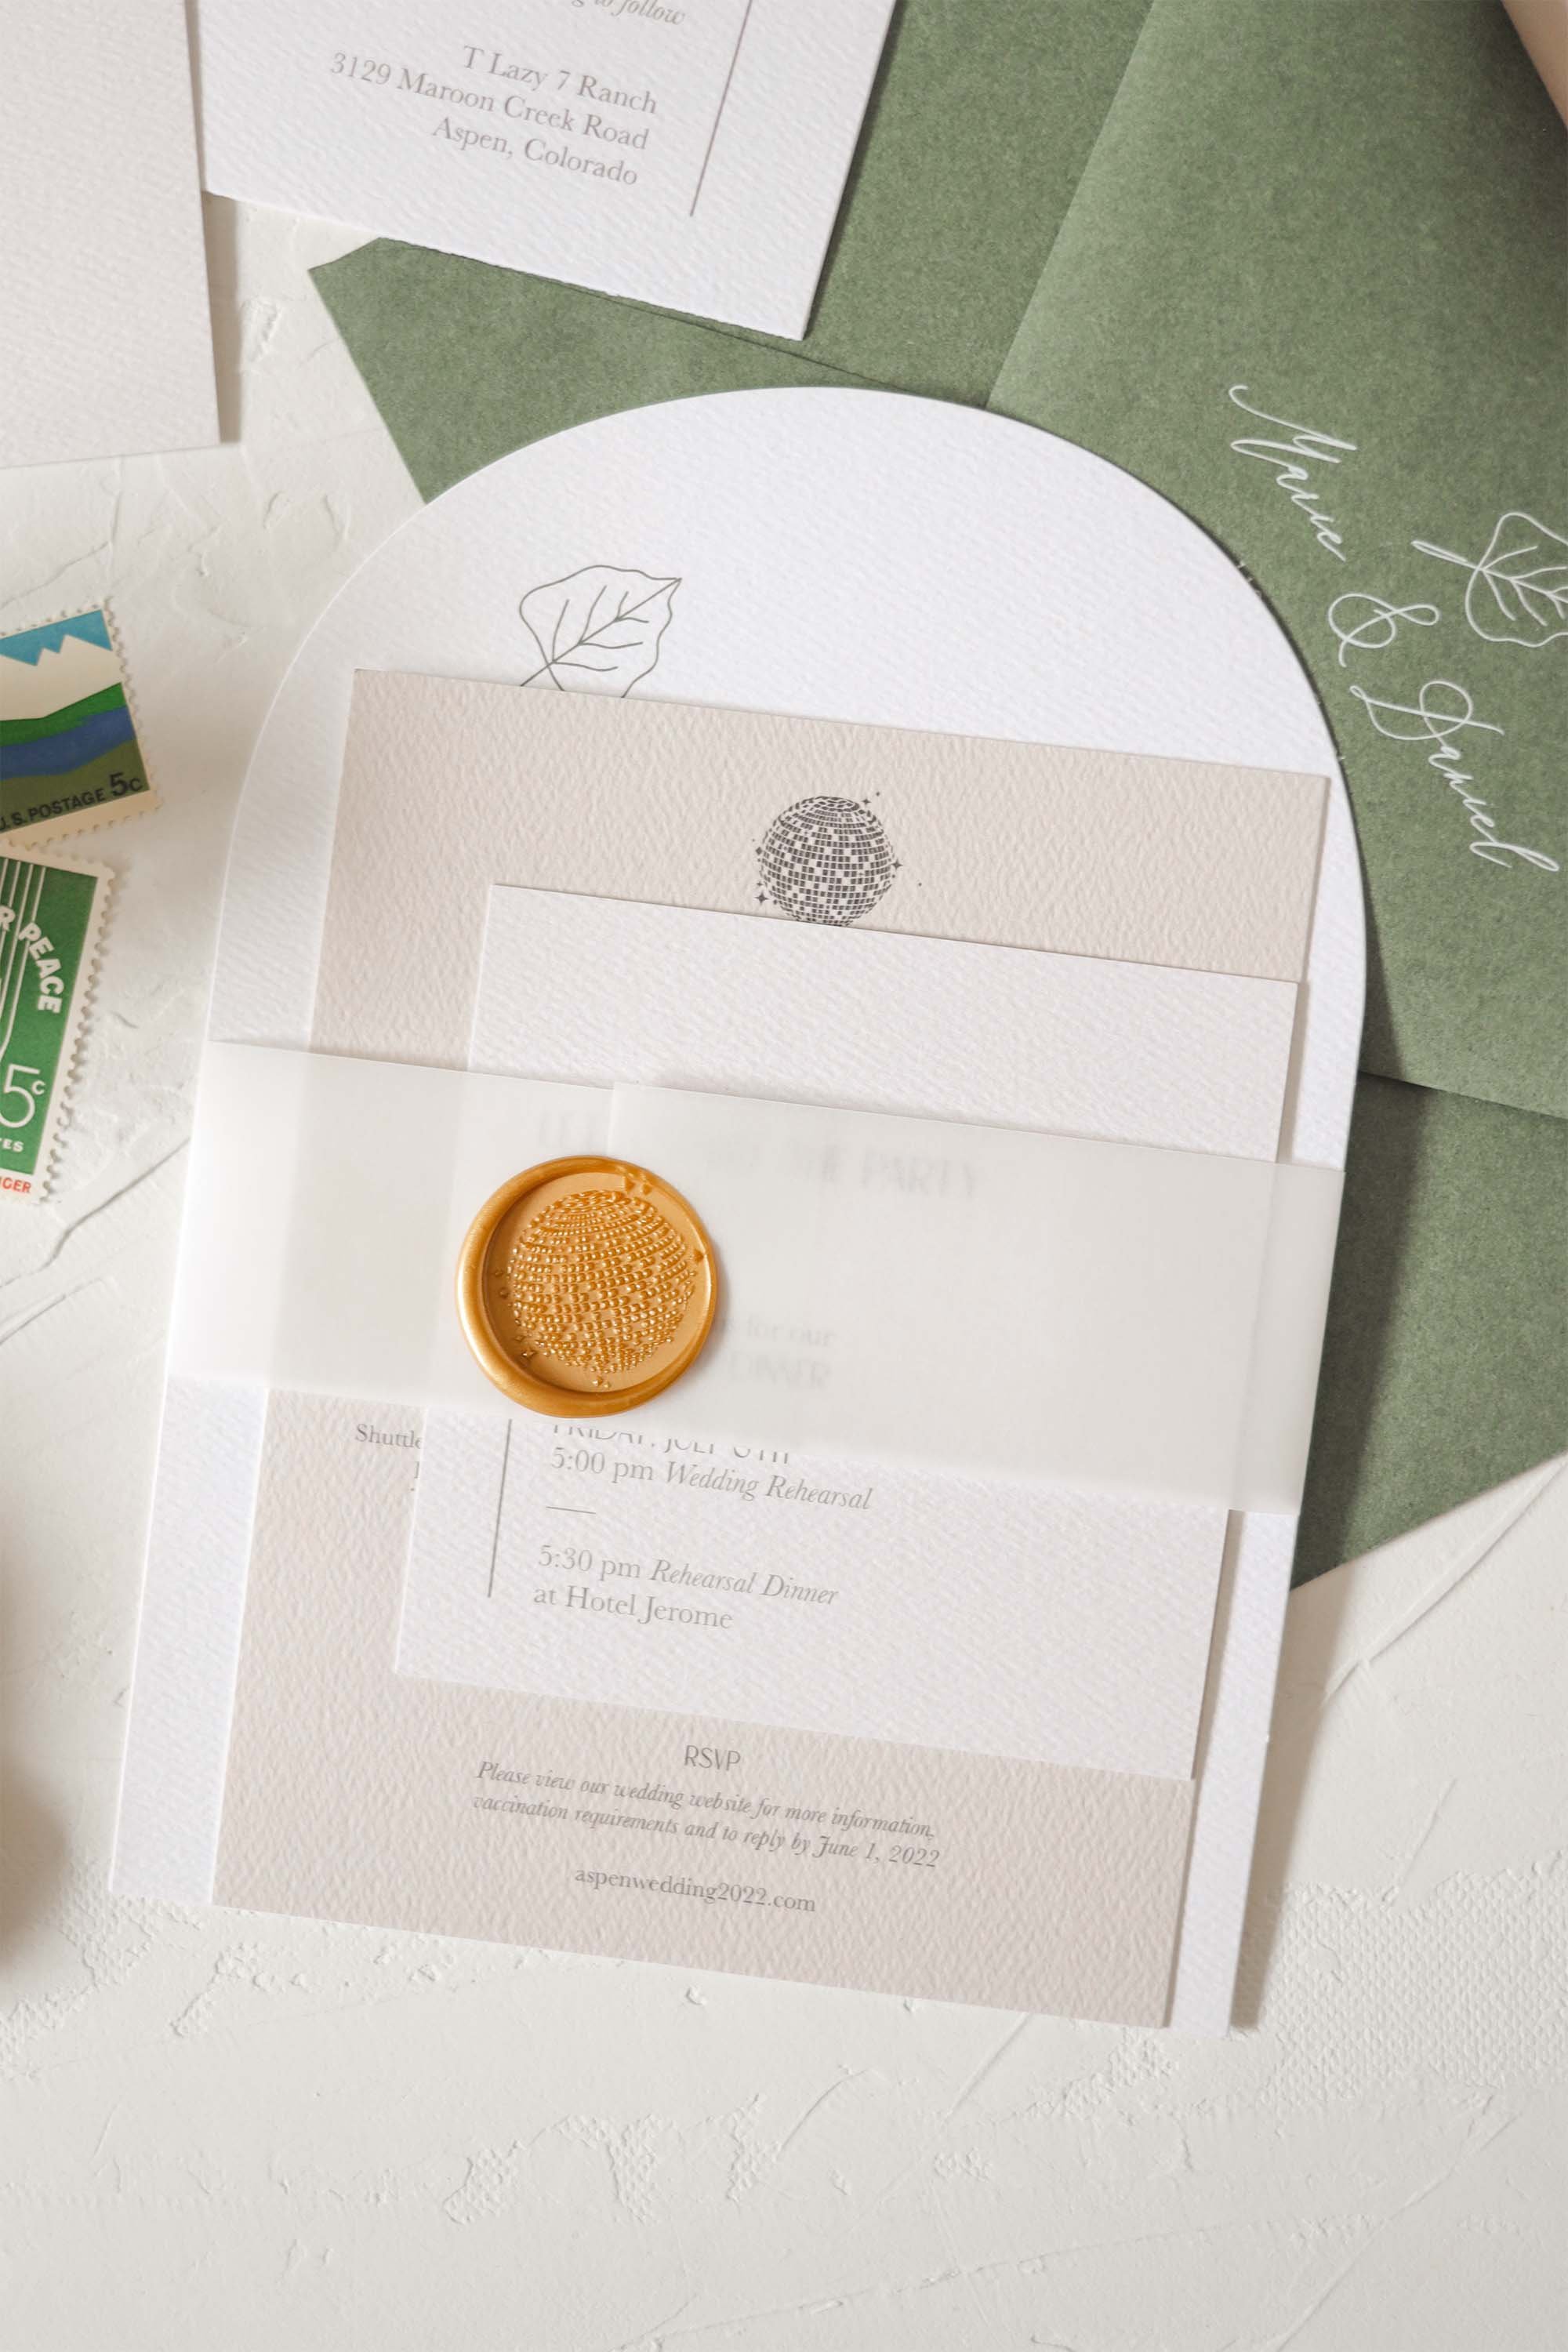
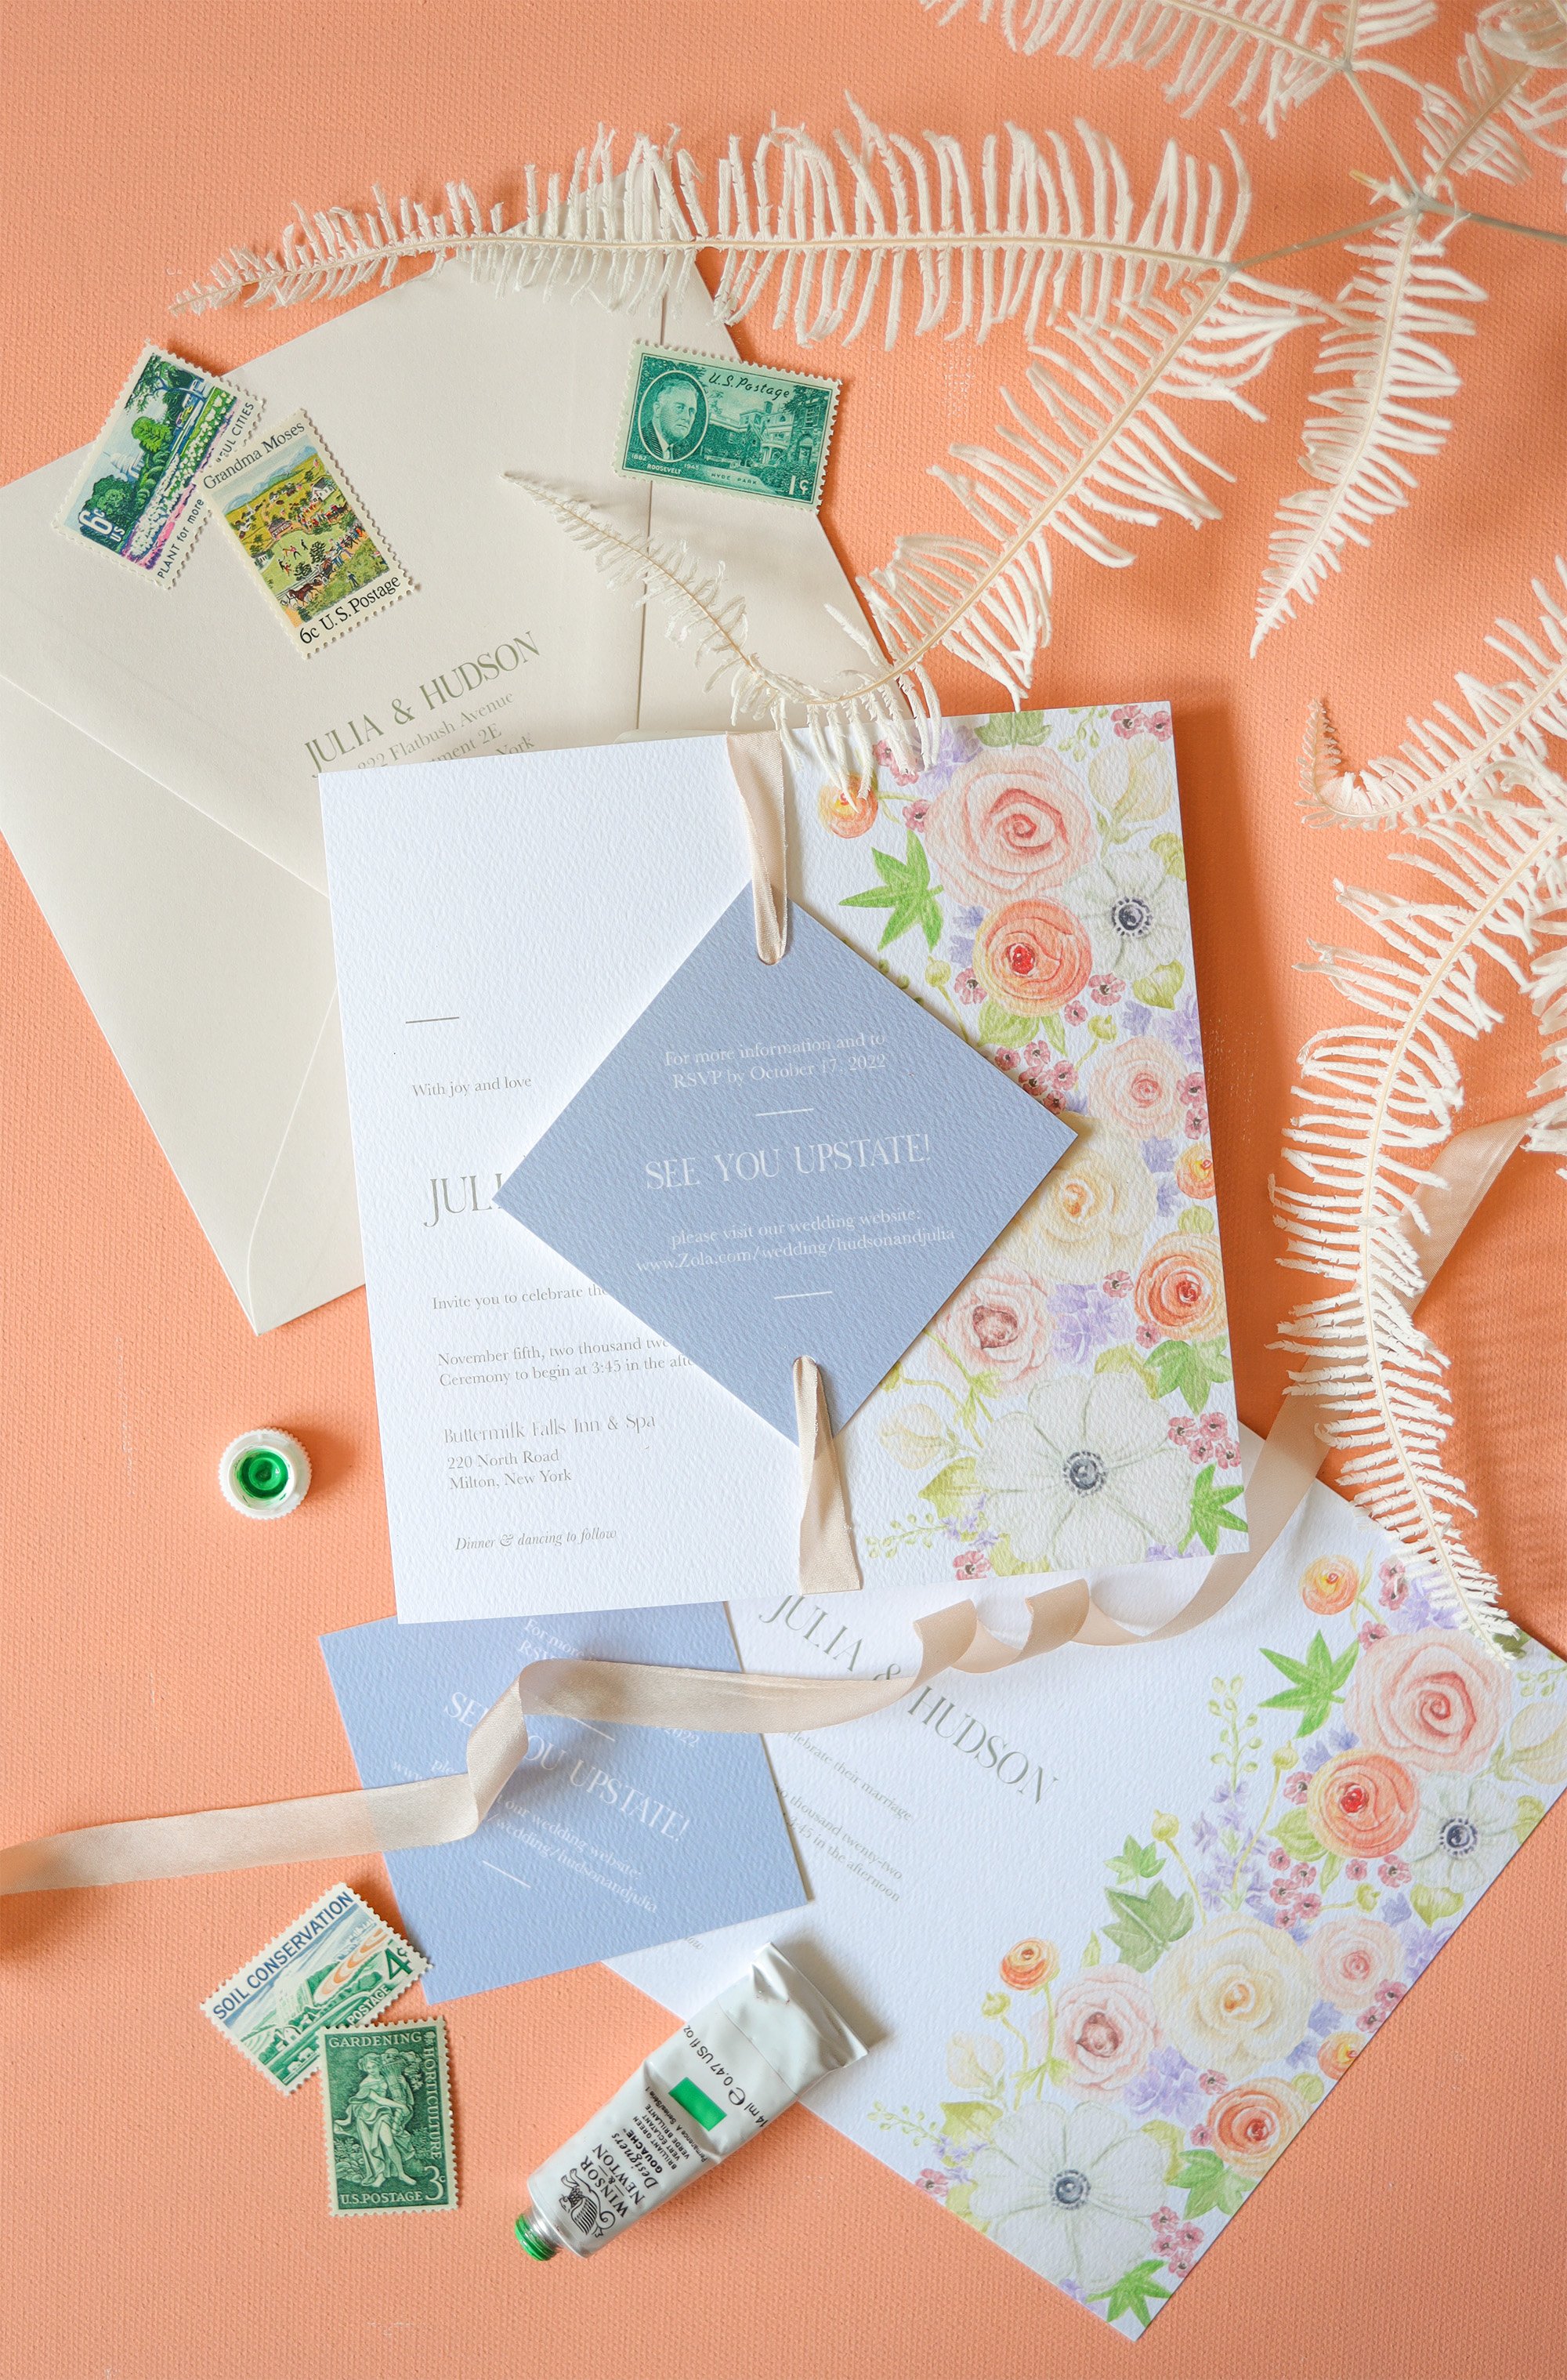
So first of all, let’s start with a good old definition. The term “wedding suite” is used all the time by people in my world of weddings but for your average bride or groom, who does not work in the field, this may be new for you so I’ll break it down simply. The wedding suite is literally all the components that are going in the envelope with the invitation to send off to your wedding guests! Your invitation, reply card, info card, rehearsal dinner insert + any embellishment details such as a belly band, ribbon, wax seal, etc. So that’s it guys. Your wedding suite is what is inside the envelope!
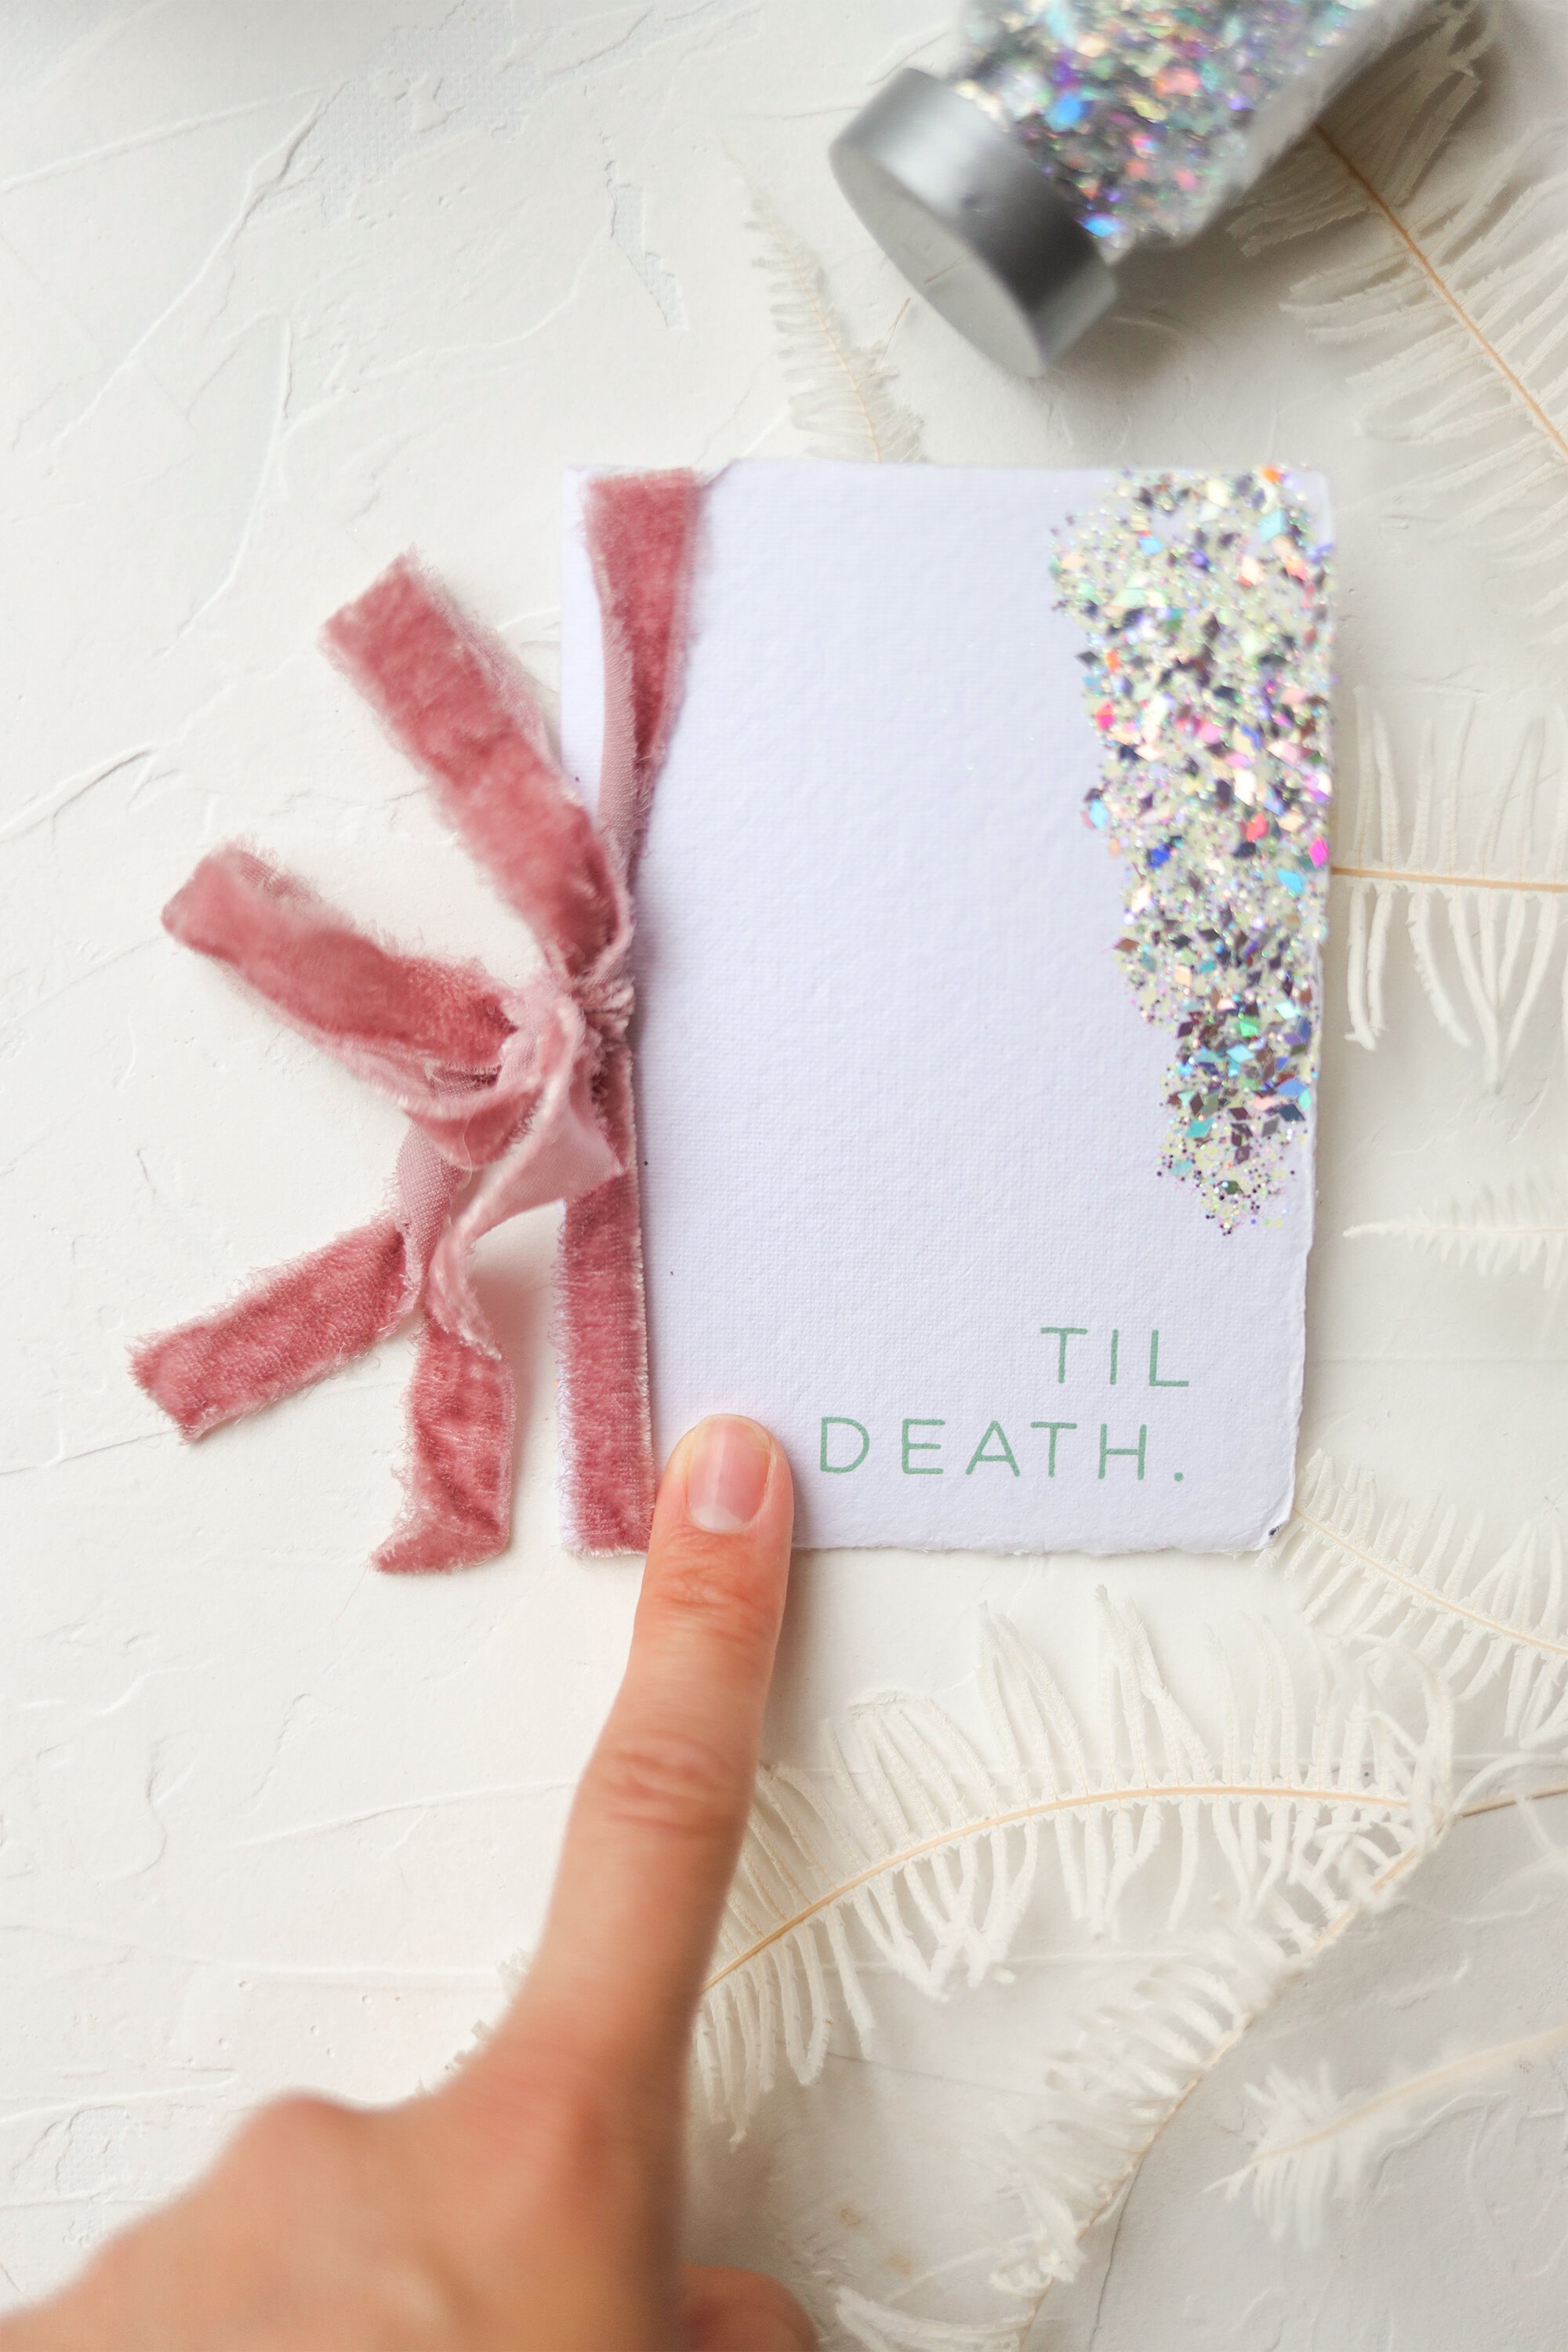
And now to the assembly + embellishments! So you have your wedding suite and each piece is designed to your perfection. But you don’t want to just stick them in the envelope one by one, you want more. And listen, I get it. I loveeee binding all the pieces together in some way whether that be with ribbon, wax seals or an enclosure envelope. There are many options here and with the options come more options! First things first, you can always always search on pinterest for examples of “a ribbon tied wedding suite” or “belly band and wax seal wedding suite” and you’ll be shown tons of different ways to do just one of those options. Or you can leave it to your wedding stationery vendor (me, hi) to do it for you!
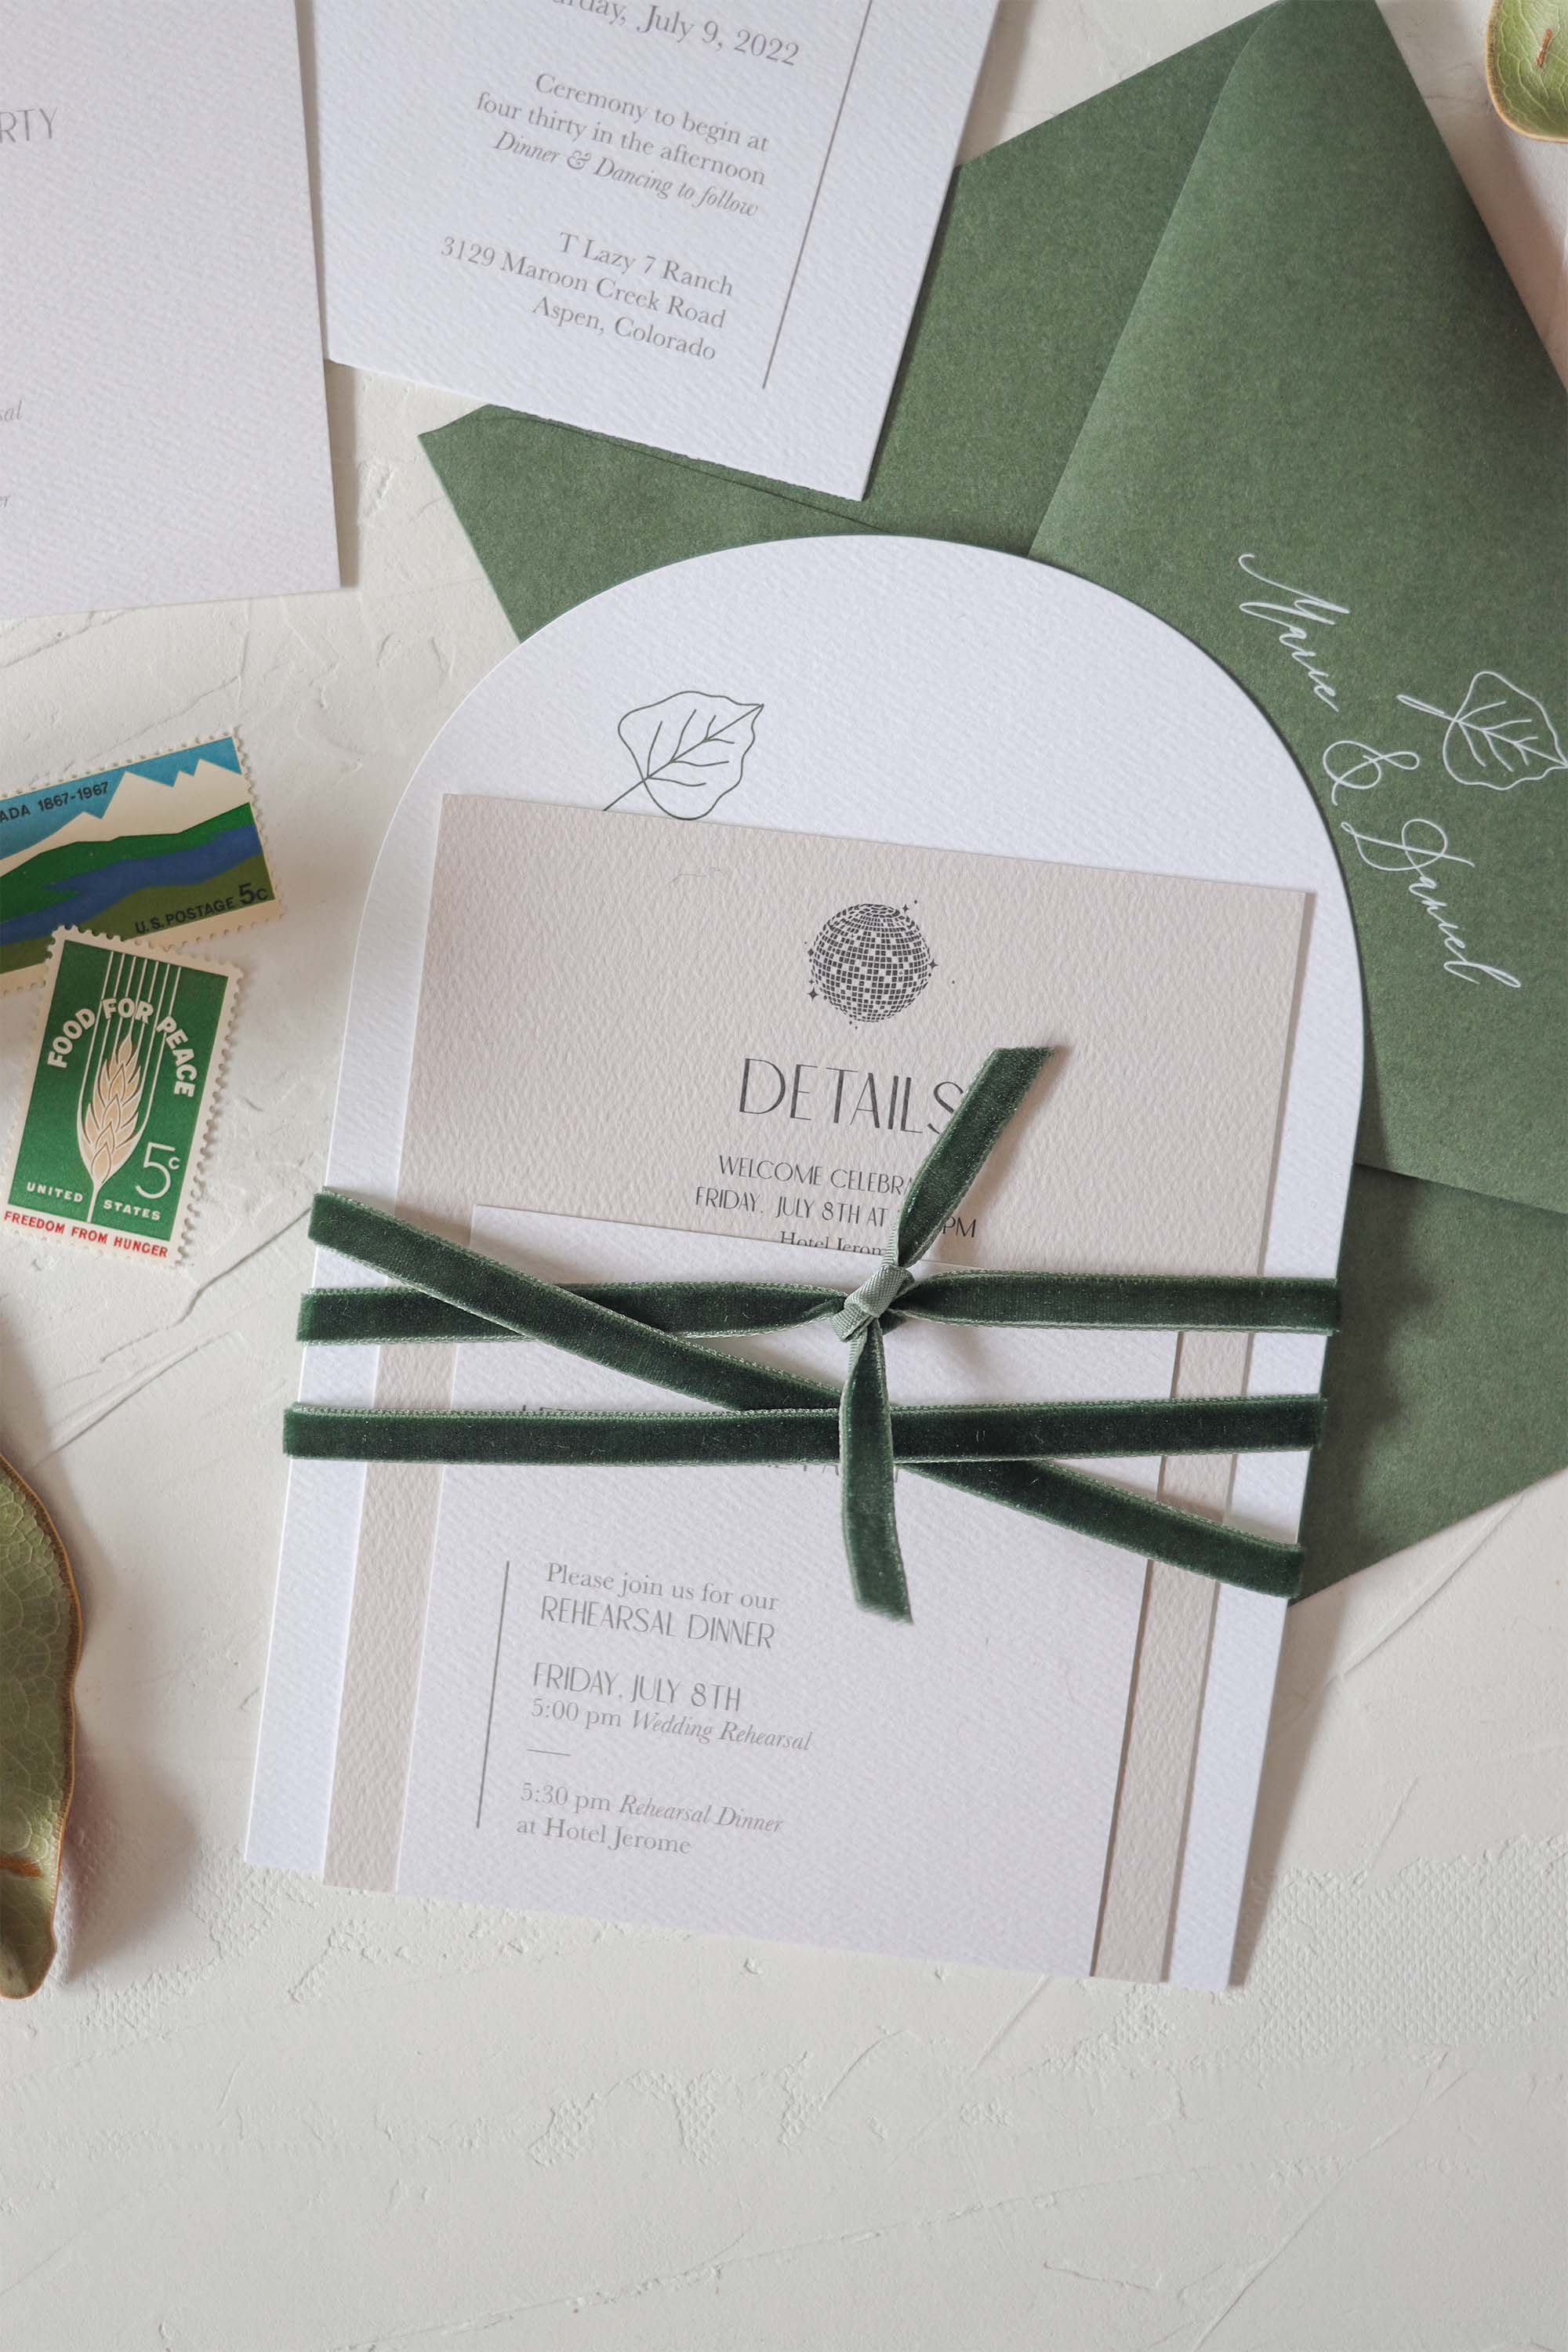
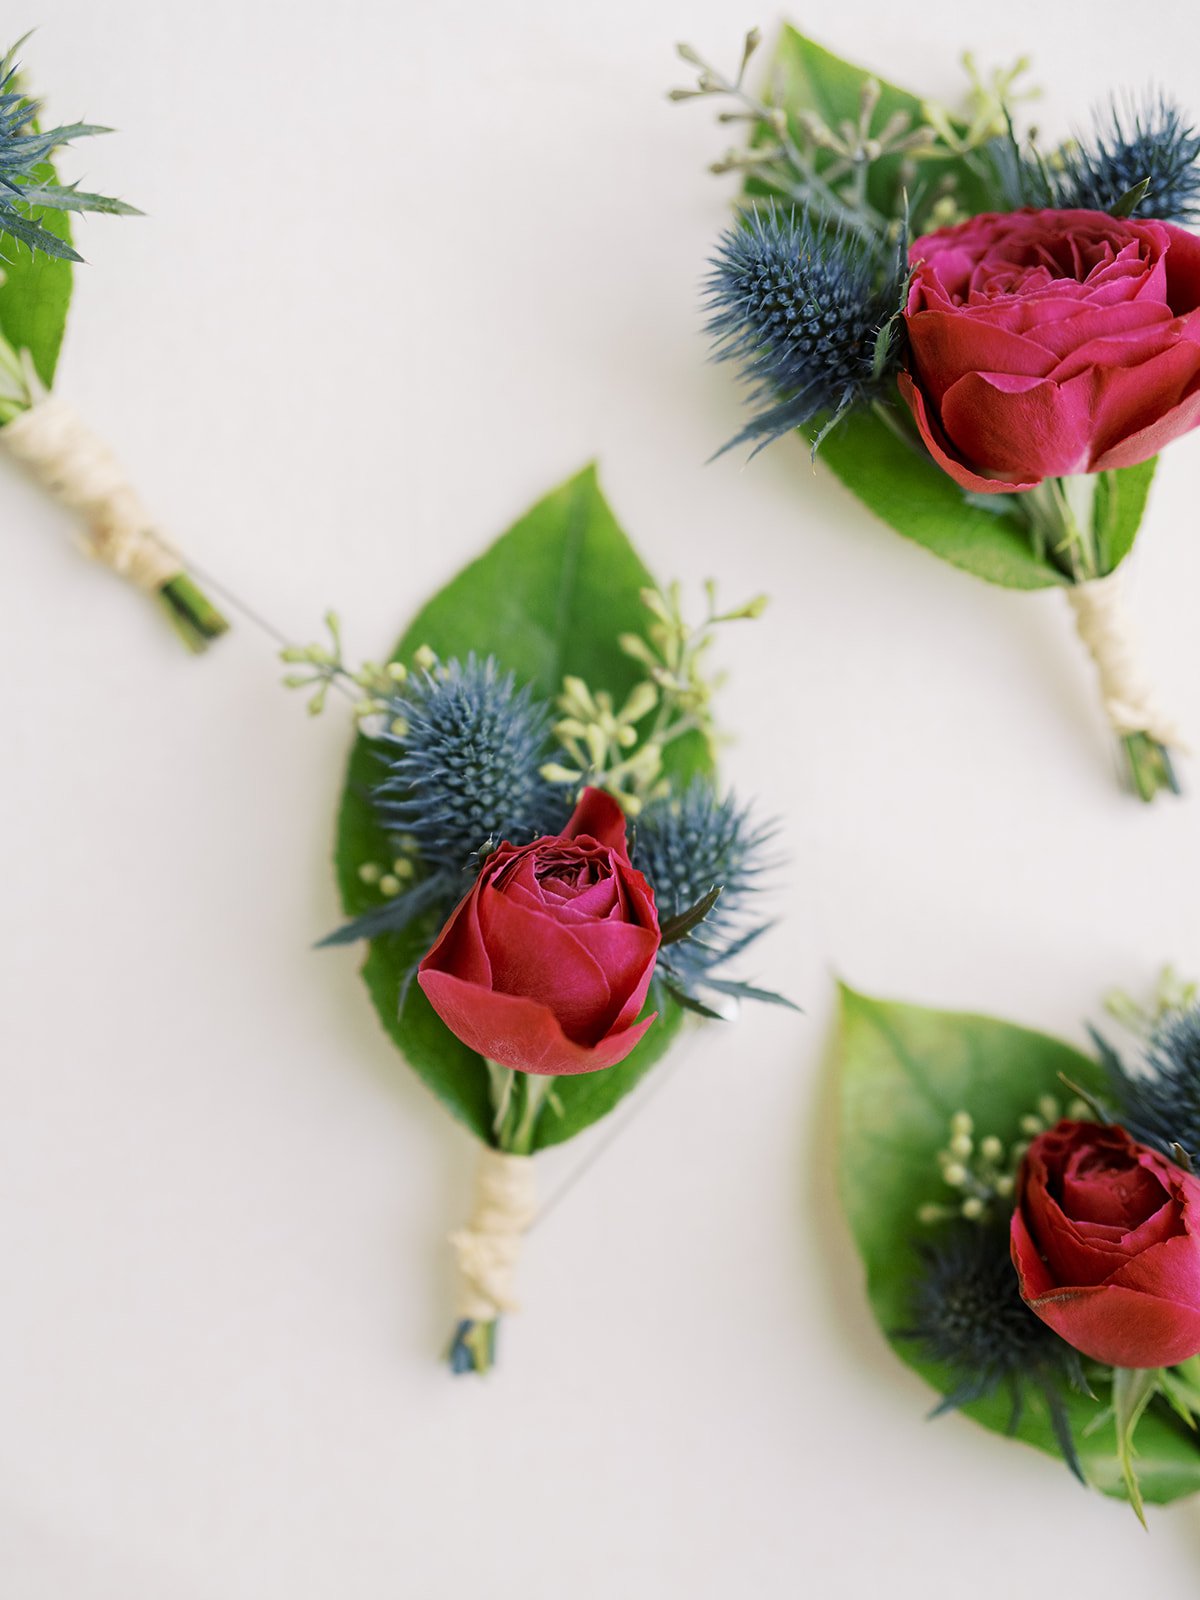
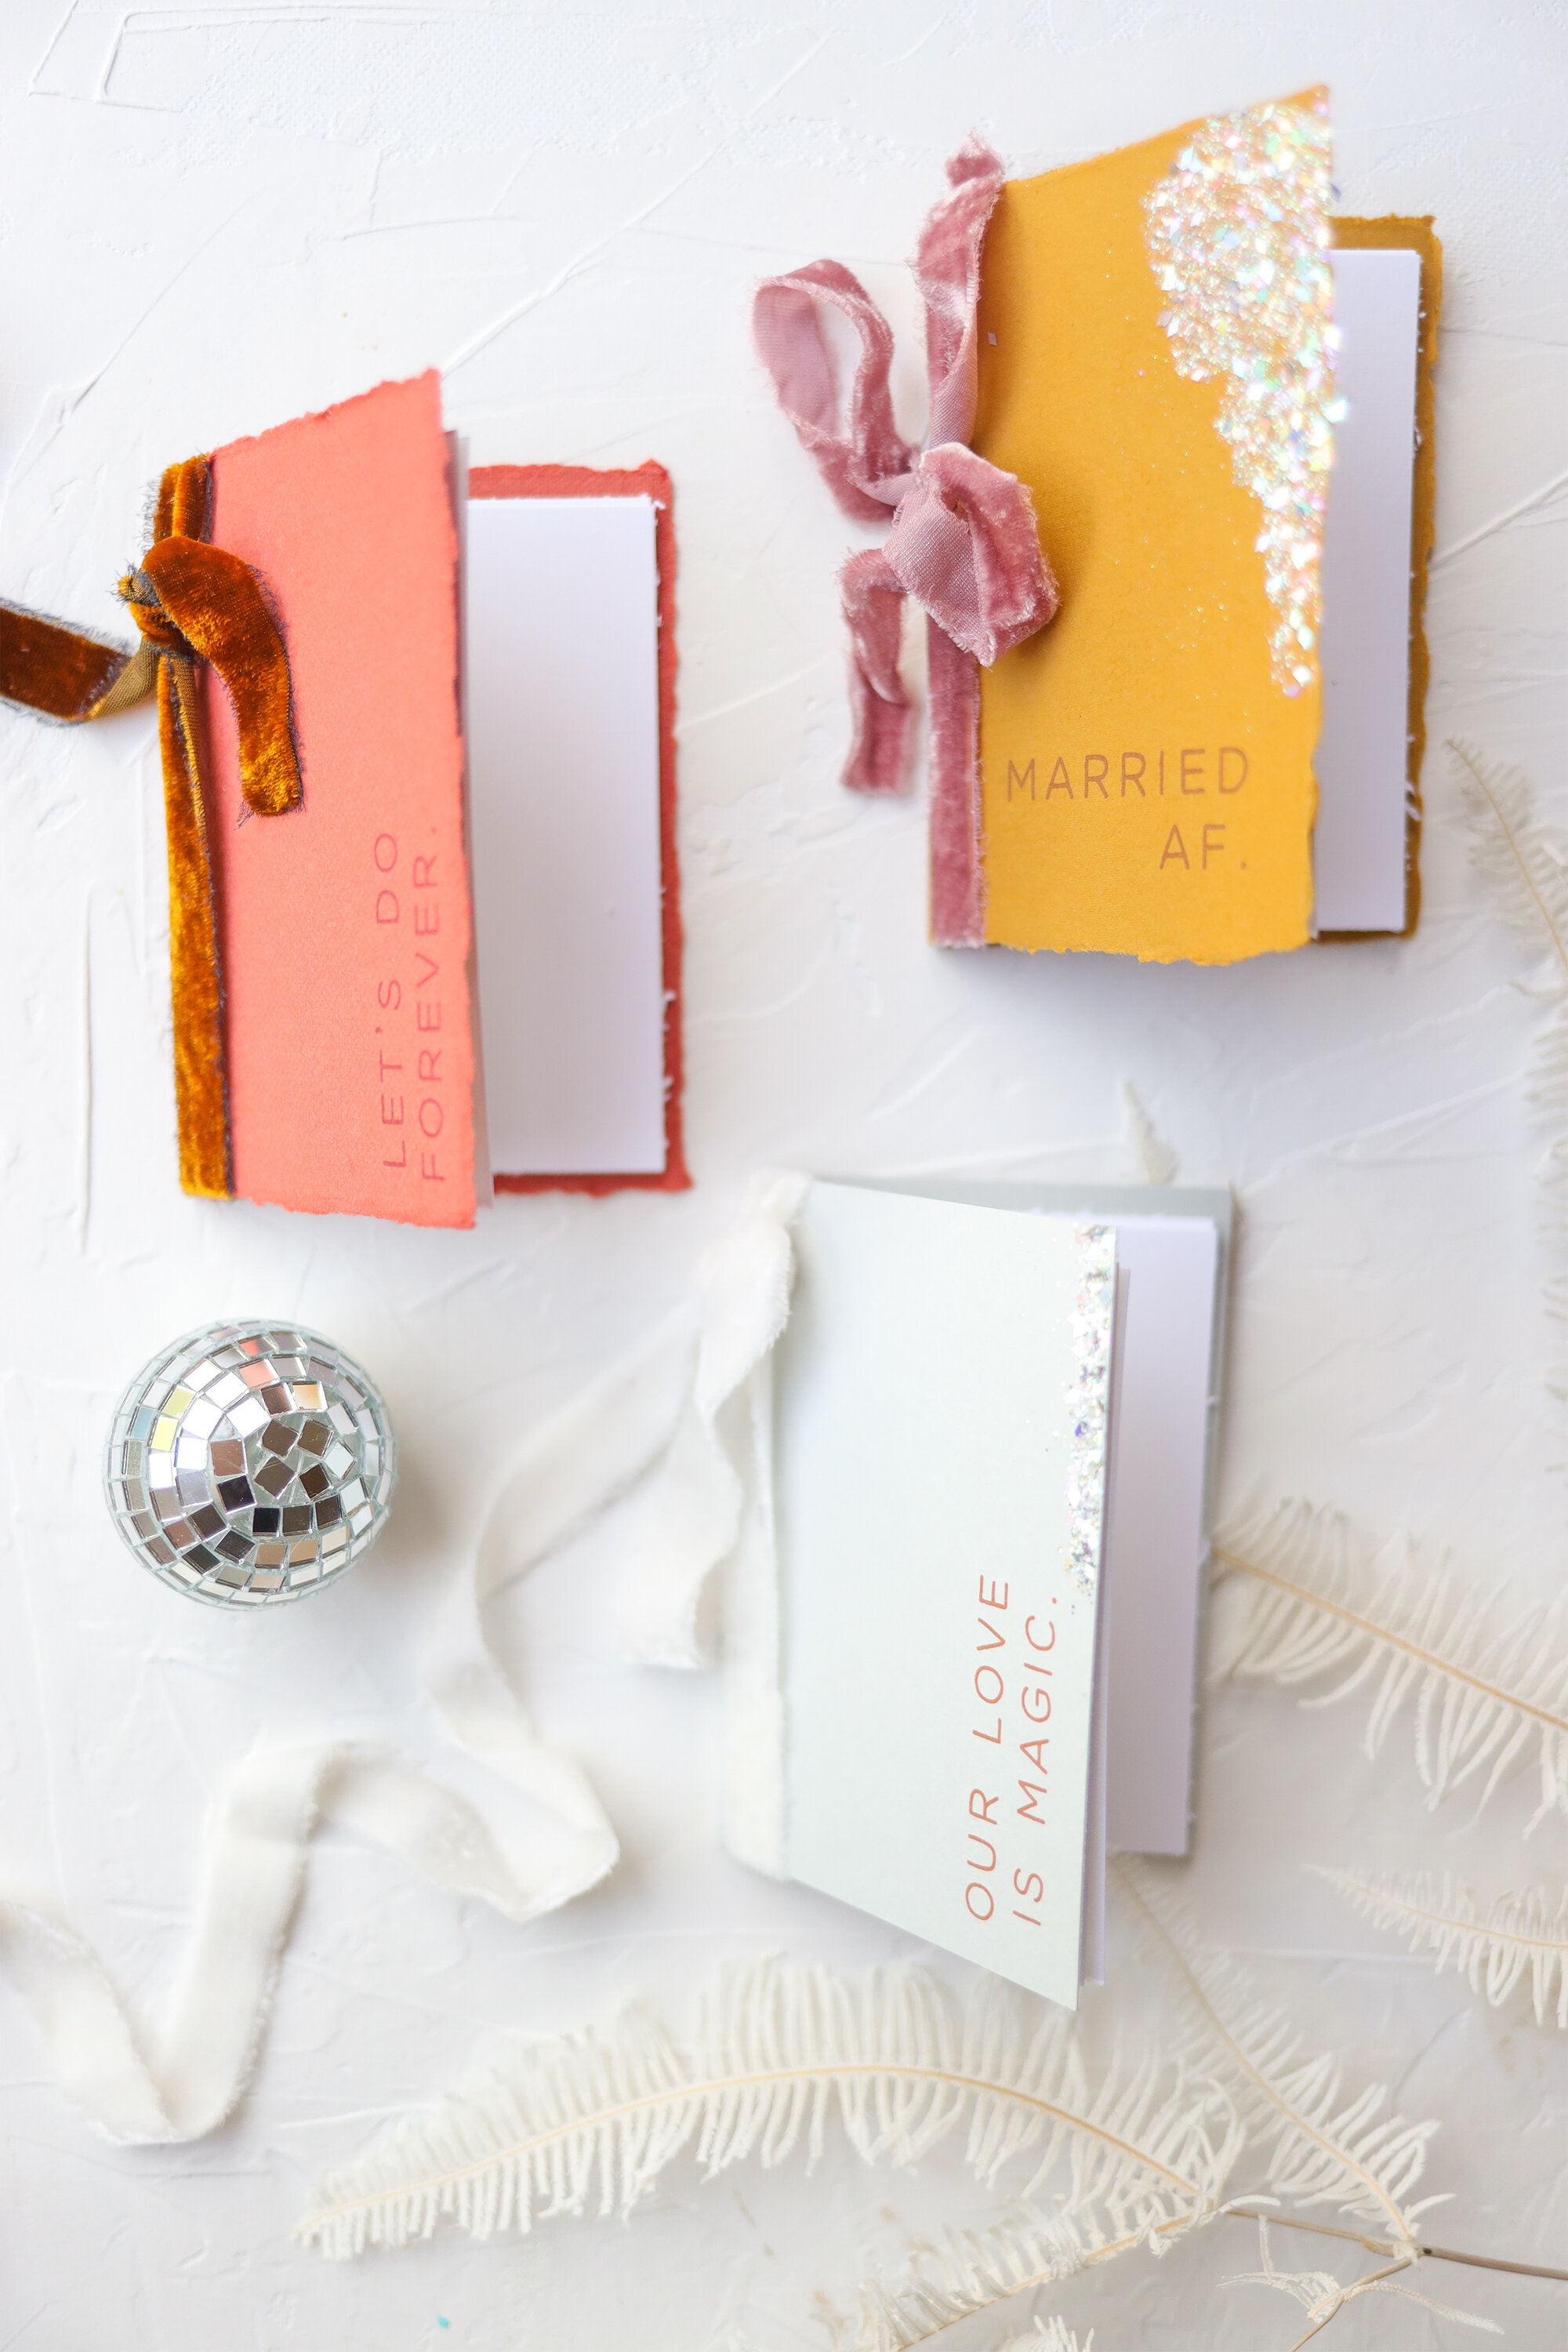
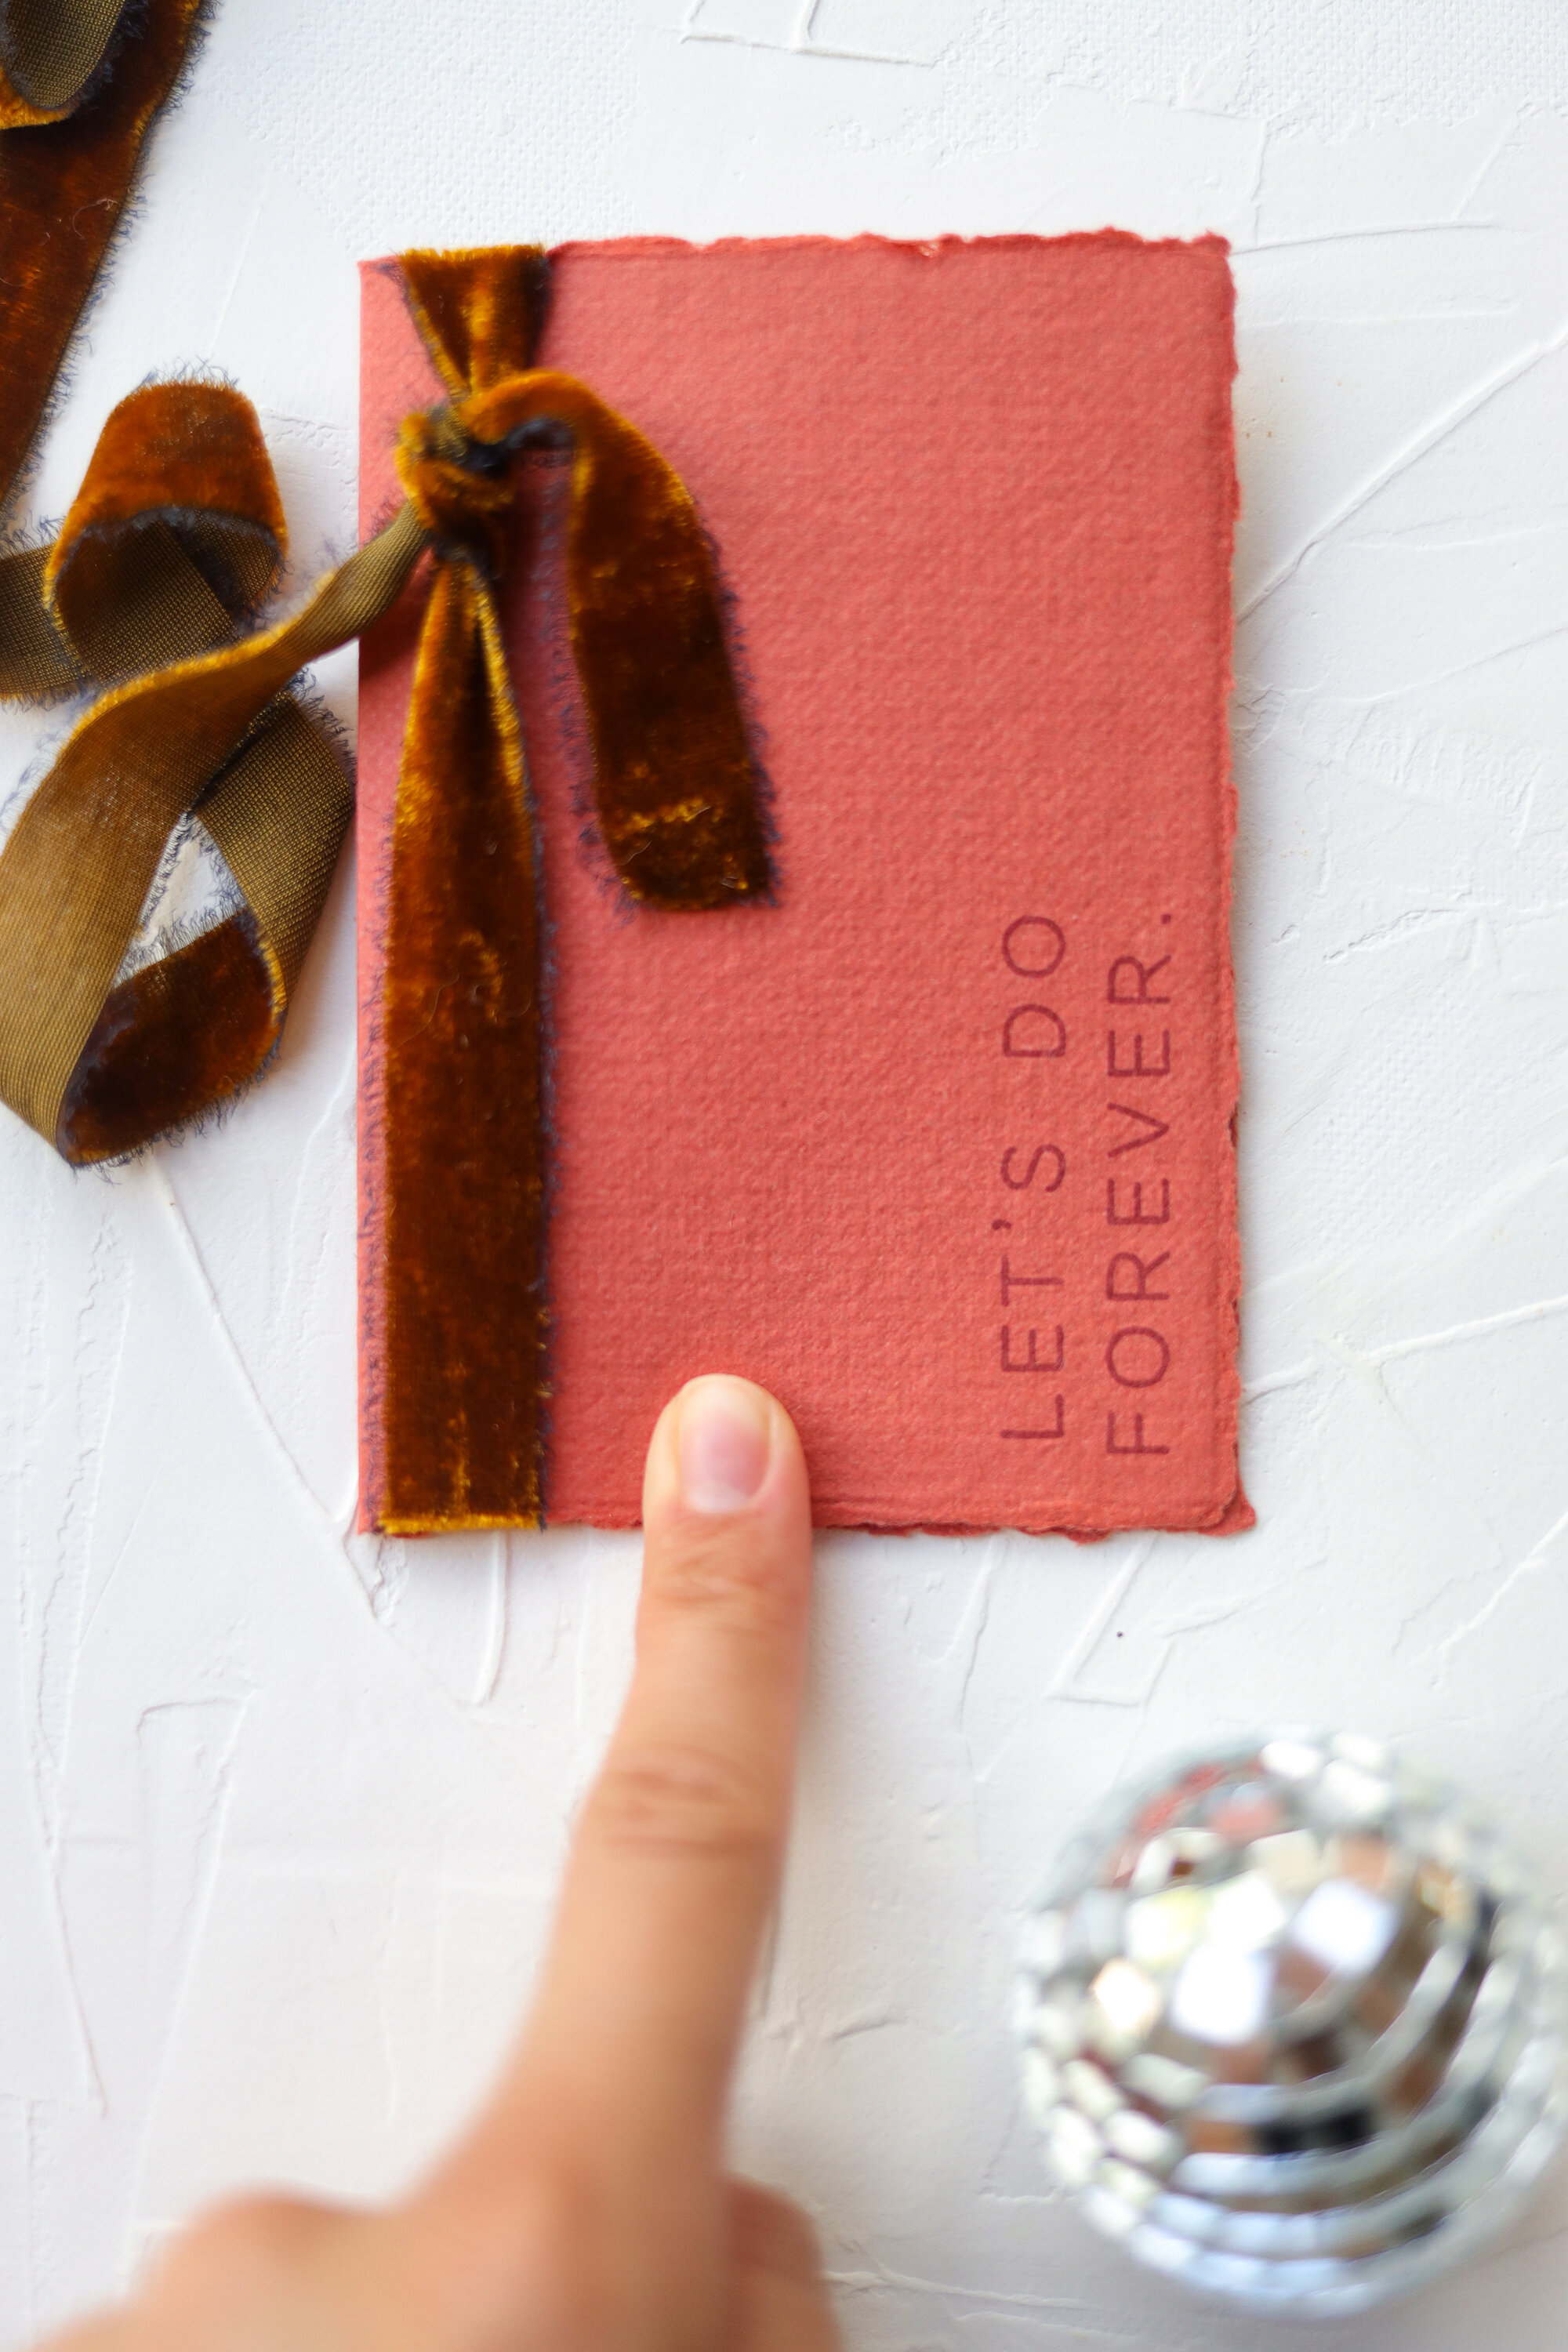
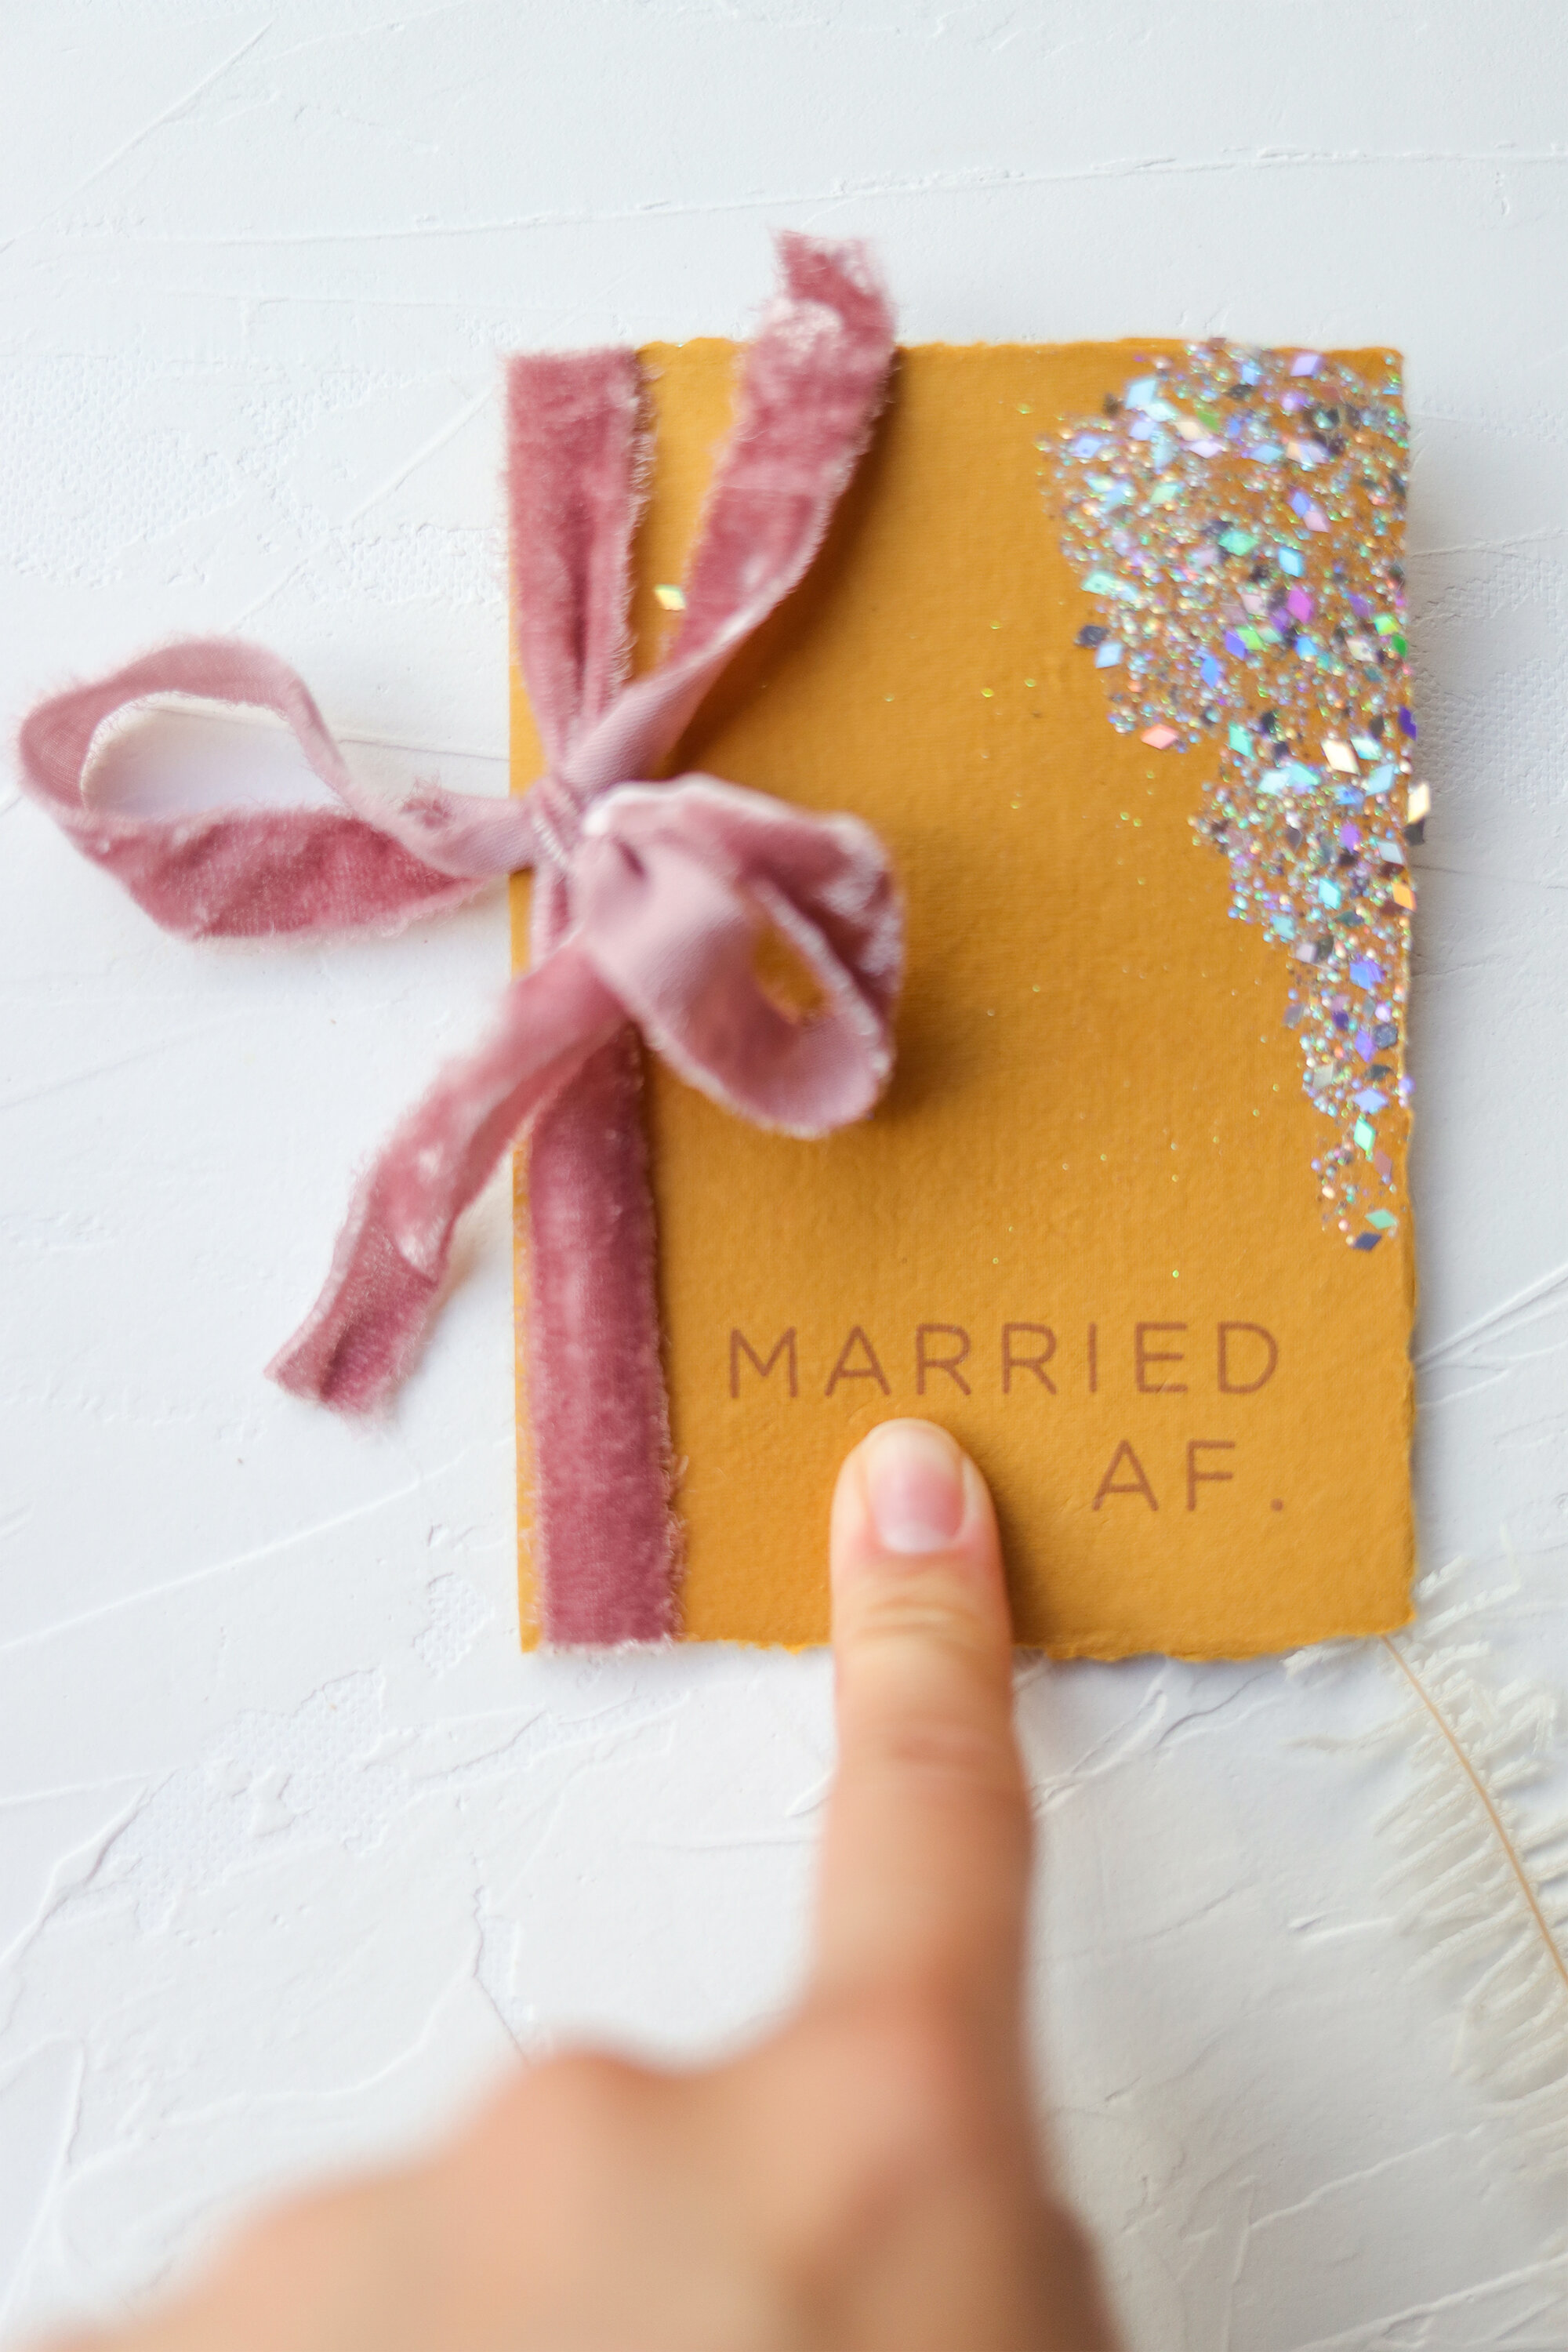
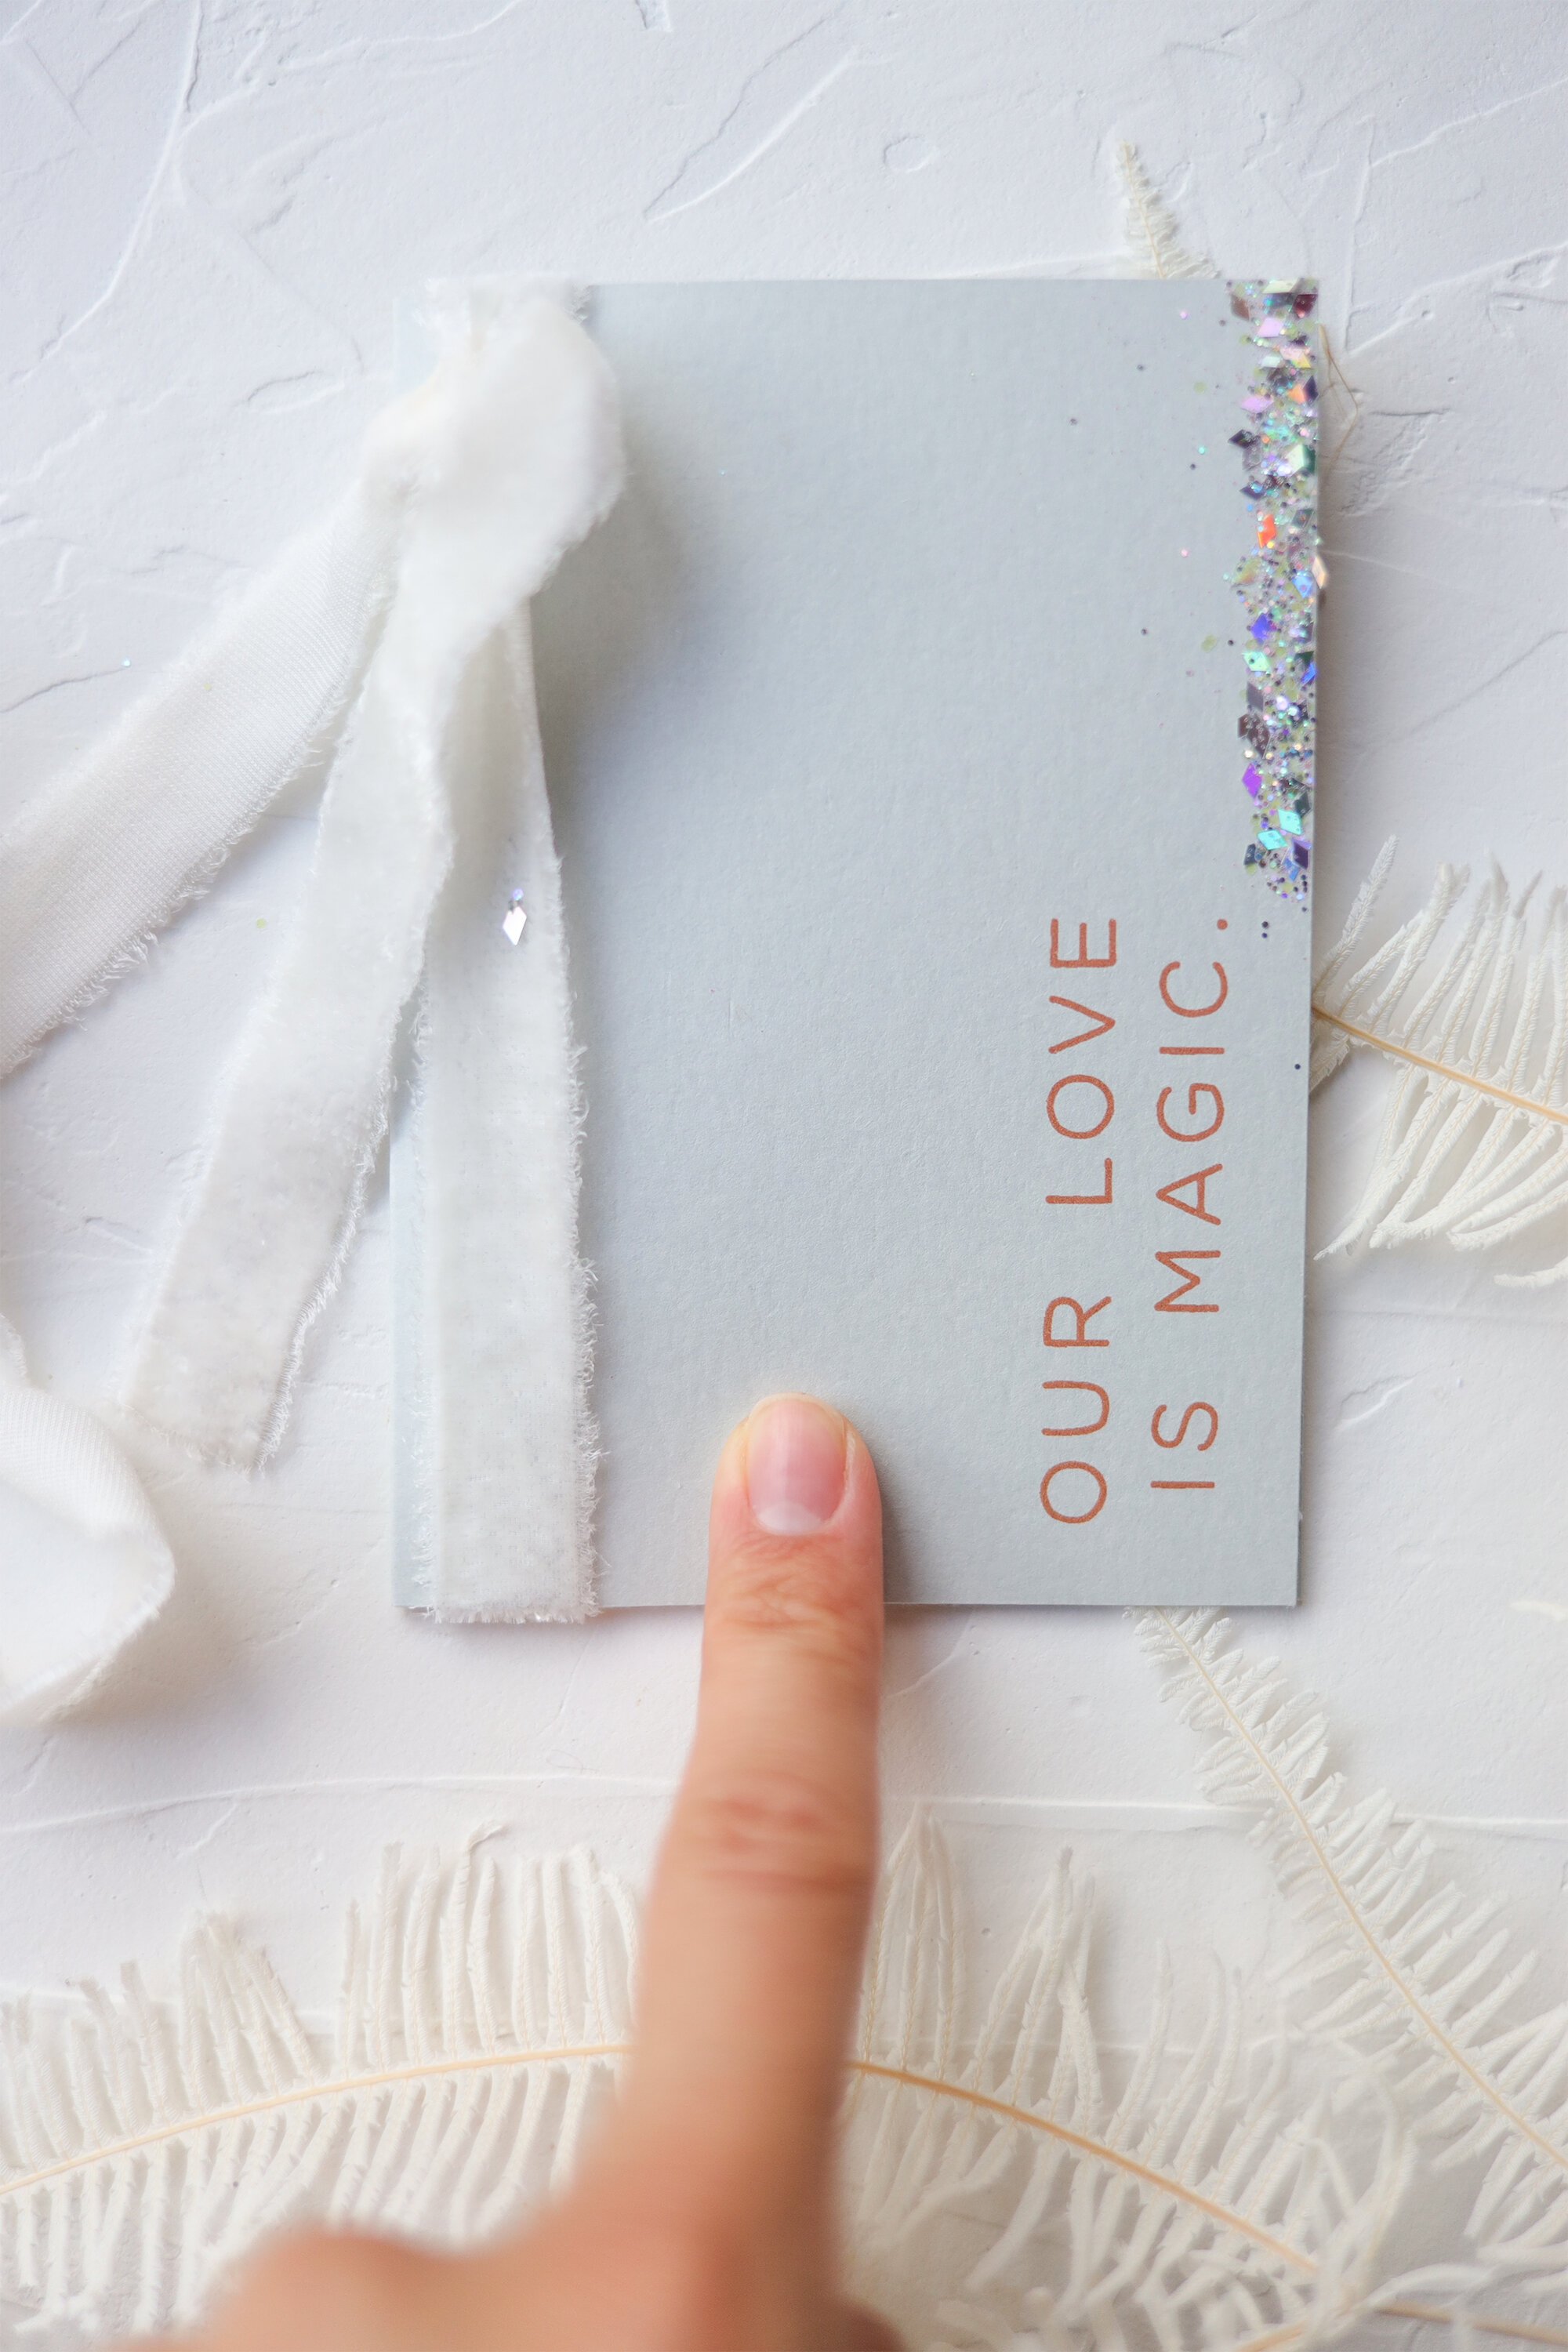
Let’s start with ribbons. You can tie it once around in a knot, you can tie it twice around in a knot, you can tie it in a bow, you can use twine or you can use velvet. There are choices and I will always guide you in the direction I think suits your wedding style and budget best. Certain ribbon materials are naturally more expensive such as silk. Other materials are more cost friendly such as ¼” velvet and twines.
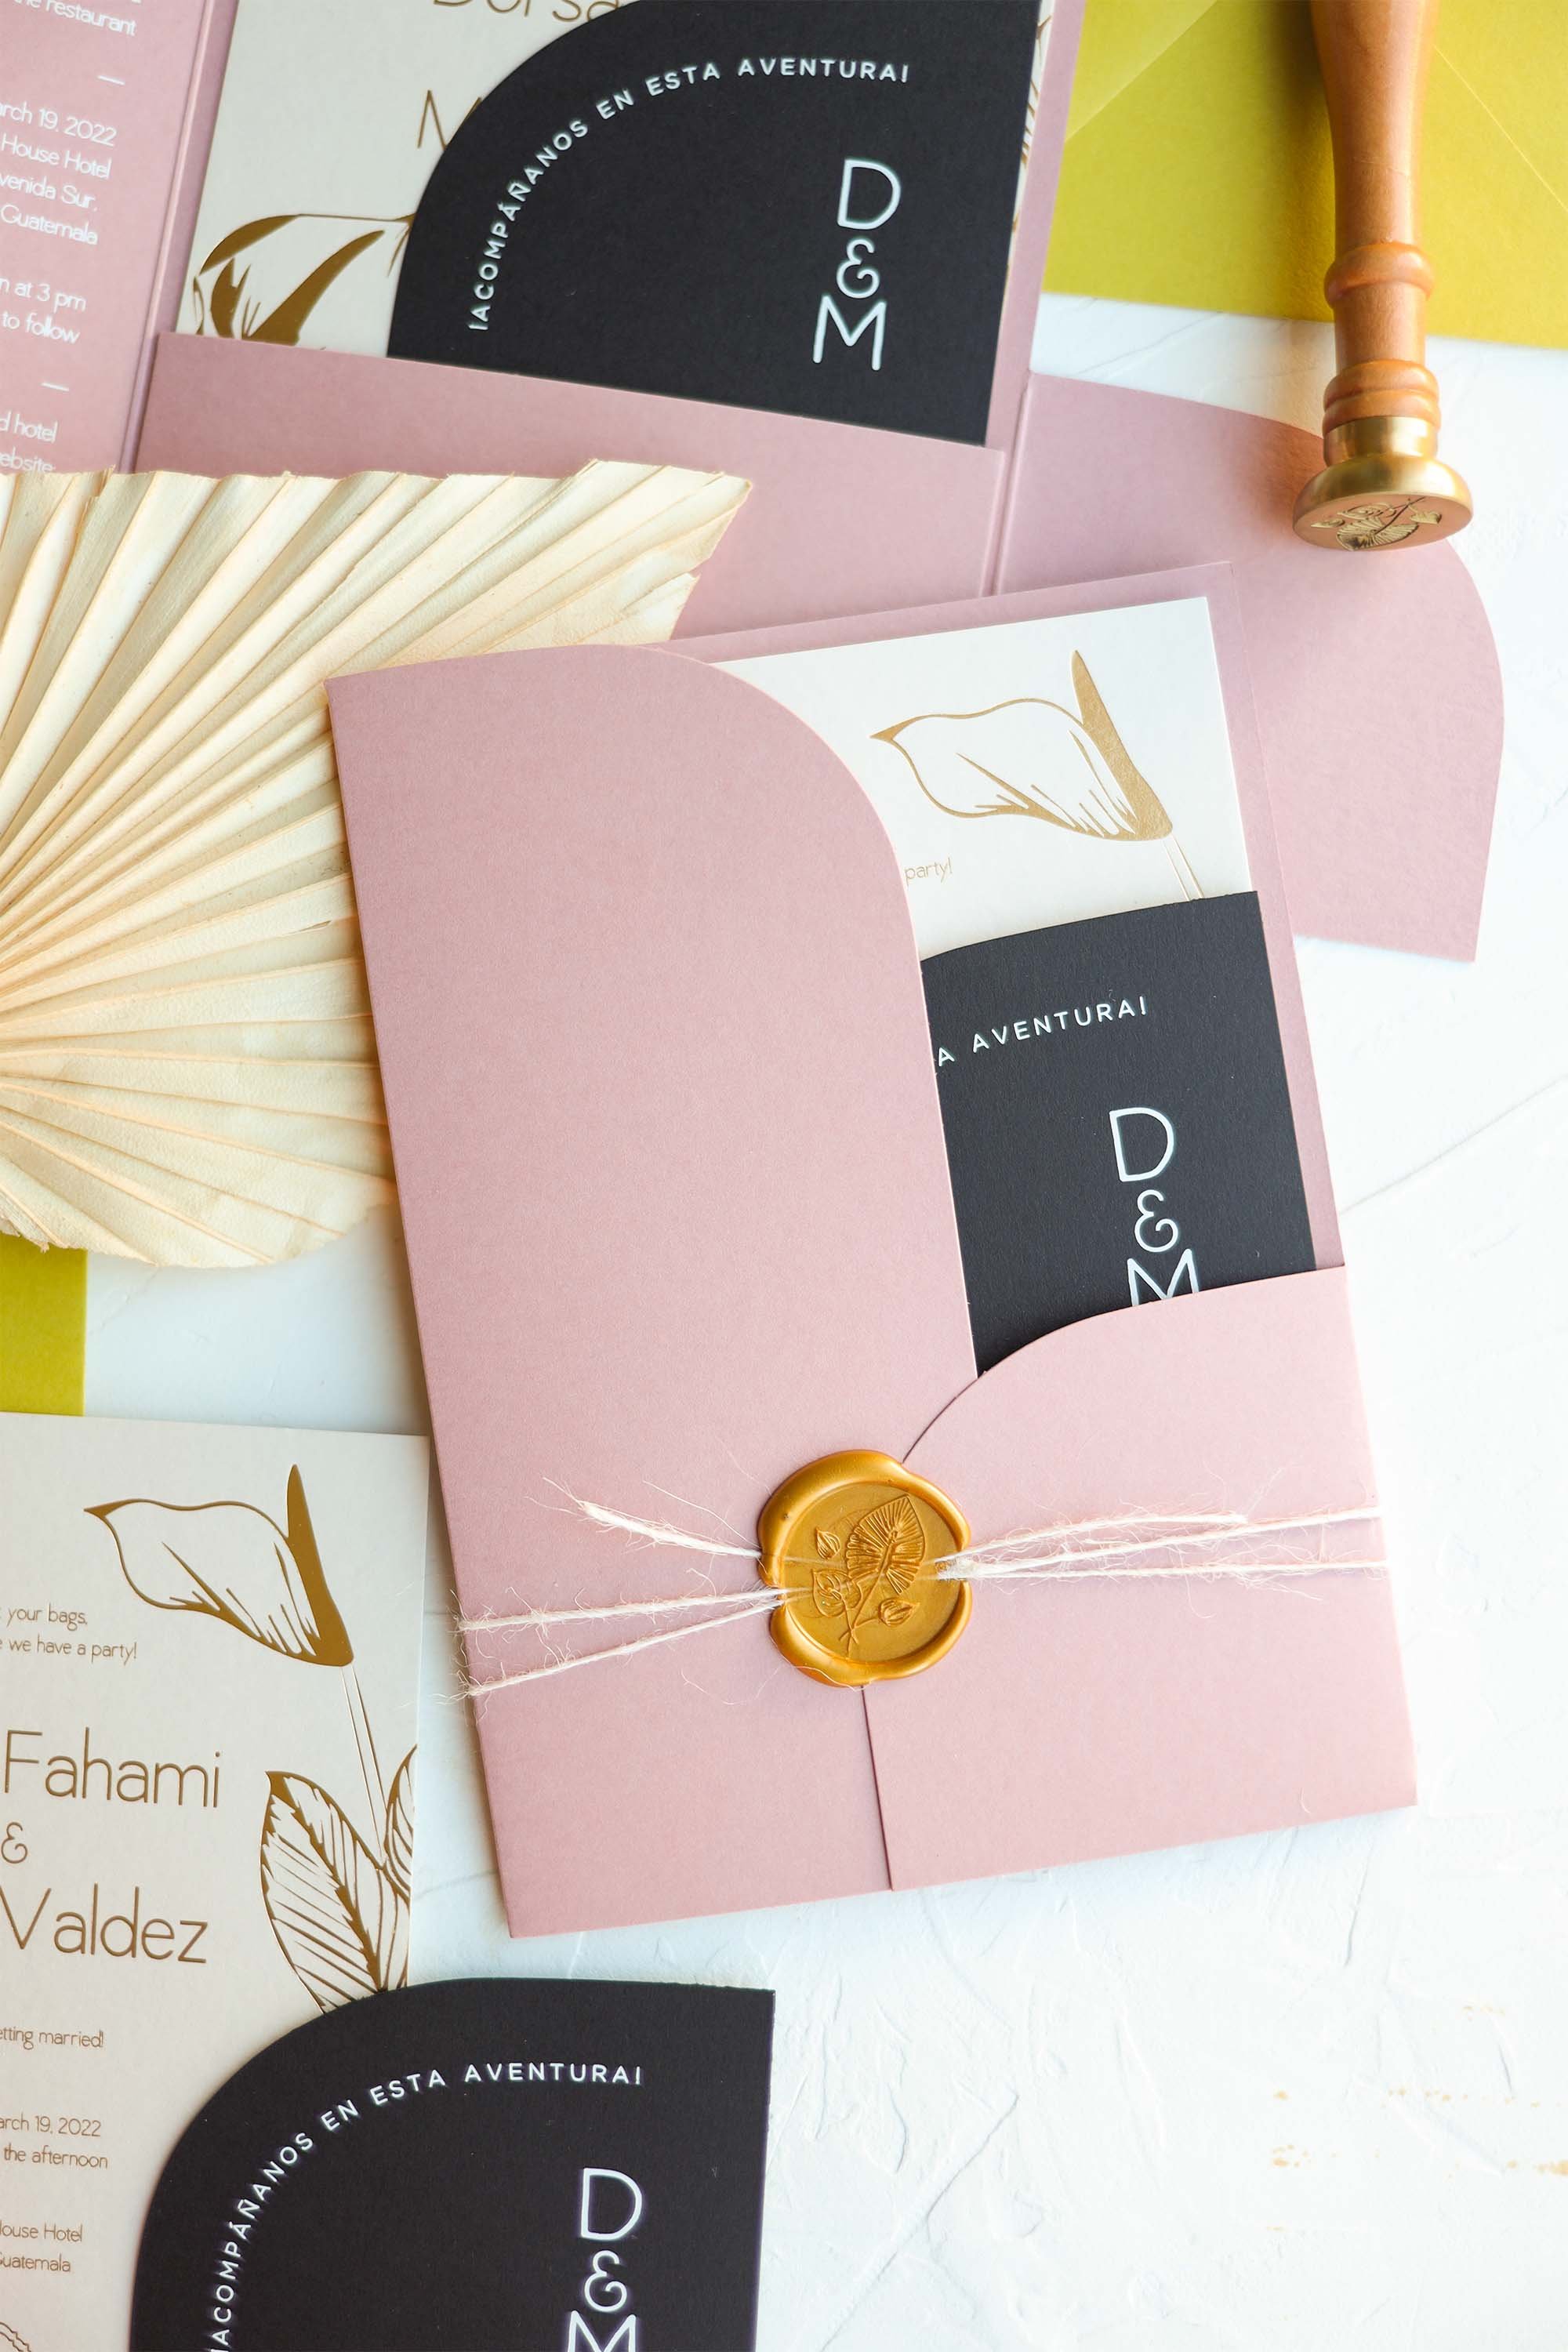
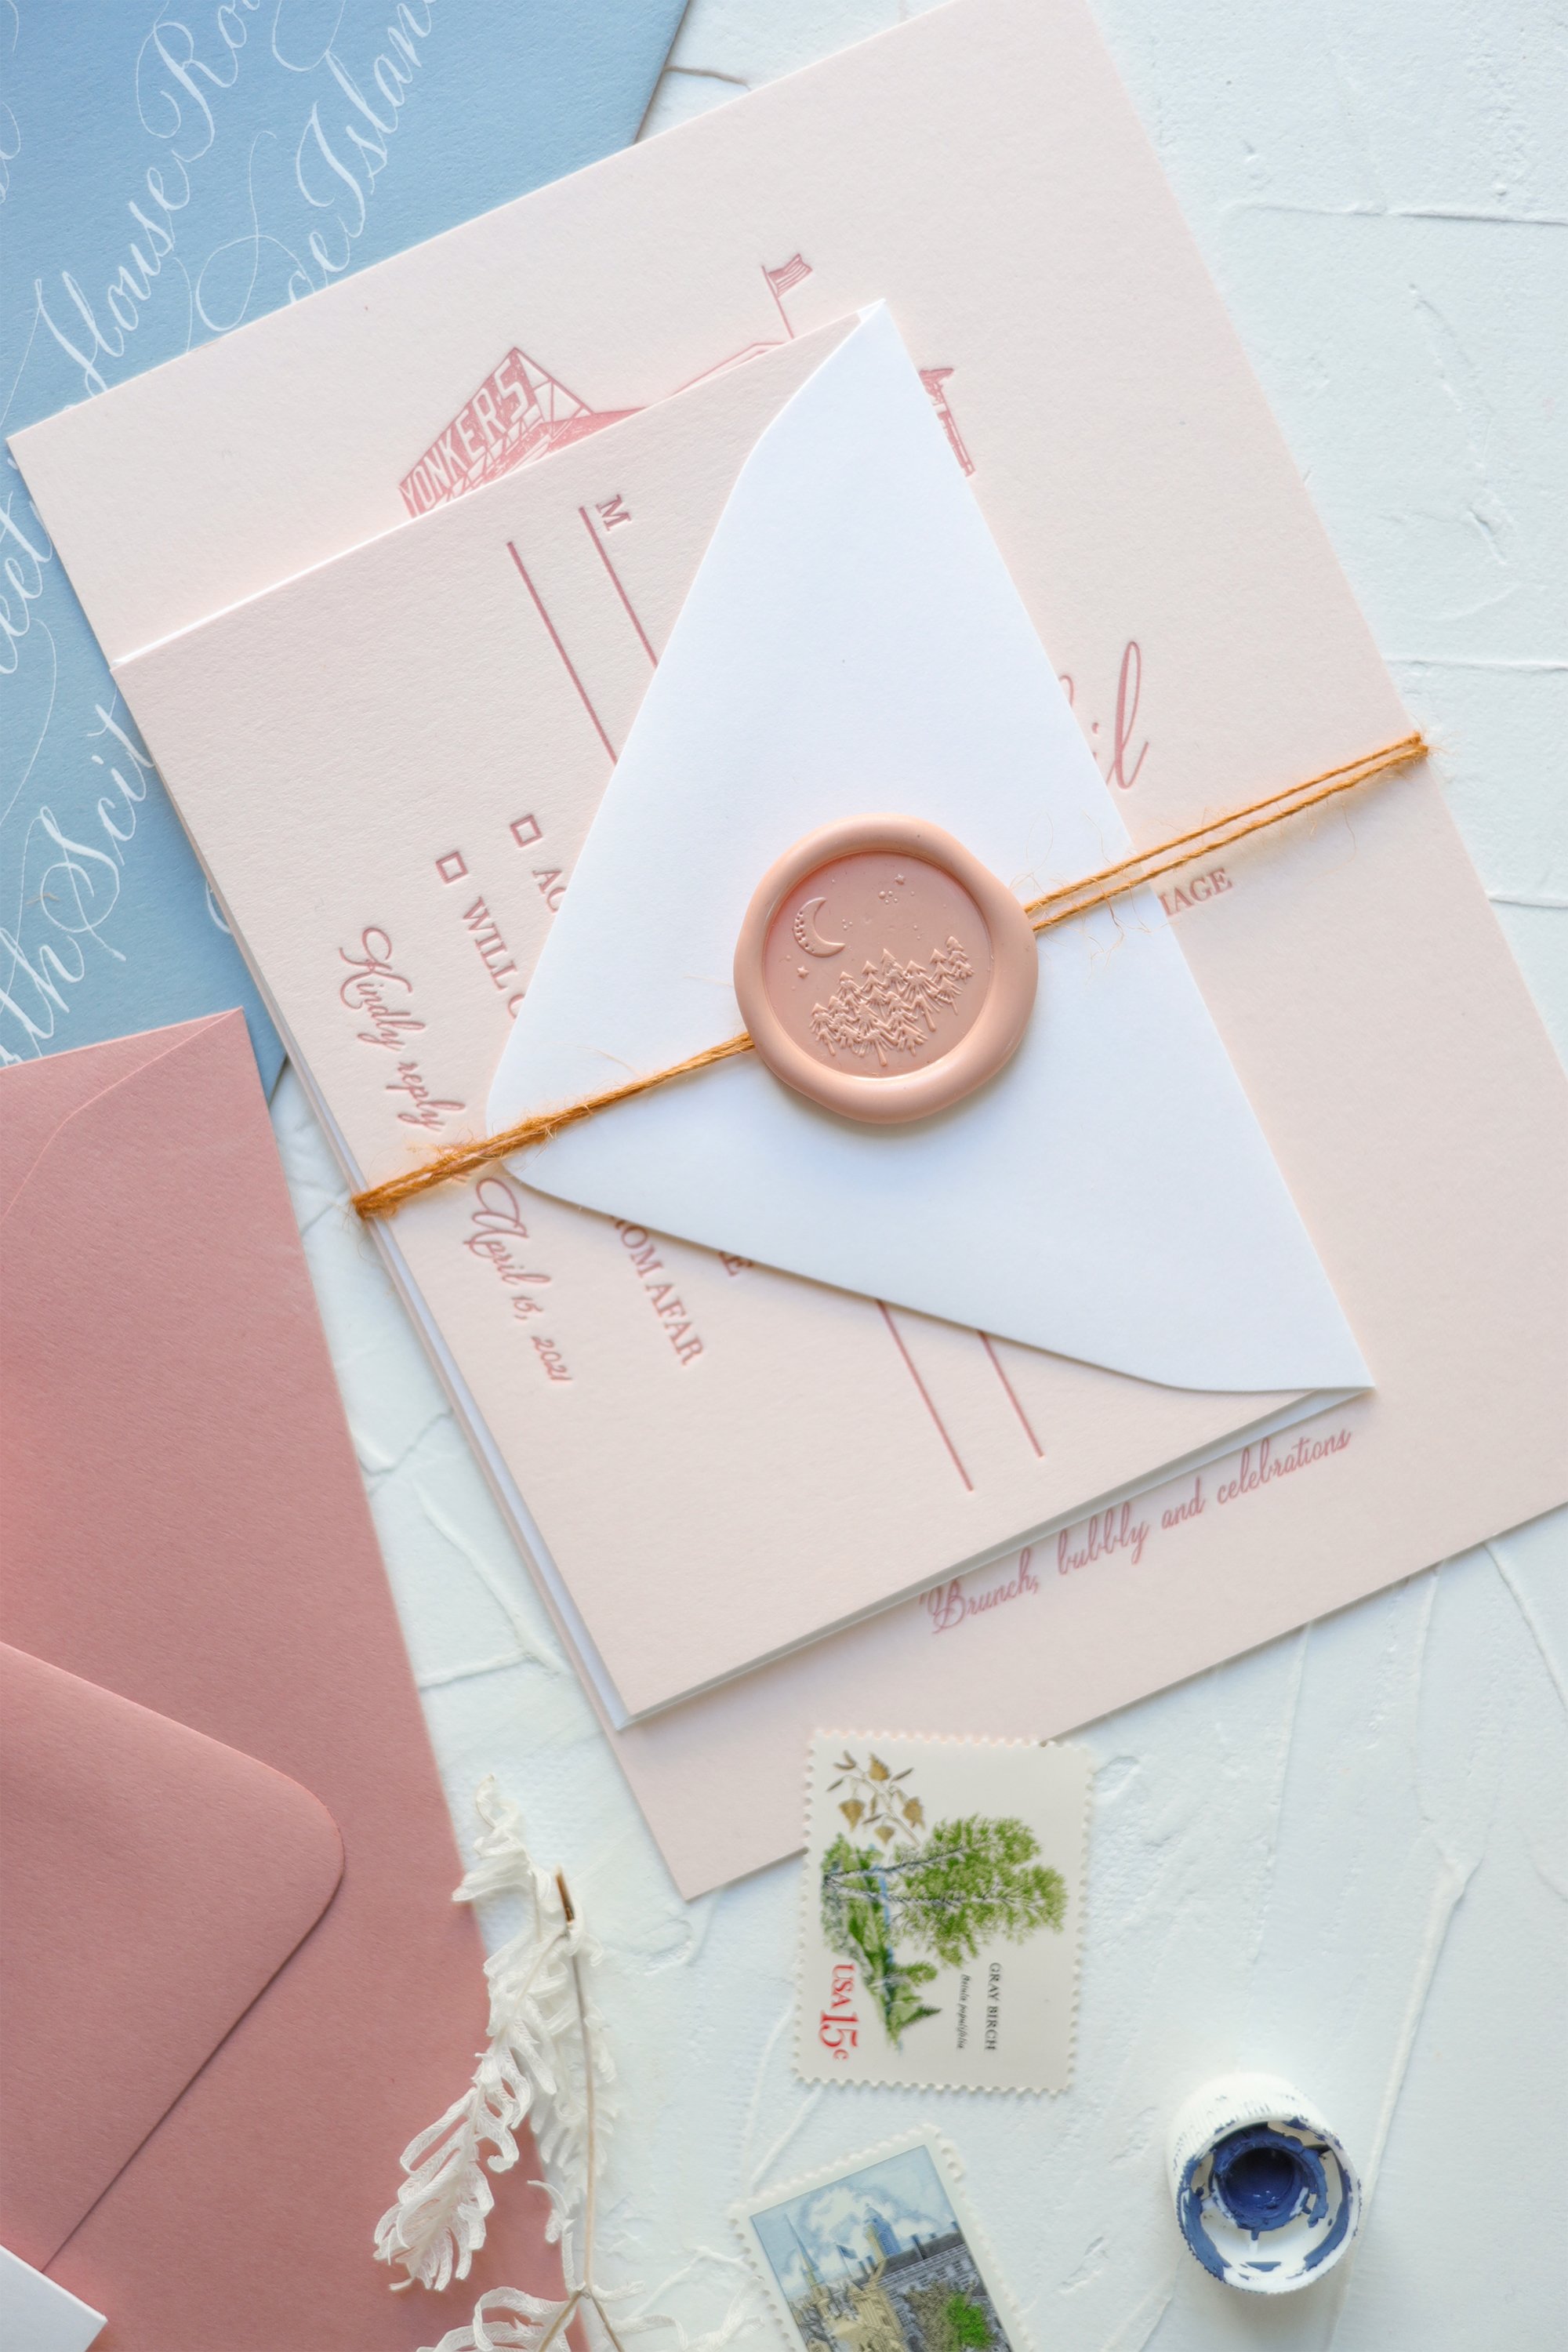
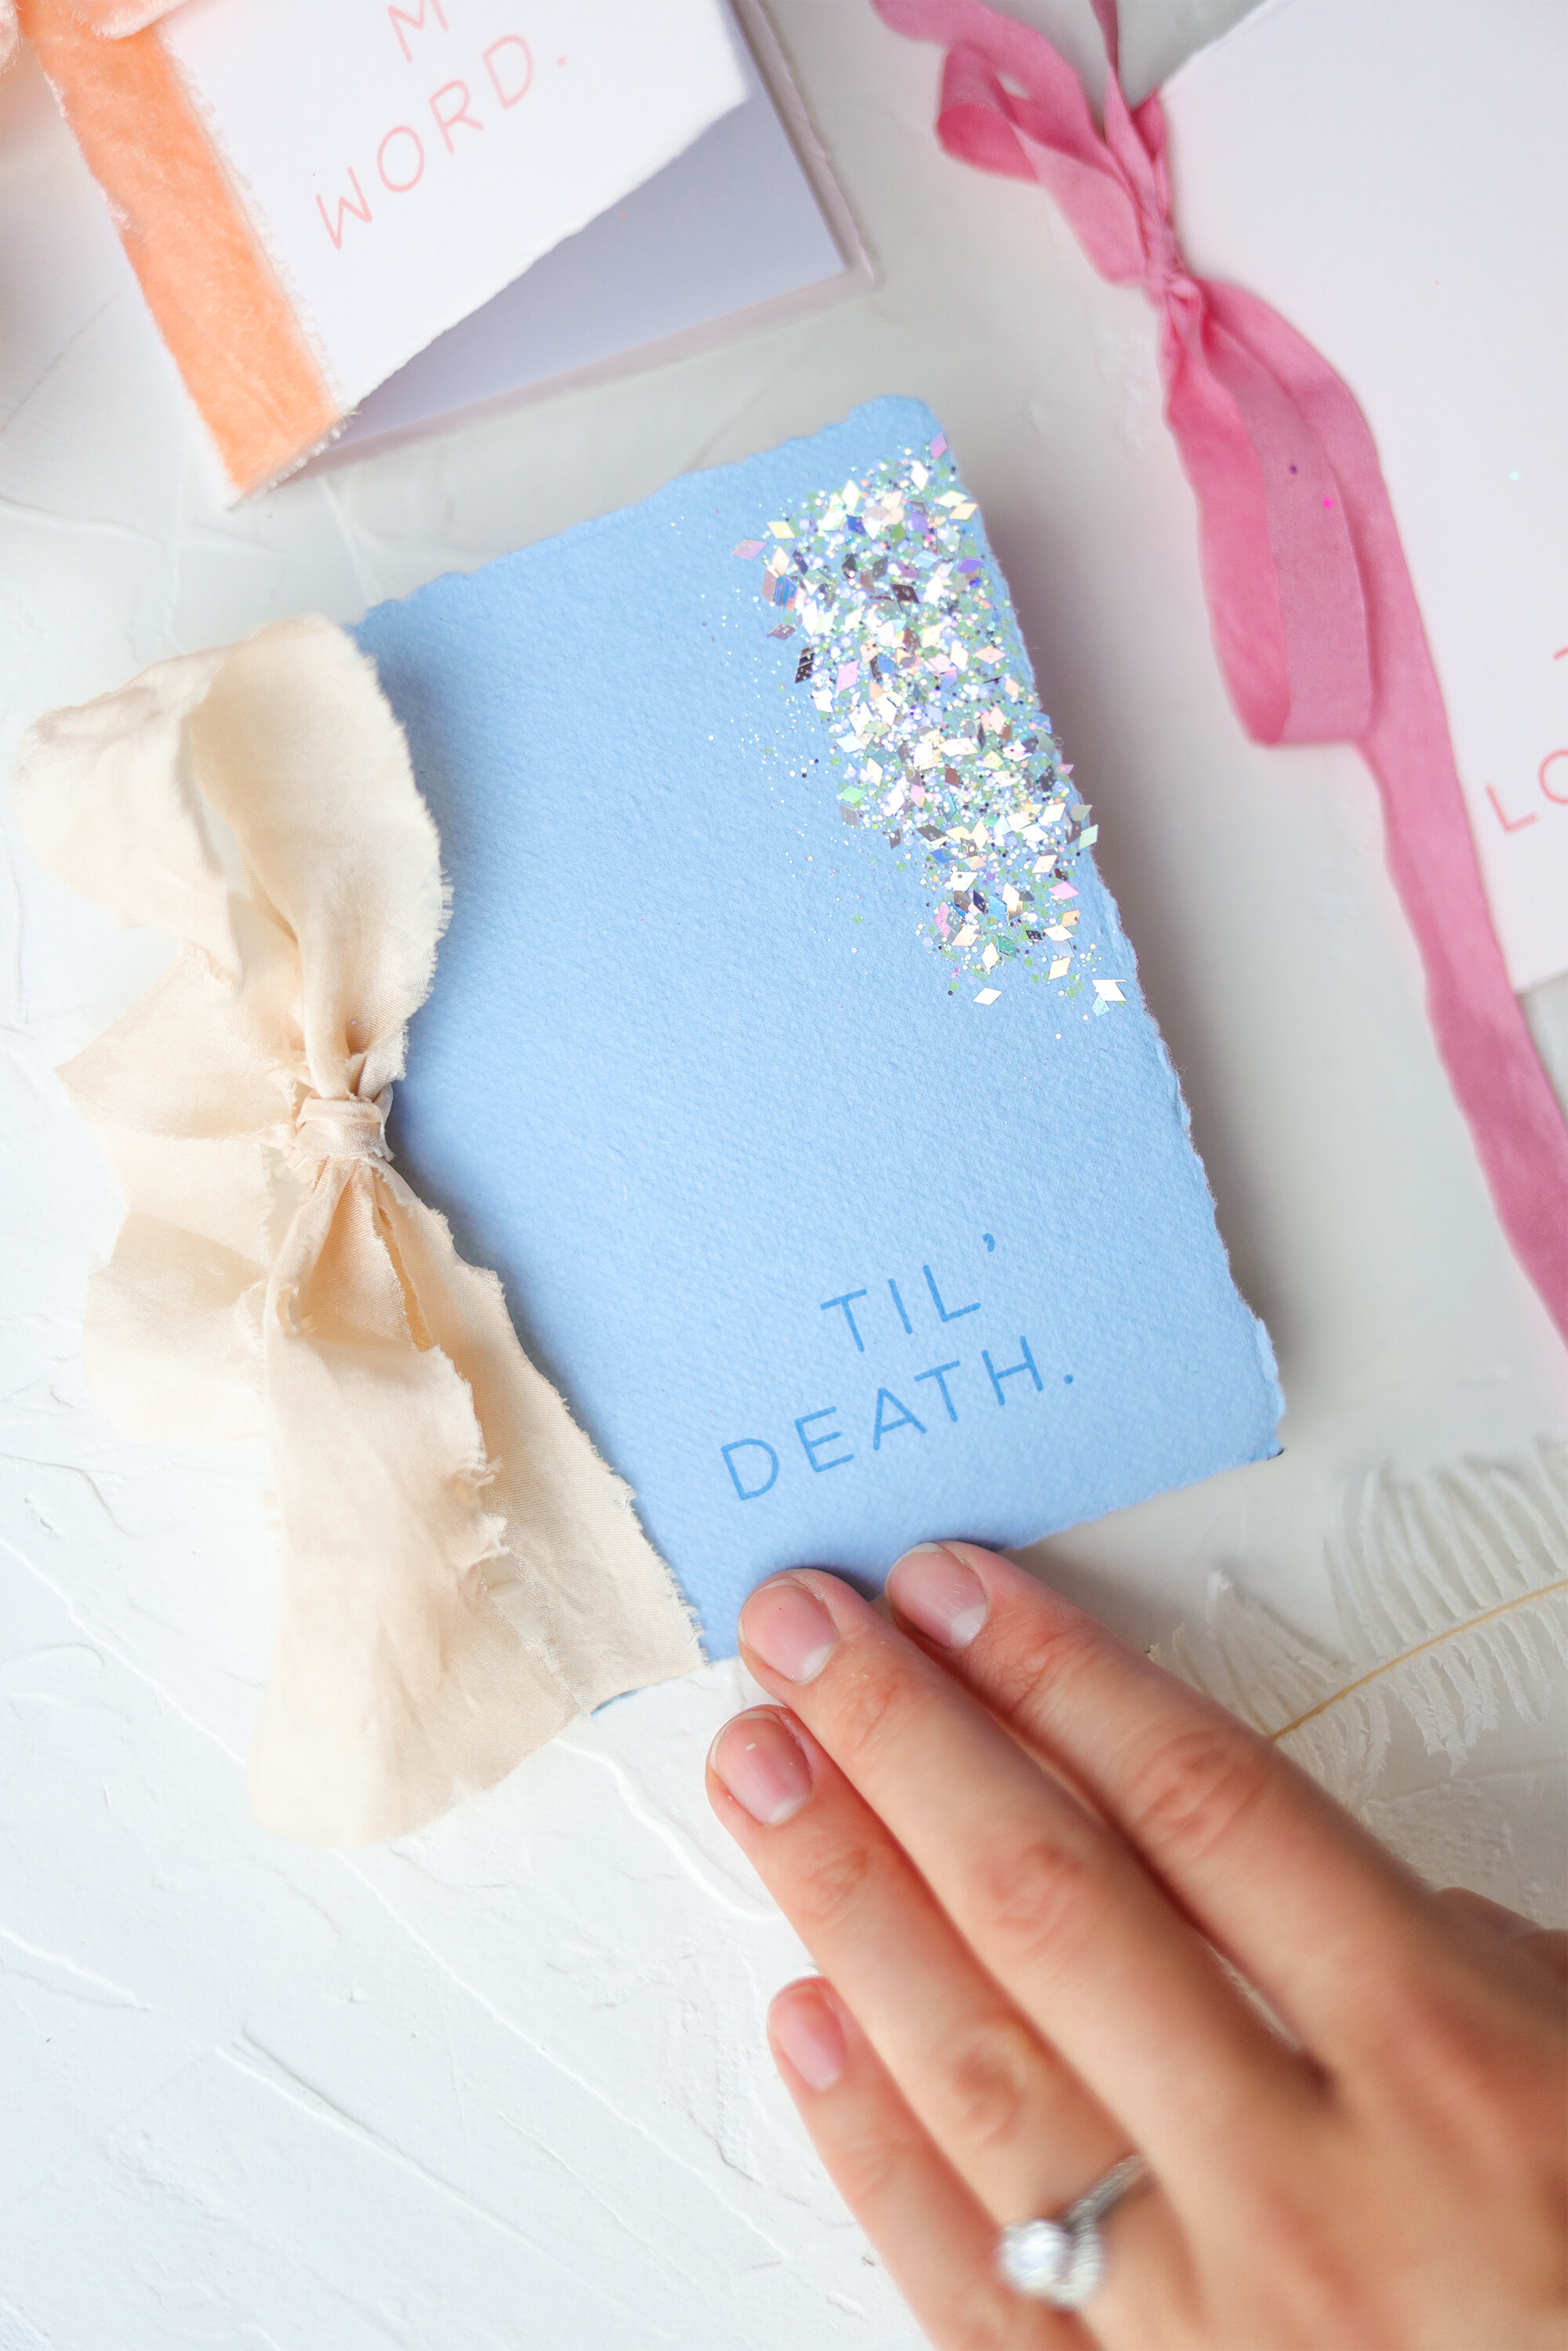
Now let’s chat wax seals. Typically, when wax seals are being used to assemble the stationery together, a belly band or ribbon is involved also so the tying part is taken care of and the wax literally seals the deal. *chefs kiss* this is such a gorgeous look. I’m a huge fan of the small details in life and if there’s anything more fun than having a wax seal on the package you receive in the mail, I’m unaware of it. It’s just a classic, snail mail, old world, receiving of a letter vibe. It’s giving Queen Victoria.
Once you hand over the reins and trust me to handle this part for you, you’ve saved yourself time and confusion and maybe decision paralysis. See in the past, I have had clients who want to handle all the assembly themselves which is fine with me. I know there are vendors who insist on handling that part but I know people like to see the stationery before it goes out and maybe enjoy being part of the process, so have fun and do you! Pinterest is your friend! For those who don’t want this job and would rather just receive a perfectly assembled suite of their own in the mail [ because yes, always put your name on the guest list so you receive an invitation for fun, too! ], I got you!
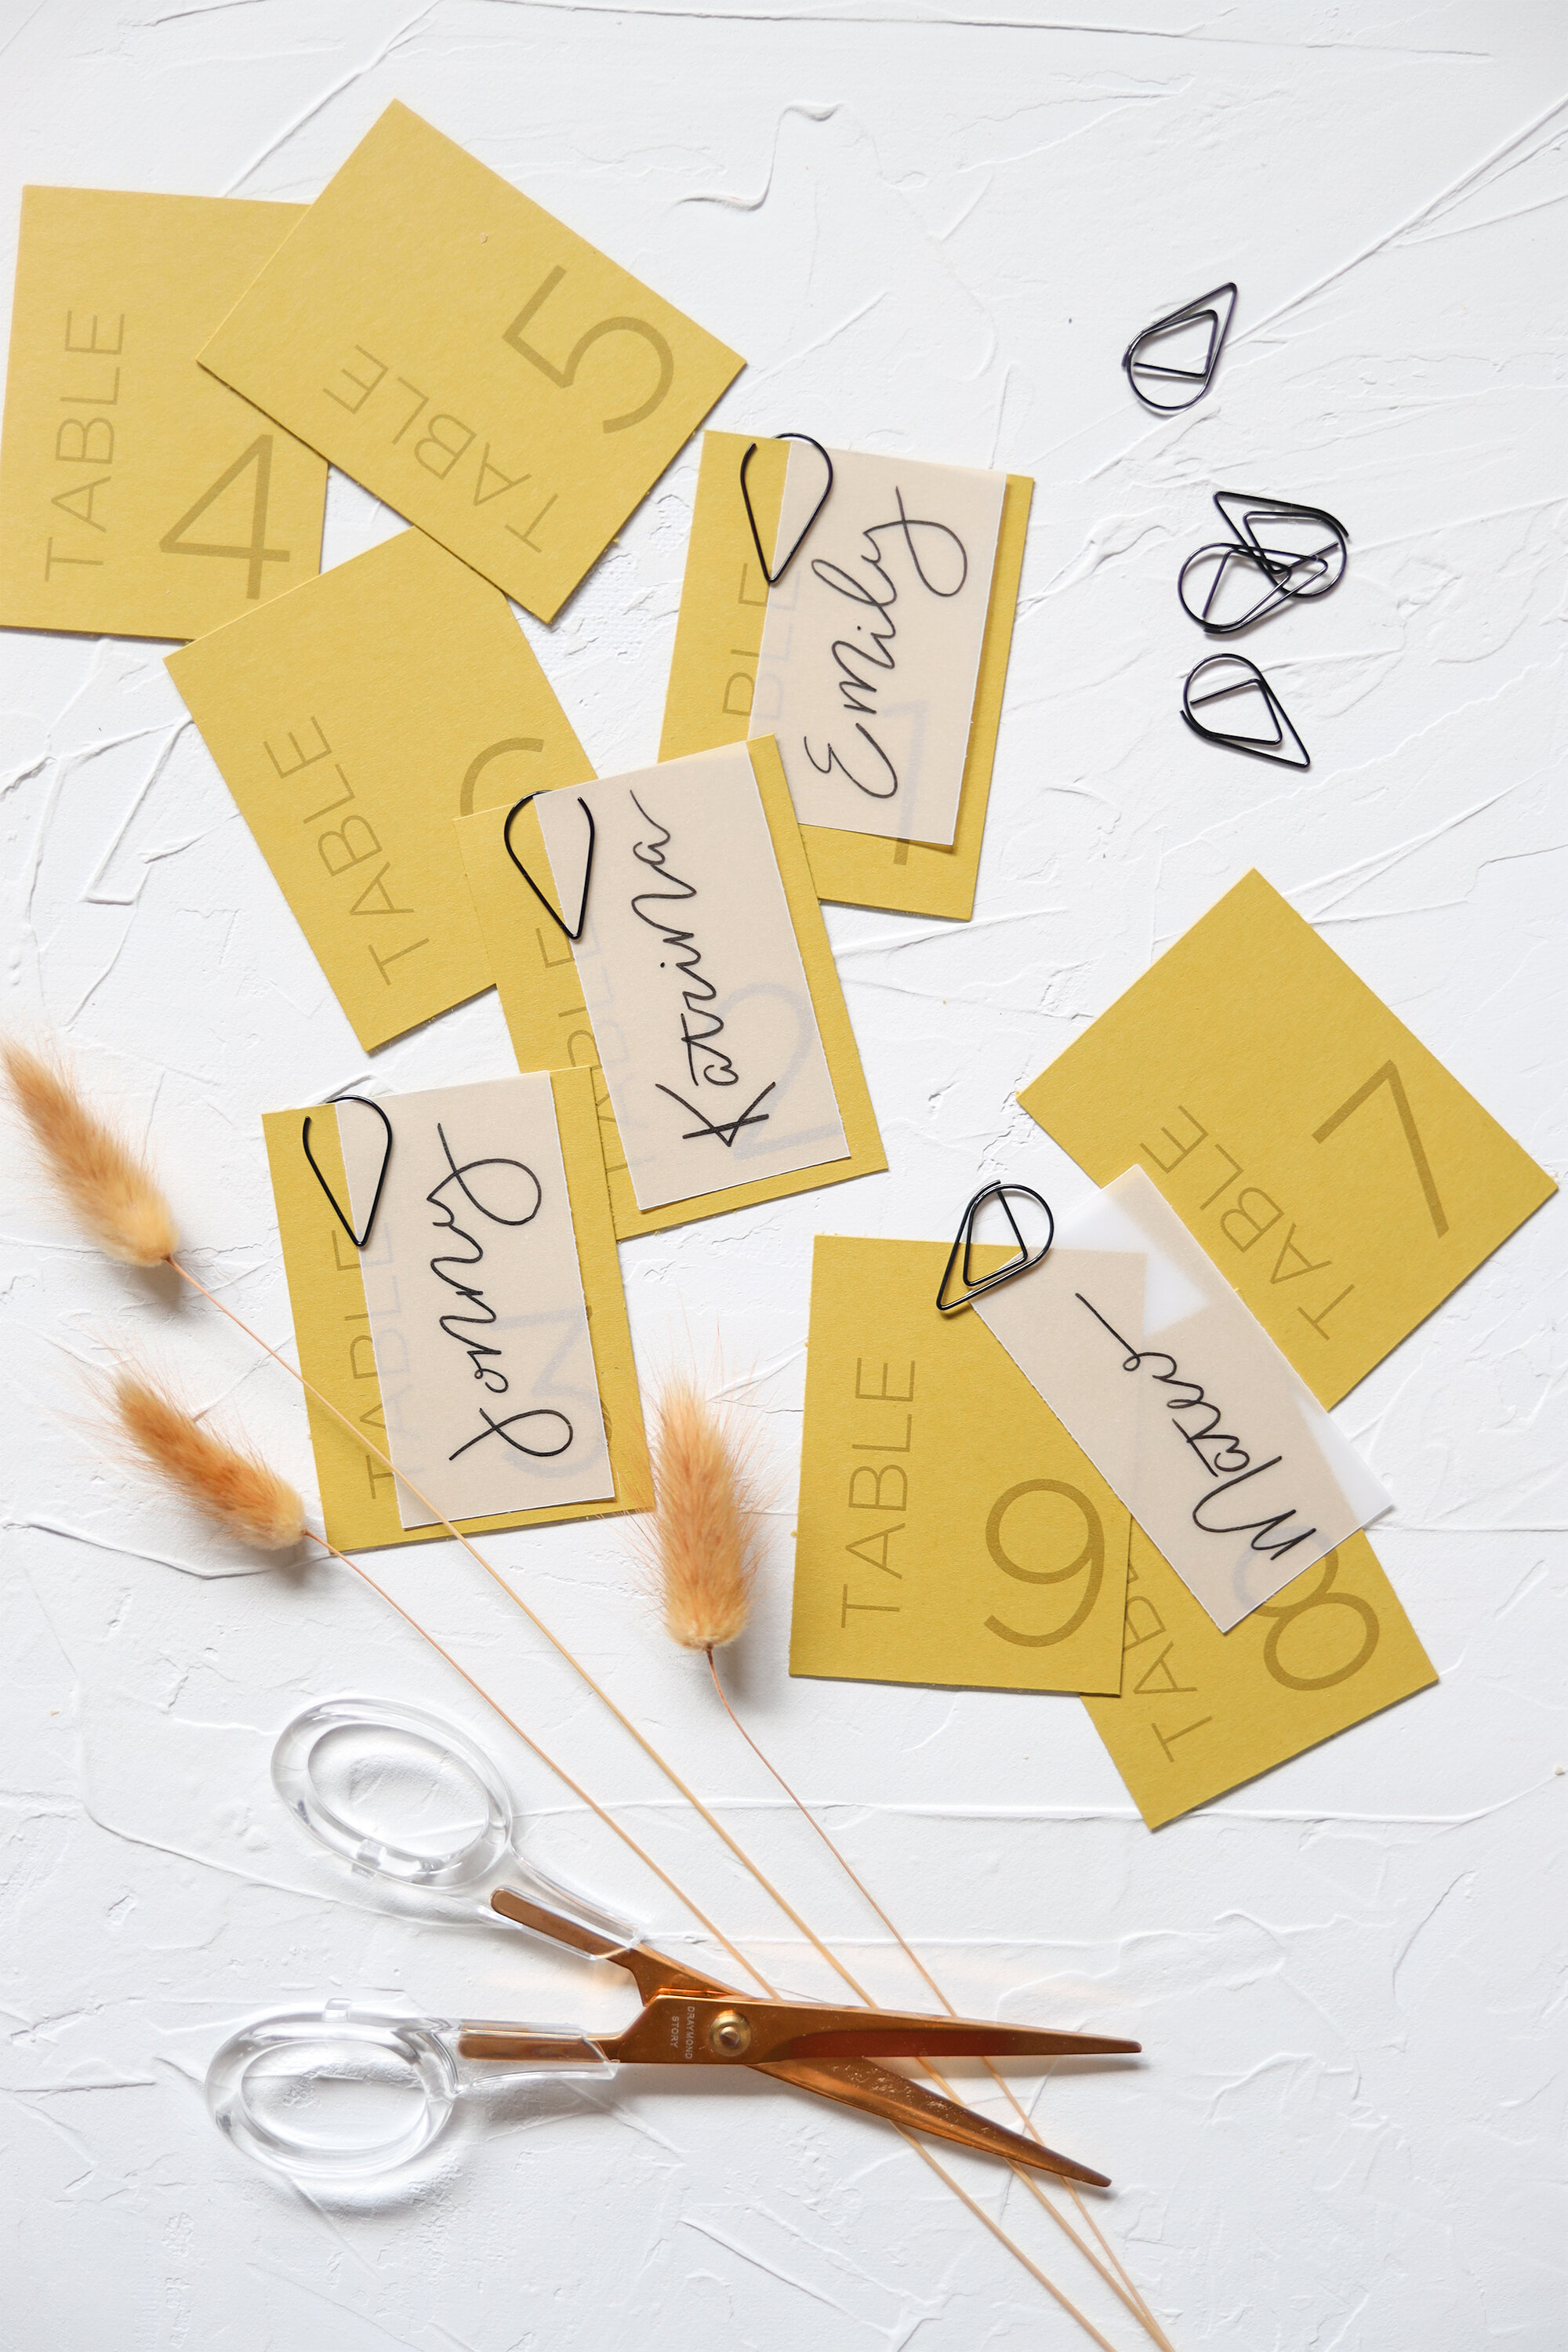
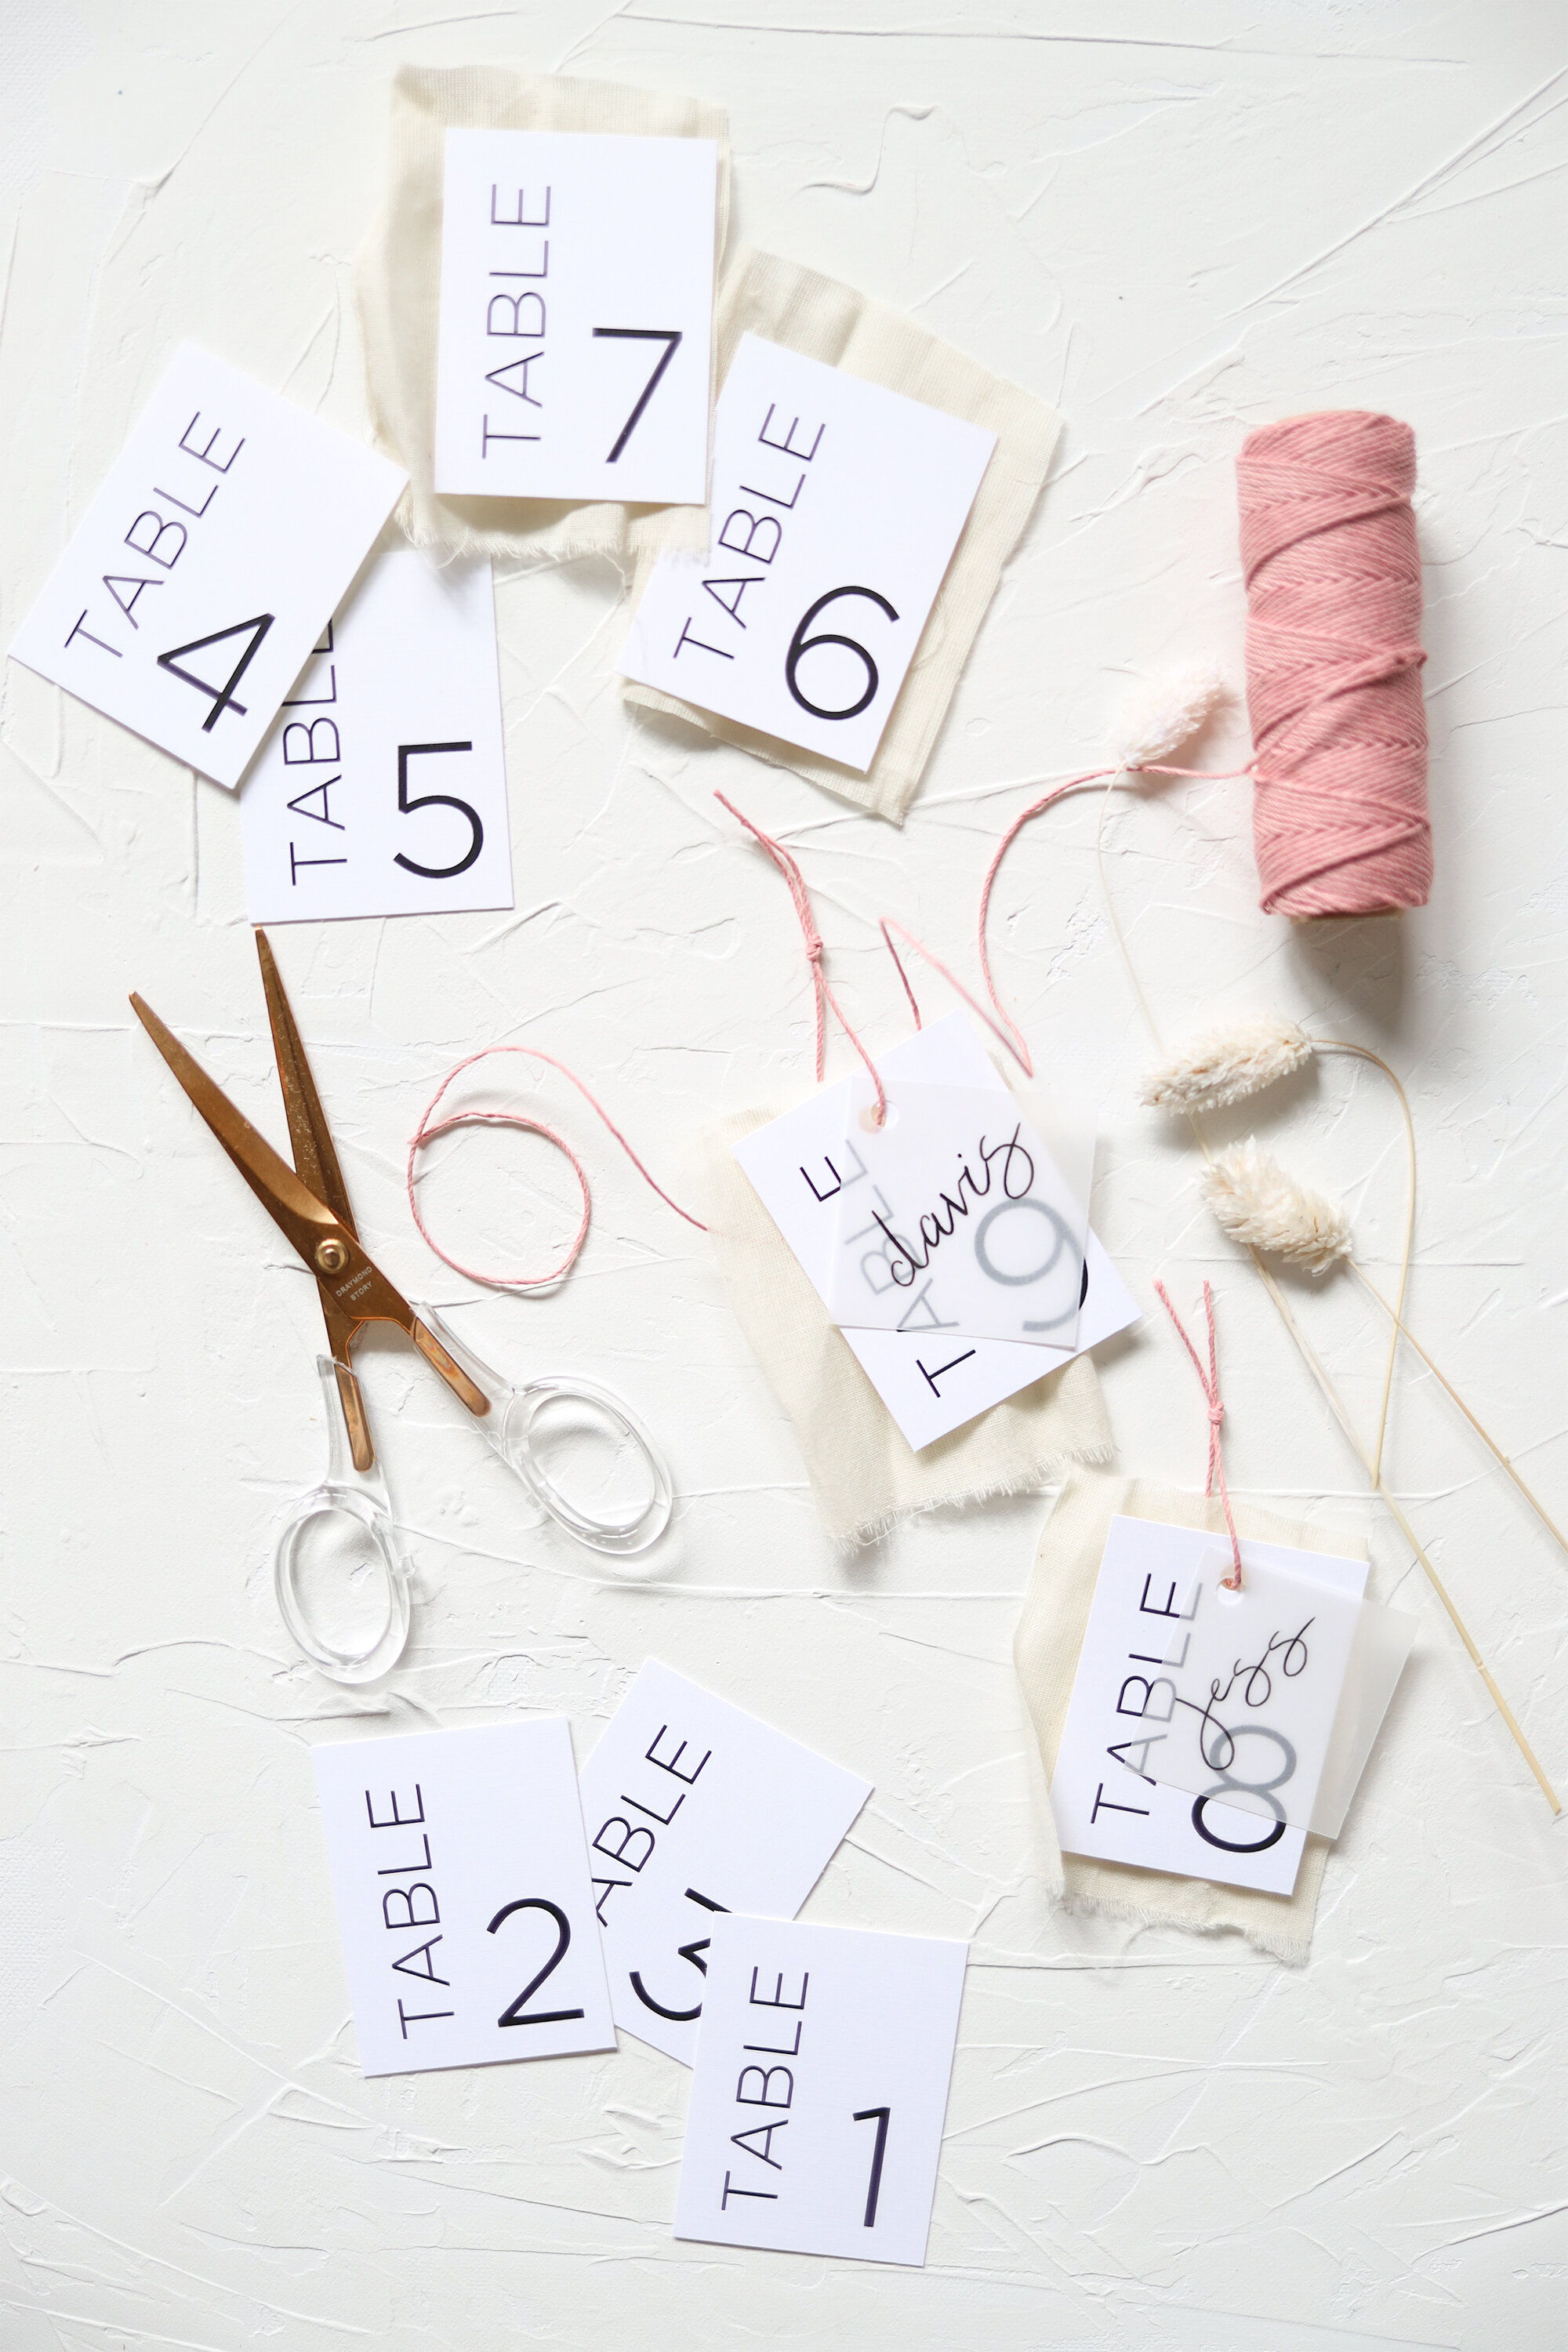
Below are some photos of different assembly styles I have done for clients and I love each and everyone of them for their unique and intentionality depending on that couples style!

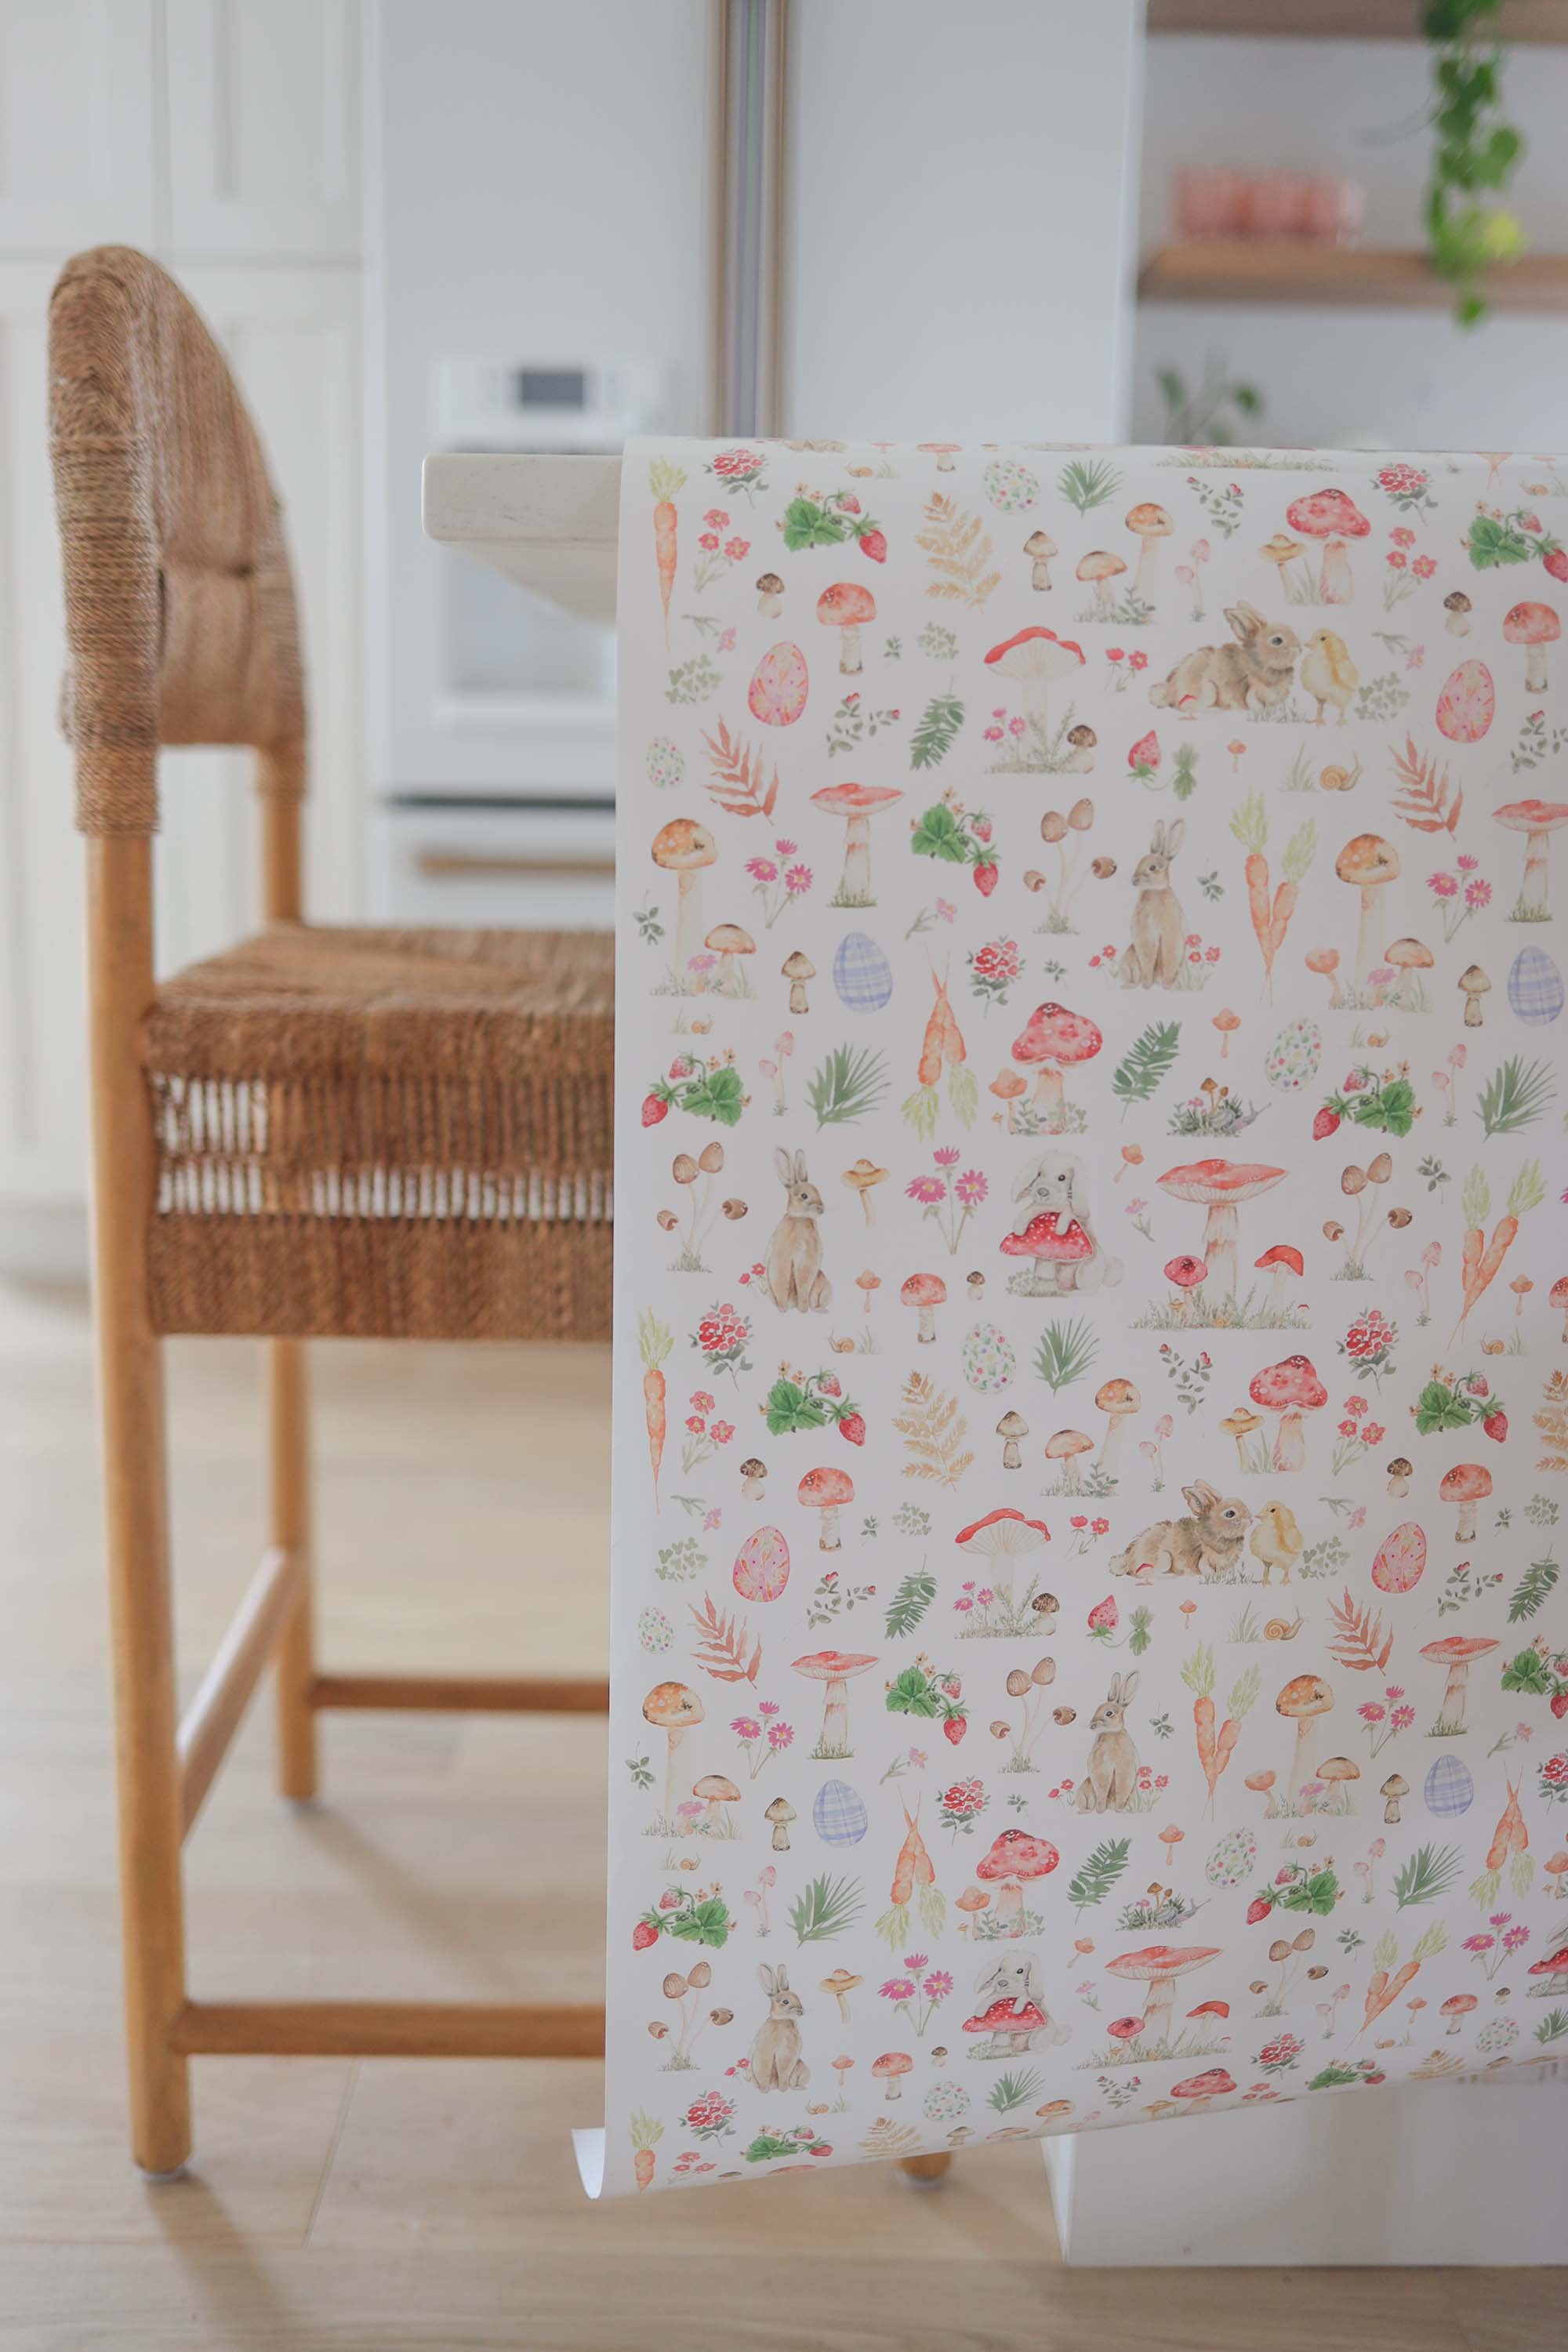
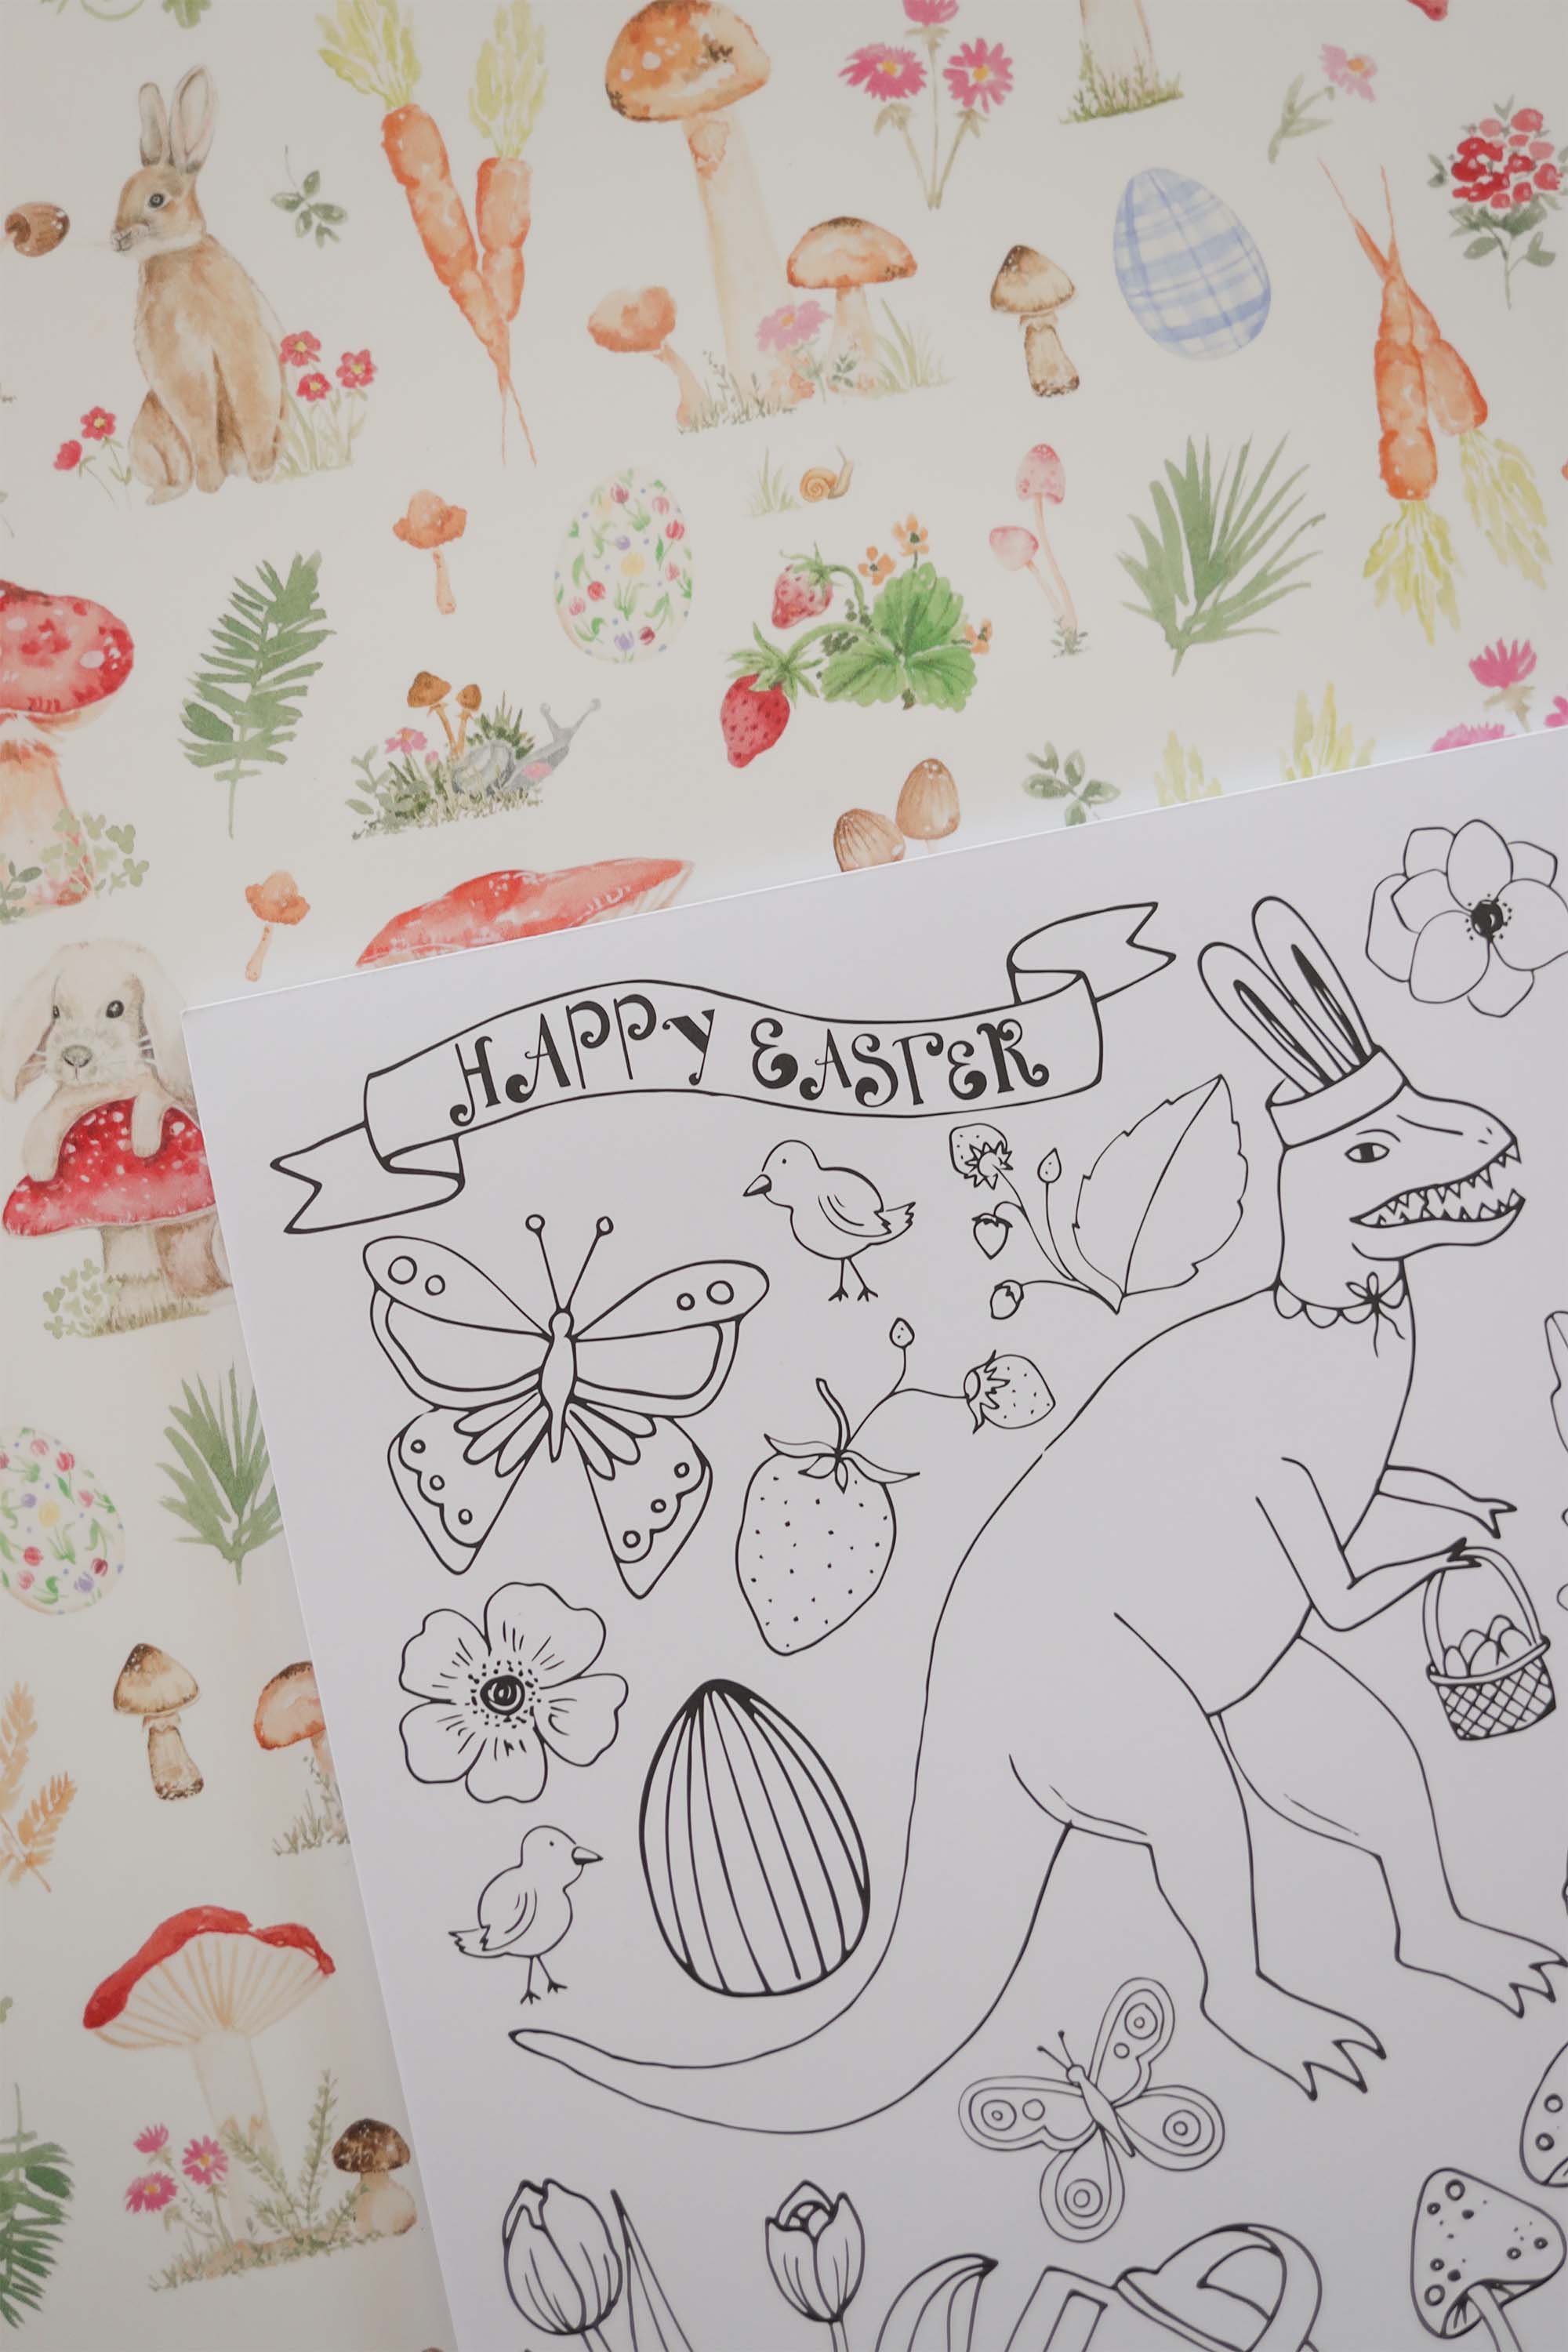
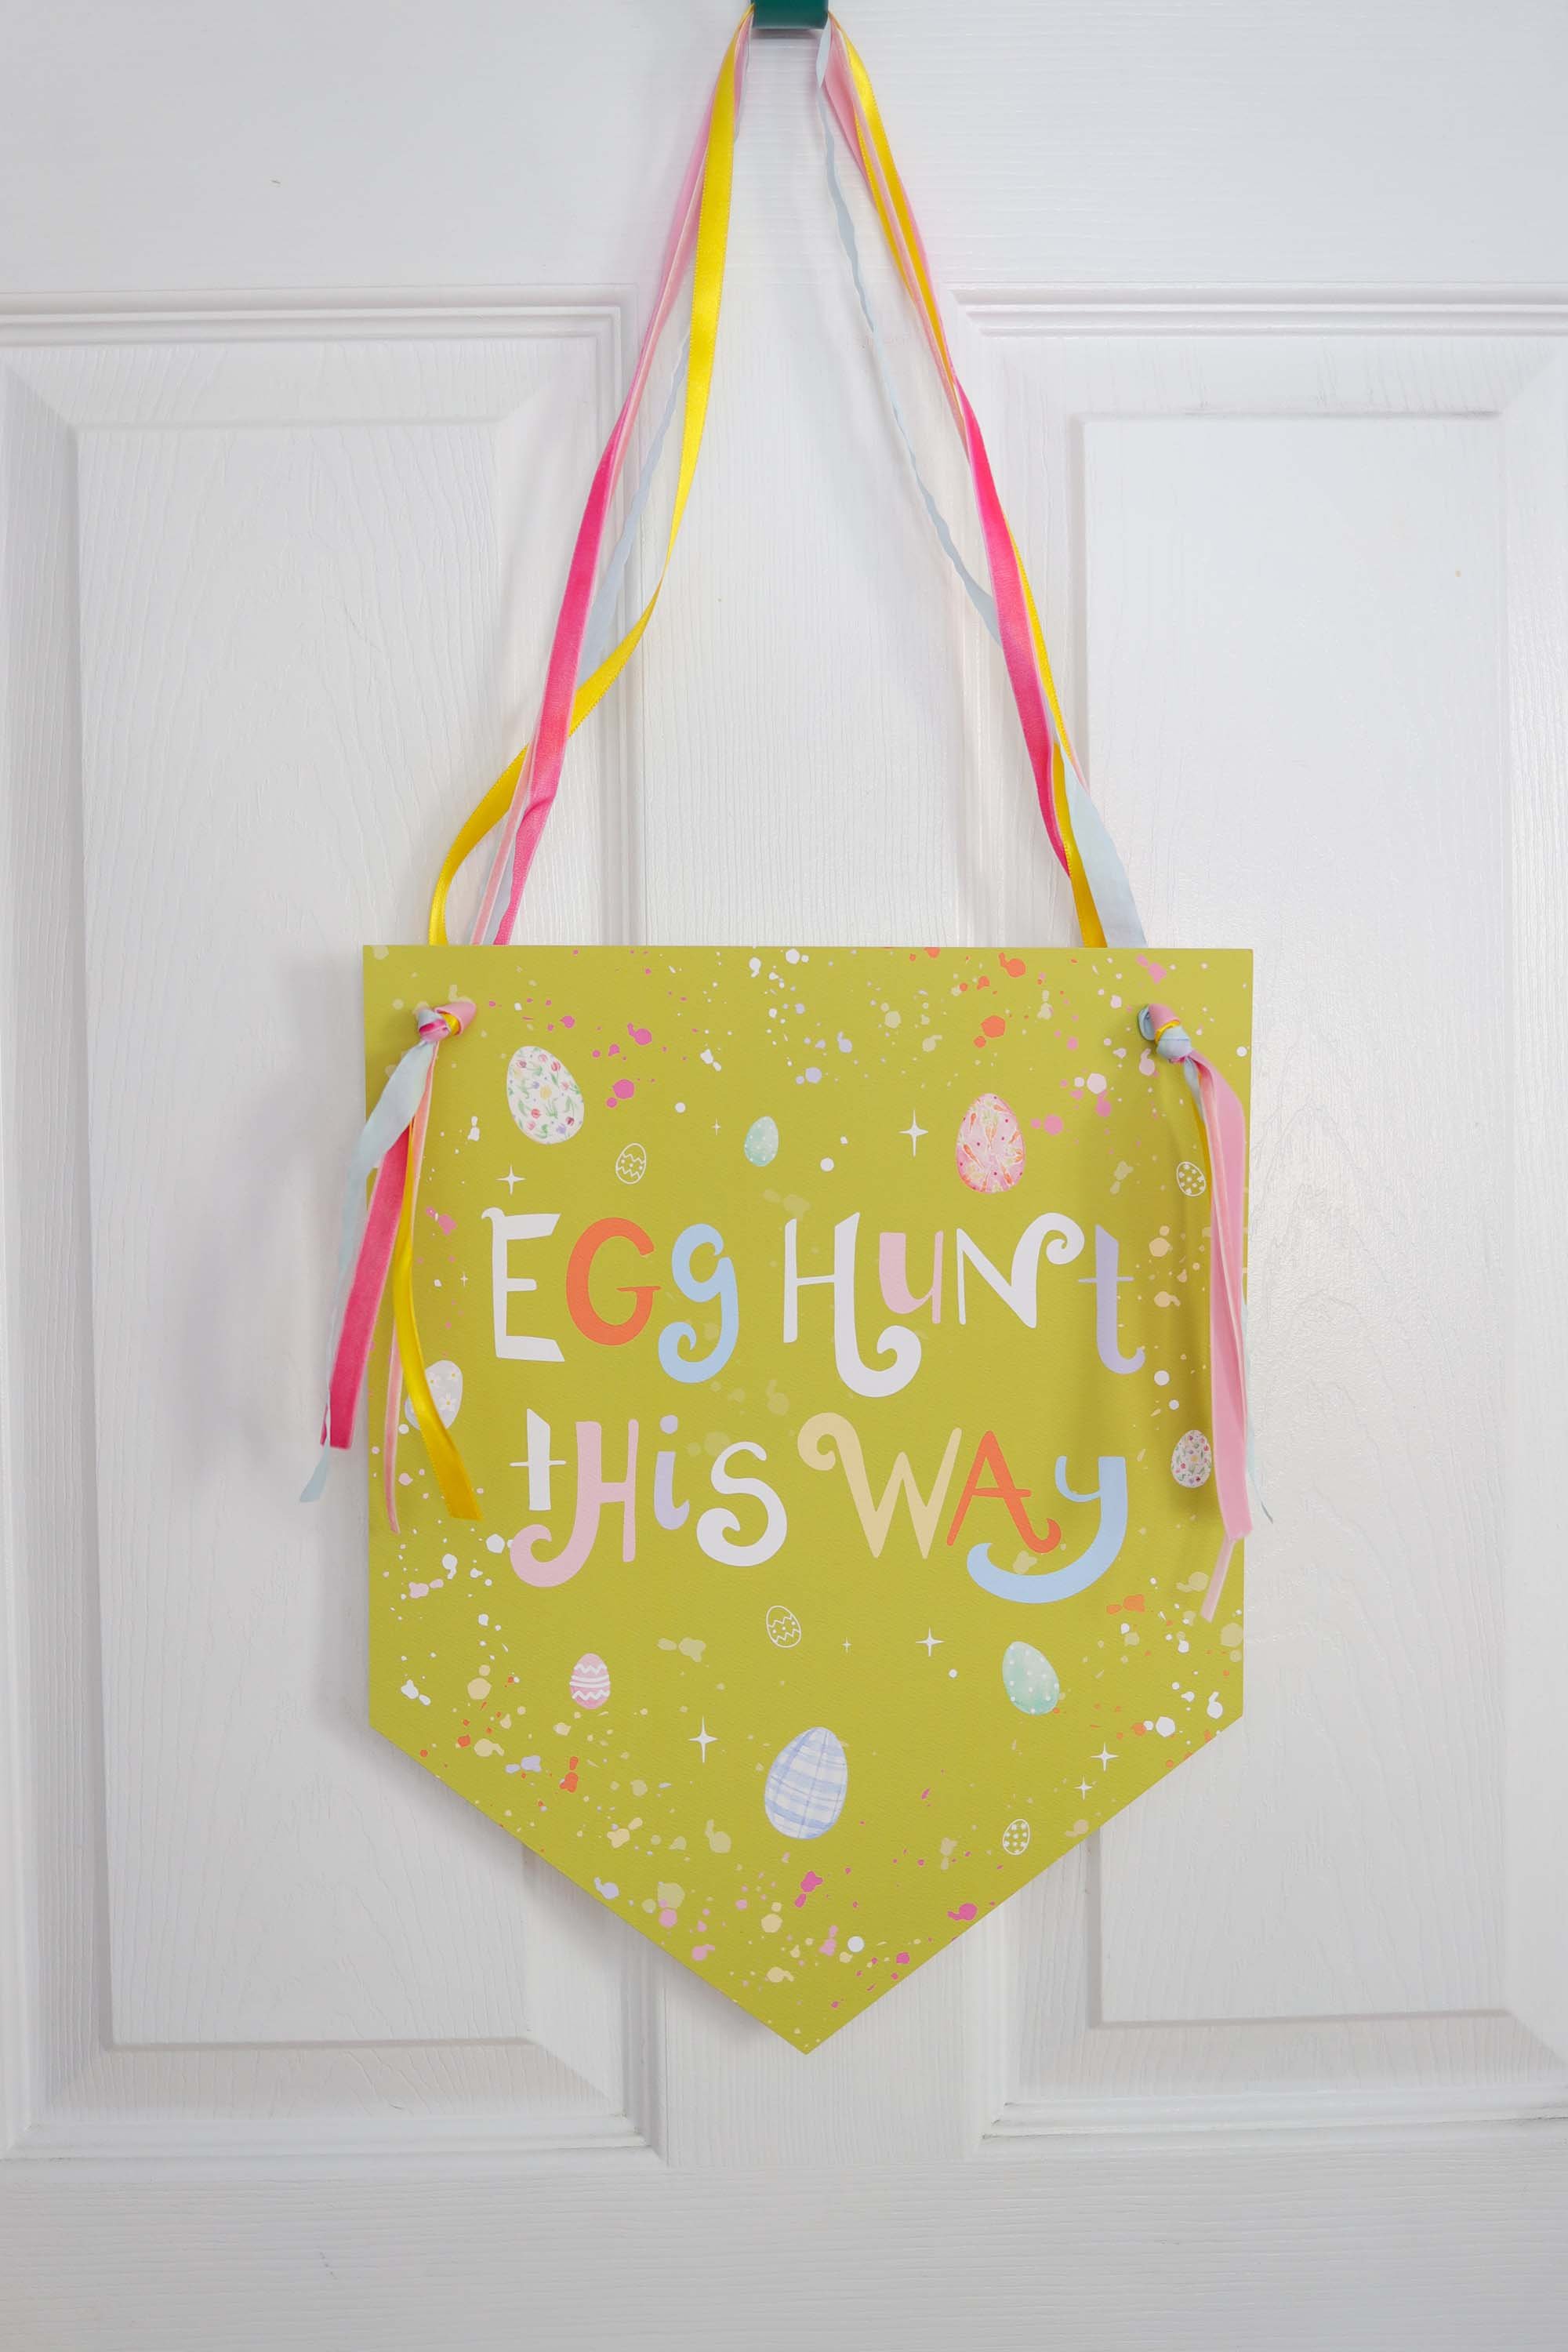
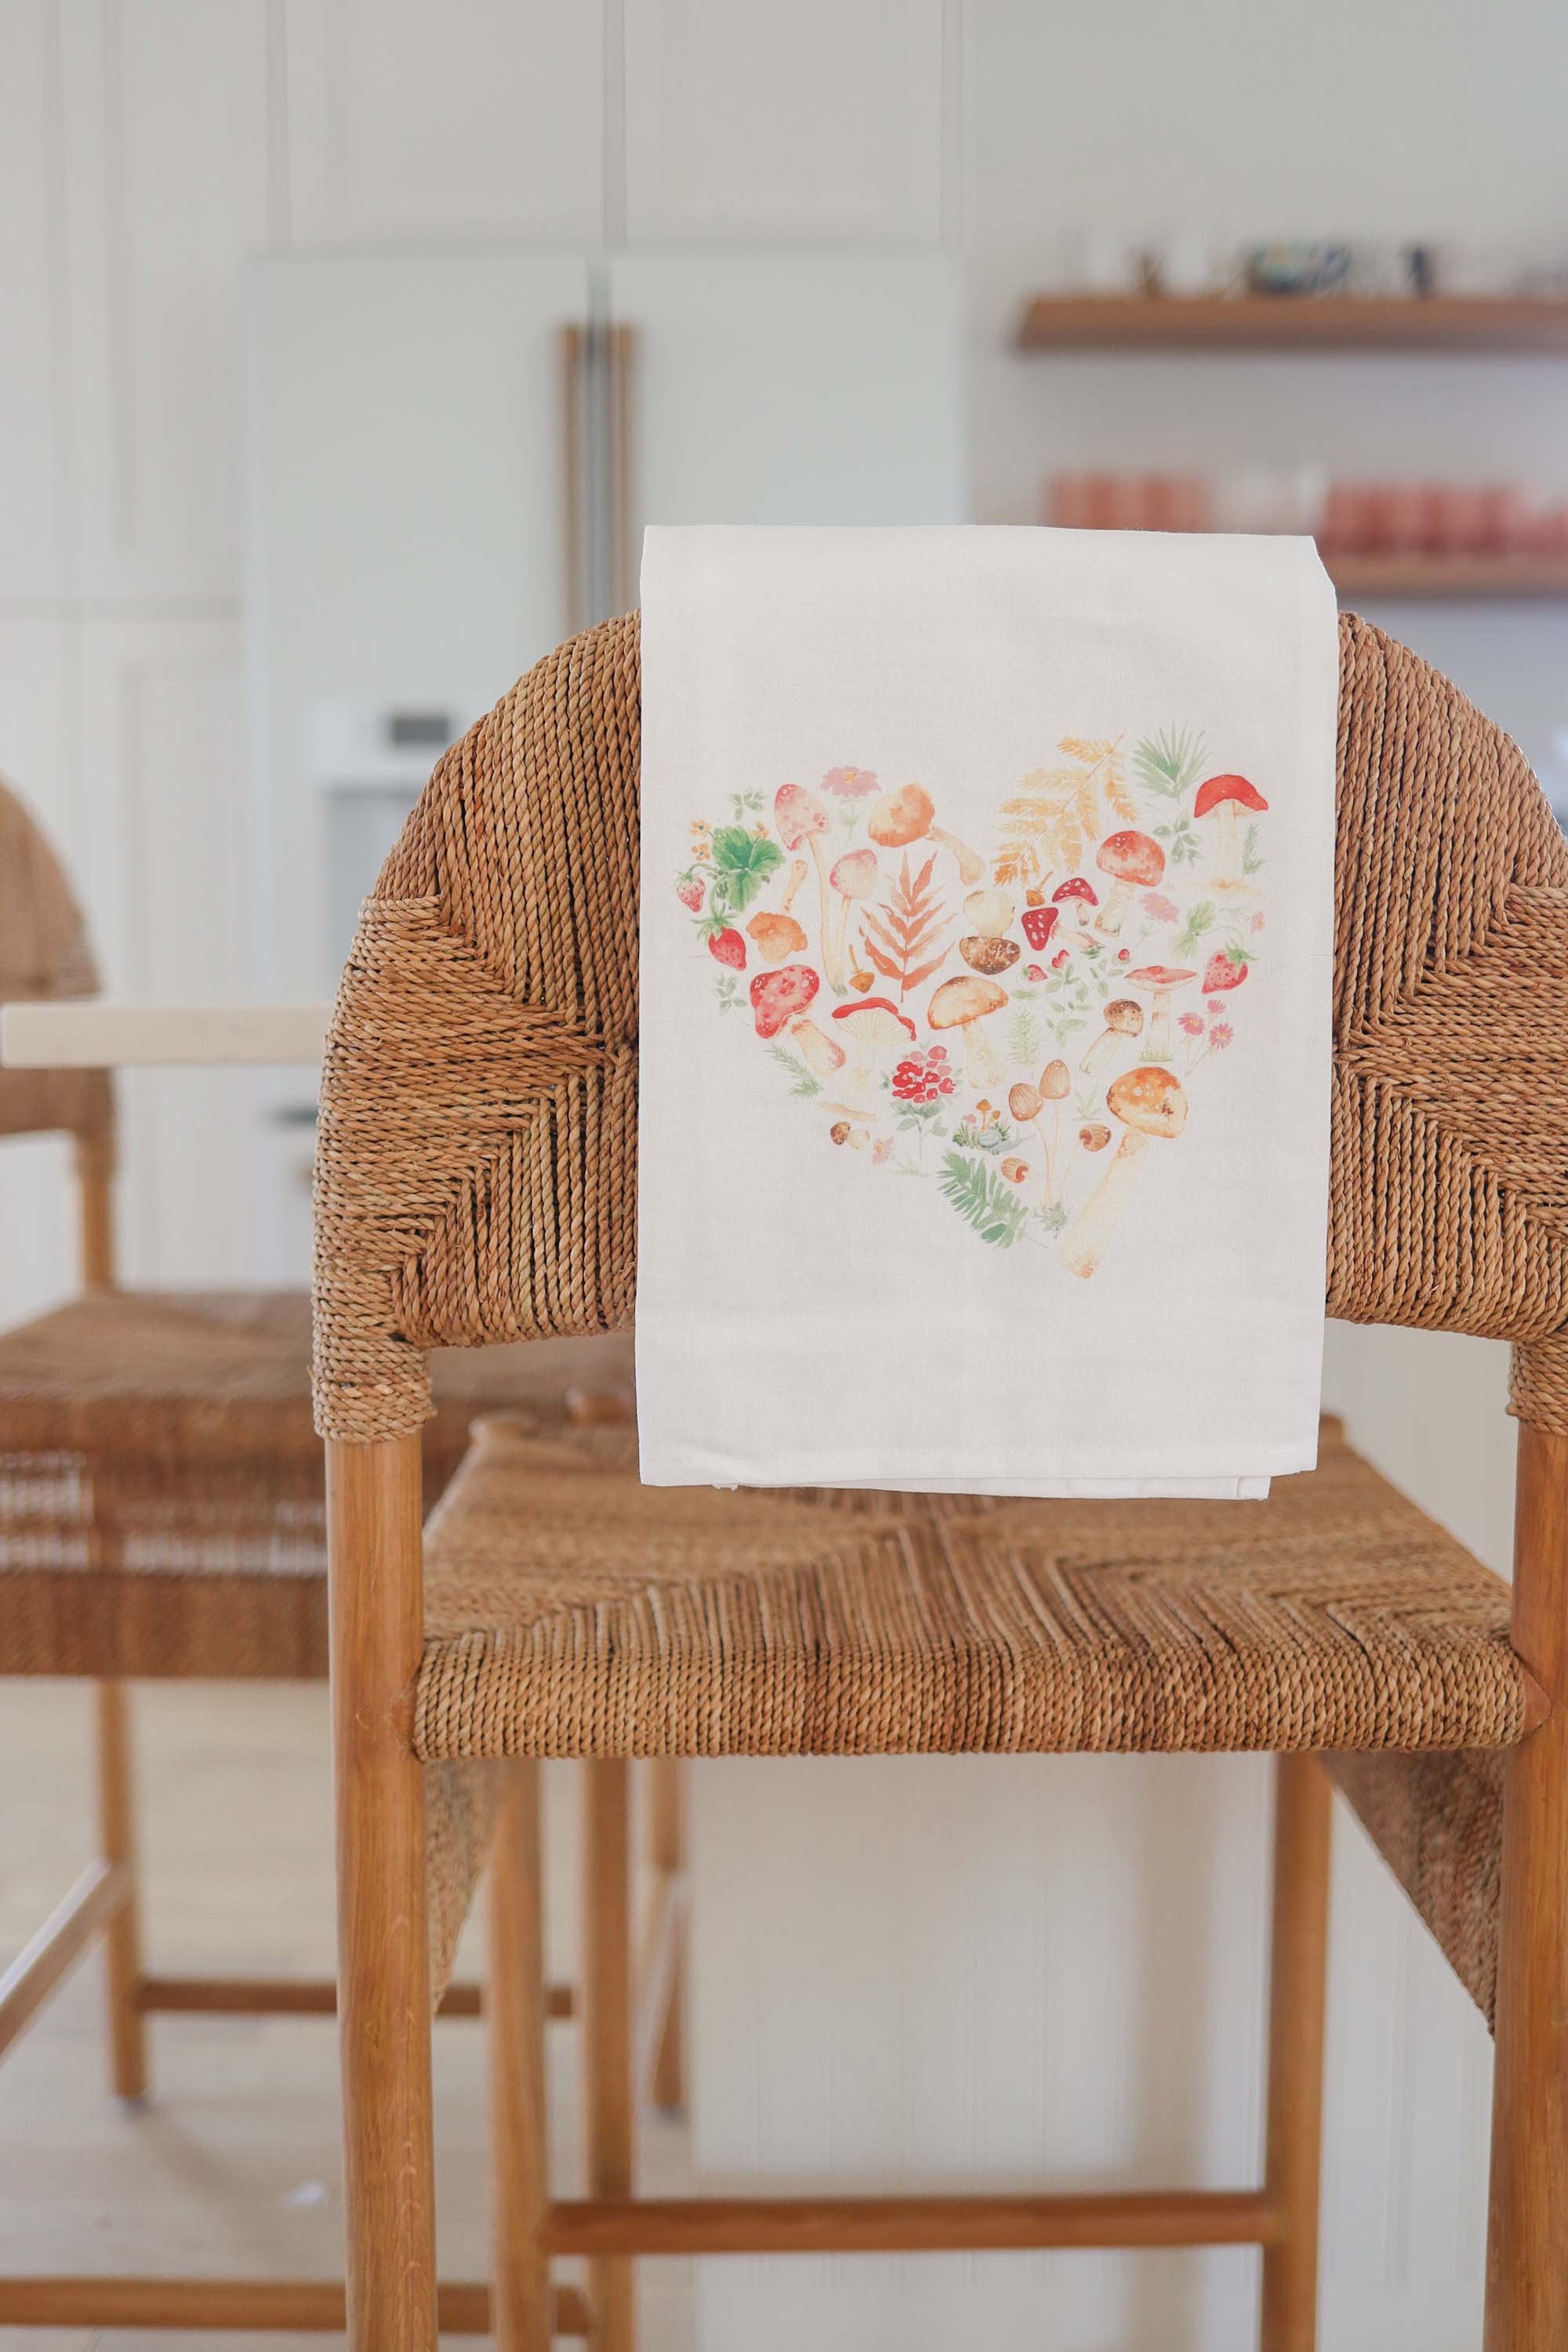
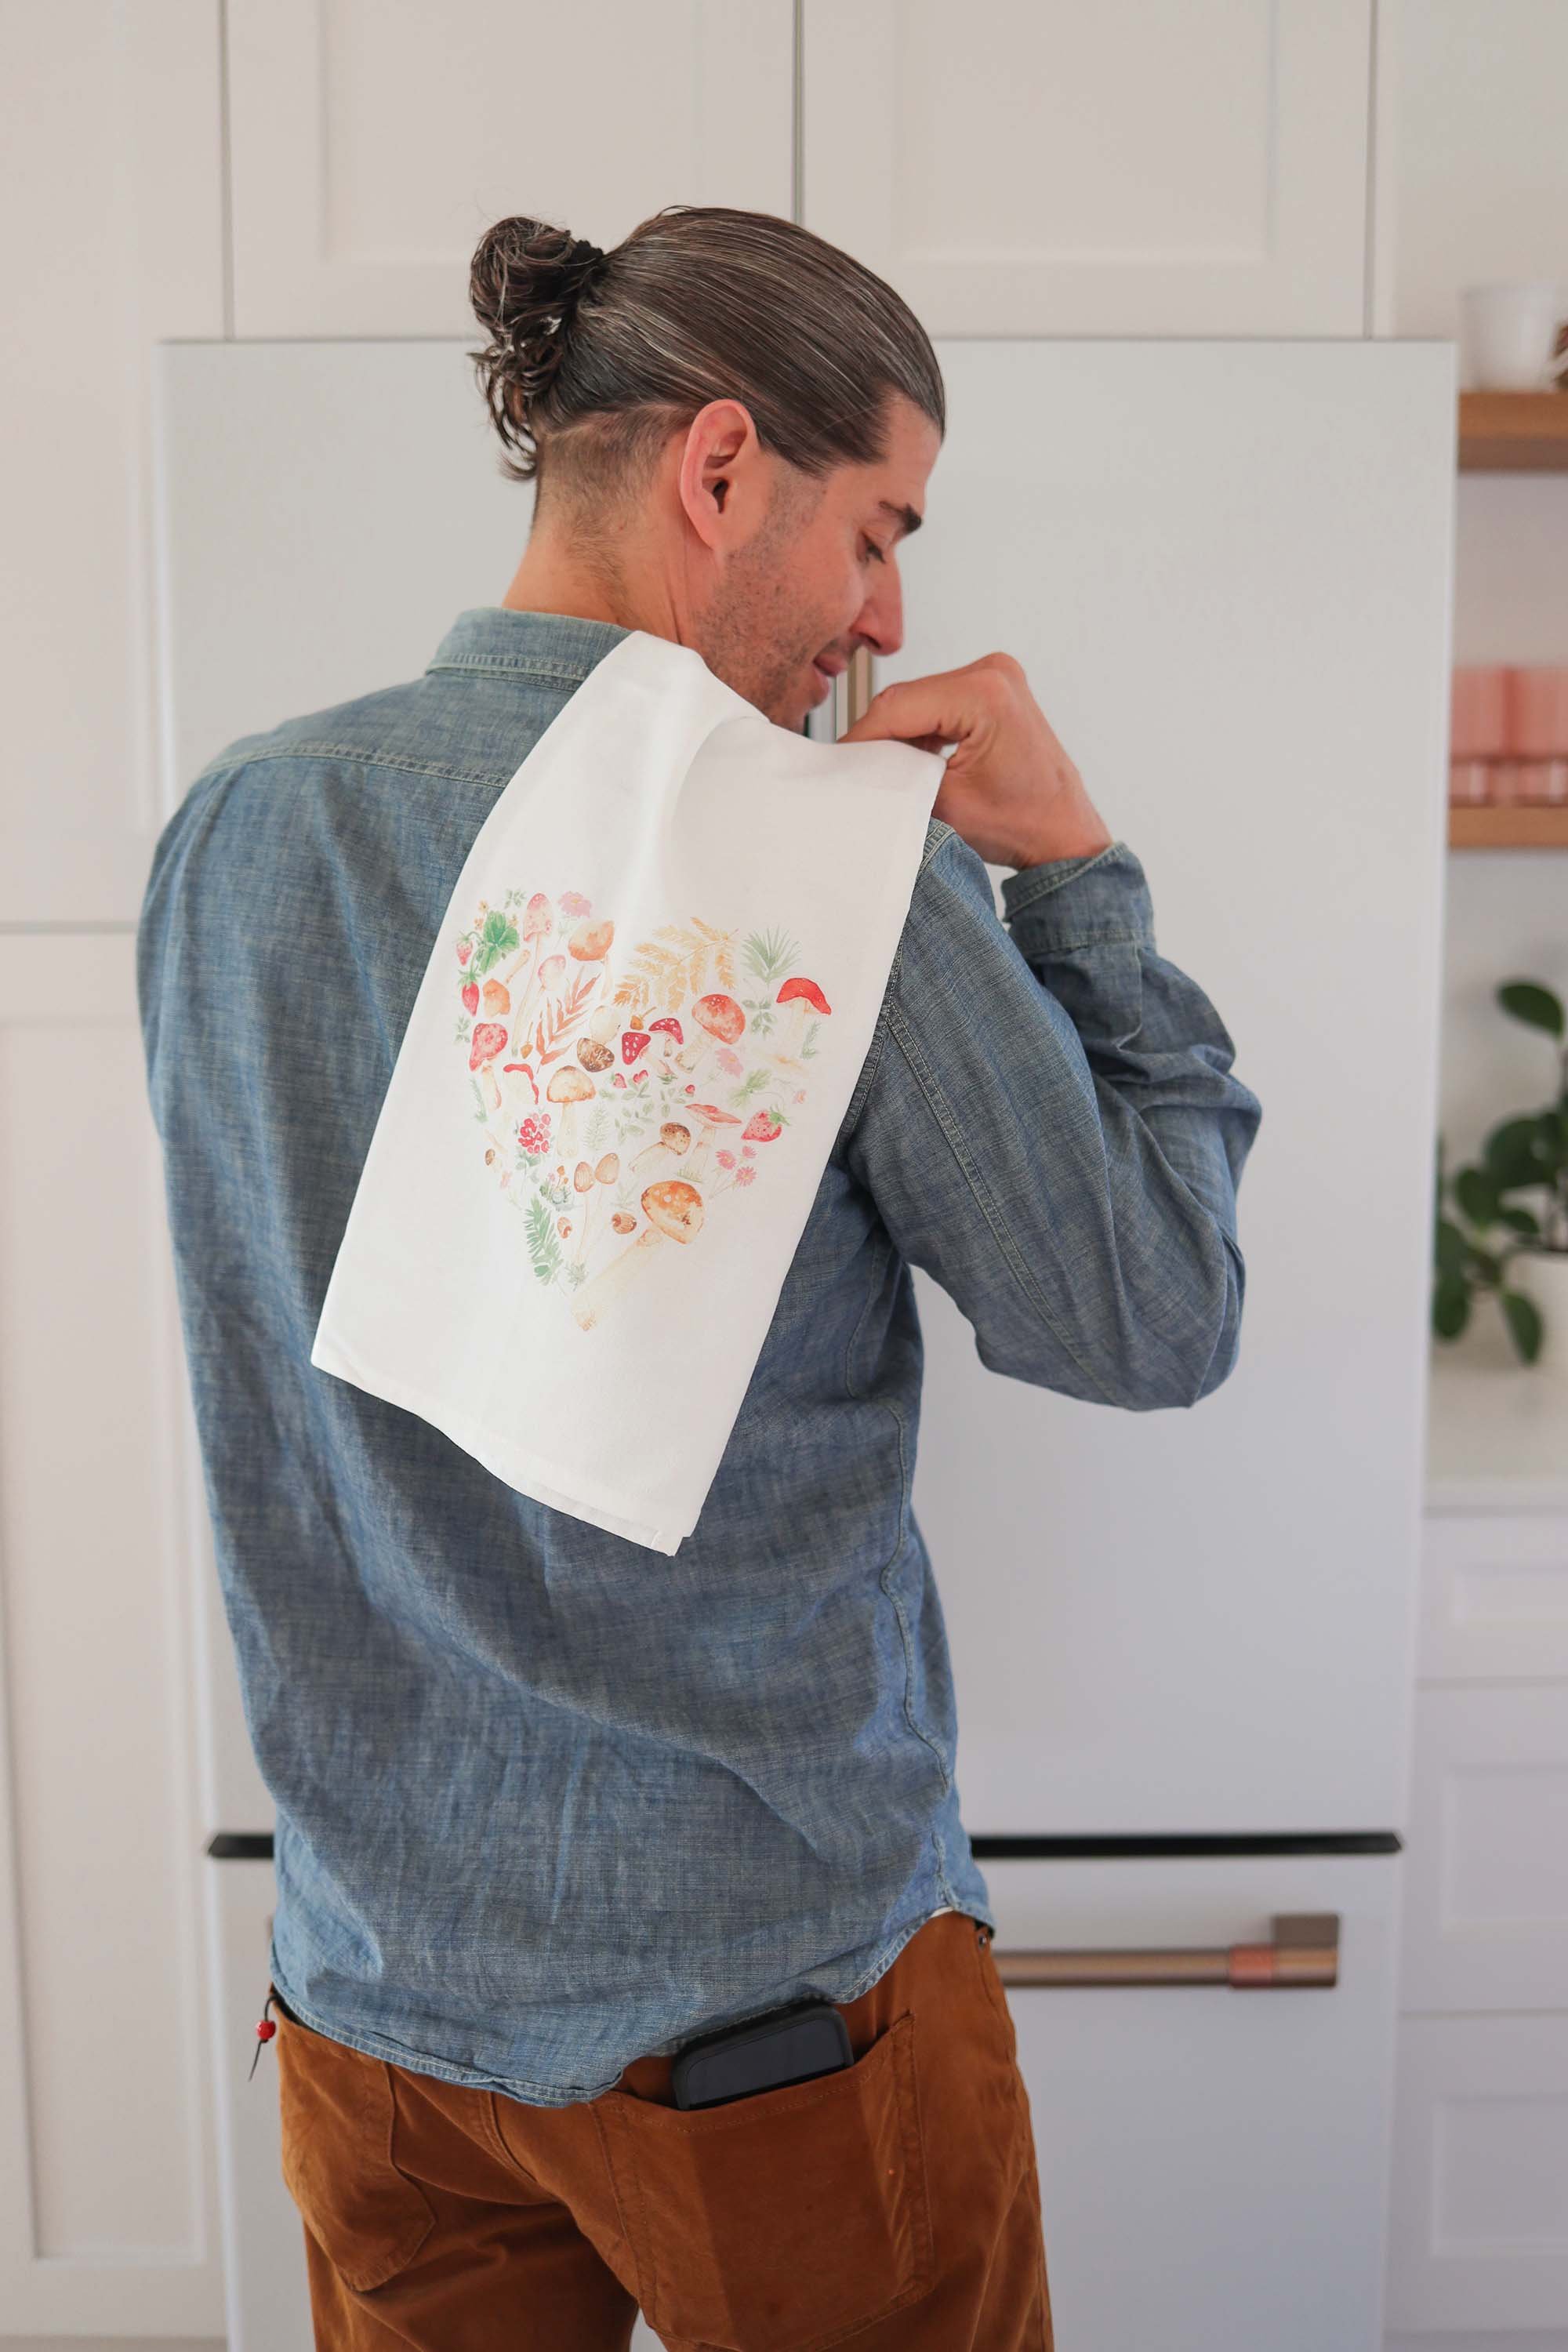
cottage core easter.

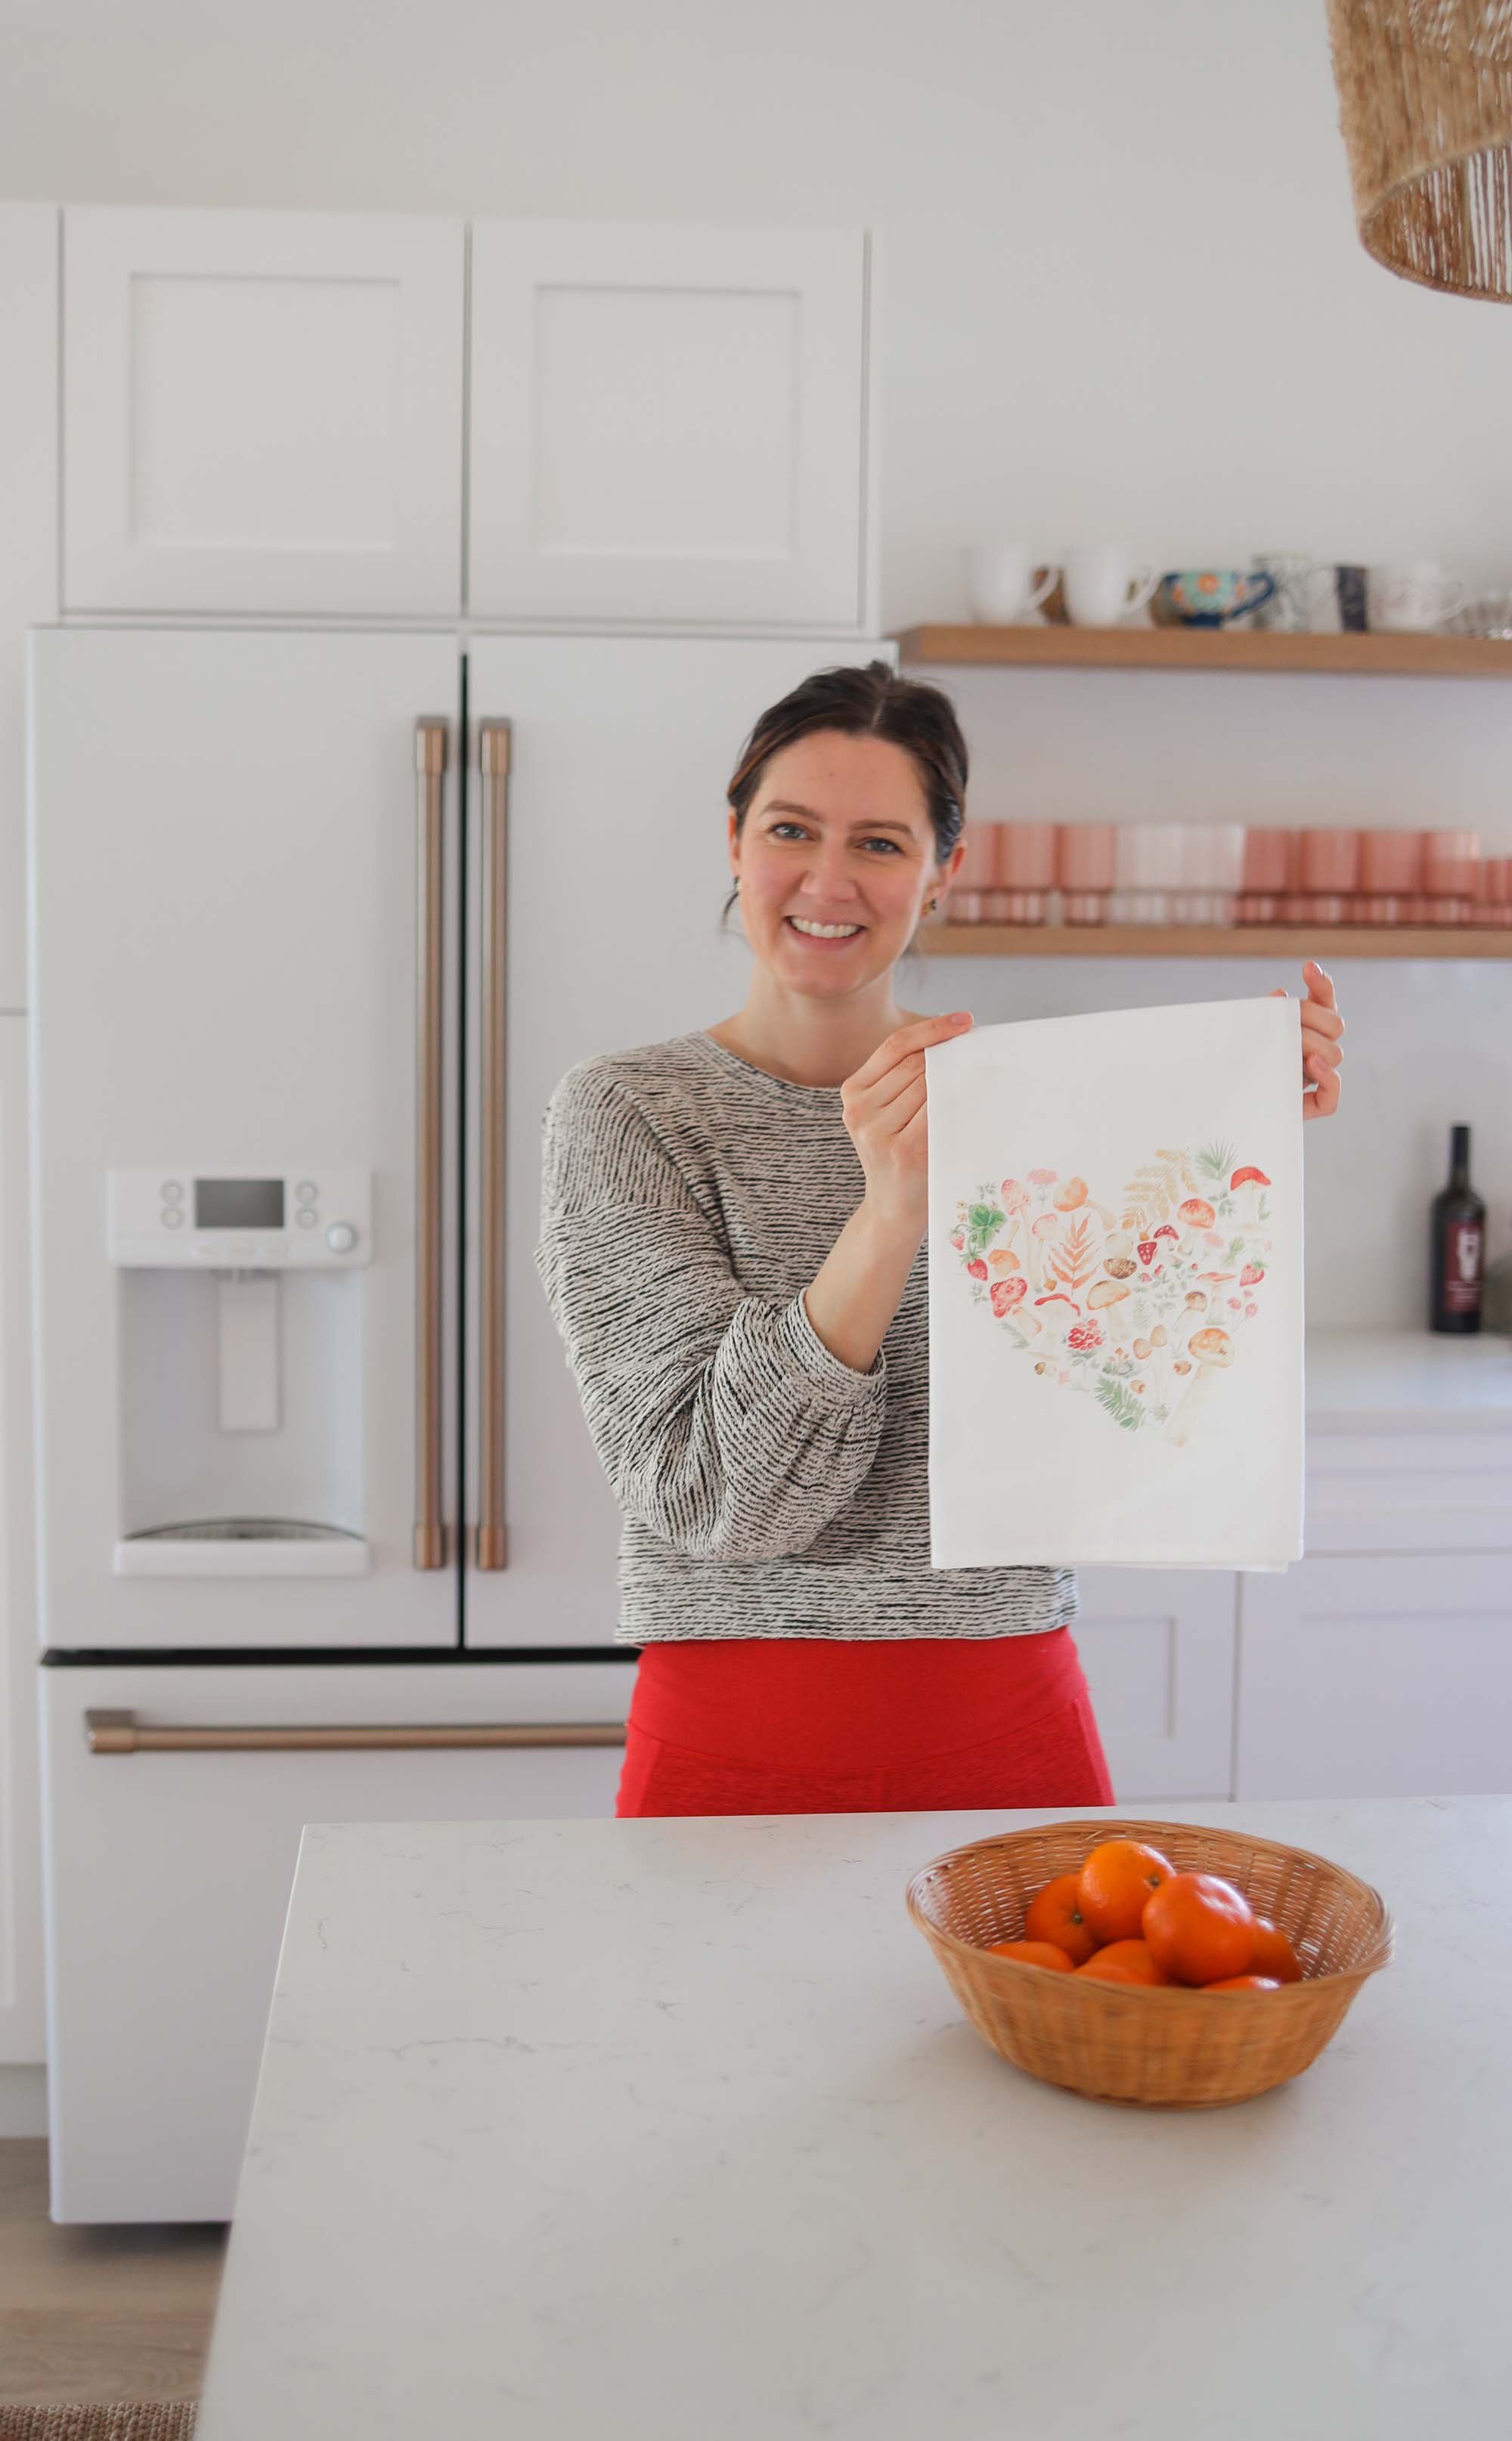
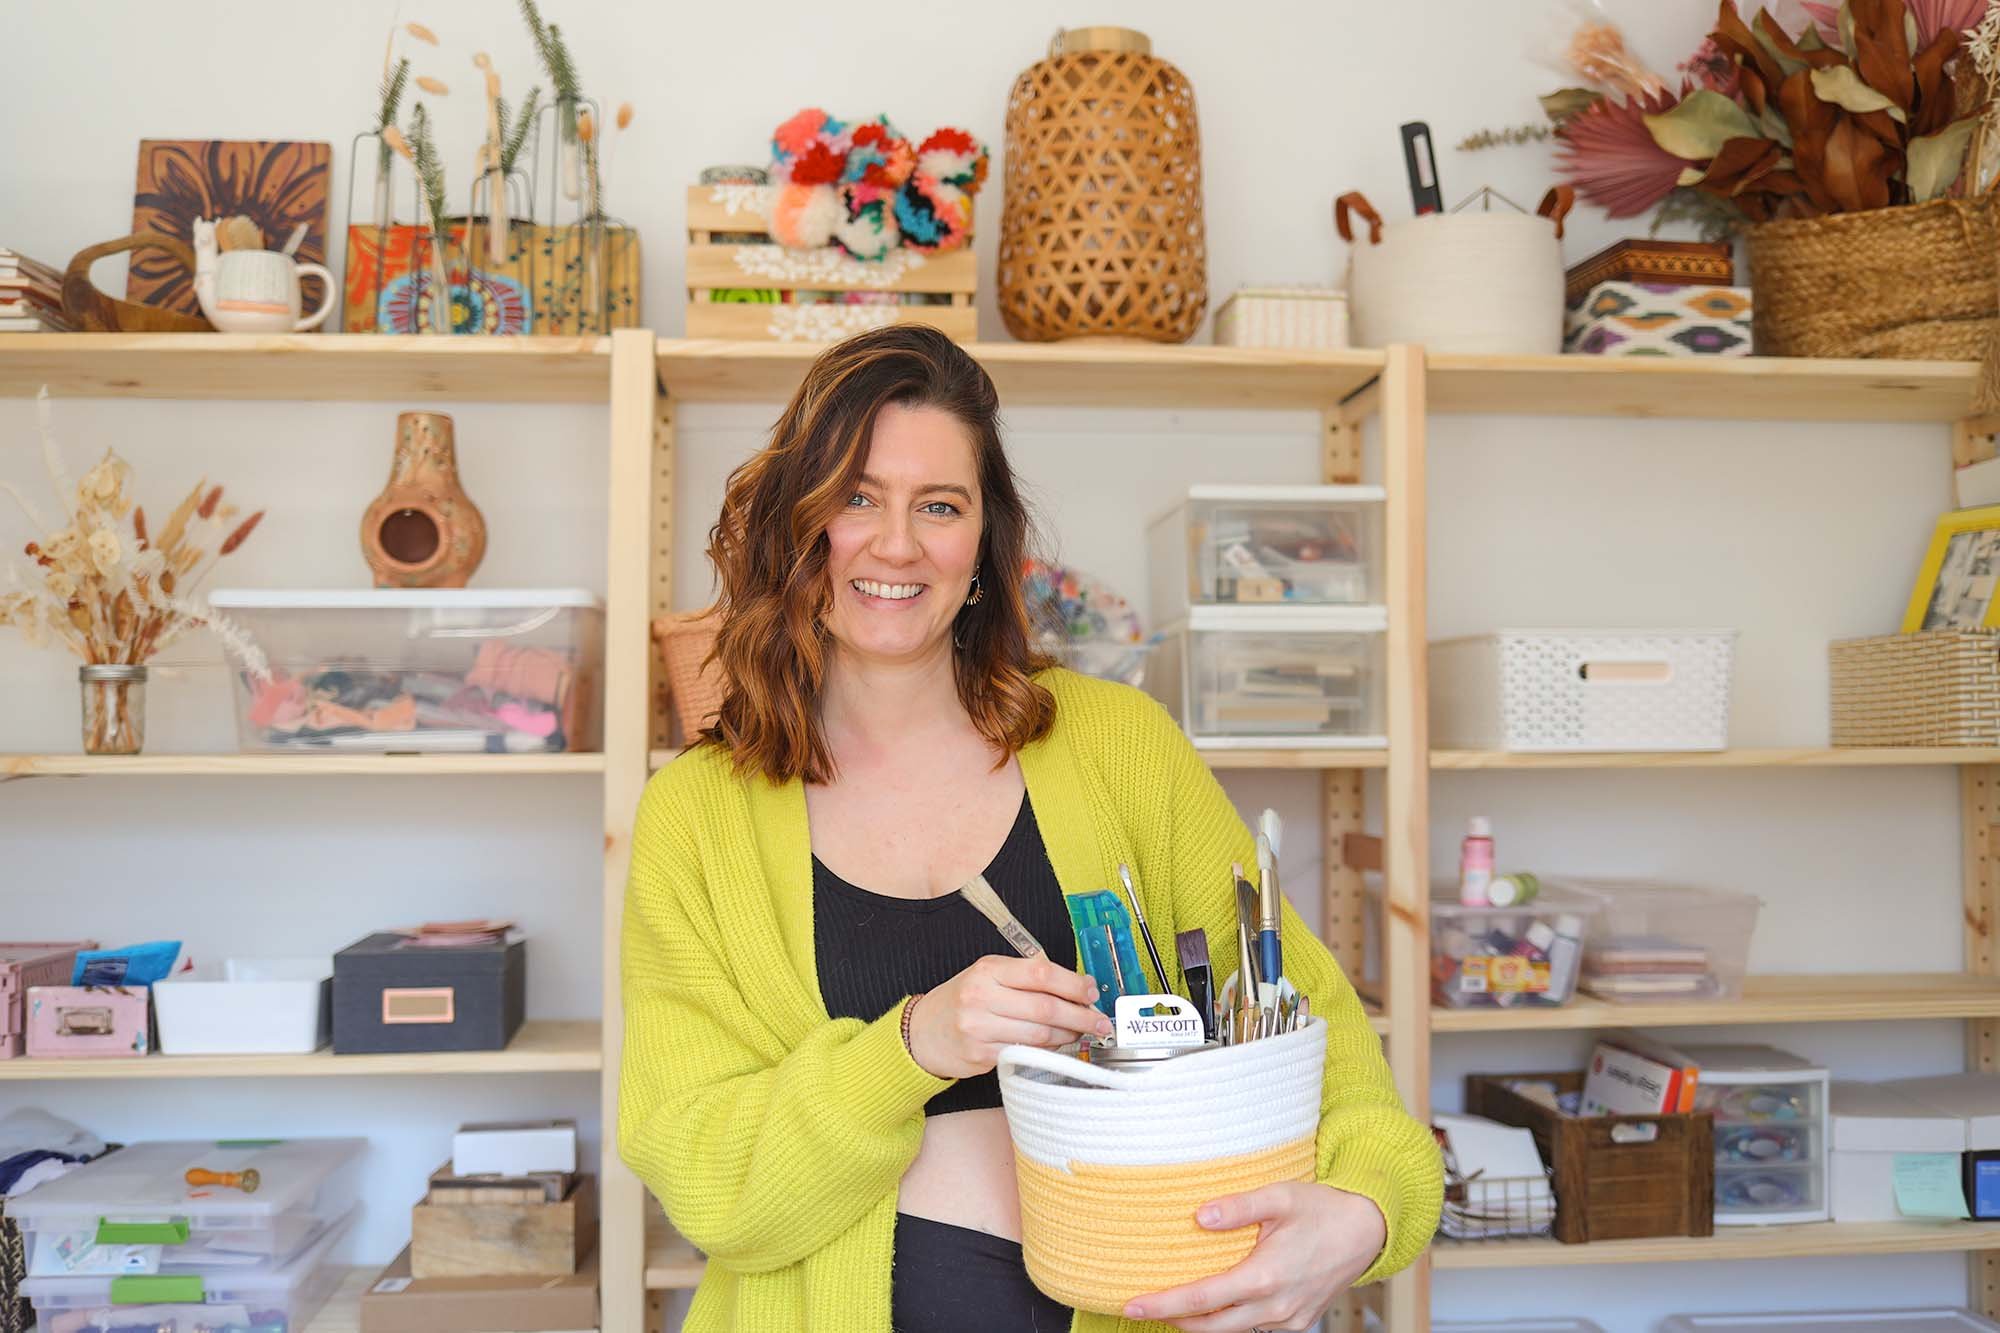
Spring-ness is in the air guys, Easter is around the corner and I’m excited to be hosting a holiday for the first time in centuries! So many changes have happened in the last few months. We moved both into a new home which also meant a new studio space! I now have a gorgeous studio room in the front of my home and a whole downstairs room for housing inventory where the order packing will take place. I’m so grateful for this space, especially after working out of my dining room for over a year! I have said that sentence so many times I need a t shirt that says “running my business out of my dining room” [ insert laugh crying emoji here ] Anyway, it’s all so exciting. A huge part of running my product based biz is showcasing and photographing the products in real life scenarios! This is a huge selling technique that I myself rely on heavily when shopping! Show me this thing that you’re saying I absolutely must have, in the room it goes in and how it works. V important. Do you agree?
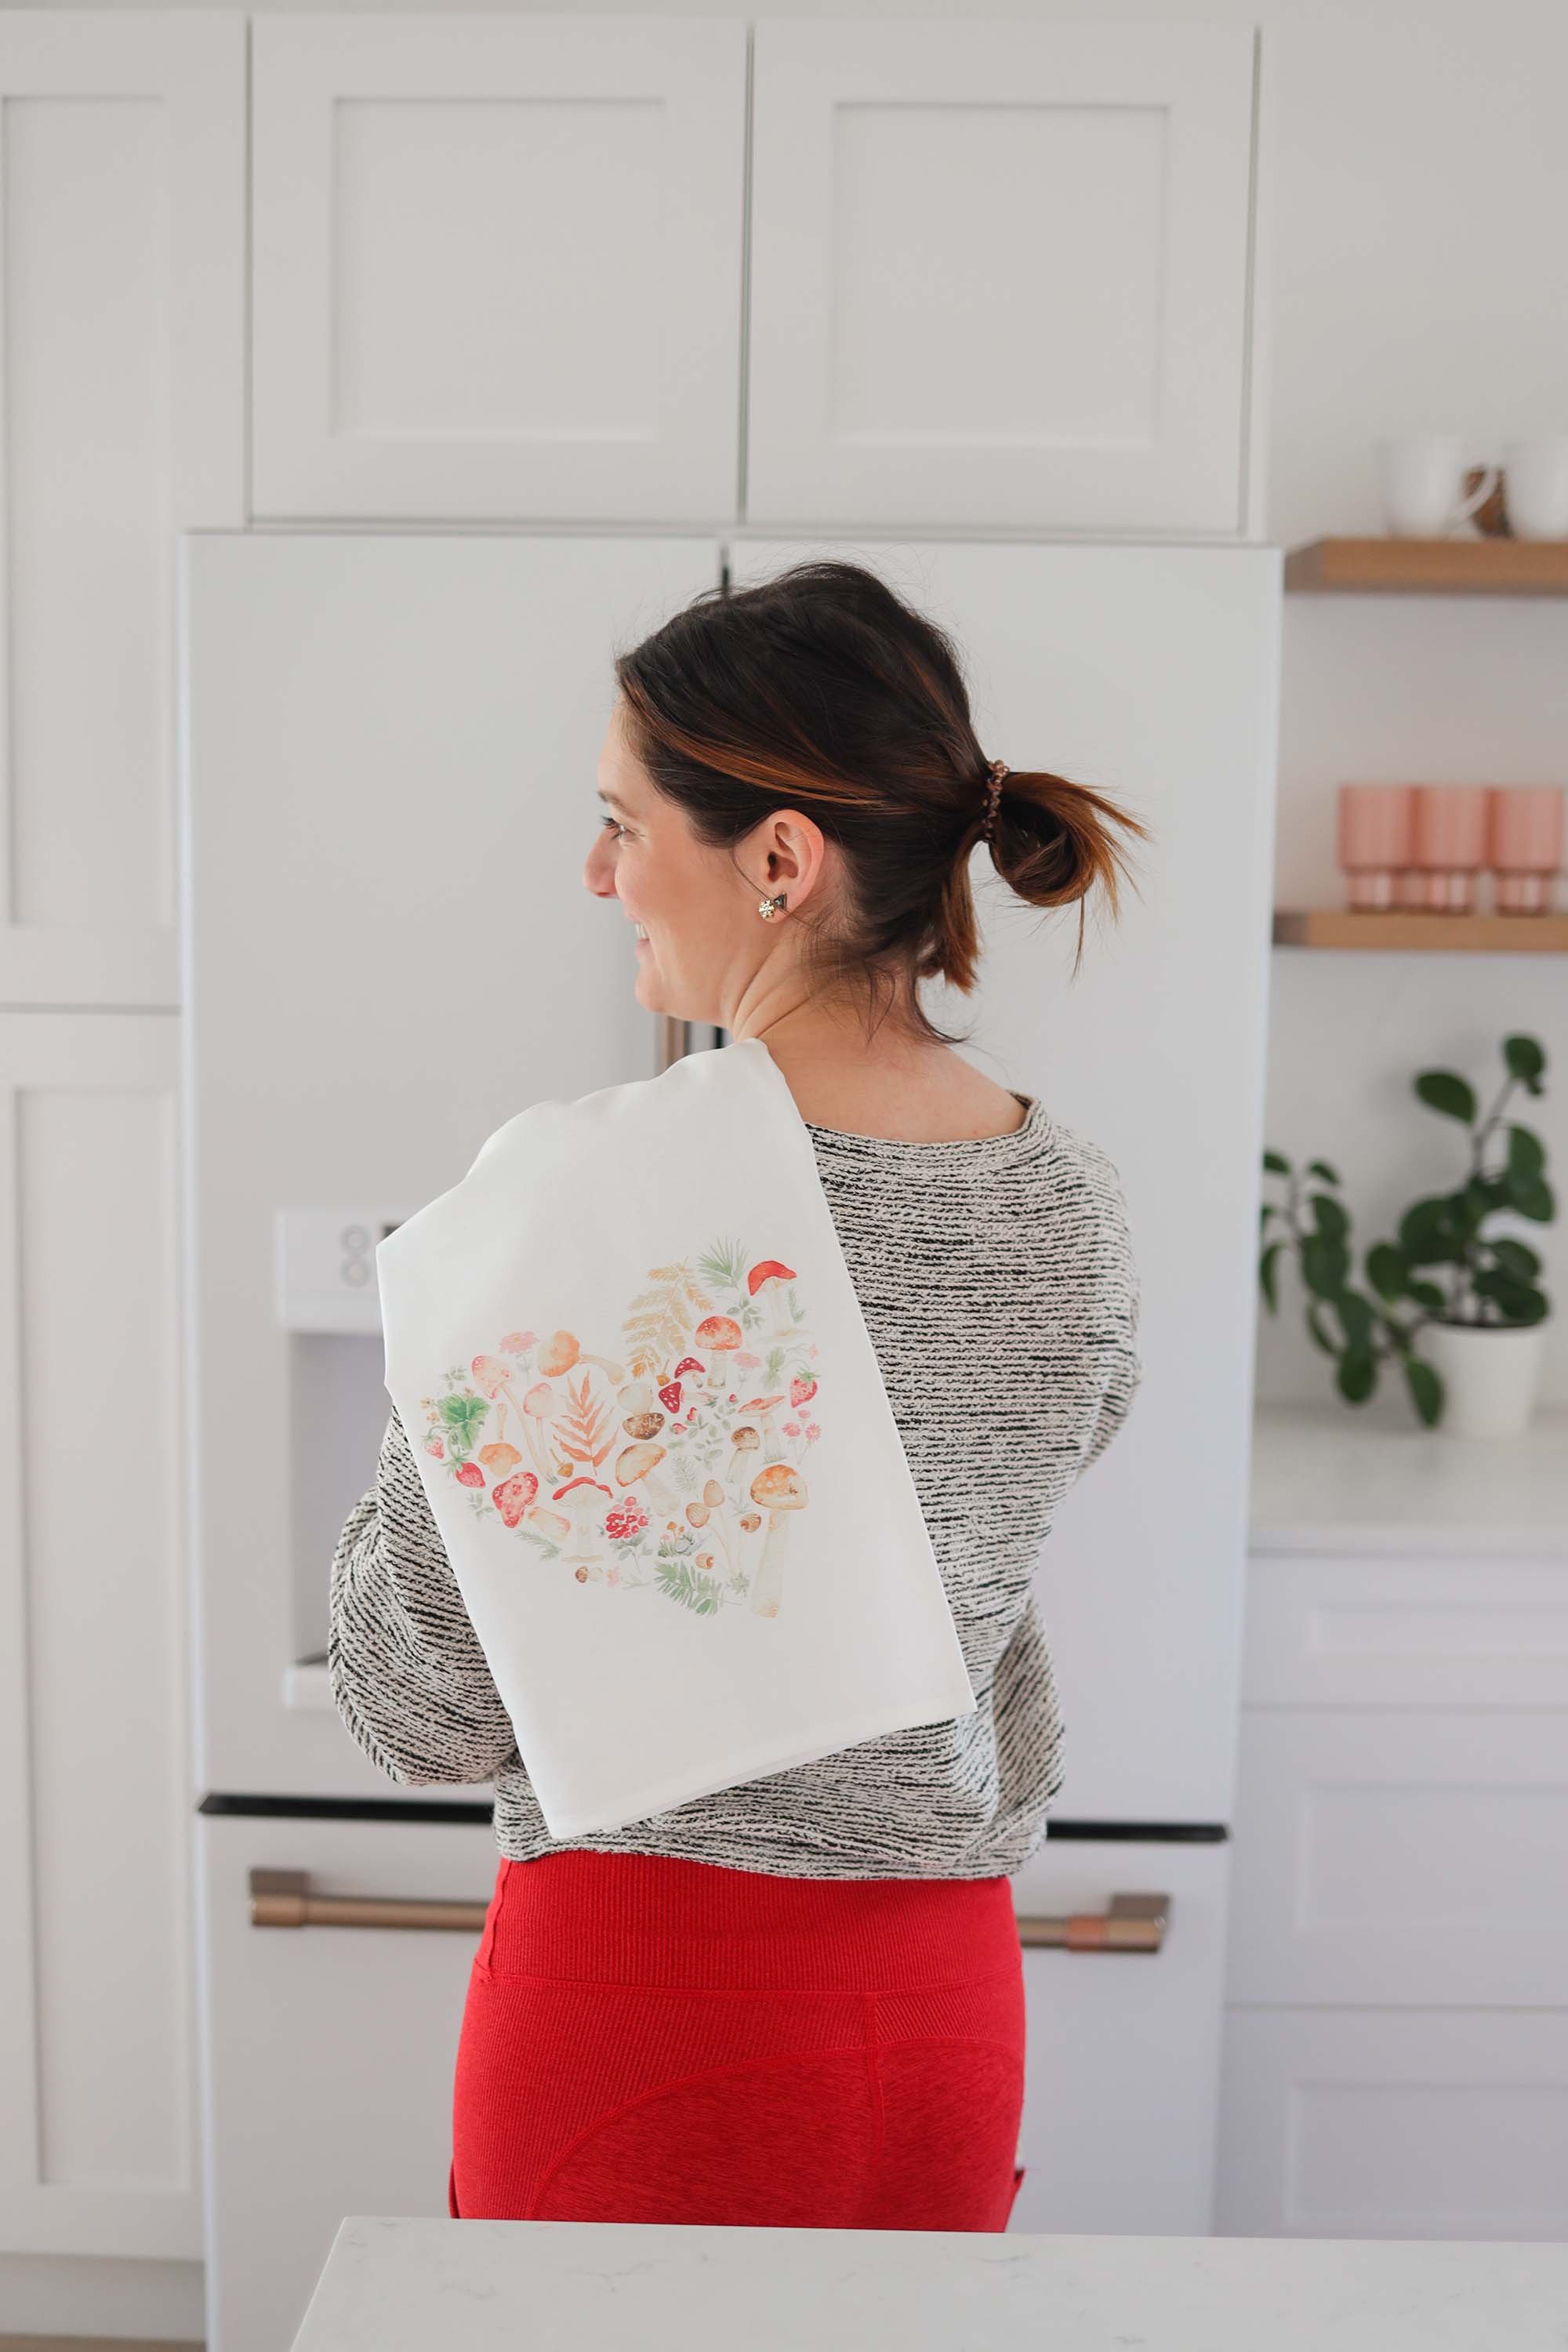
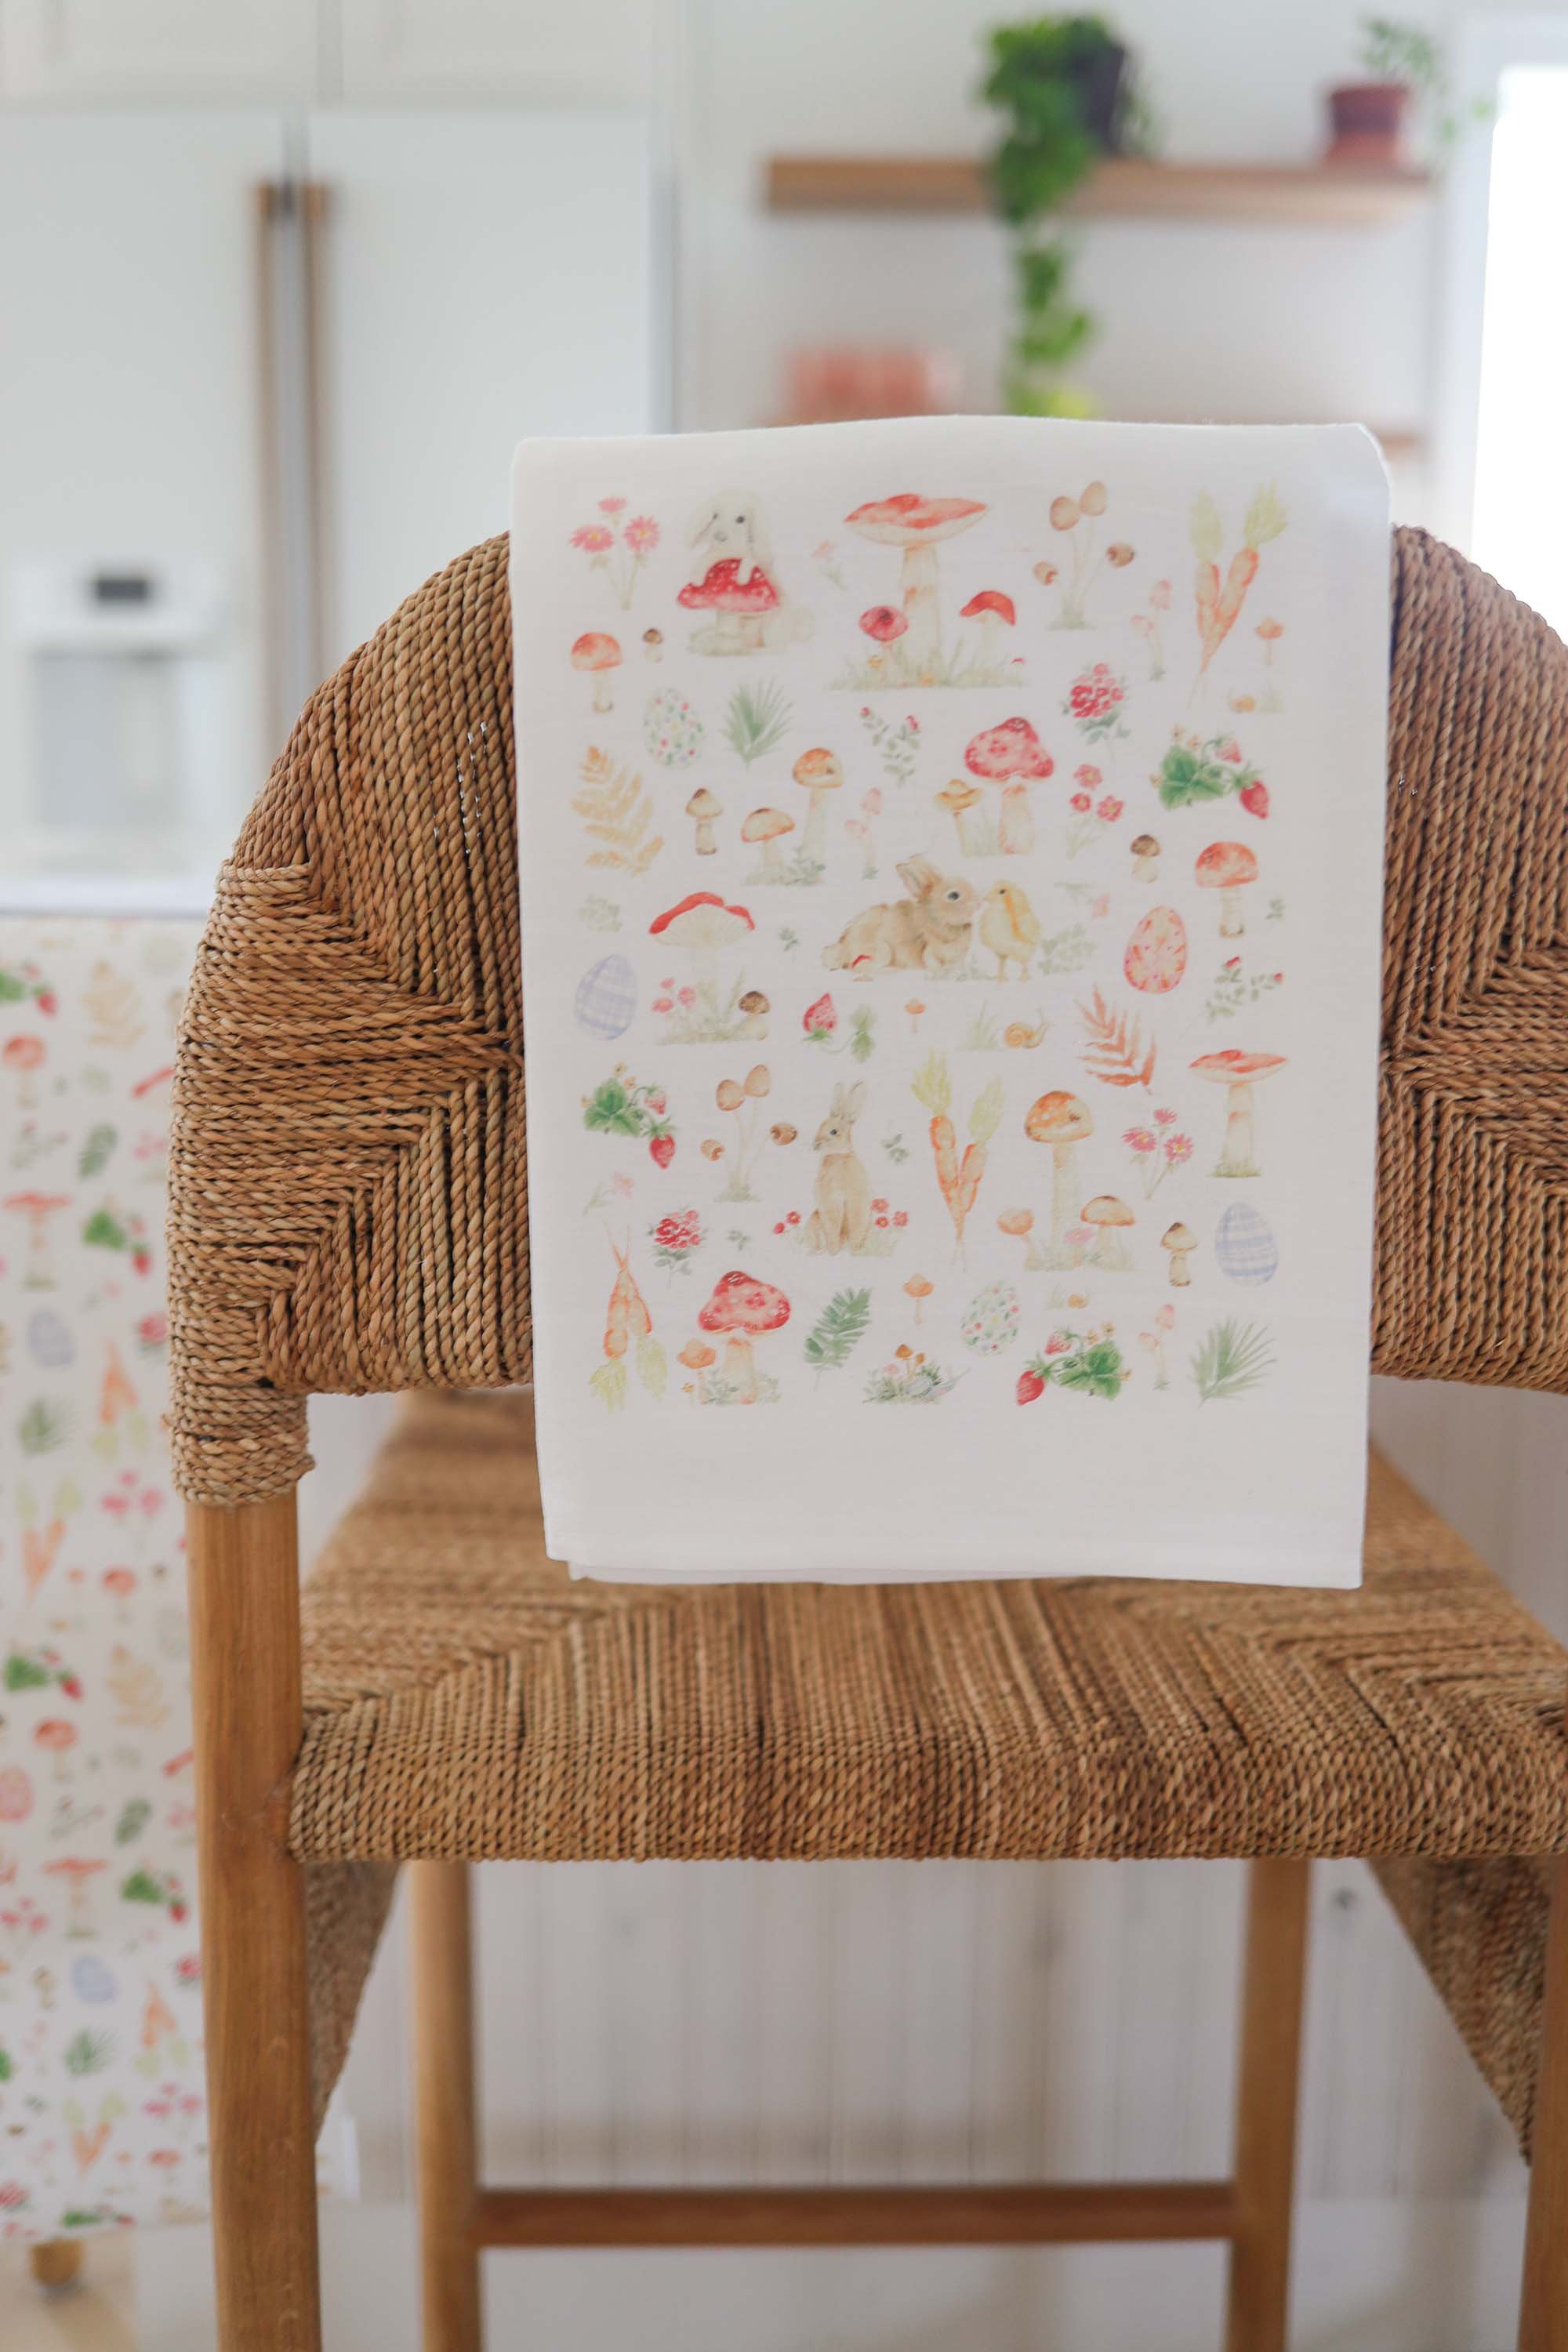
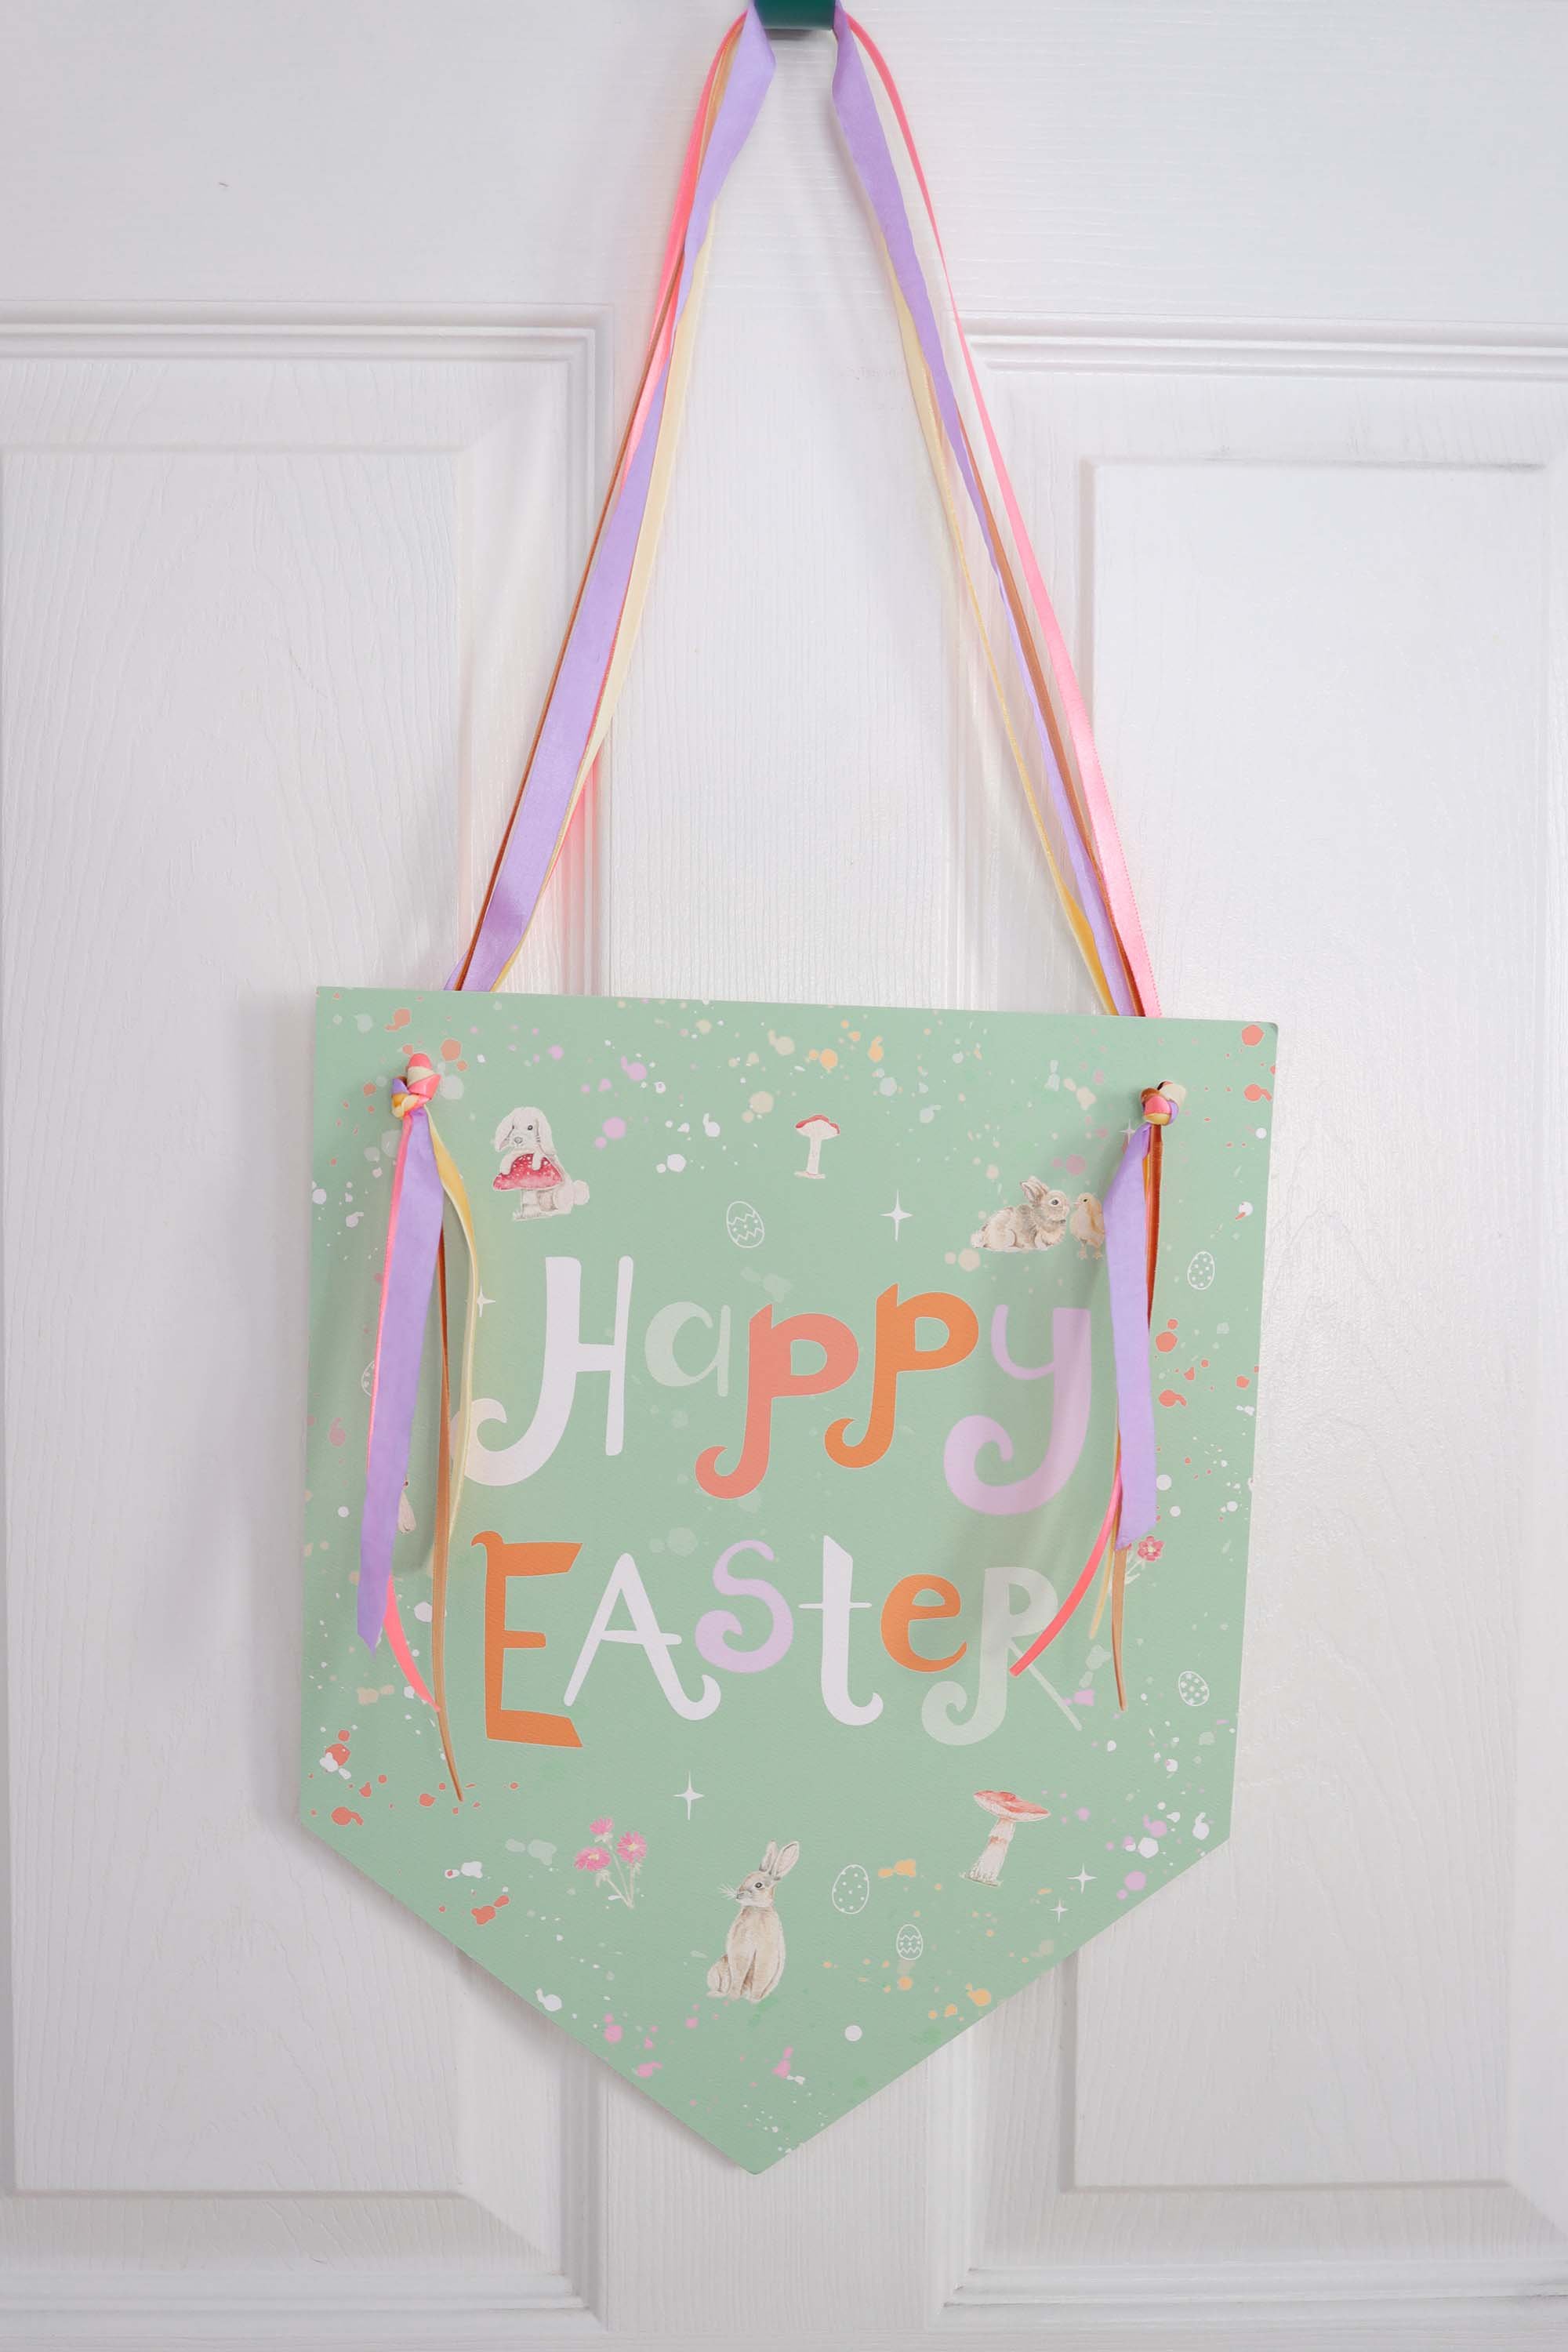
So I have a slew of cute Easter products that are all giving cottage core aesthetics. I have simply become obsessed with mushrooms and I’m not turning back anytime soon. It’s going to be a mushroom Christmas, I bet. But we won’t go there yet. I’m still aching for sunshine so focus, Stephanie.
I’ll have a blog post up with some new house photos soon but for now, here’s a few sneaks showing off a few of my favorite new Easter goodies!

when an artist designs your invitations.
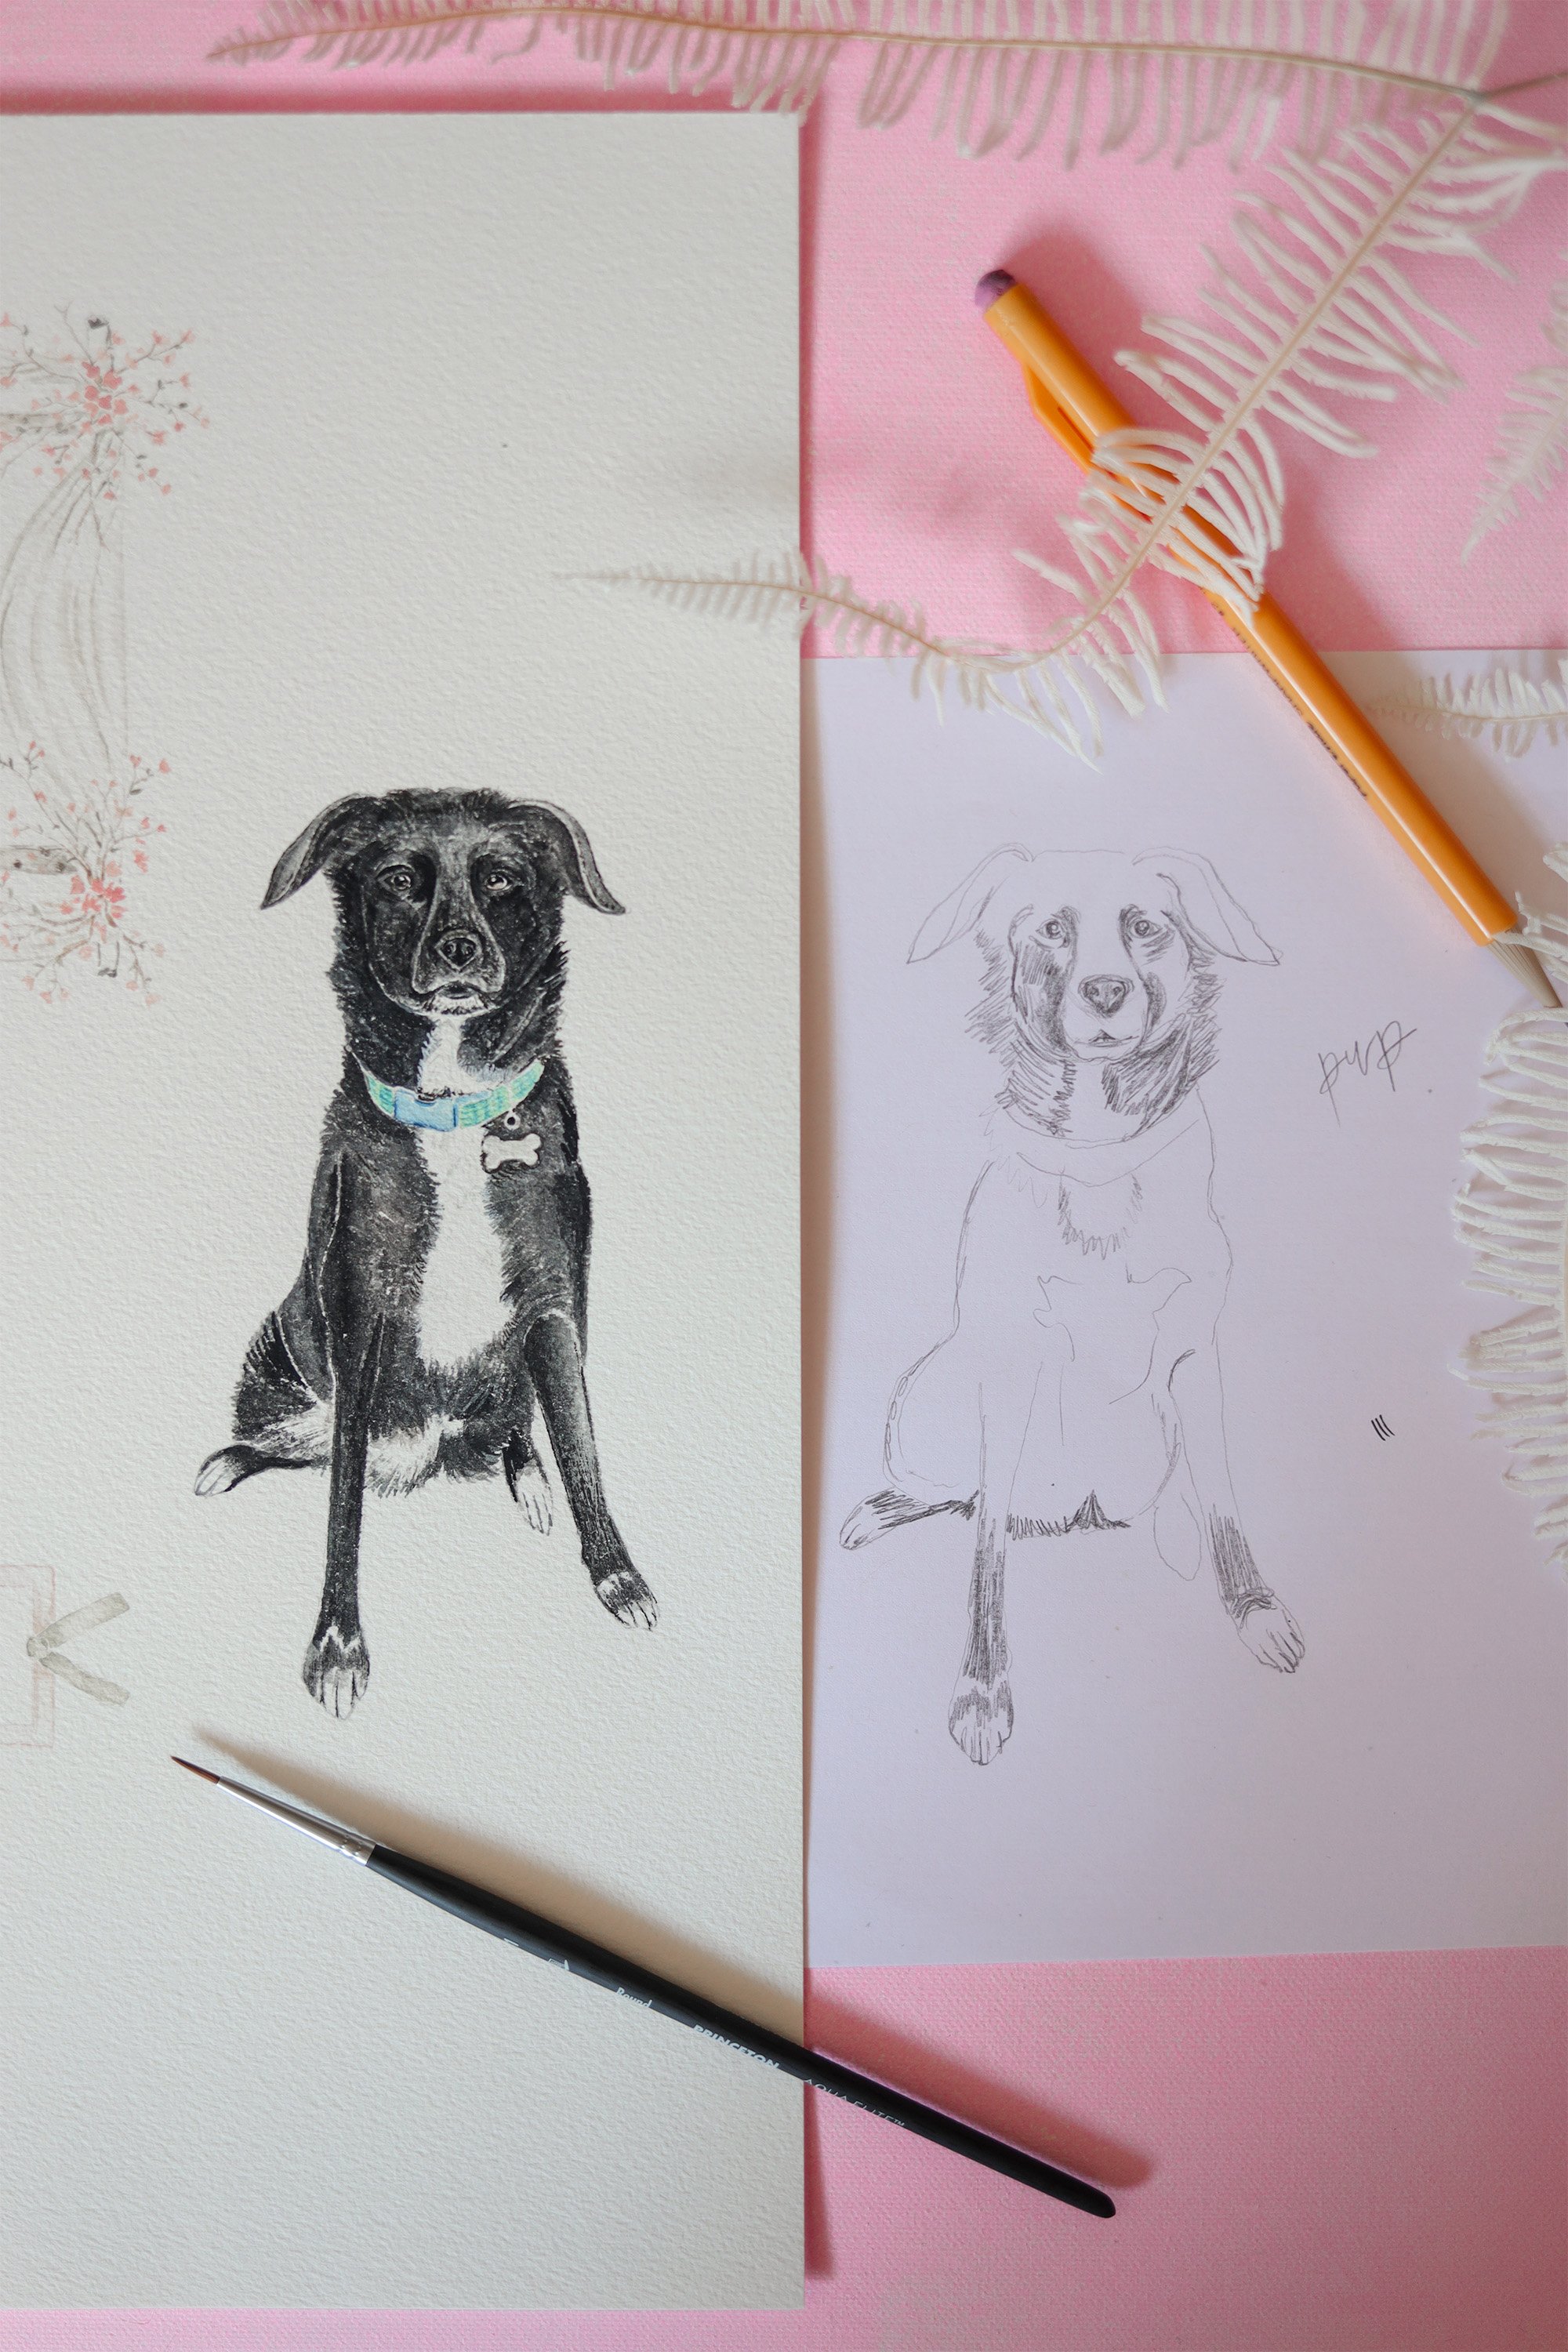
Take a piece of blank paper and look at it. That is what we start with. A blank canvas. Nothing exists on it until our conversation begins.
Was that super intense? I meant it to be very literal so you understand that I am painting custom artwork for you that has never existed before and that is like, very cool! And also, so fun. Erase the word “clip art” or the phrase “color change” from your mind entirely. None of that is happening here. It’s you, my pencil and paint brushes and me! We are about to embark on a creative journey that tells the tale of your love story. Let’s have fun with it and think of as many details as we possibly can to paint up and incorporate into your wedding stationery.
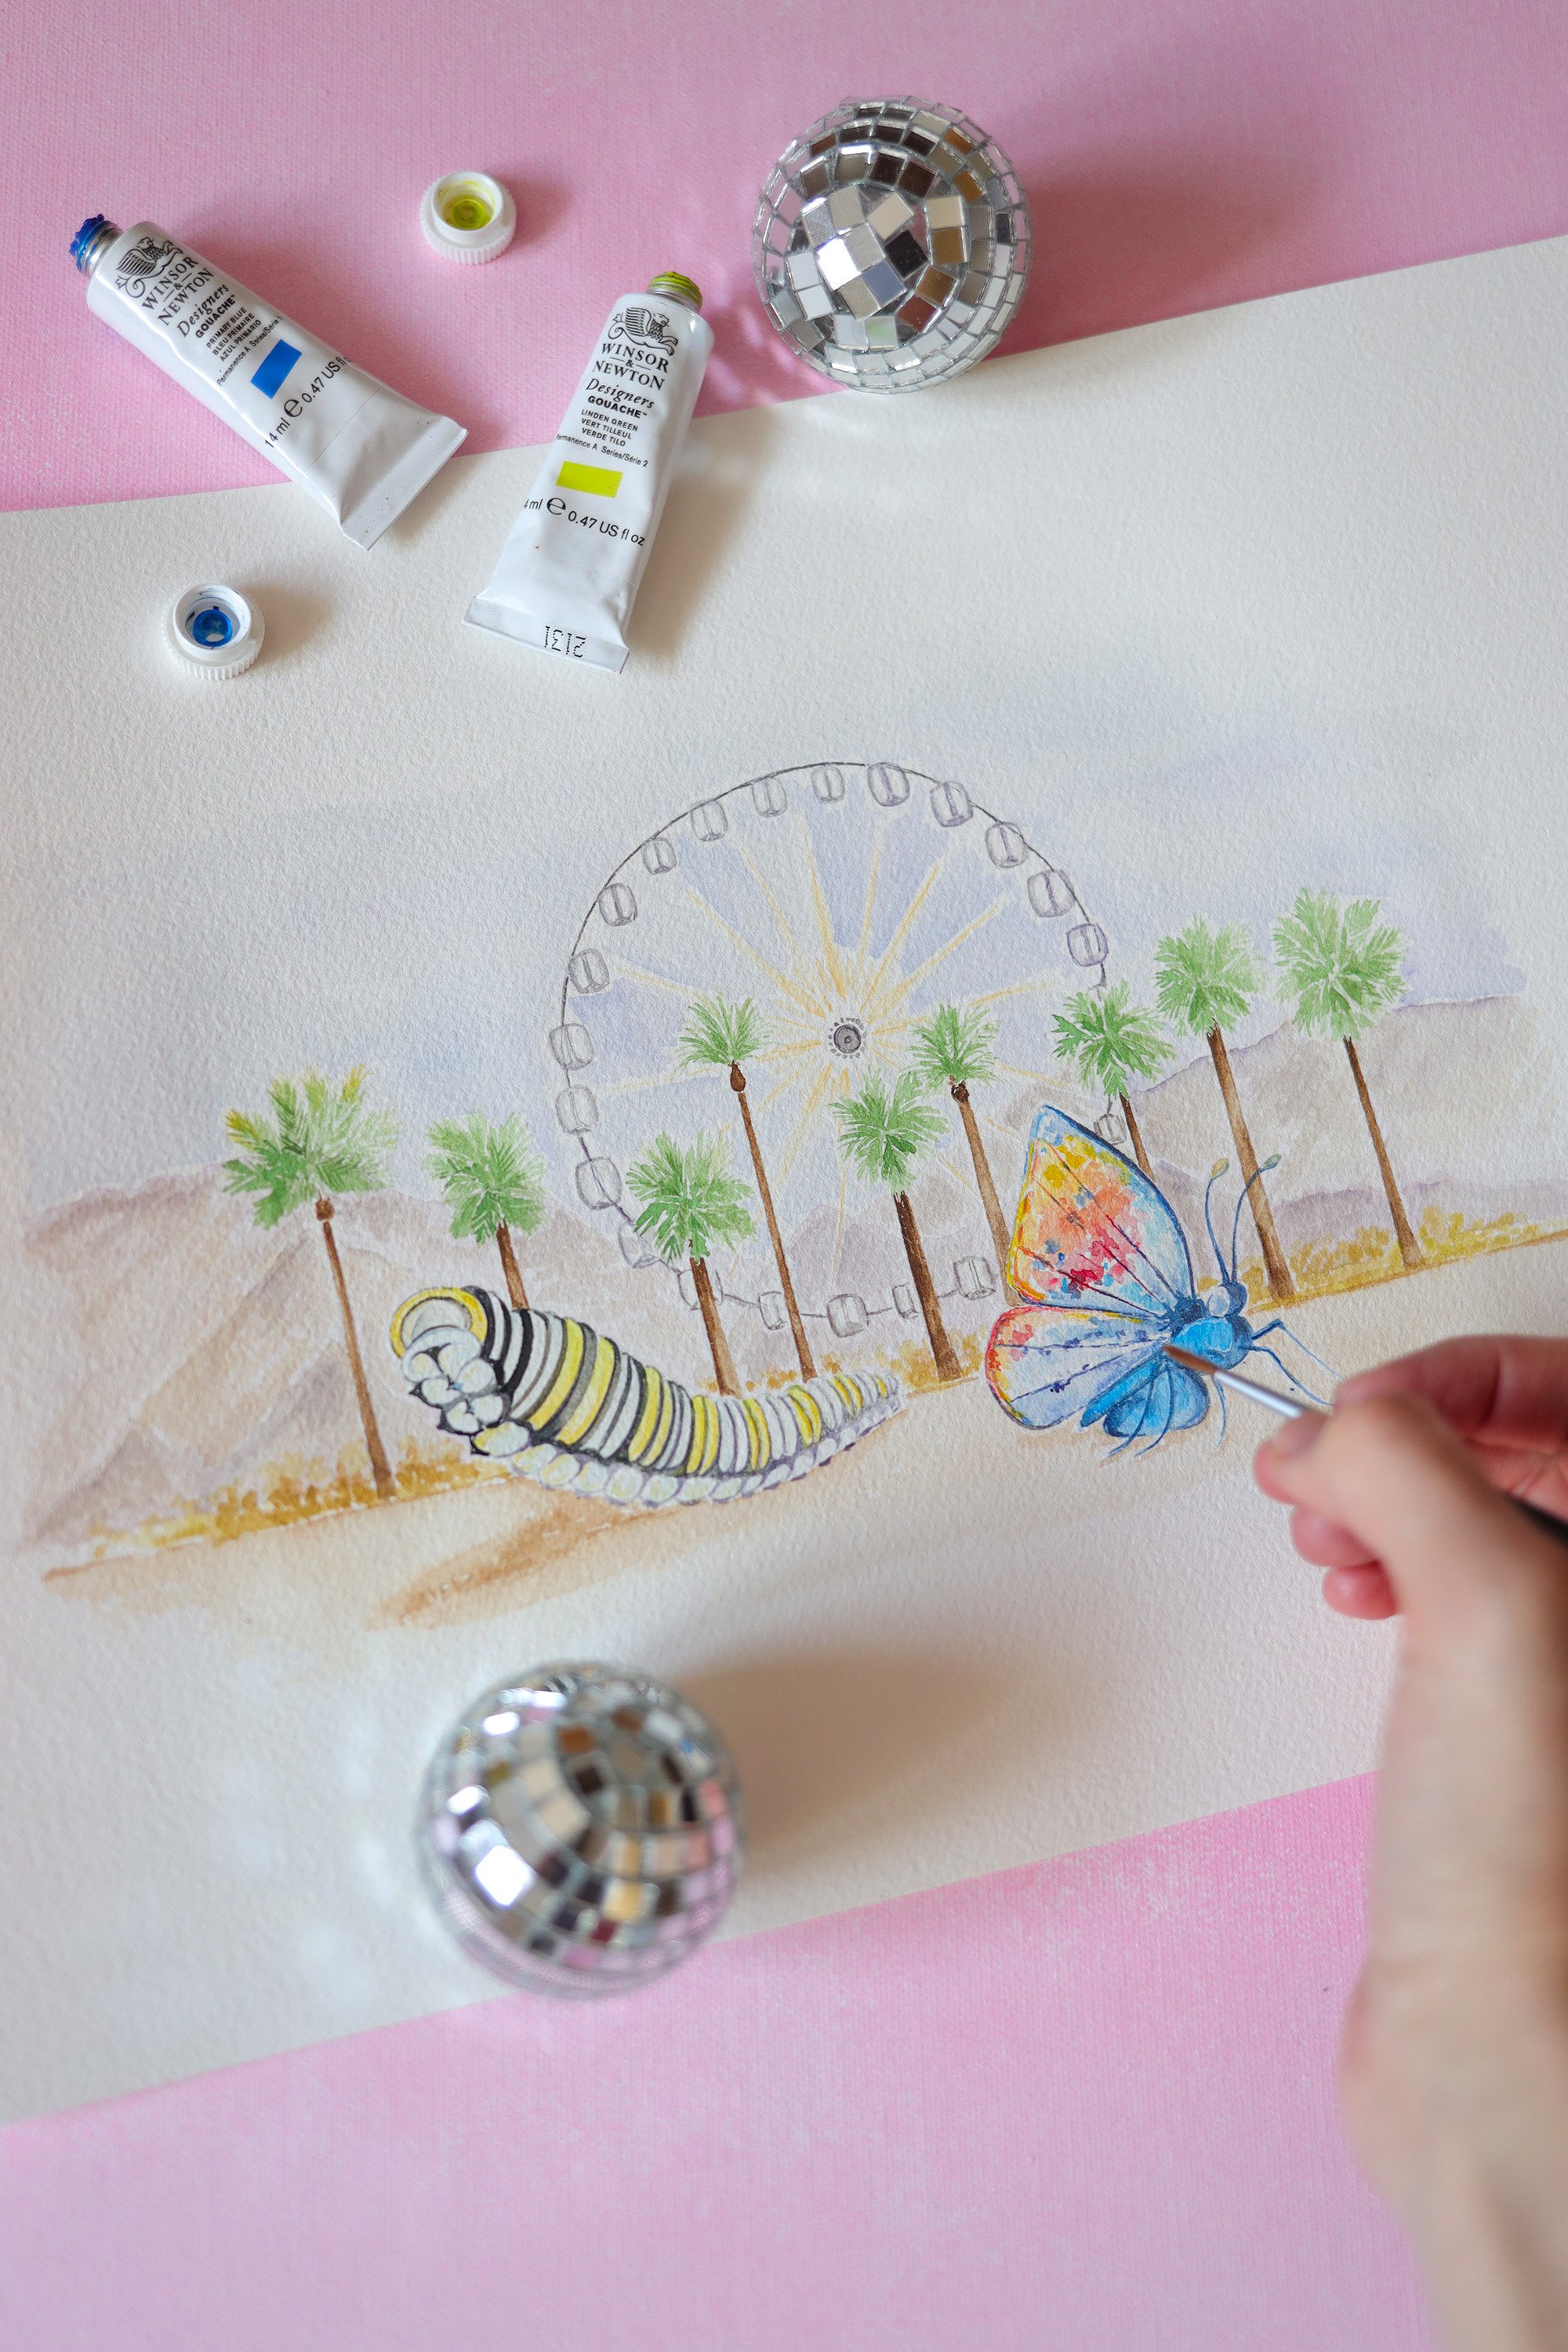
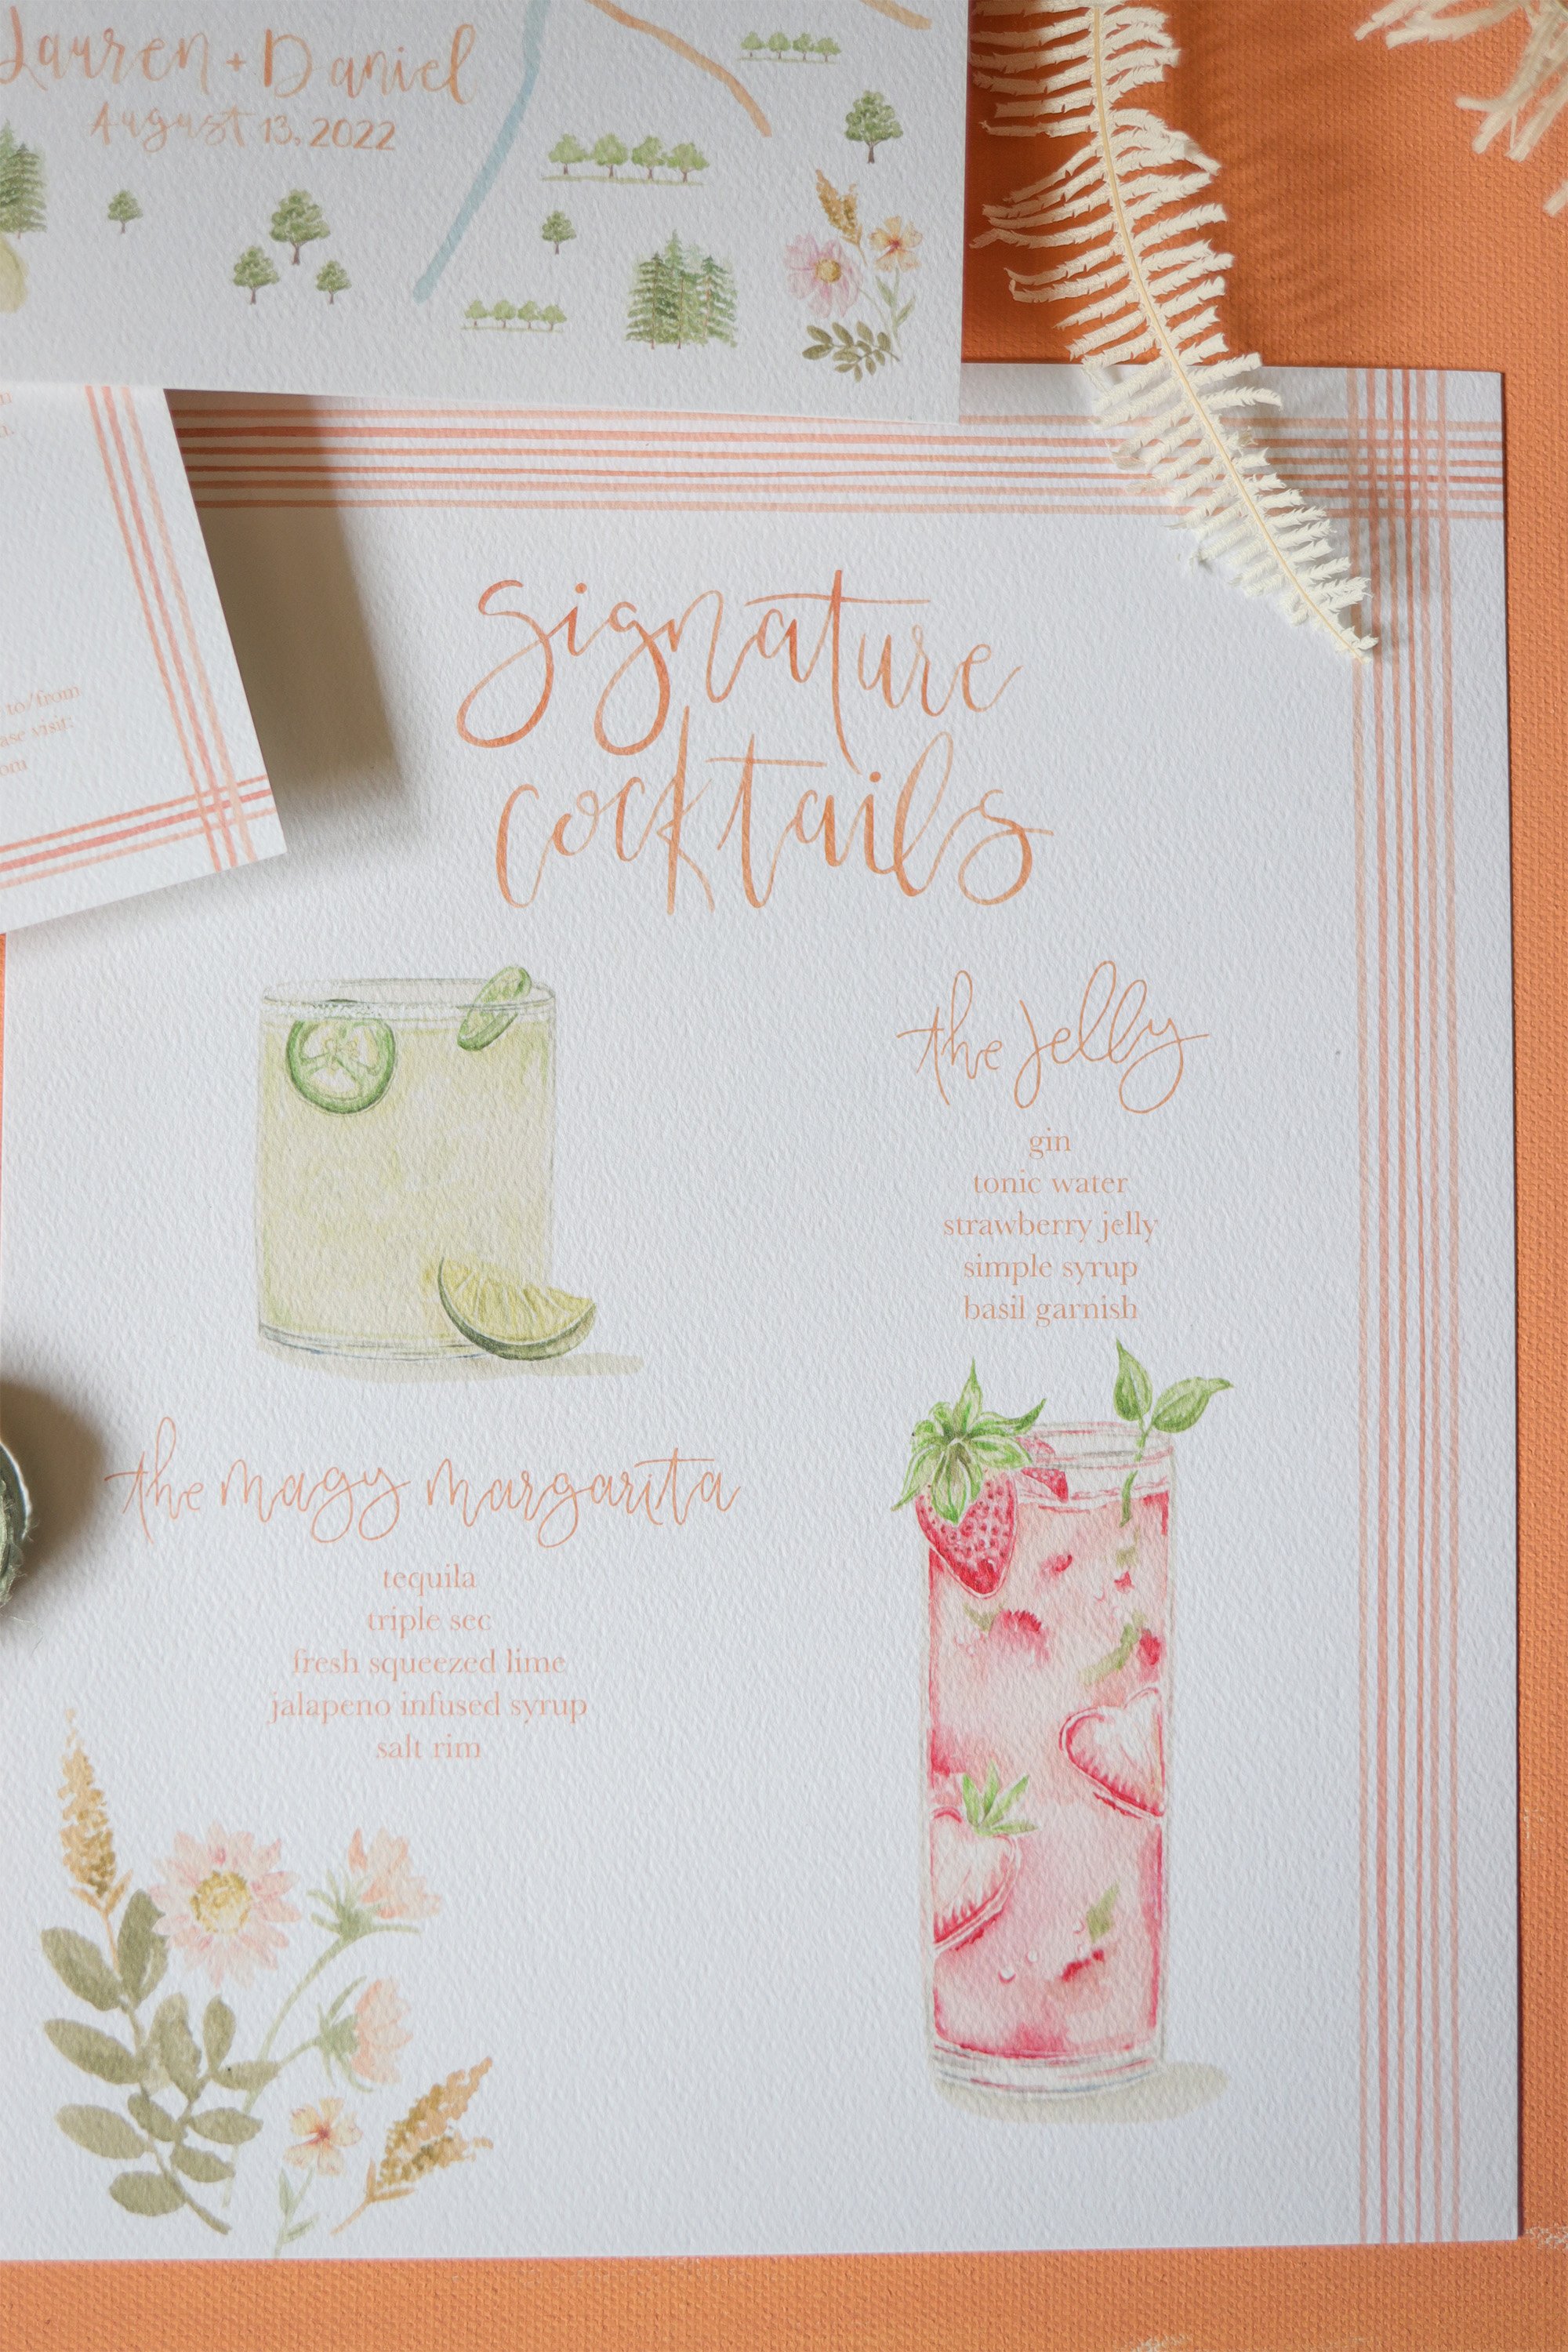
Thinking about a signature cocktail? Let me paint it for you! Dreaming of a love story illustration that pictures all the sweetest moments of your relationship leading up to the big day? Yep, I can paint that too! (p.s. This is the coolest first piece of art to hang in your home as newlyweds!)
I draw everything out with pencil and paper to outline the ideas we discussed. This phase is lose and free and meant to plant the idea seed in your minds for what is about to grow here. Once we finalize a general layout and all the details being included, the painting begins. You will have already seen my past work and know my style so the final outcome will be no surprise. Gorgeous, intricate waves of color and tiny painted details in my signature painting style. I have been an artist for over 10 years, many many more if you count my early days painting rocks as a child. It’s gotta start somewhere, right? All of those years, drawing, painting, practicing, learning, studying, taking classes, lead me to this path. I am in love with what I do and being able to illustrate a new story with each couple brings me such joy.
My goal outside of creating original artwork for you is to take away as much of the wedding stationery stress as possible. I handle everything from selecting paper, envelope colors, fonts, timelines, postage, assembling, mailing - all while communicating the steps to you so we are always on one page. You can sit back, enjoy the process and wait for your guests to receive their wedding invitations and call you to rave about how special they are! This happens everytime, really!
I can’t wait to work with you and I’m always here to answer questions or clarify parts of the process. Just shoot me an email anytime! info@stephanietara.com
I love your love story!

there’s more than one wedding map style?
YES that is correct. There is more than one wedding map style! Let’s chat…

YES that is correct. There is more than one wedding map style! Let’s chat…
Wedding stationery is full of details, needs, wants, extras, non-negotiables. And it is all really a personal decision, in my opinion. I don’t believe in “following suit” or going with traditions for a day that is literally all about you, your partner and what kind of life you lead and will continue to lead together as you grow in your marriage. If there is a tradition that holds meaning to you, go for it! If you have your own idea of how best to reflect you as people through your stationery and all your wedding details for that matter, do that! I’m here to cheer you on and help you make every moment yours using paper, and other materials.
Let’s talk about wedding maps and how, there’s not just one style! There’s full coverage watercolor artwork, partially painted artwork, letterpress or foil printed line work and probably more but those are the 3 I specialize in.
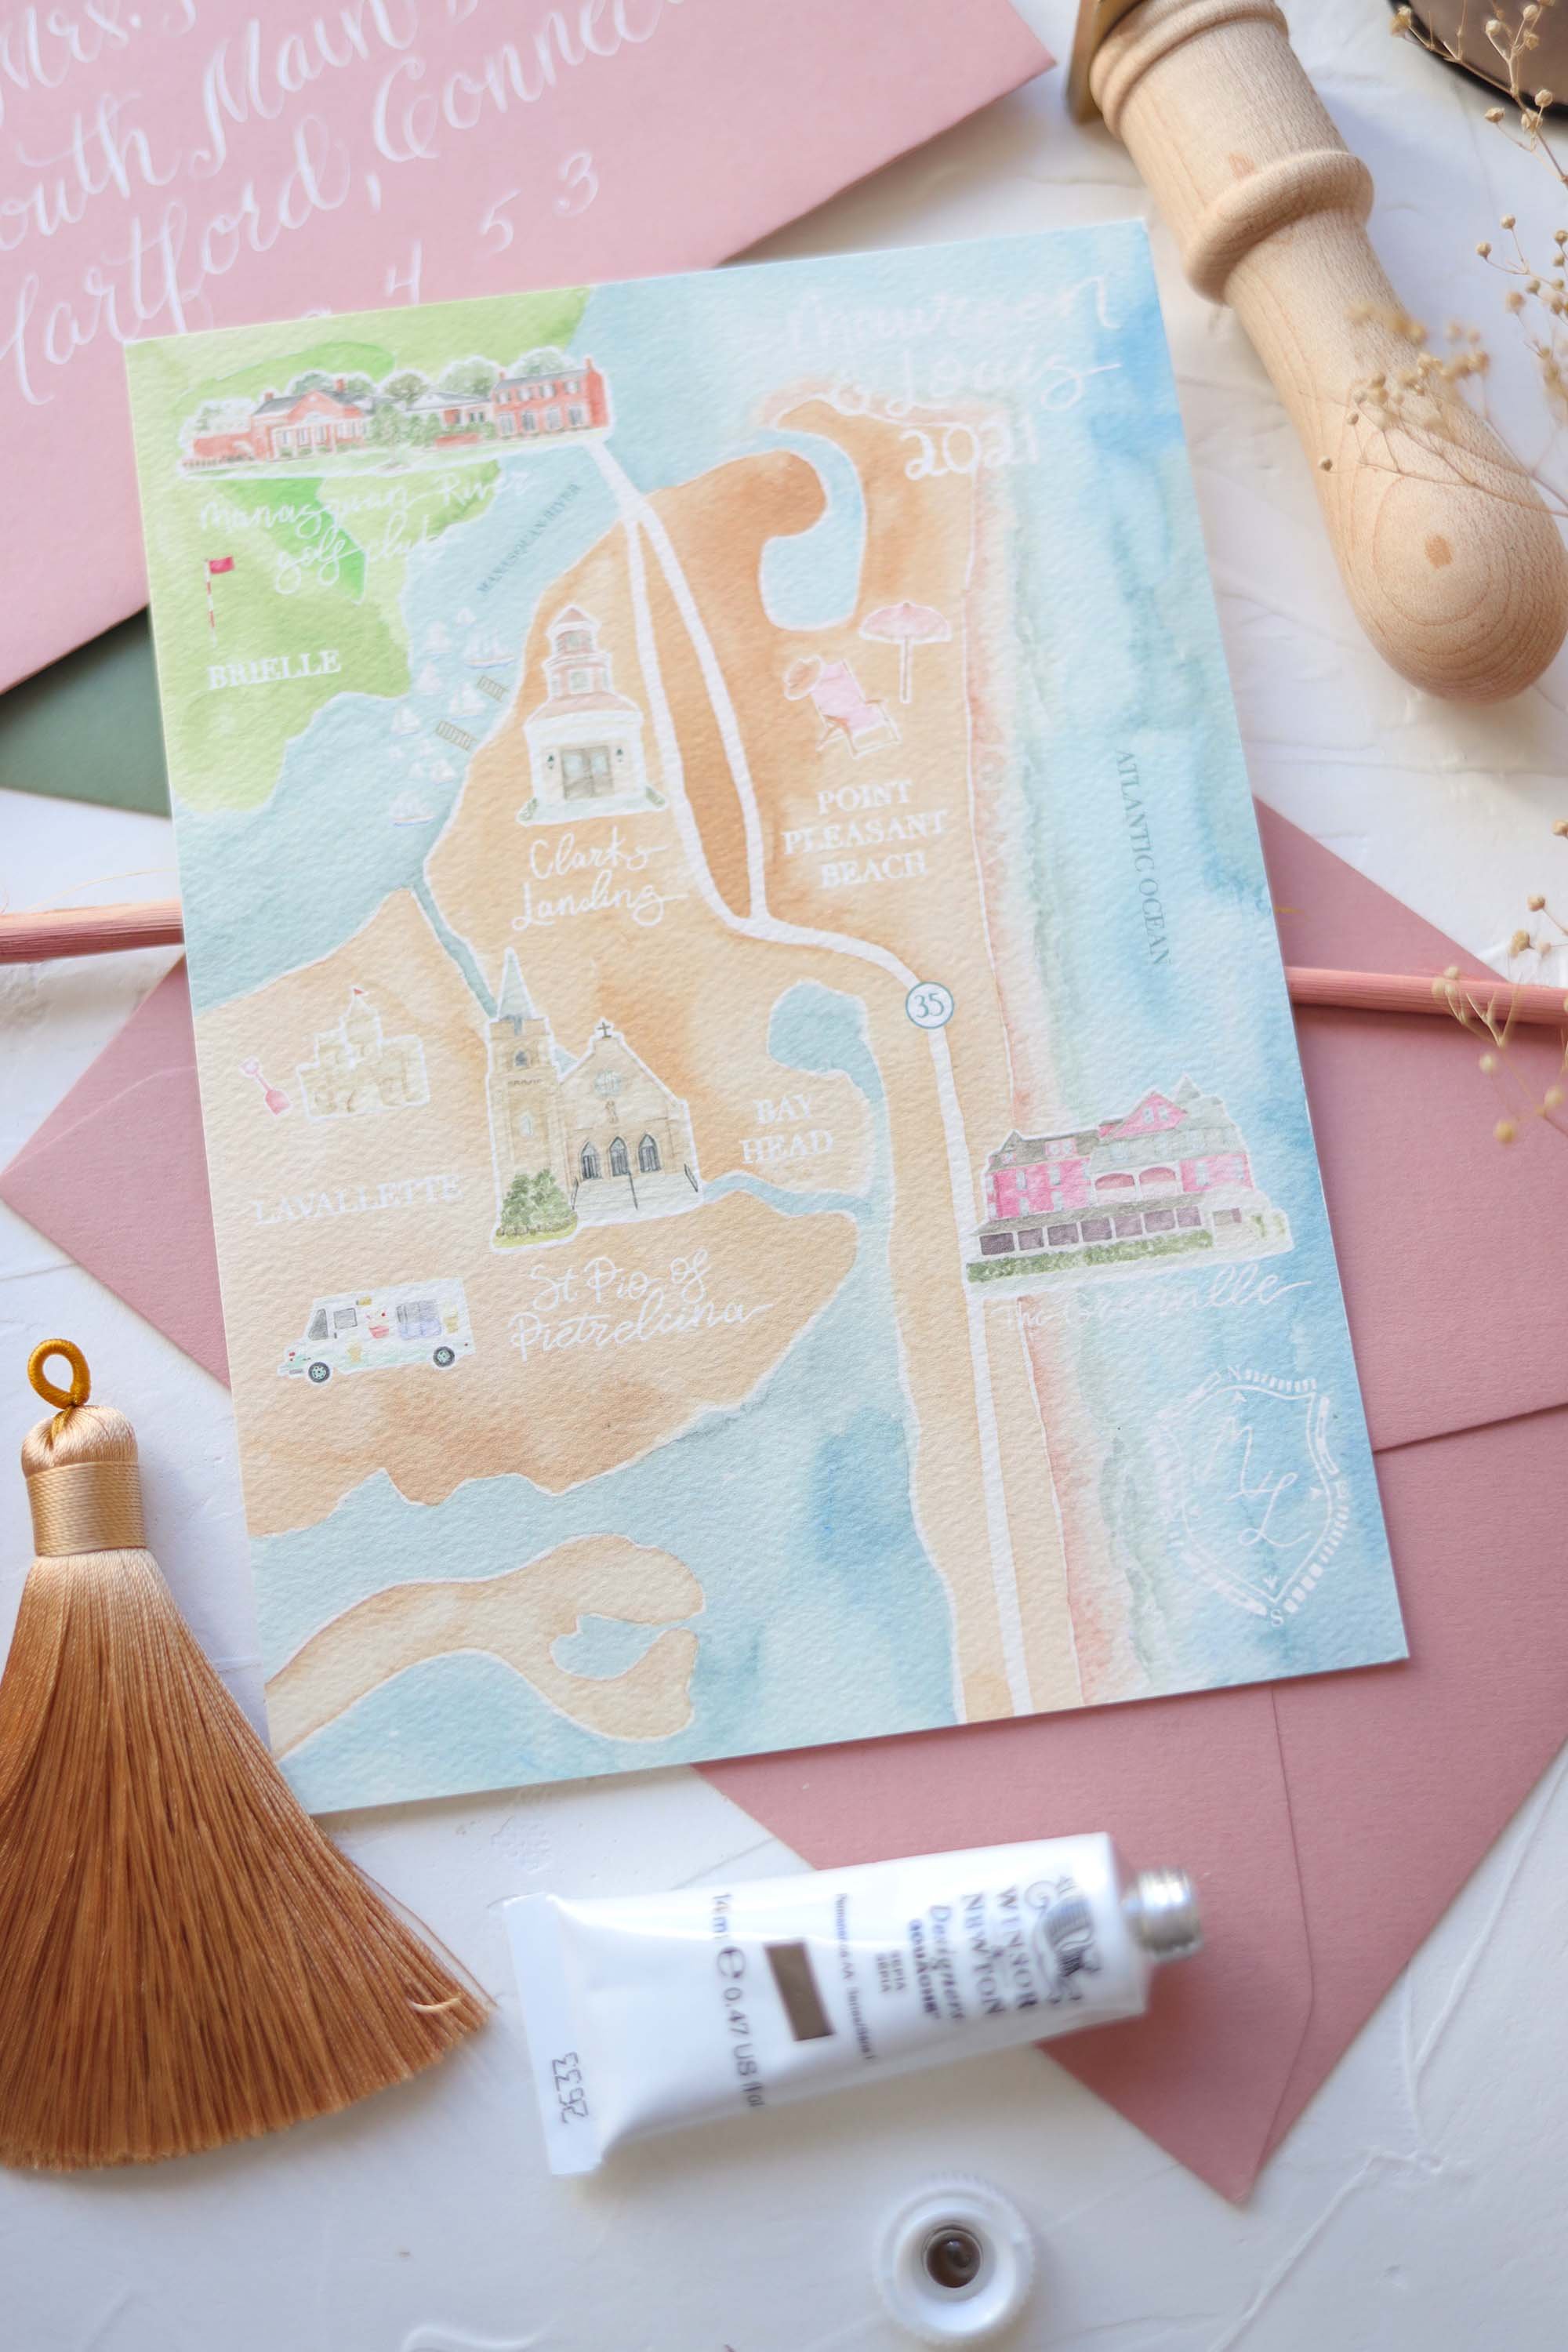
Full coverage watercolor map artwork
This is your most “realistic” map design. It looks like a real live map of the area I illustrate for you. Landscape details, body of water details, whatever foliage or other natural elements coincide with the area. I will always guide you on what style I think suits your wedding stationery best!
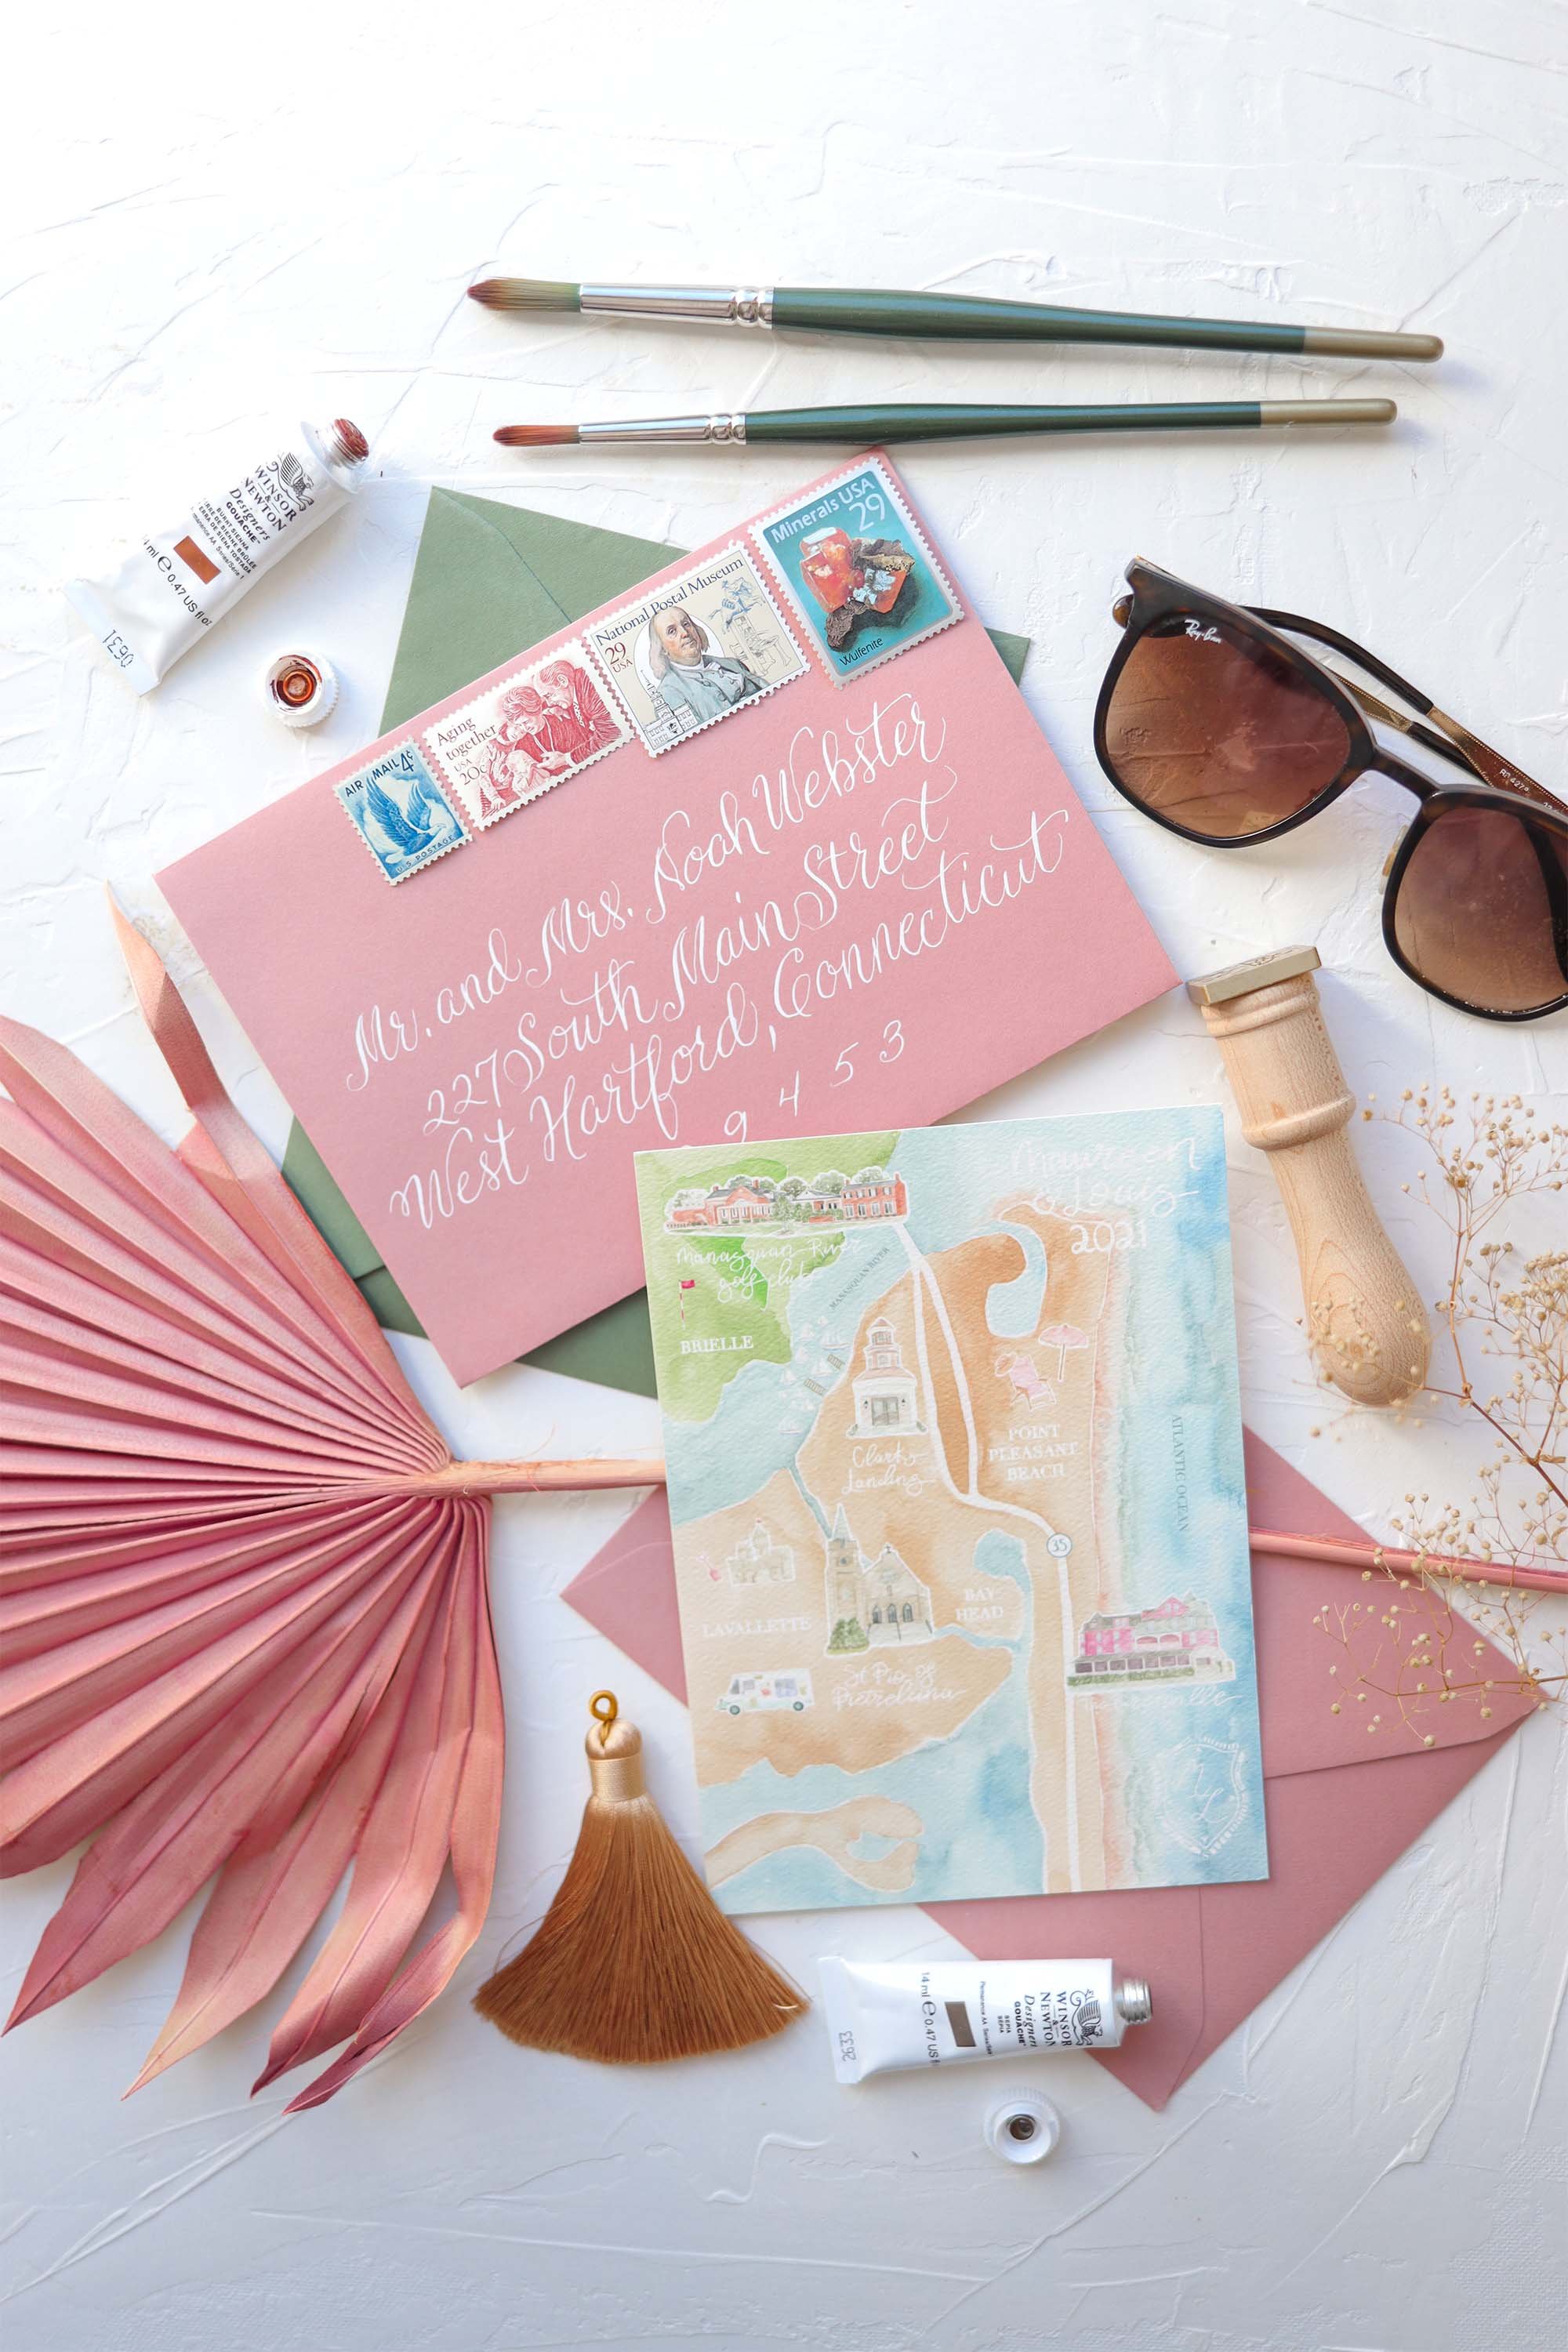
Partially painted map artwork
This is still a realistic map design in the sense that the landmarks are placed realistically to where they actually are in real life but there’s less “ground” coverage. So instead of having the background be painted with green for grass and blue for water, there will be more white areas. This option is great when there are so many little details to include that you really want to stand out on the card. Sometimes the small details lose their importance when painted on top of the ground colors. I will always guide you on what style I think suits your wedding stationery best!
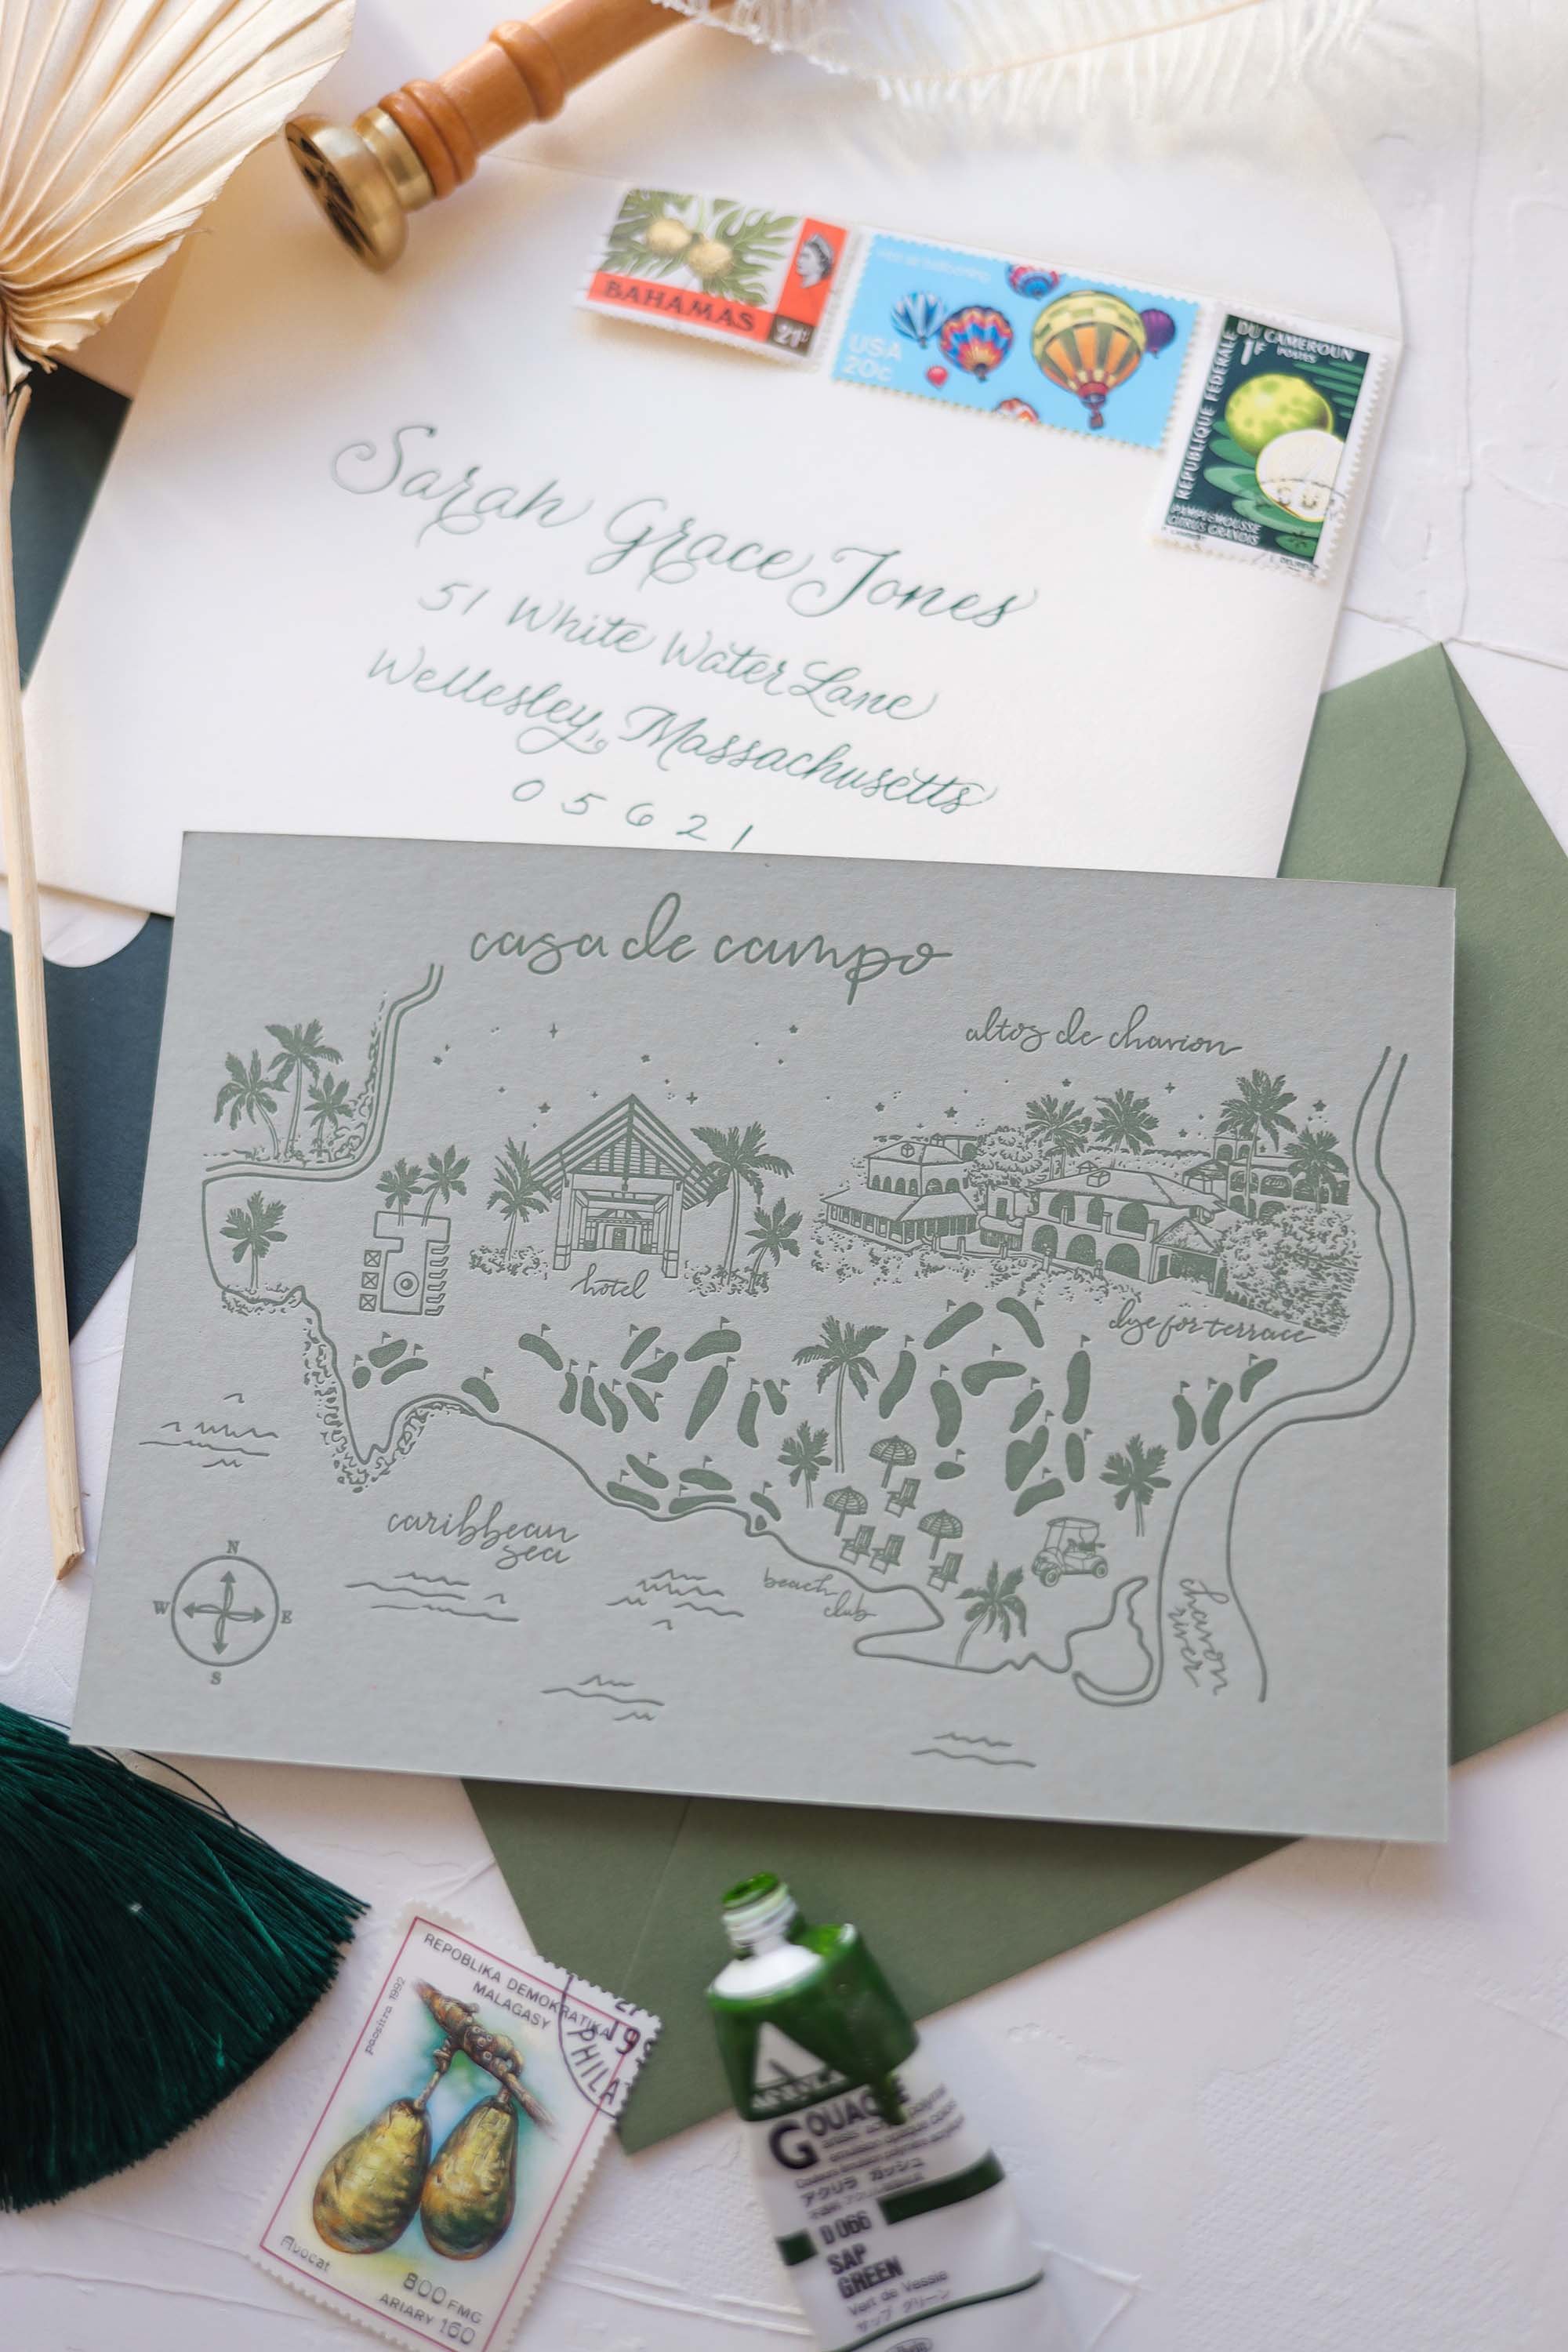
Letterpress or foil printed map artwork
This style is for the more modern, clean, sophisticated stationery suites. Maybe your wedding is more monochromatic so we’re focusing on artful details with clean lines and specific design aesthetics. I will always guide you on what style I think suits your wedding stationery best!
Part of our design process while working together is honing in on the vibes of your wedding. What kind of introduction are you looking to make to your guests? What kind of mood and energy are you amping them up for? I mean it is the biggest celebration of love after all! Let’s make it cohesive and get a reaction out of them when they open that first bit of stationery whether it be a save the date or the invitation suite. The more personal it is, the more memorable it will be!
Want to inquire about your own wedding maps? Fill out the inquiry form on my contact page!

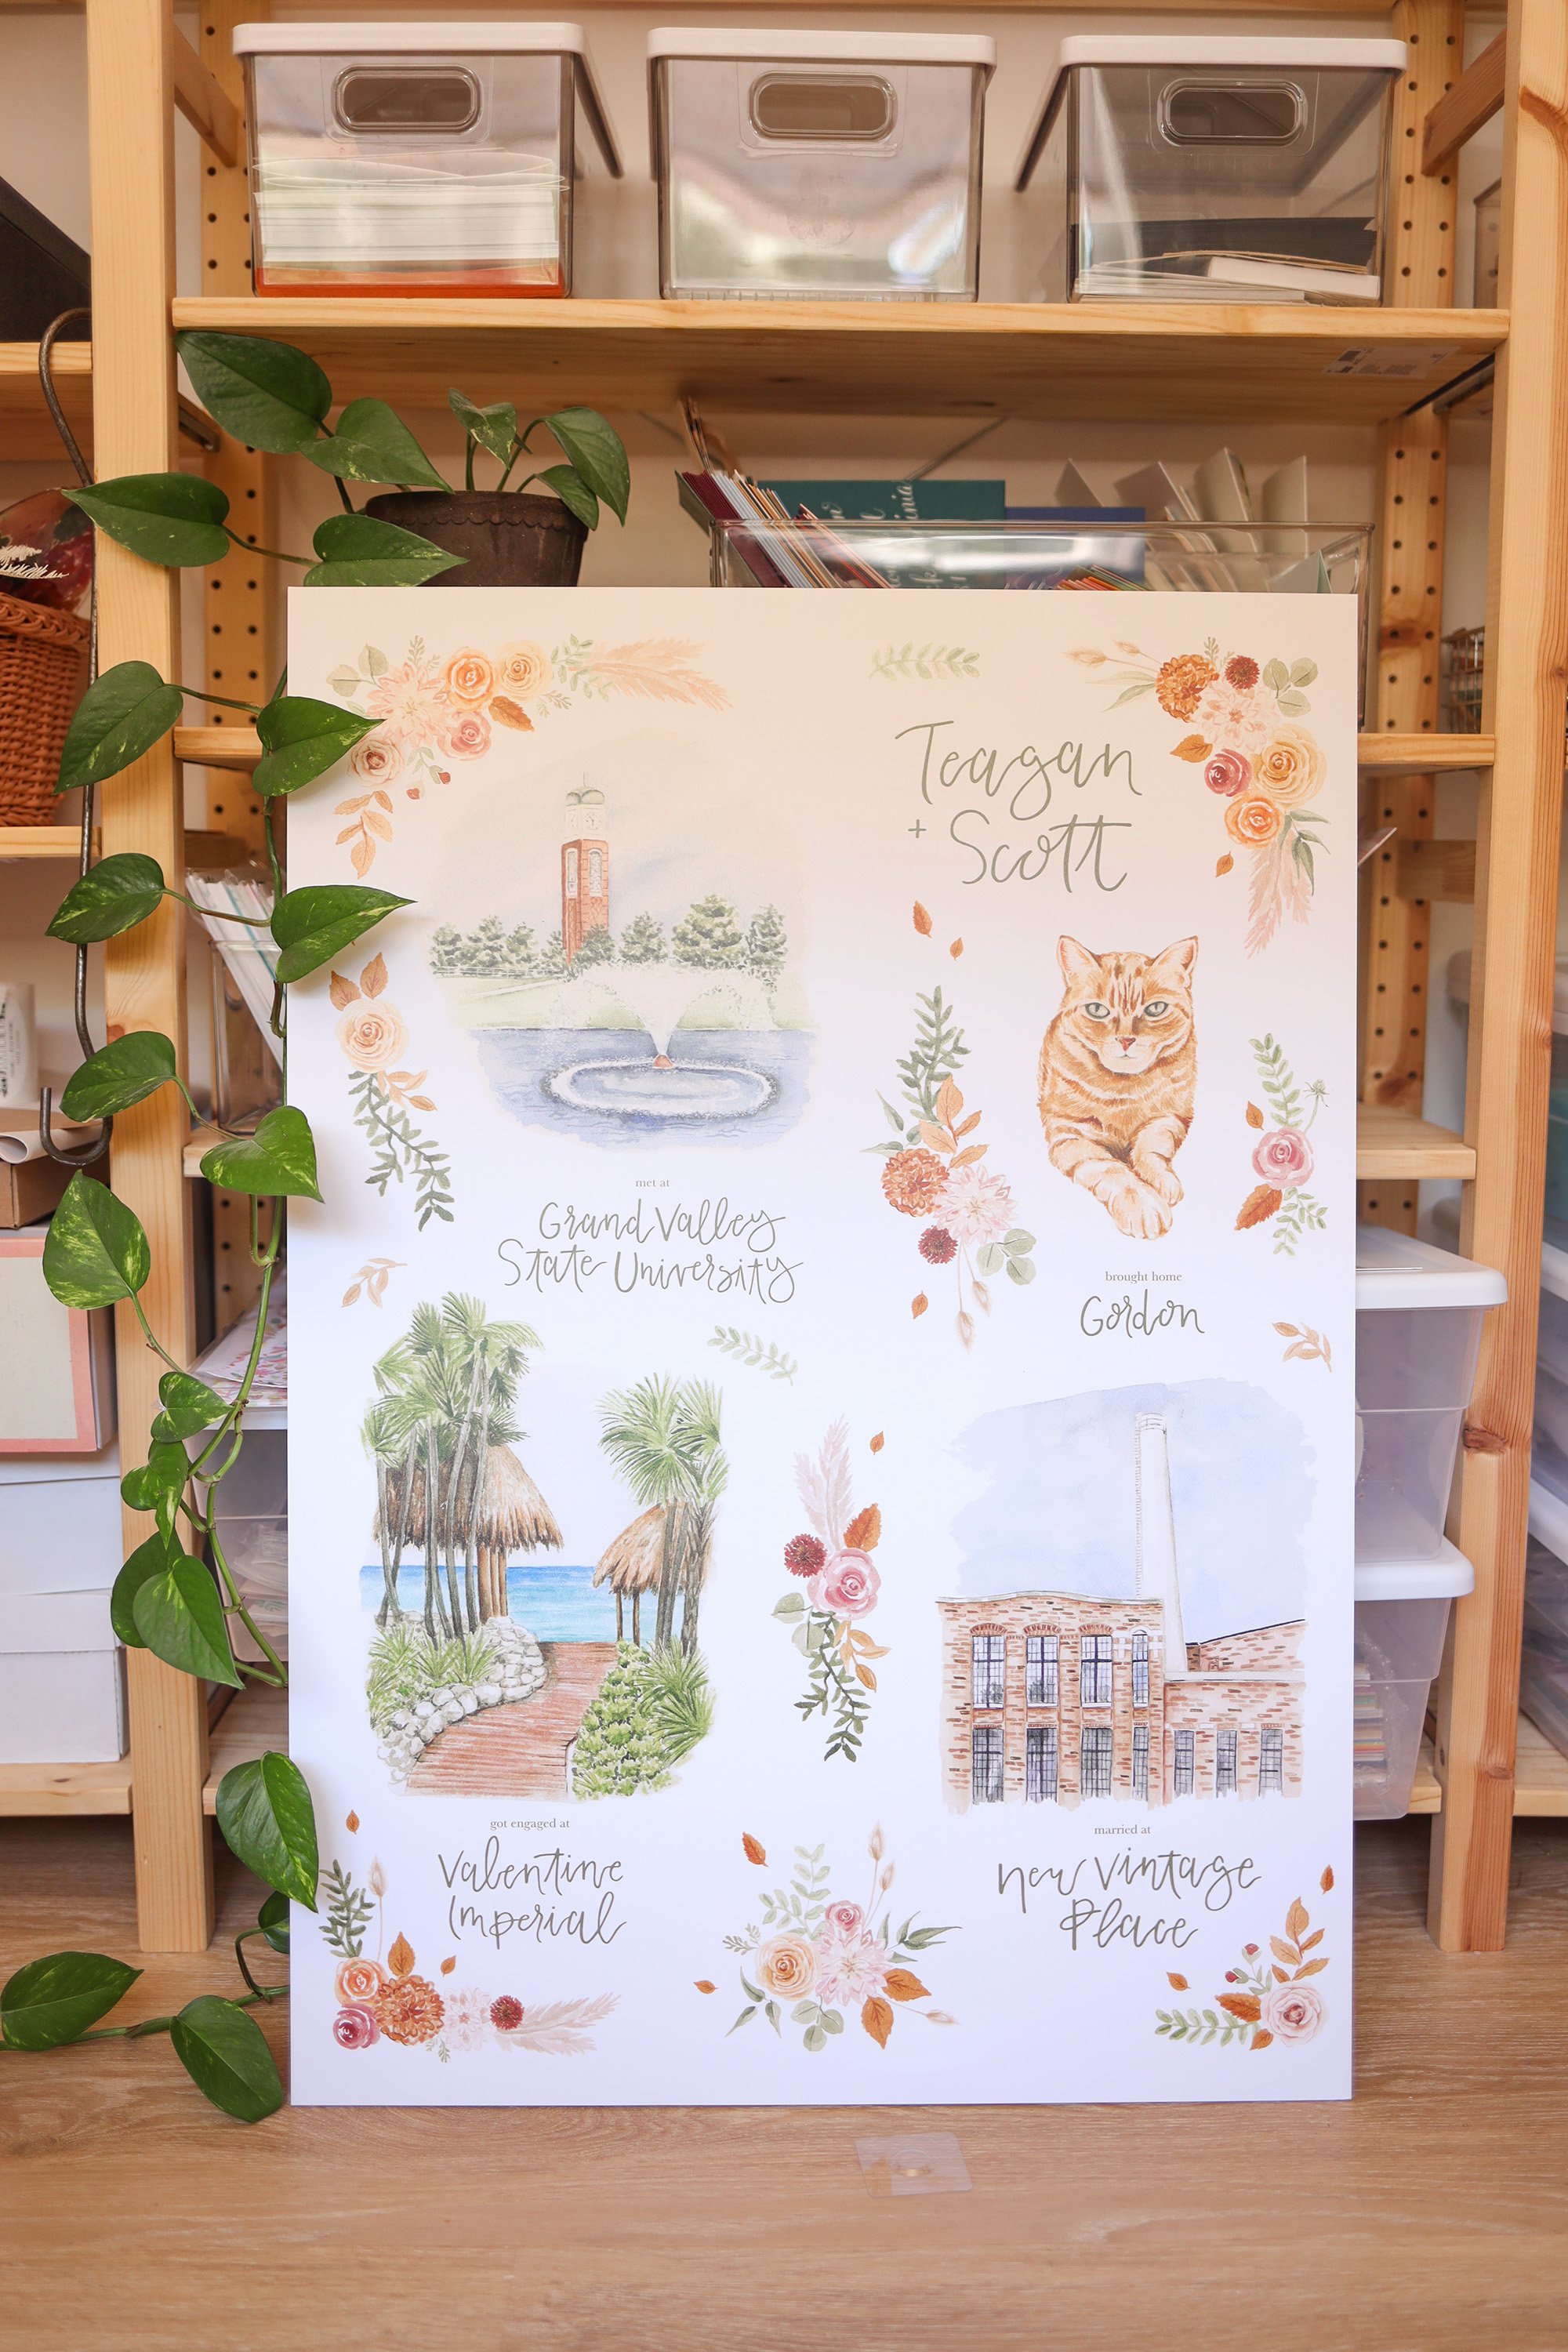
From the top:
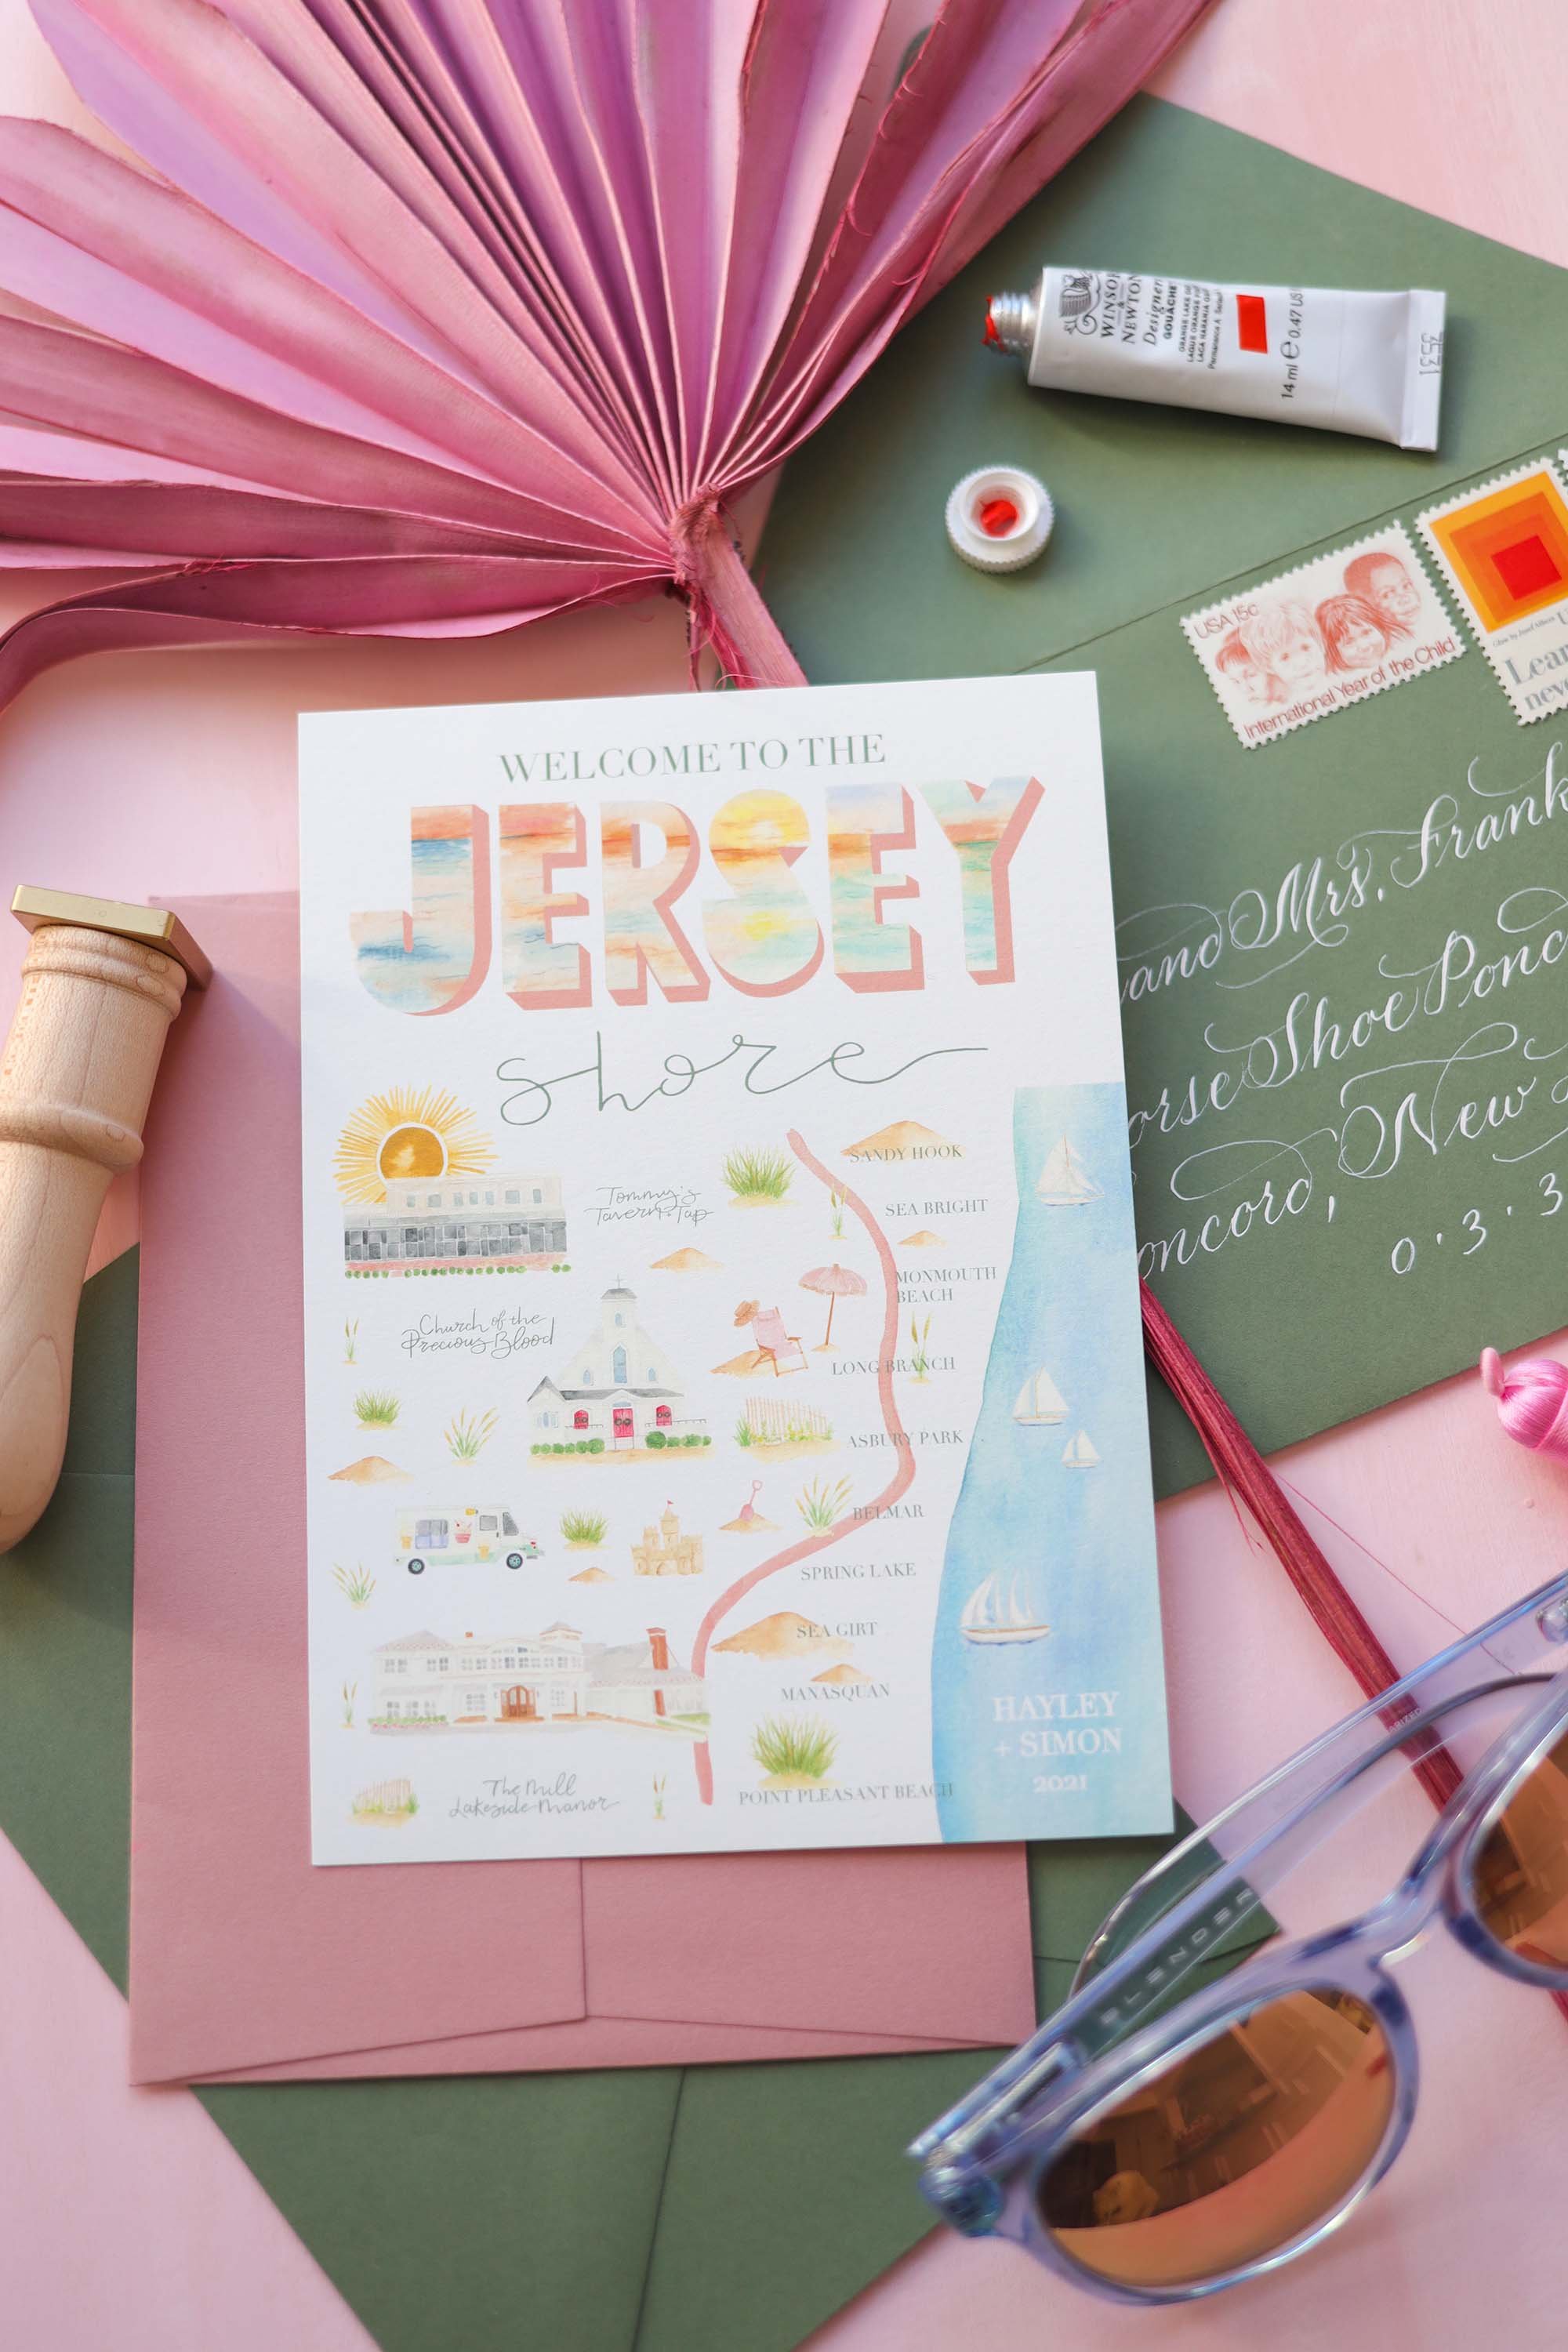
1st row, left and right, both photos are a examples of a “partially painted map design”
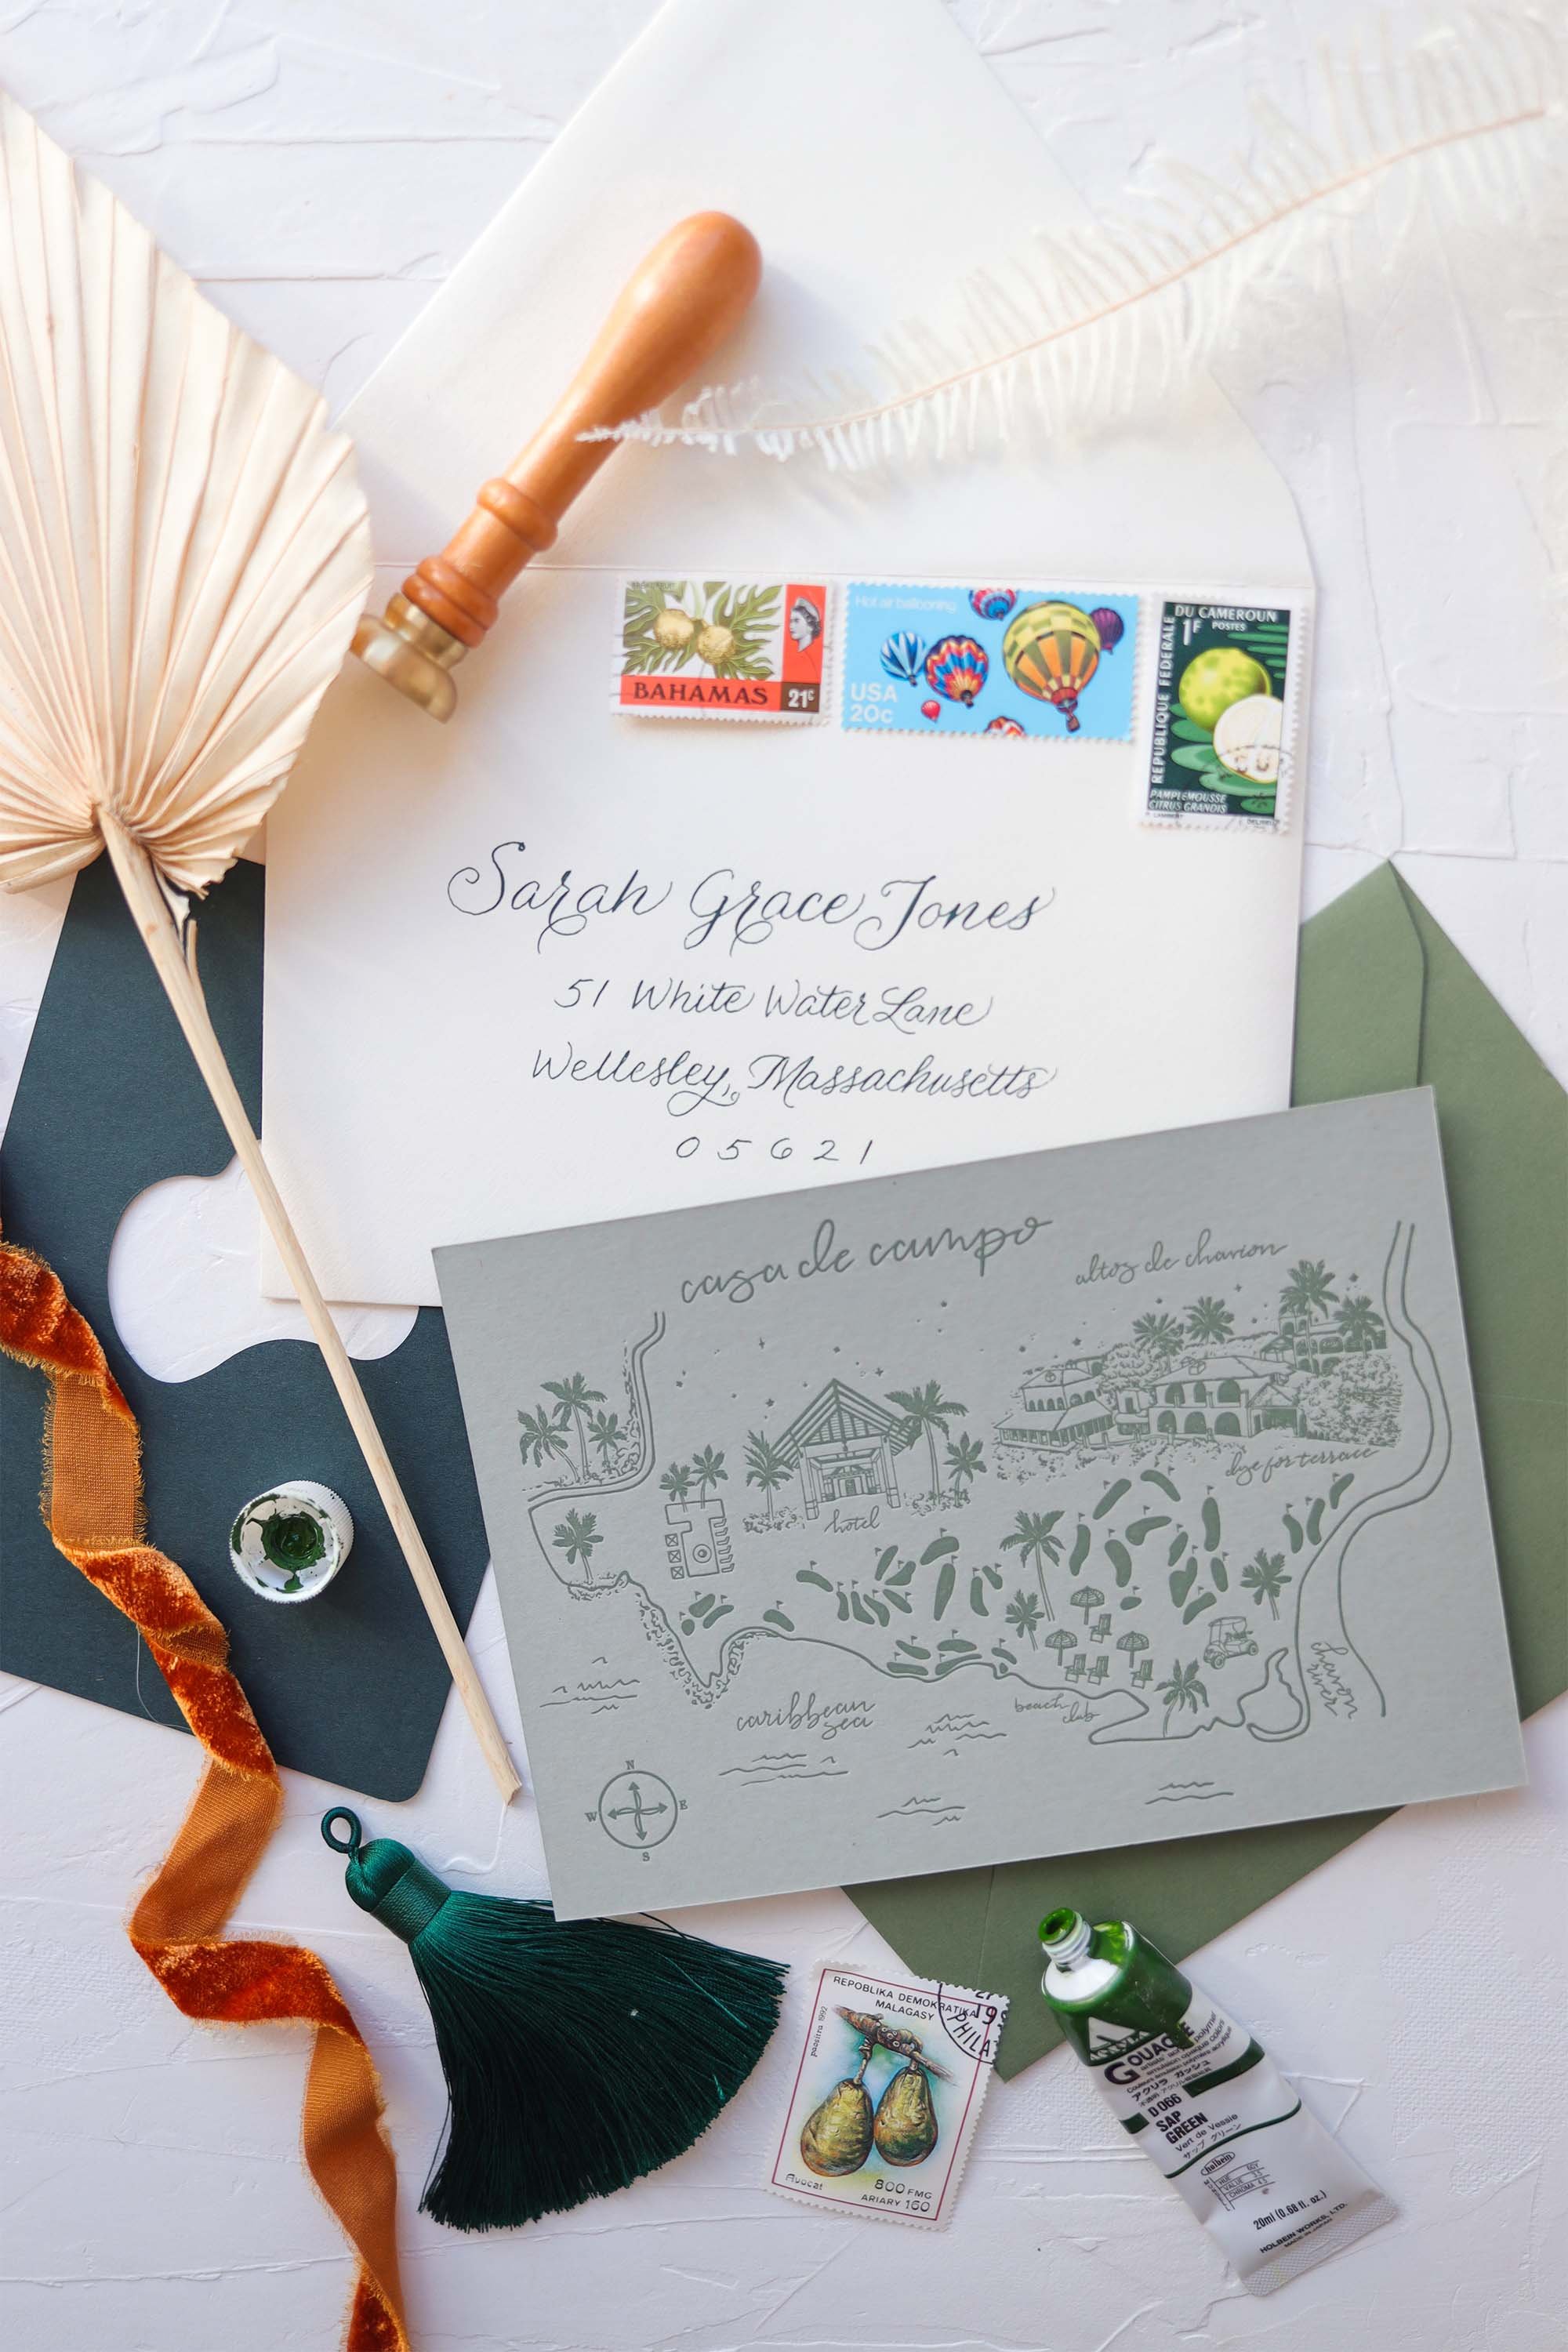
2nd row, left and right, both photos are examples of a“hand drawn line work map design”
3rd row, left and right, both photos are examines of a “full coverage painted map design”
_____
Thanks for reading!
xx Stephanie

Kids holiday class gifts
Your very own curated list of holiday class gift ideas from other small businesses!

So I dropped the ball this halloween…
The Friday before halloween weekend, Logans school did their classroom halloween party. Everyone wore their costumes and * most * of the kids parents thought to send them in with a little ‘treat’ to give out for all their classmates. I, naturally, forgot. Well actually, the day before I thought about it and then said to myself “toddlers don’t need to be eating candy so I’m not going to send anything in”…
So Logan comes home with a giant, like huge, bag of goodies from his halloween party day. As we’re going through the bag, there’s all these individually wrapped treat bags saying “to: Logan, From; insert kids names” So now, John is like “oh my god we didn’t send anything in, the kids are going to hate Logan and he’s not going to be invited to any birthday parties!” First of all, he’s so dramatic and I hate him a little. But I also was like, ugh why do I suck? And to top it all off, these parents thought like I did and nixed the candy and in place put cute little Halloween themed goodies.
So, I am putting together a little list of holiday themes gifts for the kids and linking all the shops where you can find them! I am also including holiday themed artwork that I' drew so you can send in some printouts for the kids to color!
Favorite crayon shop: Art2theextreme
_______________
* CLICK THE BOLDED SHOP NAME TO SEE THE PRODUCTS!
Halloween:
Bath bombs!
Etsy shop: Sun Basil Garden Soap
Etsy shop: Cocoa Soap Co
Thanksgiving:
Bath Bombs!
Etsy shop: Cocoa Soap Co
Crayons!
Etsy Shop: Domino Magnetic Toys
Etsy Shop: Scarlet Chickadee
Kids Thanksgiving games!
Etsy shop: Meck Mom
Kids tattoos!
Etsy Shop: Xo Fetti
Christmas / Hannukkah / Winter:
Bath Bombs!
Etsy shop: Snazzie Bombs
Etsy shop: Sneeds Boro Soap
2. Snowflake crayons!
Etsy shop: twinklebytomb
I will continue adding to this post all season leading up Christmas and then I’ll even add Valentine’s Day ideas! Or maybe I have my very own sneaky gift coming in the new year for that very occasion…stay tuned and thanks for being here!
xx Stephanie

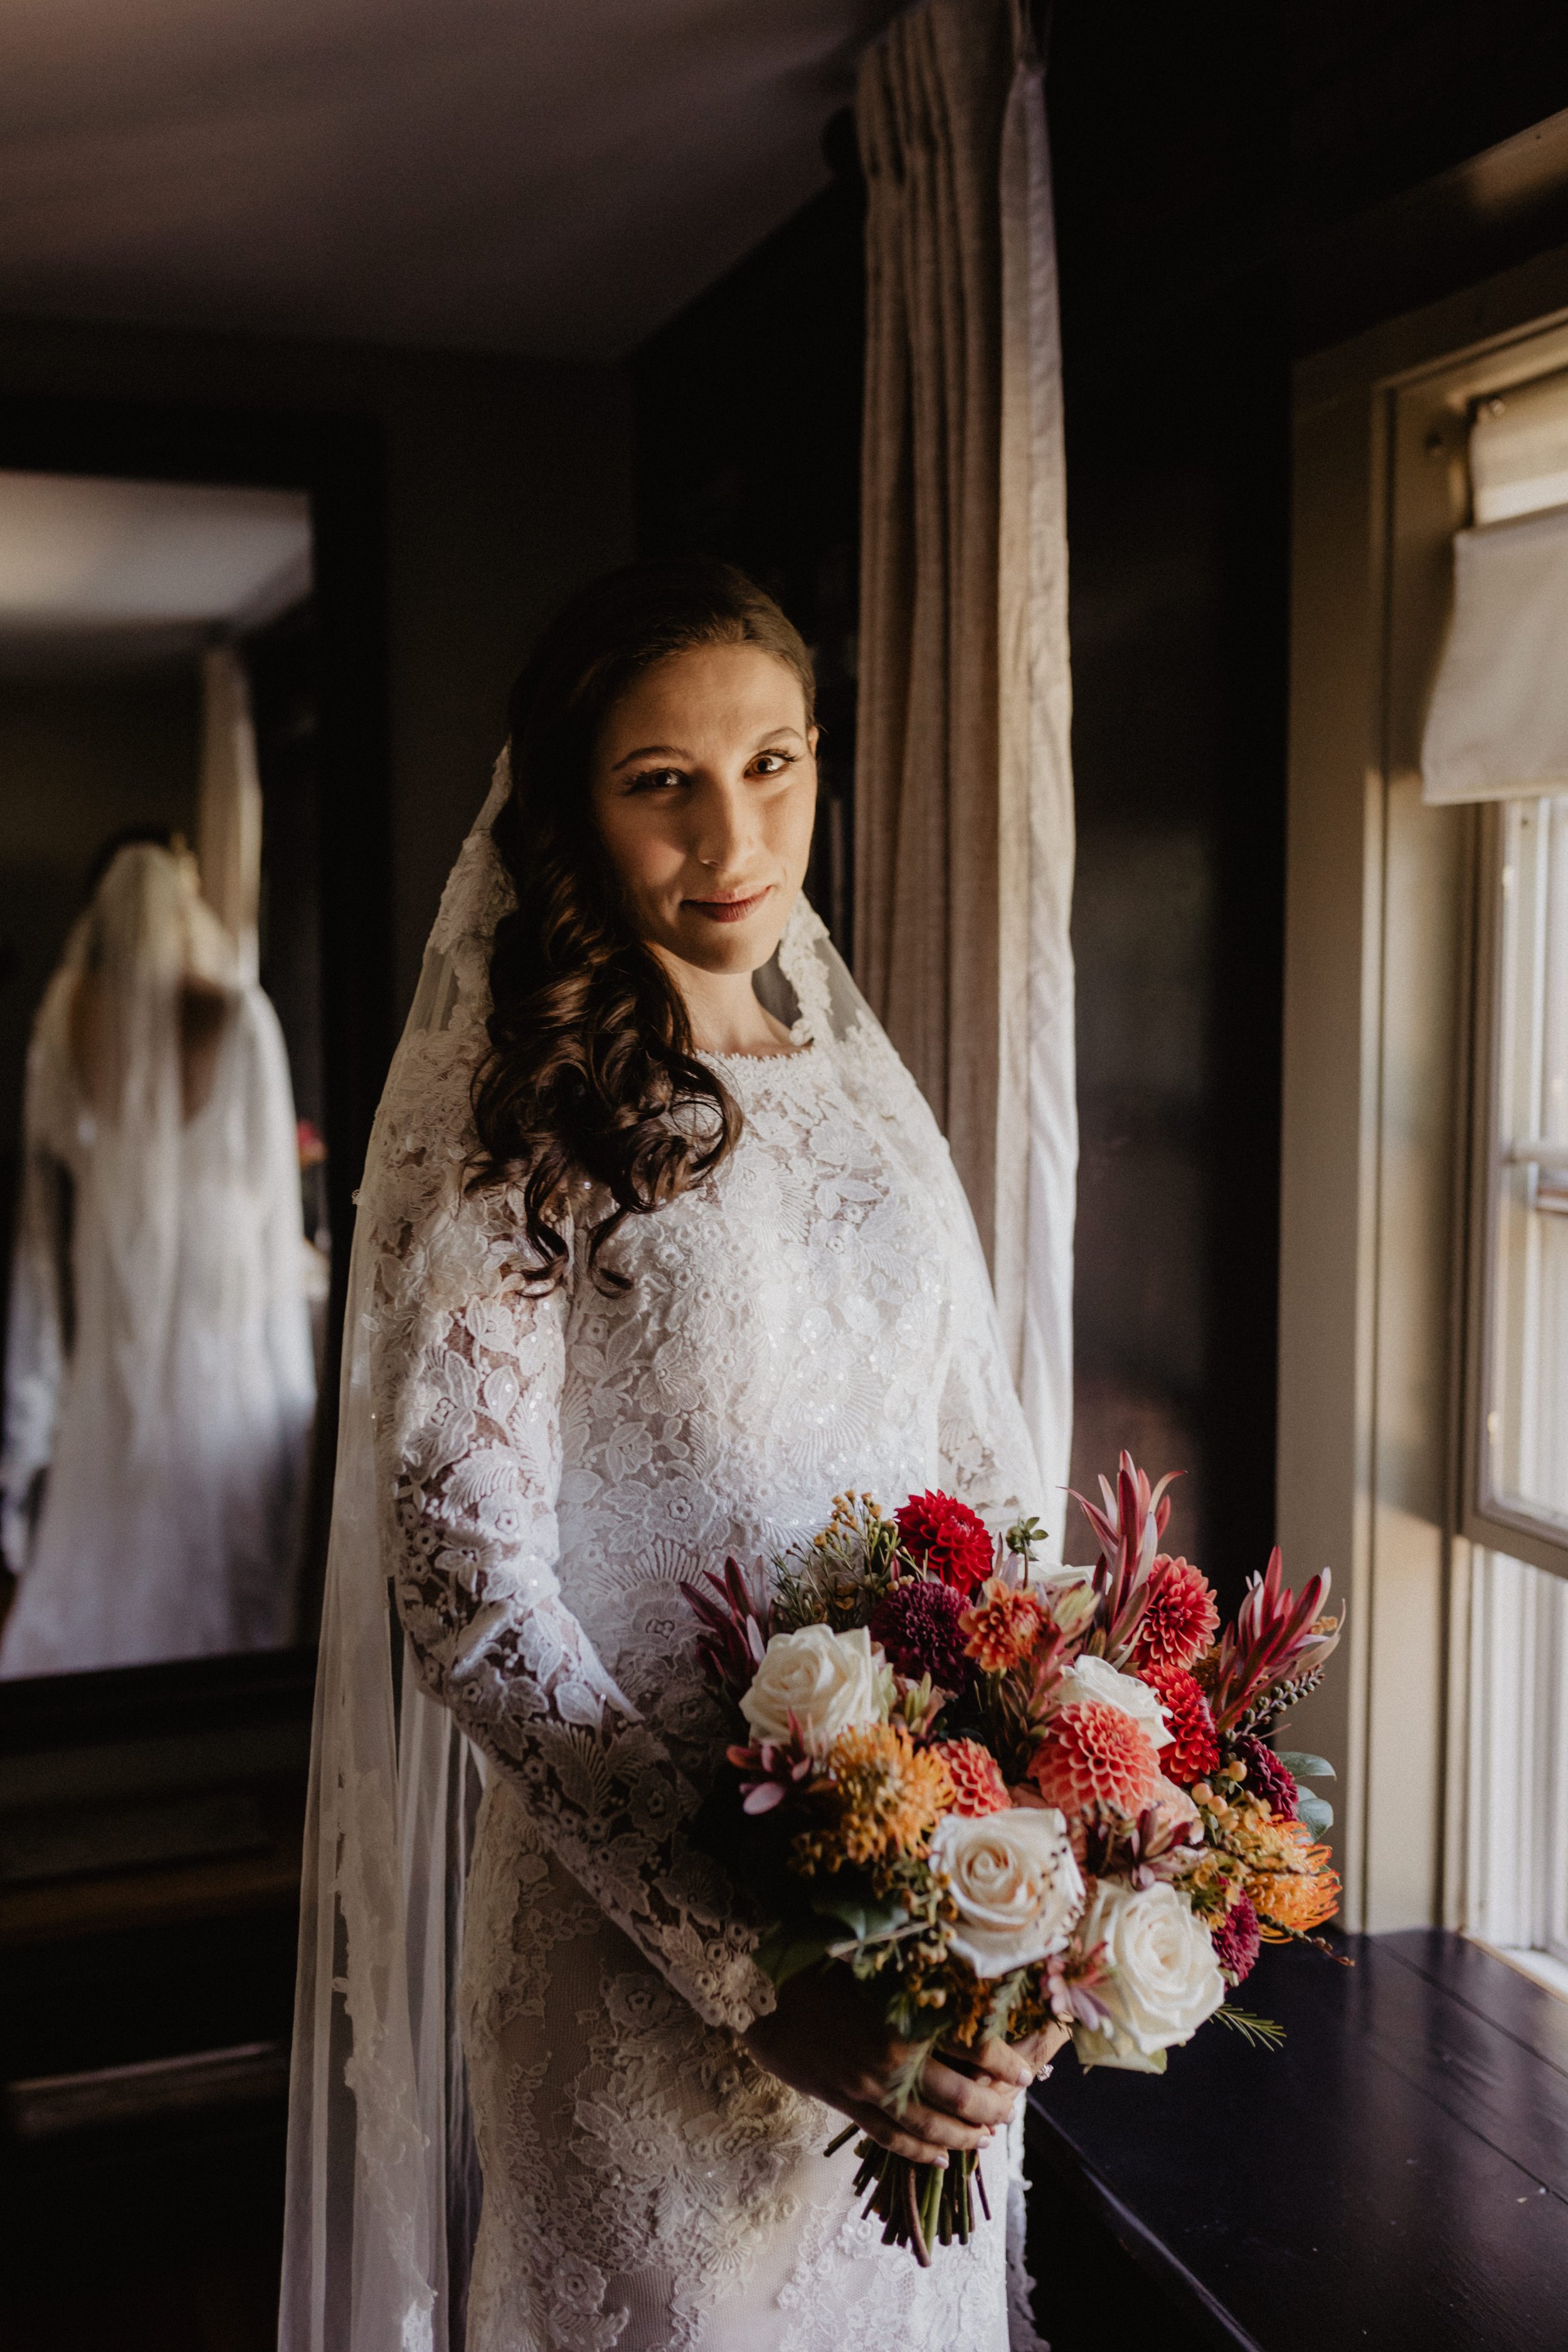
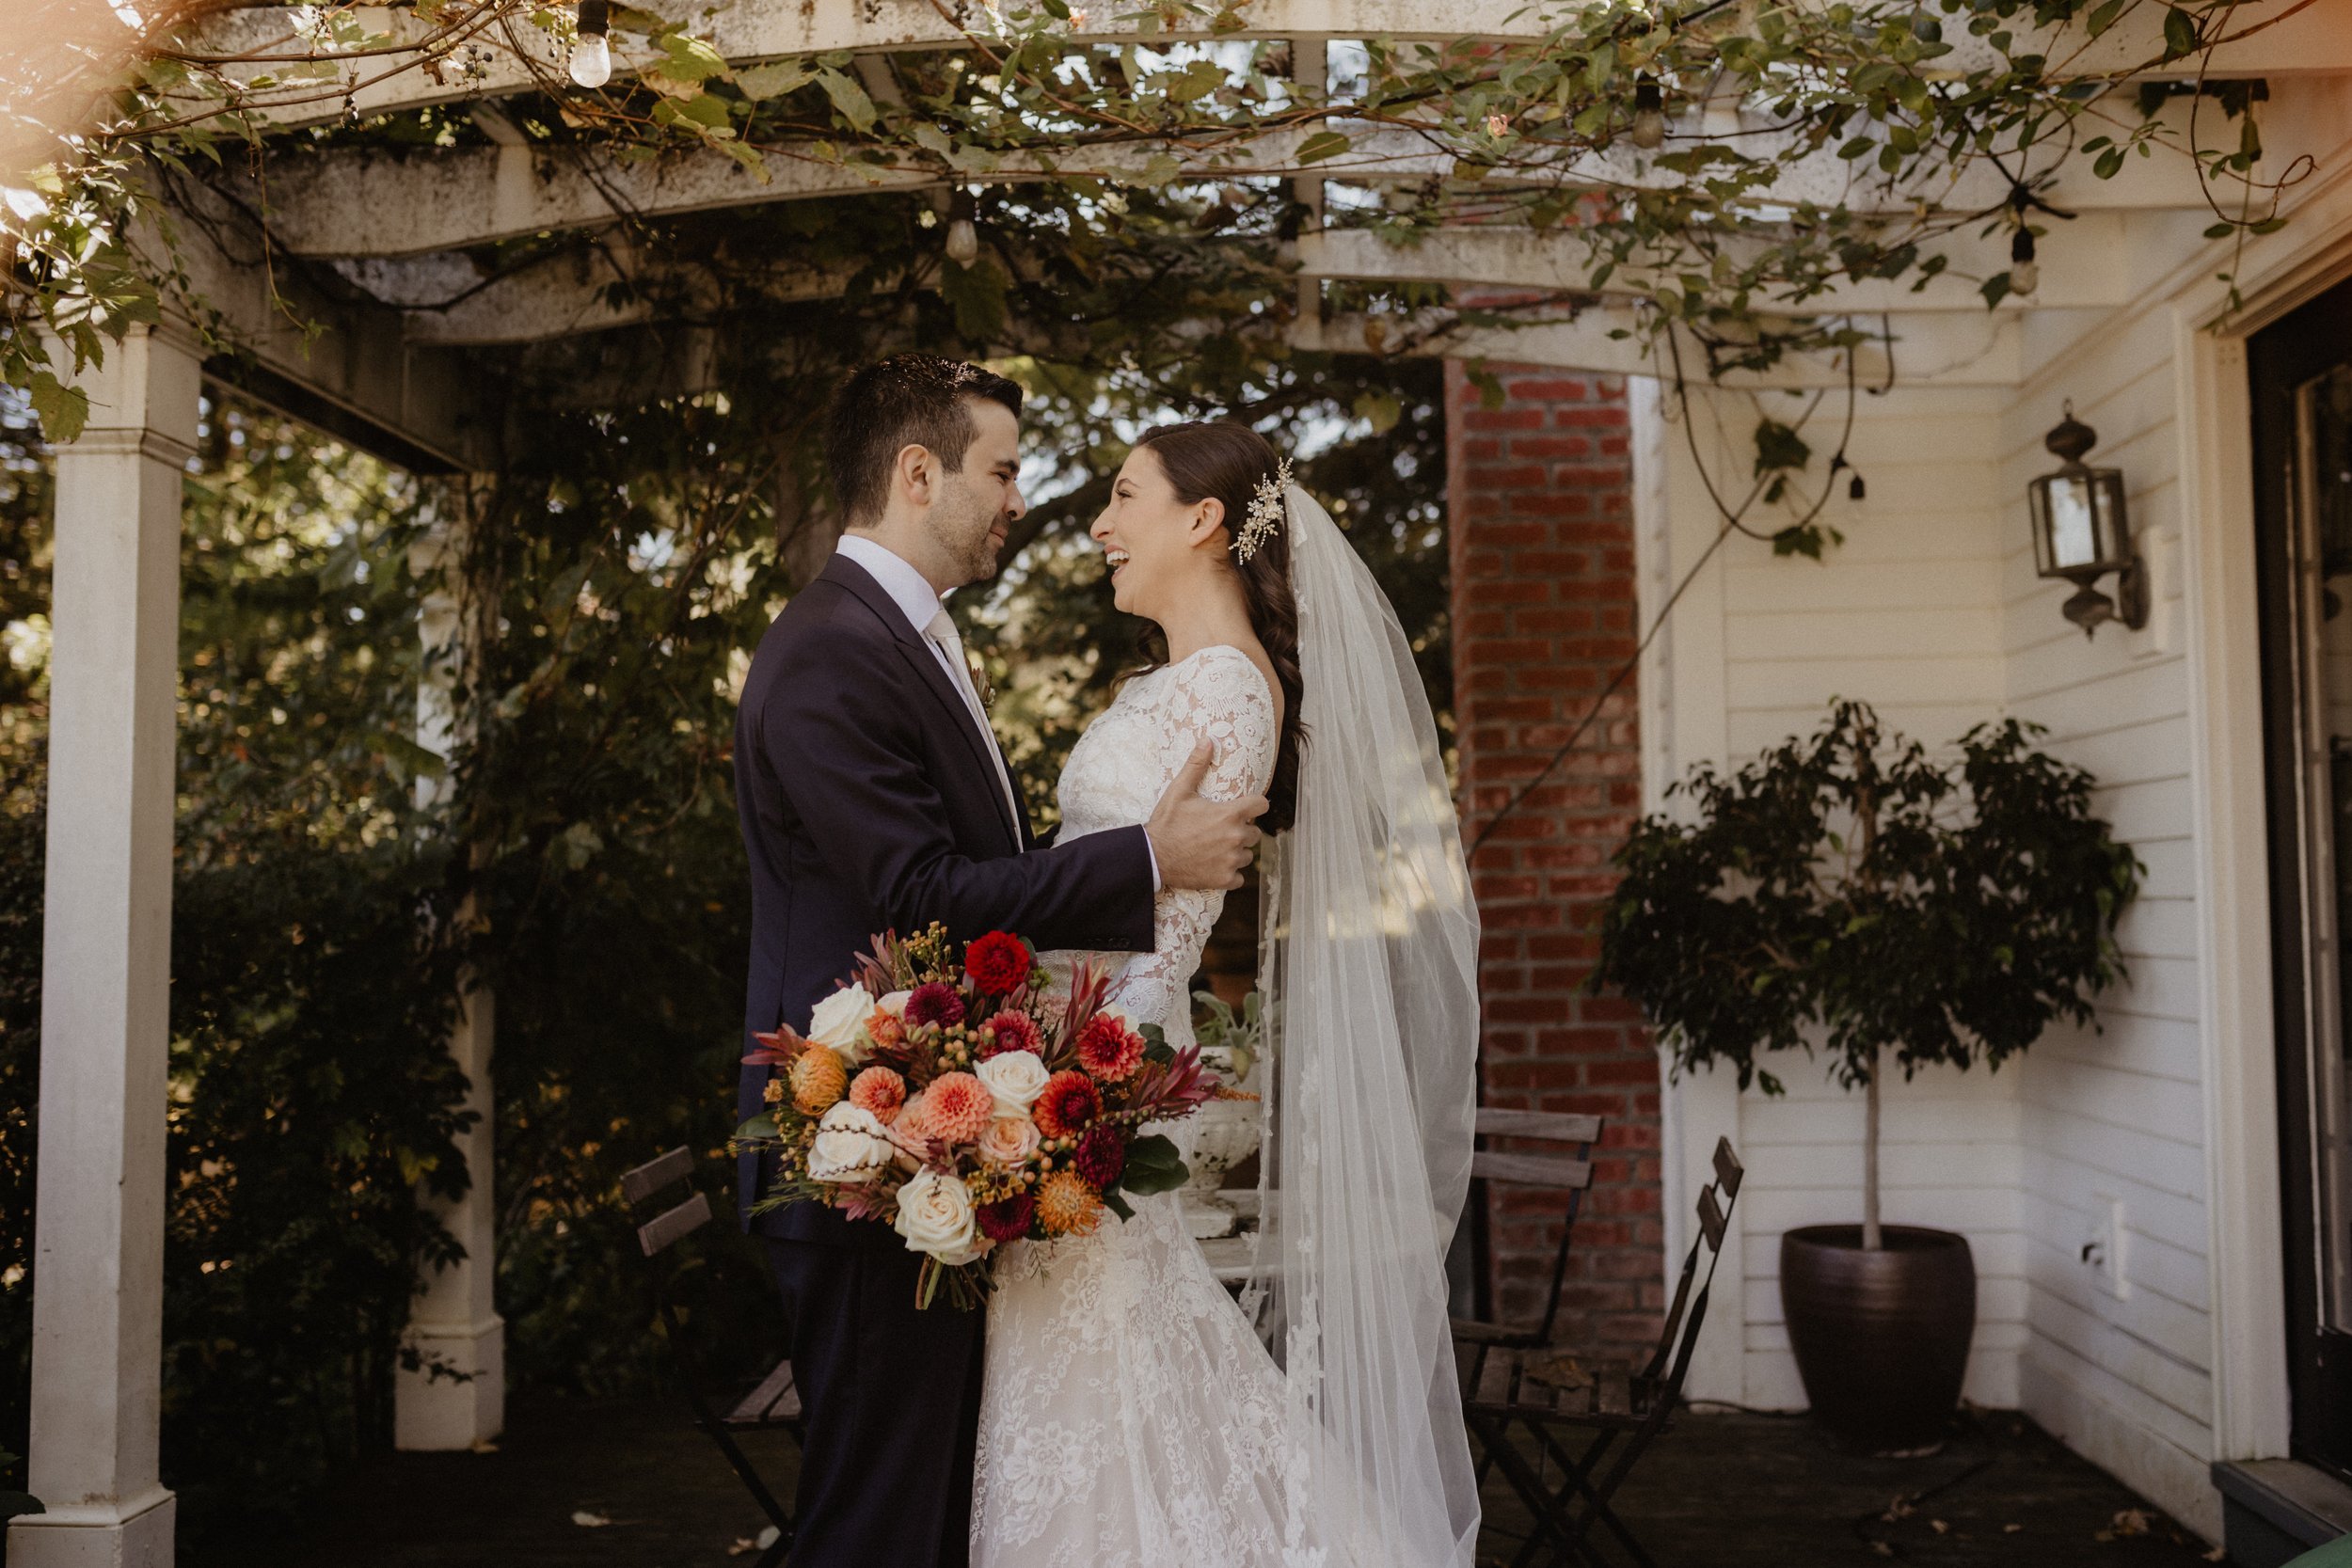
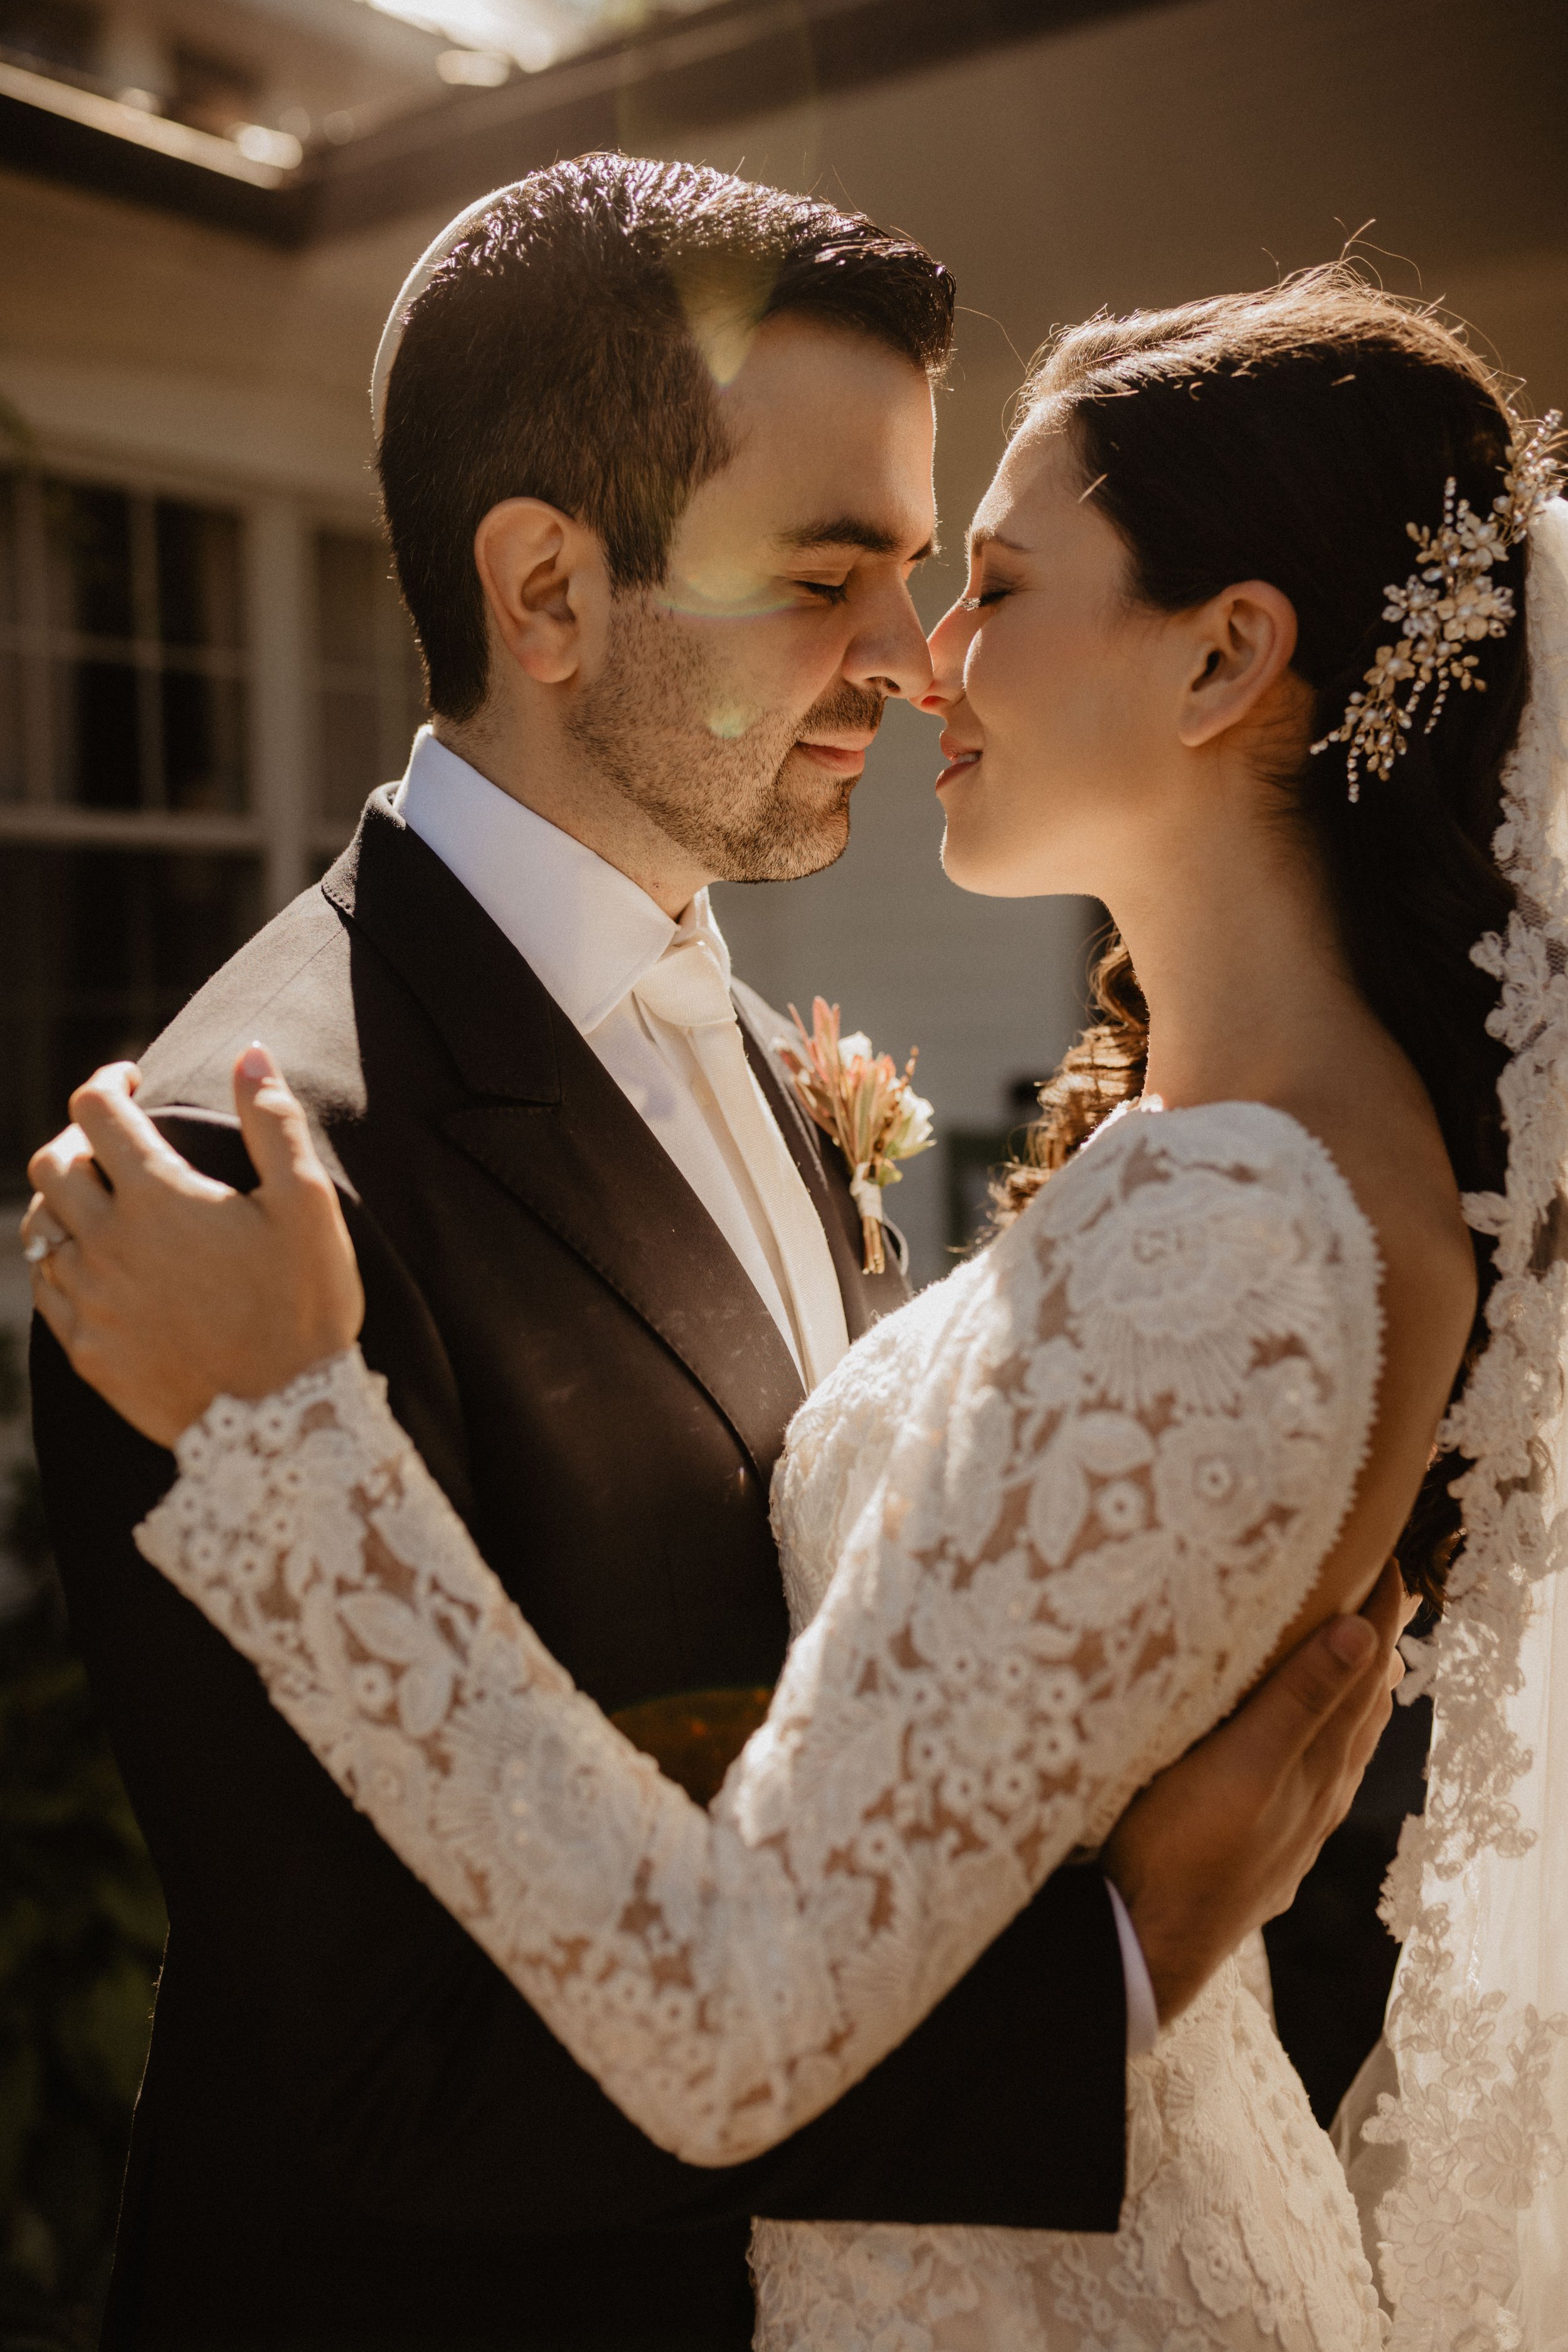
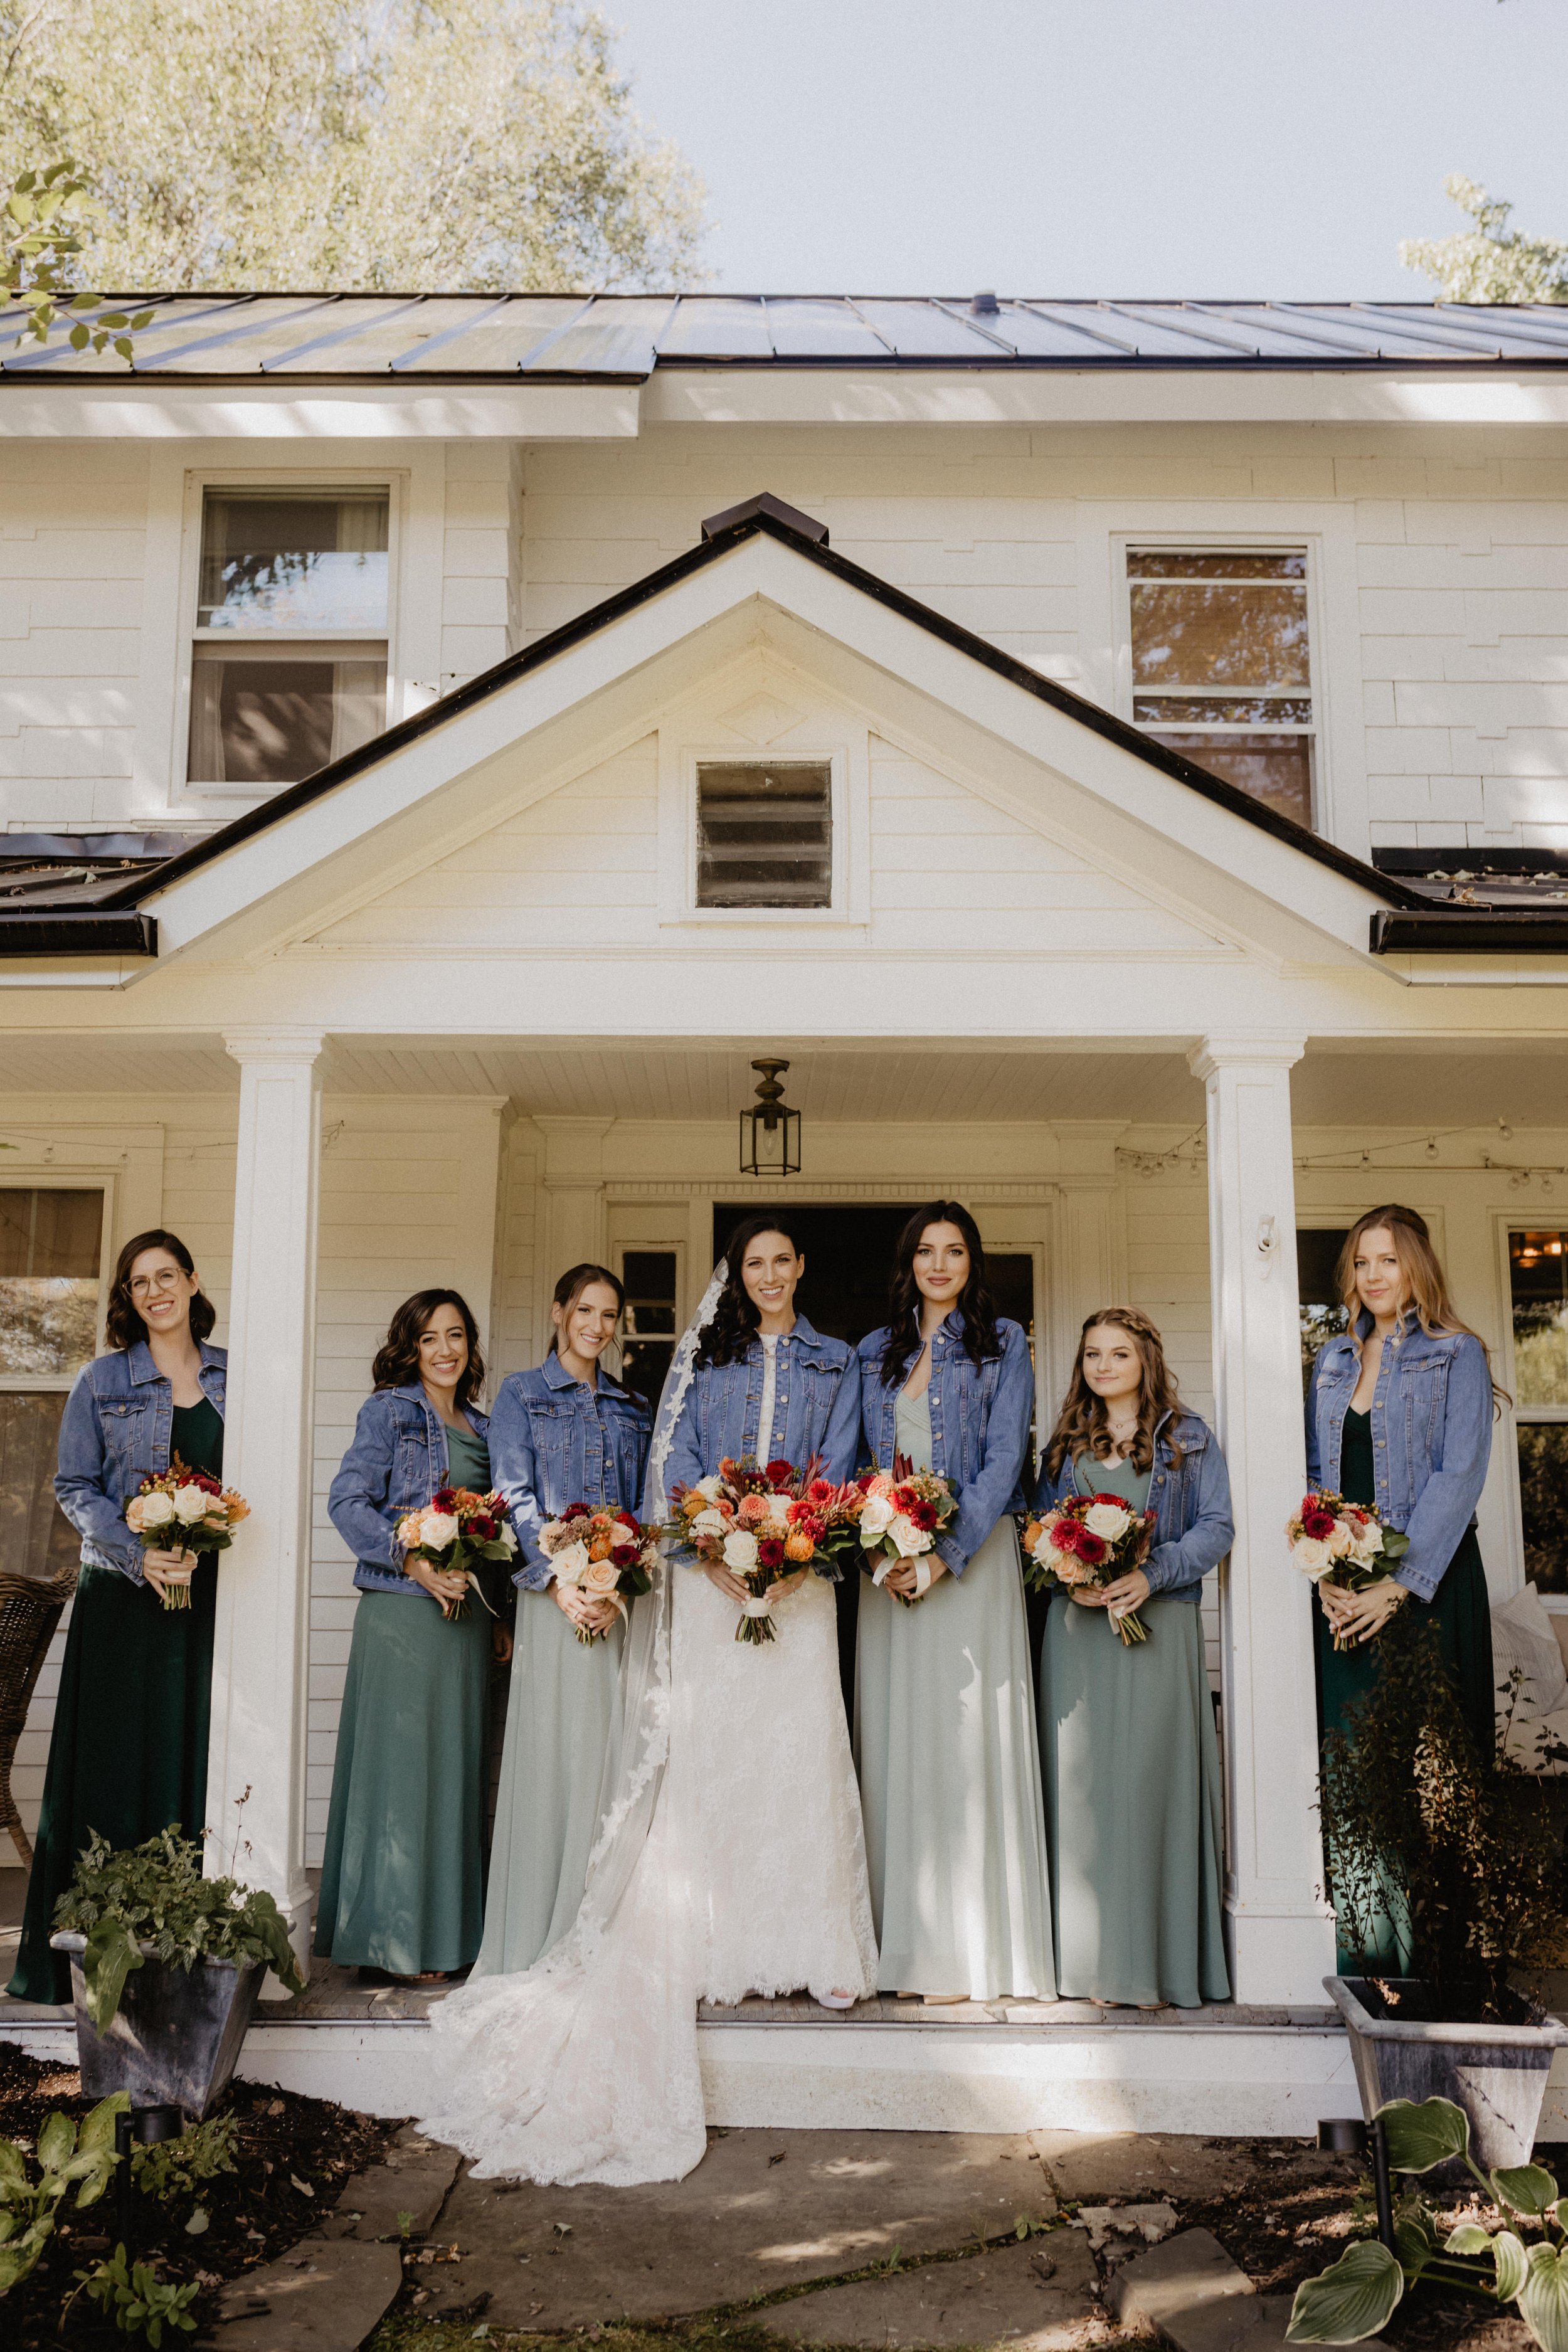
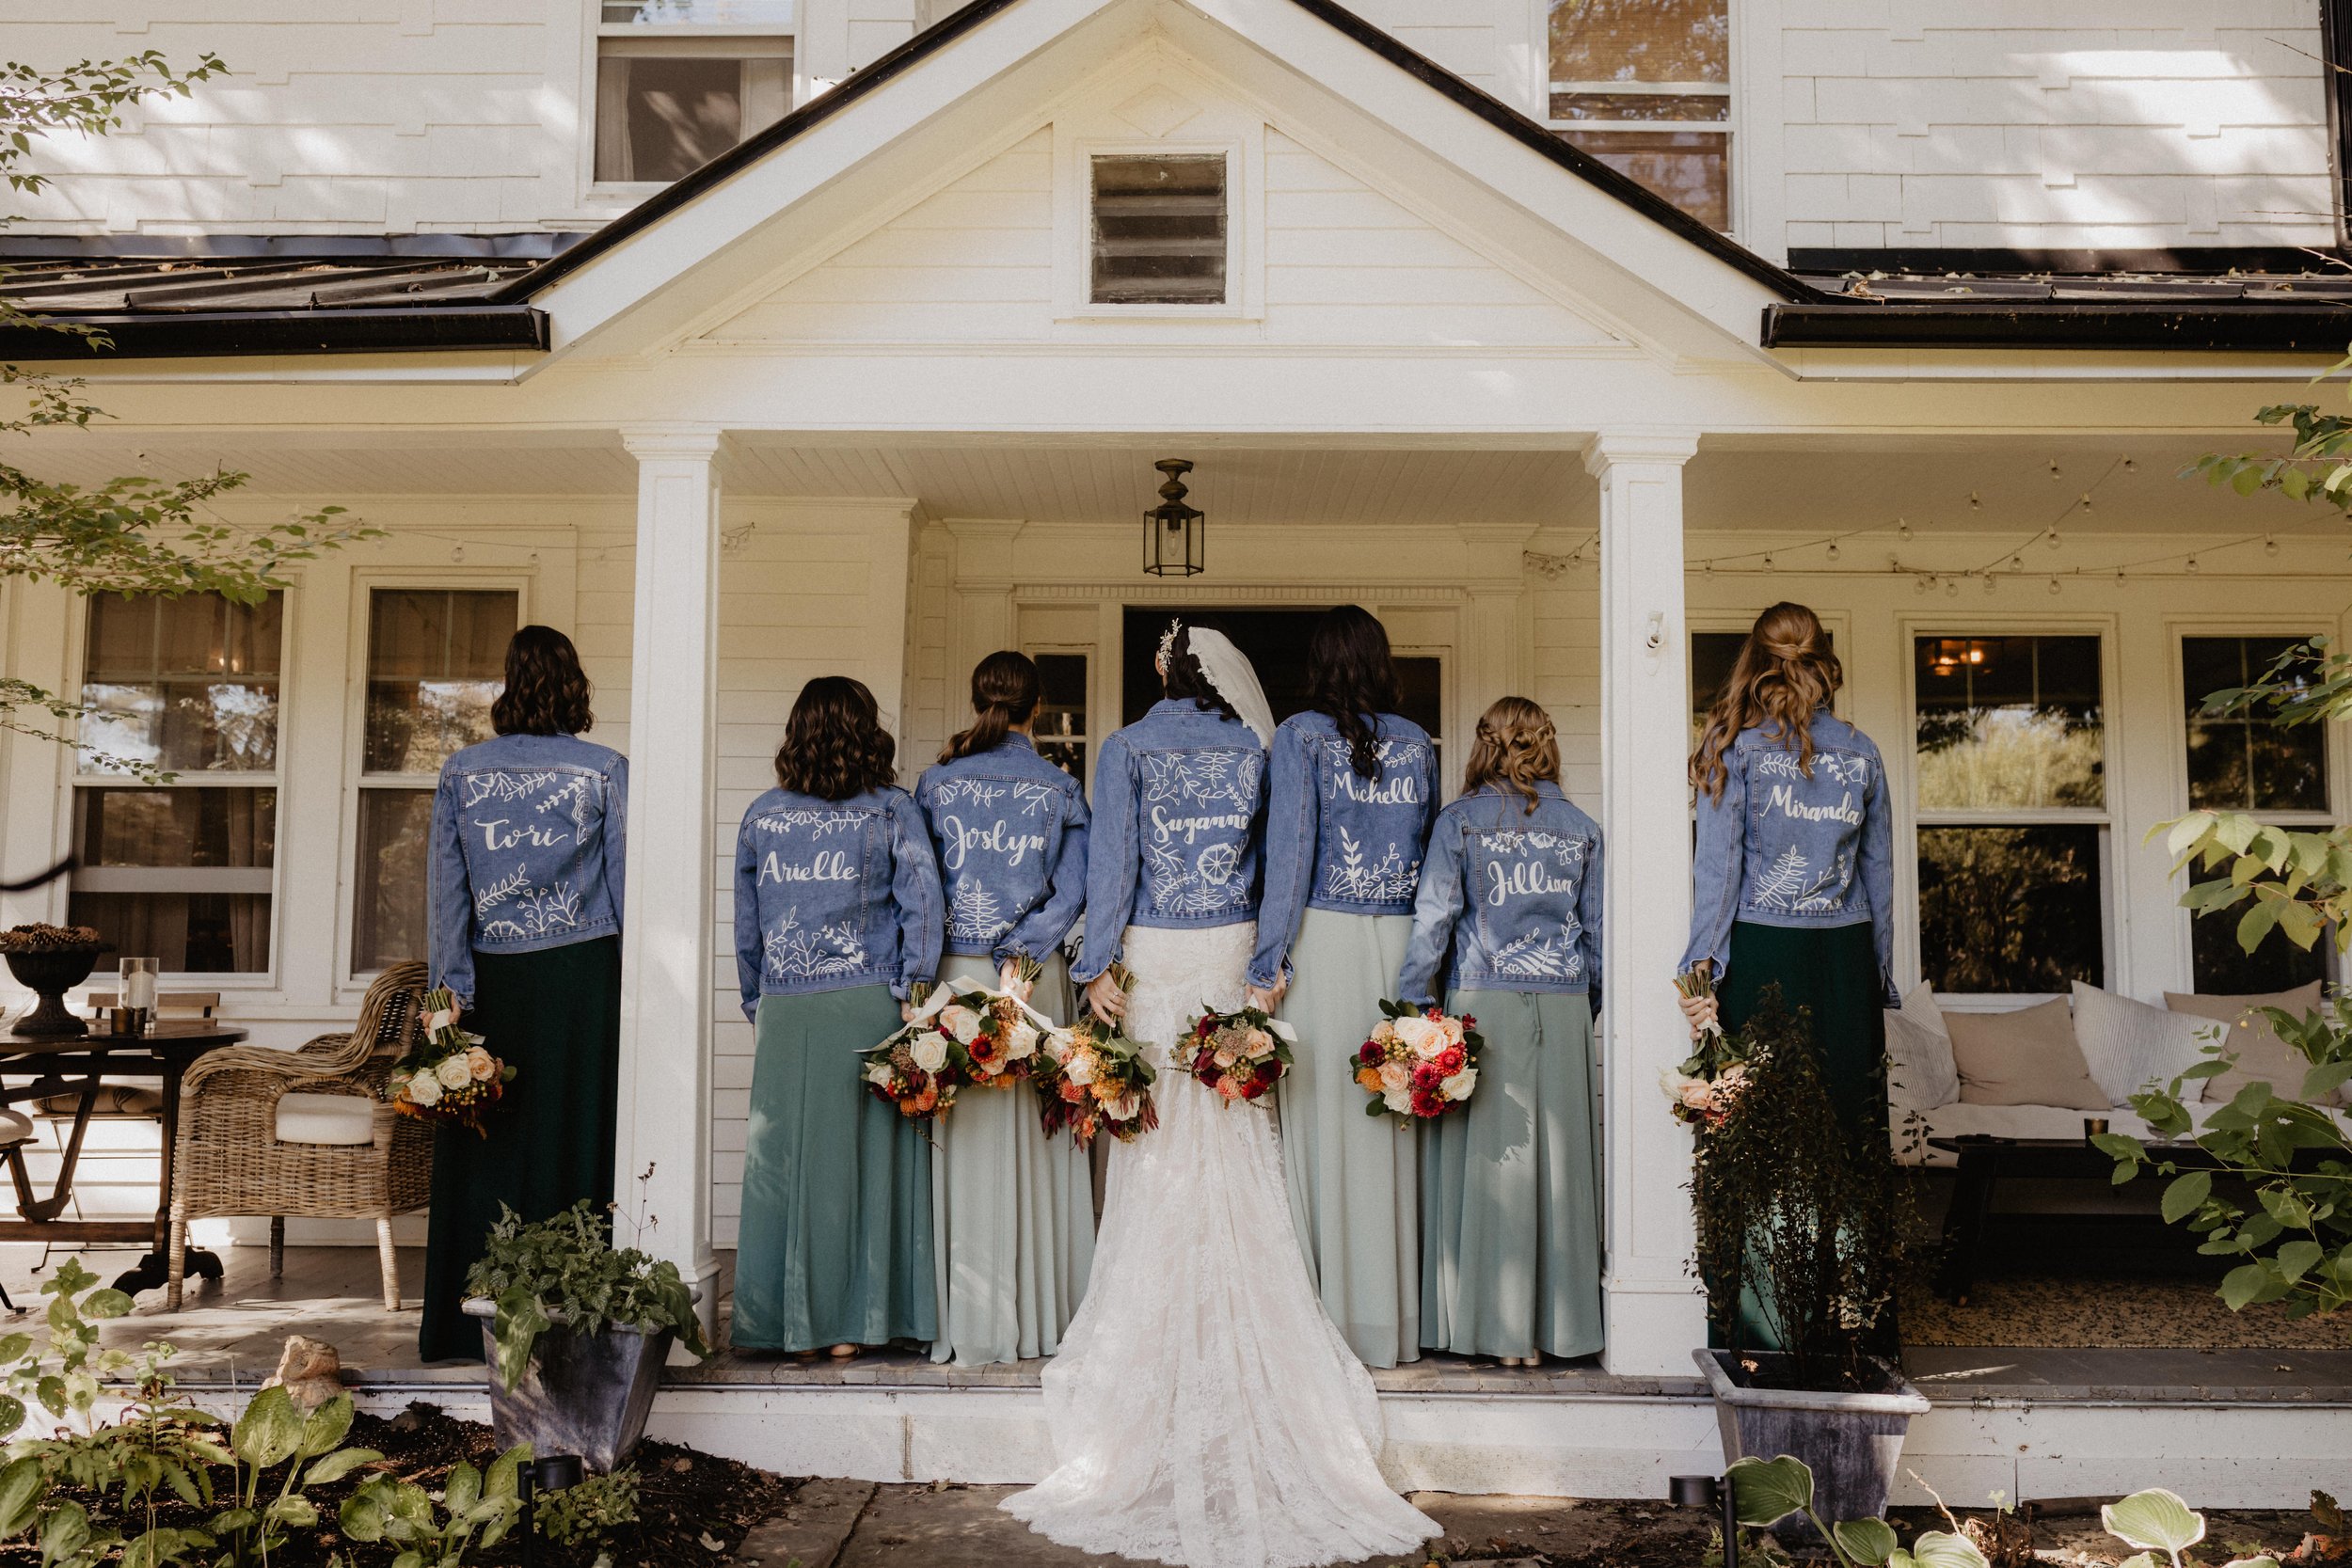
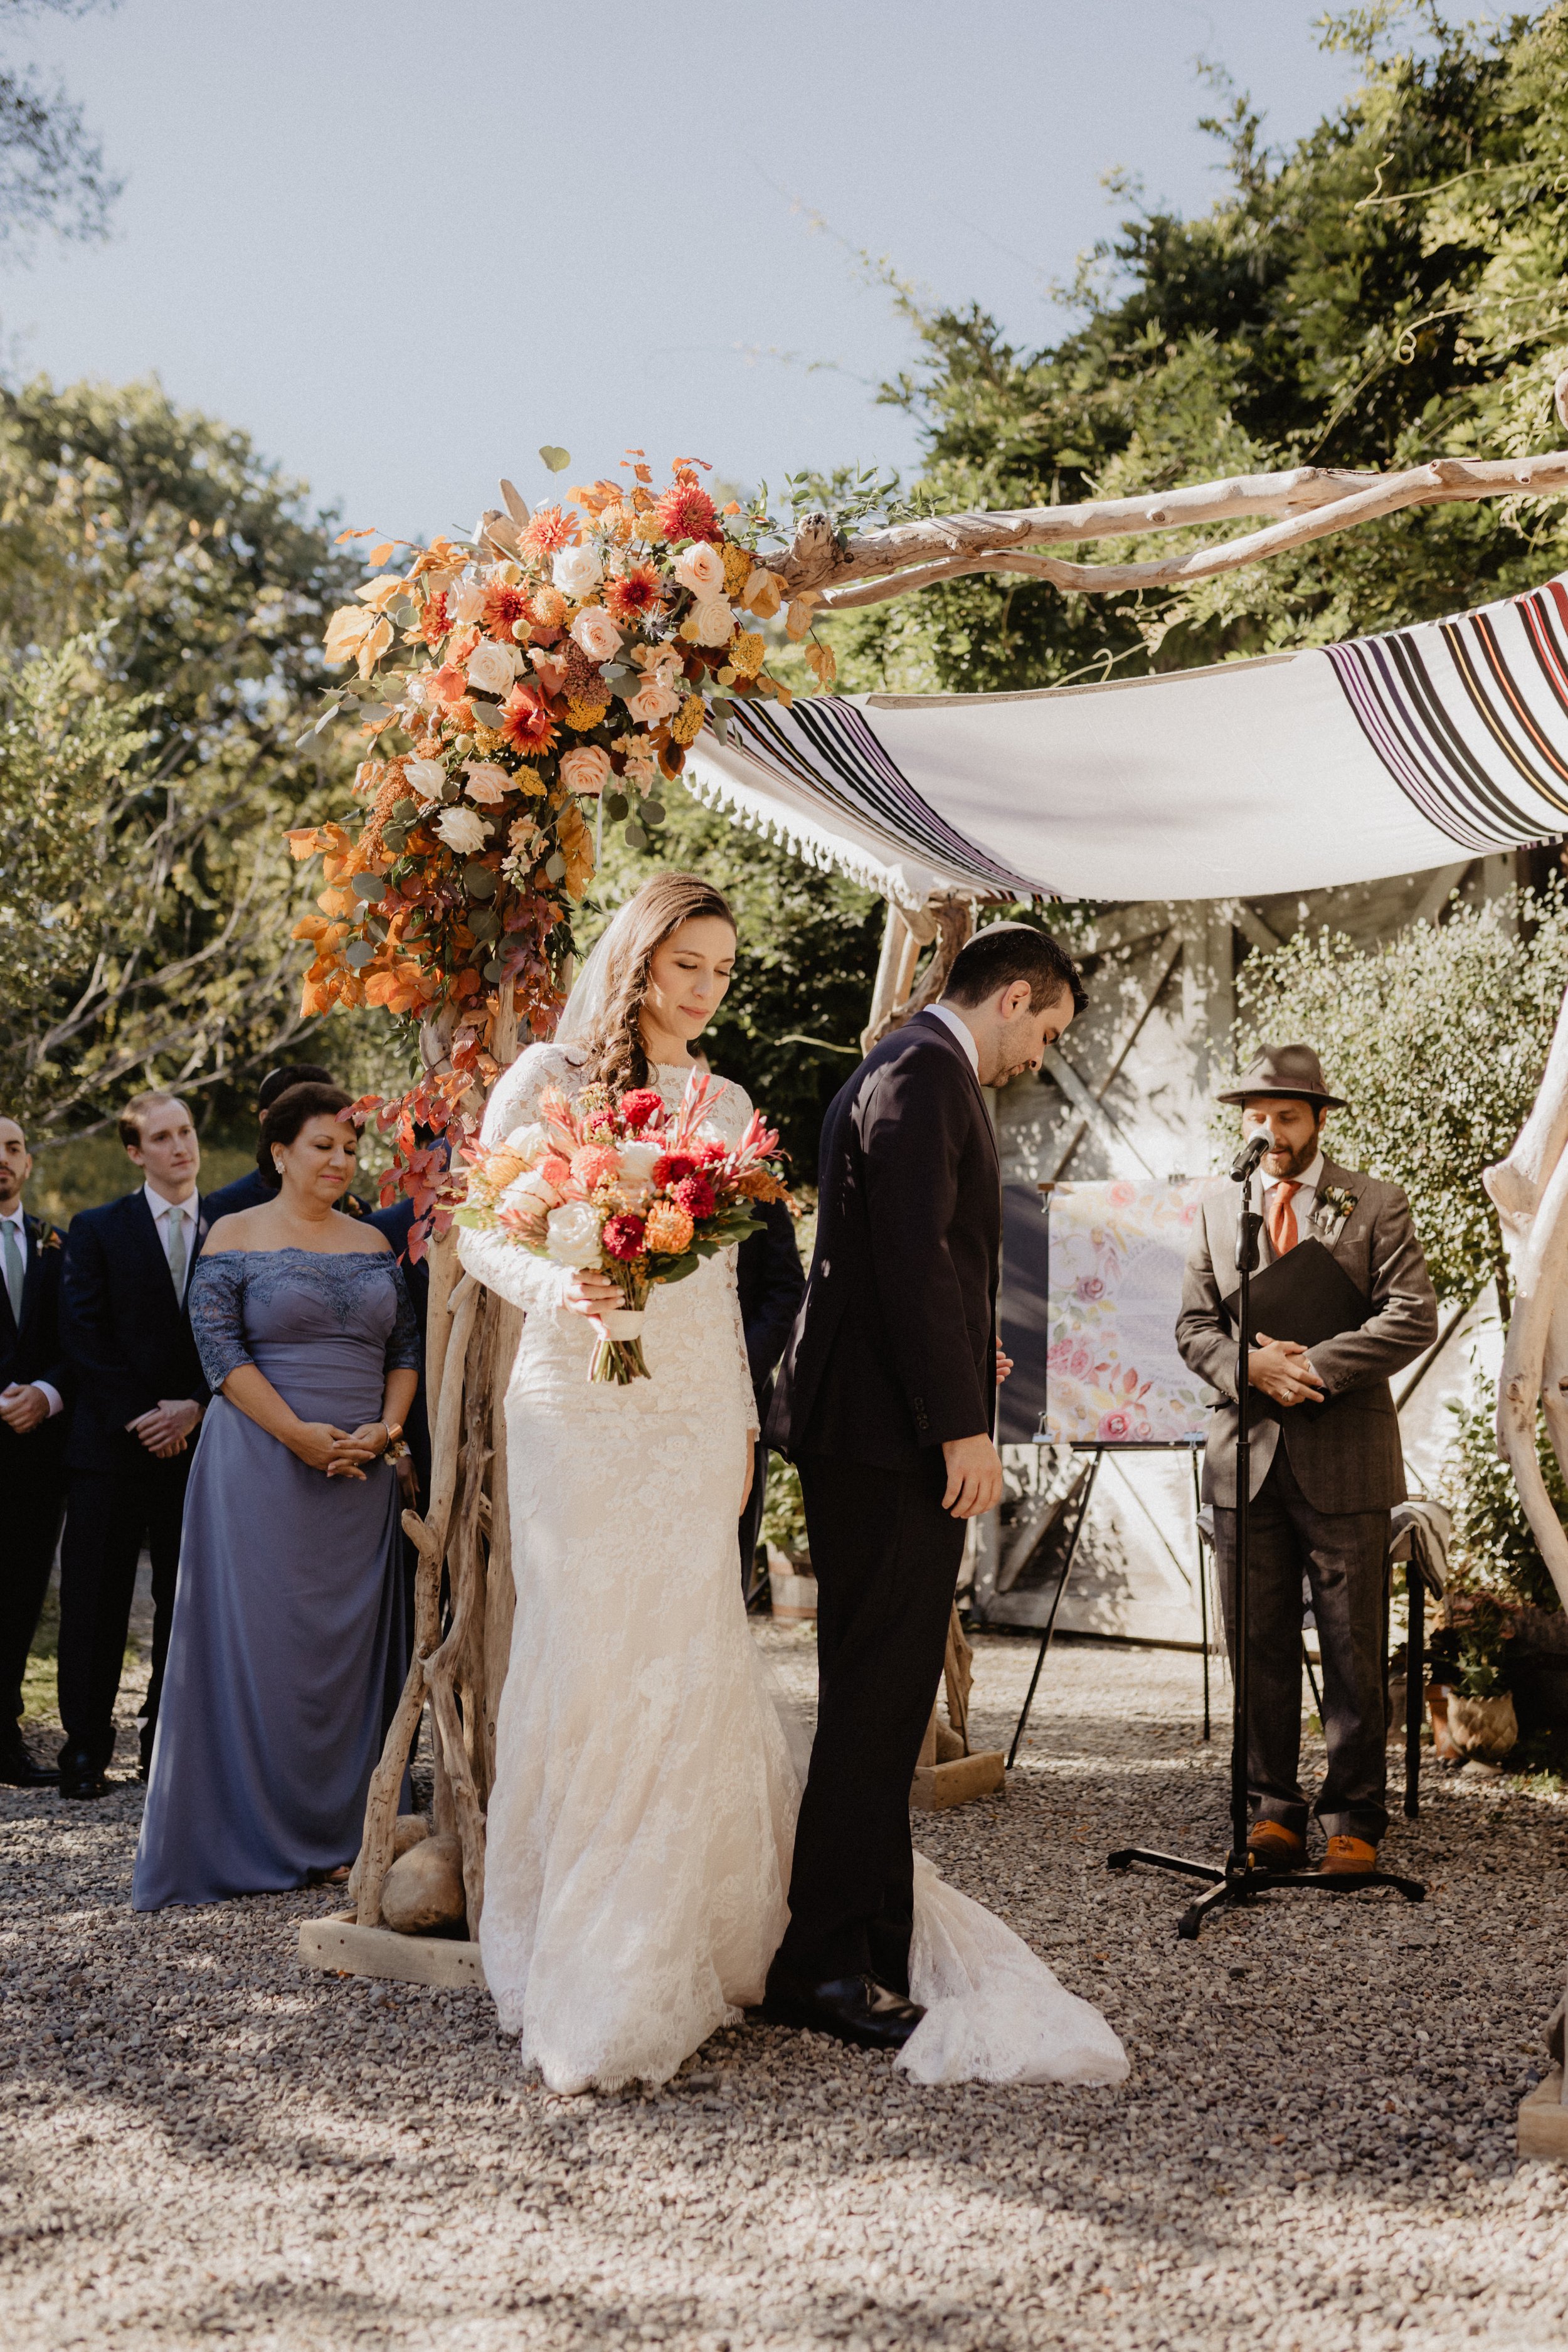
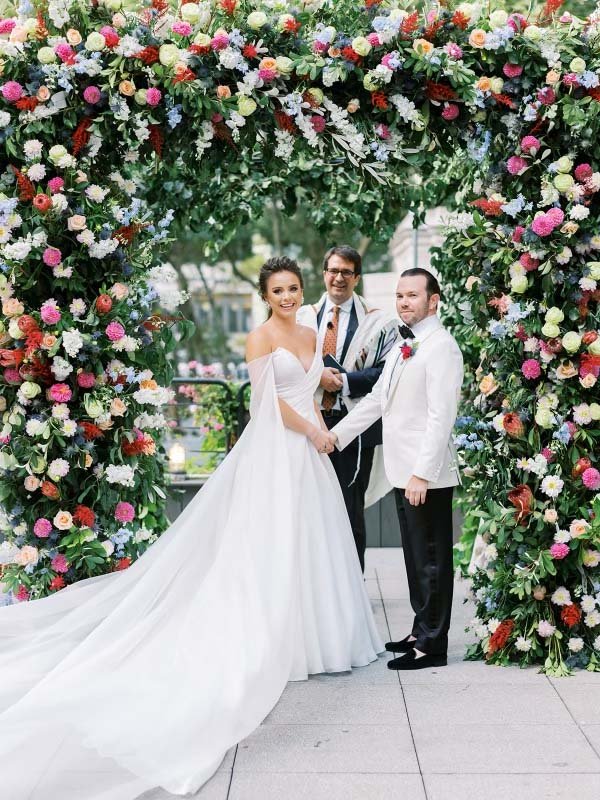
real wedding, Suzanne + Nick.
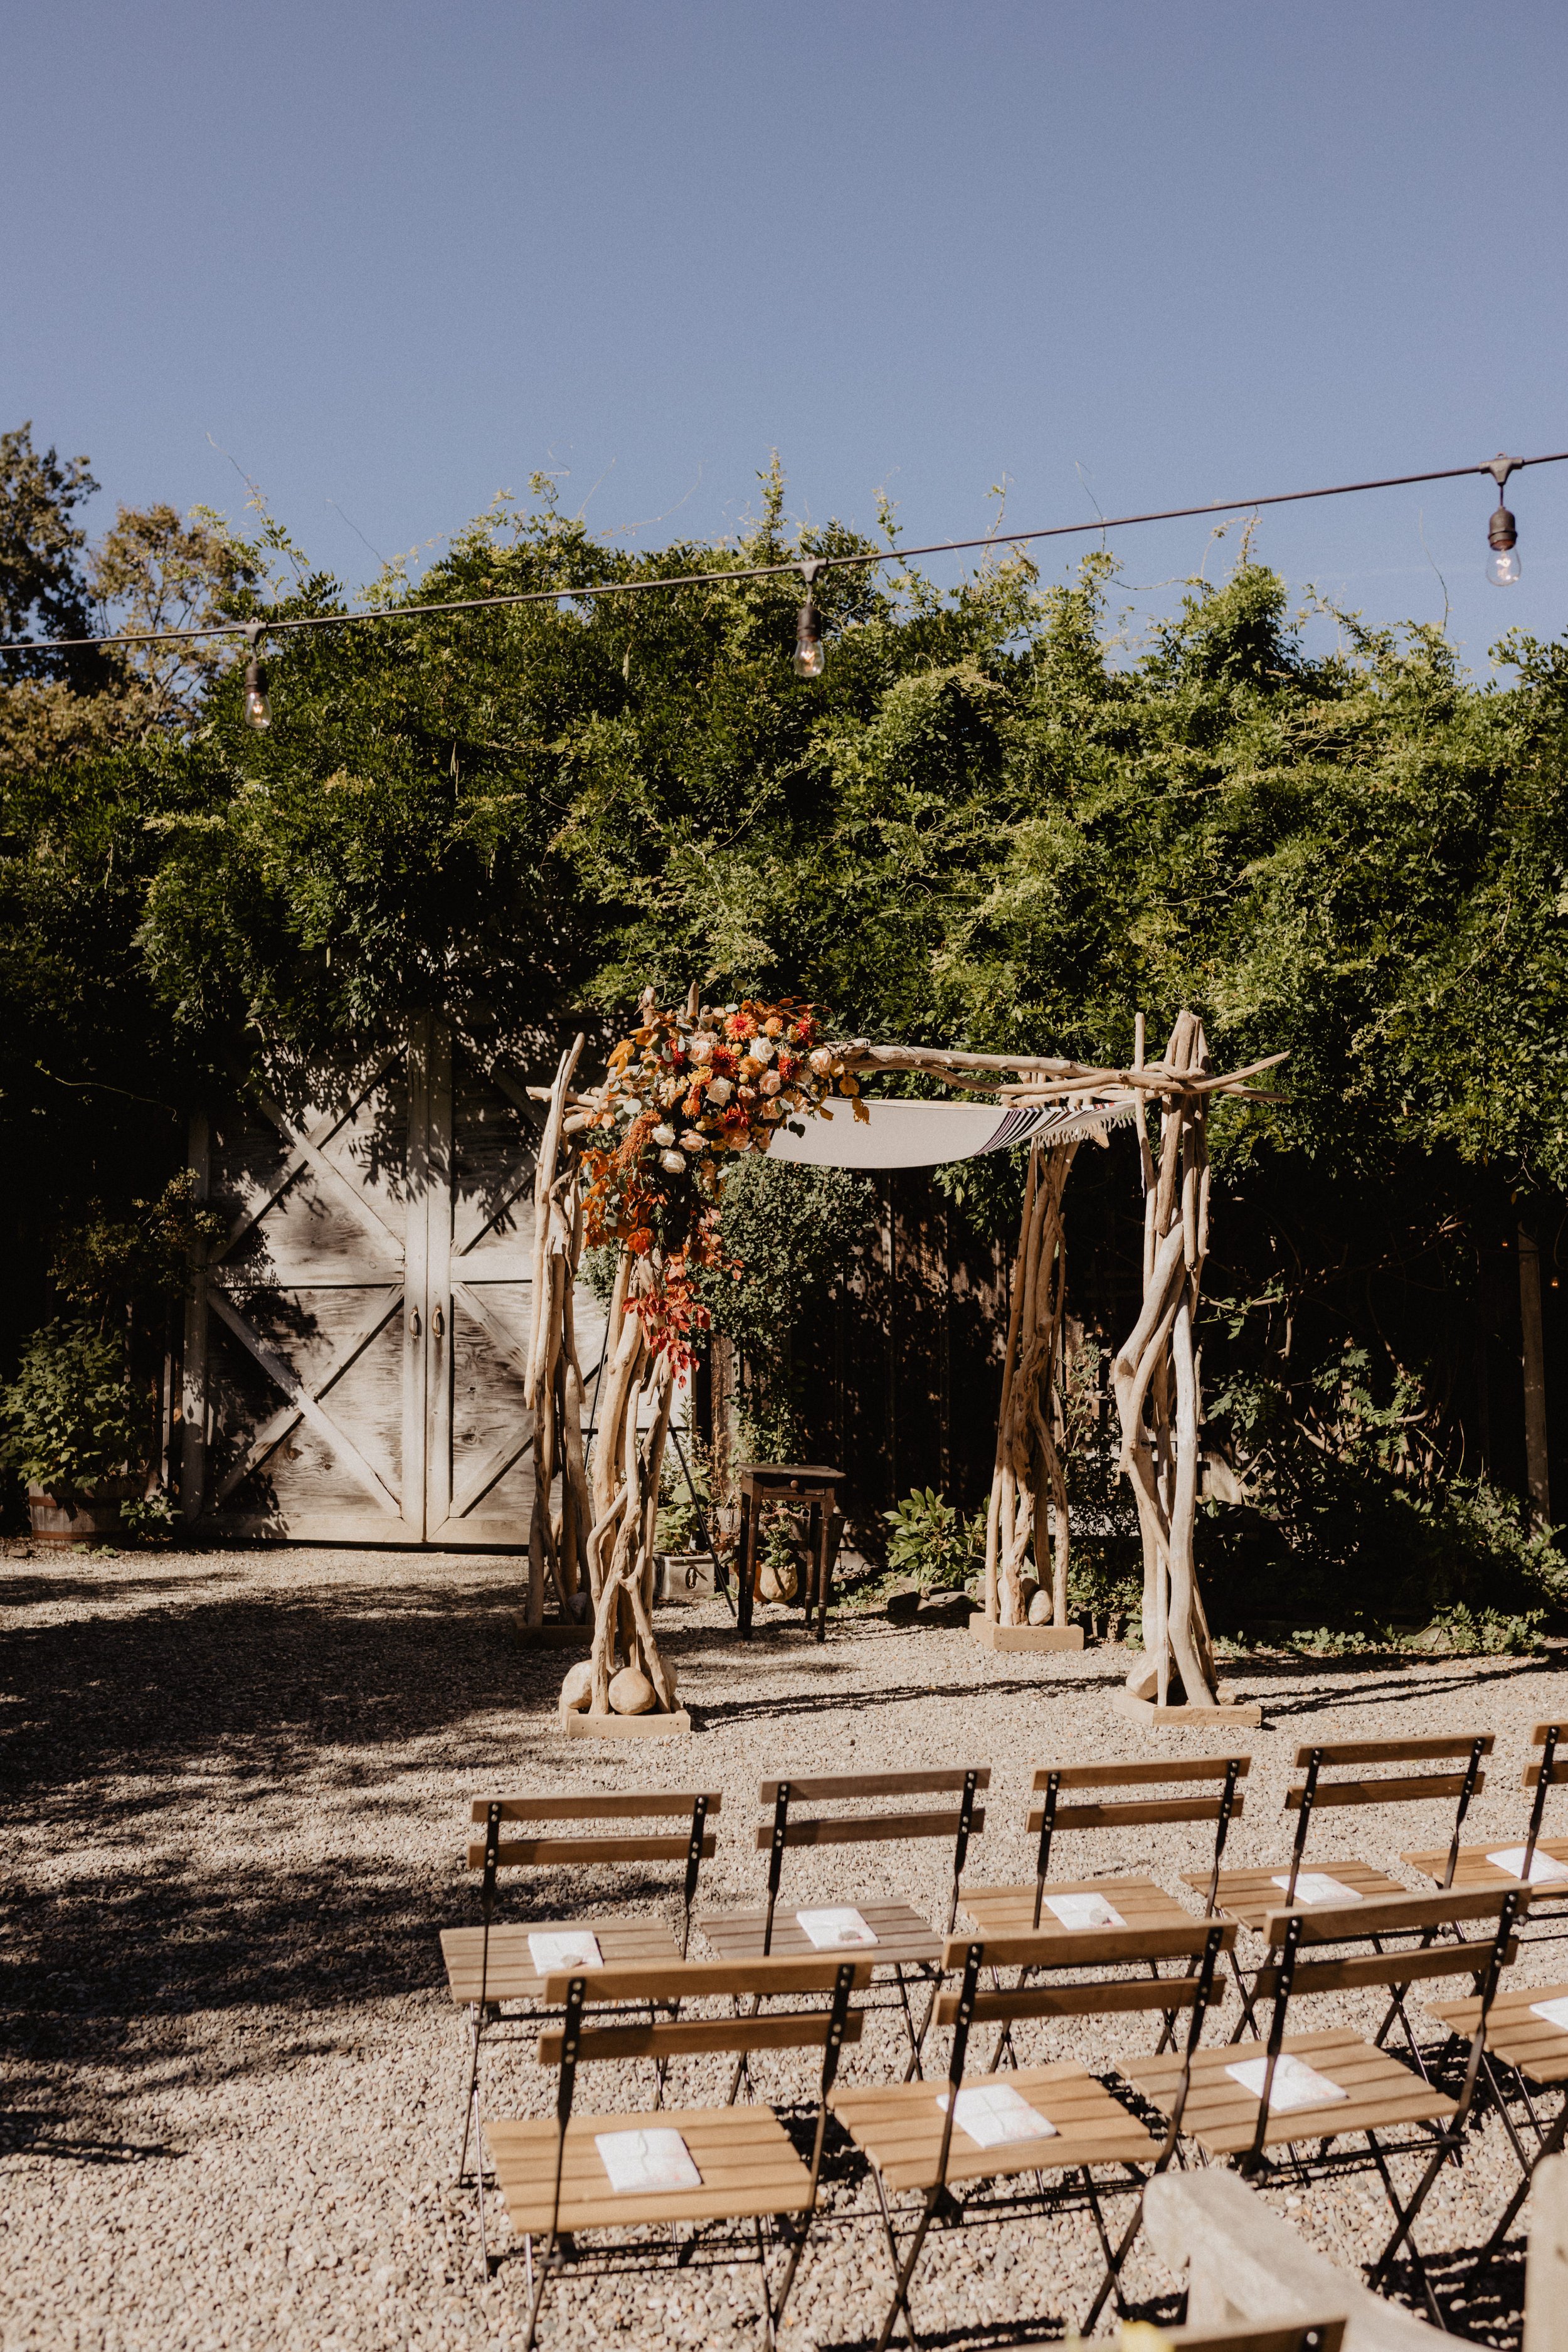
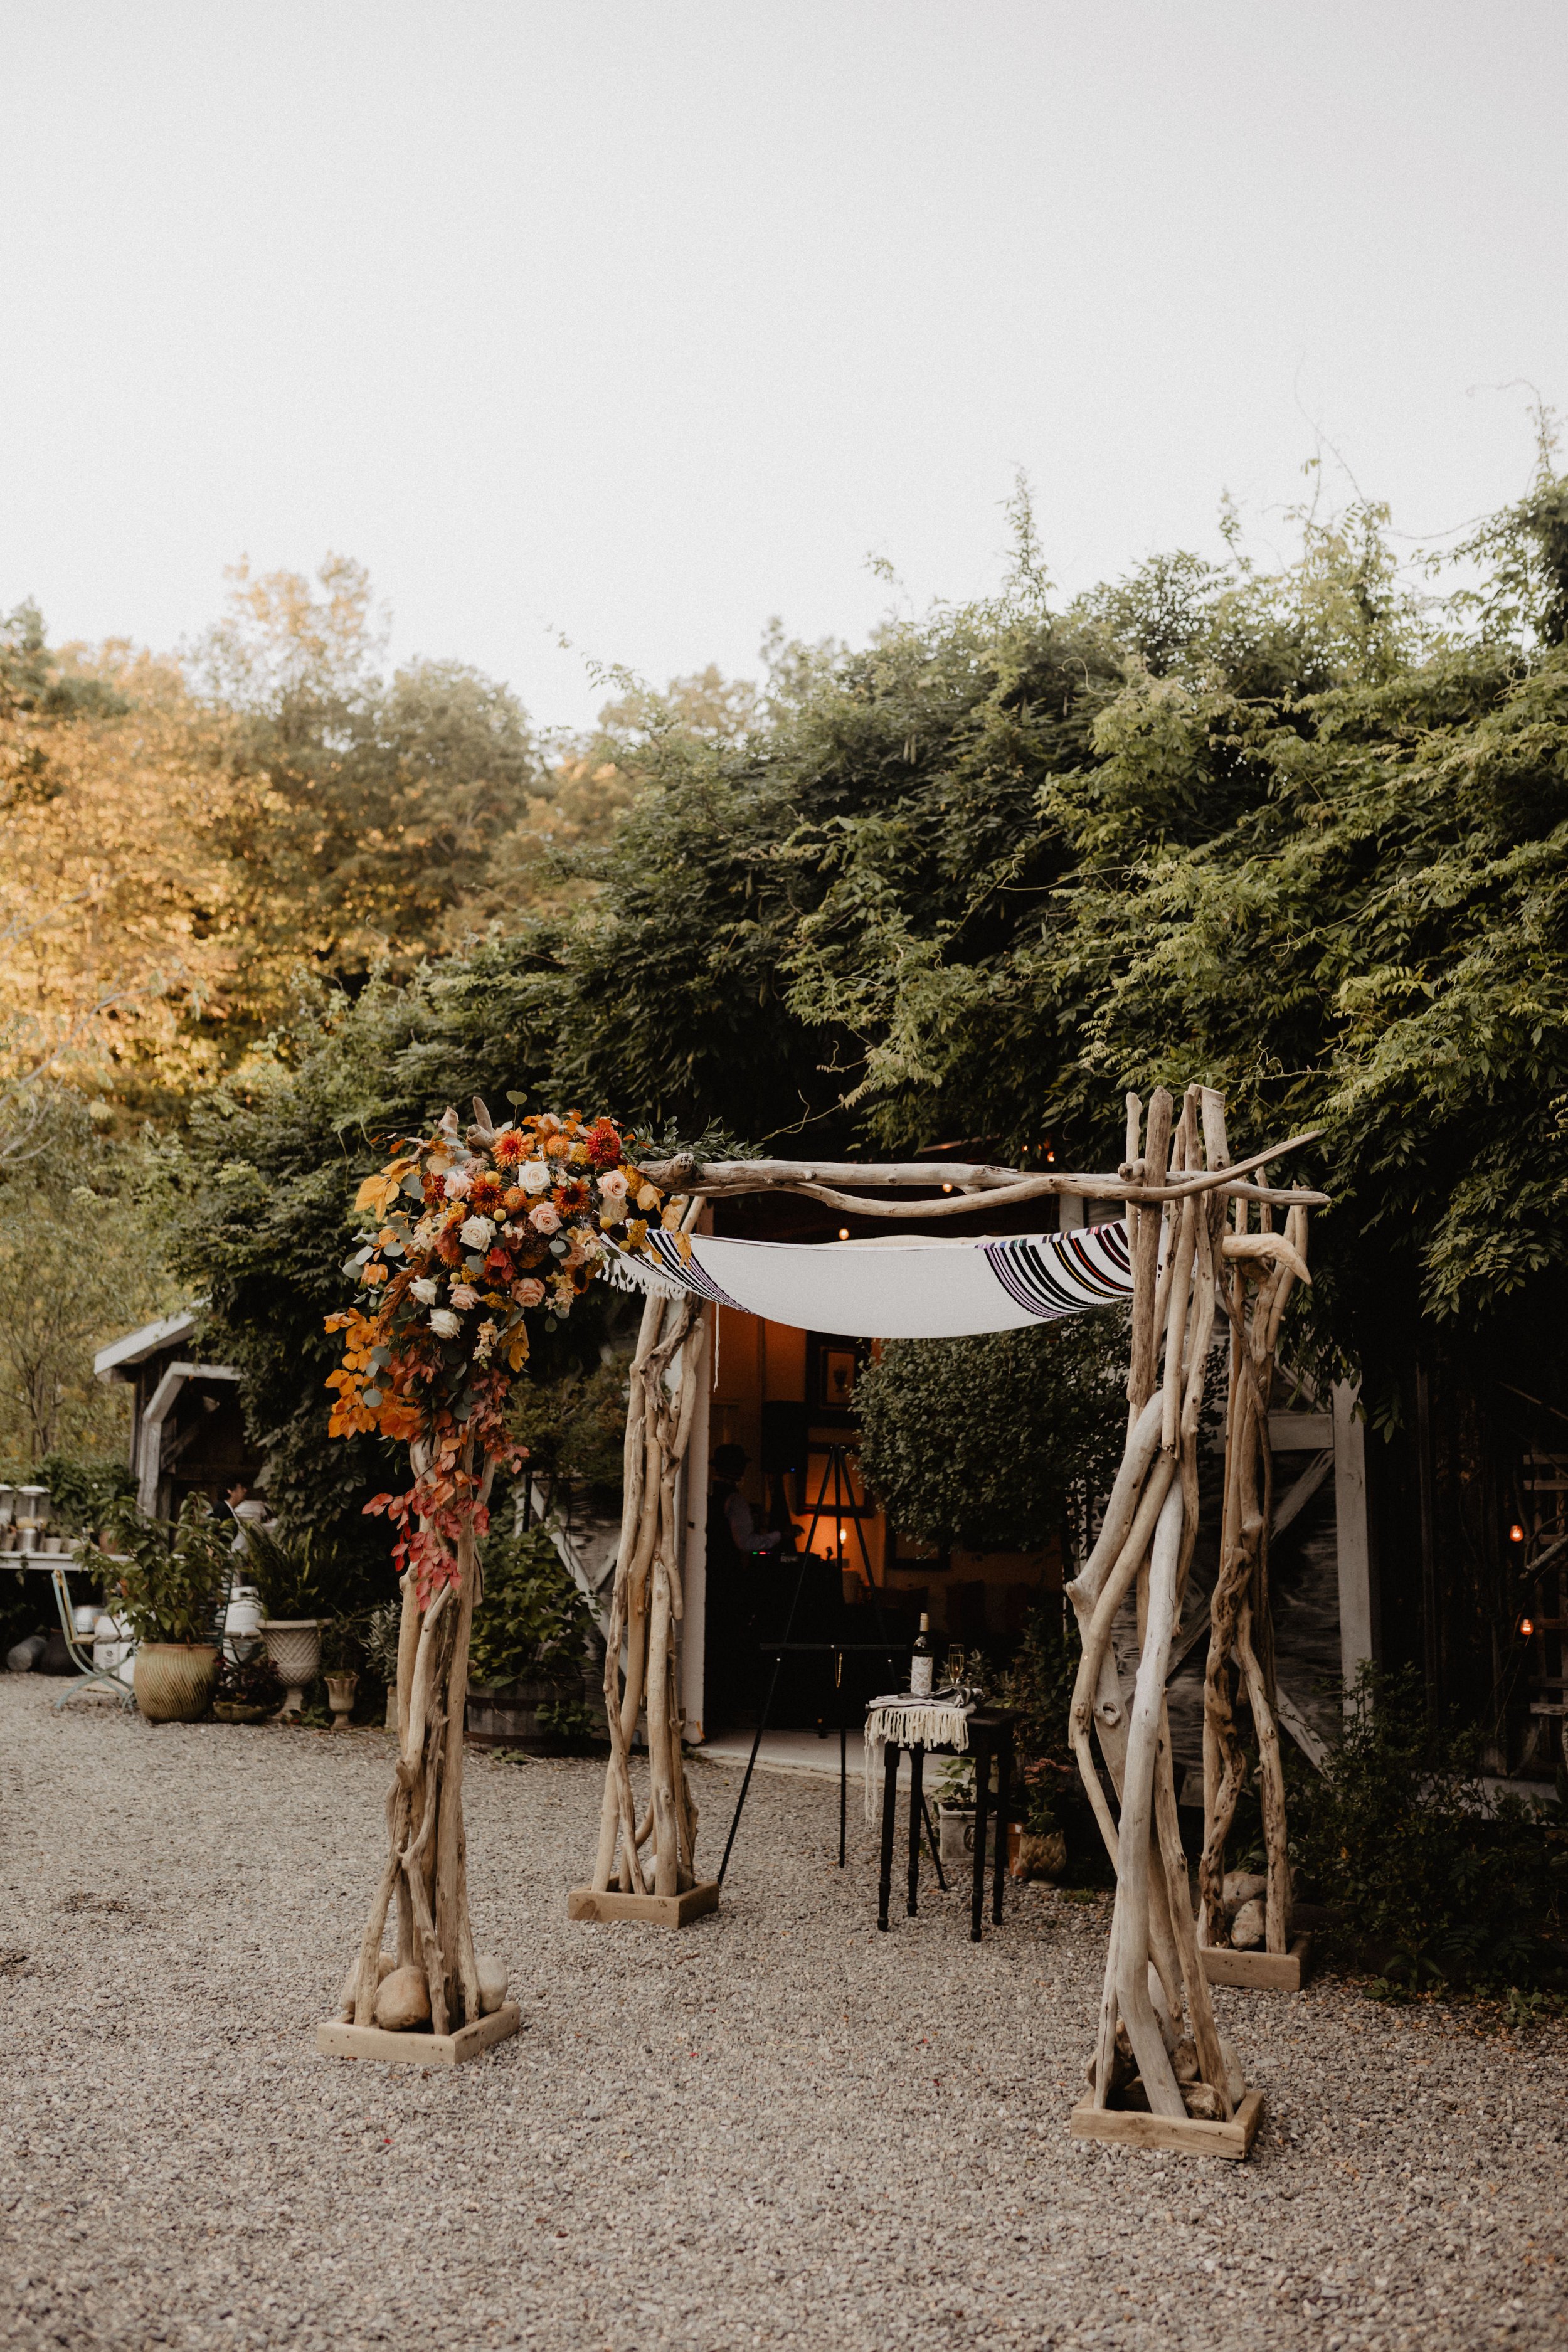
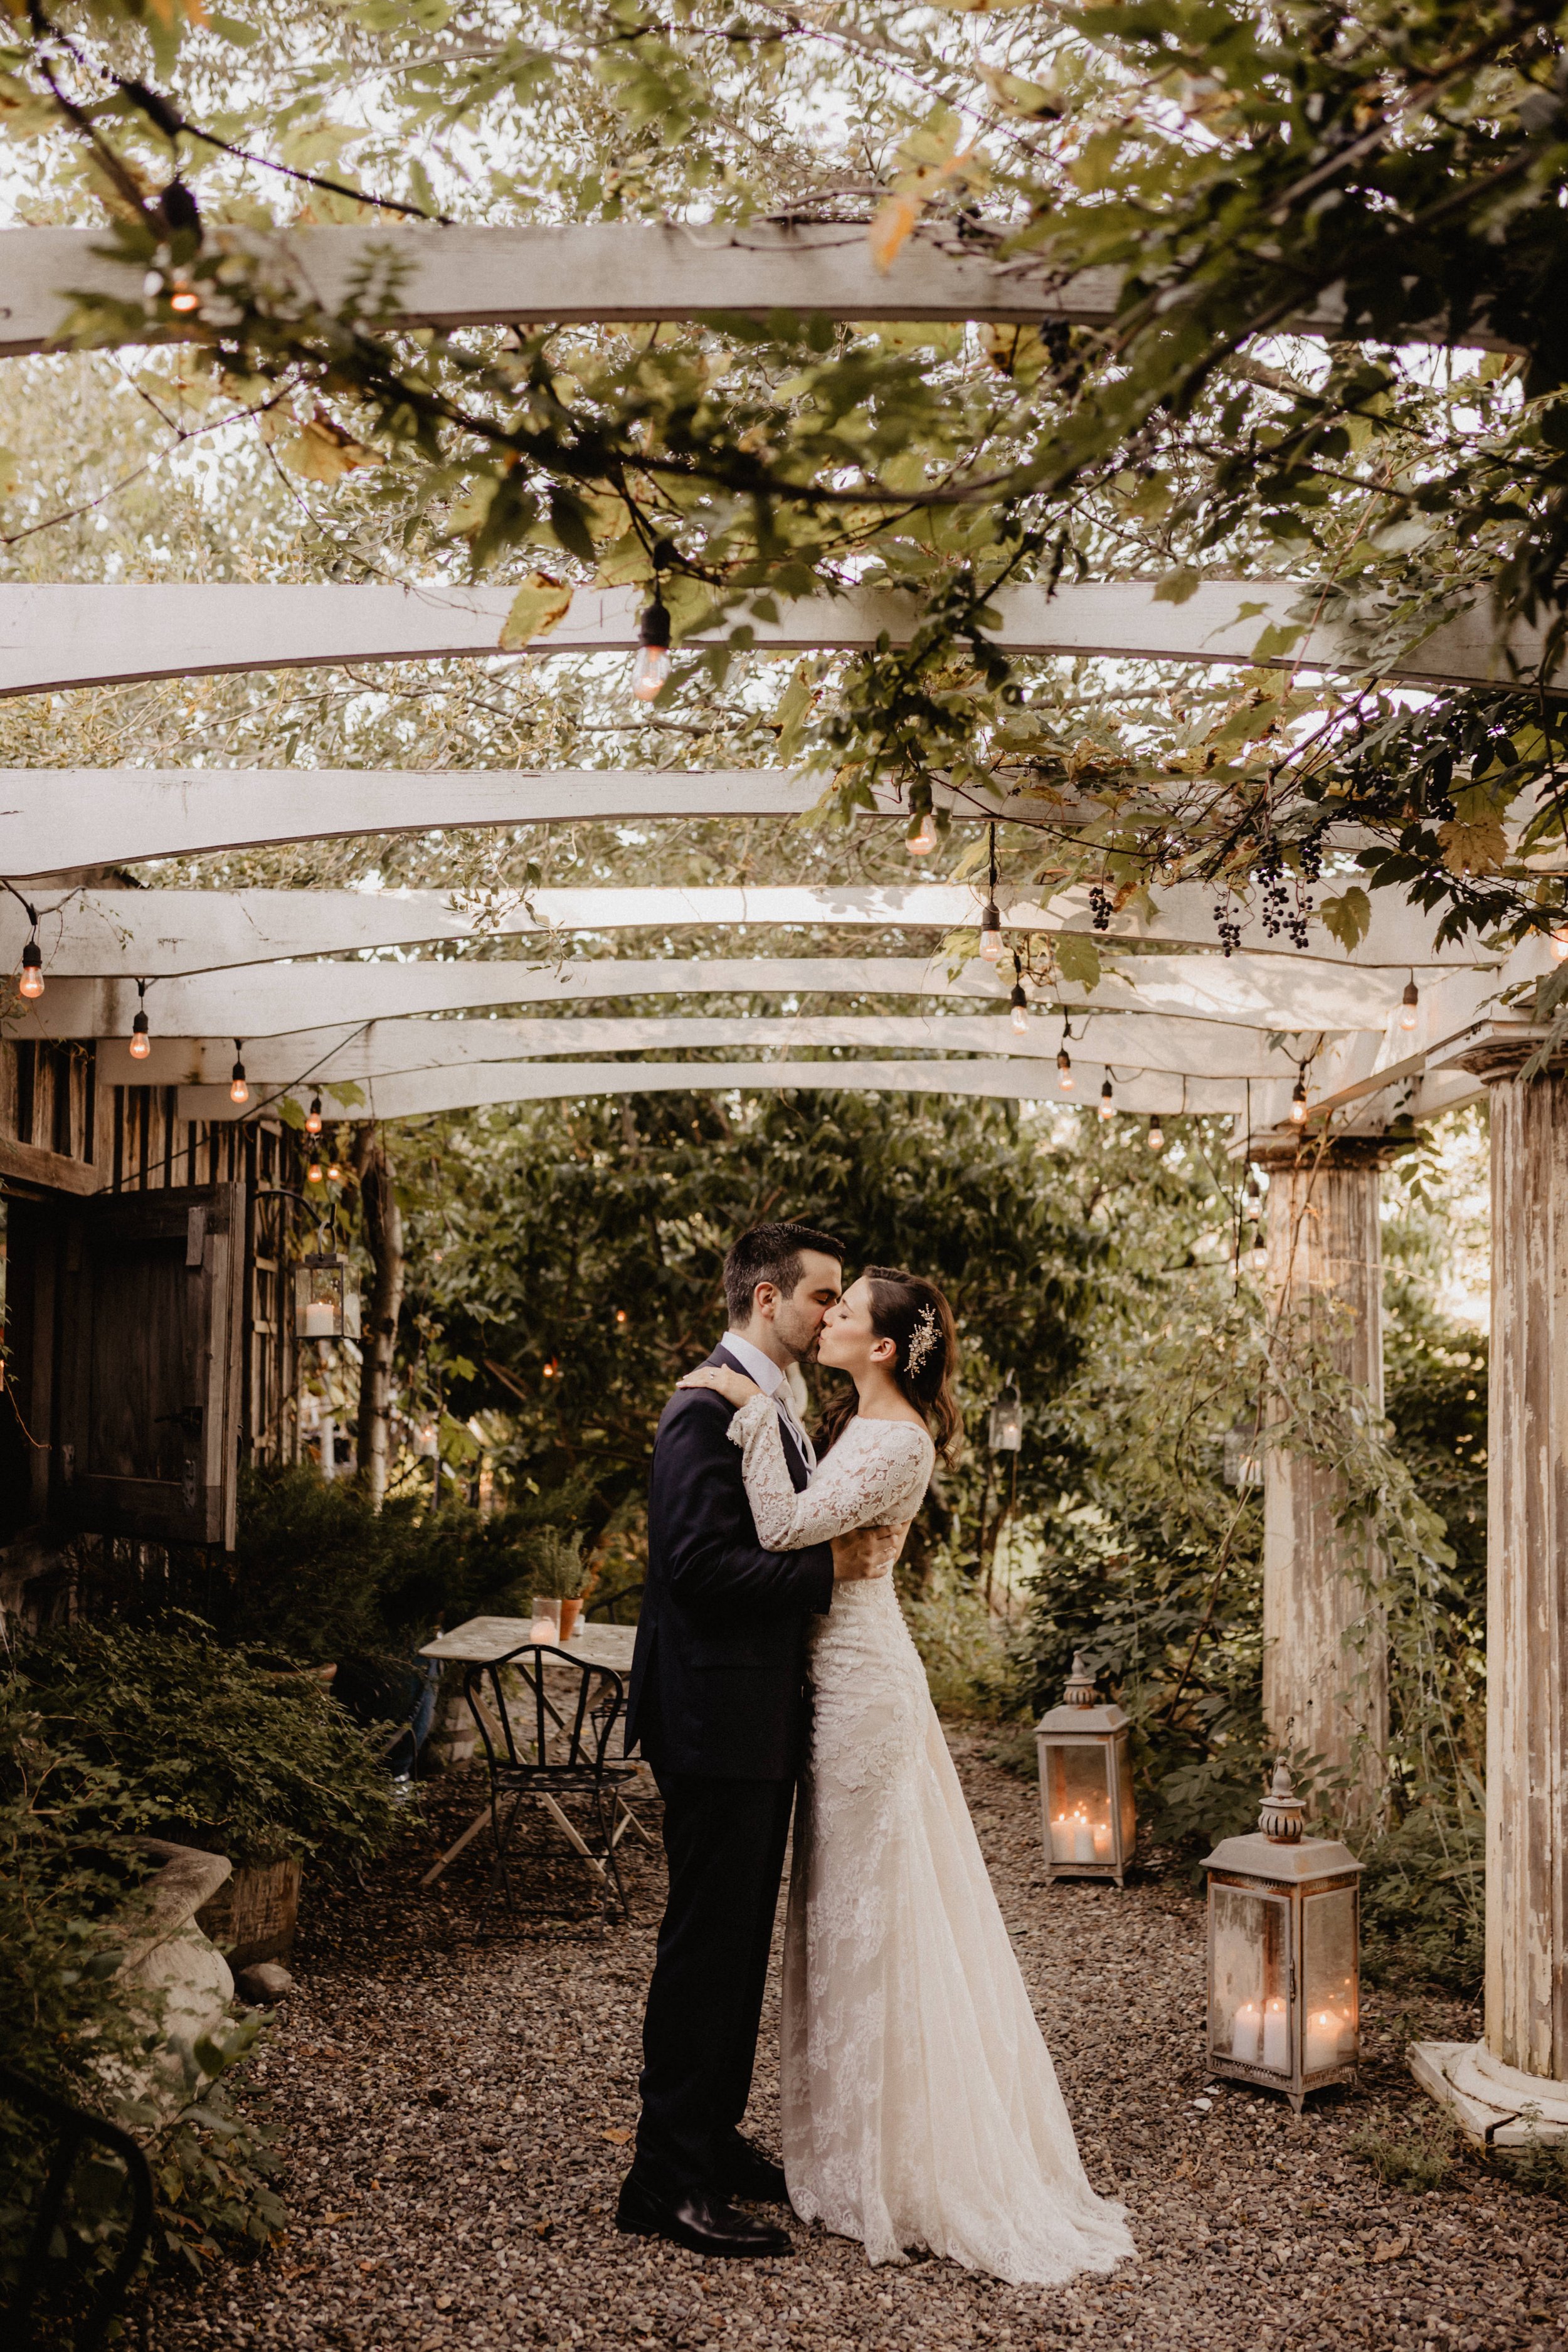
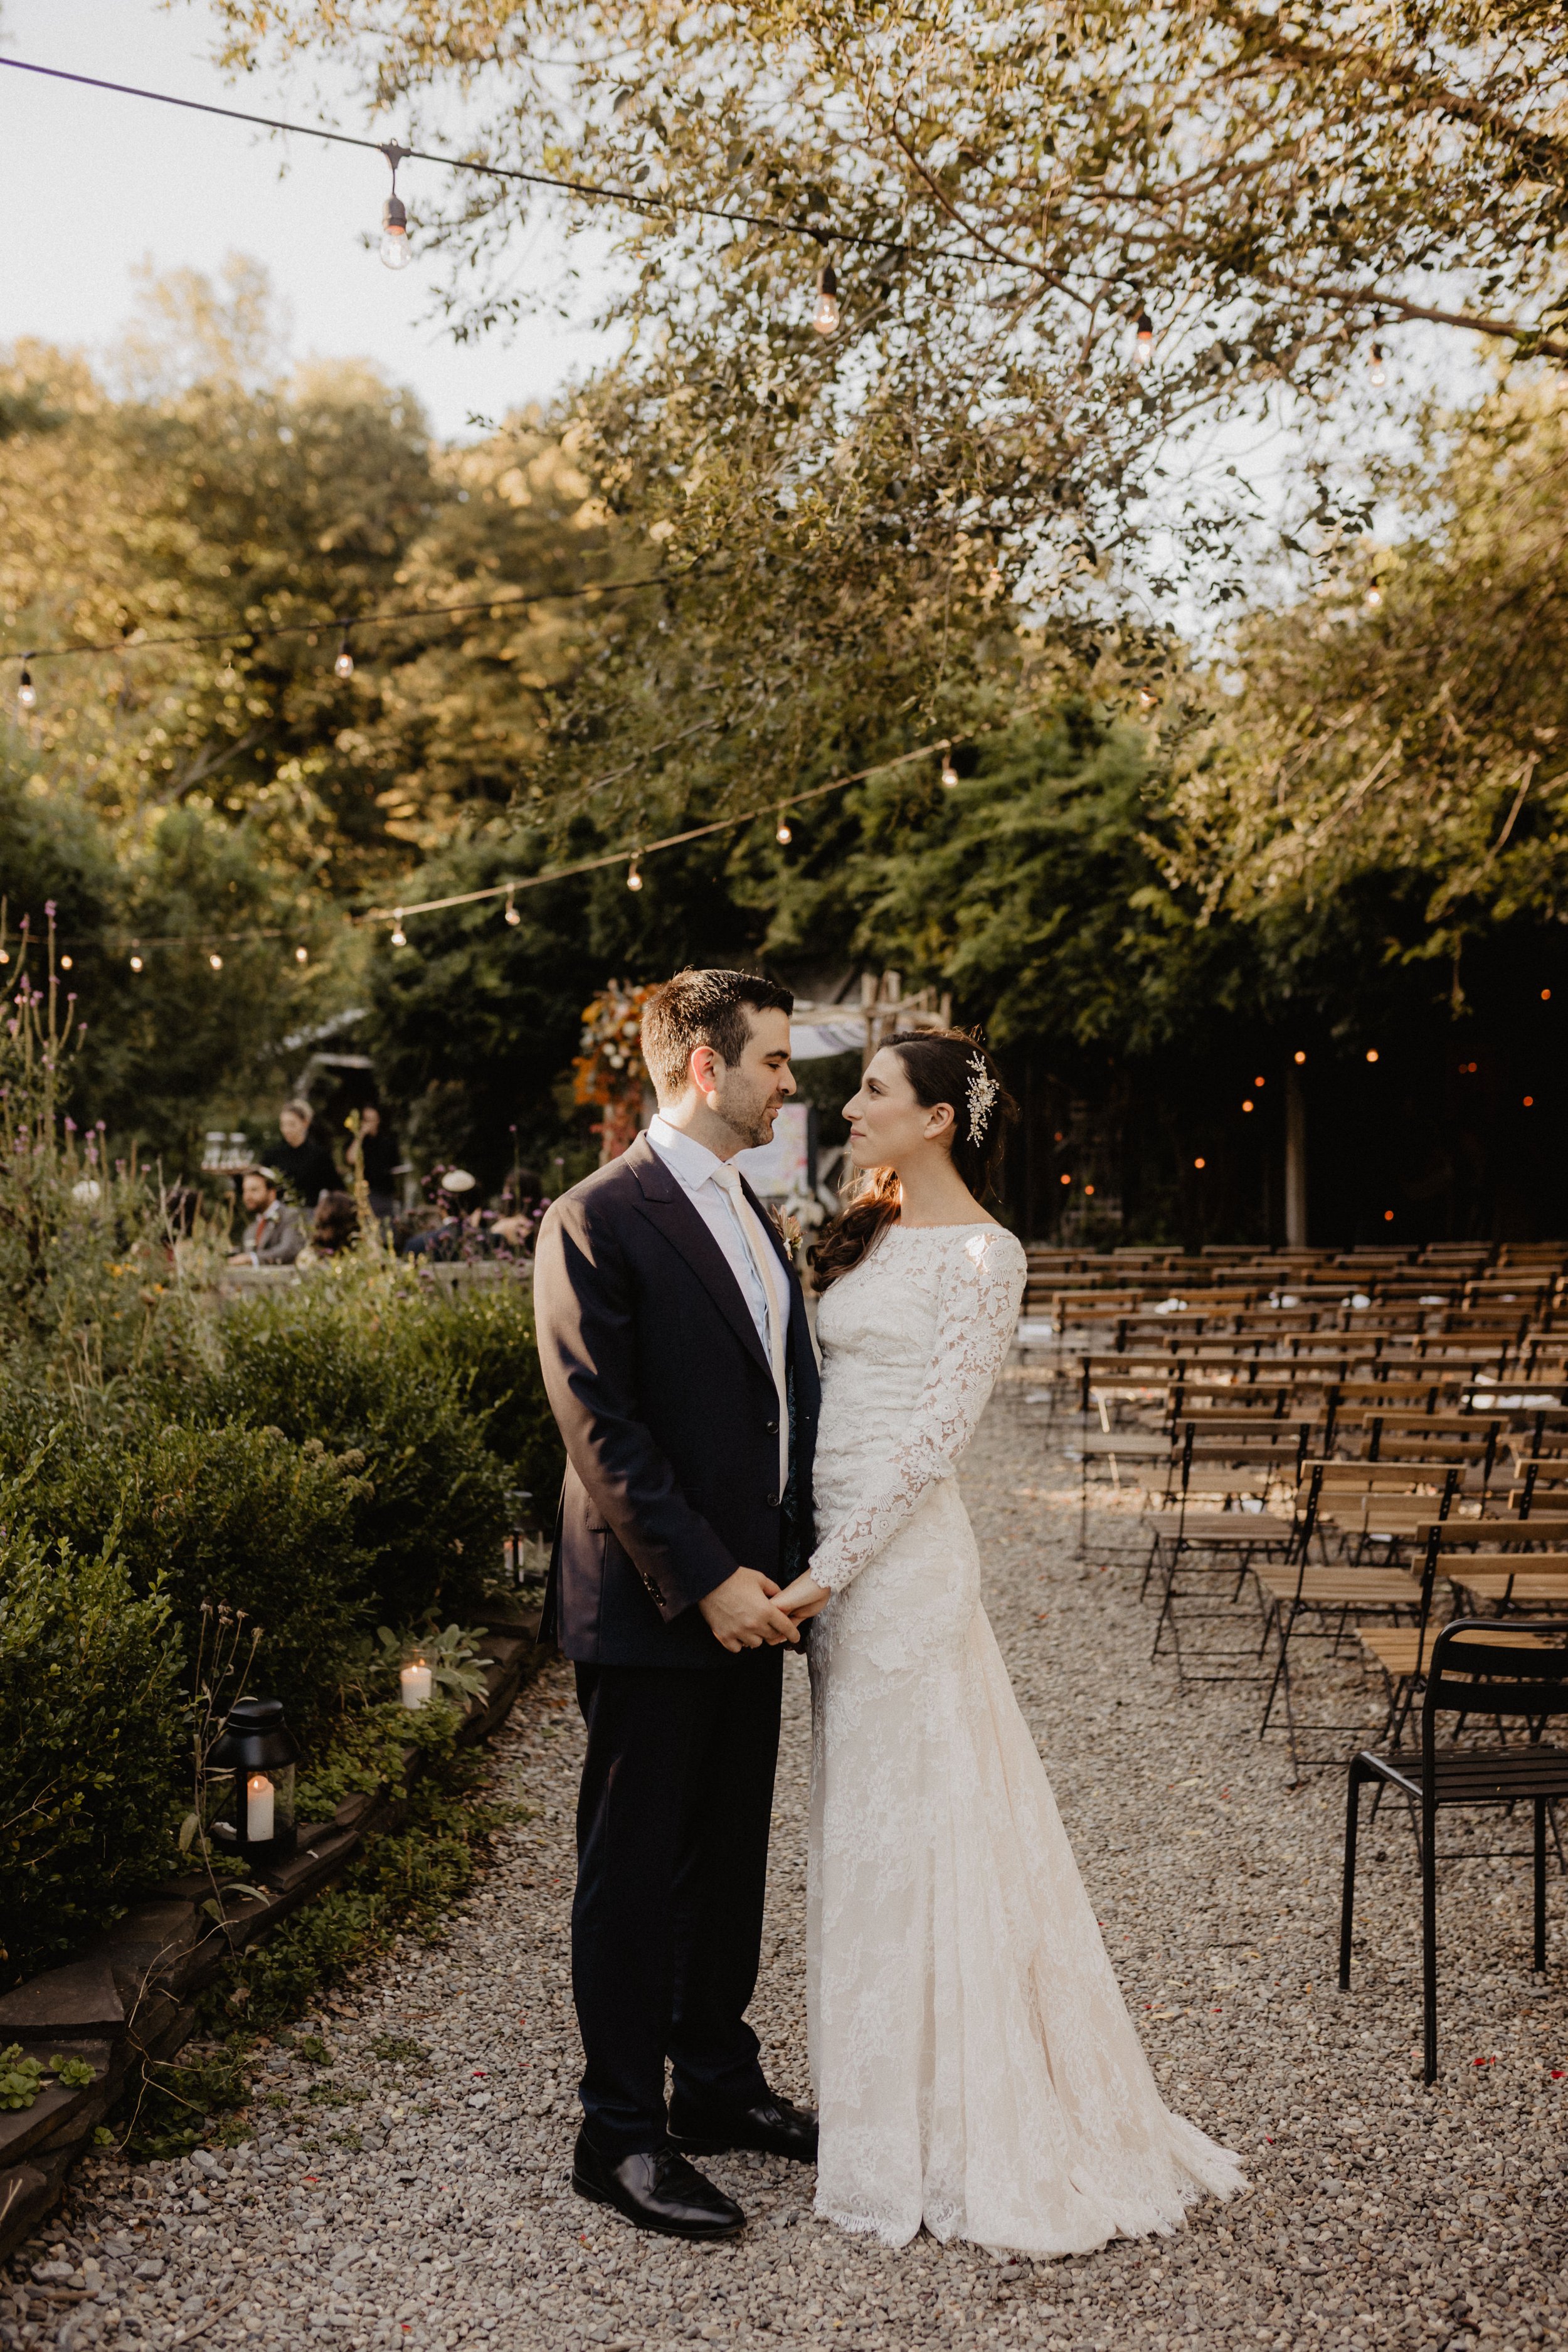
A perfect, fall, fairytale wedding at MnD Farms…

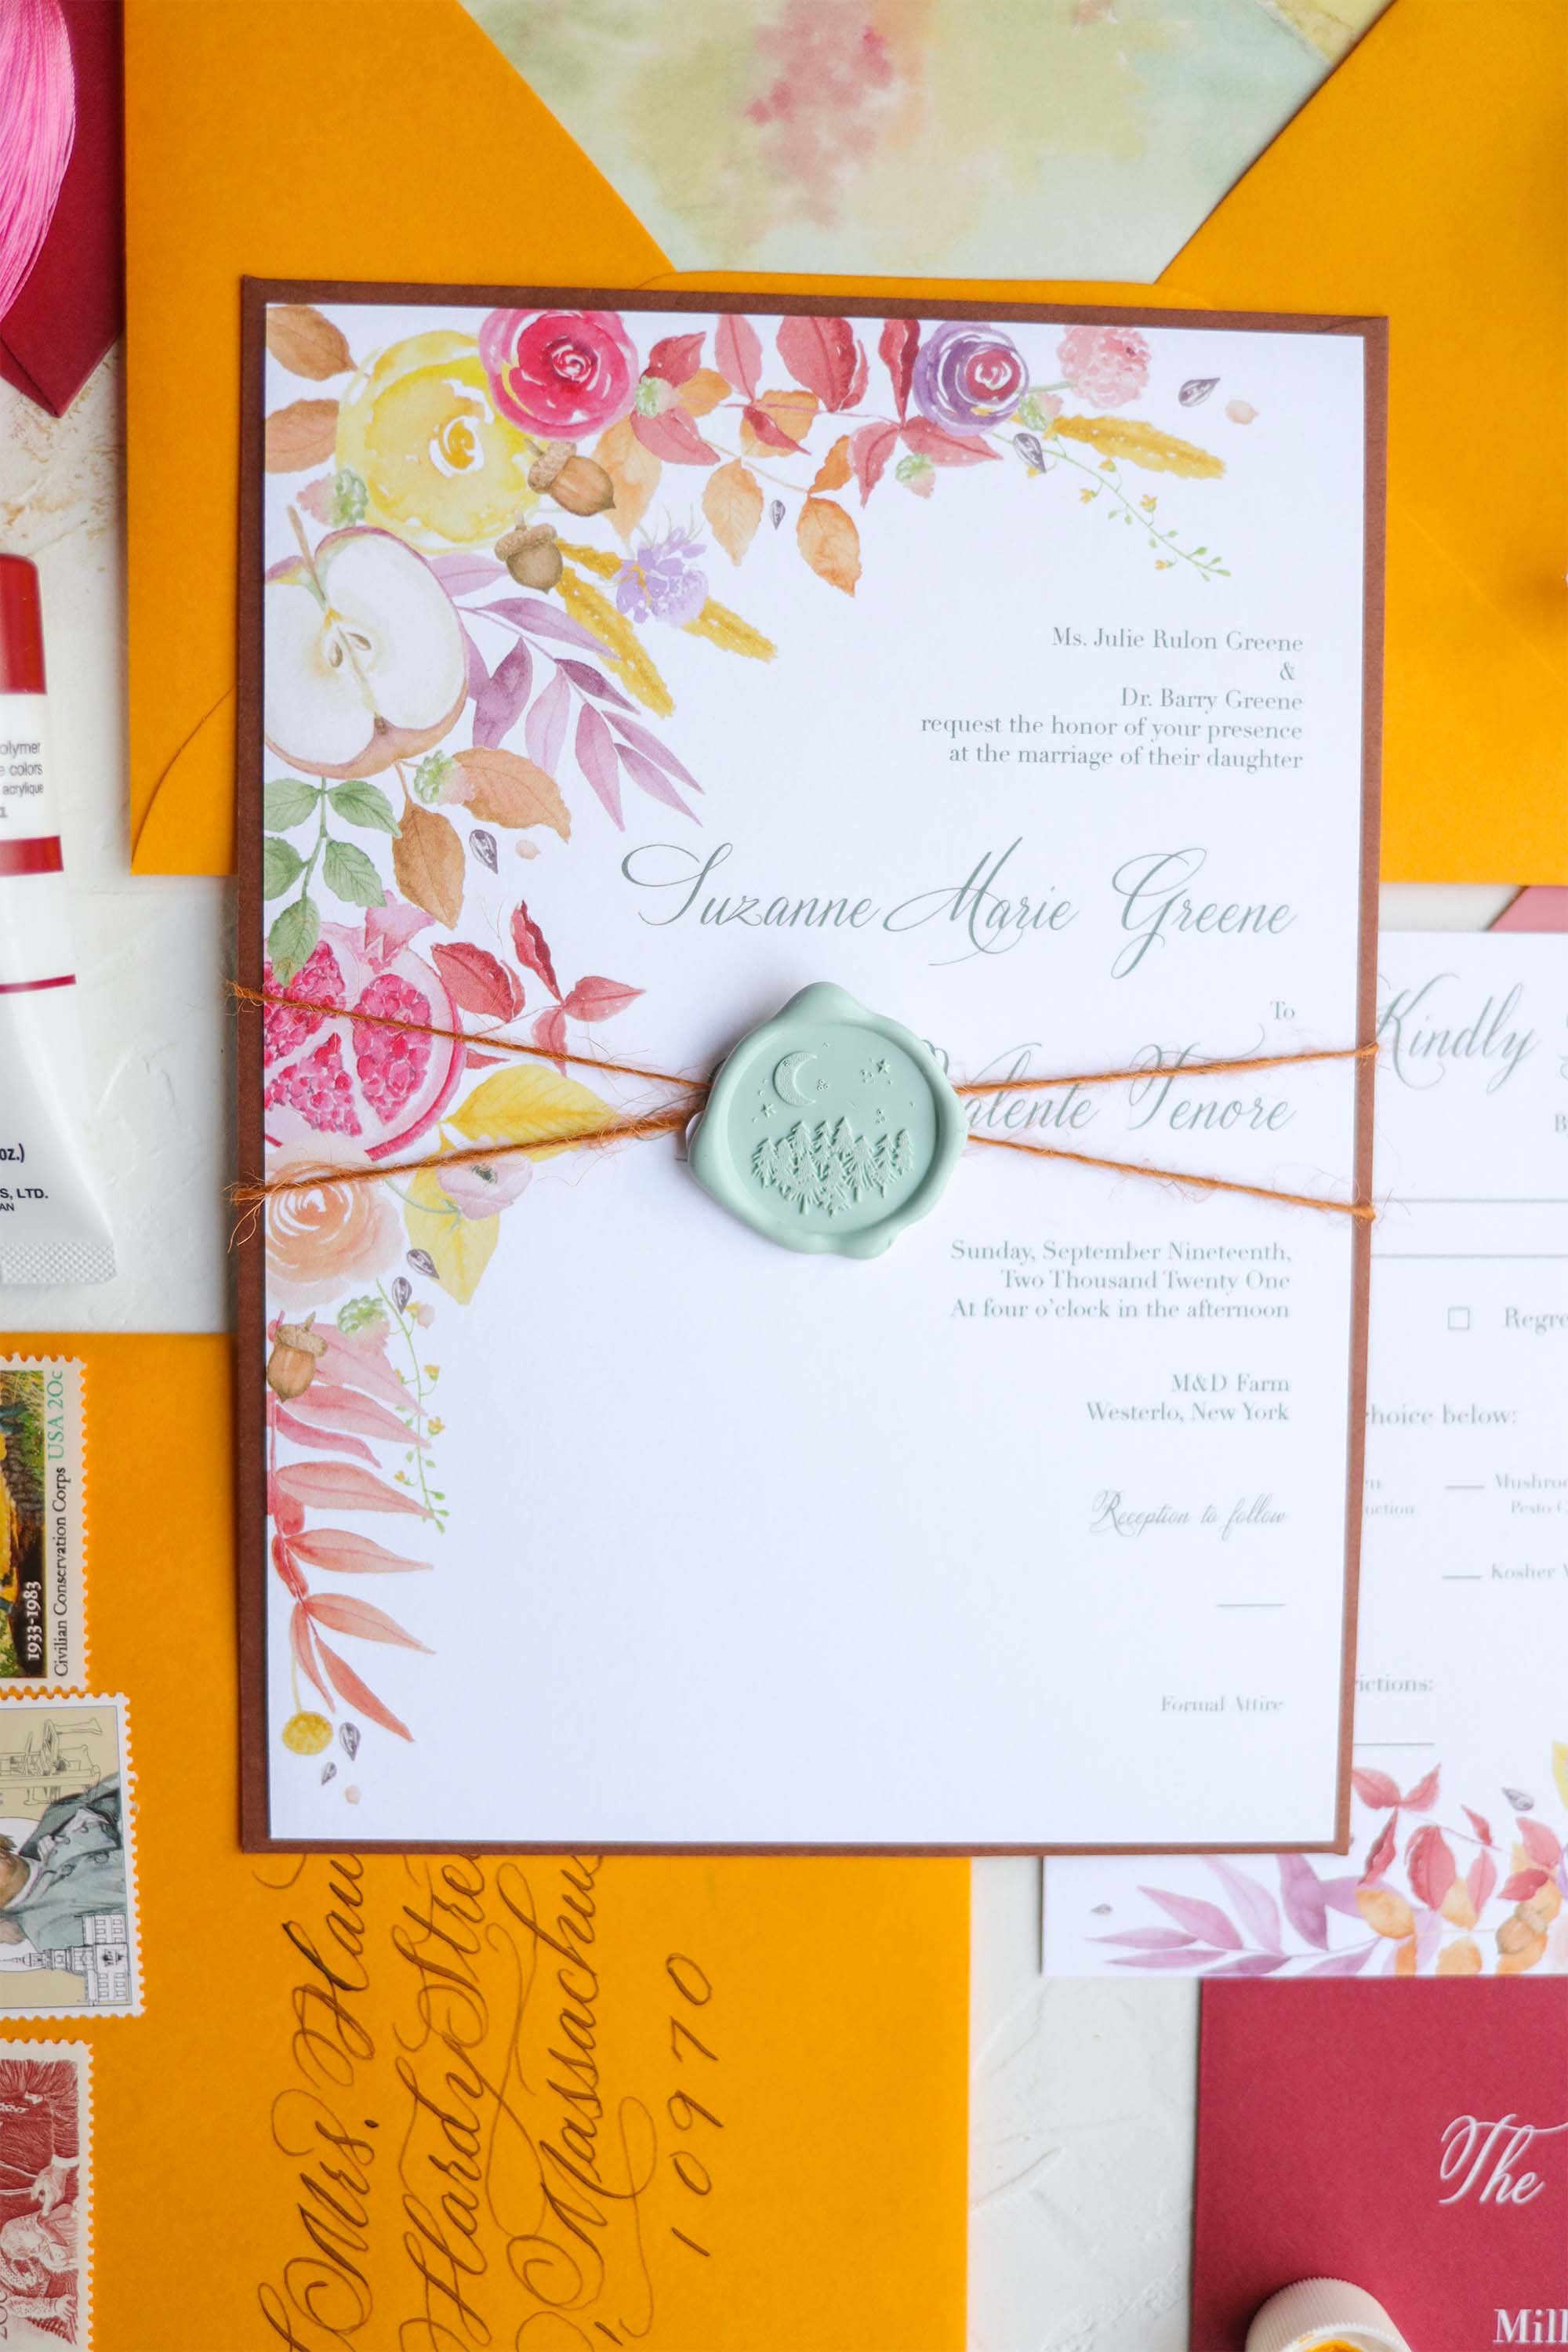
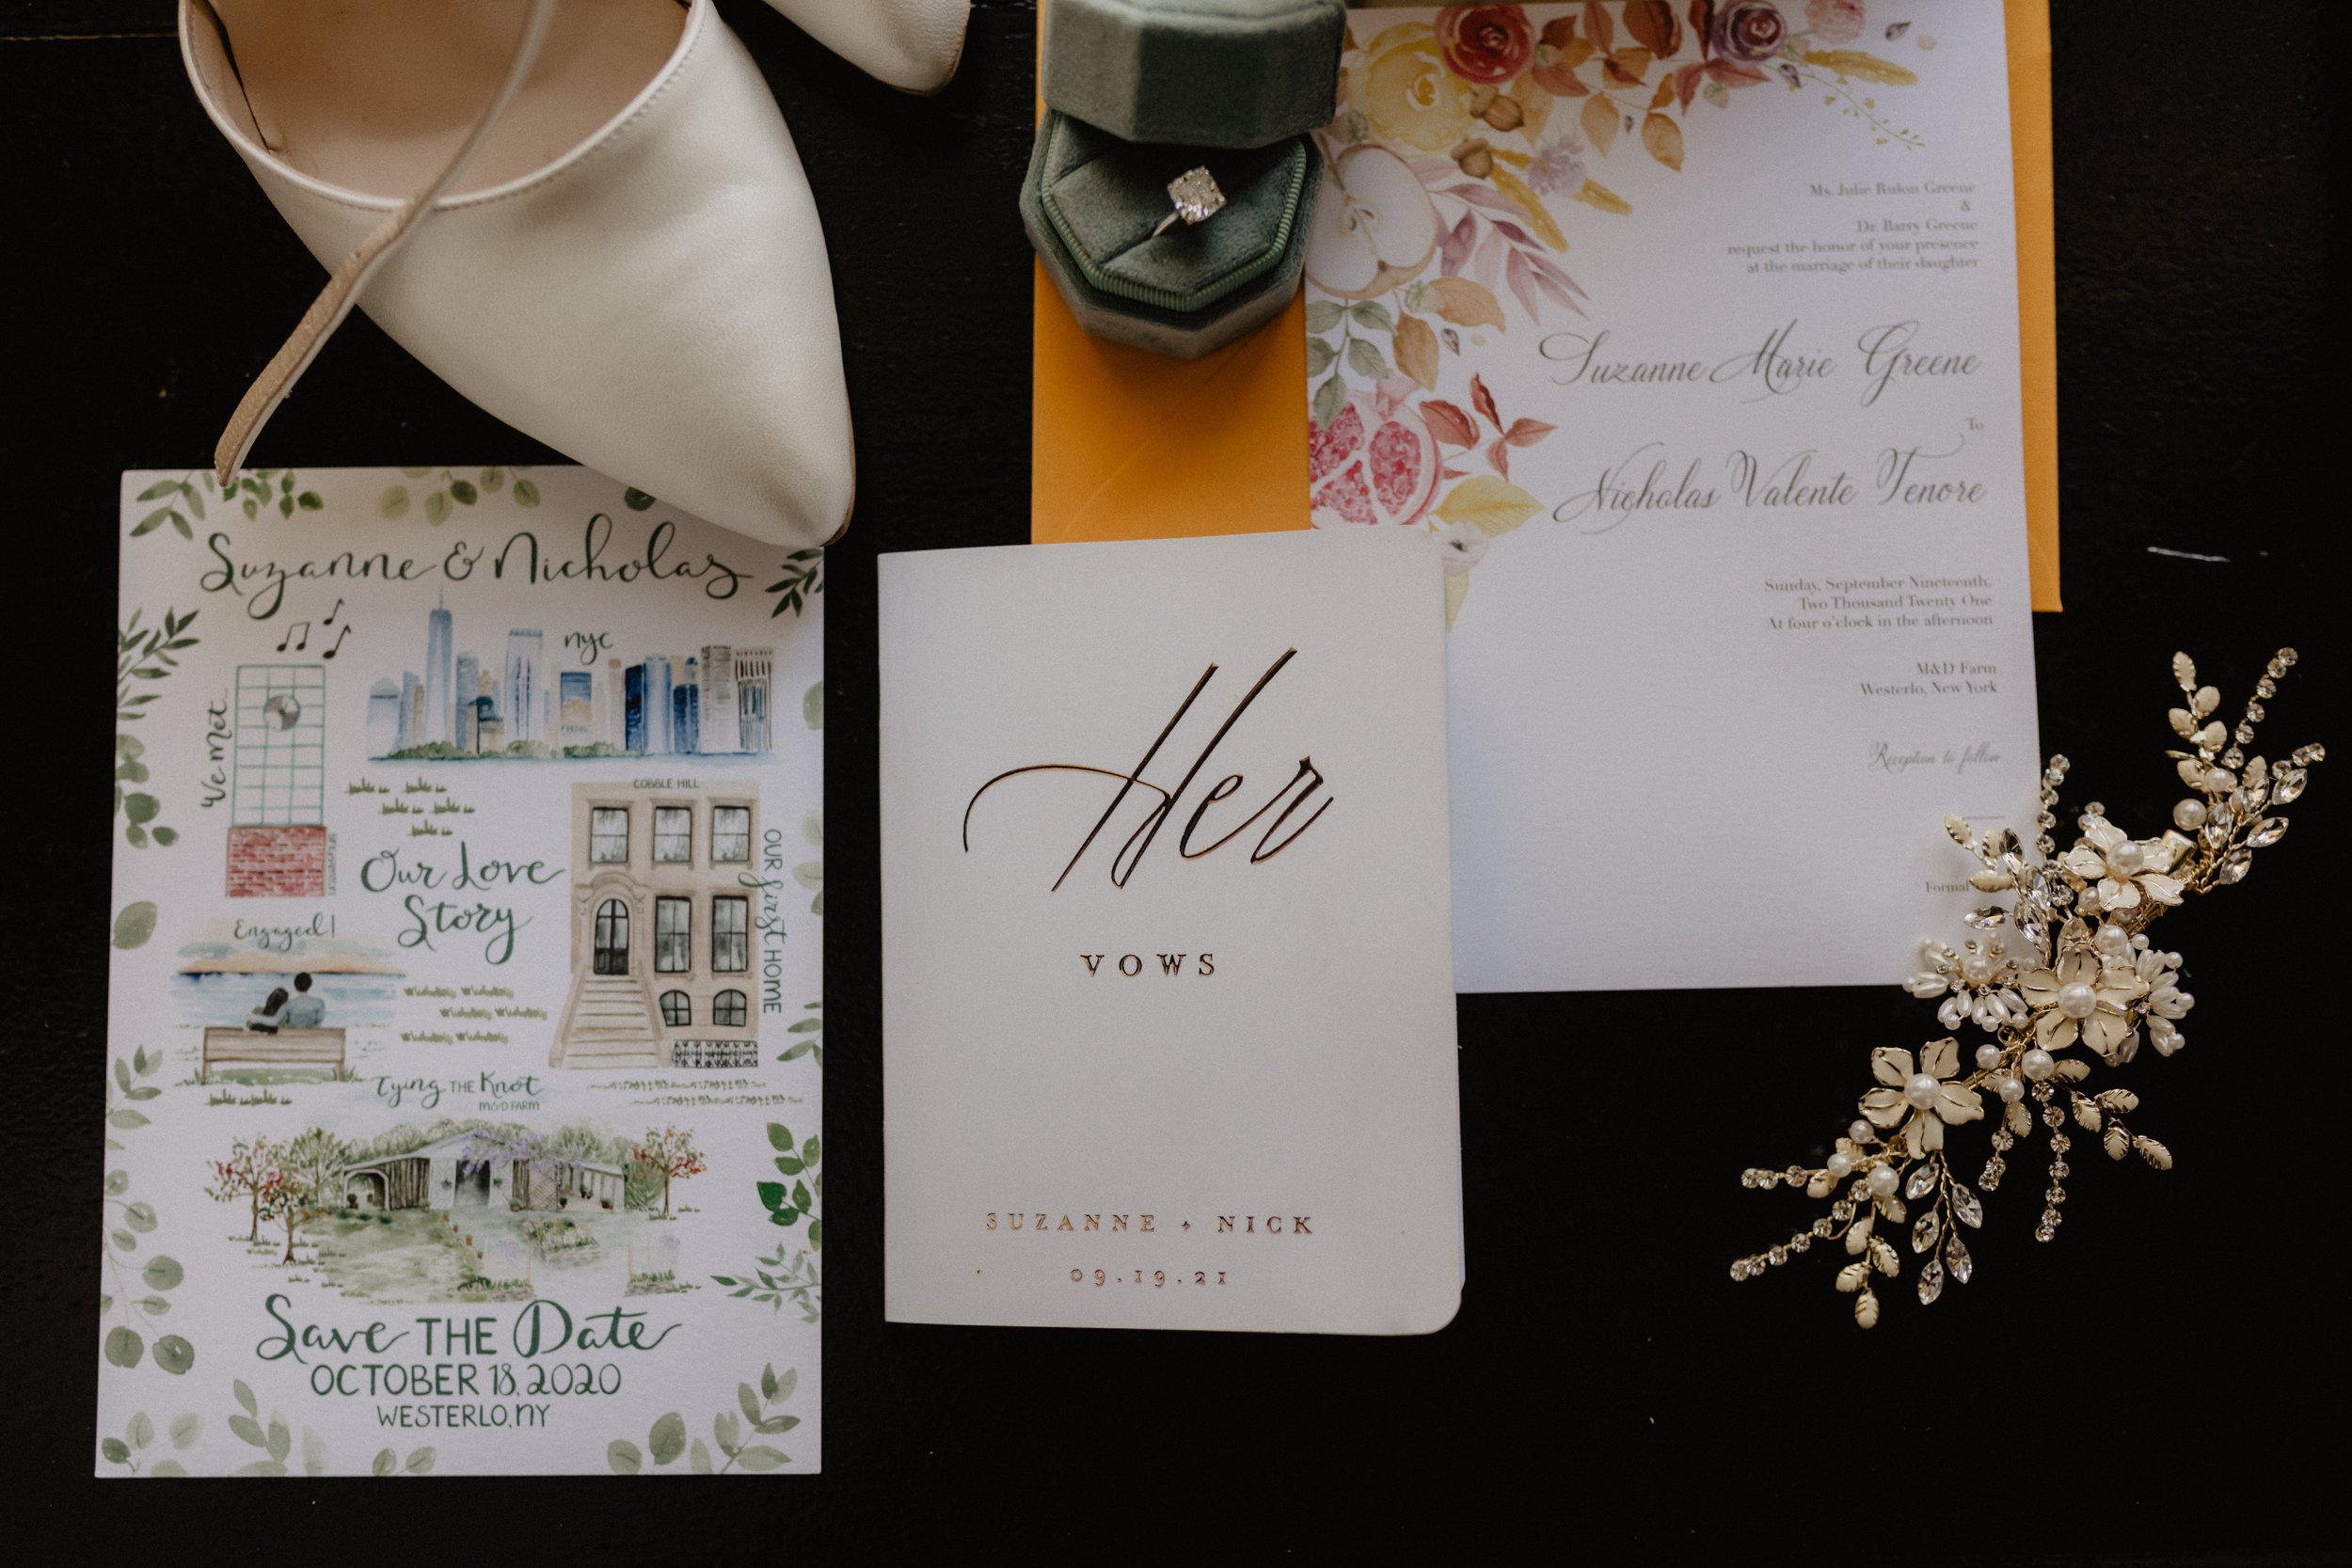
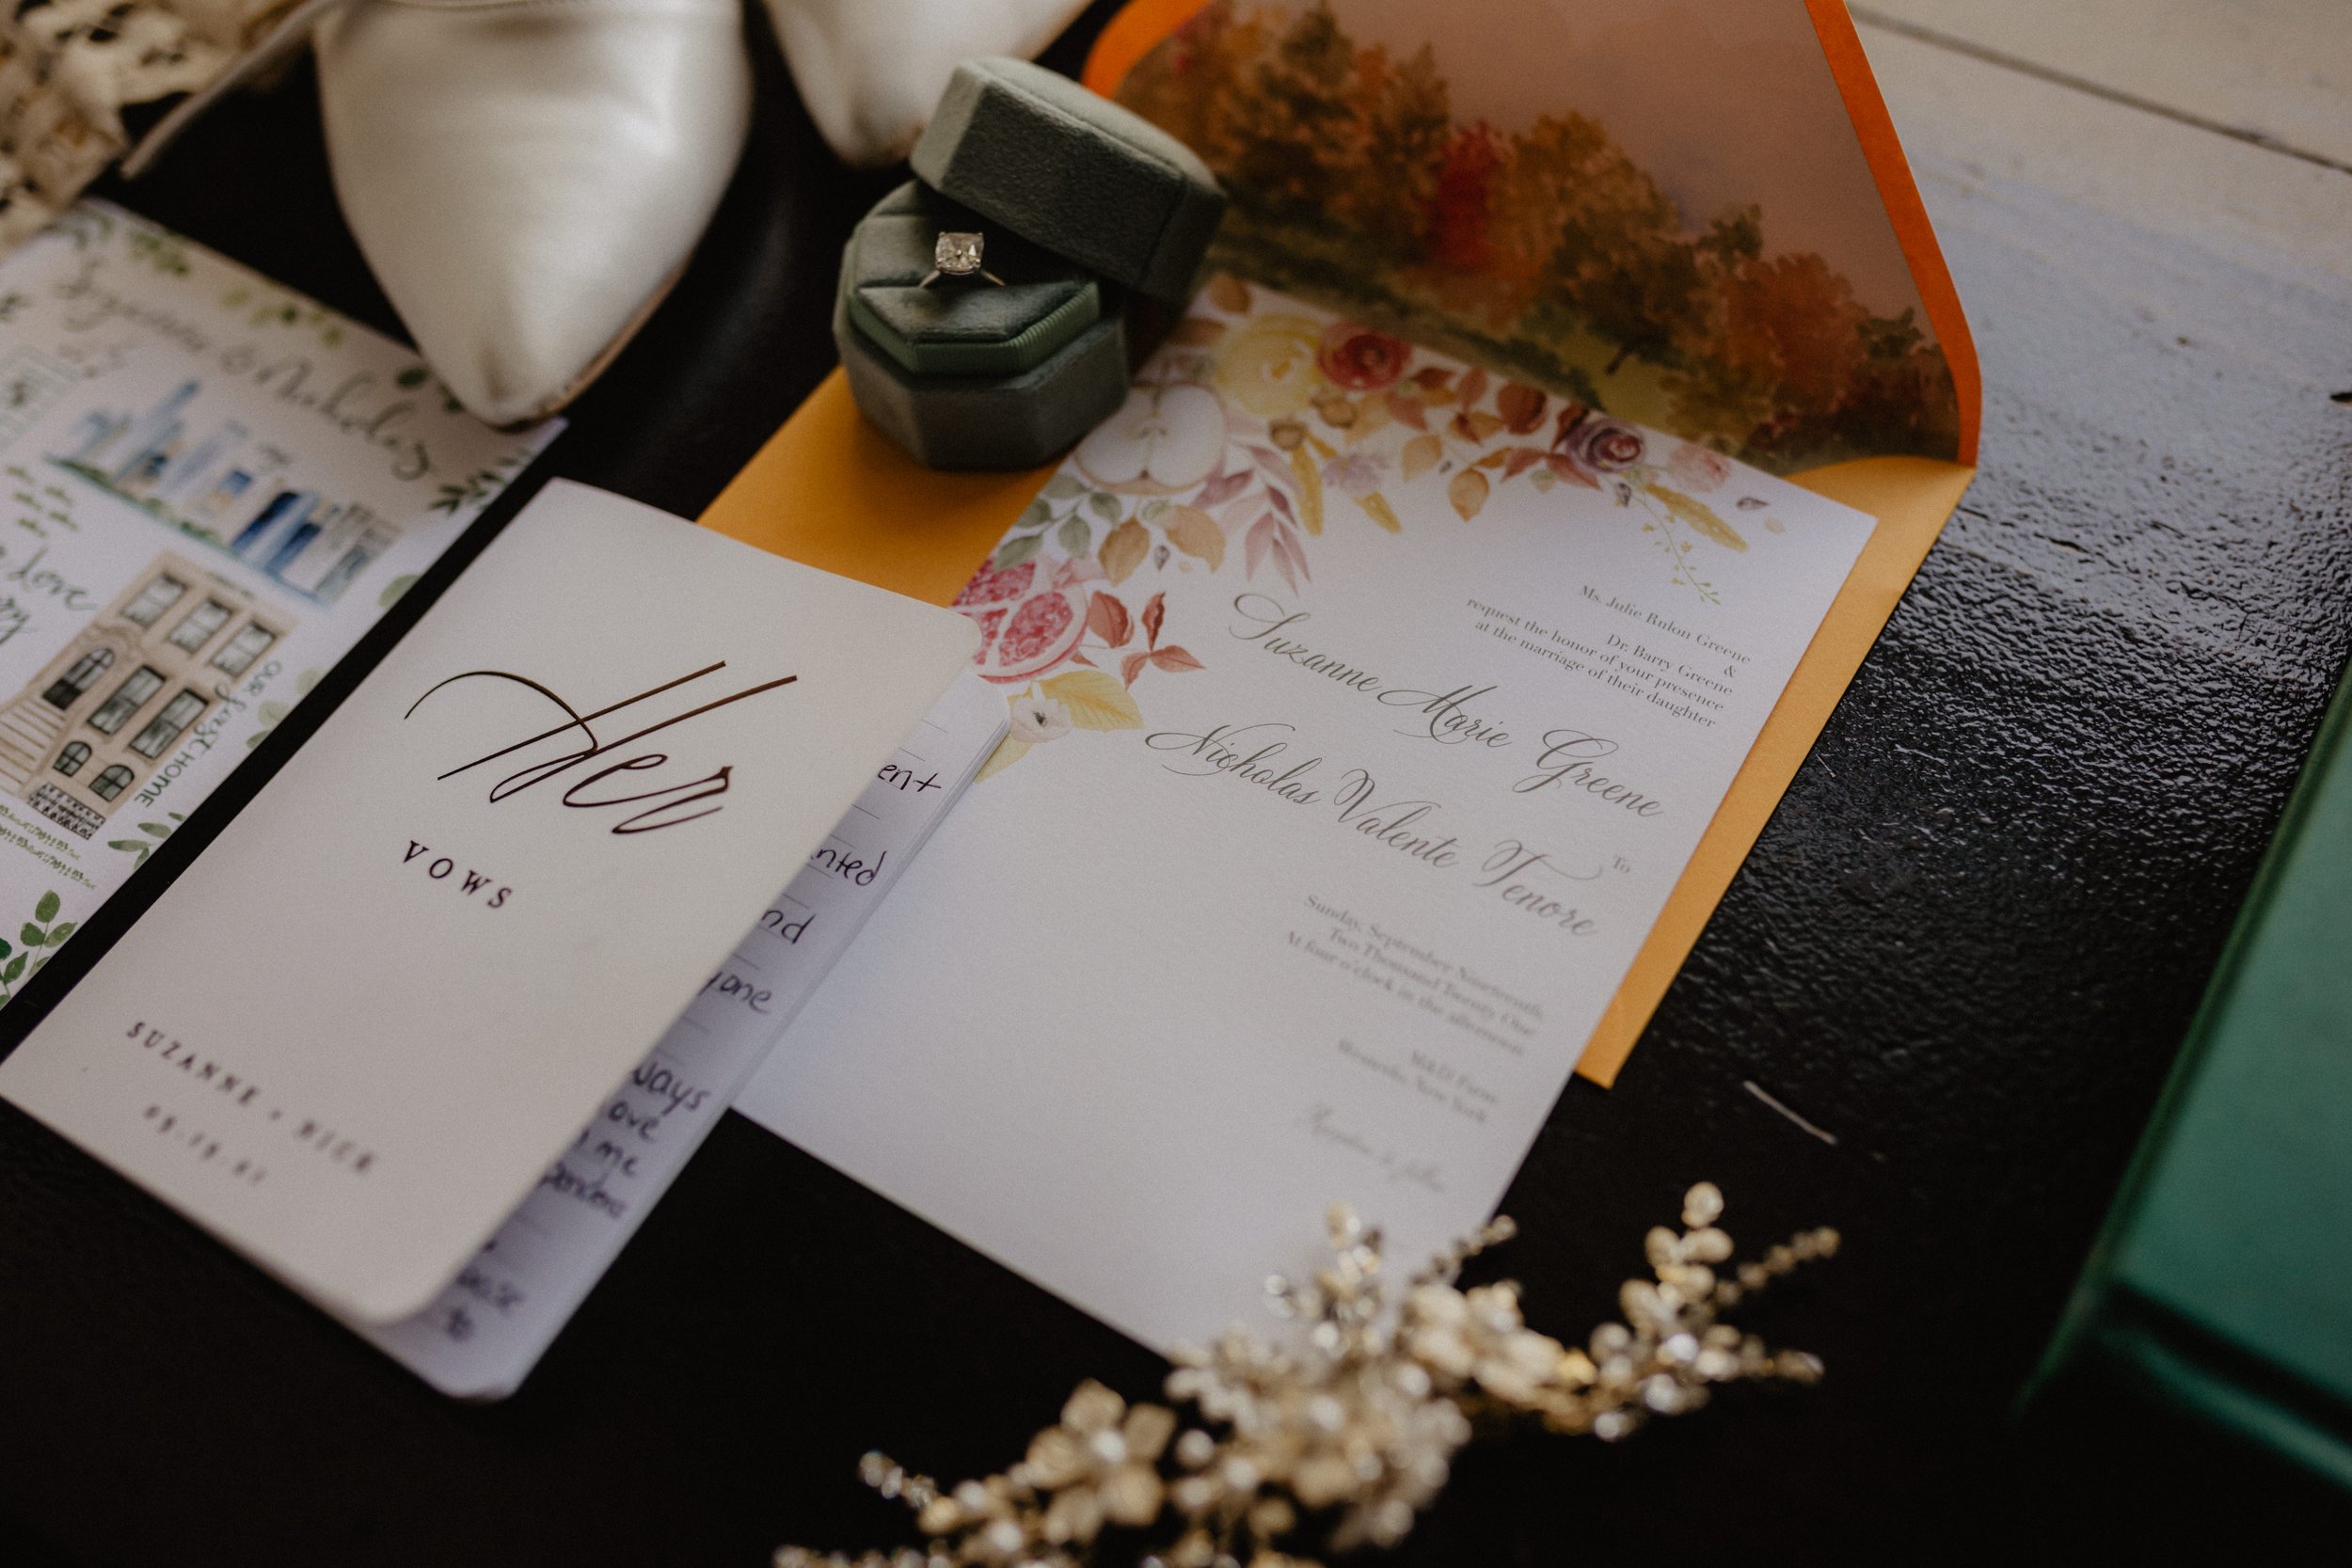
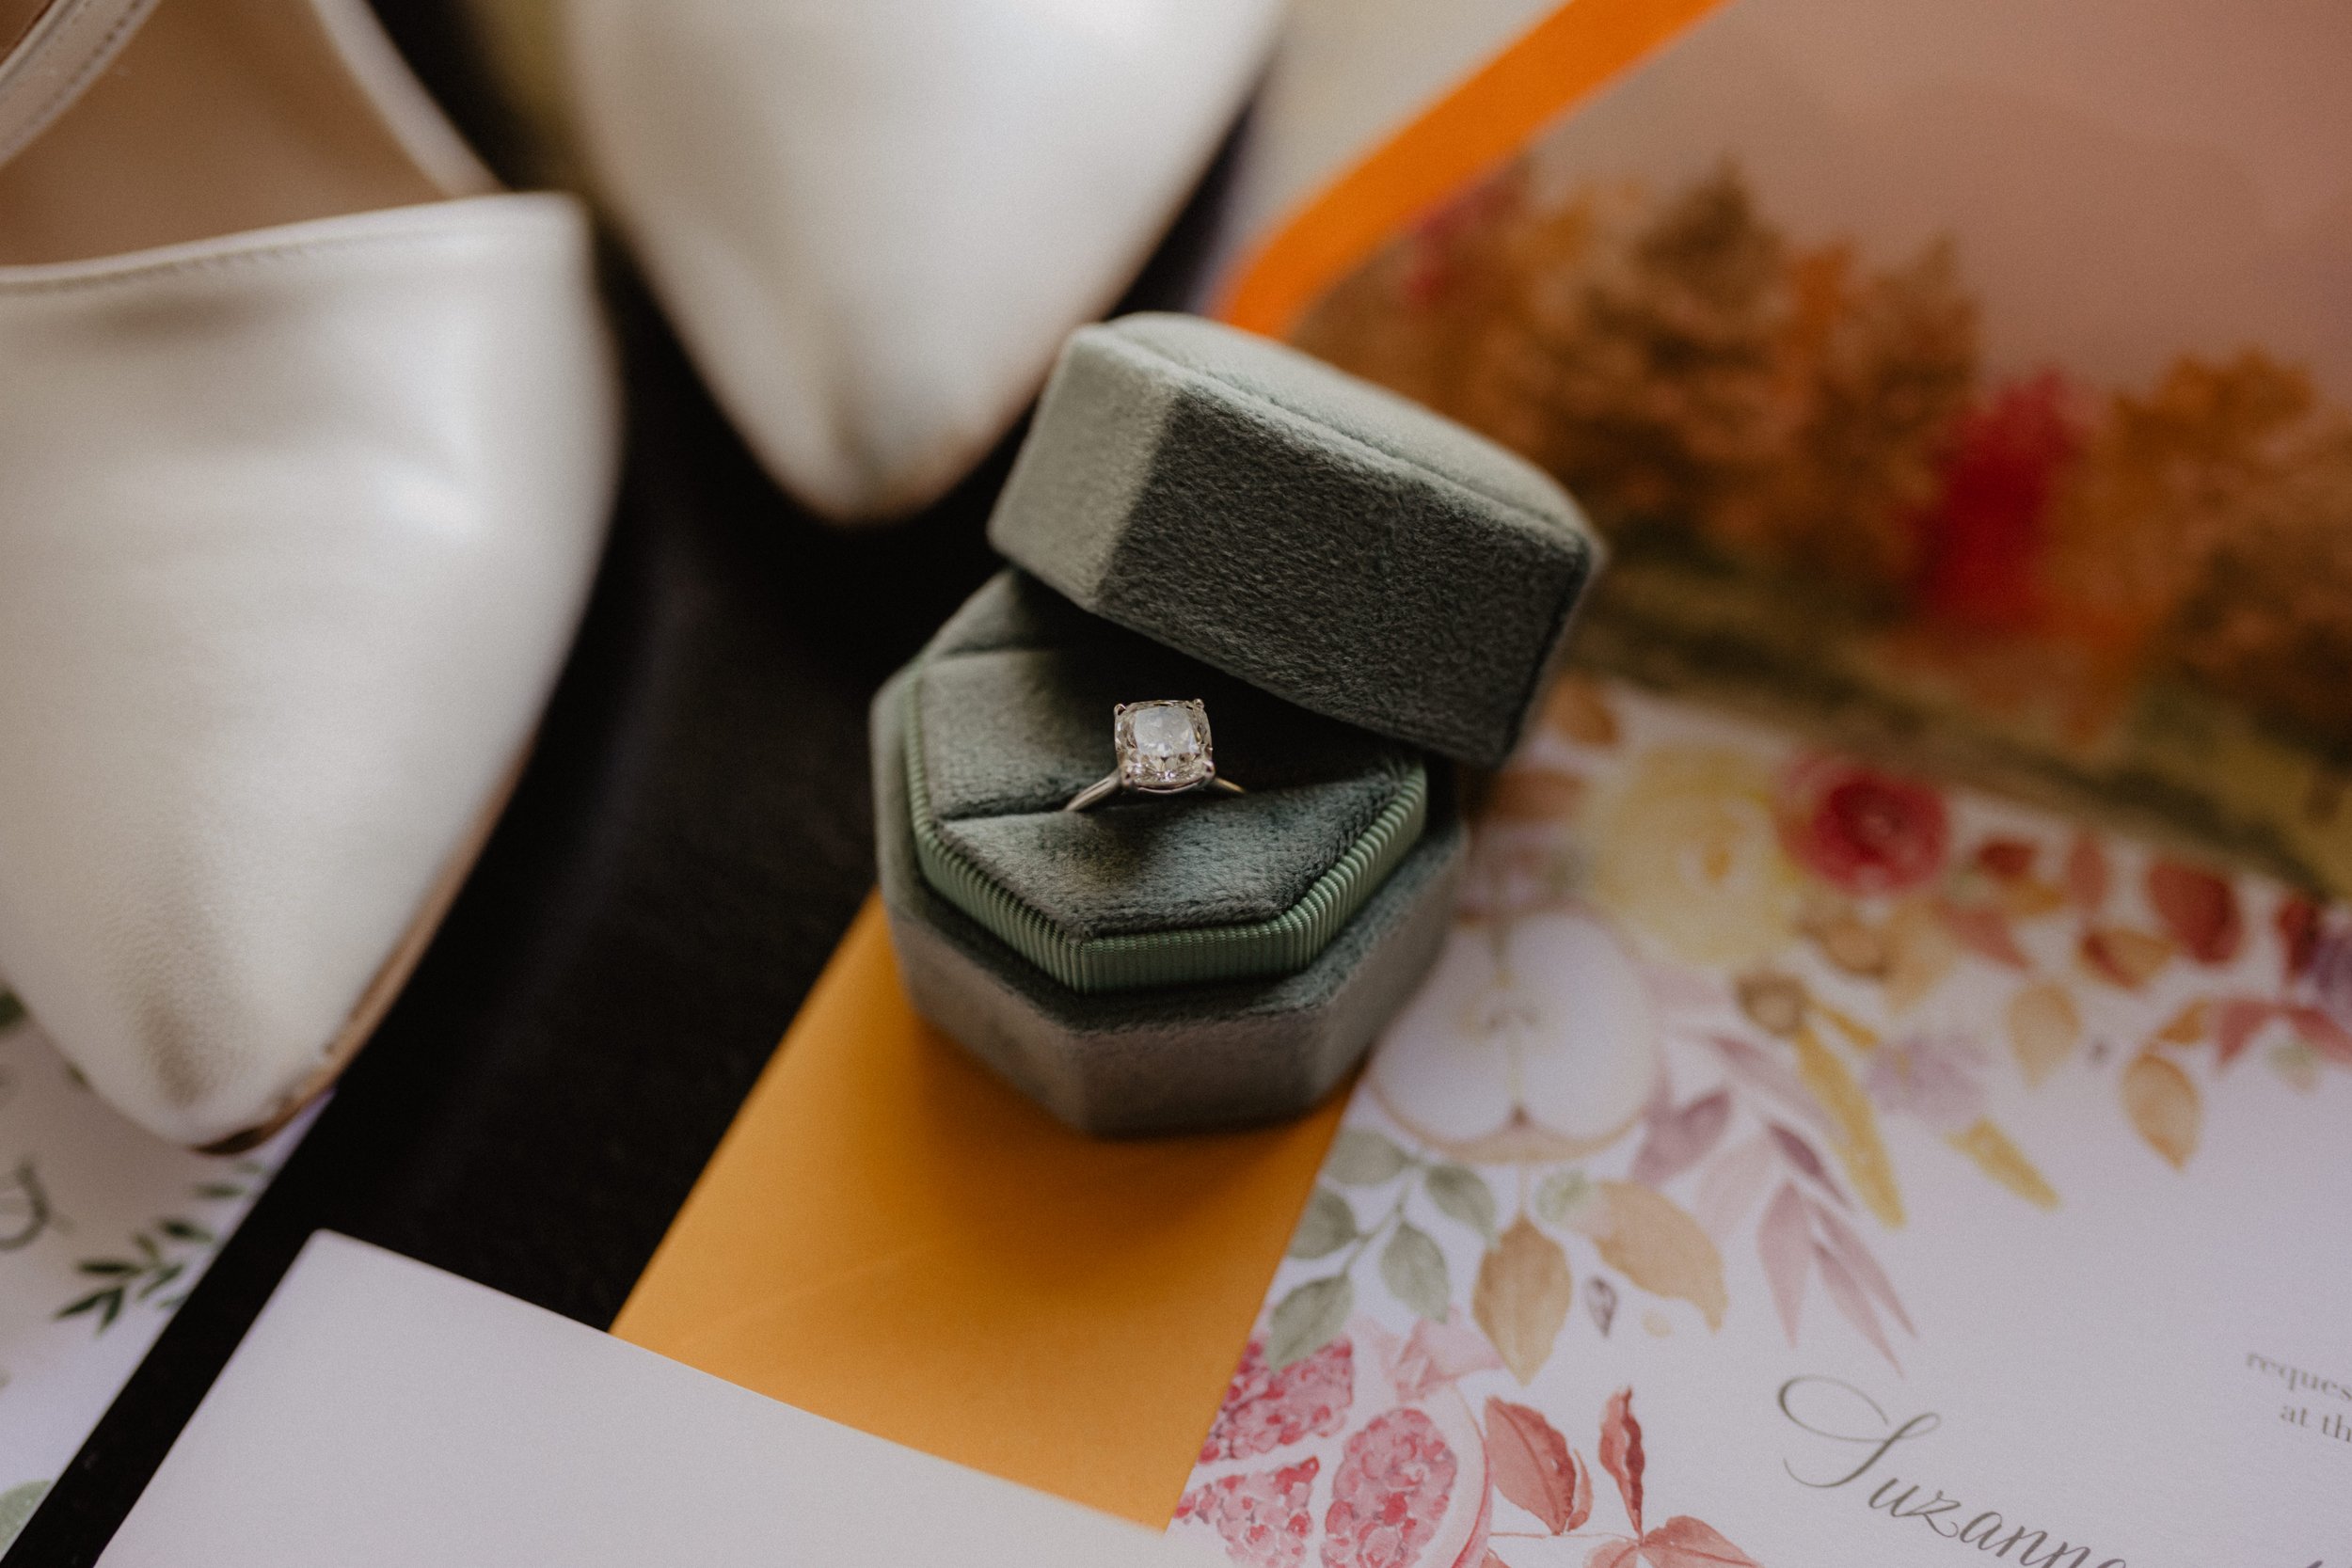
One of my favorite watercolor floral paintings to date. I absolutely adored bringing Suzanne + Nick’s stationery vision to life.
First up was a custom love story illustration for their save the date. This timeless piece is the best introduction to all your guests. Some of them know your story but plenty don’t or at least they don’t know all the details! What’s more fun than giving them a picture book story to enjoy as they anticipate your big day!
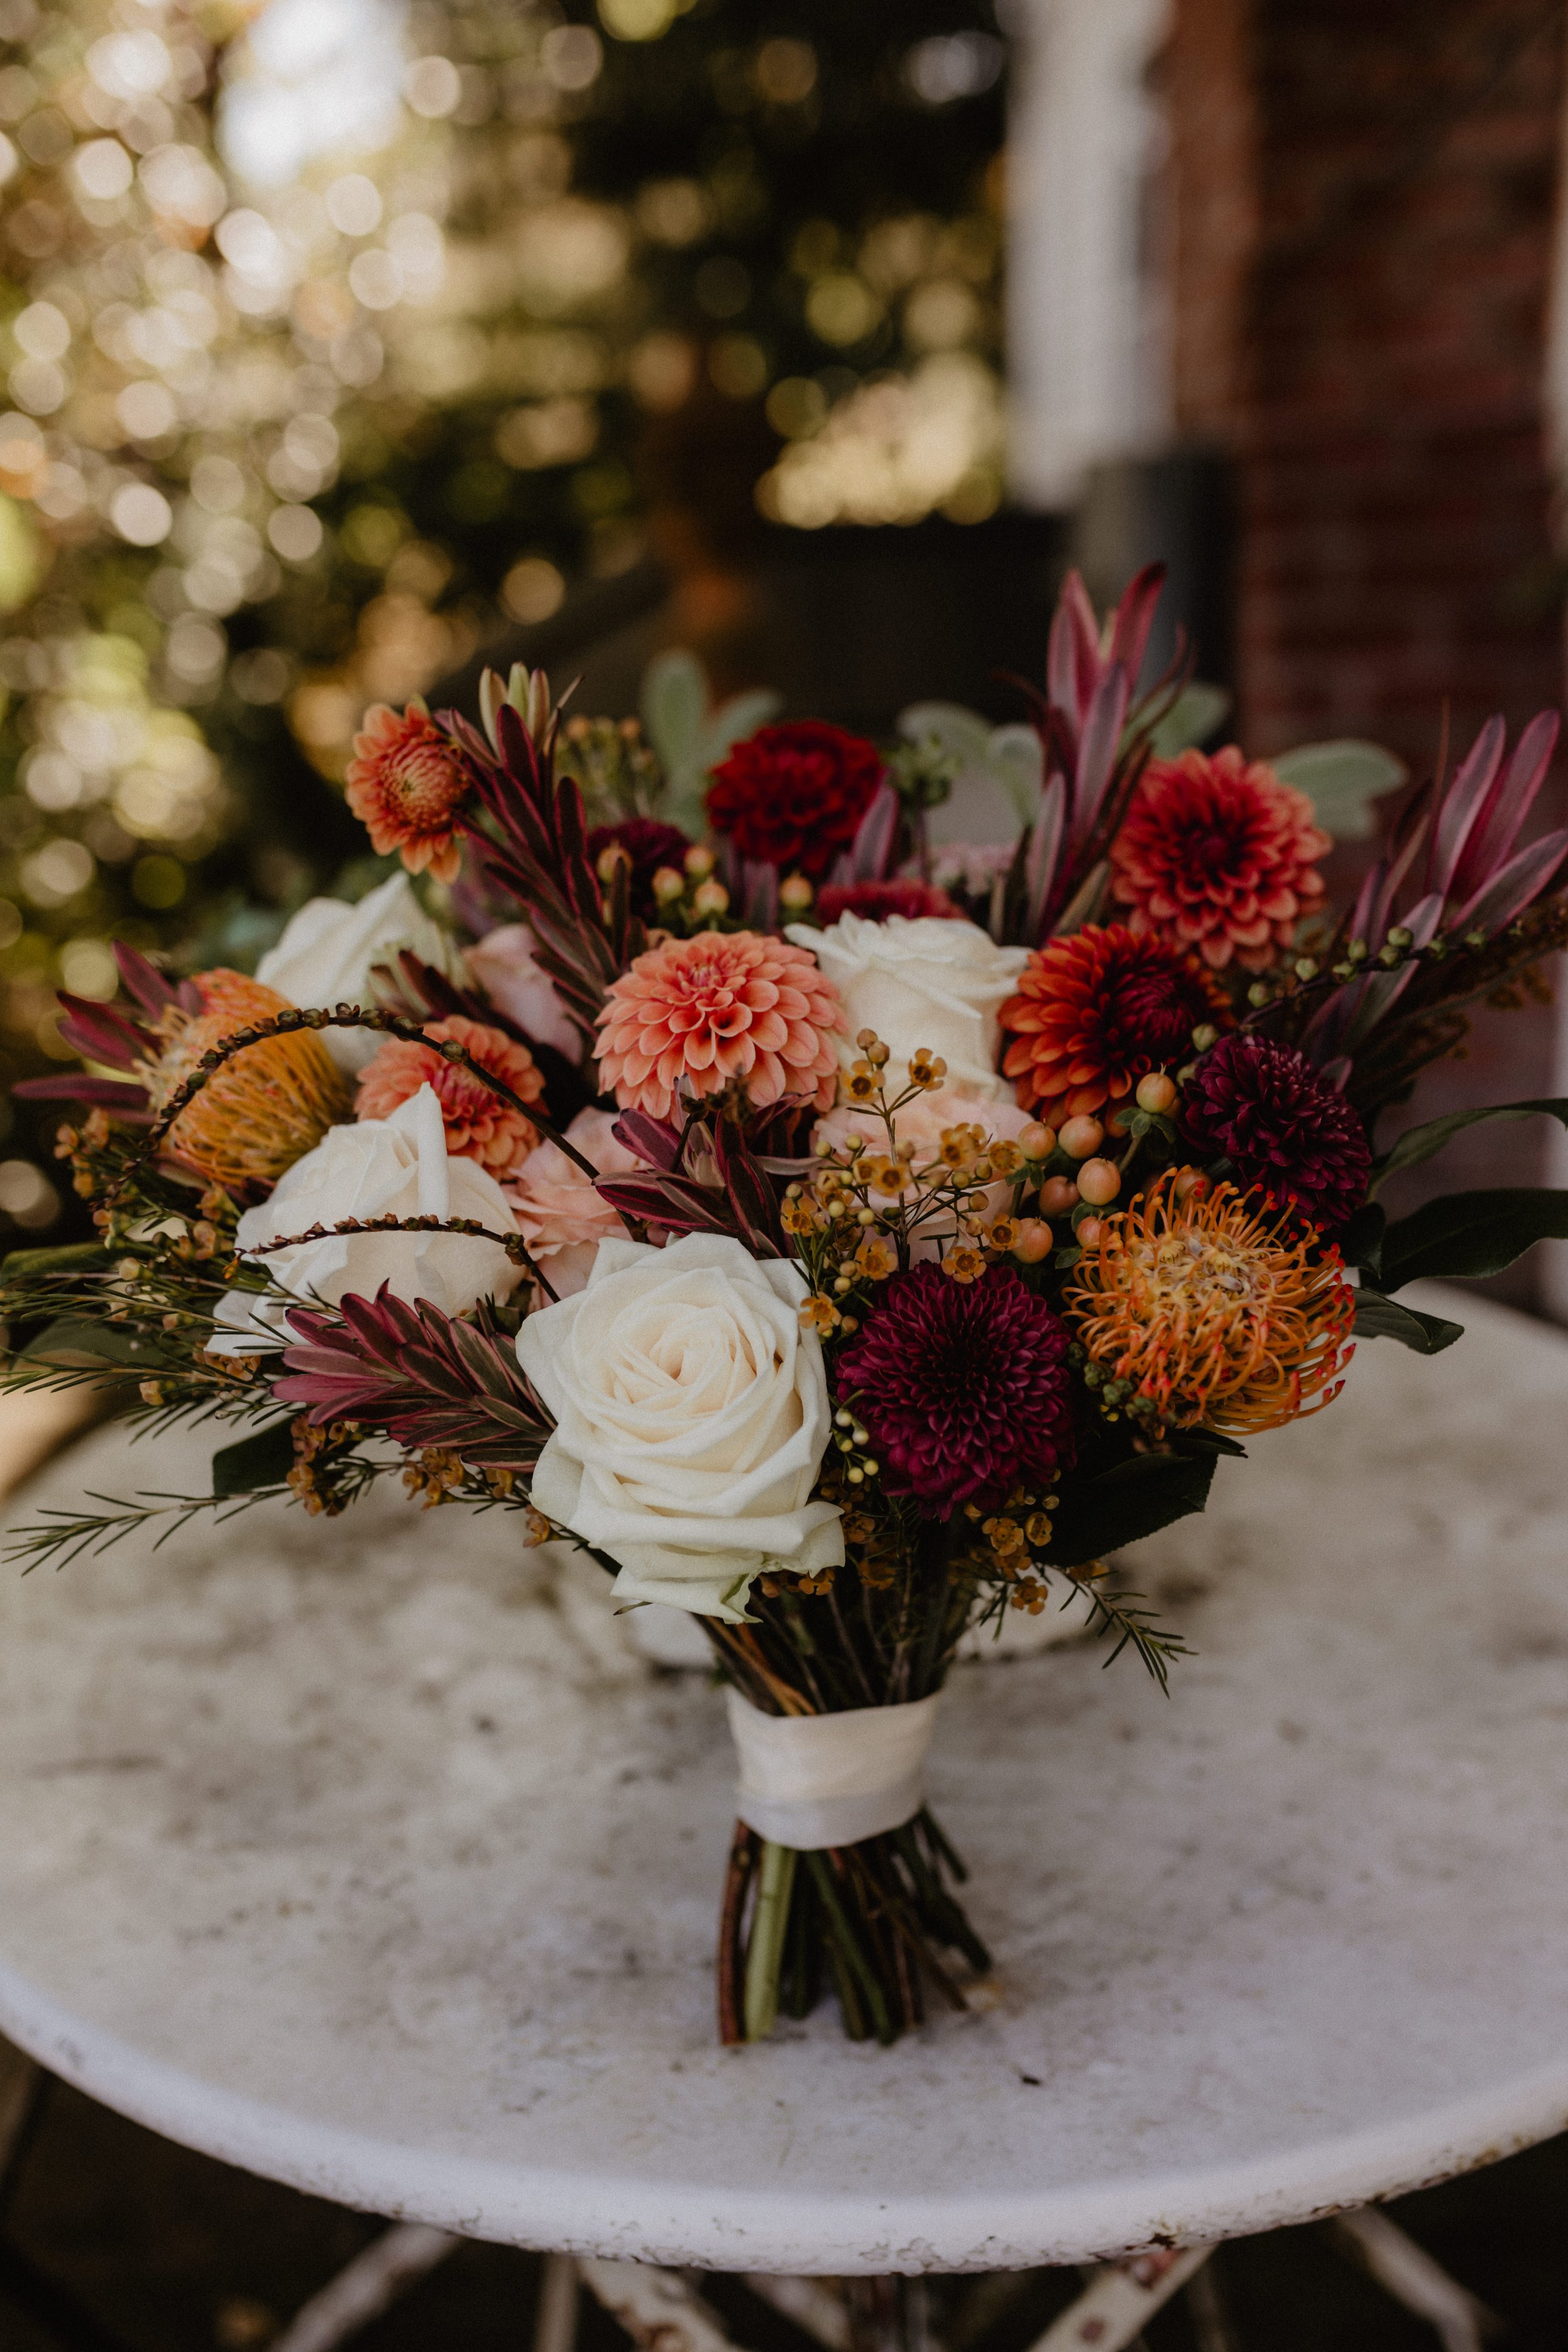
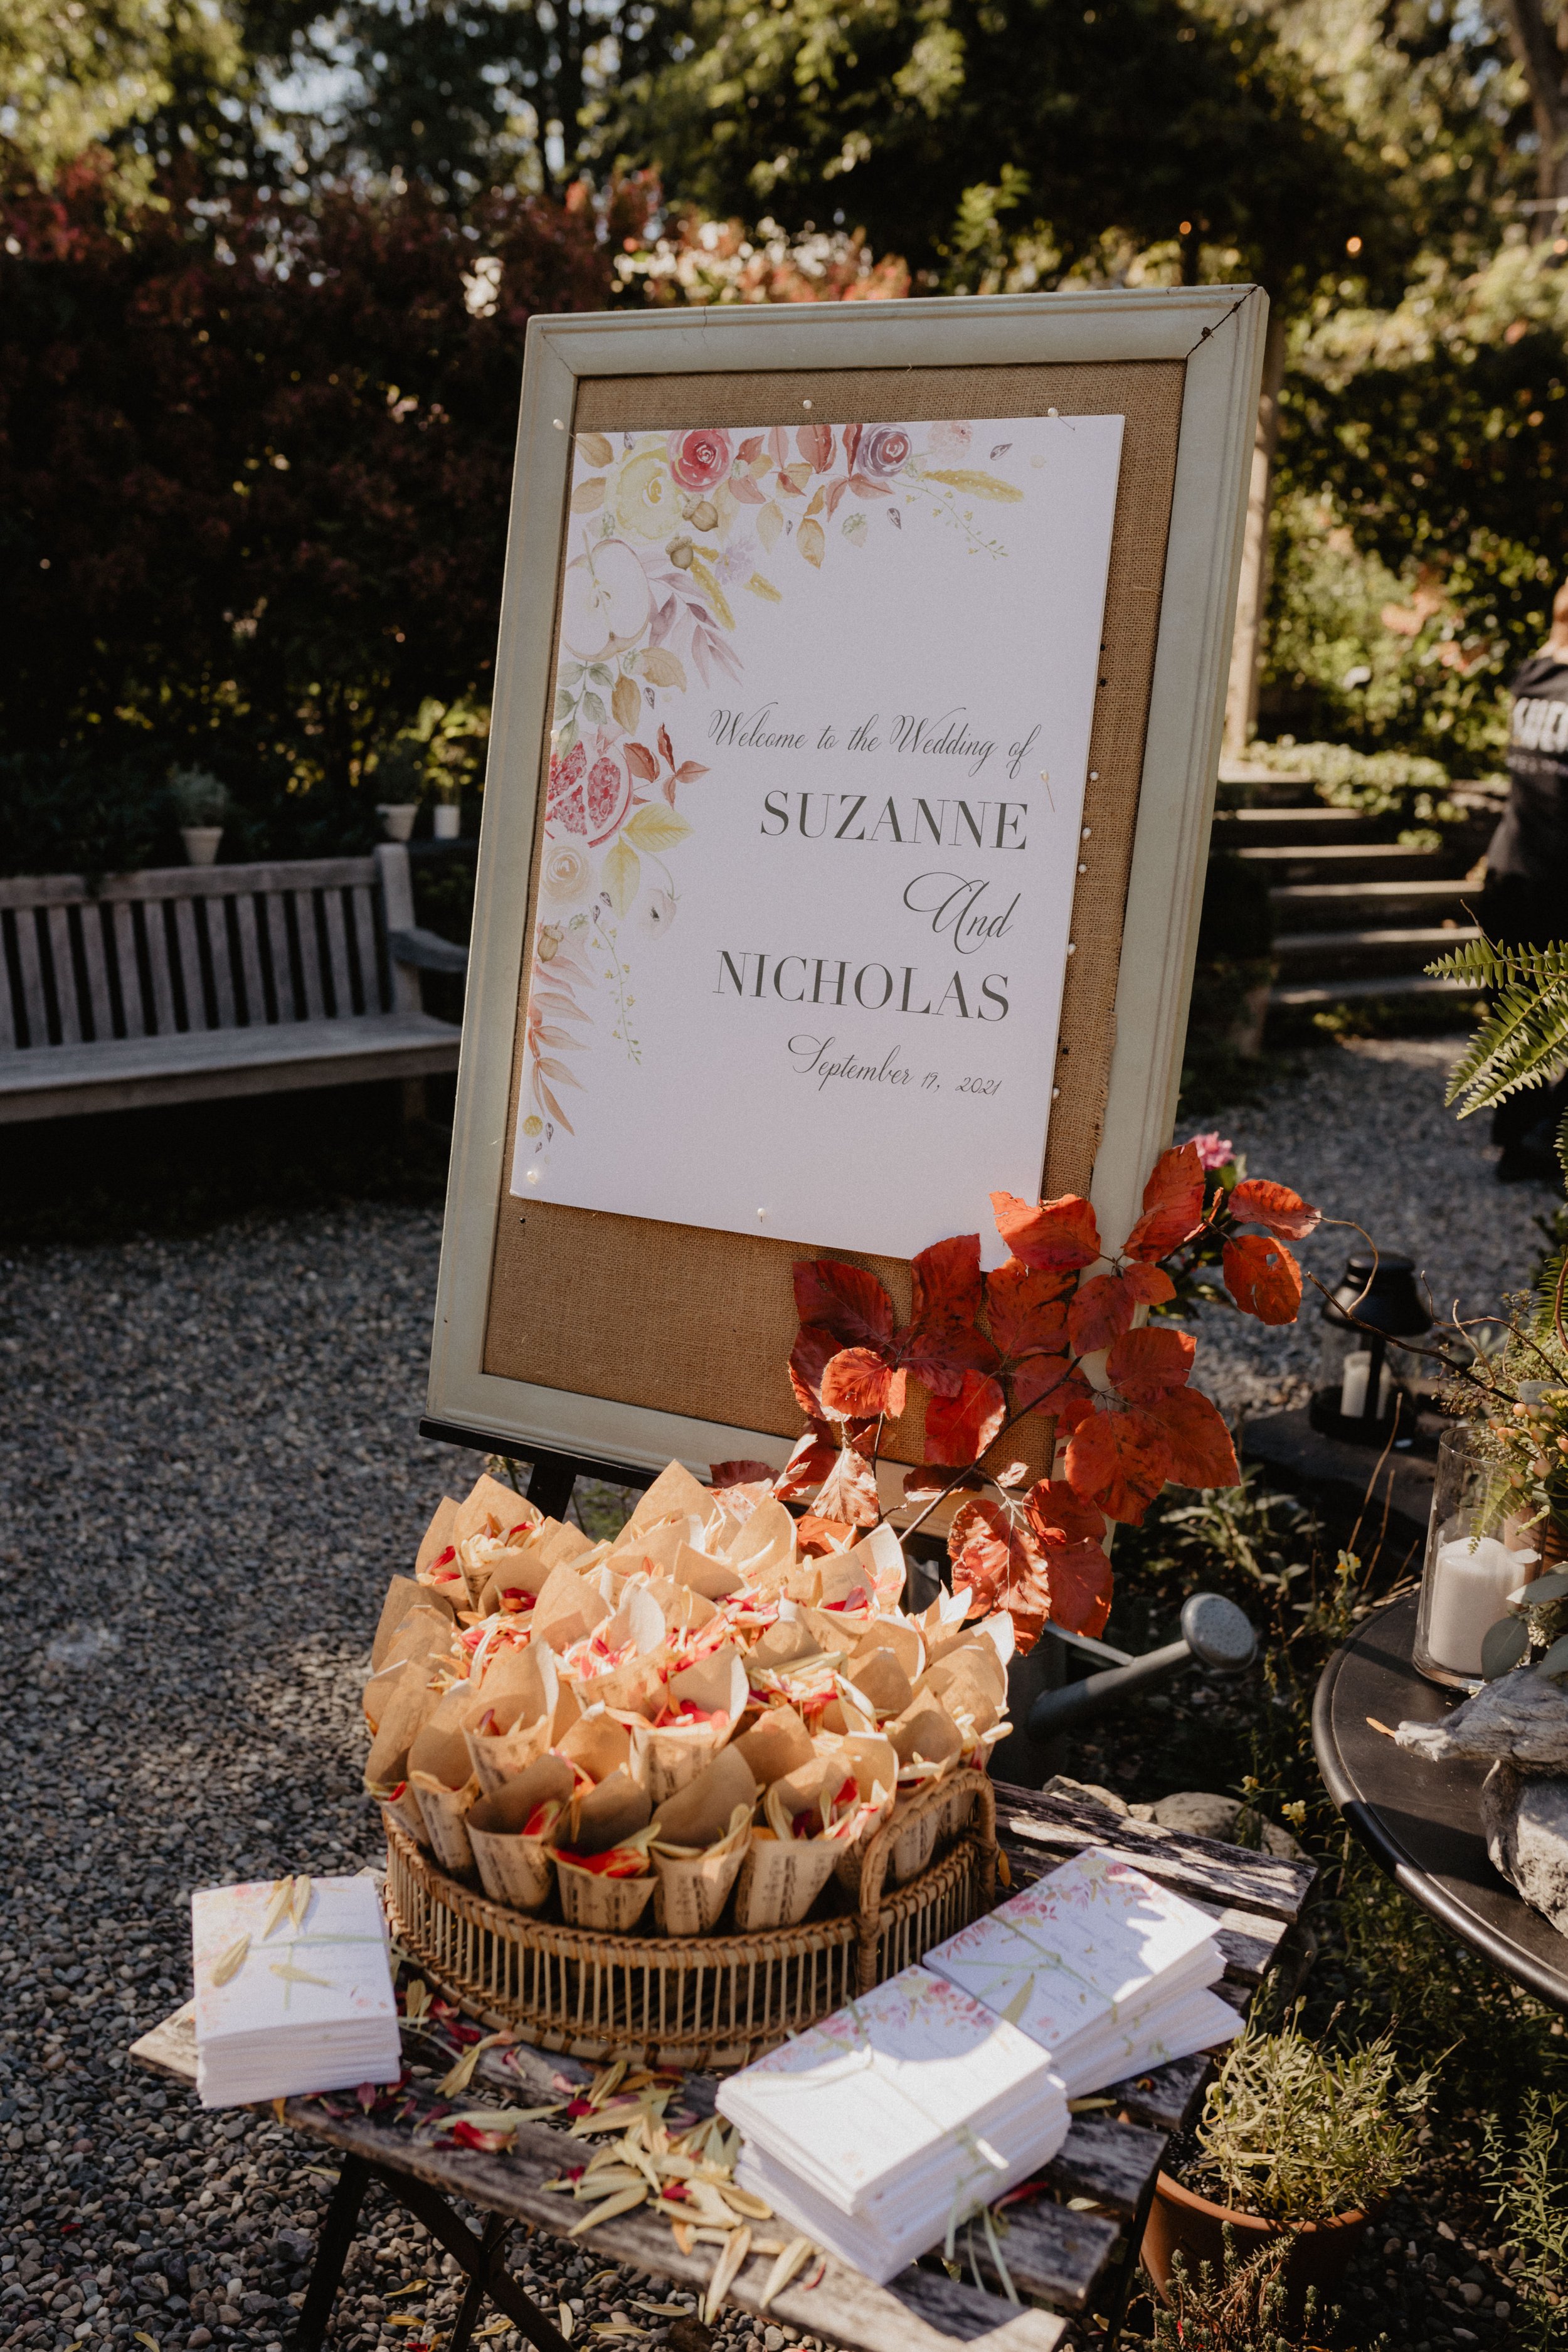
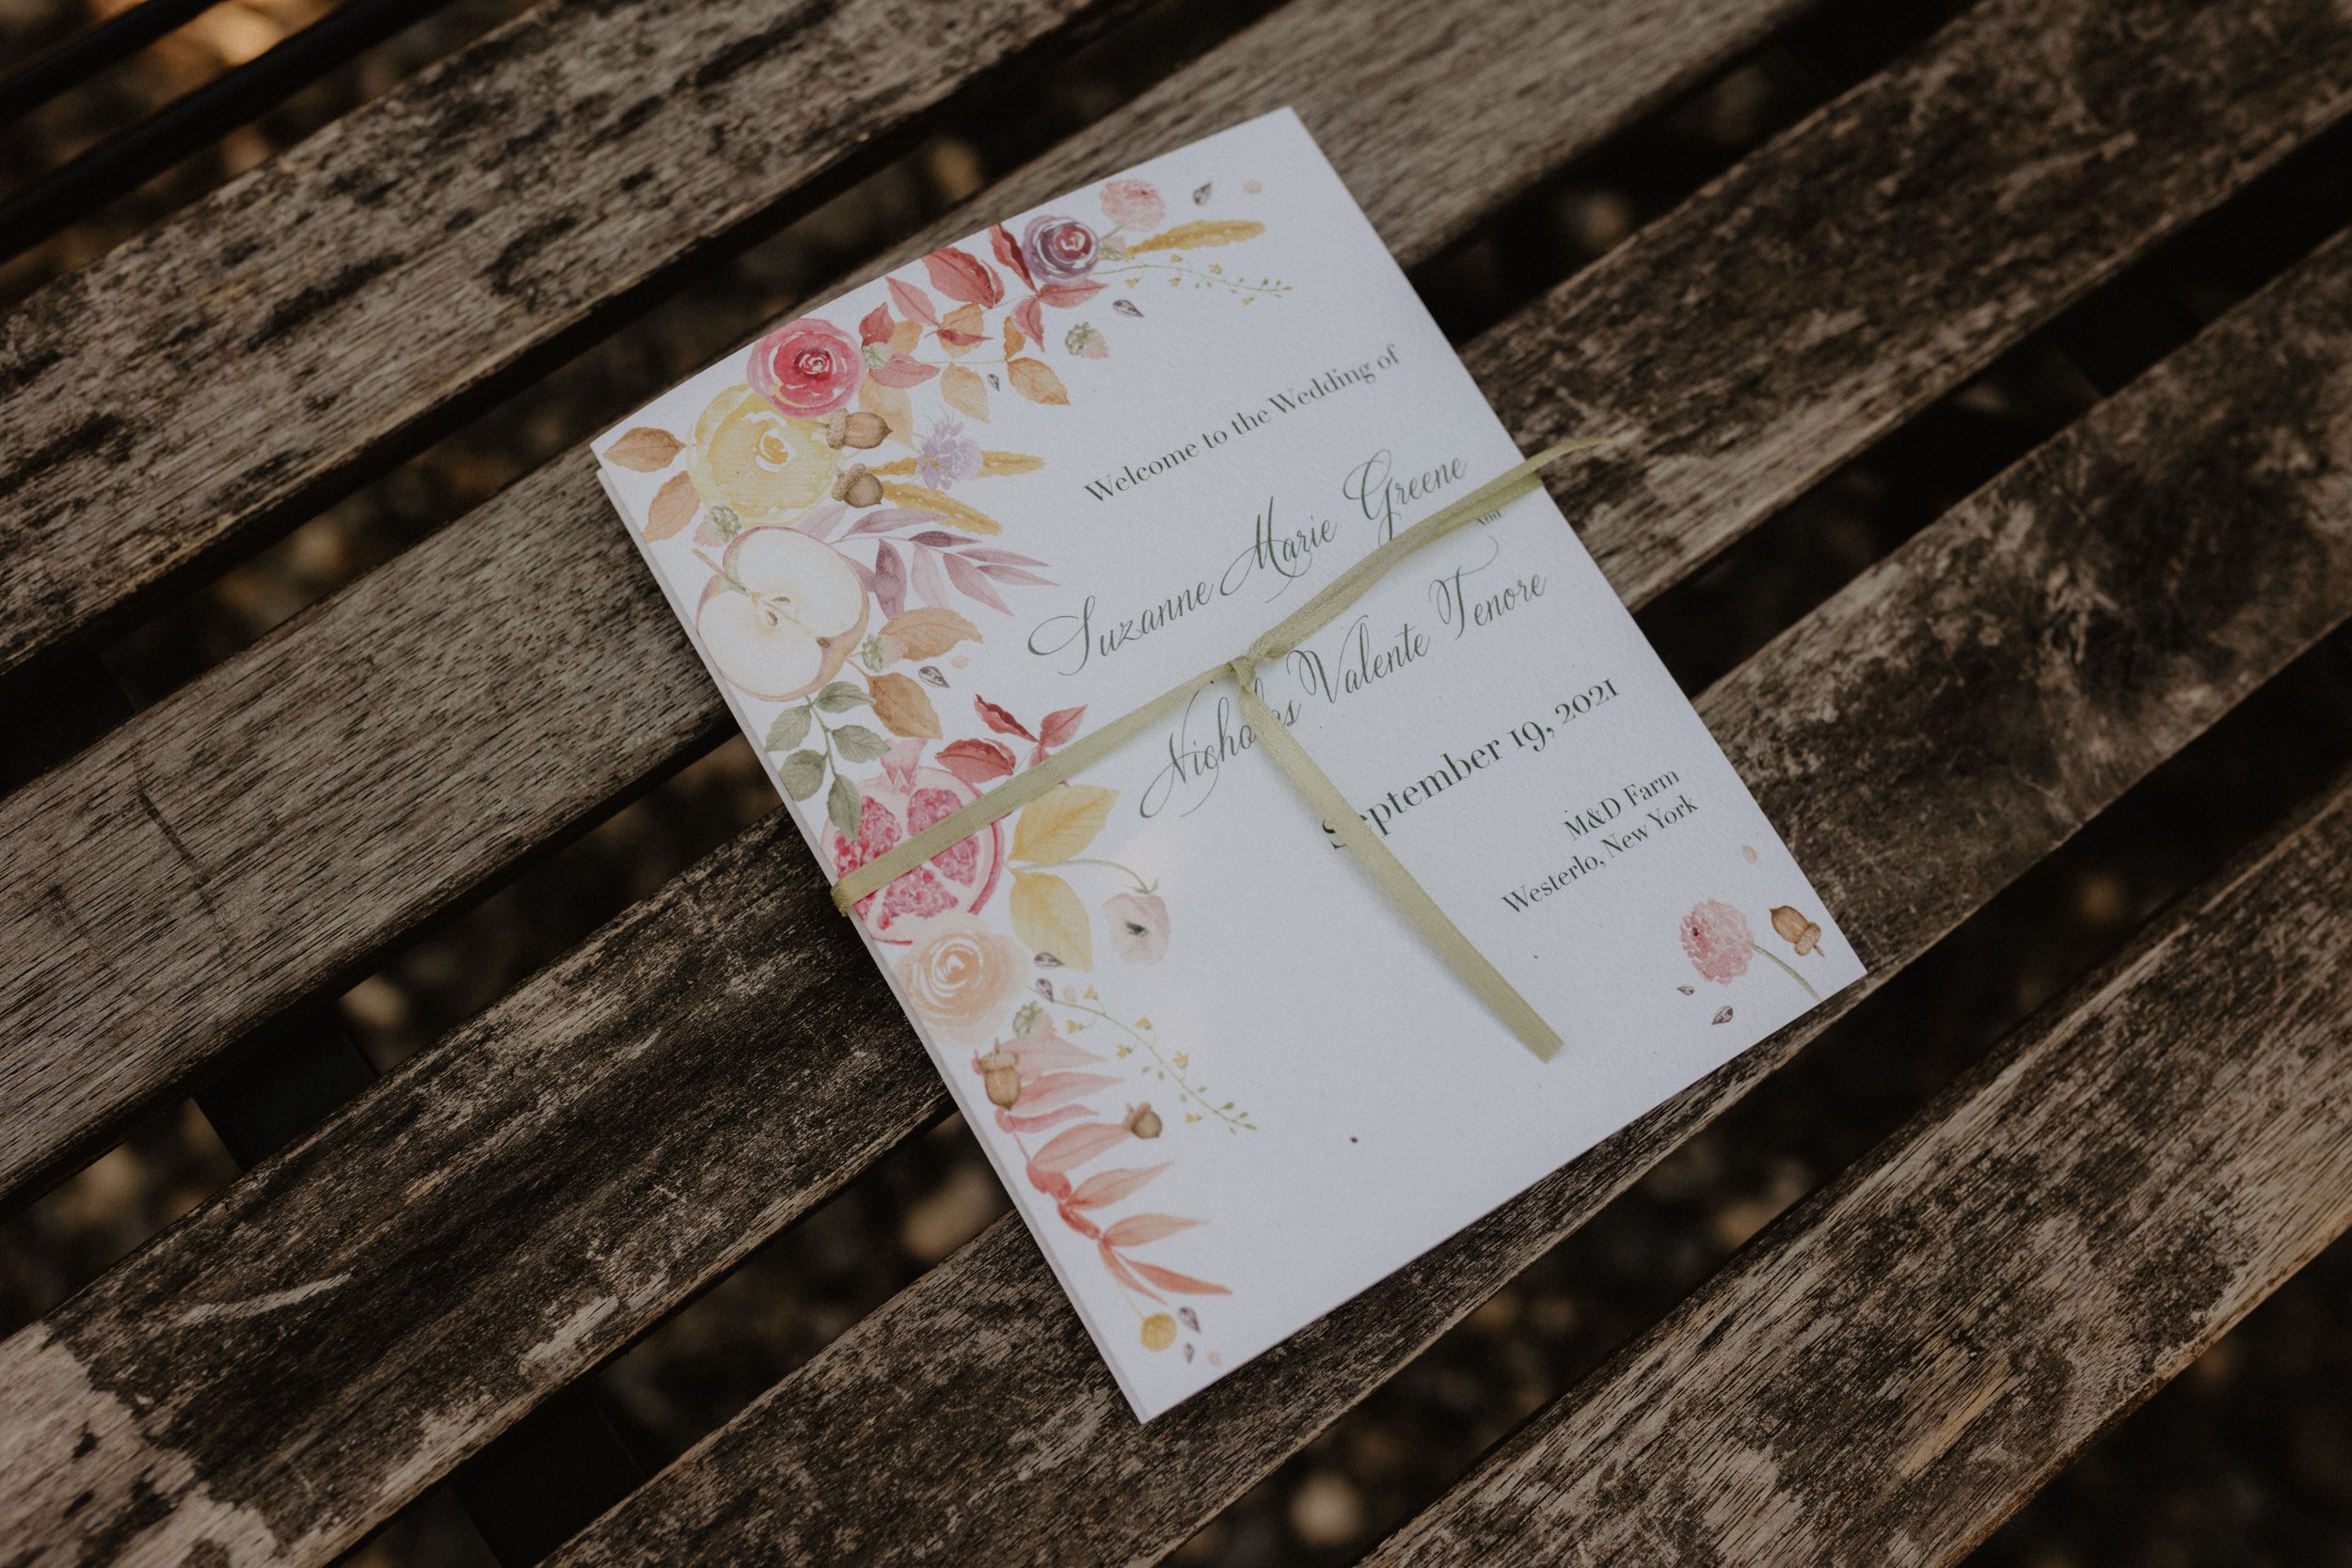
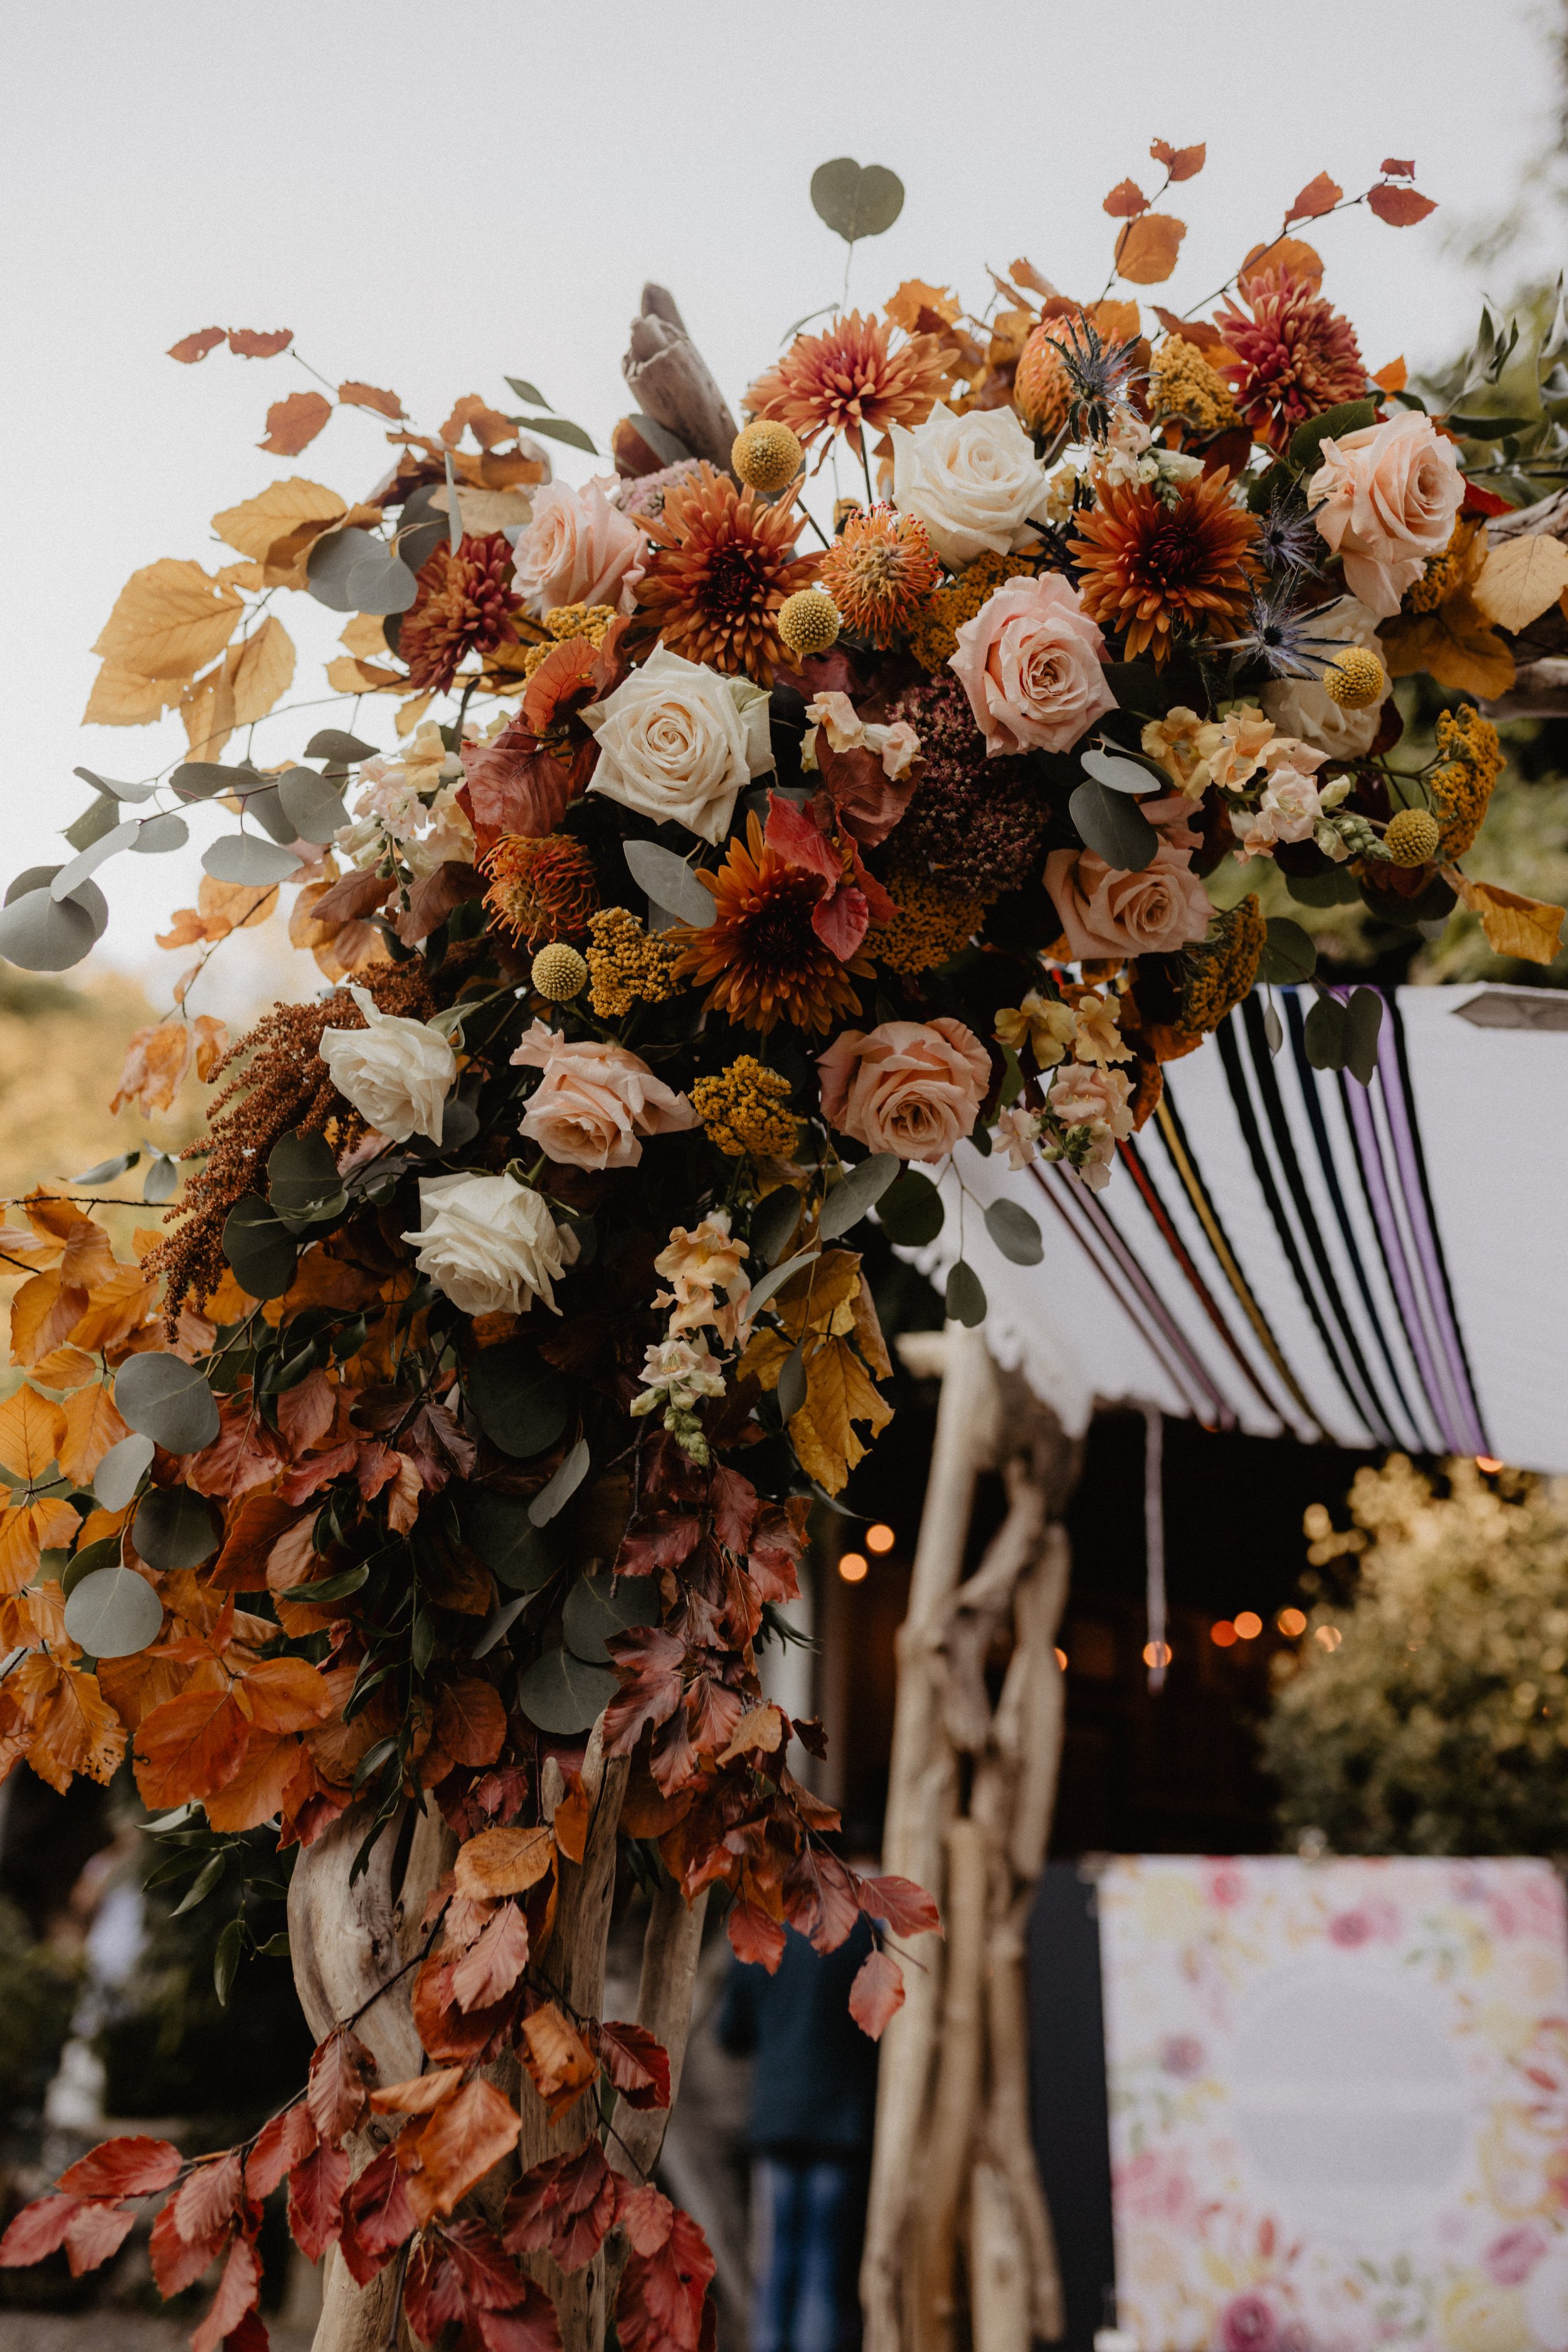
For the invitation suite, it was all autumn everything. They tied the knot at MnD farms and it was the perfect, fairytale, fall wedding. MnD is run by the loveliest couple - Mario and Daniel. They live on the grounds and put so much attention to detail into the landscape and all of their many many gardens and potted plants. It’s so dreamy. I had the pleasure of visiting the venue a few years ago and I’m still so taken with the memory of it. If any of my unmarried friends read this, please get married and invite me! Thank you.
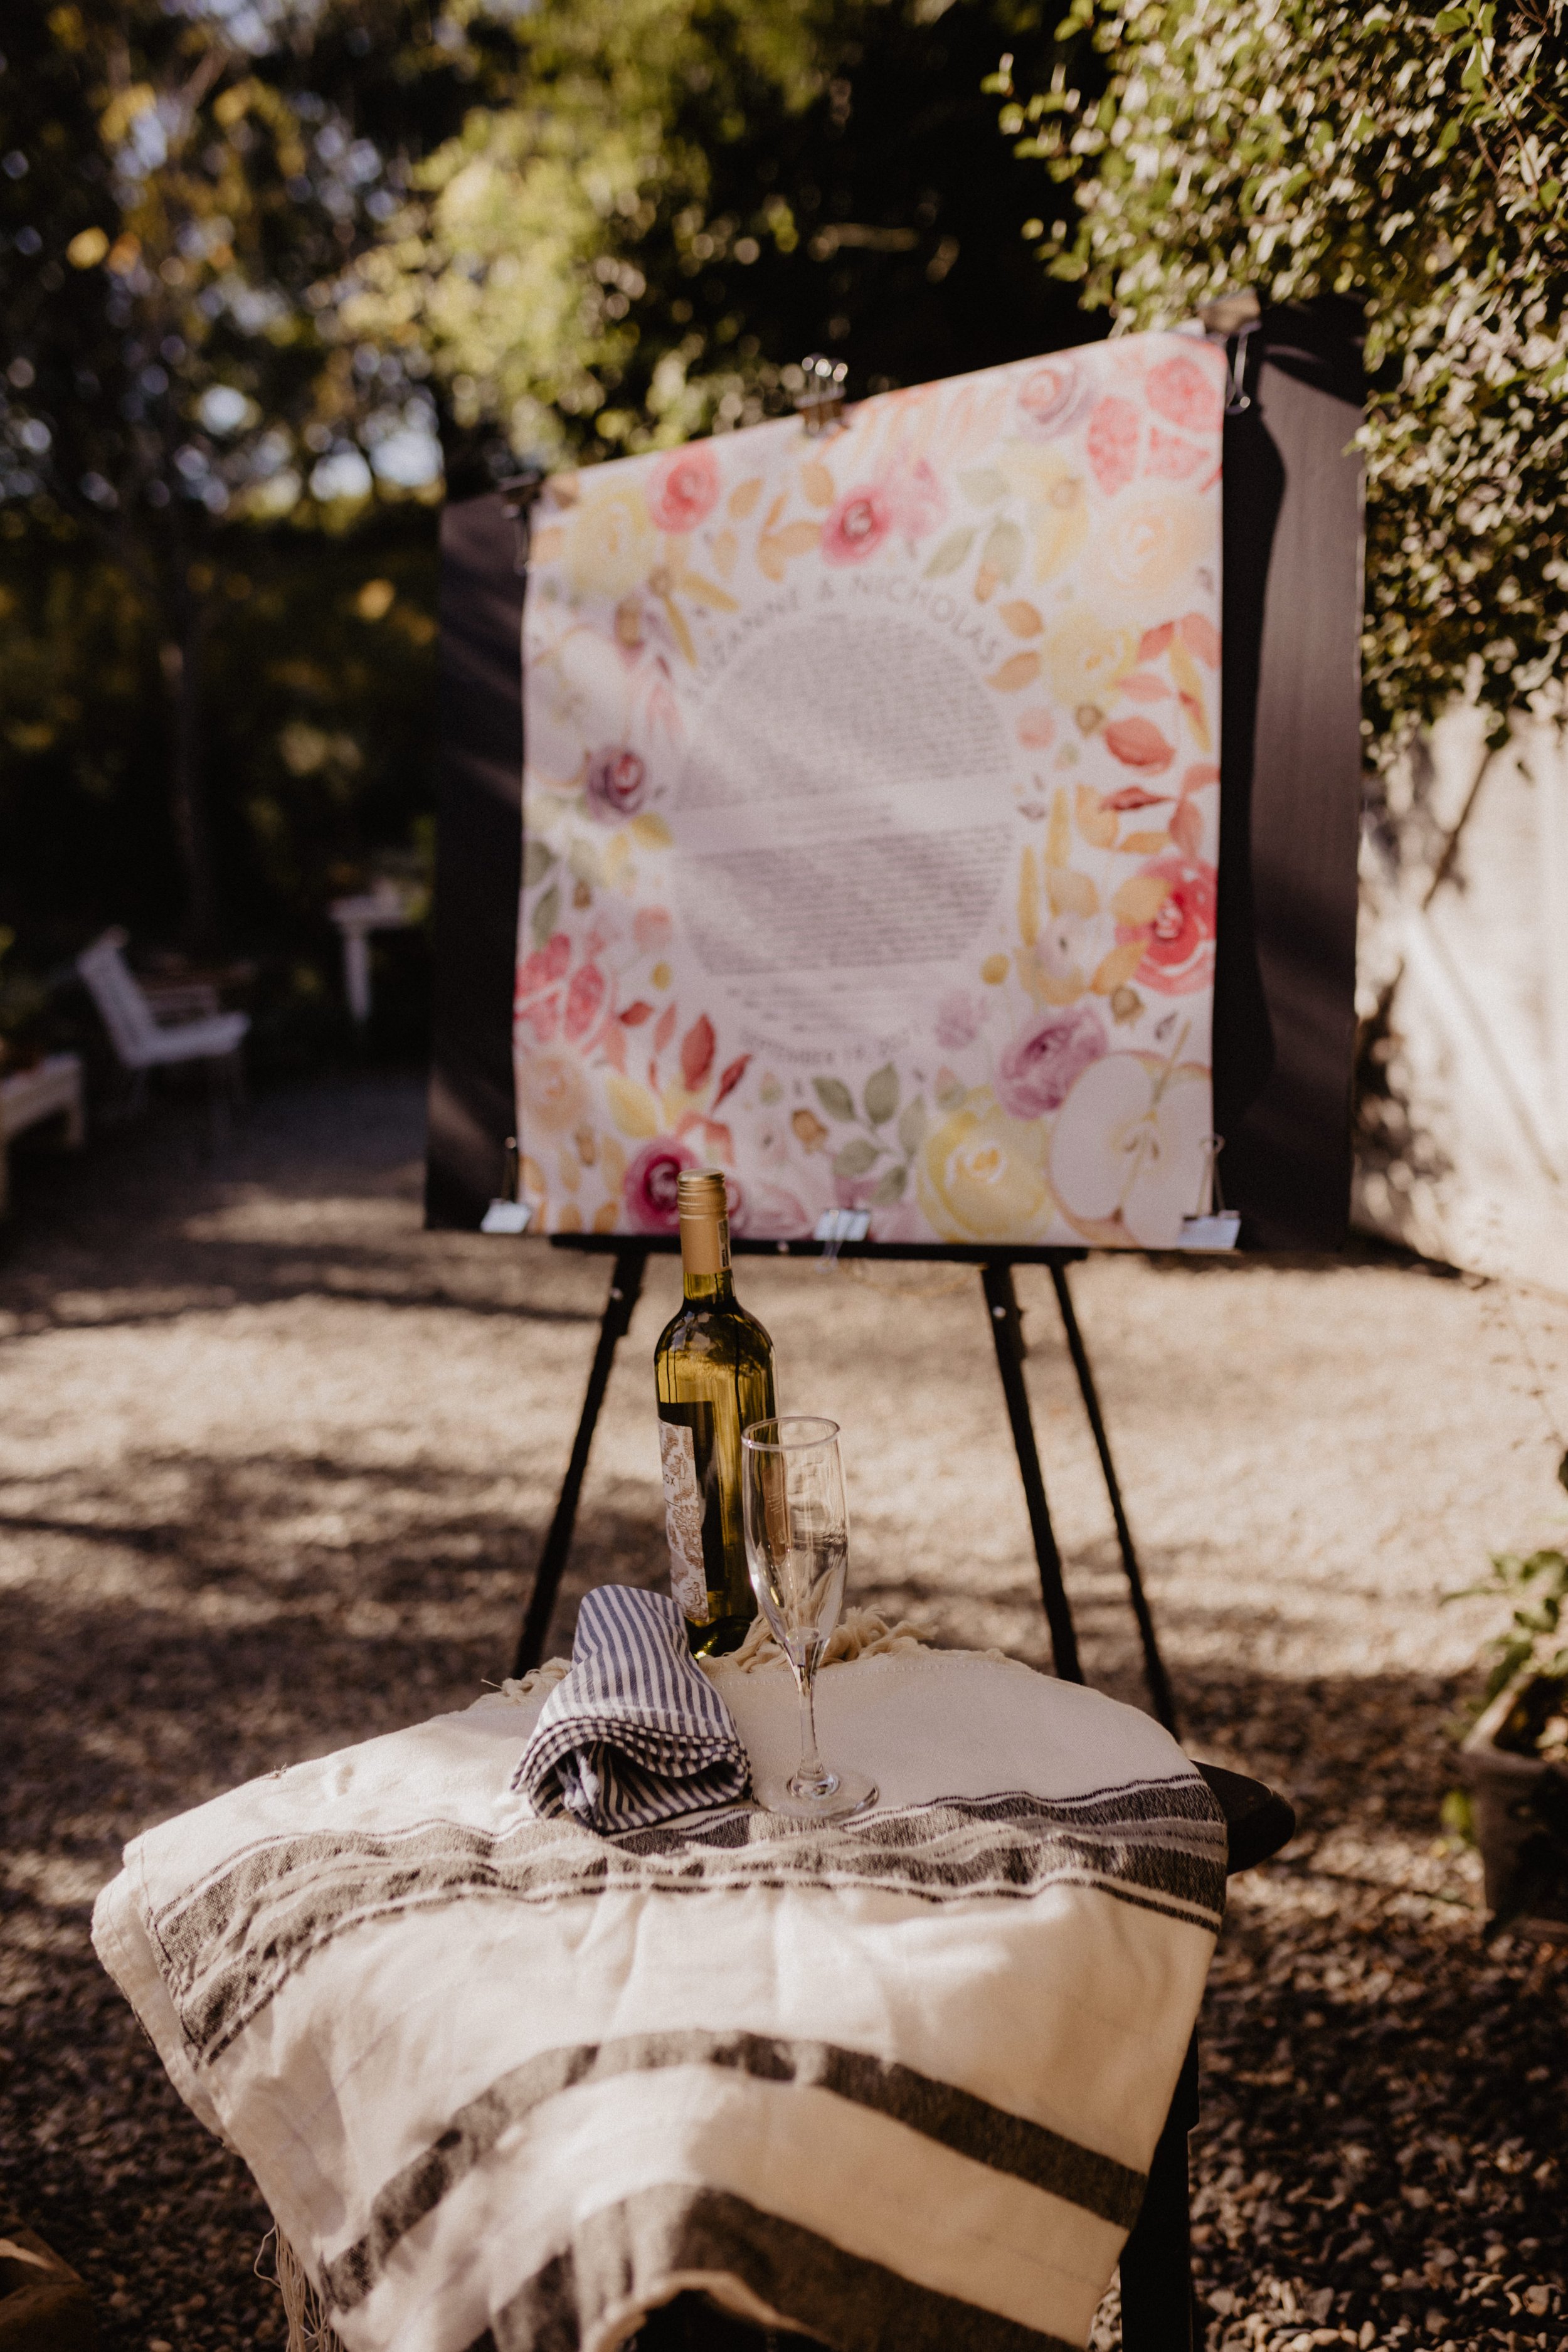
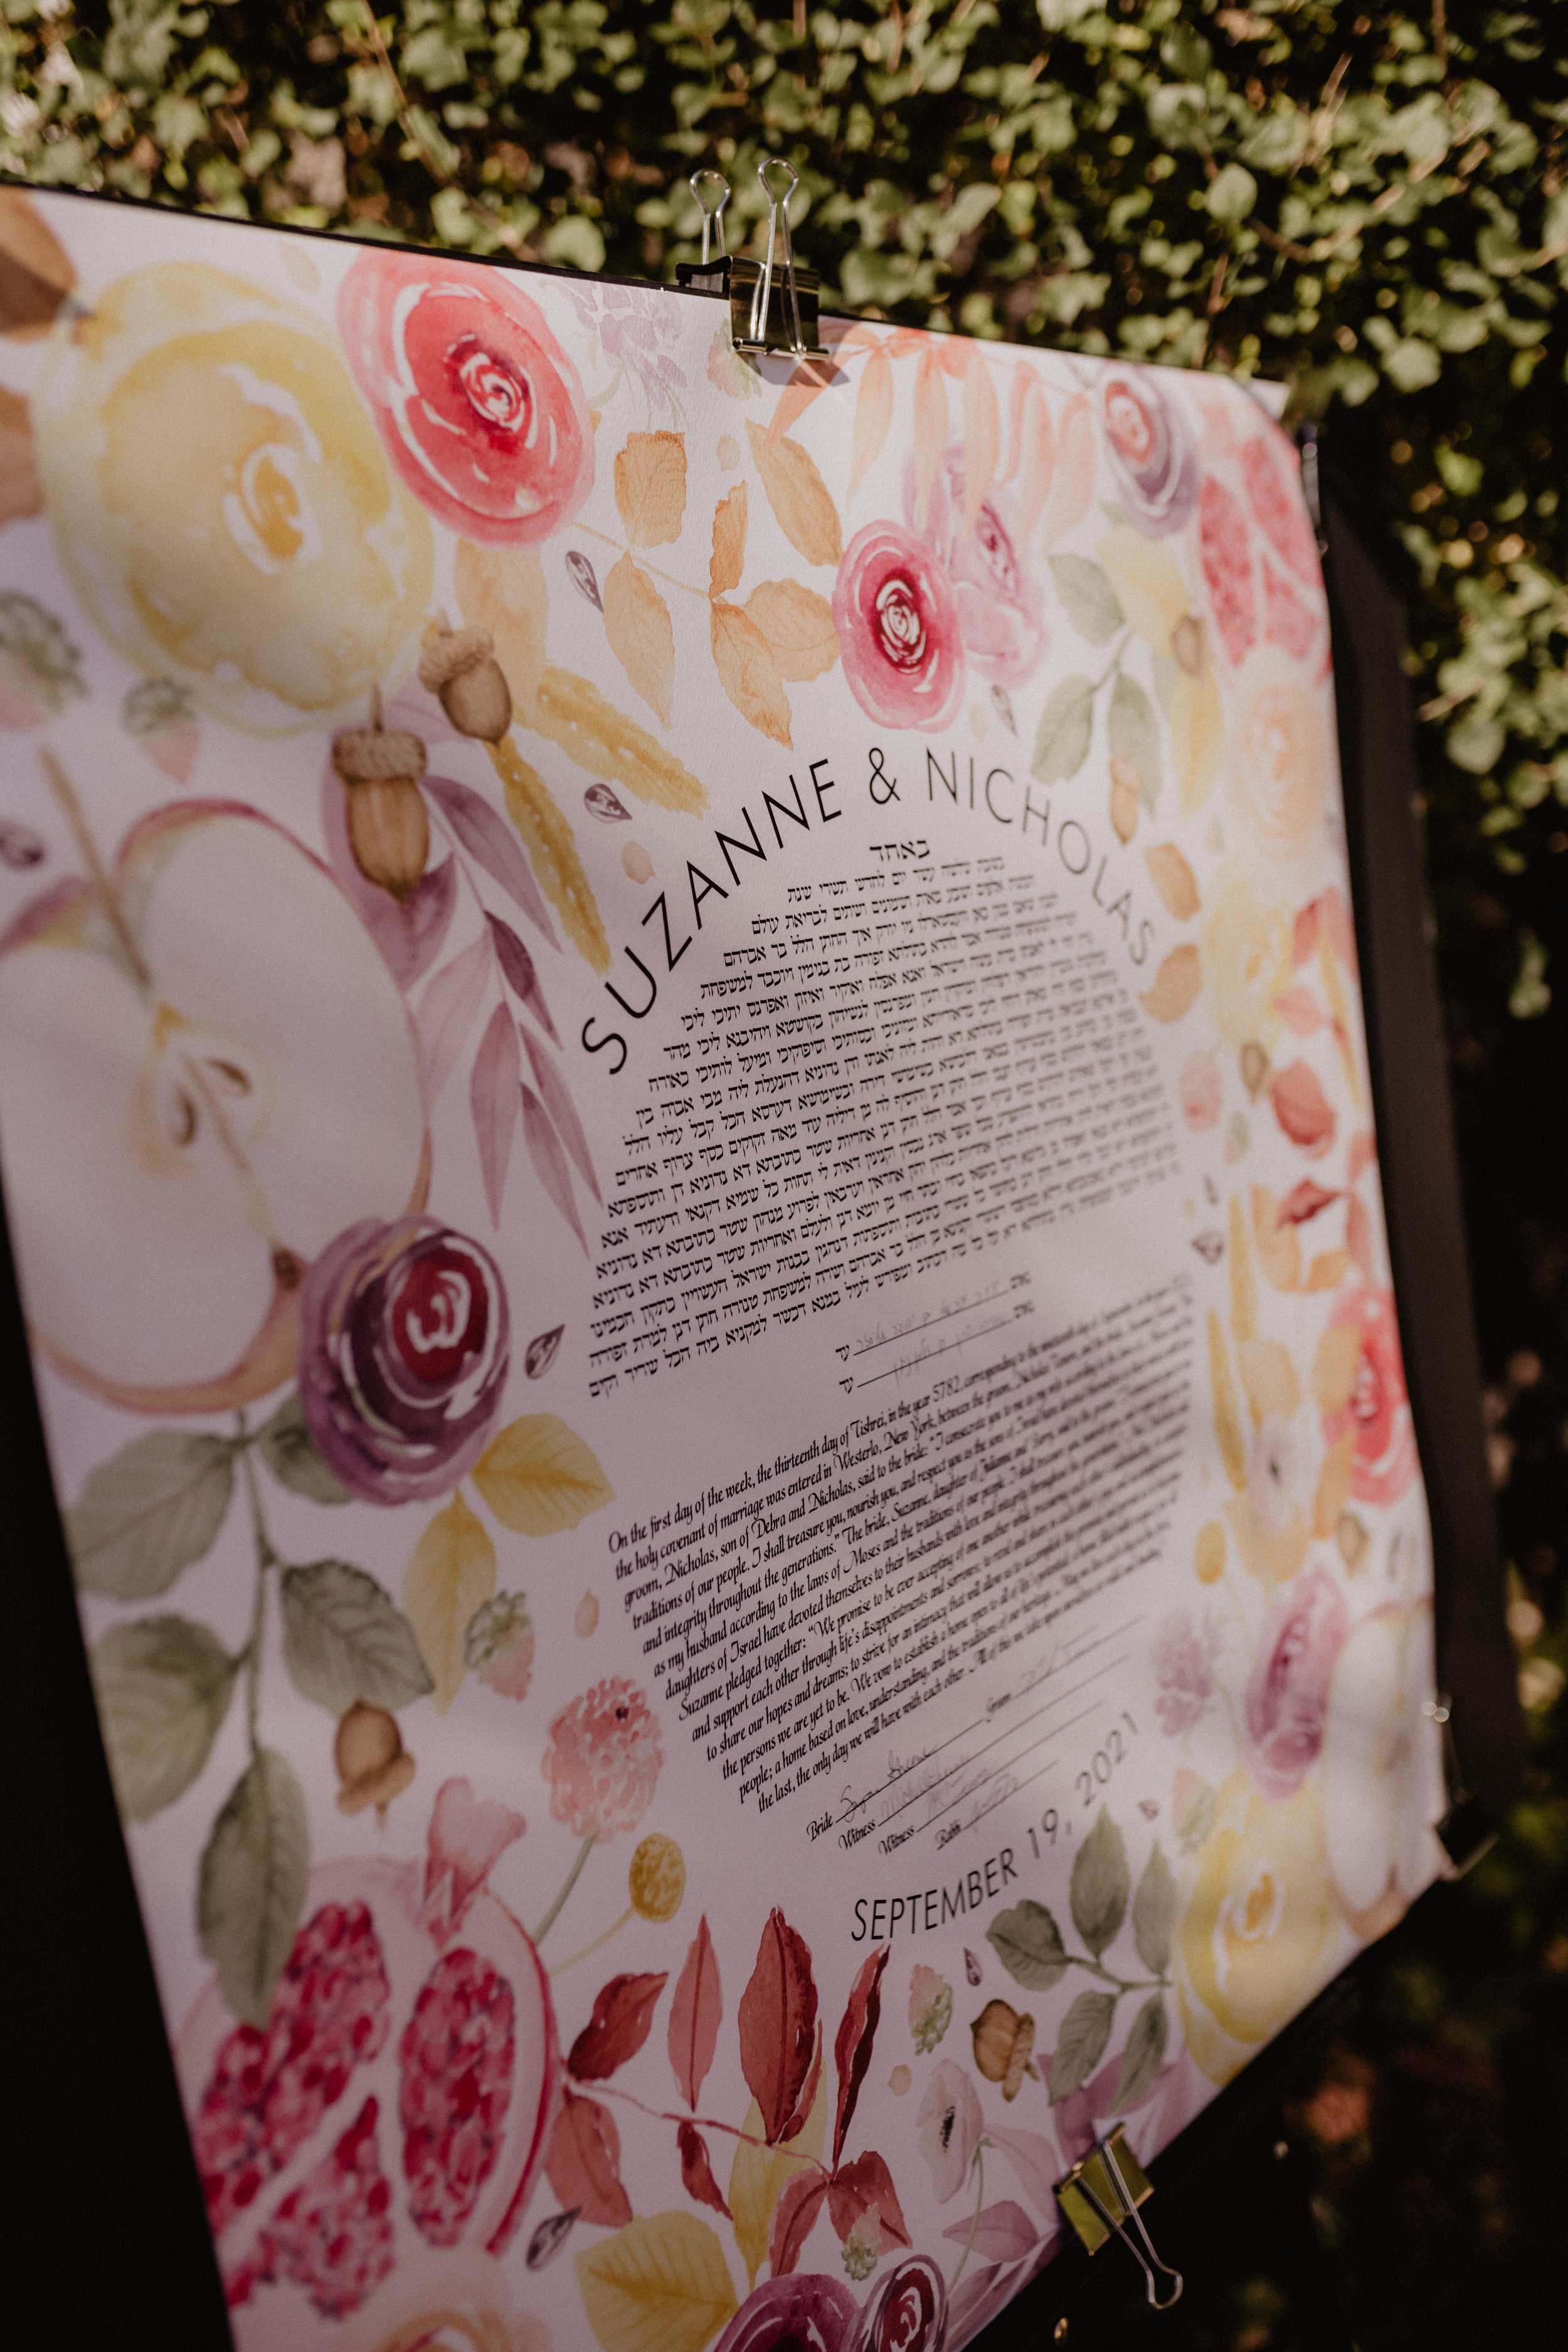
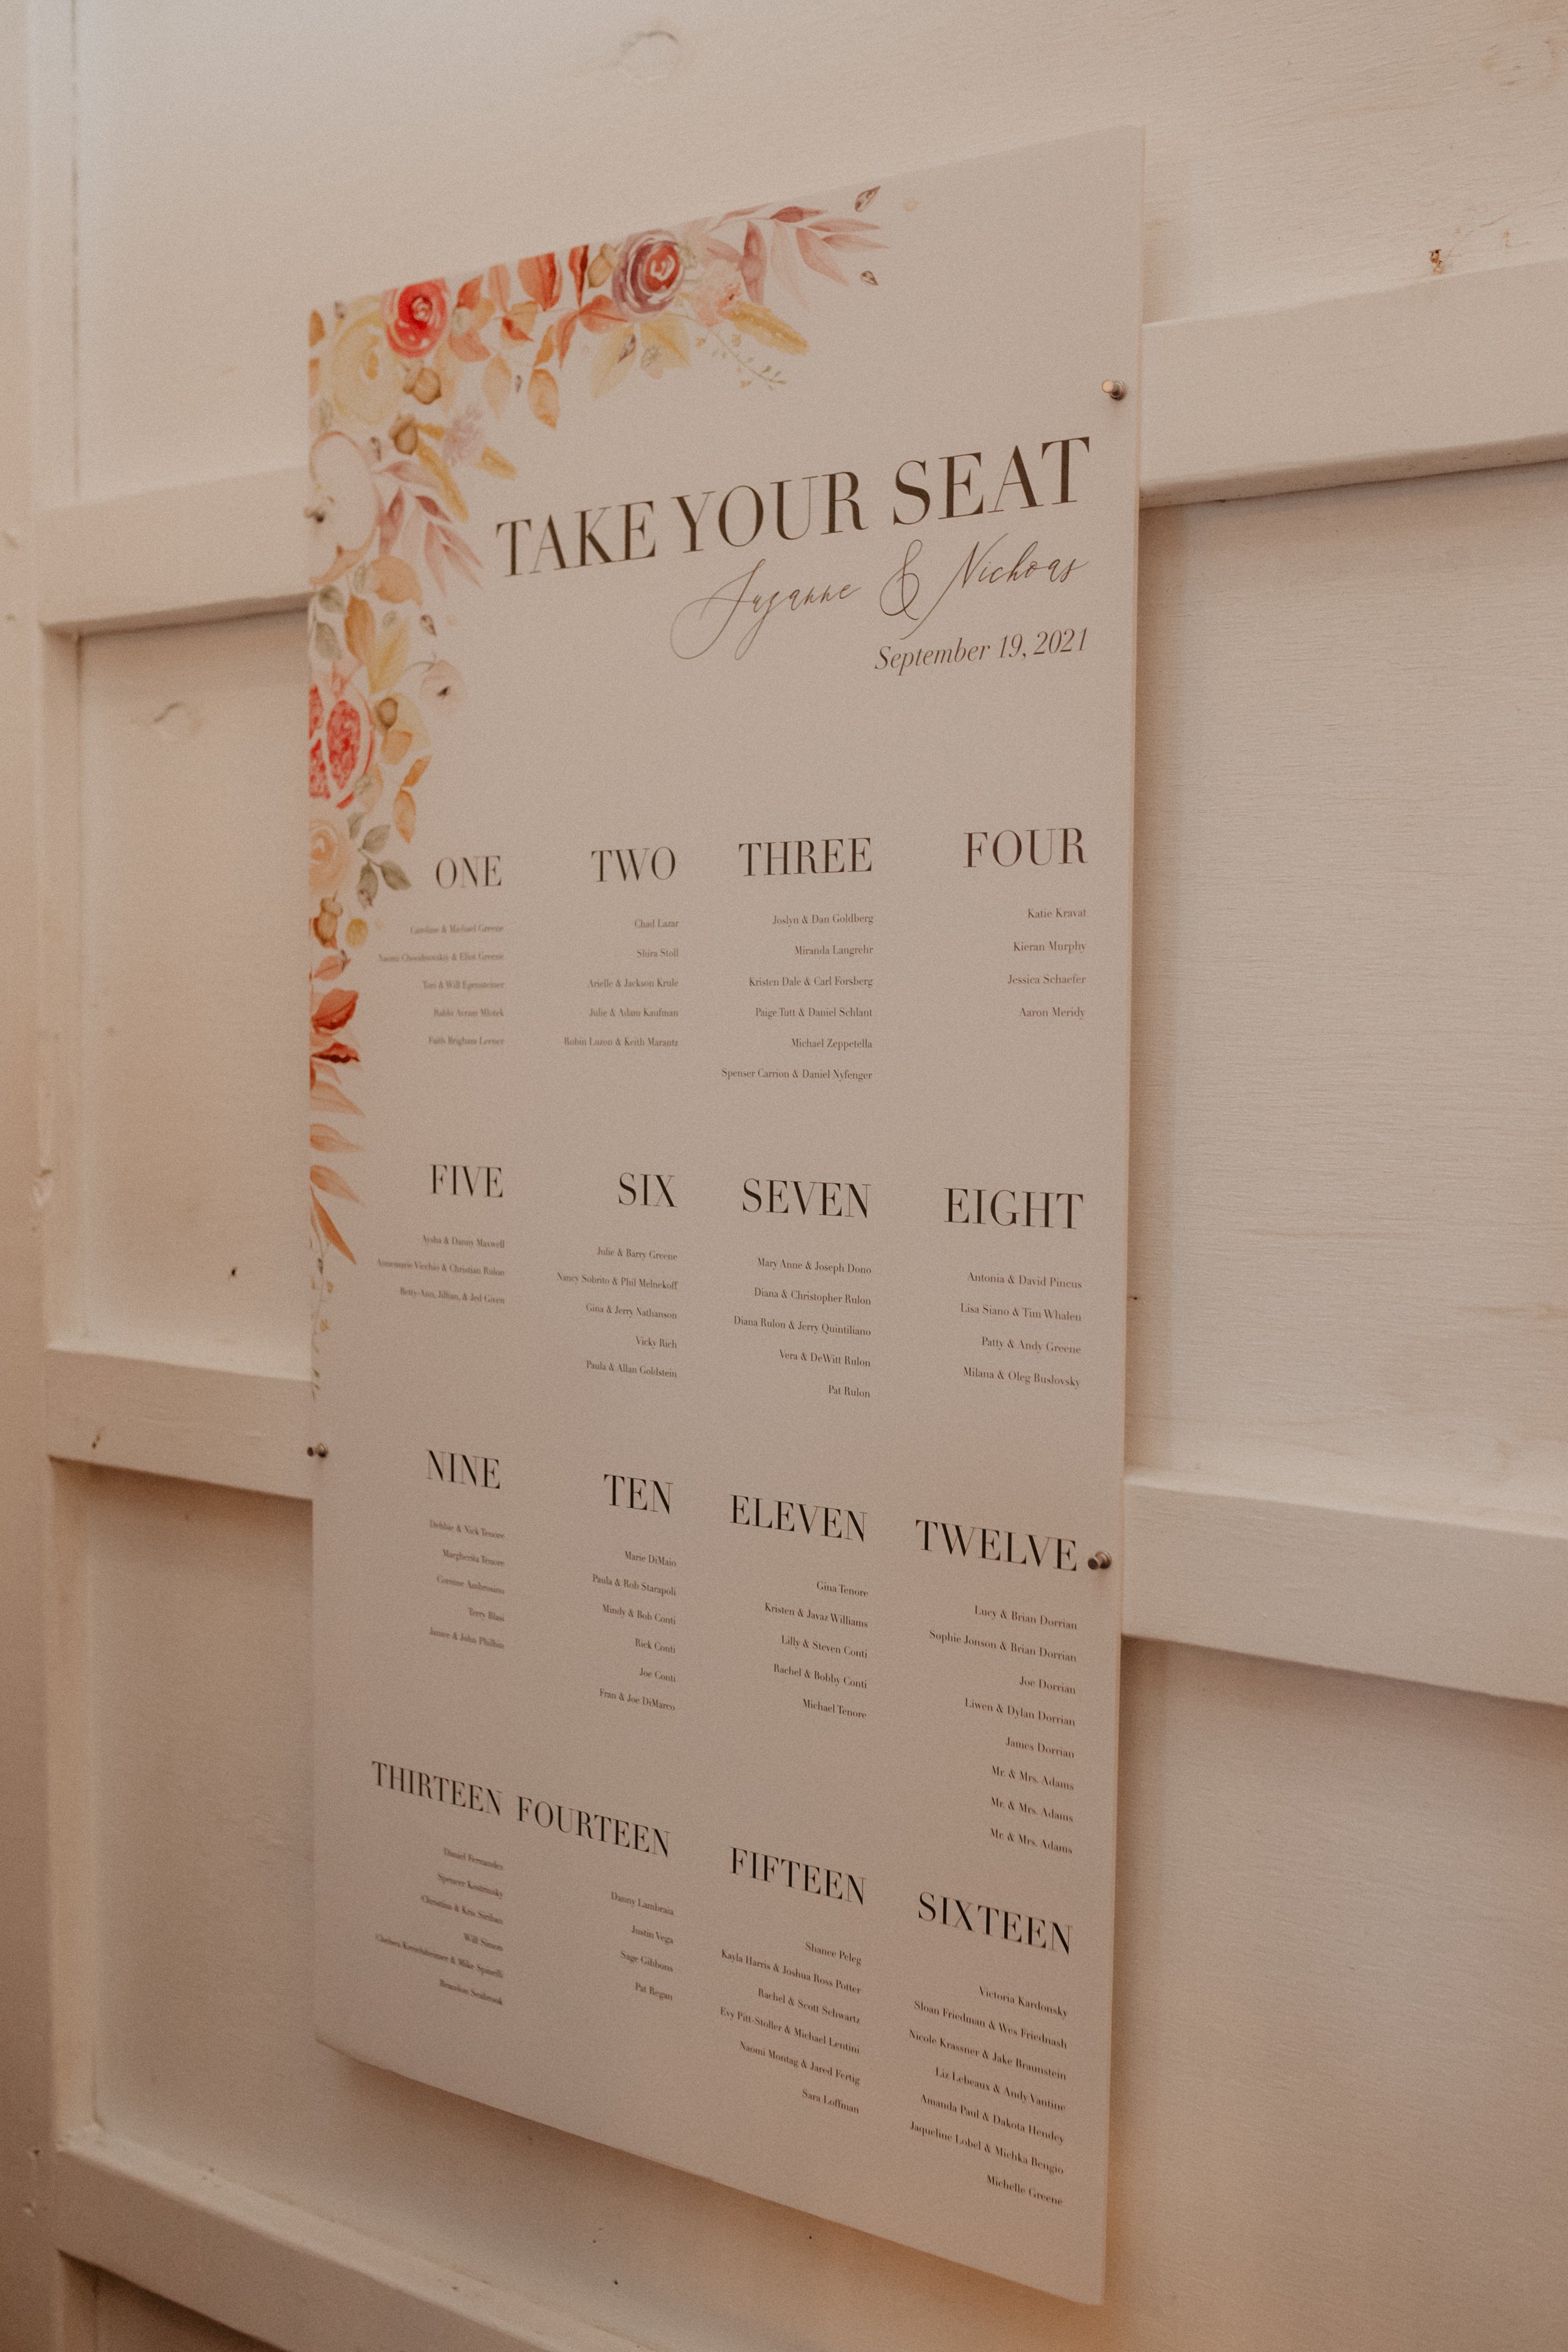
For the invitation, I hand painted all kinds of floral and foliage bits to correlate with the floral varieties that would be in Suzanne’s bouquet and all the wedding flowers for the day. These motifs became the focus for all the stationery pieces. They were especially show stopping on the gorgeous Ketubah that was printed large scale to go up on an easel for the ceremony and then to be framed and hung in Suzanne and Nick’s home. I am a sucker for making the stationery art a keepsake exactly like that. These two are full of passion and appreciation for their love story and I’m so happy to have worked with them.
Below you can see a sprinkling of their beautiful wedding and all their insanely talented vendors!
______________
Vendor Lineup
Venue: MnD Farms
Photographer: Nicole Nero Studio


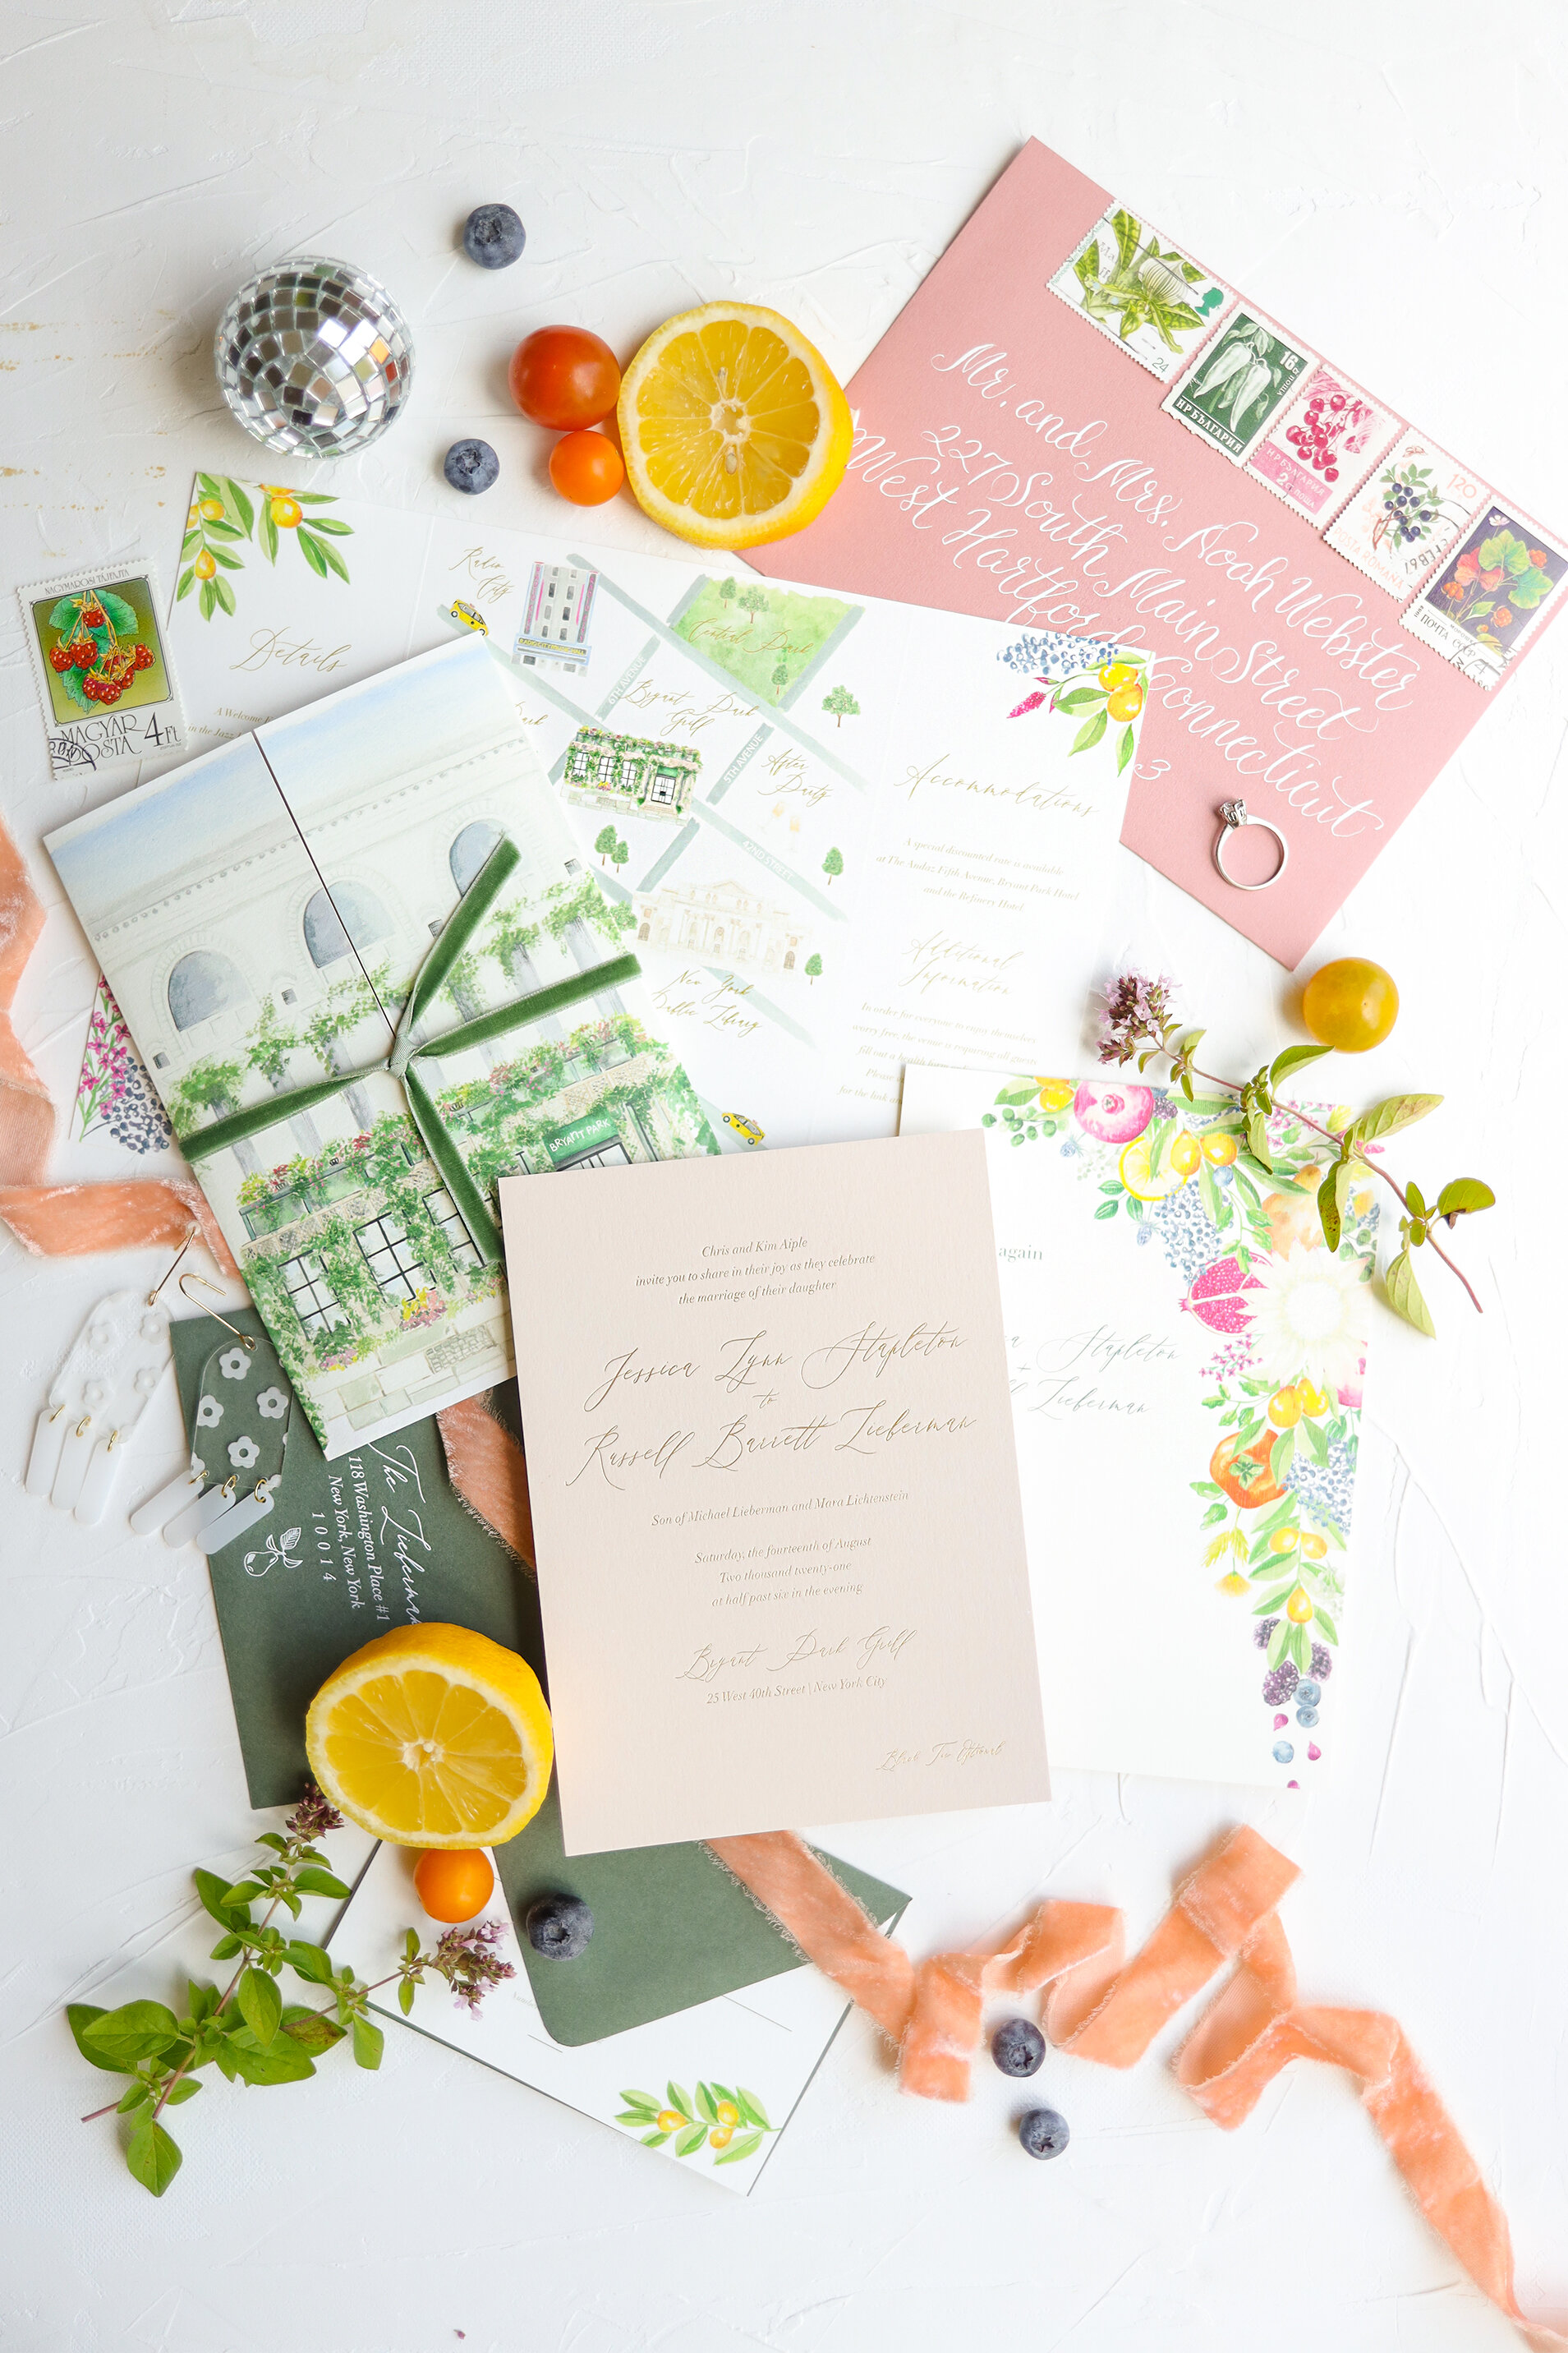
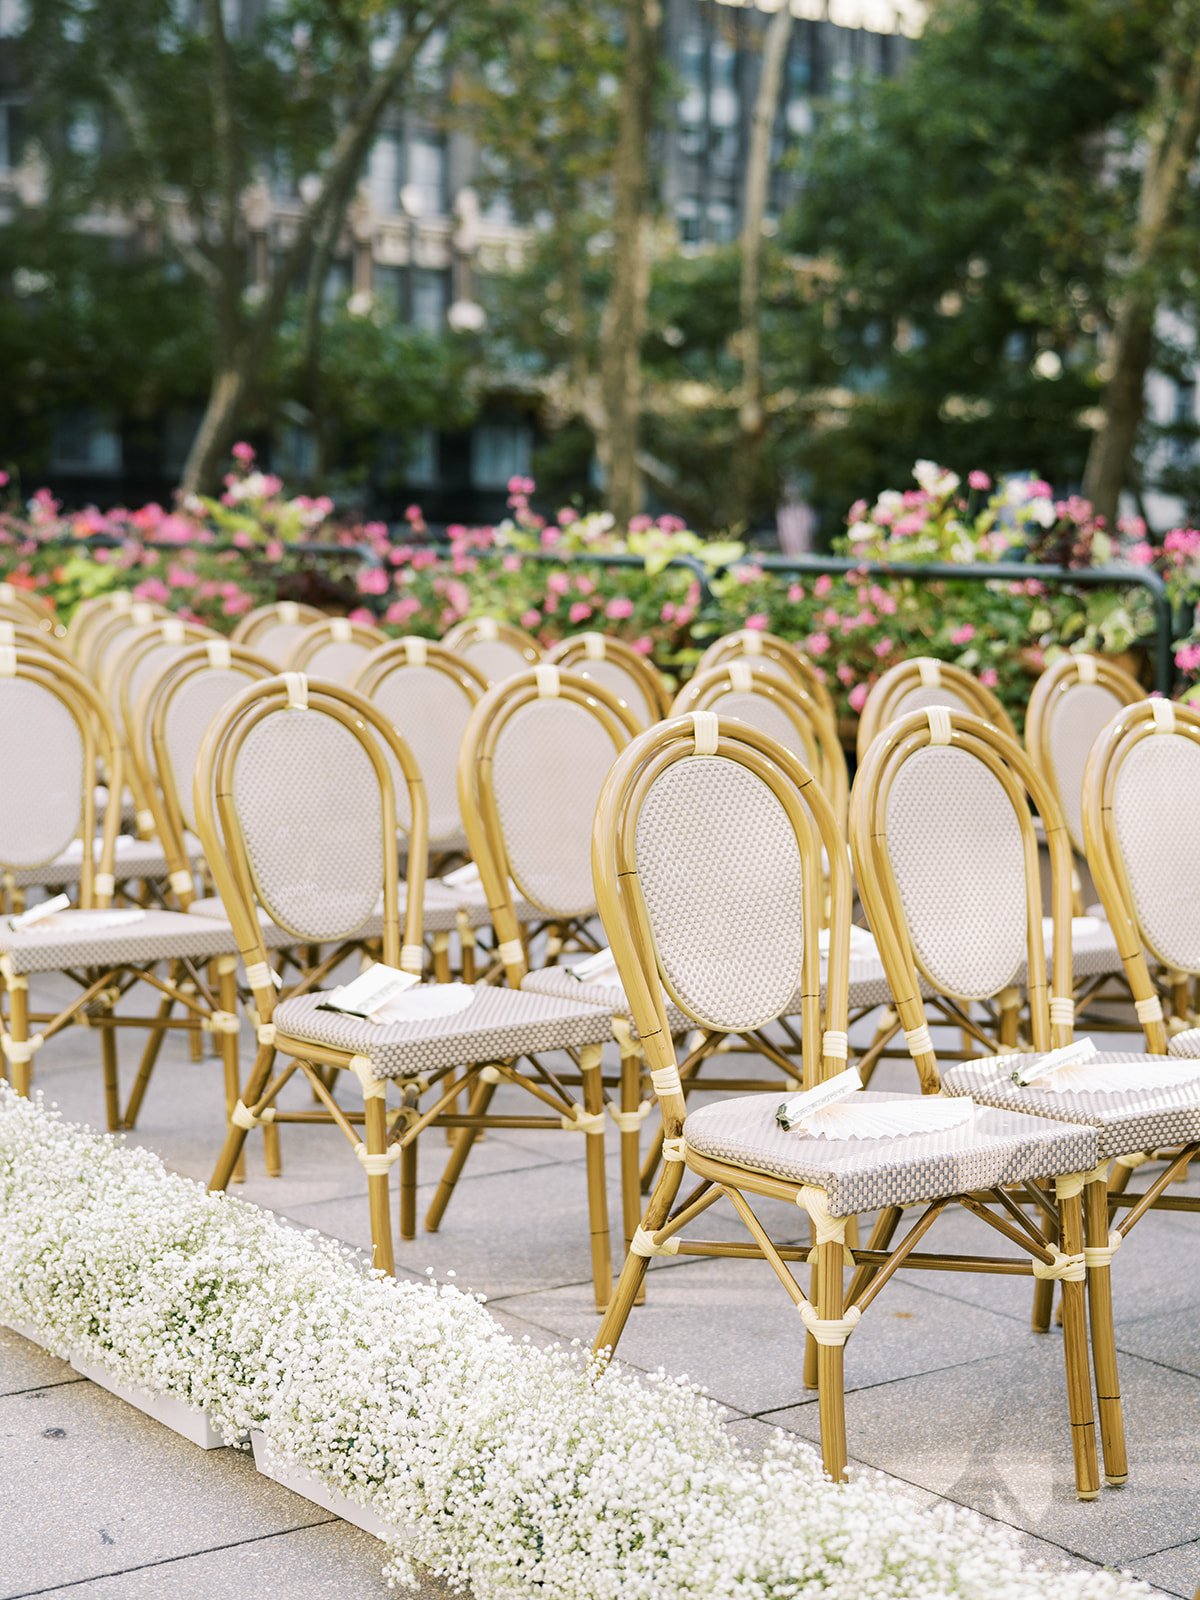
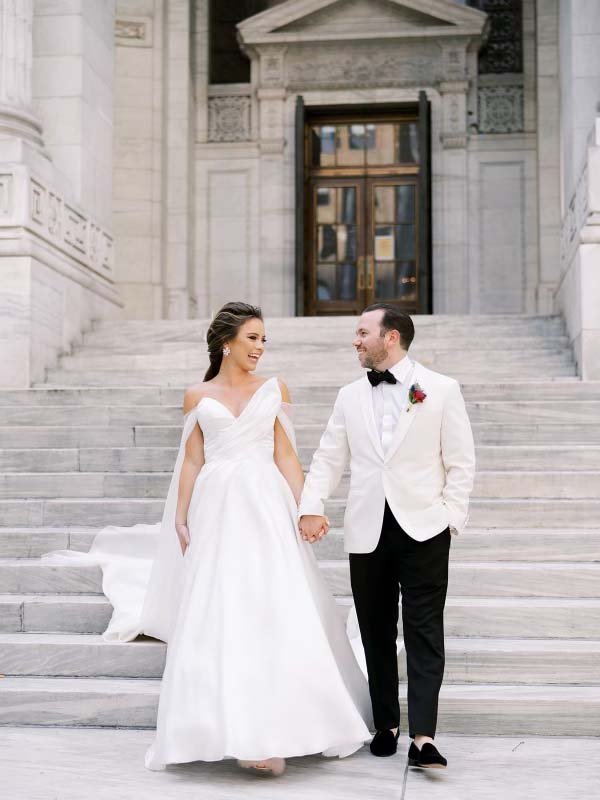
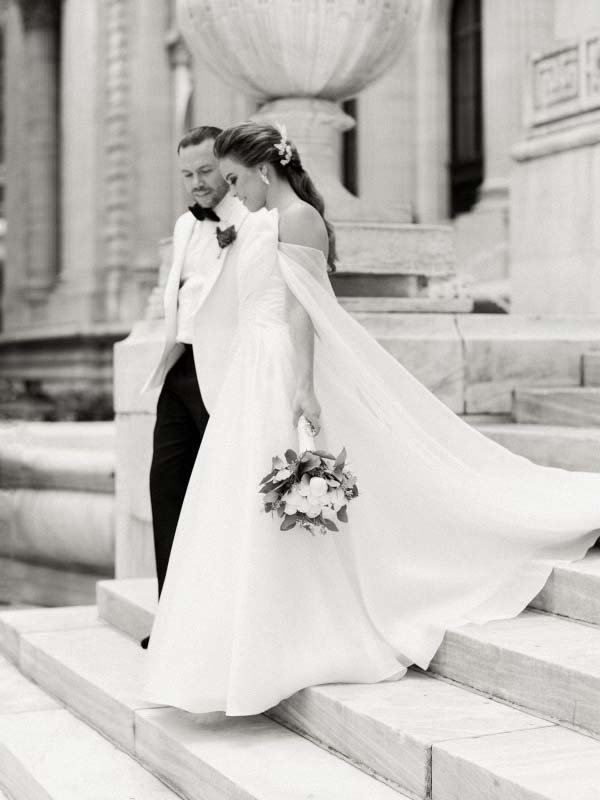
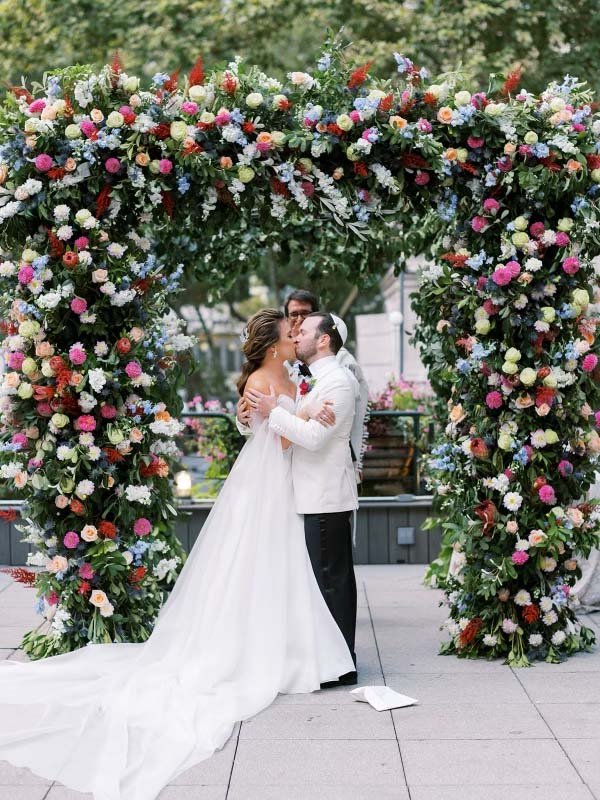
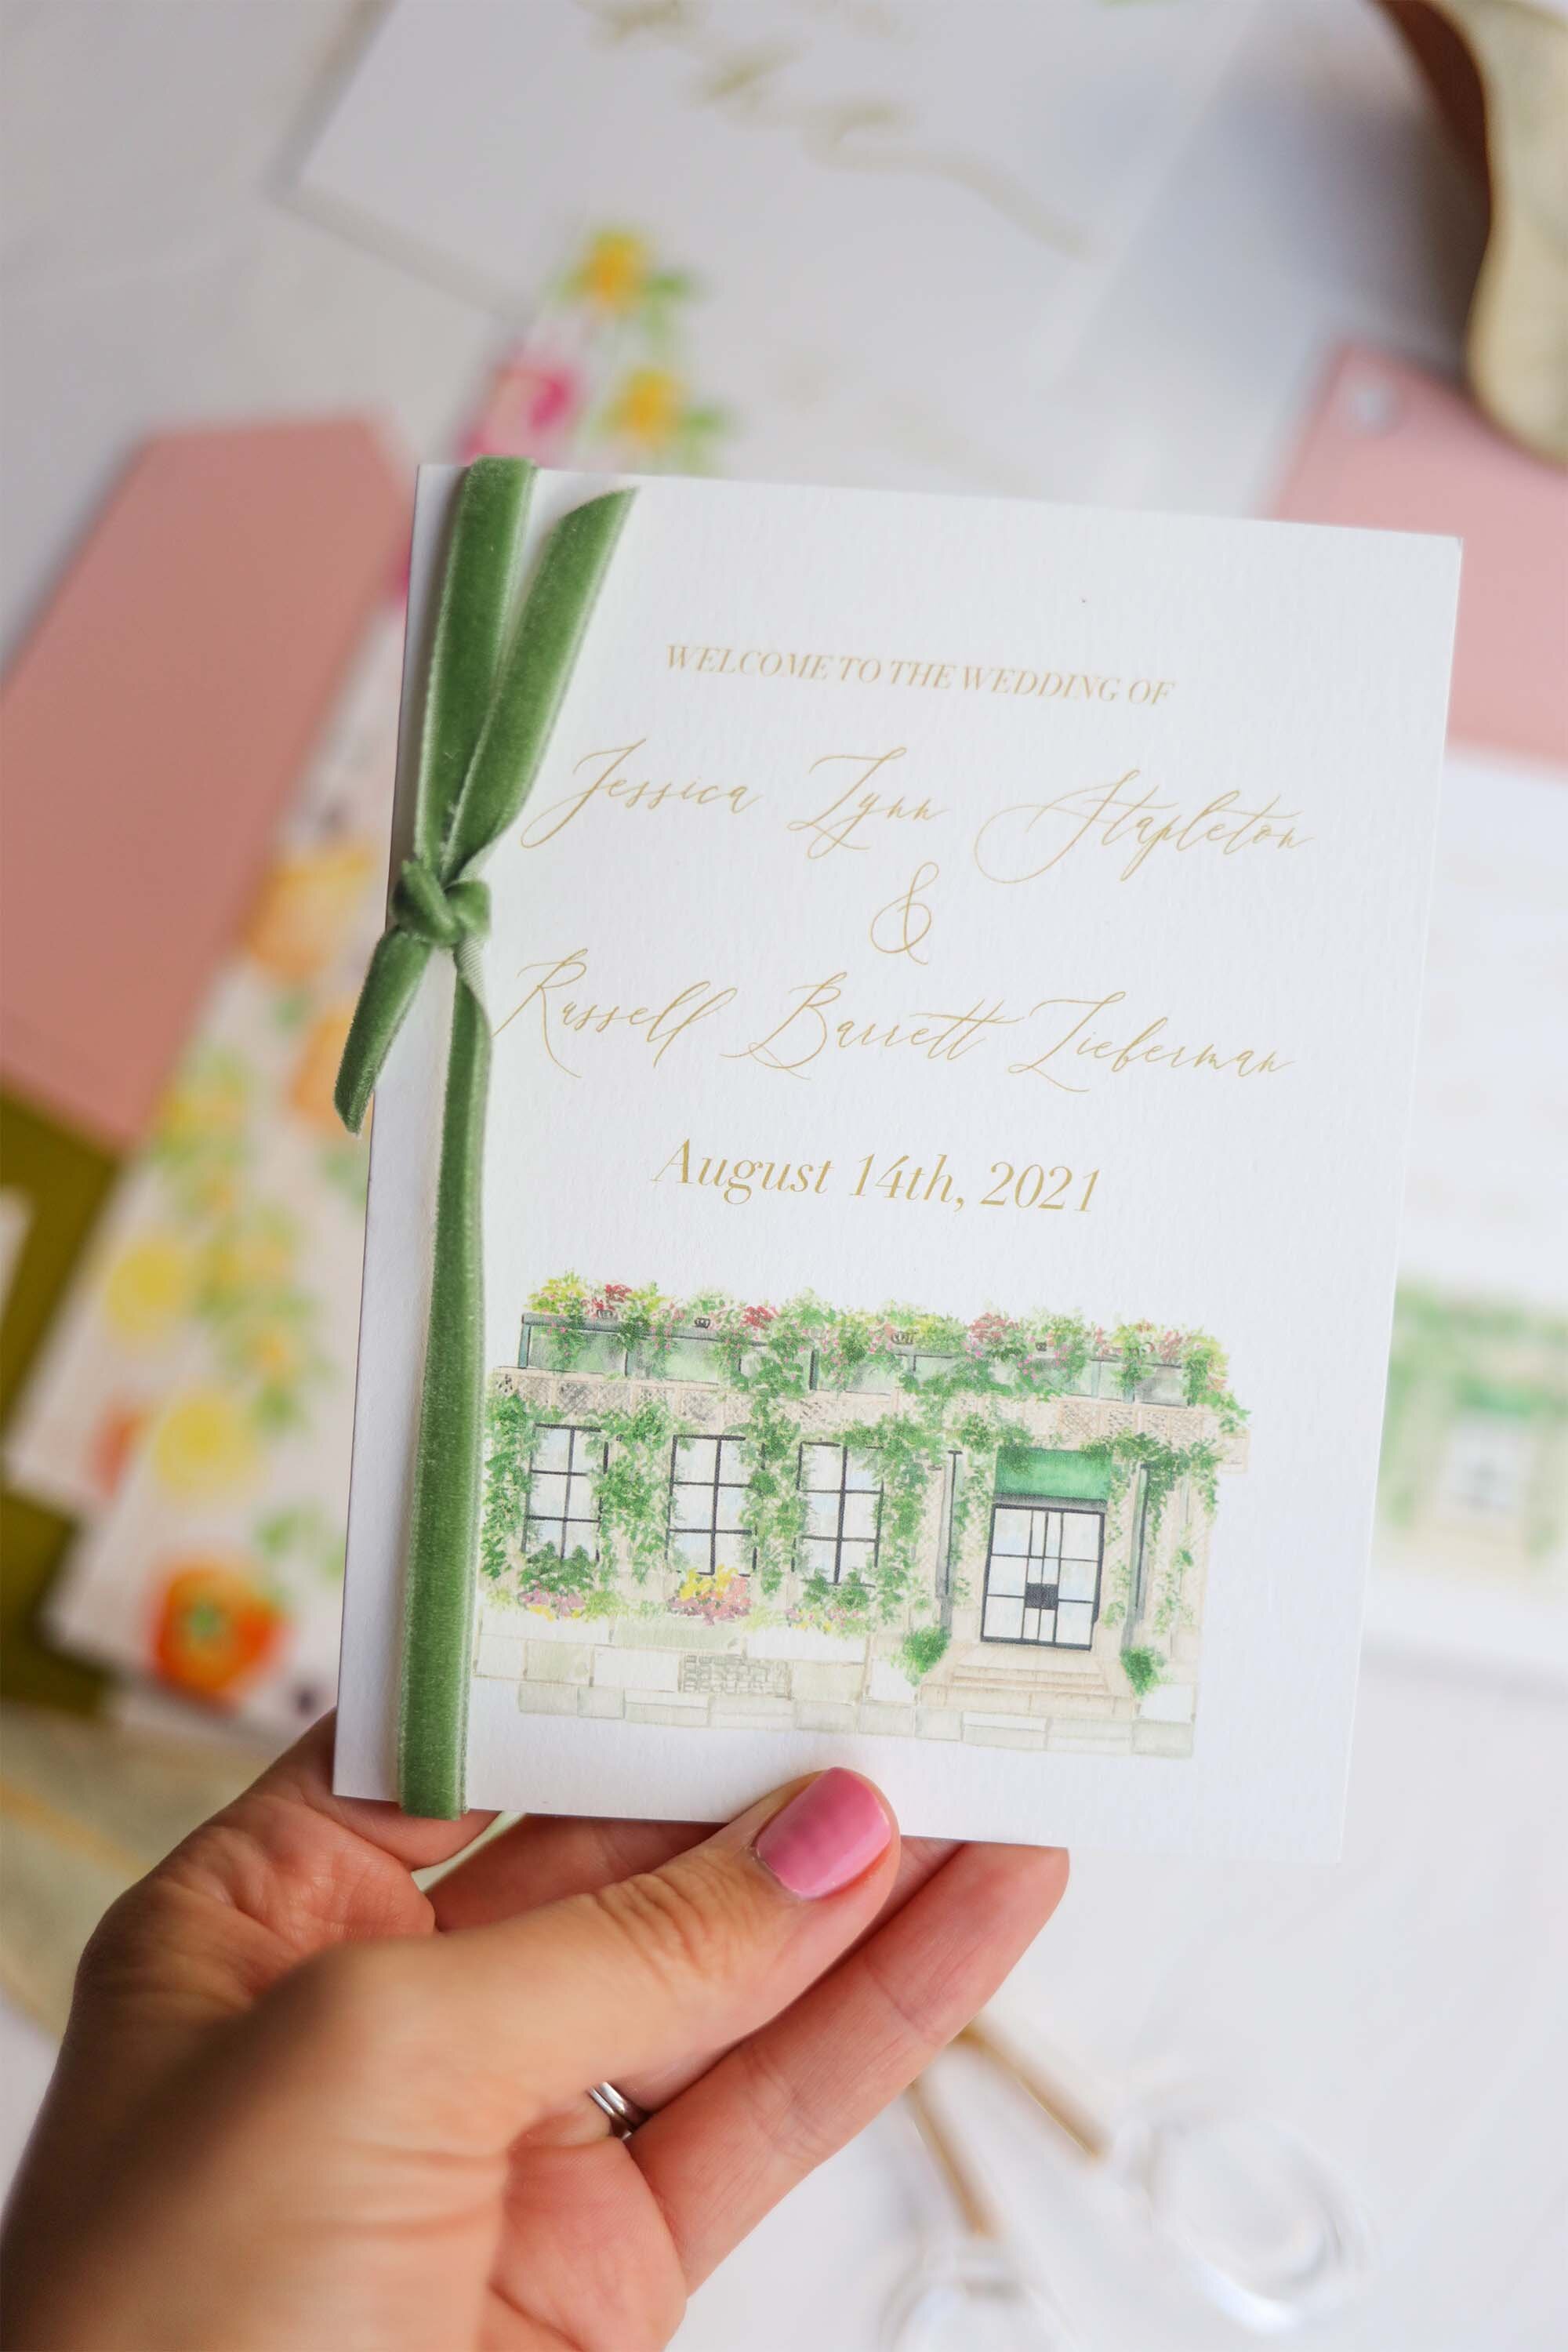
real wedding, Jess + Russ.
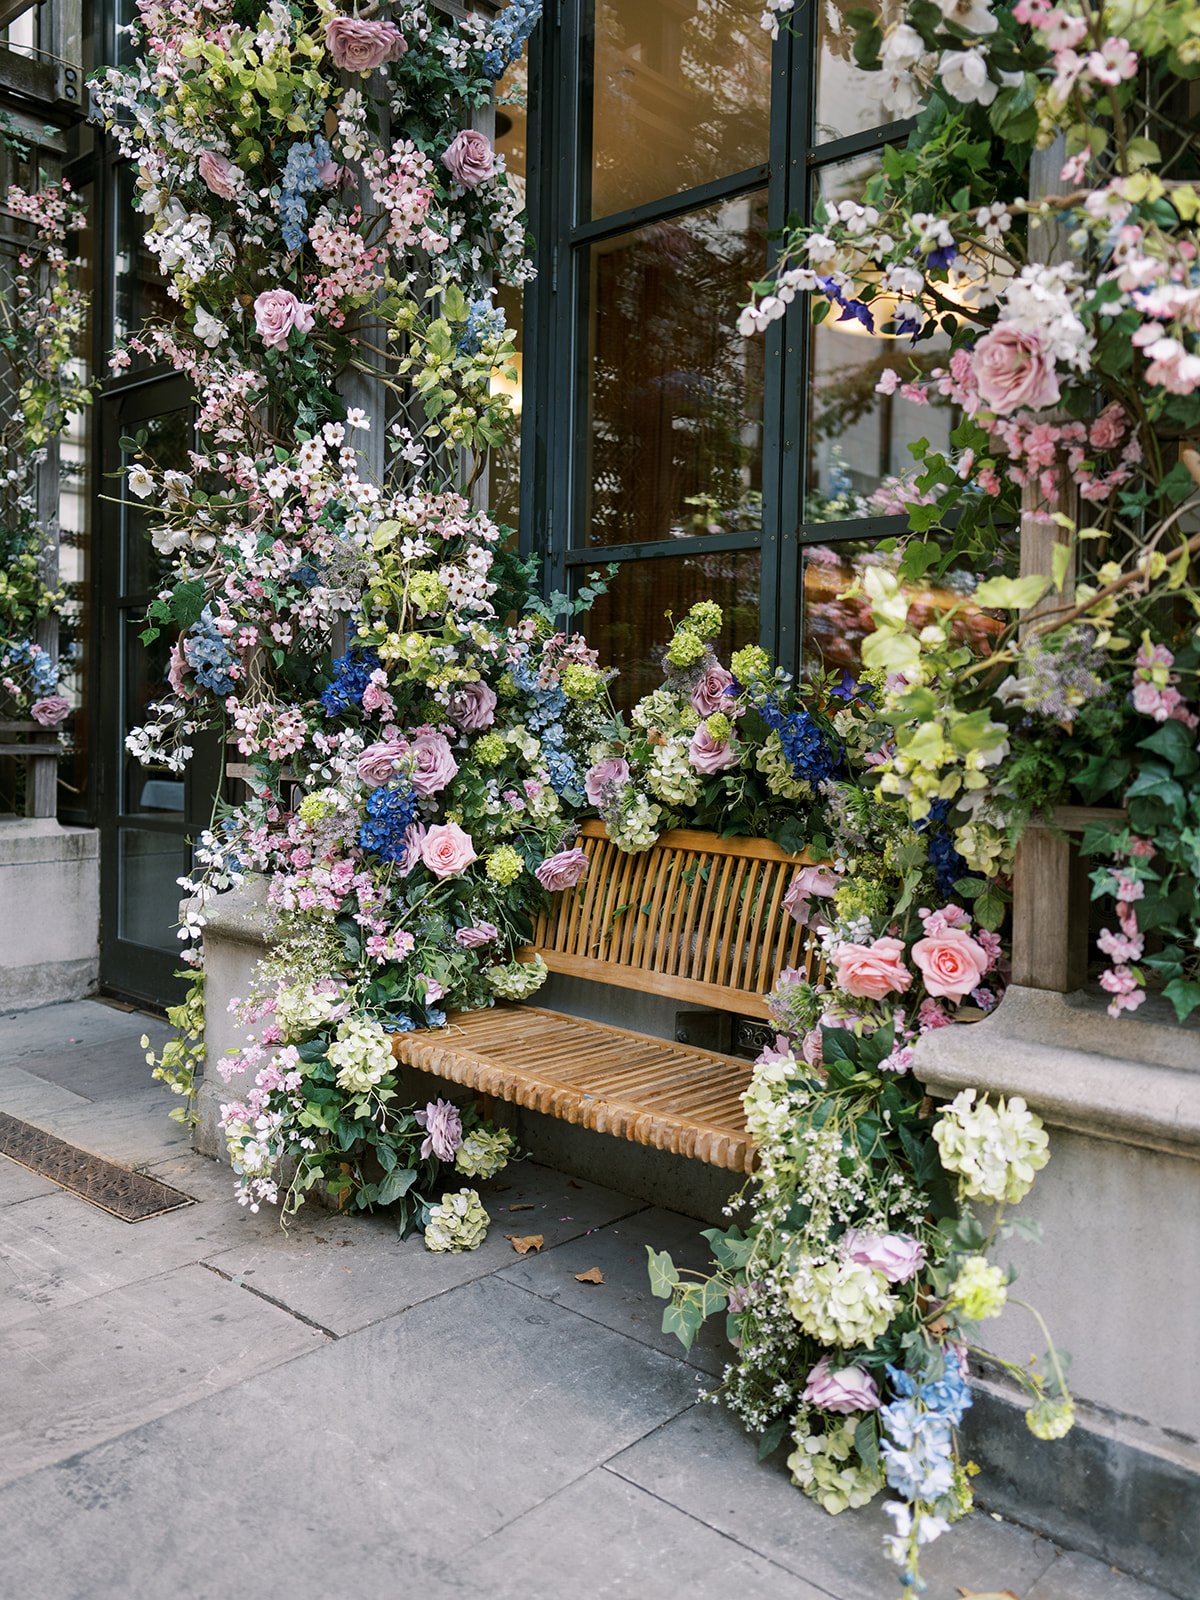
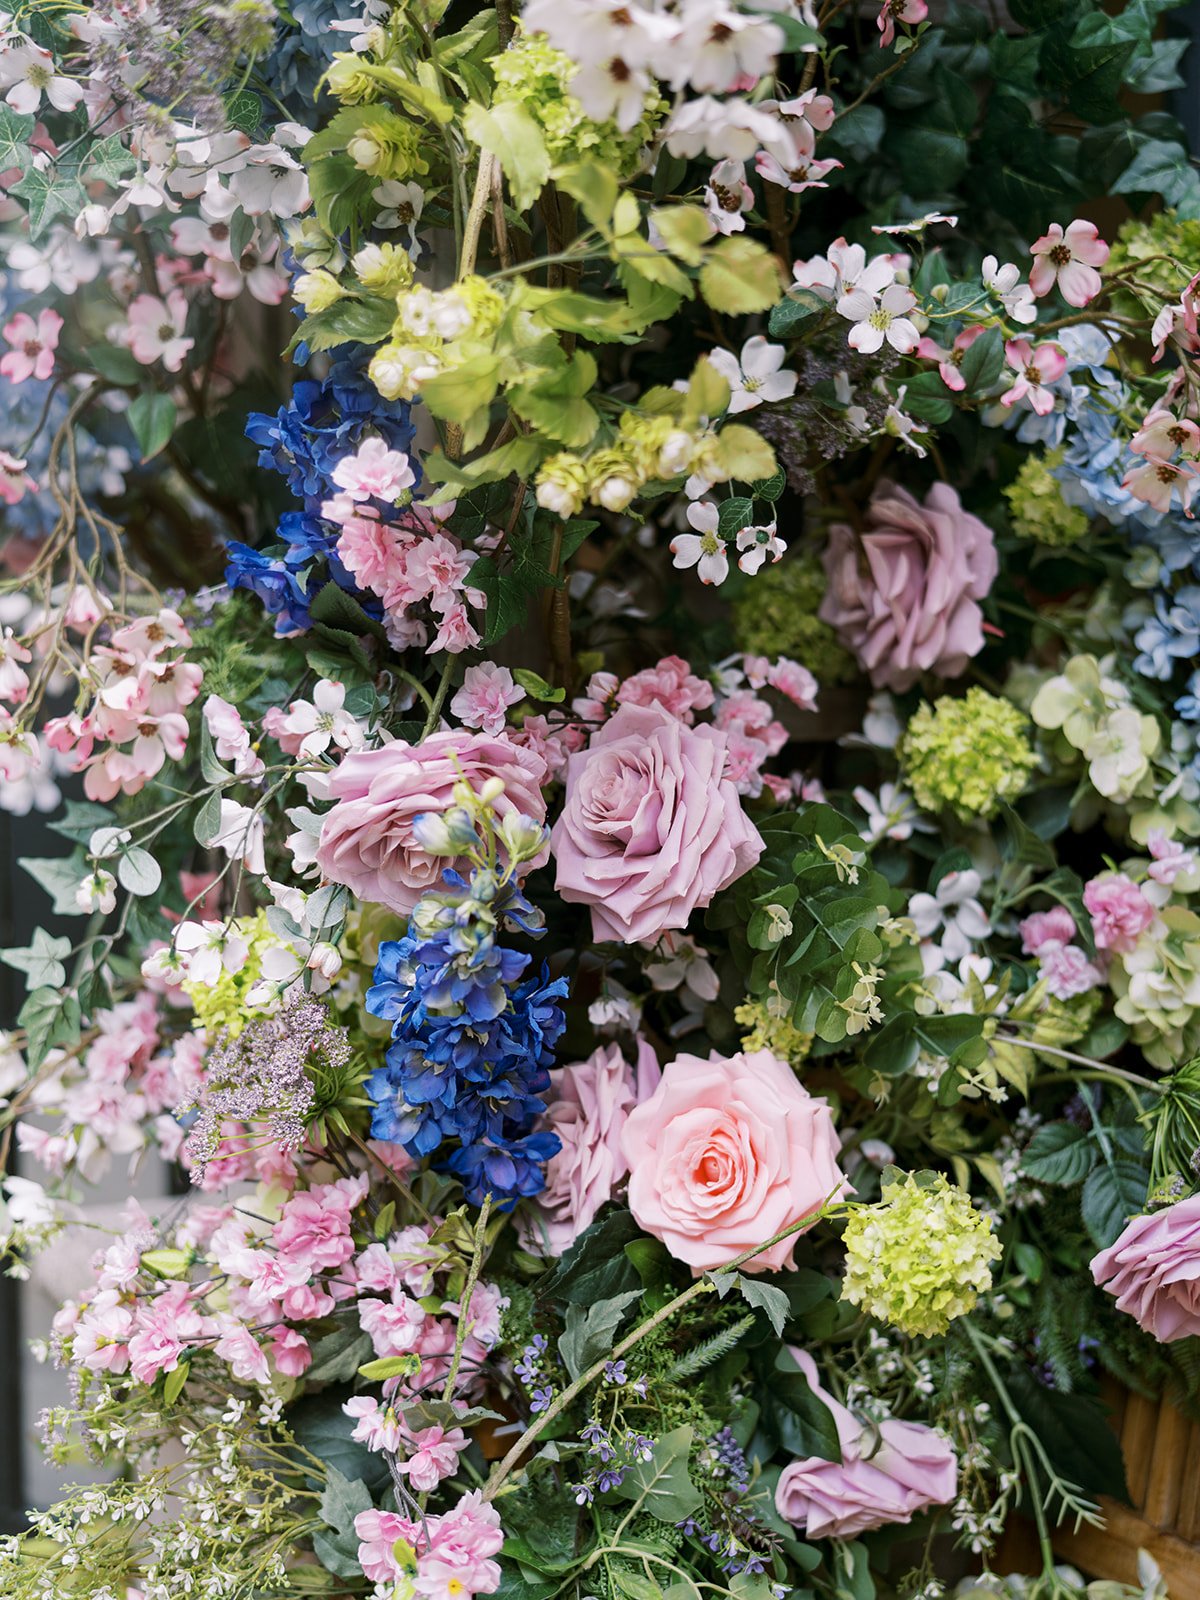
A stunning, NYC garden wedding right this way…

A real NYC love story.
Jess + Russ will always stand out in my mind. I worked with Jess one on one for almost 2 years due to the pandemic which was no easy course to navigate but Jess and Russ took it I stride. I swear those two never broke a sweat, cool as cucumbers. They are two people who know exactly what they want and like and were not willing to sacrifice that beautiful dream and I’m so glad they held on and waited!
They did get married in the NYC court house before their big wedding celebration which is exactly as it should be! Don’t let life’s curveballs stop your plans. Keep on moving and get yourselves married, you can party later! And they did.
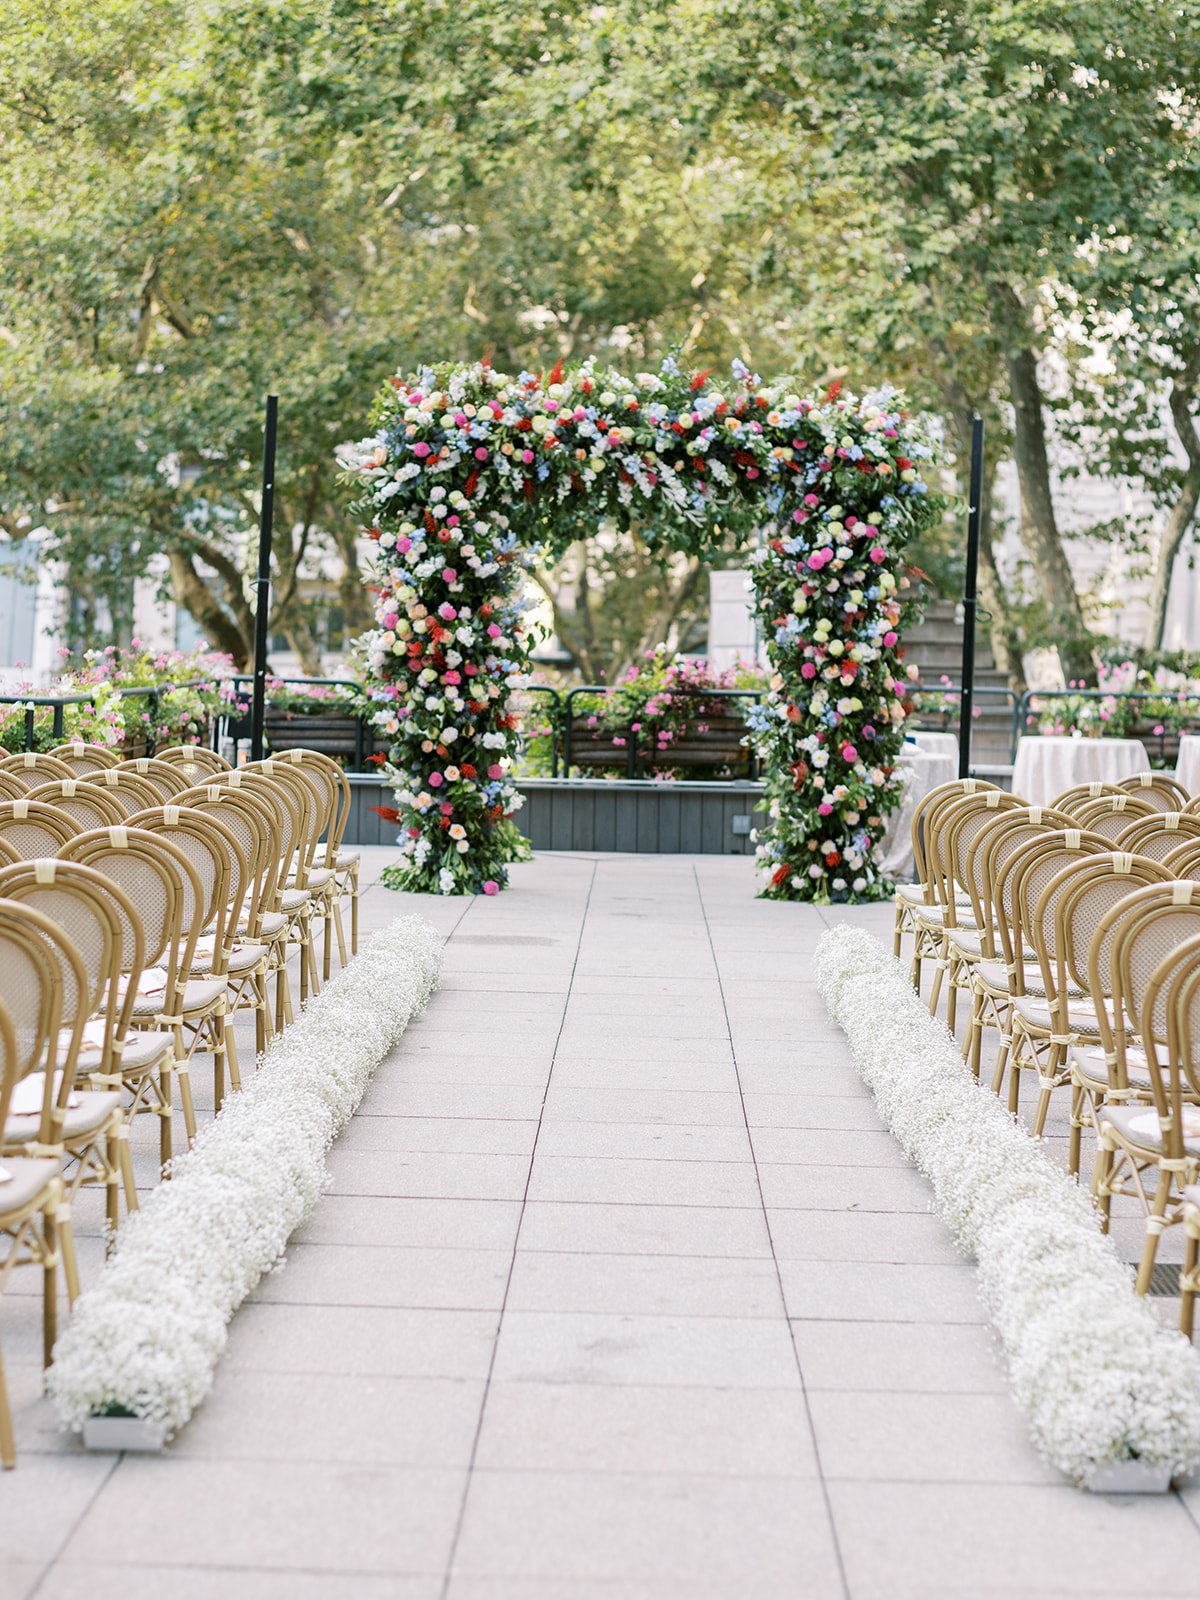
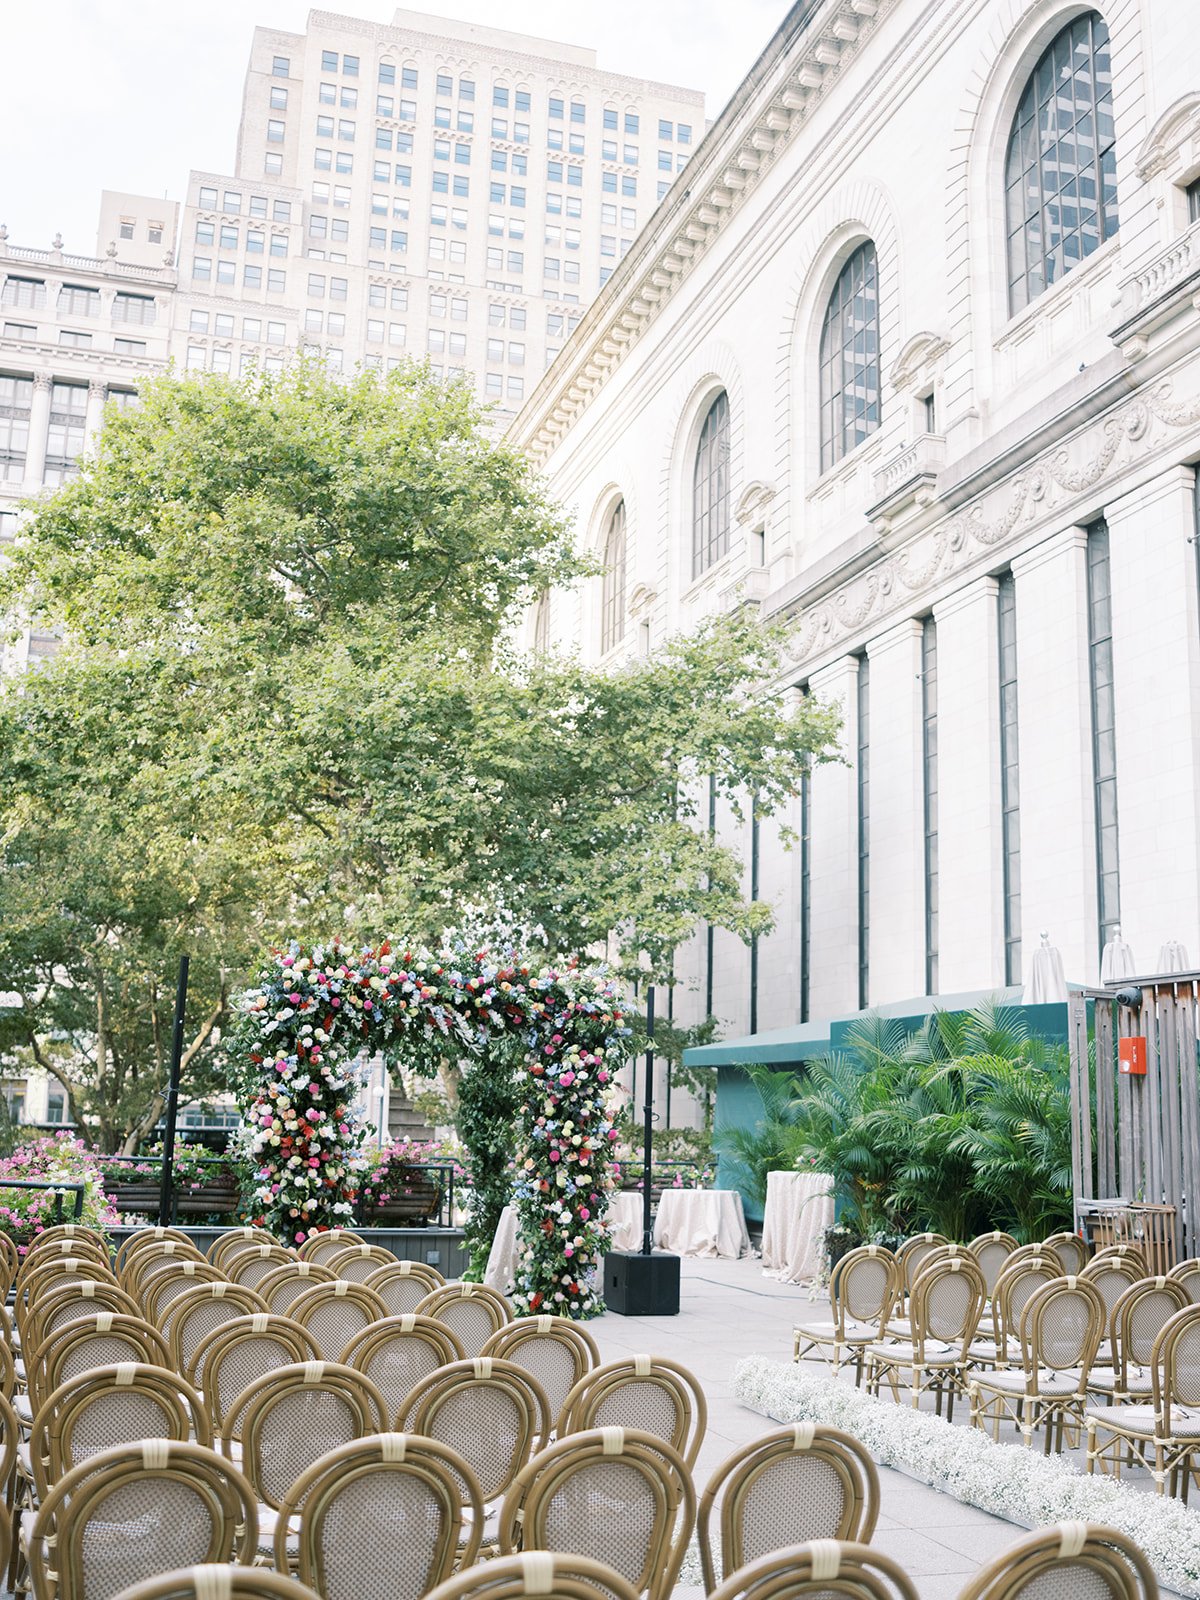
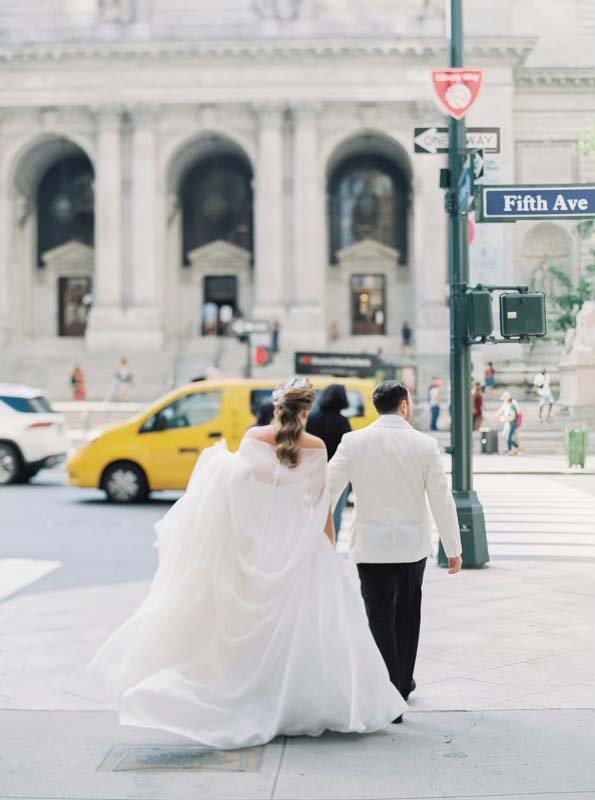
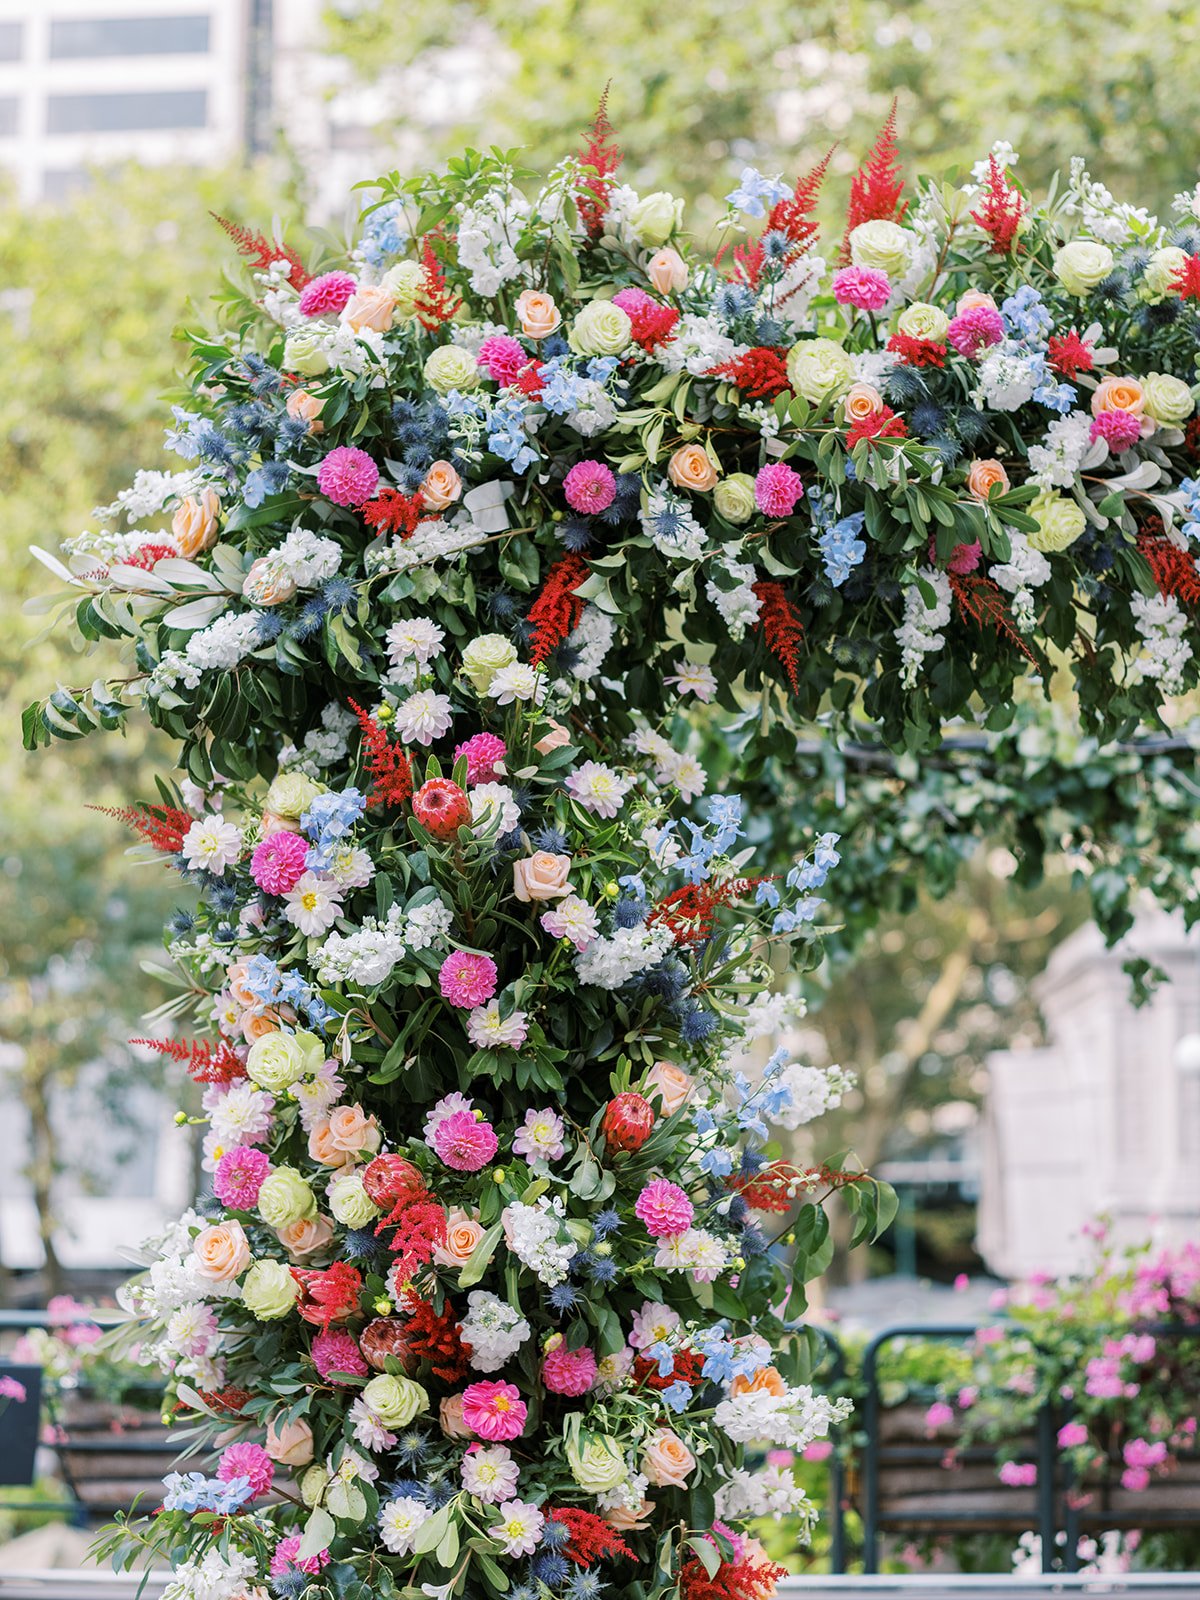
Oh my god they partied at the most gorgeous, lush, floral filled garden wedding held at the Bryant Park Grill. Only the photos will do it justice which you’ll see below.
I adore these two people and wish them al the happiness, love, adventure and cats <3
_______________
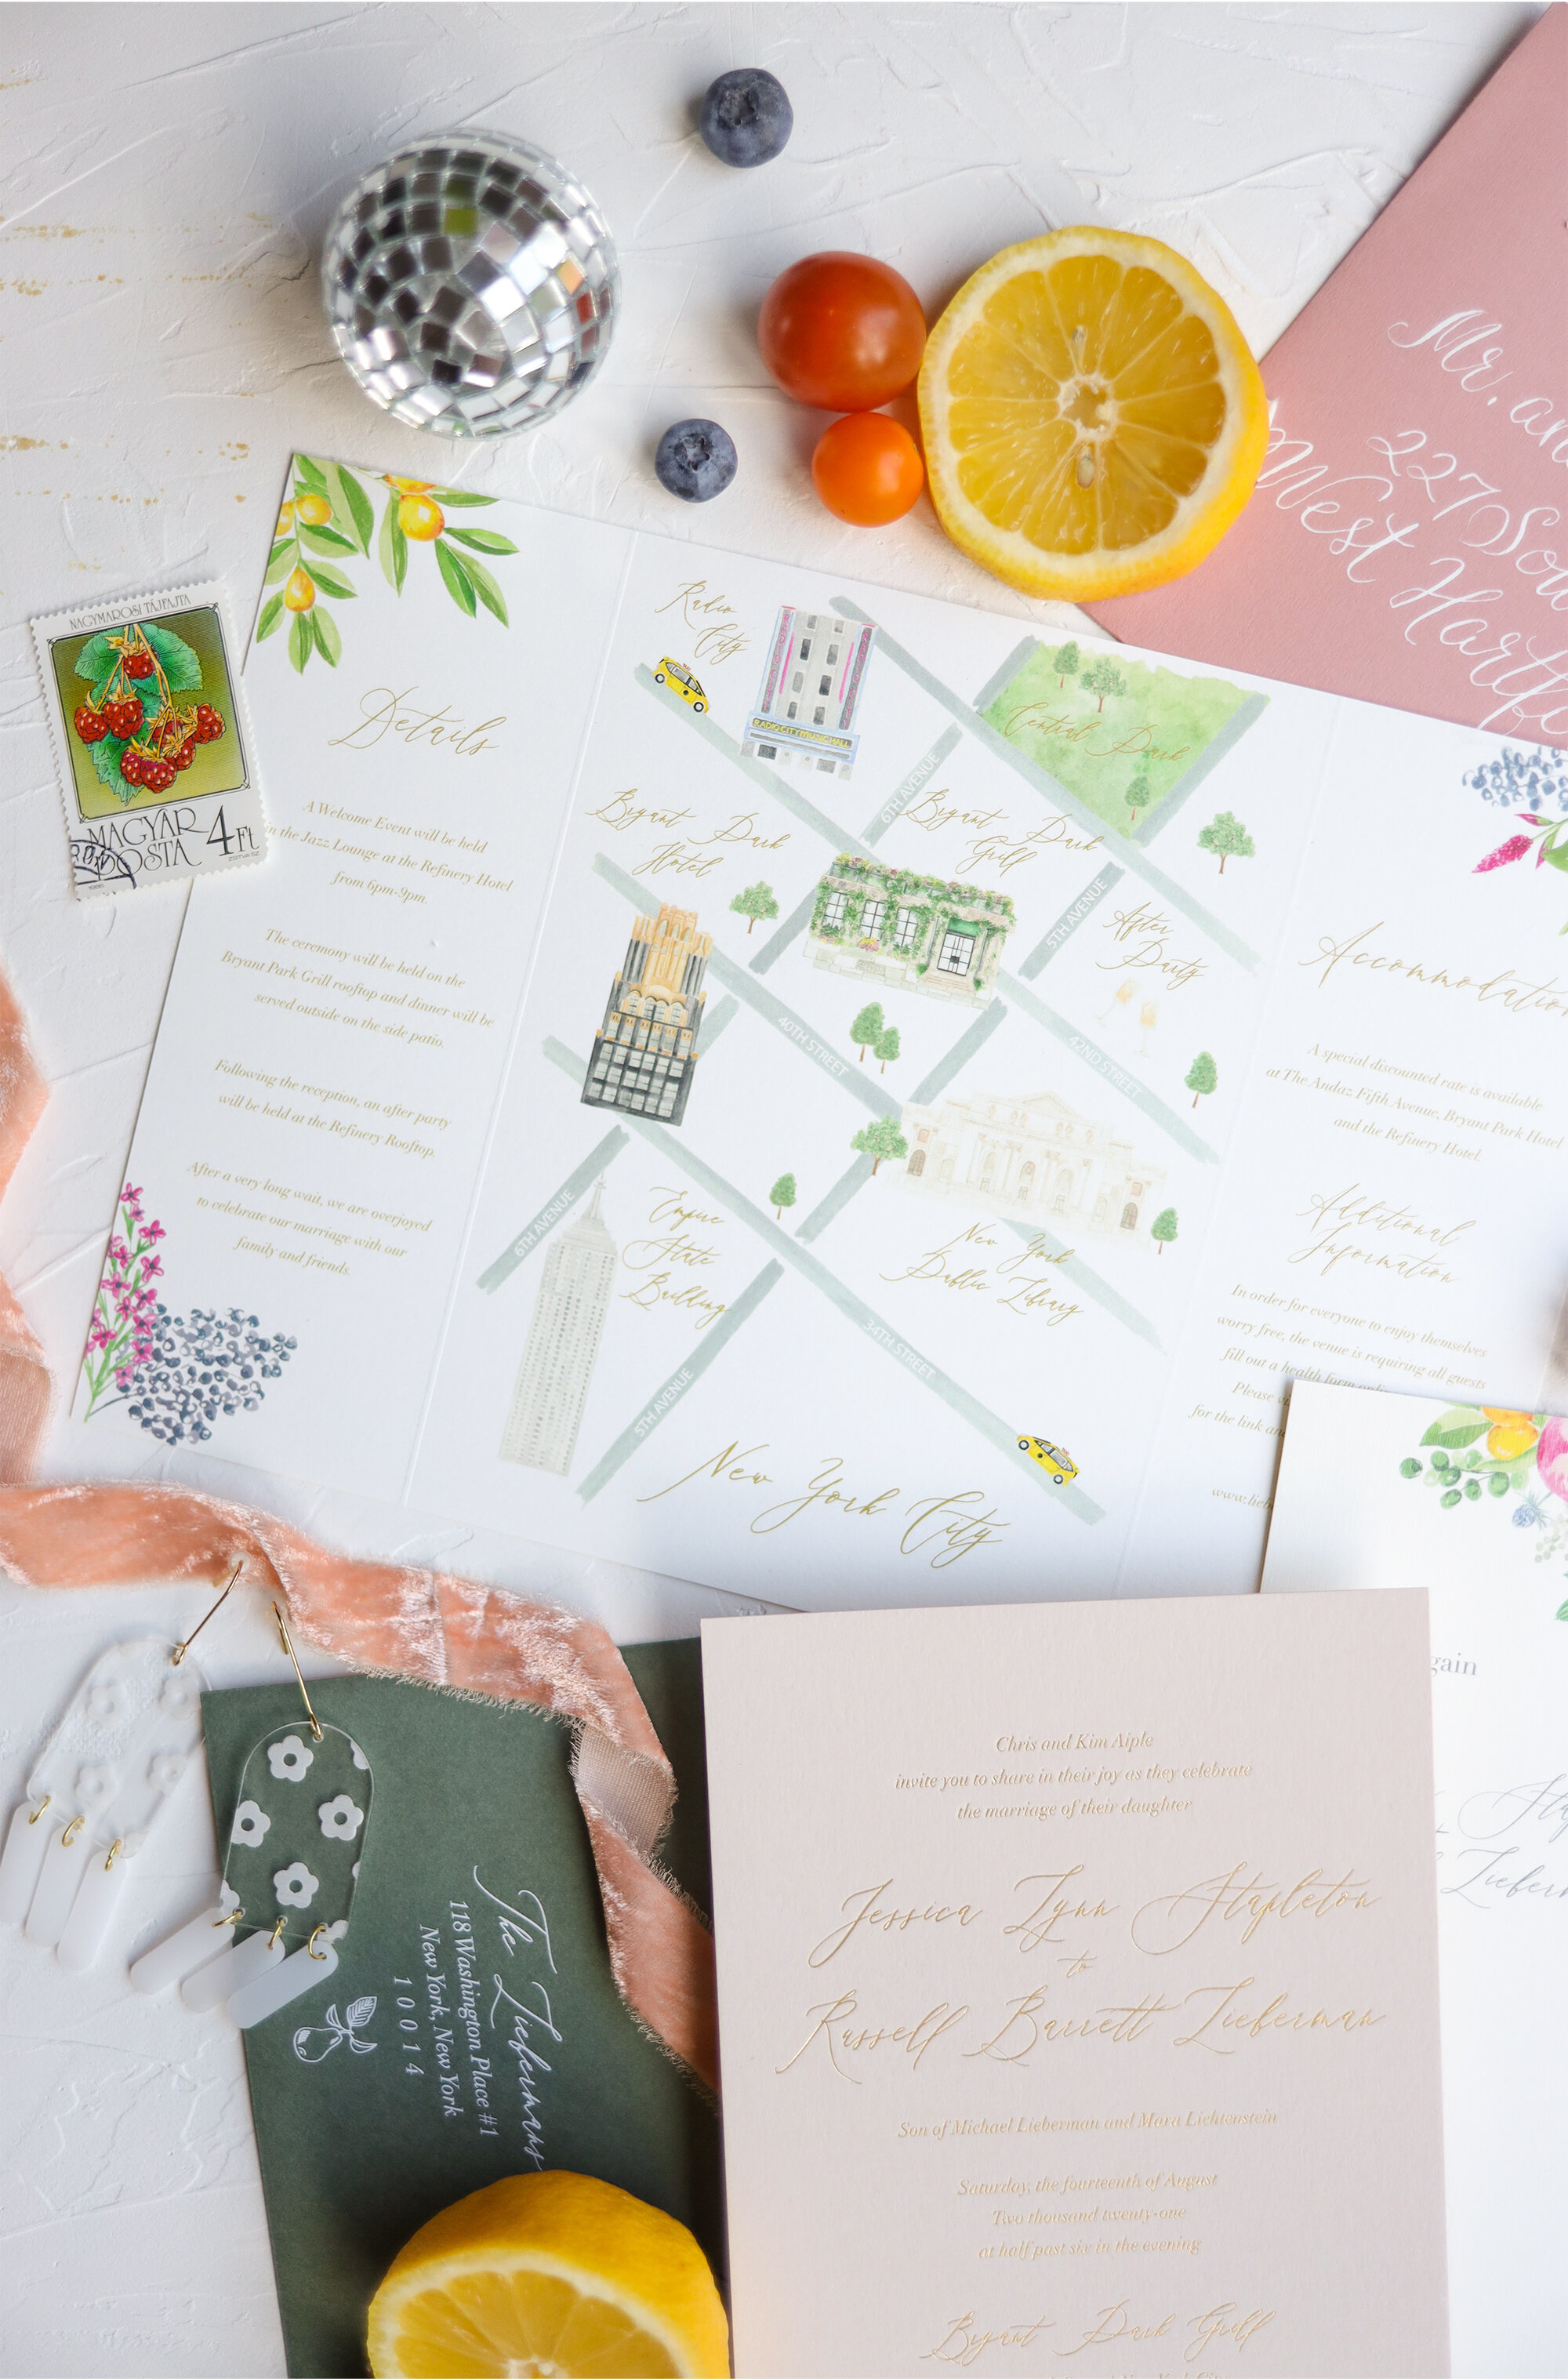
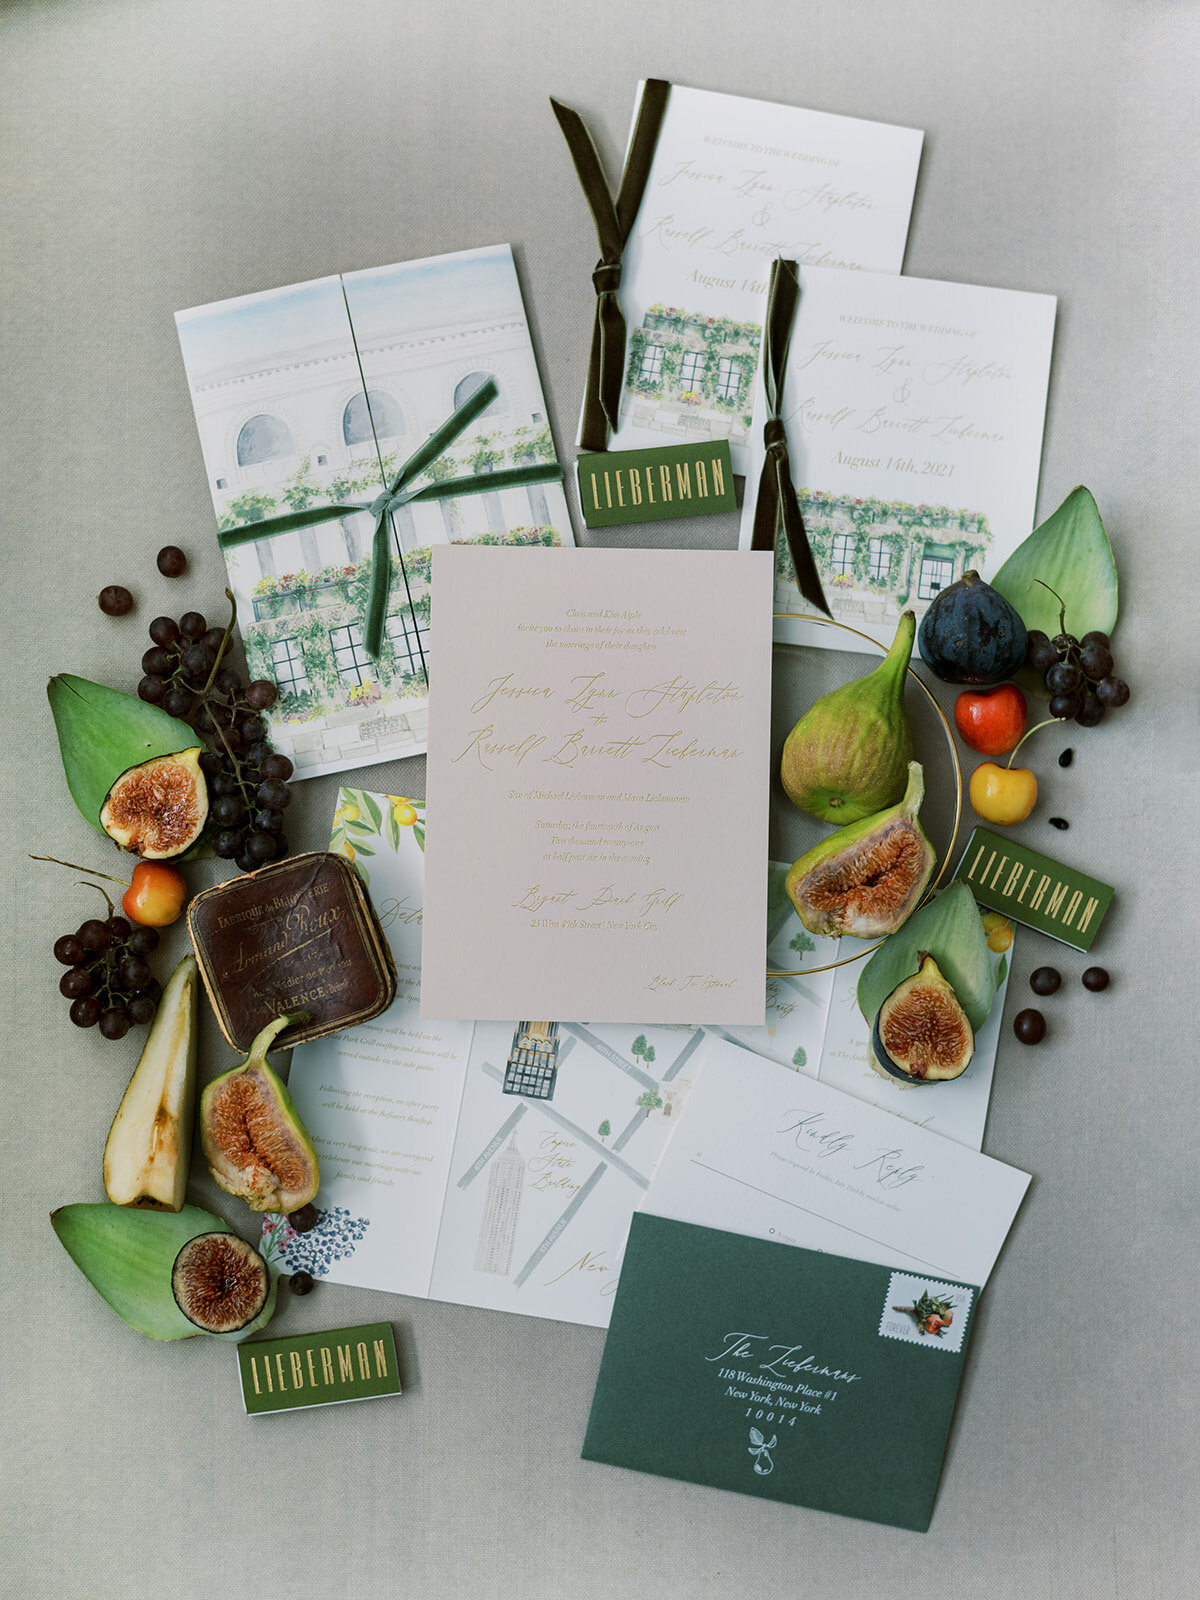
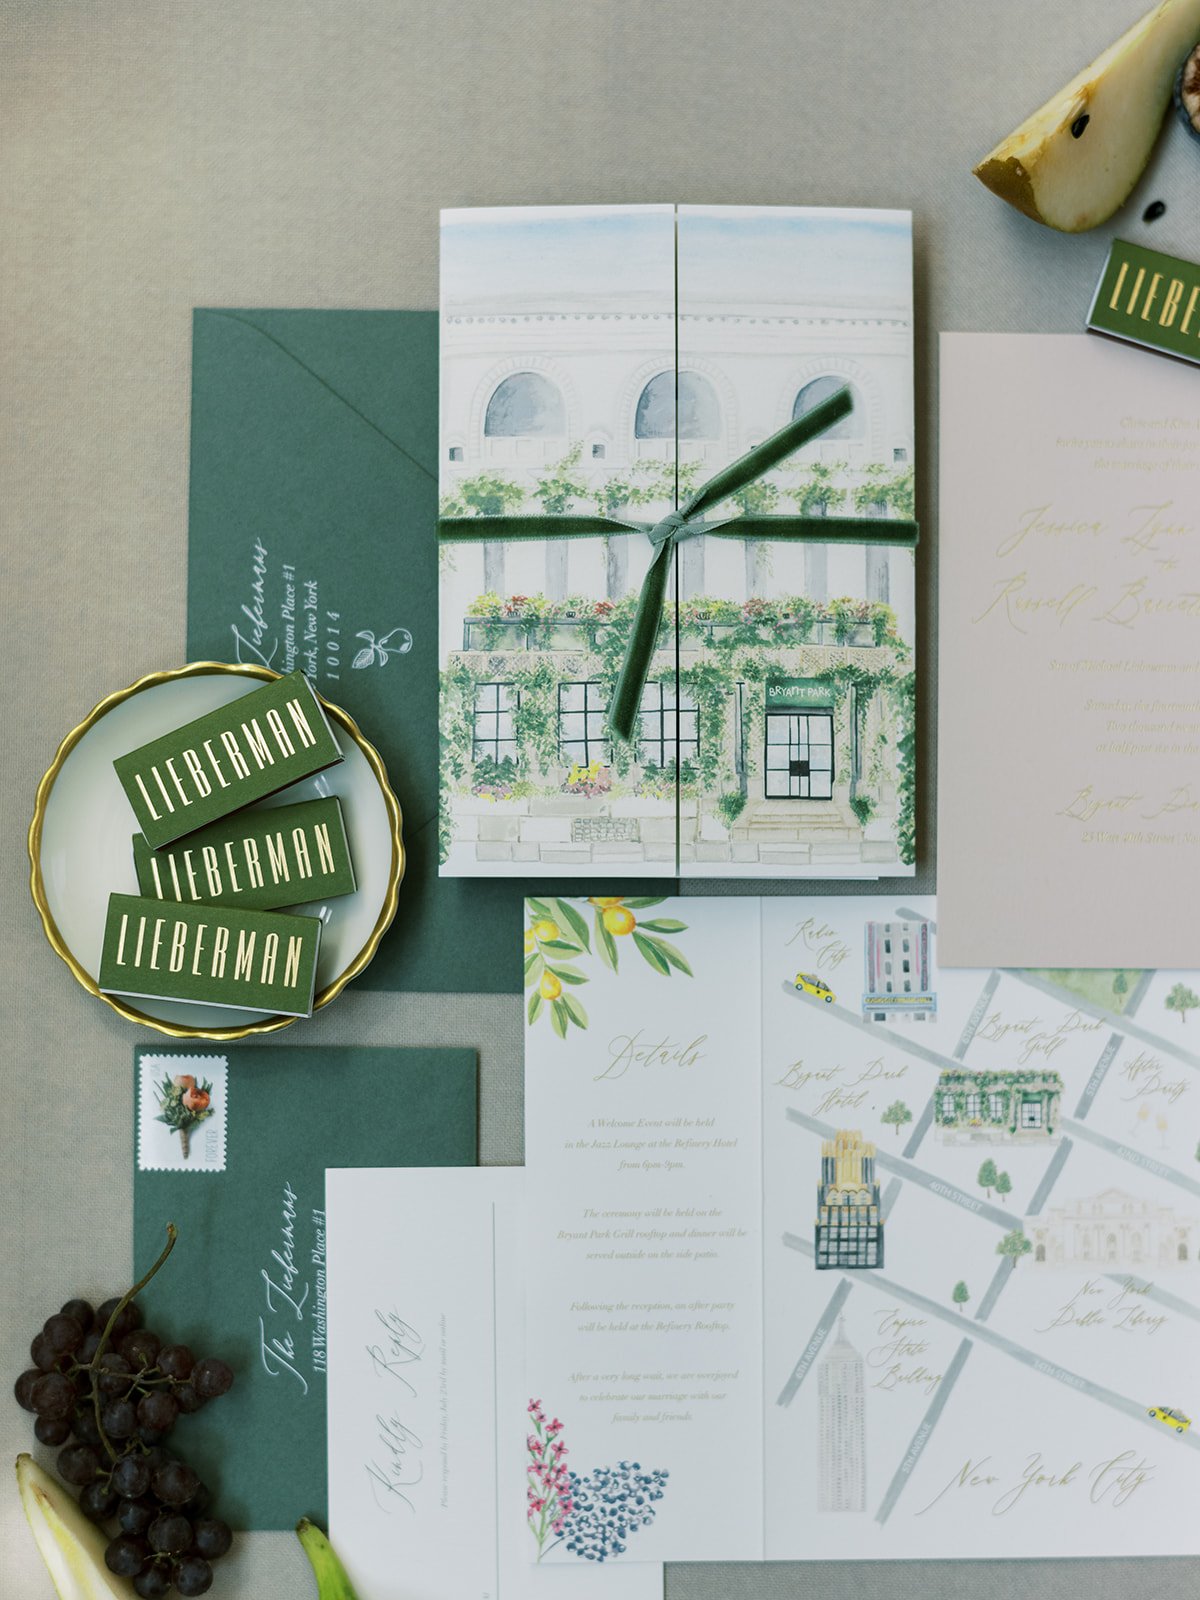
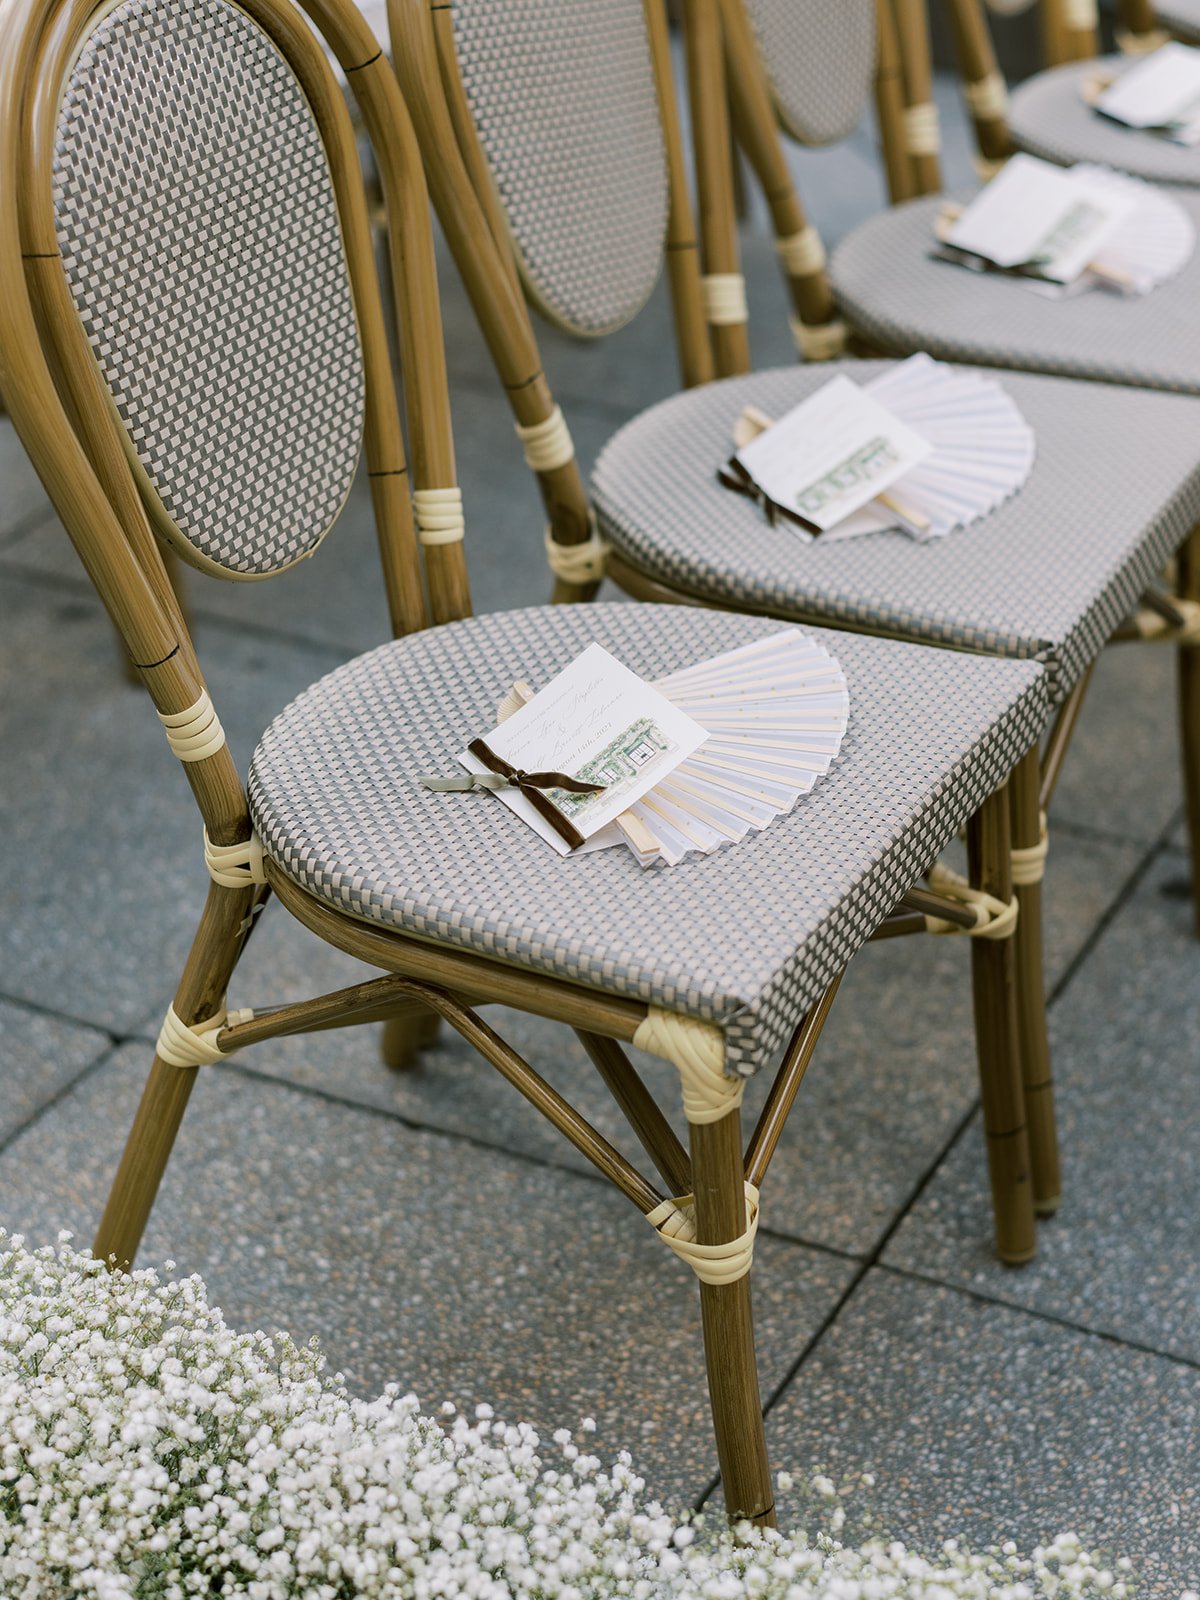
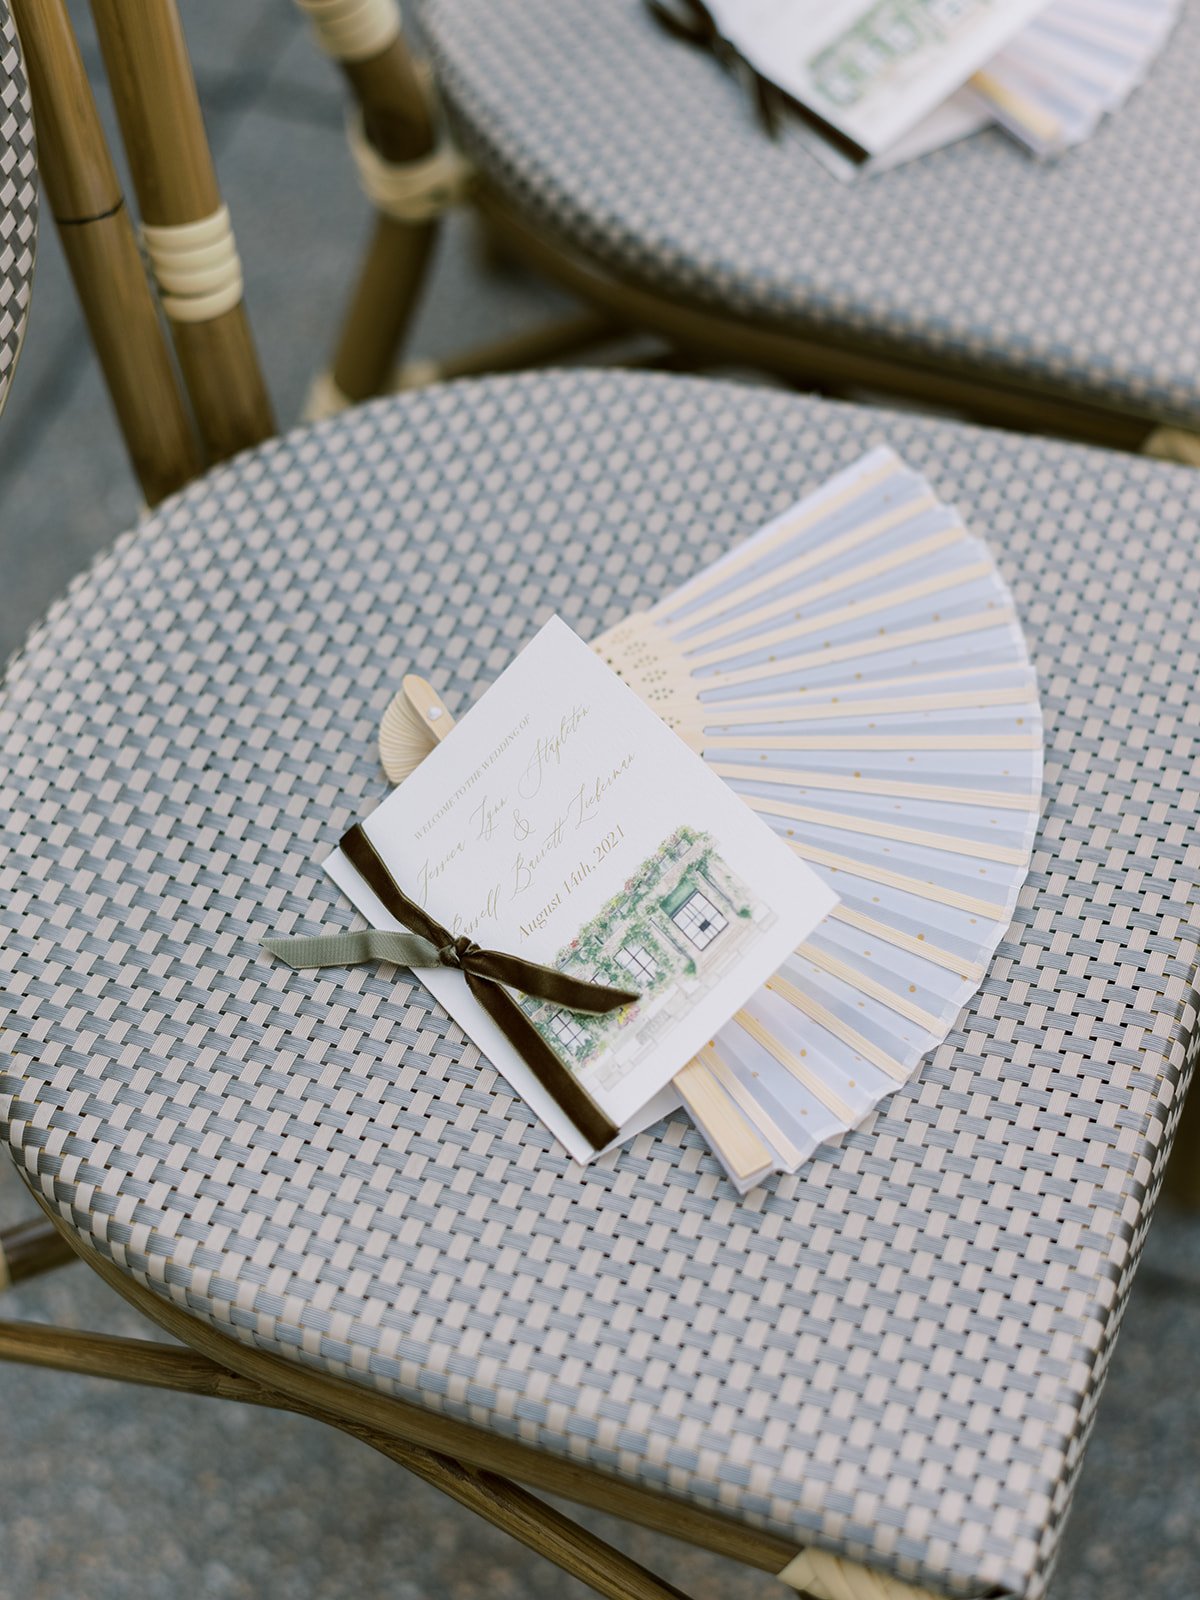
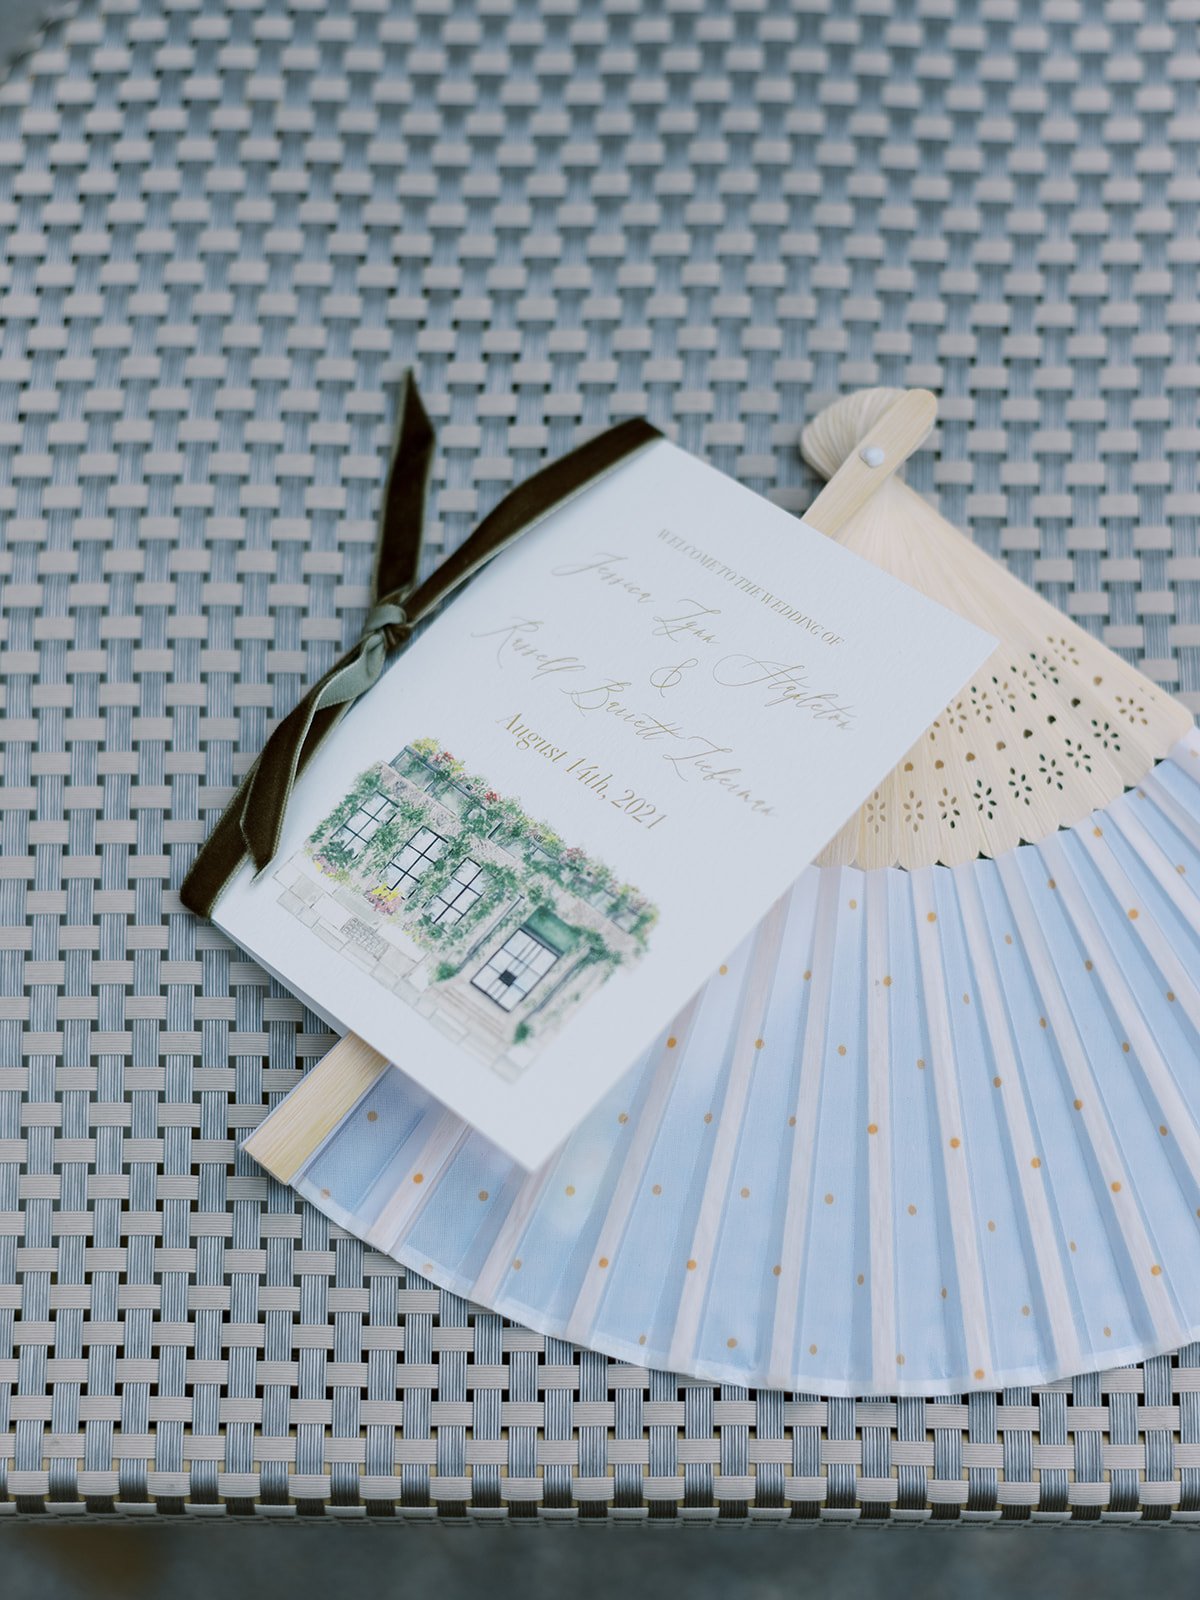
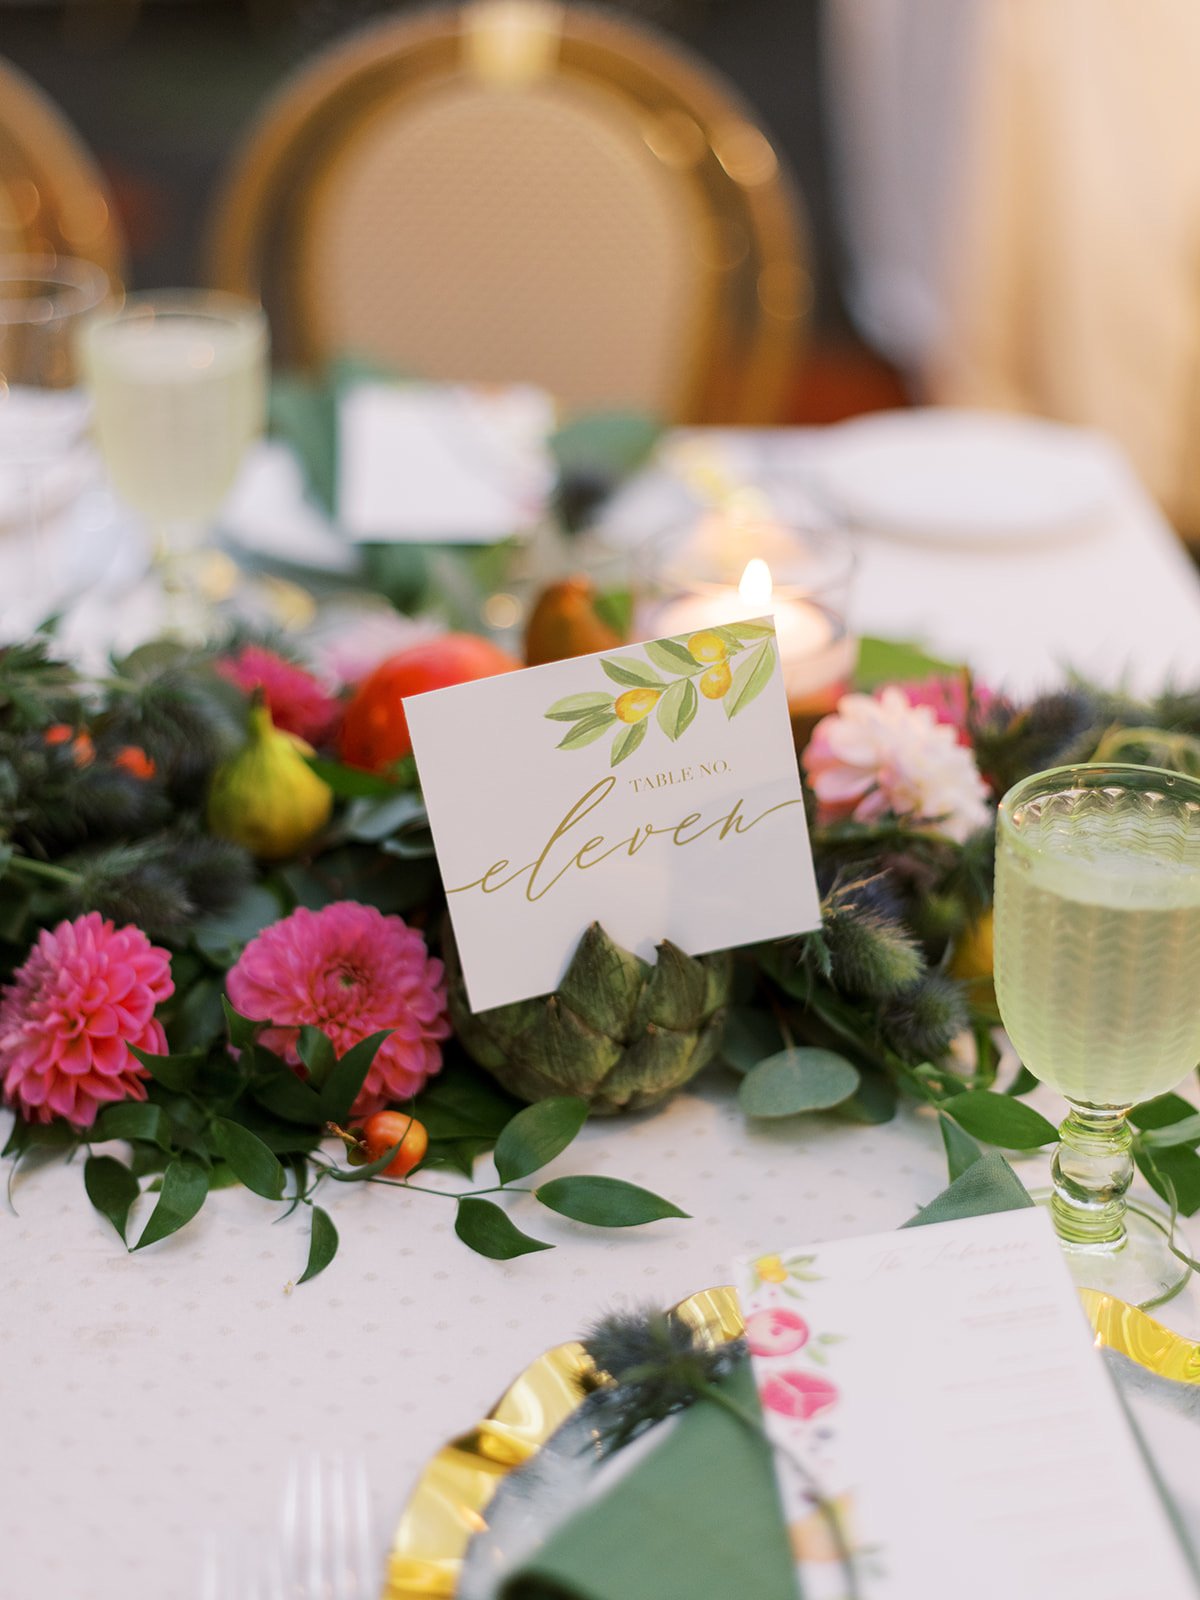
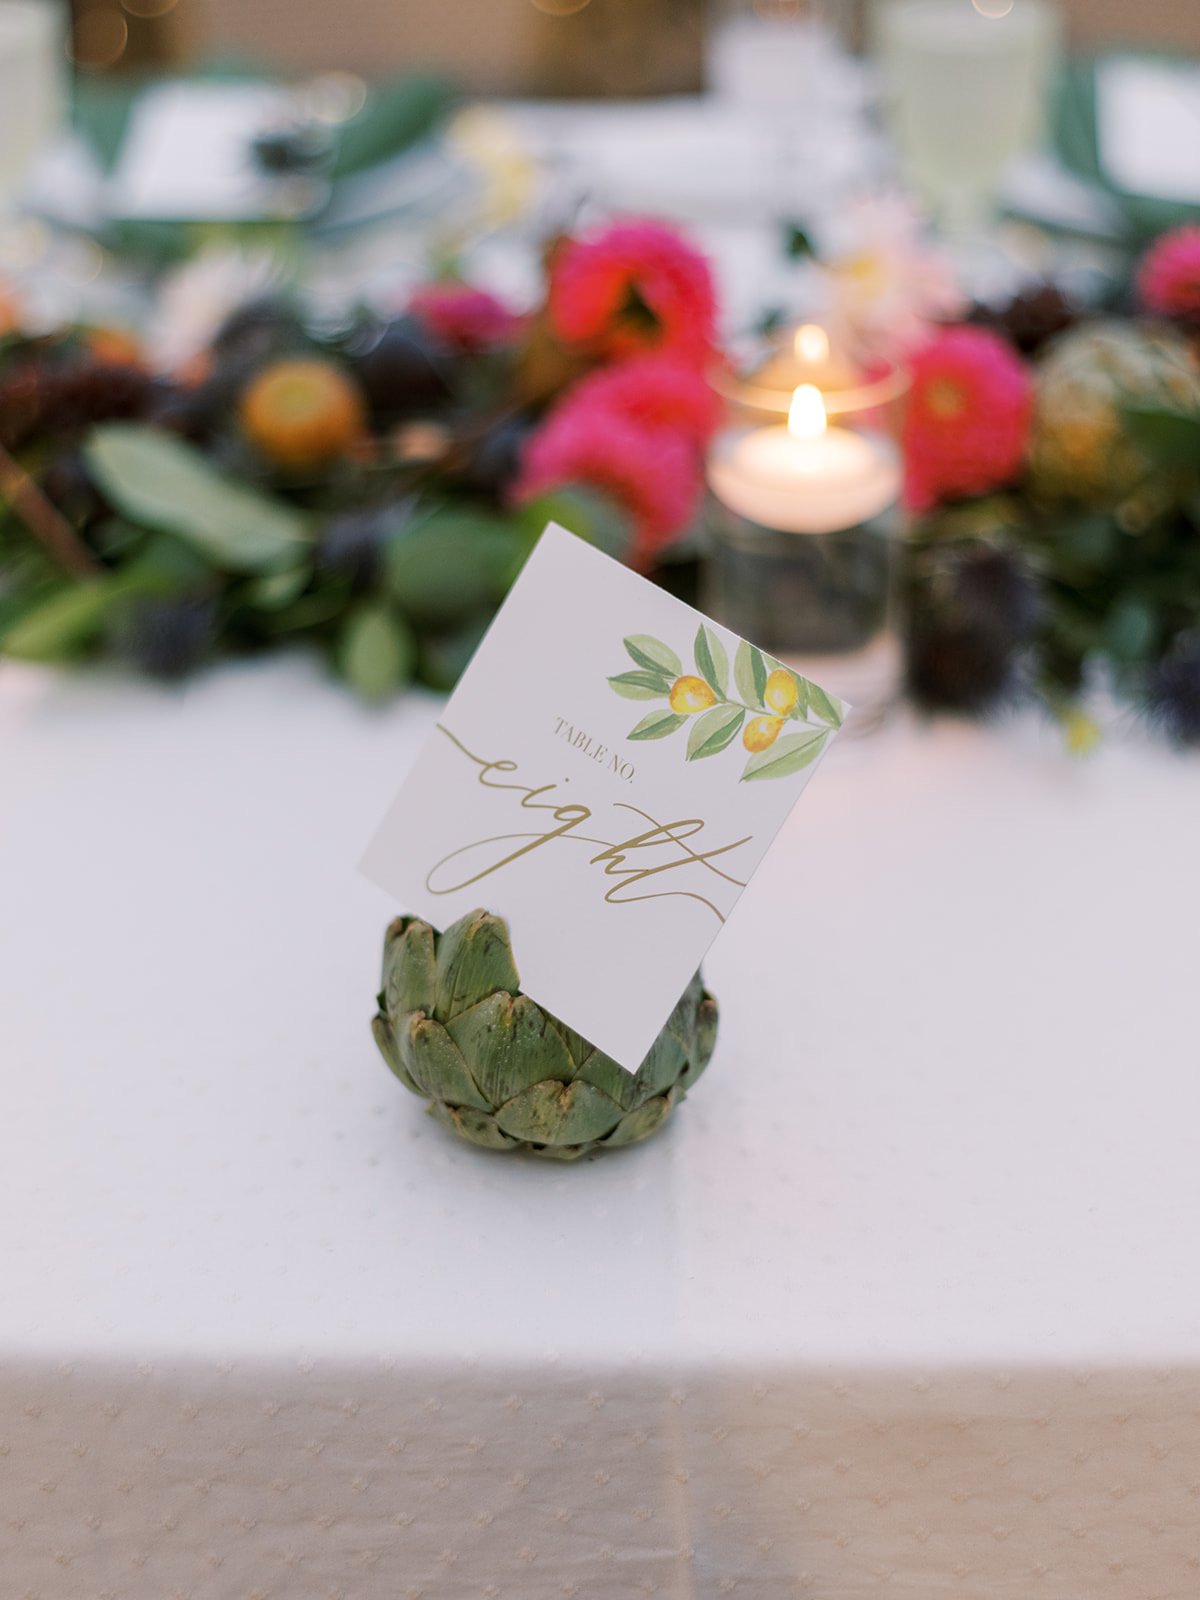
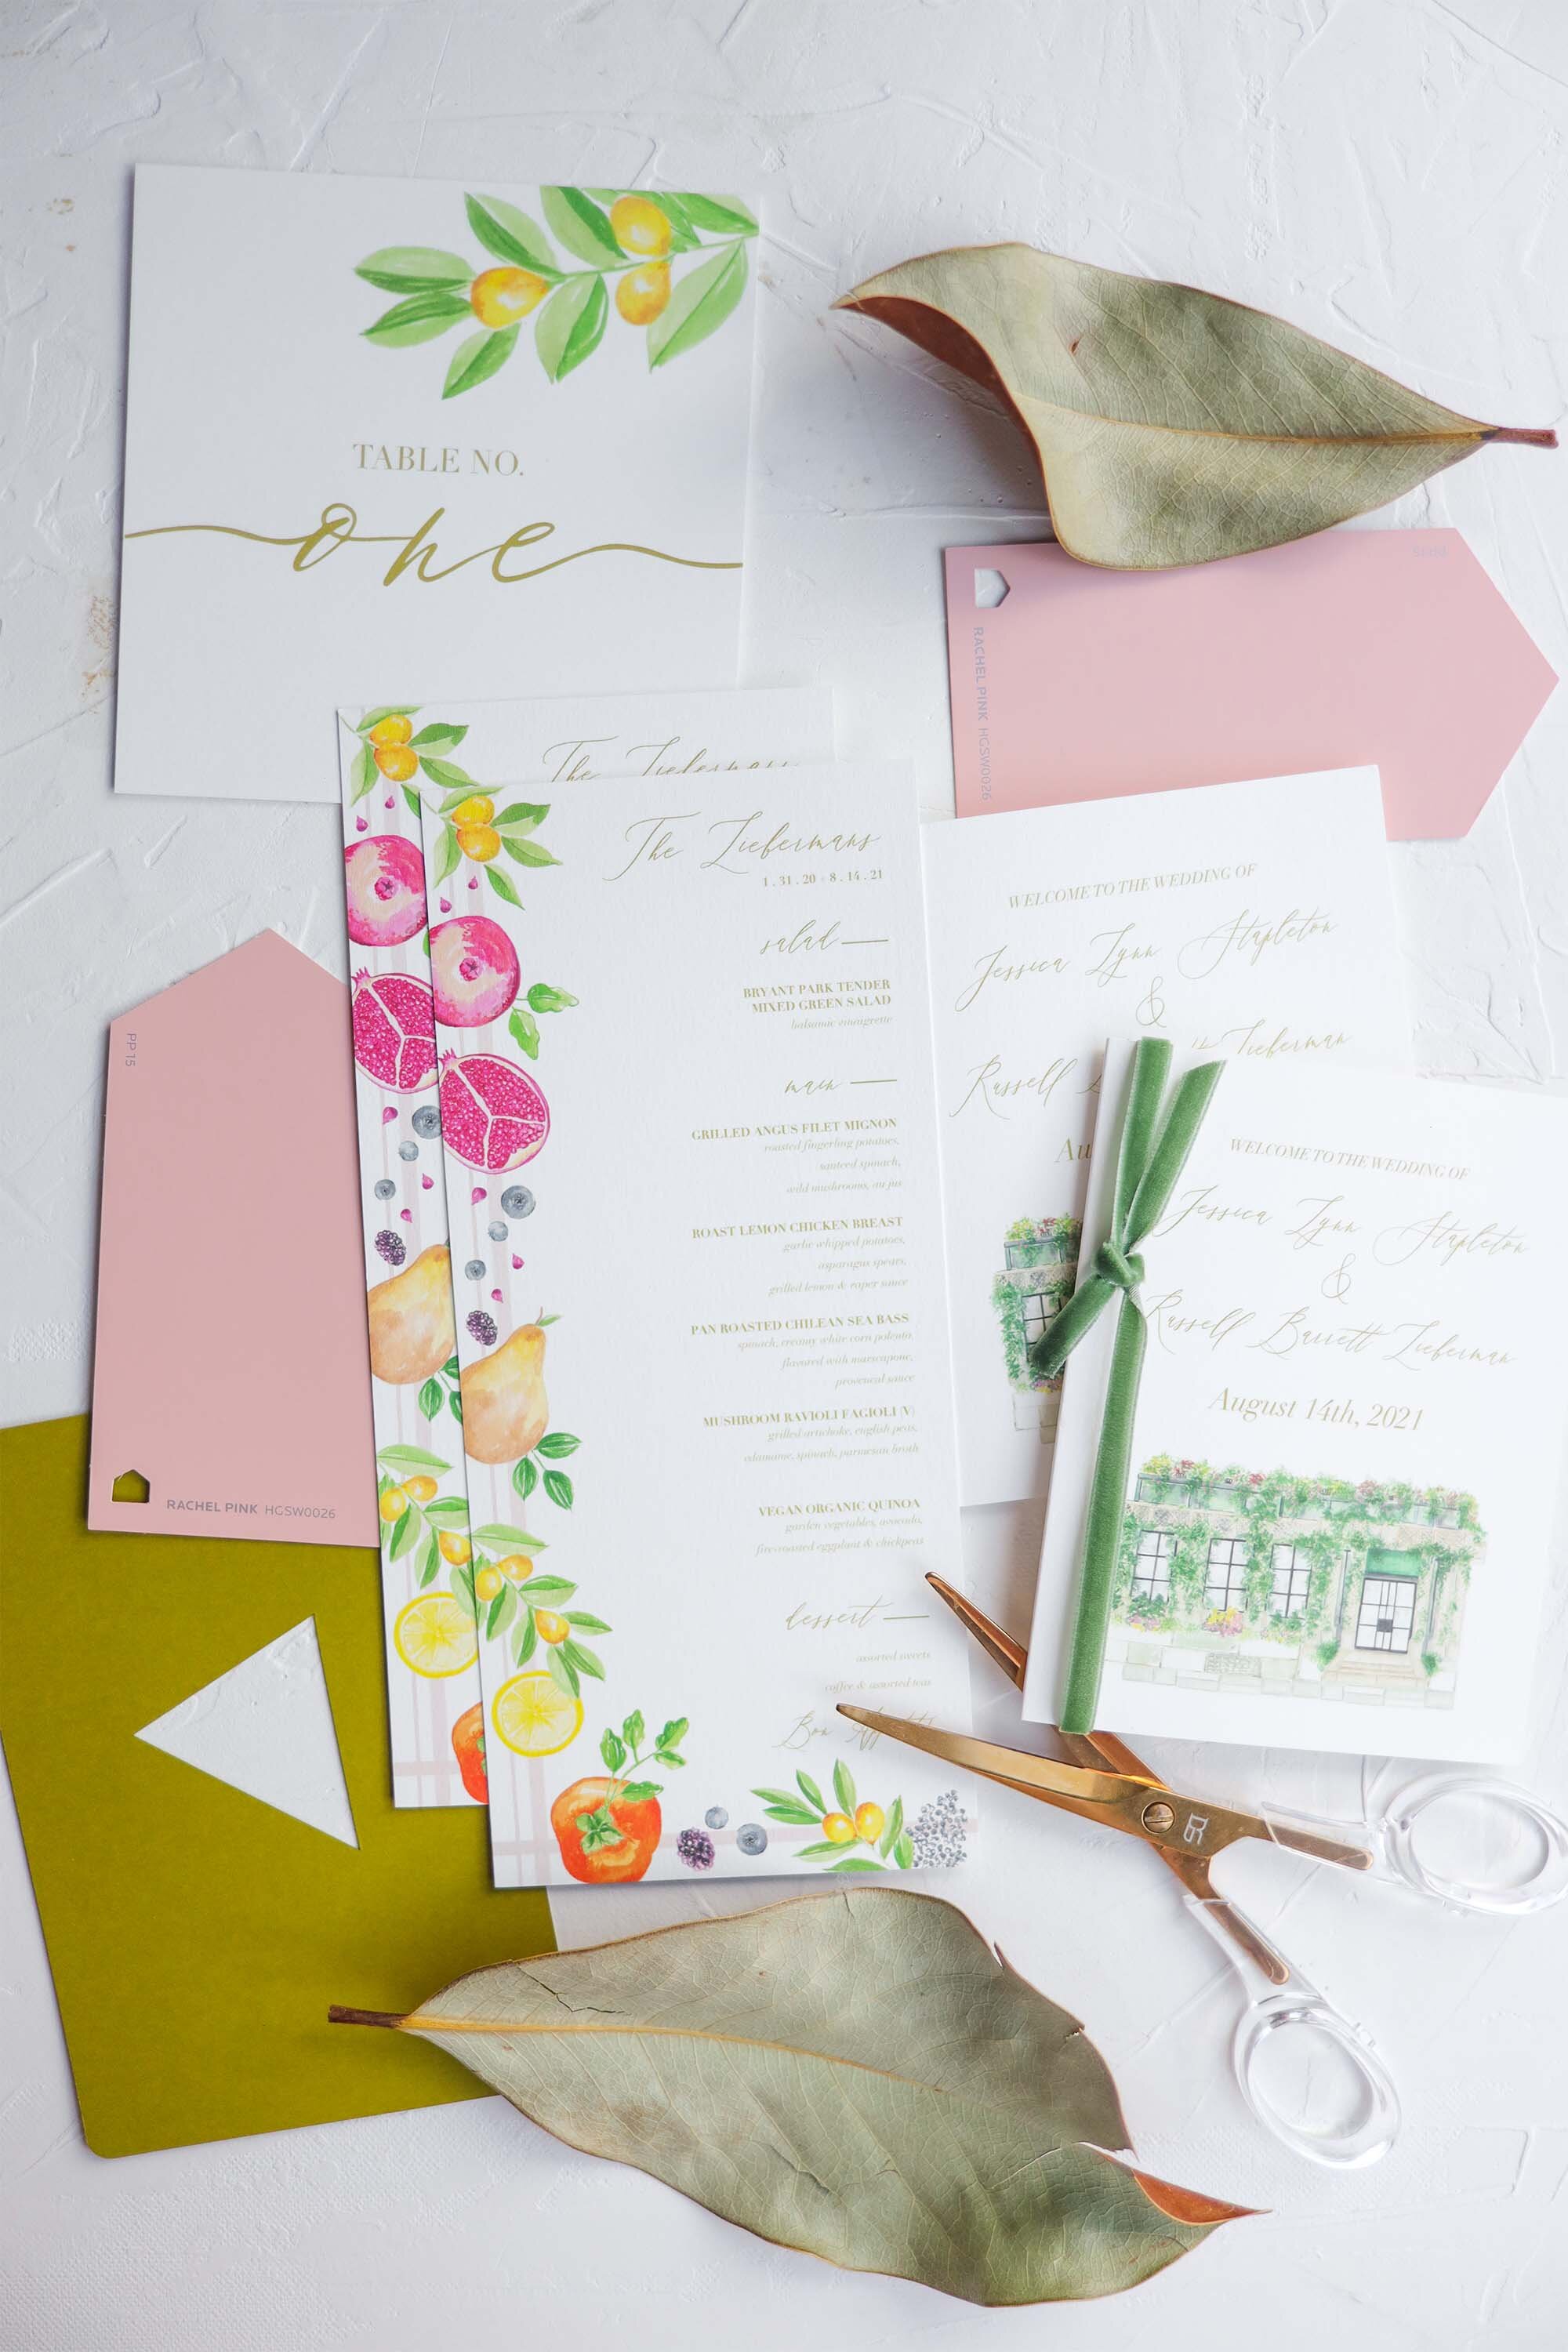
The details of their stationery suite-
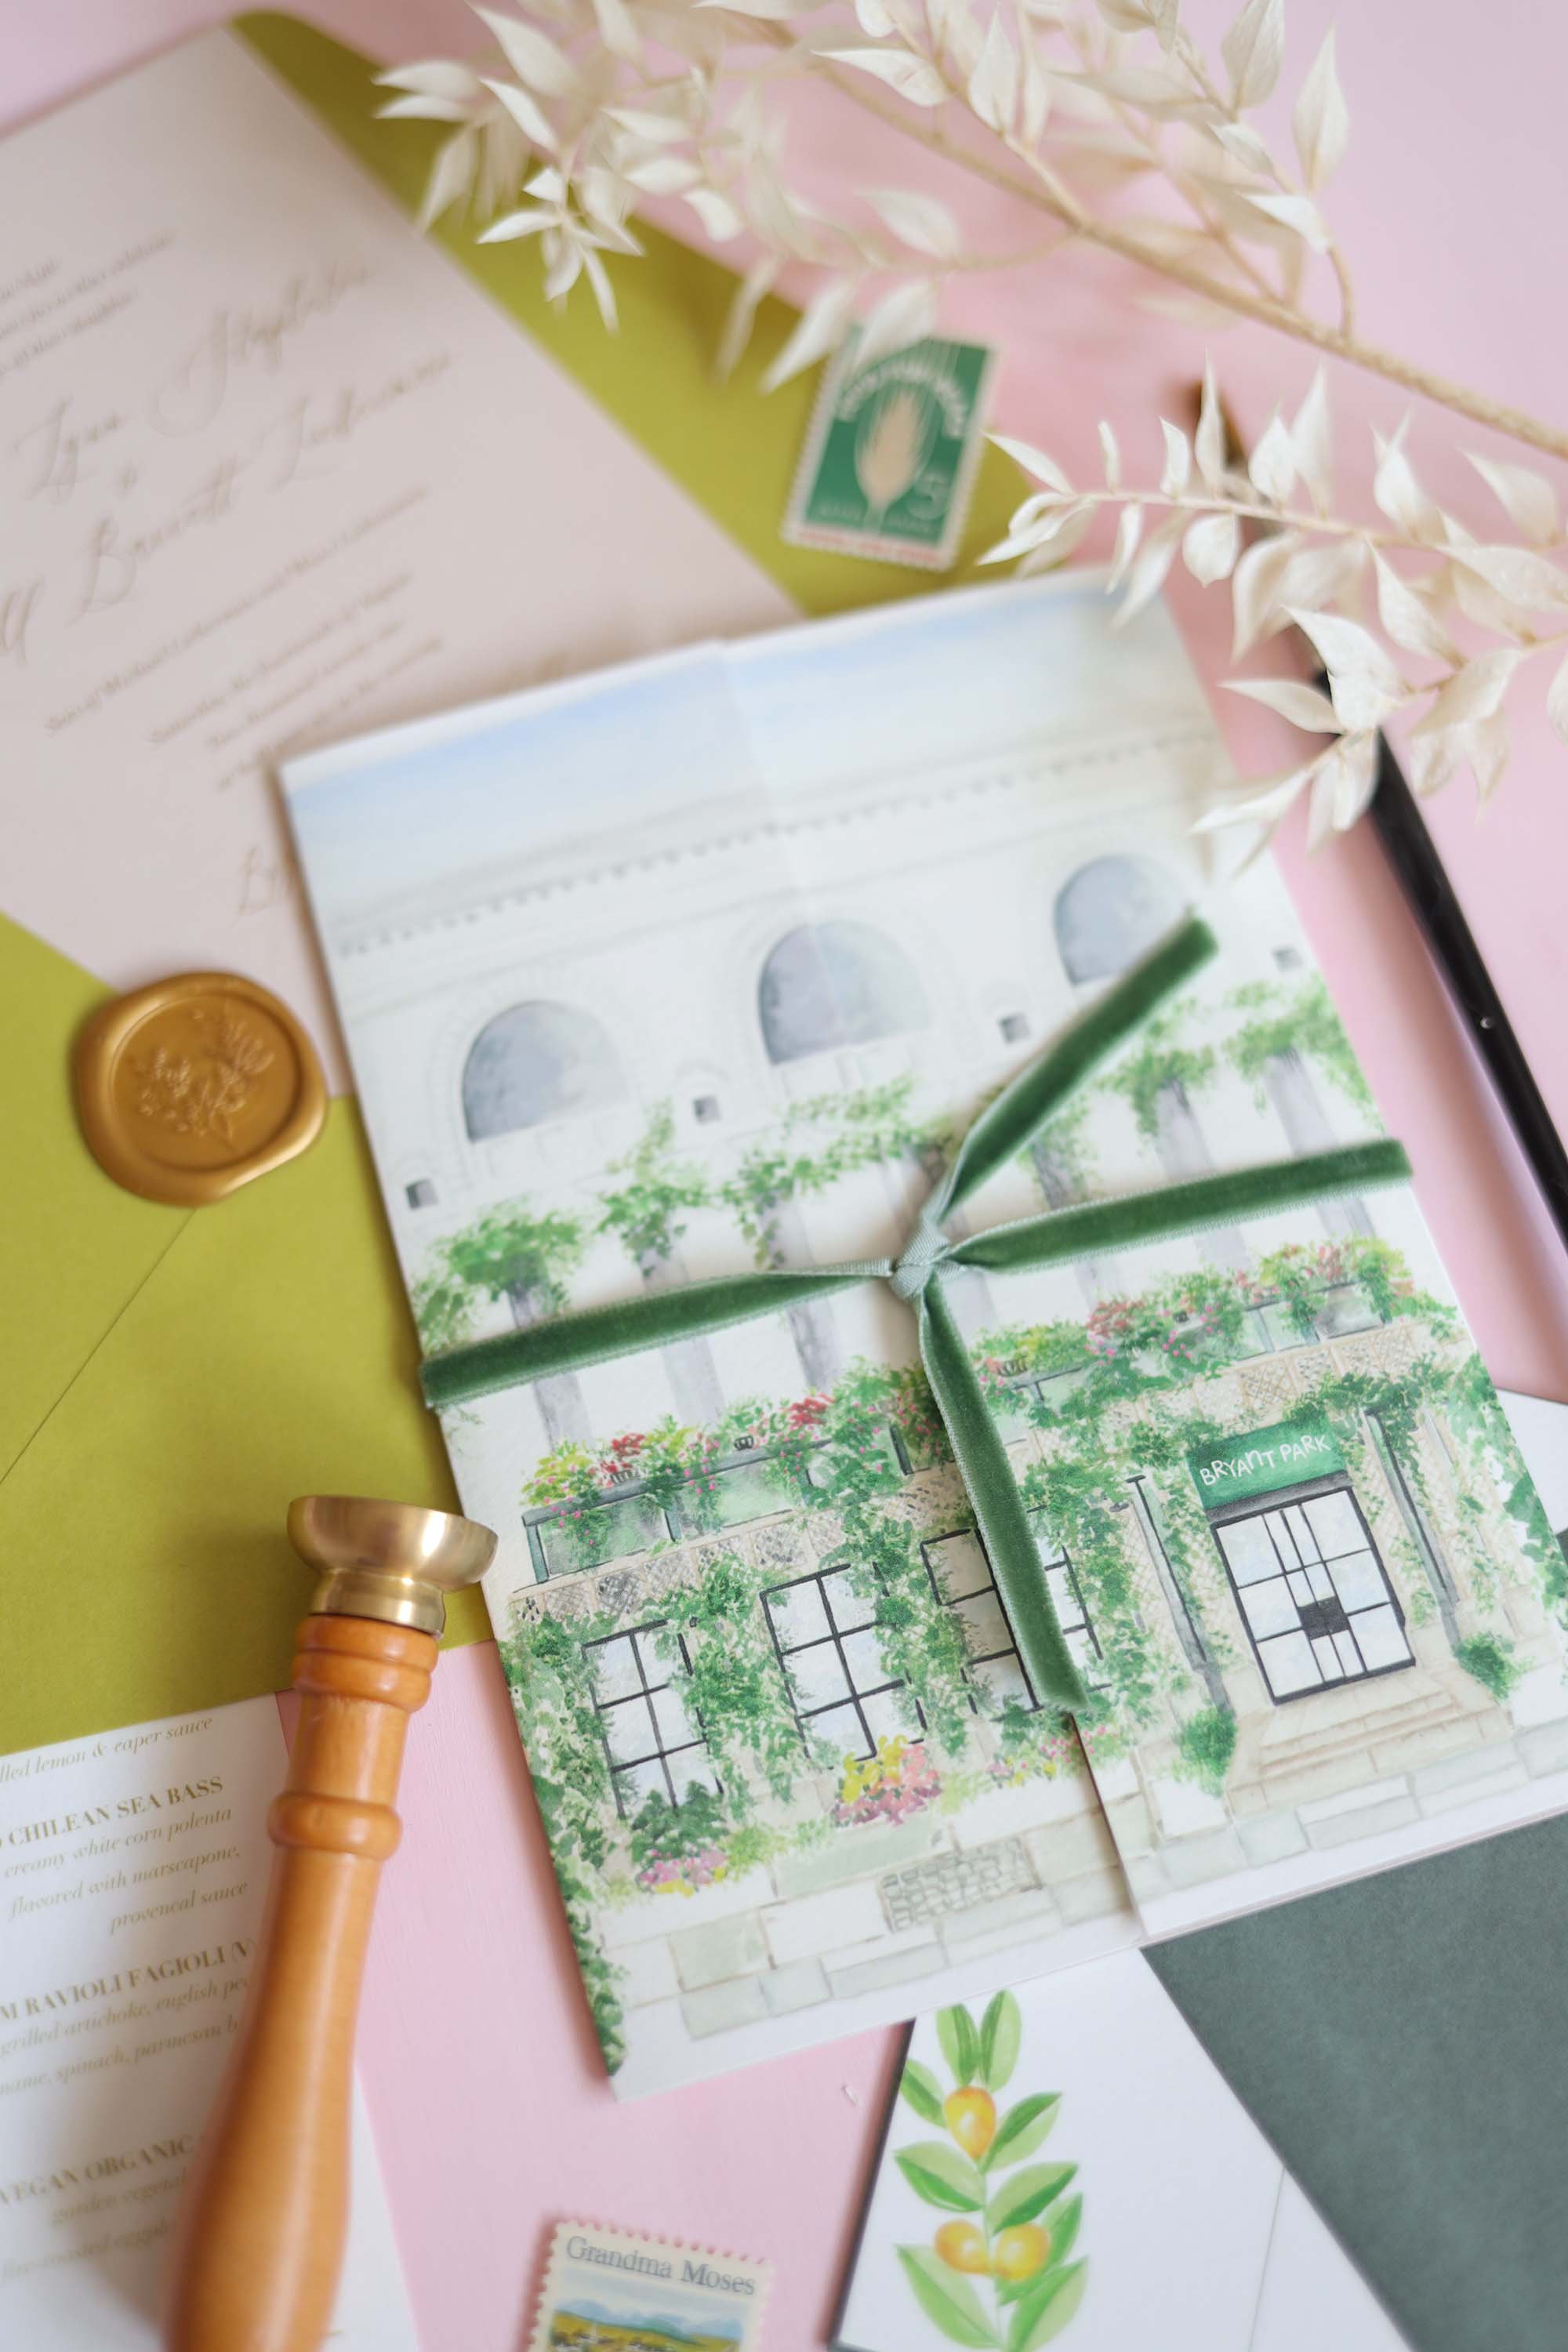
It started with the save the date featuring a fruits + veg garland, hand painted using acrylic paint and letterpress printed verbiage for a luxe, classic touch.
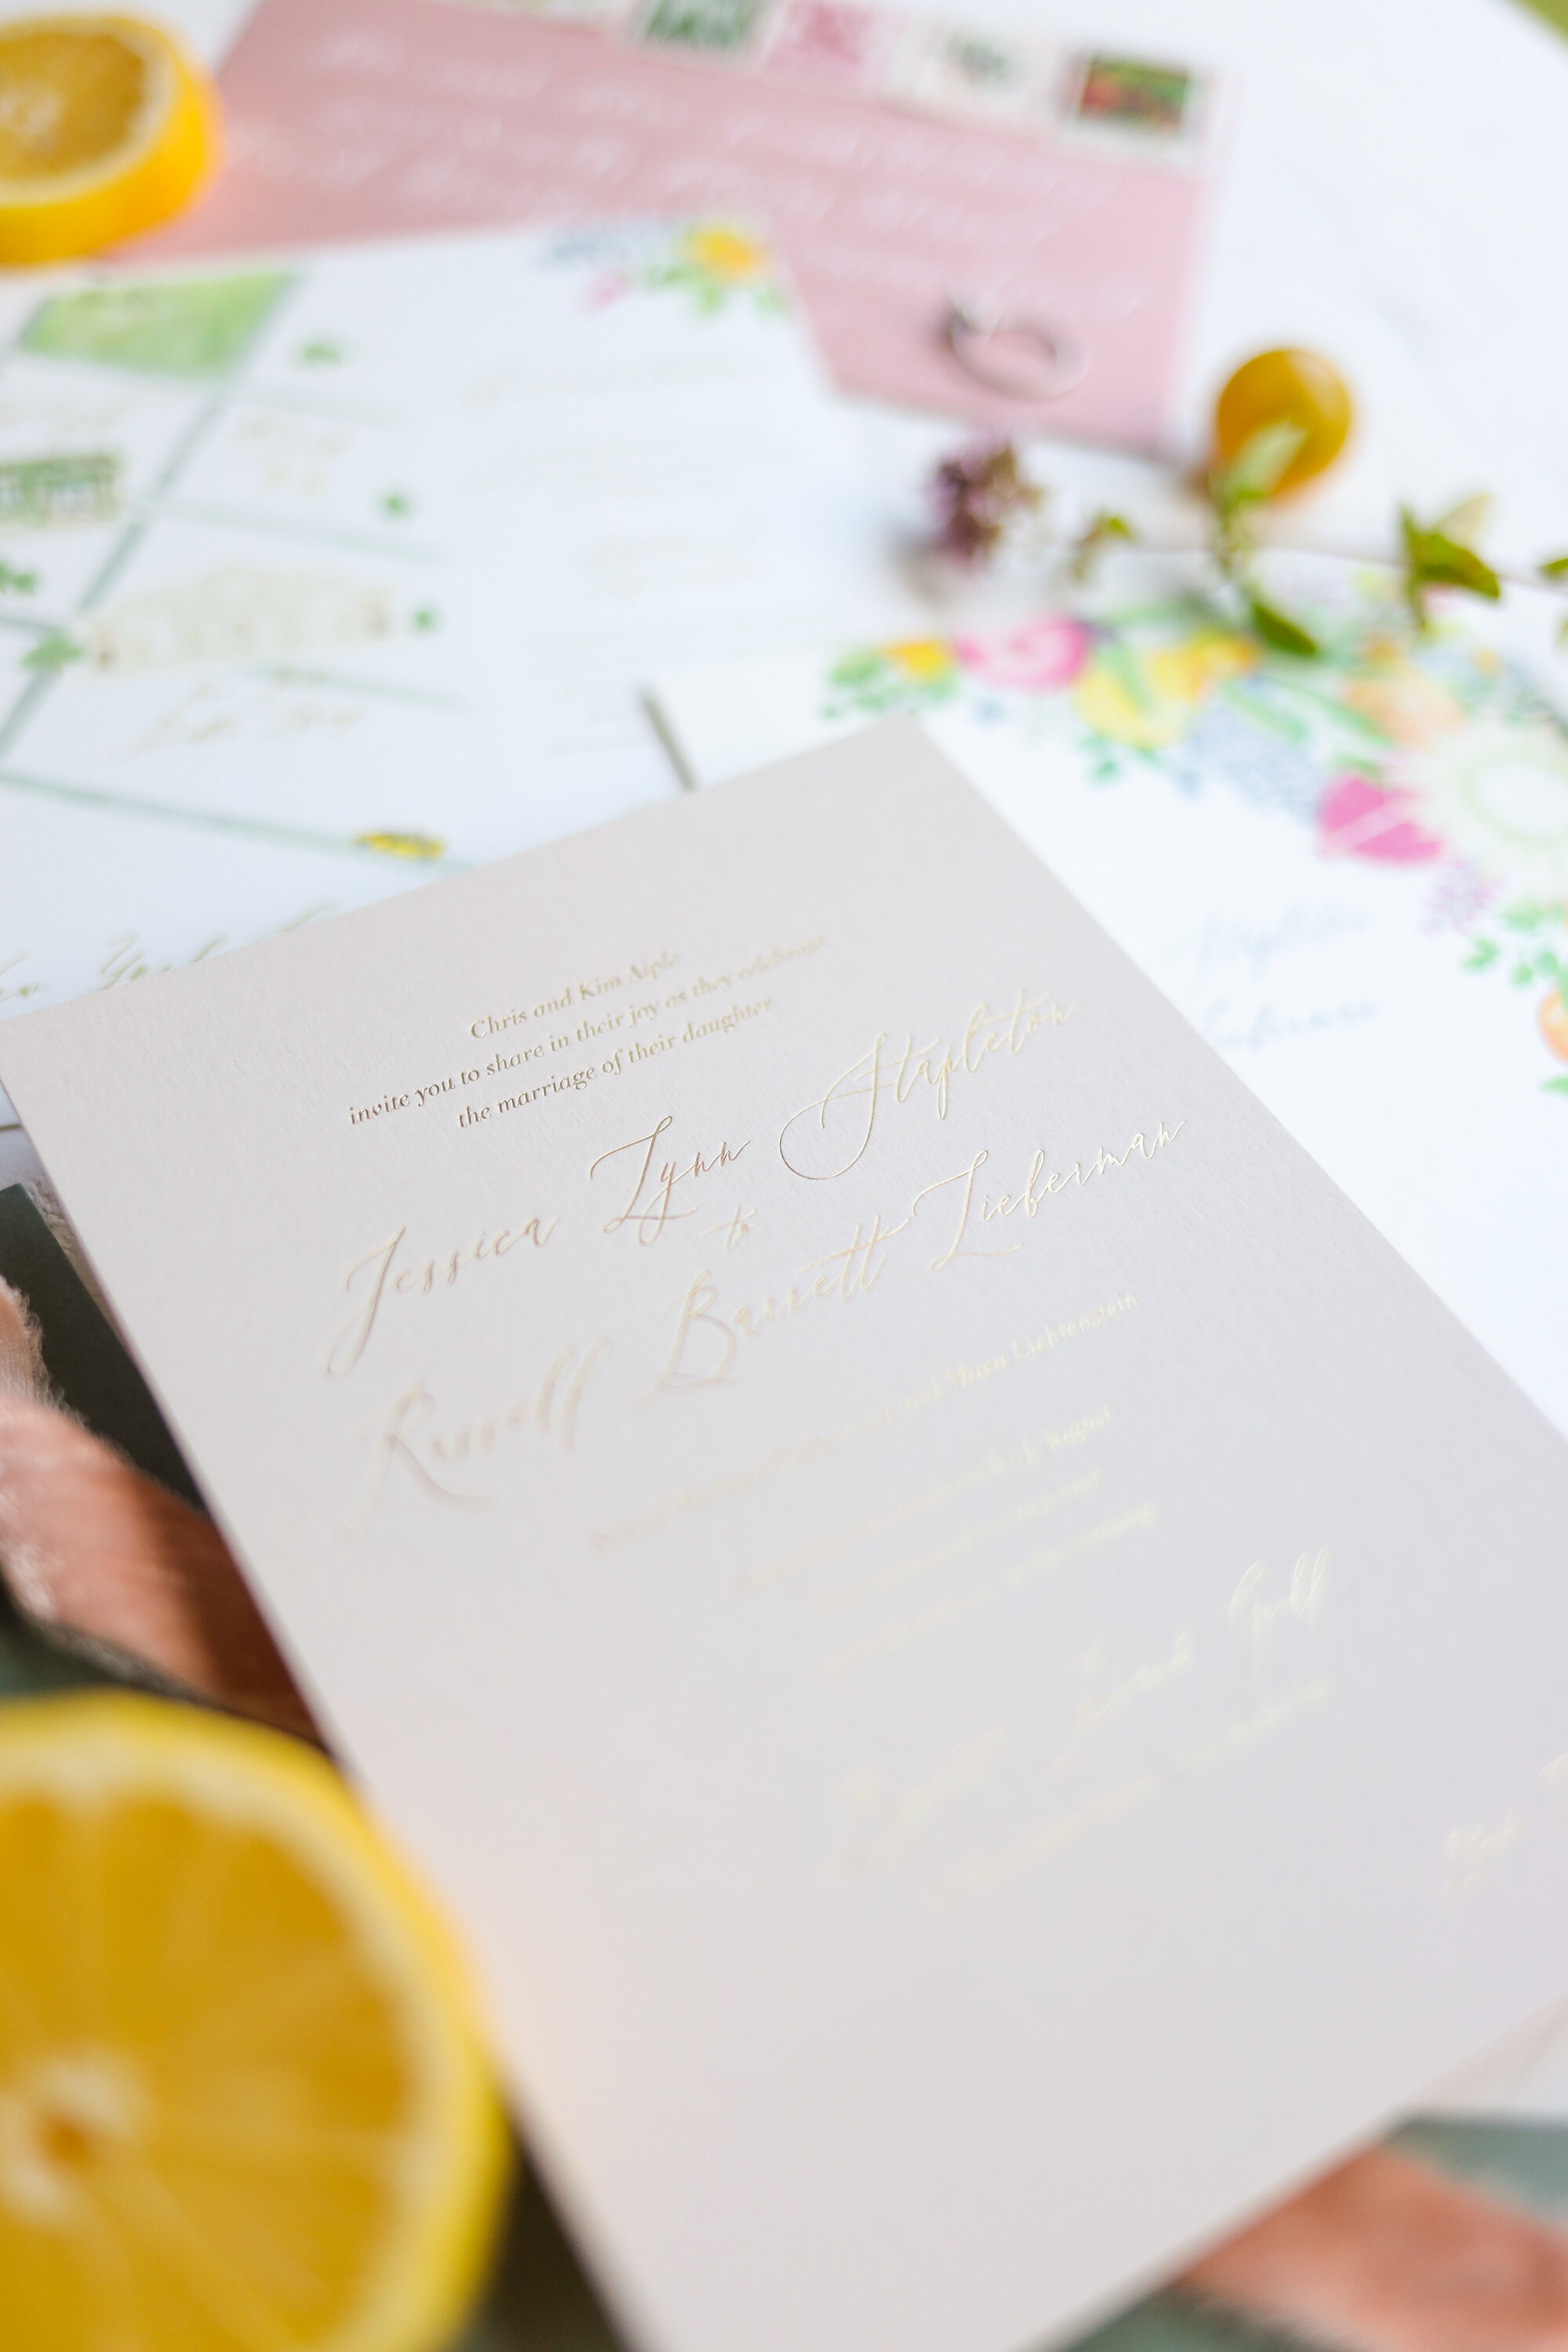
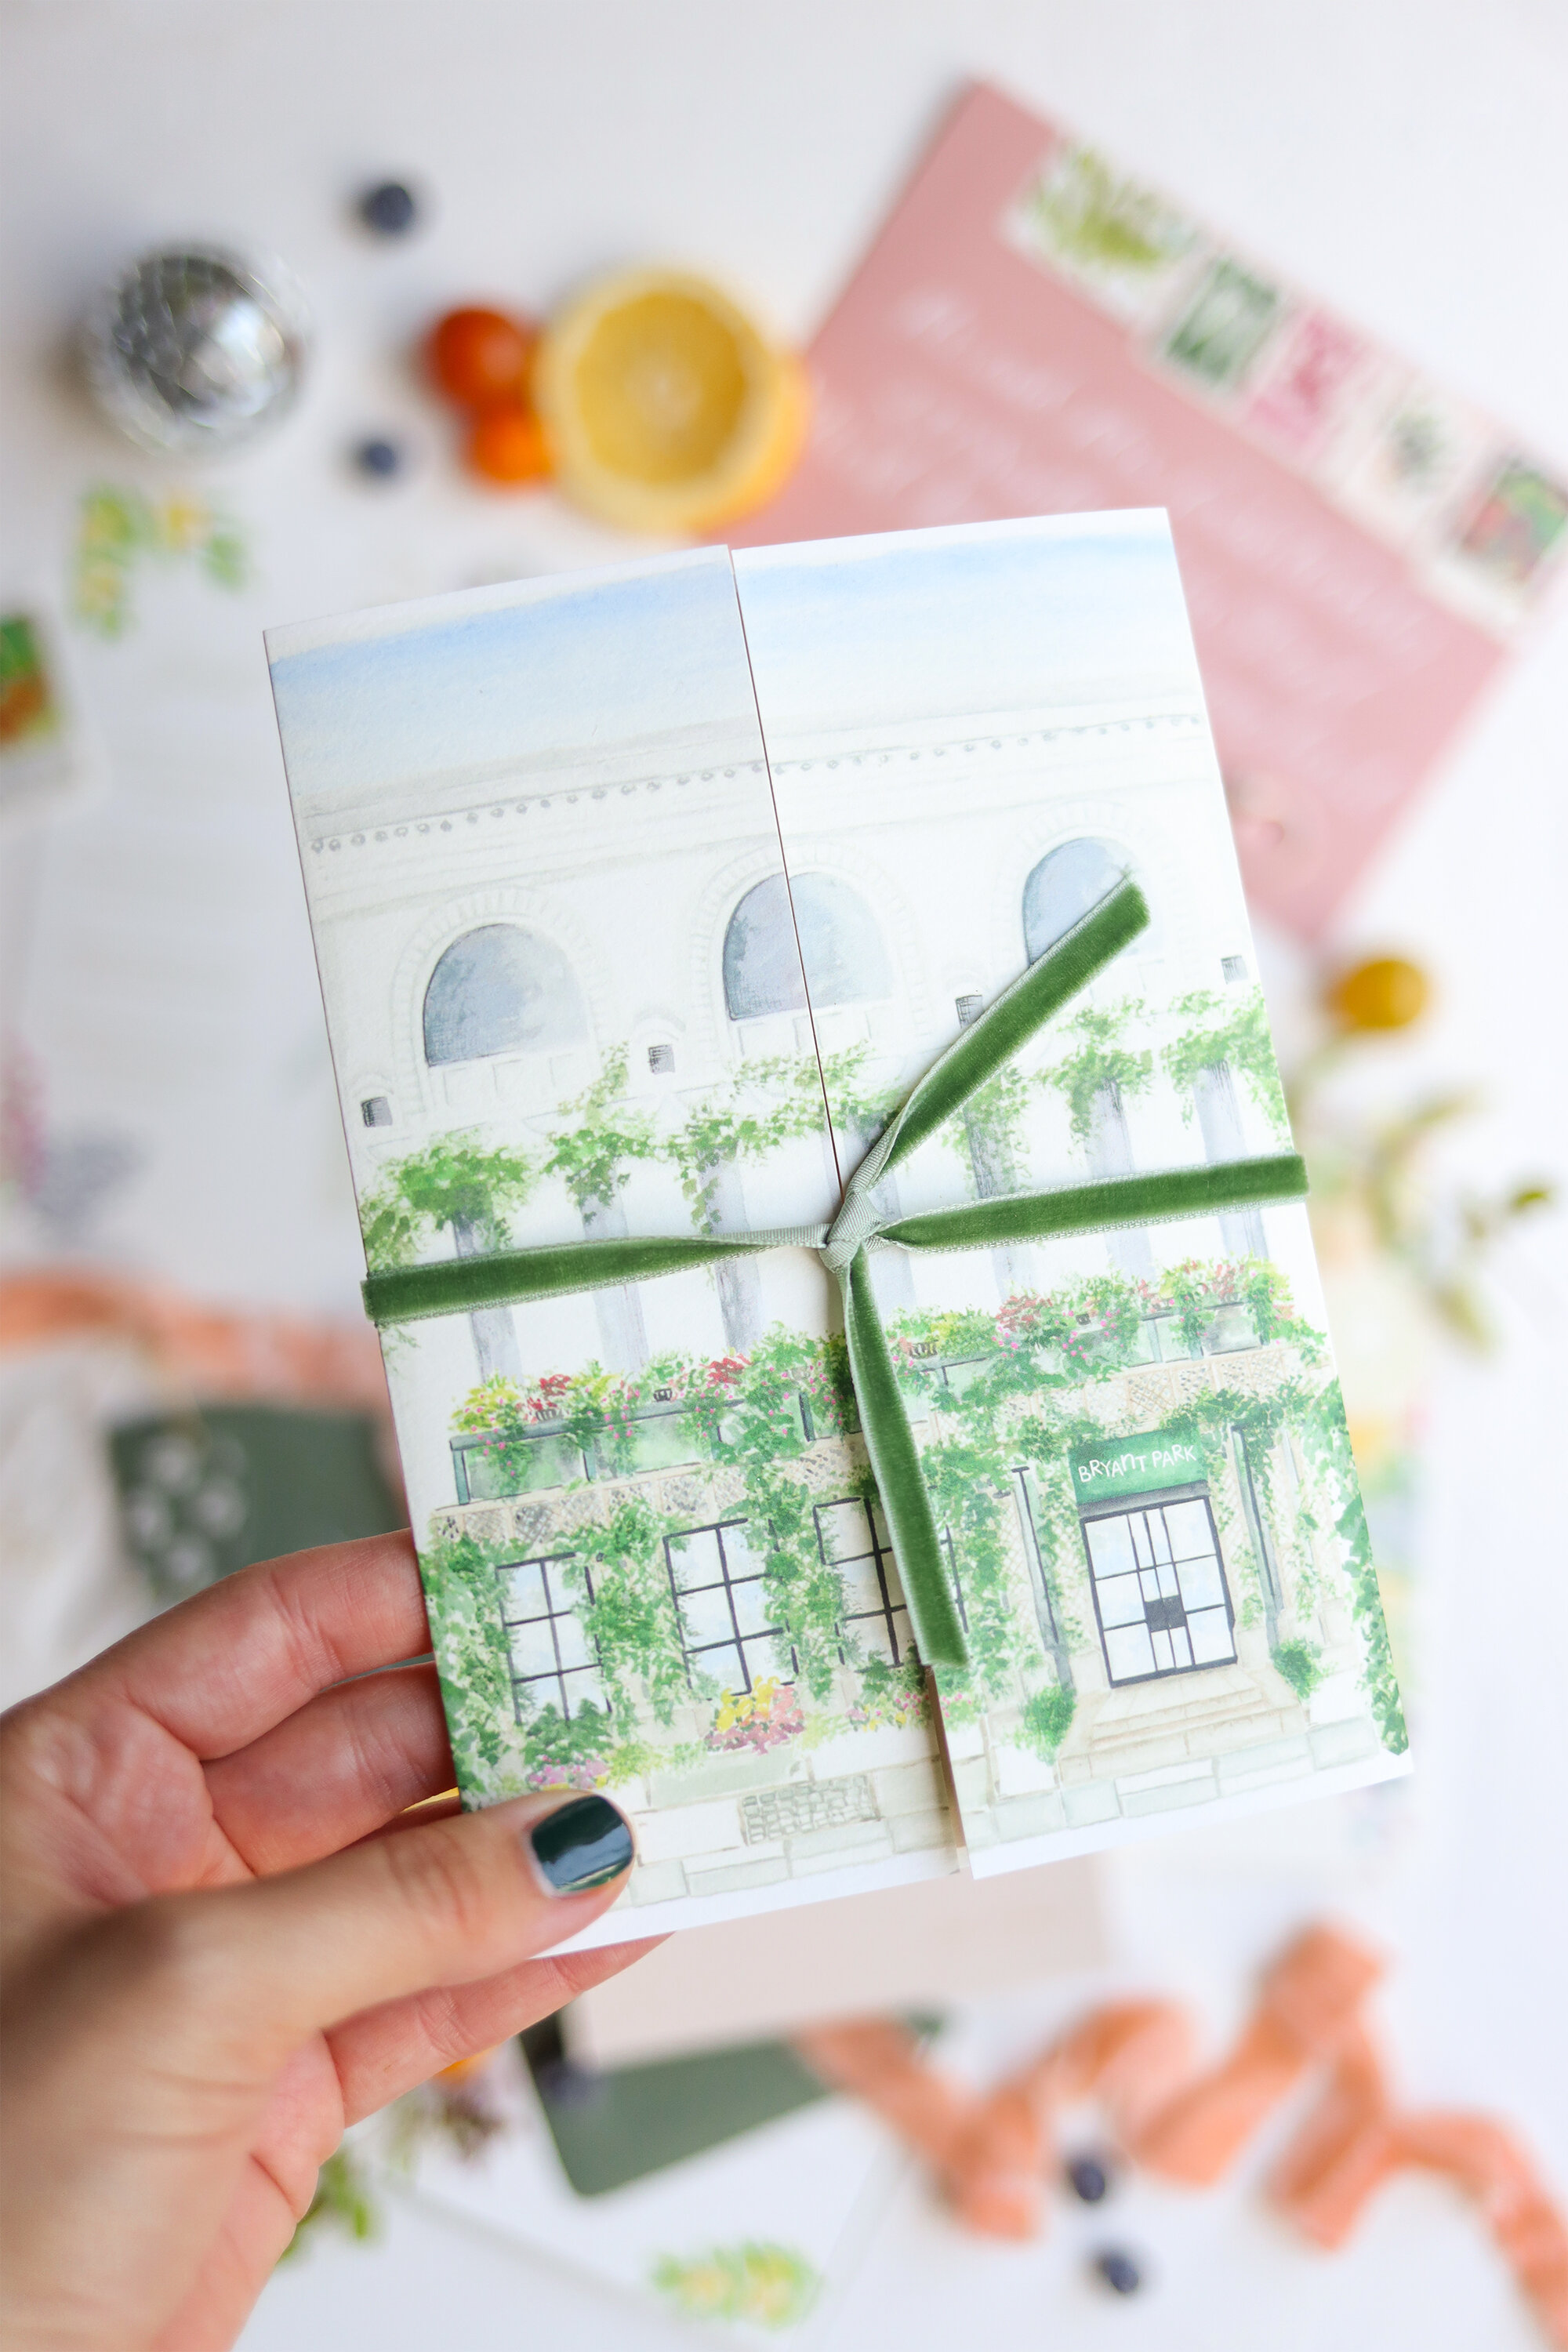
For the invitation set, I illustrated a gate fold card with a panting of the Bryant Park Grill and the top of the NY public library behind it on the front of the card. Inside is a map of the area of NYC where the wedding took place with a few surrounding faves called out such as radio city music hall and the Empire State Building. Each important place was hand painted using watercolor. This special gate fold card provided all the details the guests would need to know. Then for the invitation, to keep with that luxe and timeless feel, the verbiage was all gold foil printed on 2 ply biscuit stock. The perfect bit of glitz and sparkle. The deep green envelopes had all the guest addresses printed in white ink with a little hand drawn pear illustration on the back flap below Jess + Russell’s return address. All the components were stacked delicately inside of the gate fold card and then tied shut with beautiful green velvet ribbon. So many little details that told this romantic NYC wedding story.
_______________
Vendor Lineup -
Venue: Bryant Park Grill
Planner: Simply Styled Events
Photographer: Sophie Kaye Photography
Videographer: Love and Covenant
Florist: @simsonandco.theflowerstudio


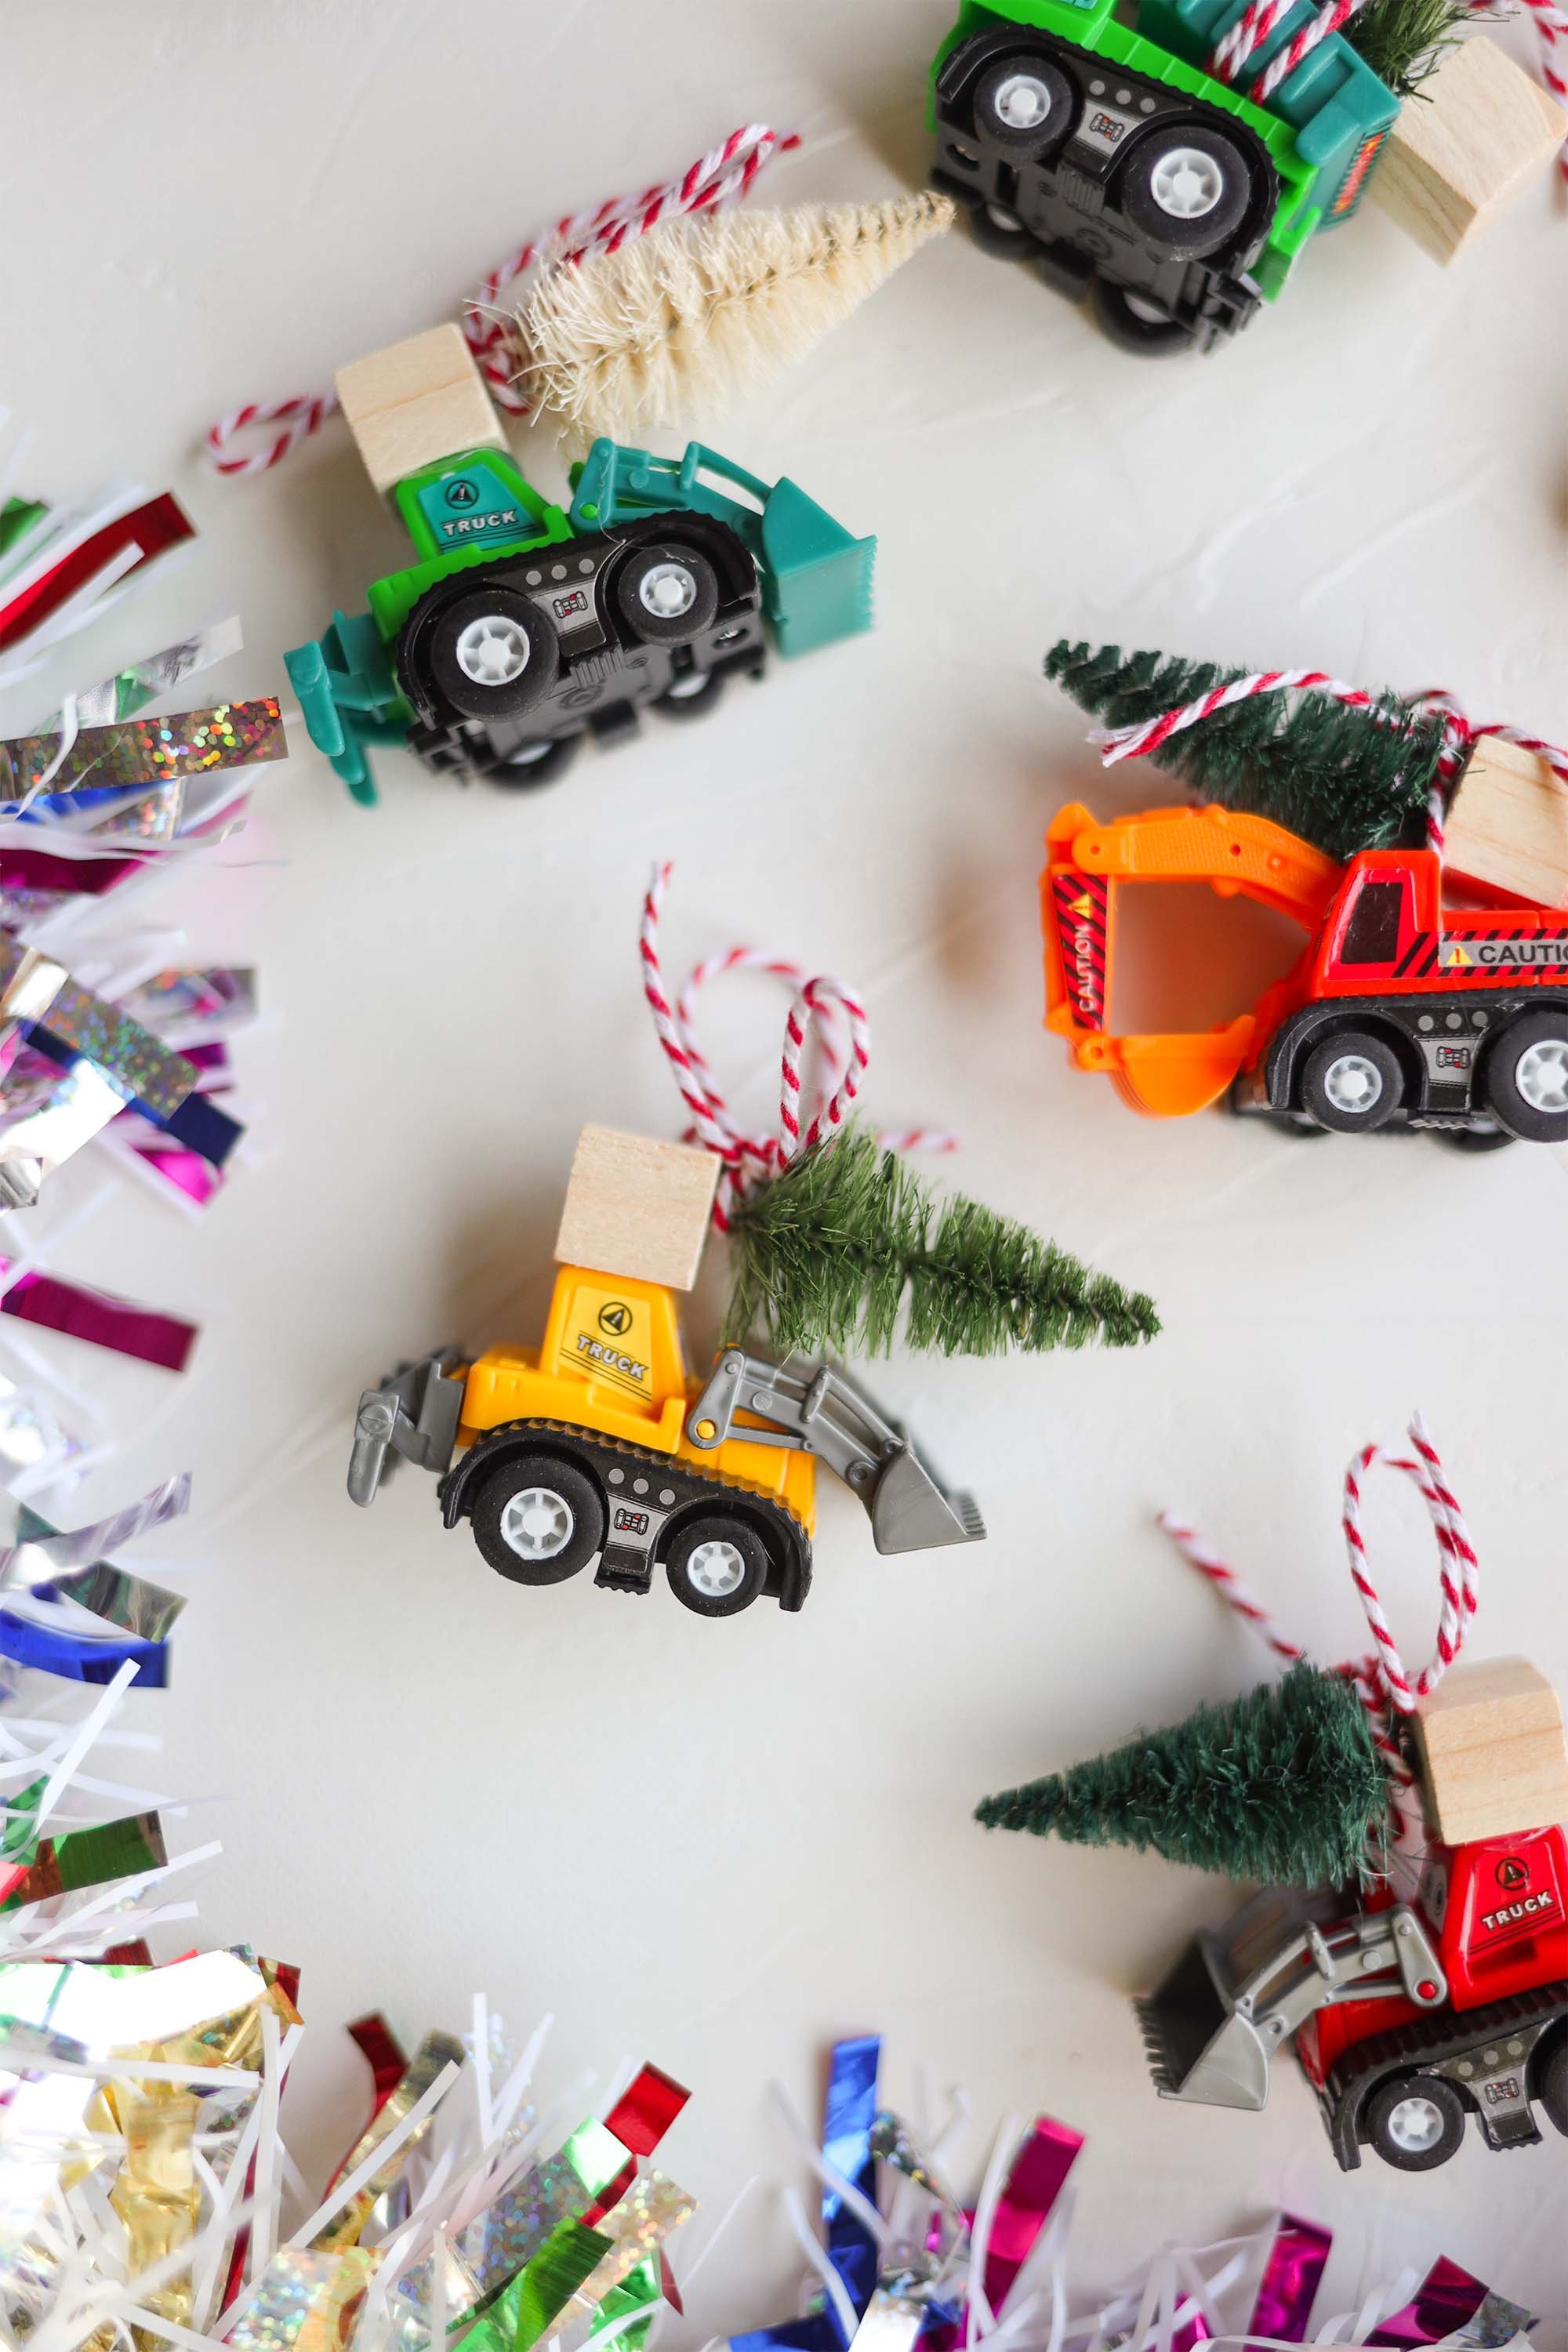
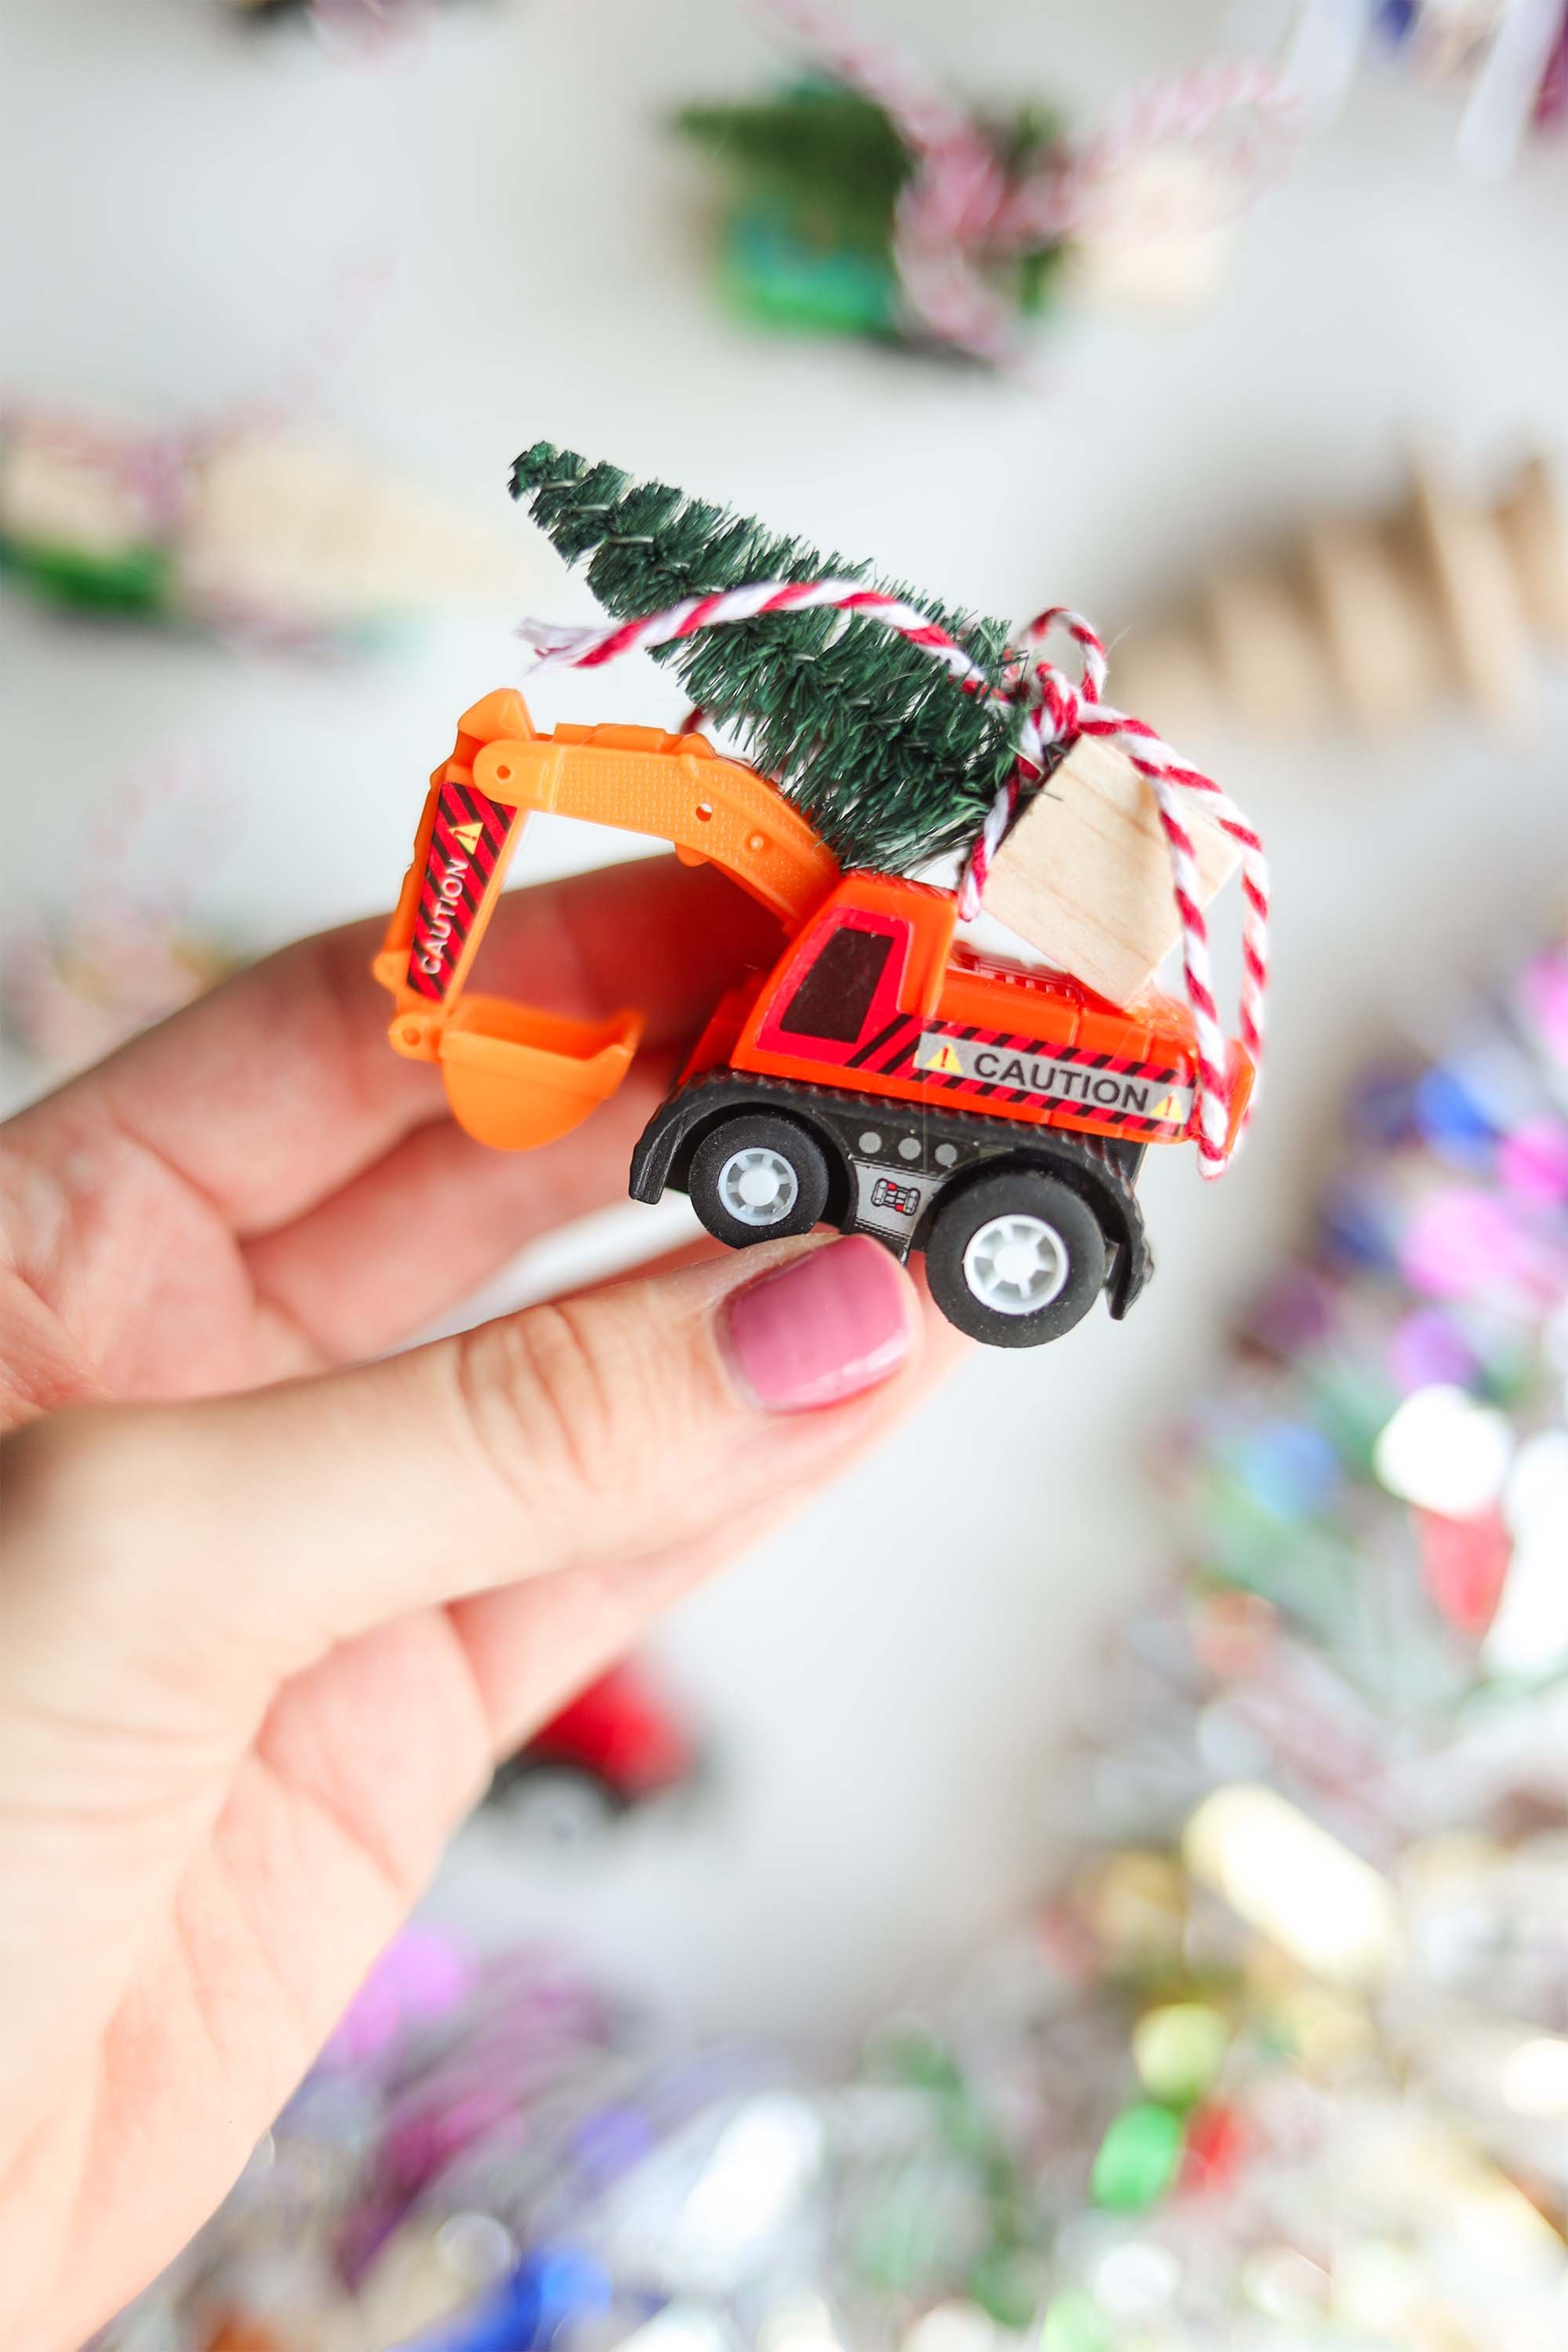
30 minute holiday DIY

First up, do not show these to your child by accident like I did because they all not understand they cannot have it. Whoops.
I would say this little project is perfect to give to kids who are in preschool - kindergarten! Definitely avoid small children who put things in their mouth or who will just crush it. Use your own discretion here. For me, Logan is in preschool with other 3-4 year olds and I think this is perfect for them.
Okay let’s dive into this DIY. I executed this to be sure it wasn’t a total pain in the a$$! Happy to report it only took 30 minutes to make 12 of these and I’m so pumped. Target has these mini bottle brush trees in a pack of 9 for 5 bucks! But don’t worry, there’s also lots of etsy sellers who you can get them from, too and that’s my fave thing to do since you’re supporting a small biz!
The supplies:
Small trucks:
https://www.amazon.com/gp/product/B01ESZPRHI/ref=ppx_yo_dt_b_asin_title_o01_s00?ie=UTF8&psc=1
https://www.amazon.com/dp/B08HCJ37V1/ref=sspa_dk_detail_9?psc=1&pd_rd_i=B08HCJ37V1&pd_rd_w=BNQxt&pf_rd_p=887084a2-5c34-4113-a4f8-b7947847c308&pd_rd_wg=cLgPh&pf_rd_r=QBM8T7XC3TRJ8NMXTF2Q&pd_rd_r=bb97a309-3fd7-4acc-b2bc-b0dea31f0d51&spLa=ZW5jcnlwdGVkUXVhbGlmaWVyPUExMjE2SlZUTDZMTlImZW5jcnlwdGVkSWQ9QTAzNDI0MDExTjdKRTFMQ0dIWDZTJmVuY3J5cHRlZEFkSWQ9QTA4NzE5NTgyT09NT0FaMjFXMVFRJndpZGdldE5hbWU9c3BfZGV0YWlsJmFjdGlvbj1jbGlja1JlZGlyZWN0JmRvTm90TG9nQ2xpY2s9dHJ1ZQ==
Bottle brush trees:
https://www.etsy.com/listing/213747384/10-miniature-bottle-brush-trees-sisal?ref=yr_purchases
https://www.etsy.com/listing/1043812671/10-mini-pastel-mix-bottle-brush-trees-1?ref=shop_home_active_39&crt=1
Check your local Target in their front section where things are like $1-$5!
The process:
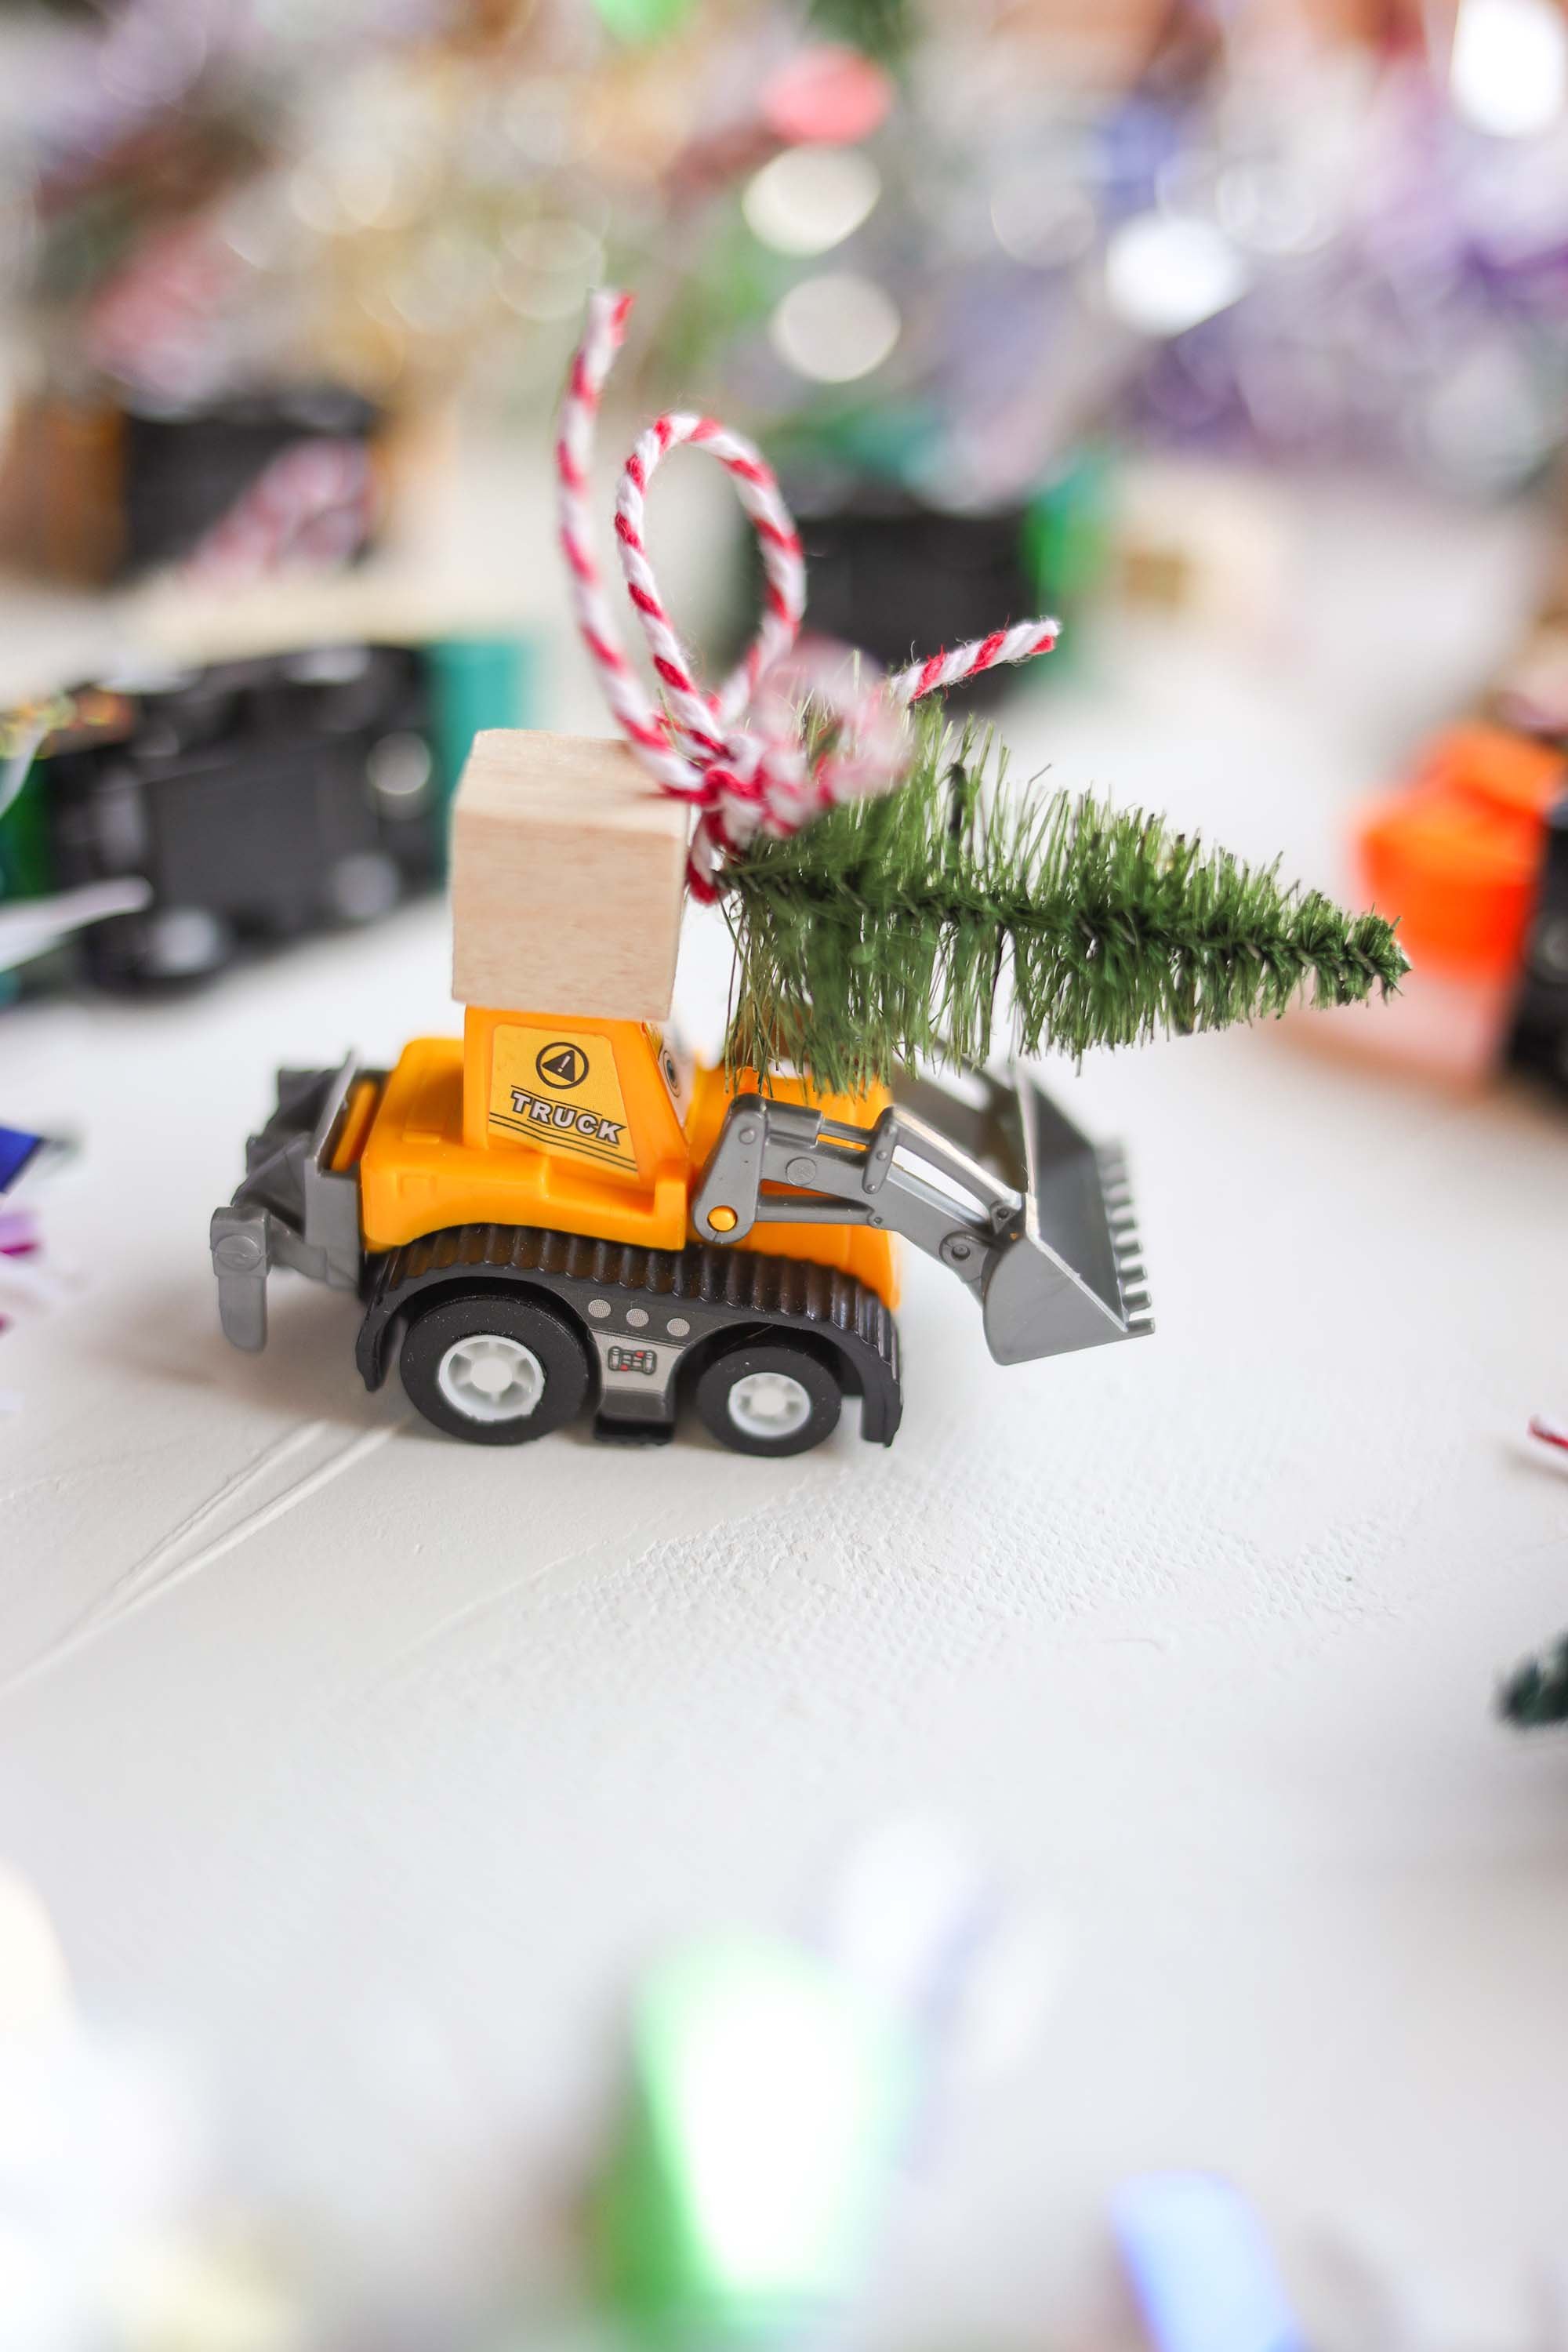
Warm up your hot glue gun
Play around with the placement of the bottle brush tree on your little car so you know where to put the glue
Add your hot glue to 1 or 2 spots on the truck or car
Press the bottle brush tree lightly into the glue spots and hold for about 20-30 seconds to be sure it stays put and allows for the glue to dry a bit
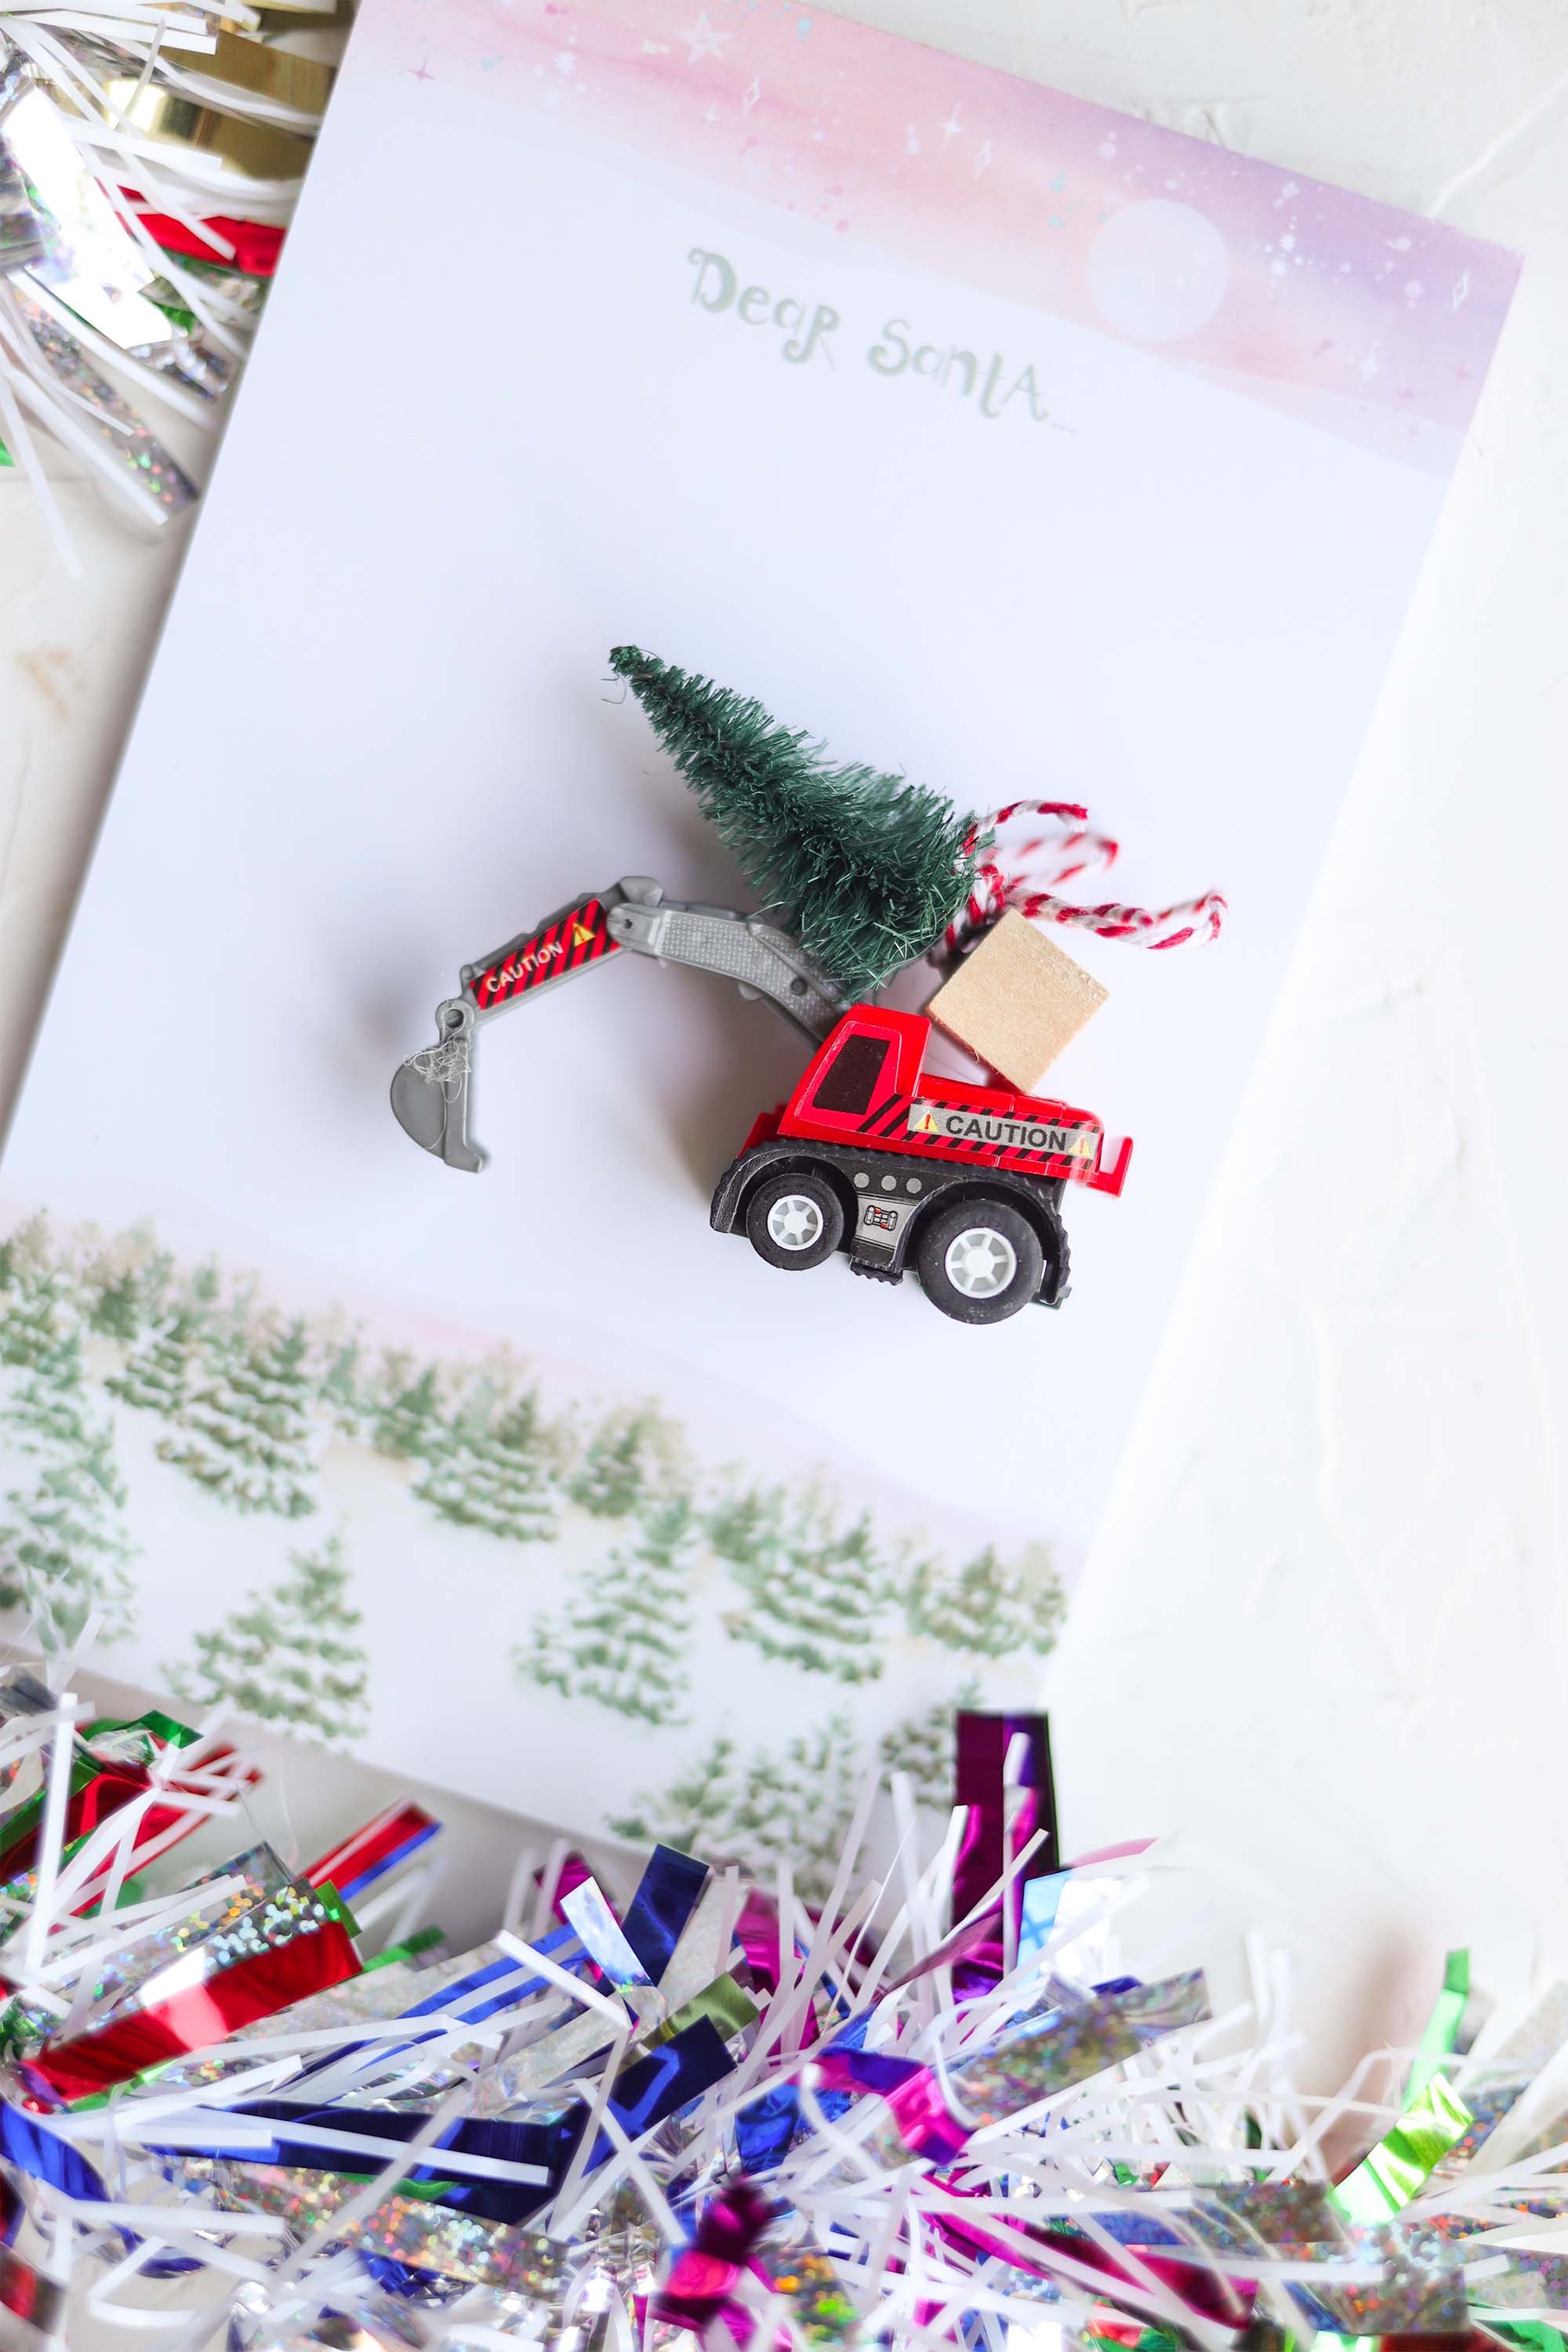
Cut some twine, any thin kind will do, and tie a little knot around the tree wherever you think it looks best
Optional step, add a little ornament hook so the kids can hang this on their Tree! But since not every kid celebrates Christmas I would save that for only kids you know personally or for your own kids!

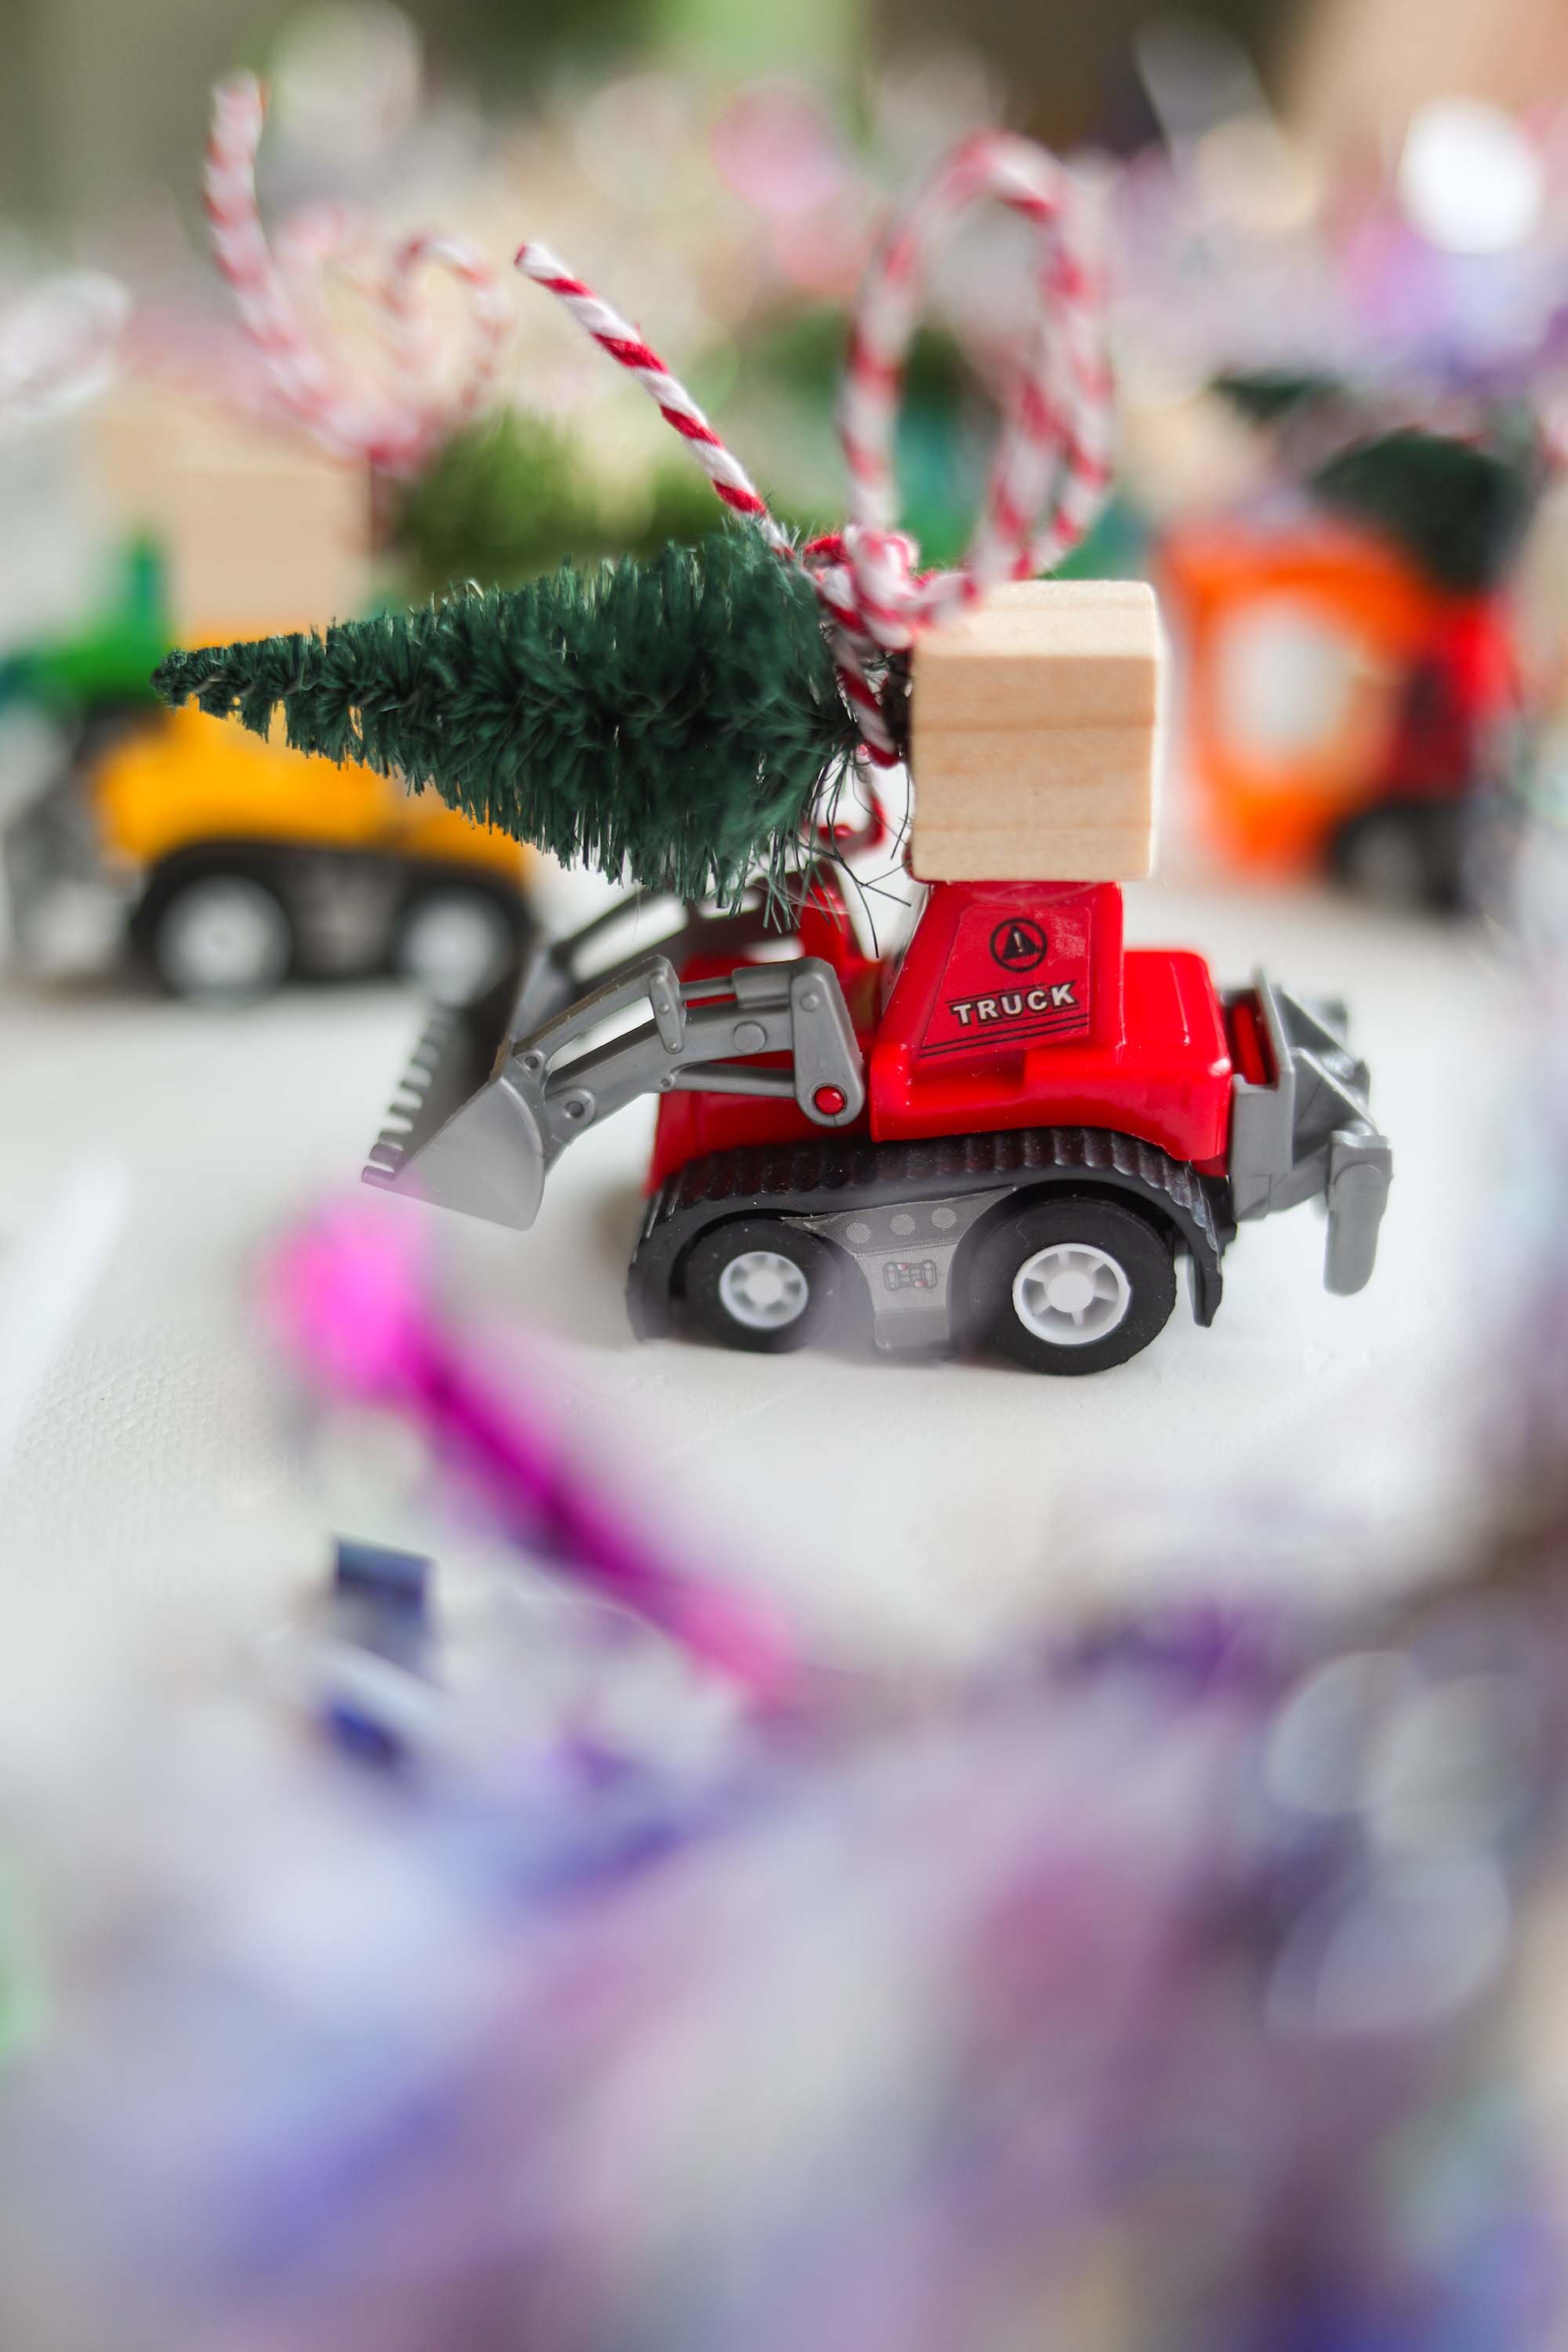
And before you tell me trucks are only for boys, they absolutely are not. Aren’t we raising fearless girls who will grow up to be bad a$$, take on any challenge, drive any vehicle women? That’s what I thought.

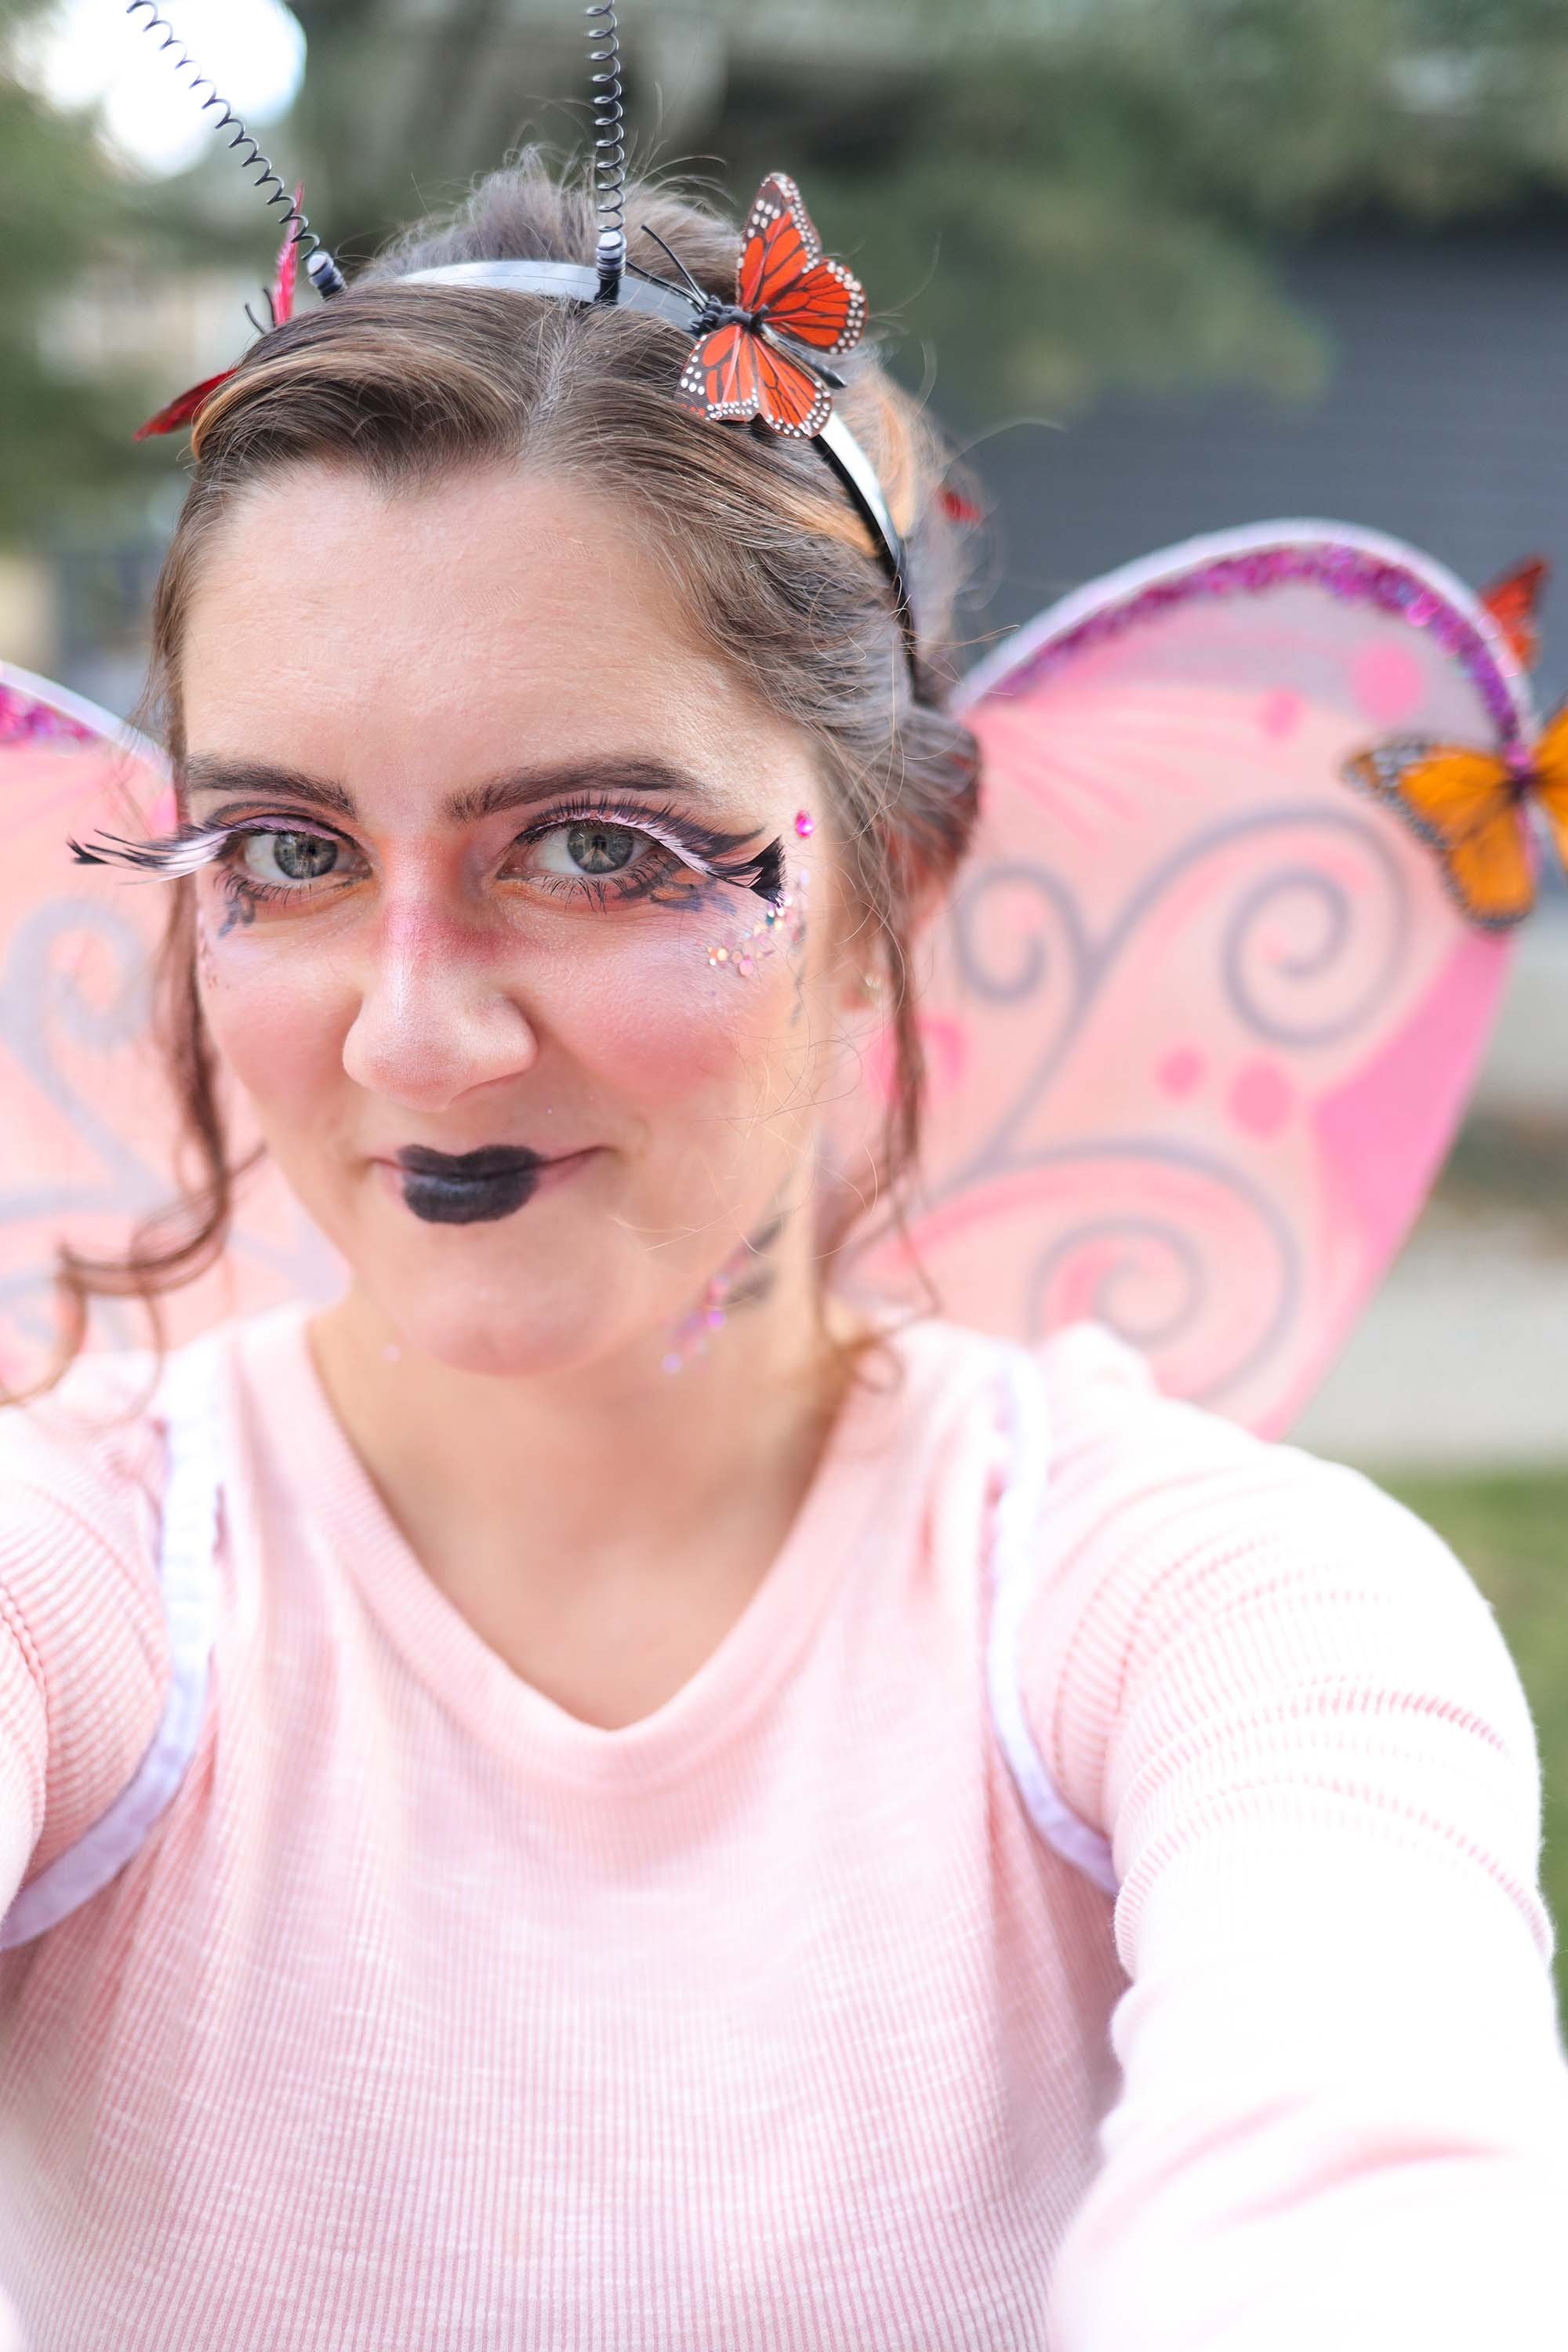
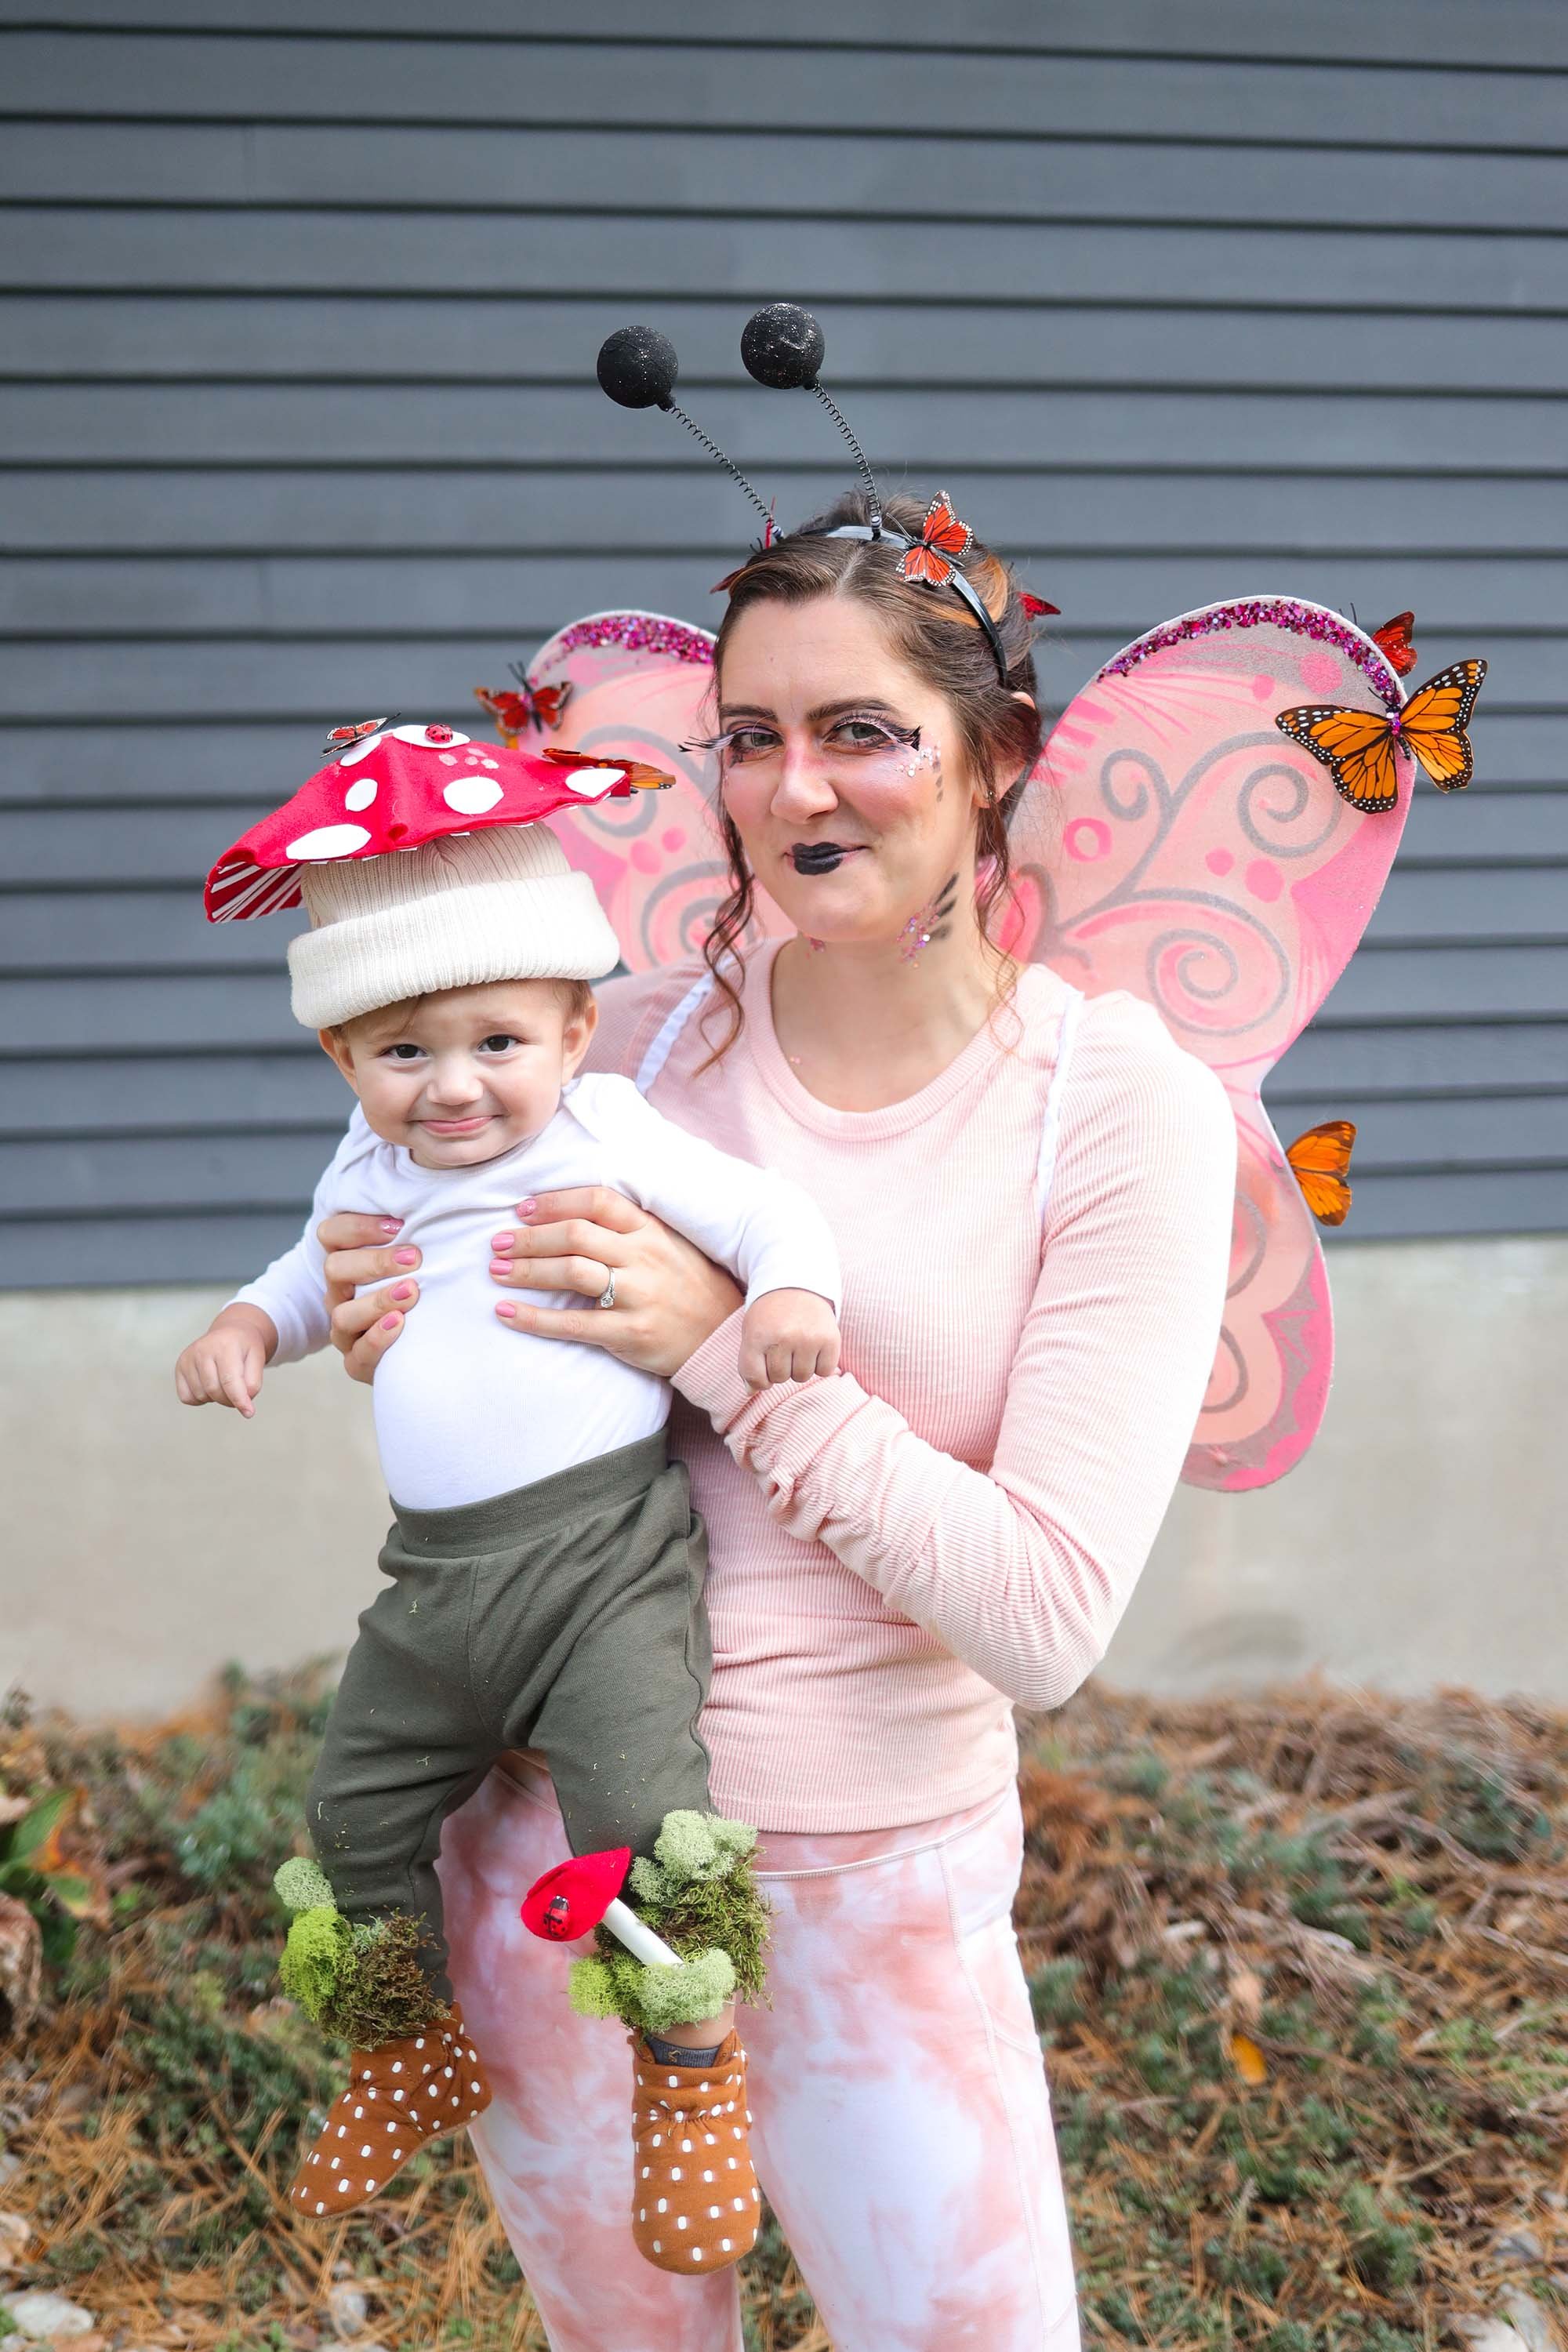
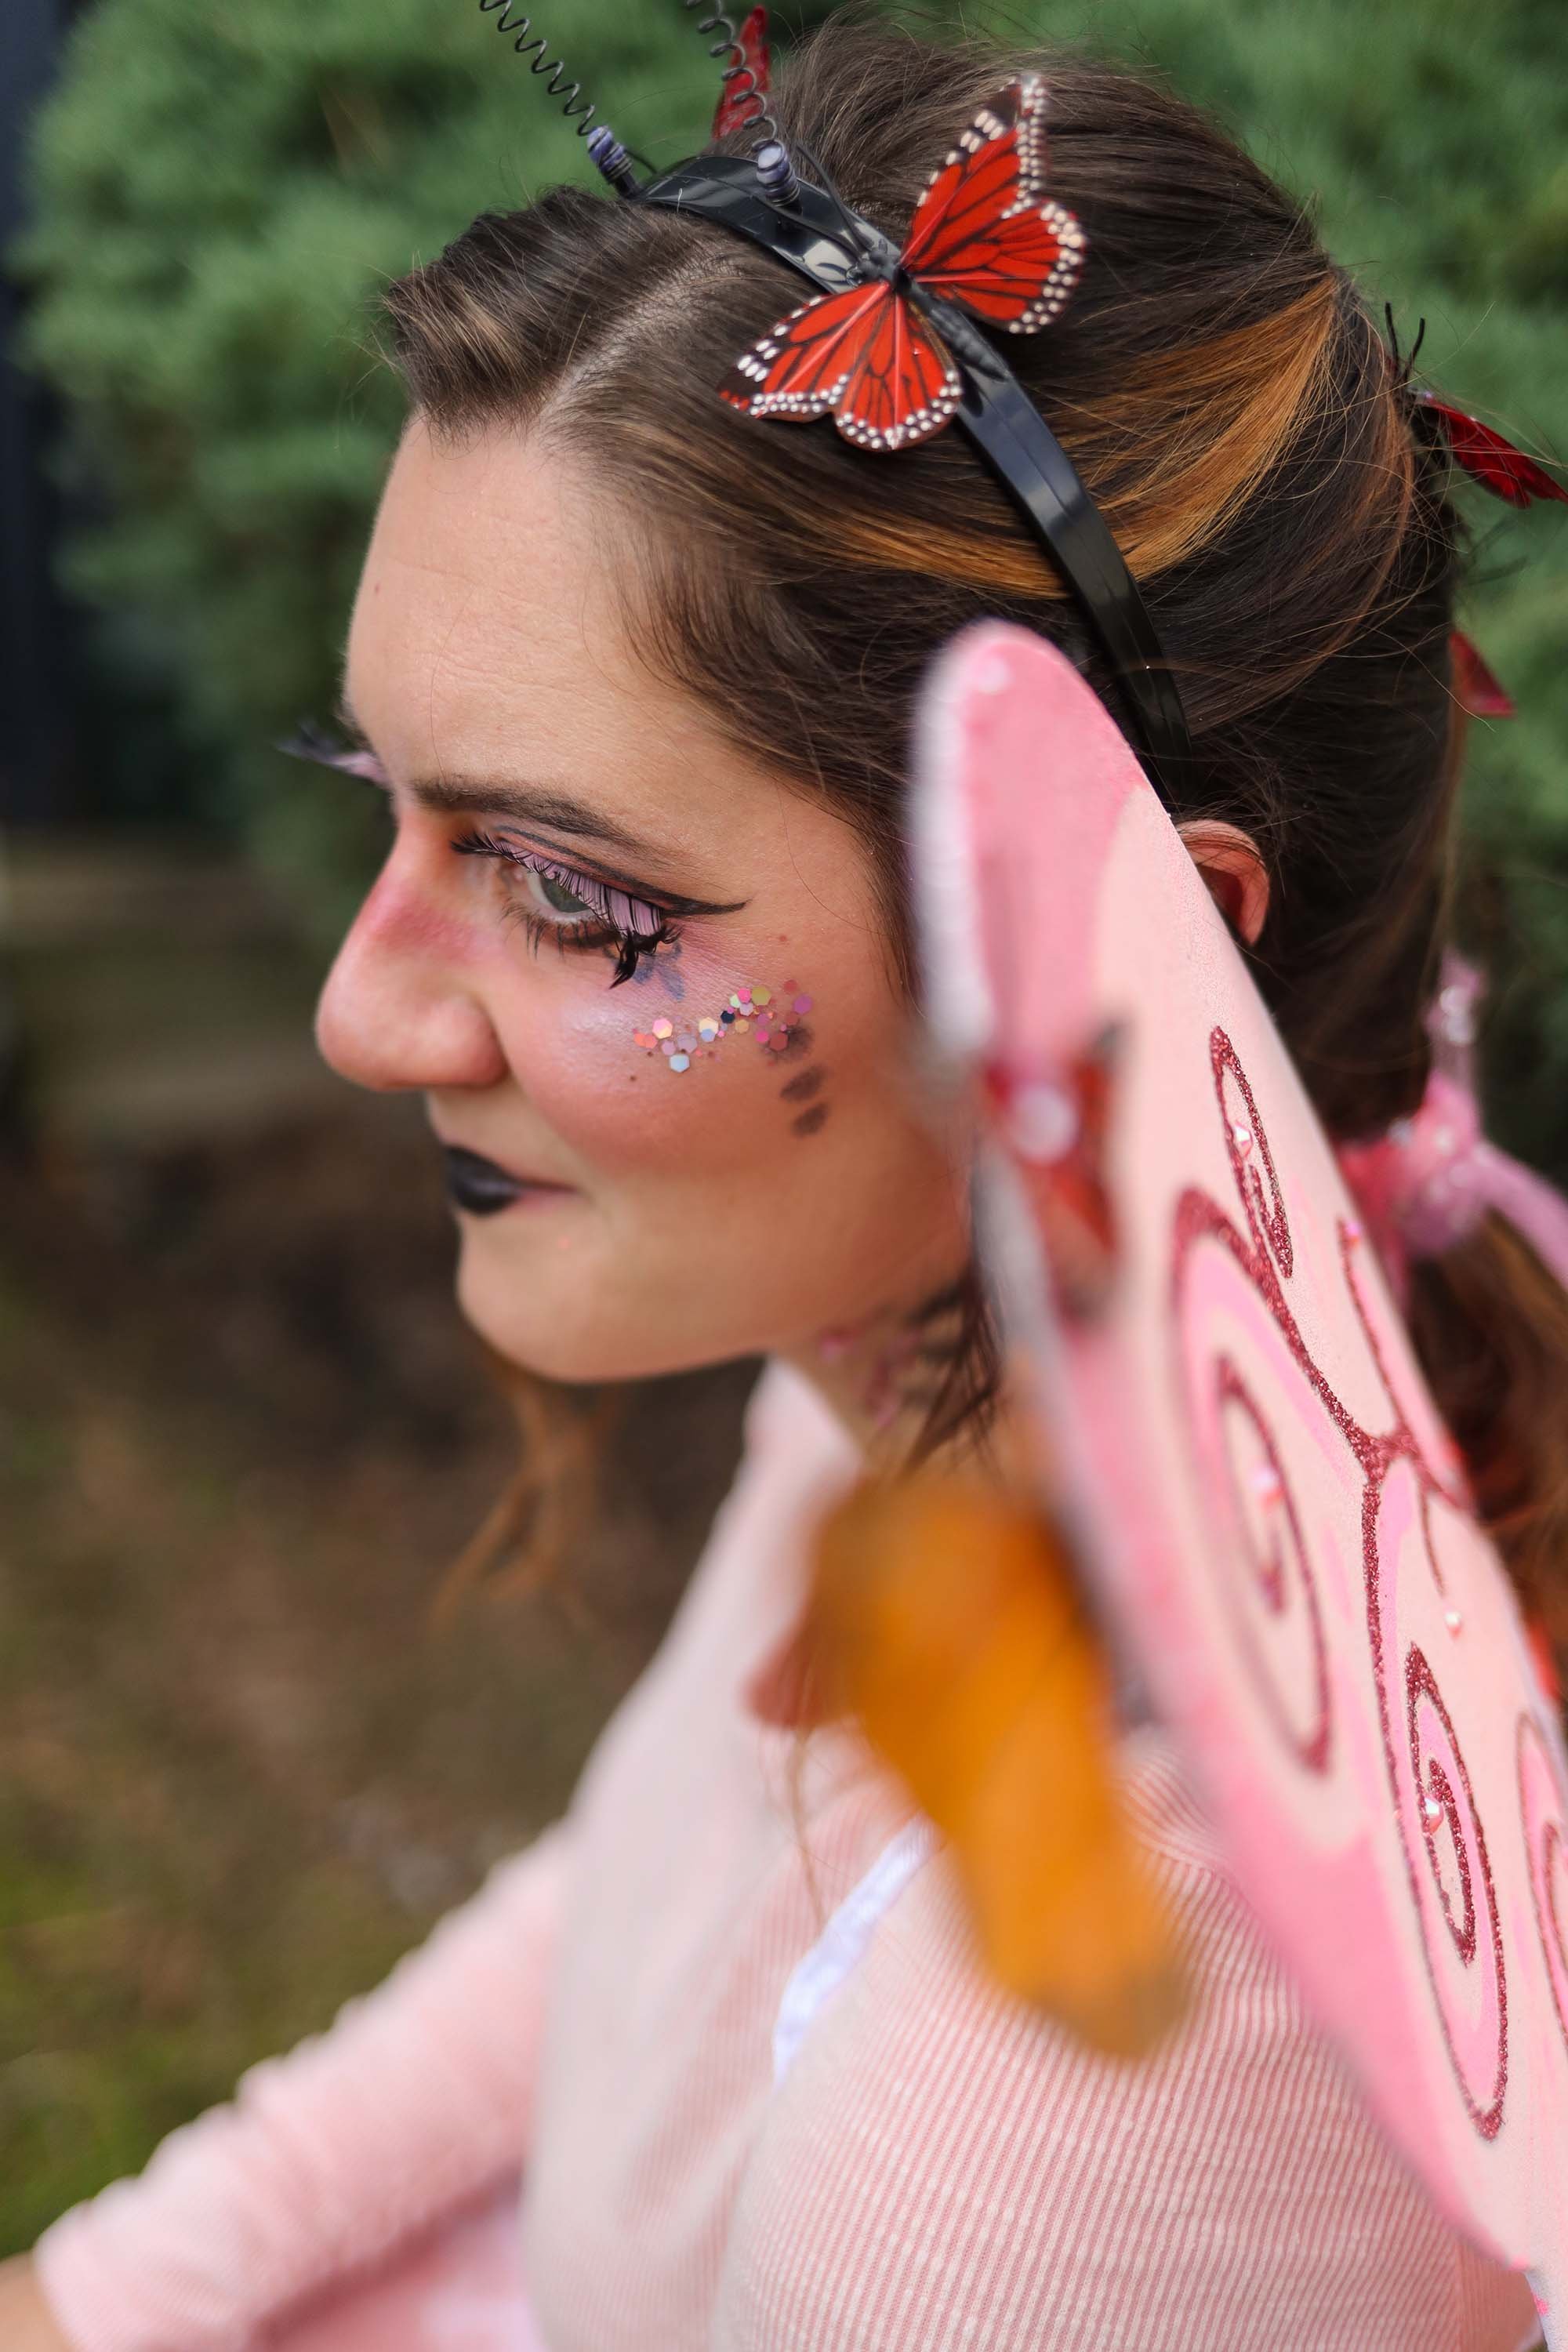
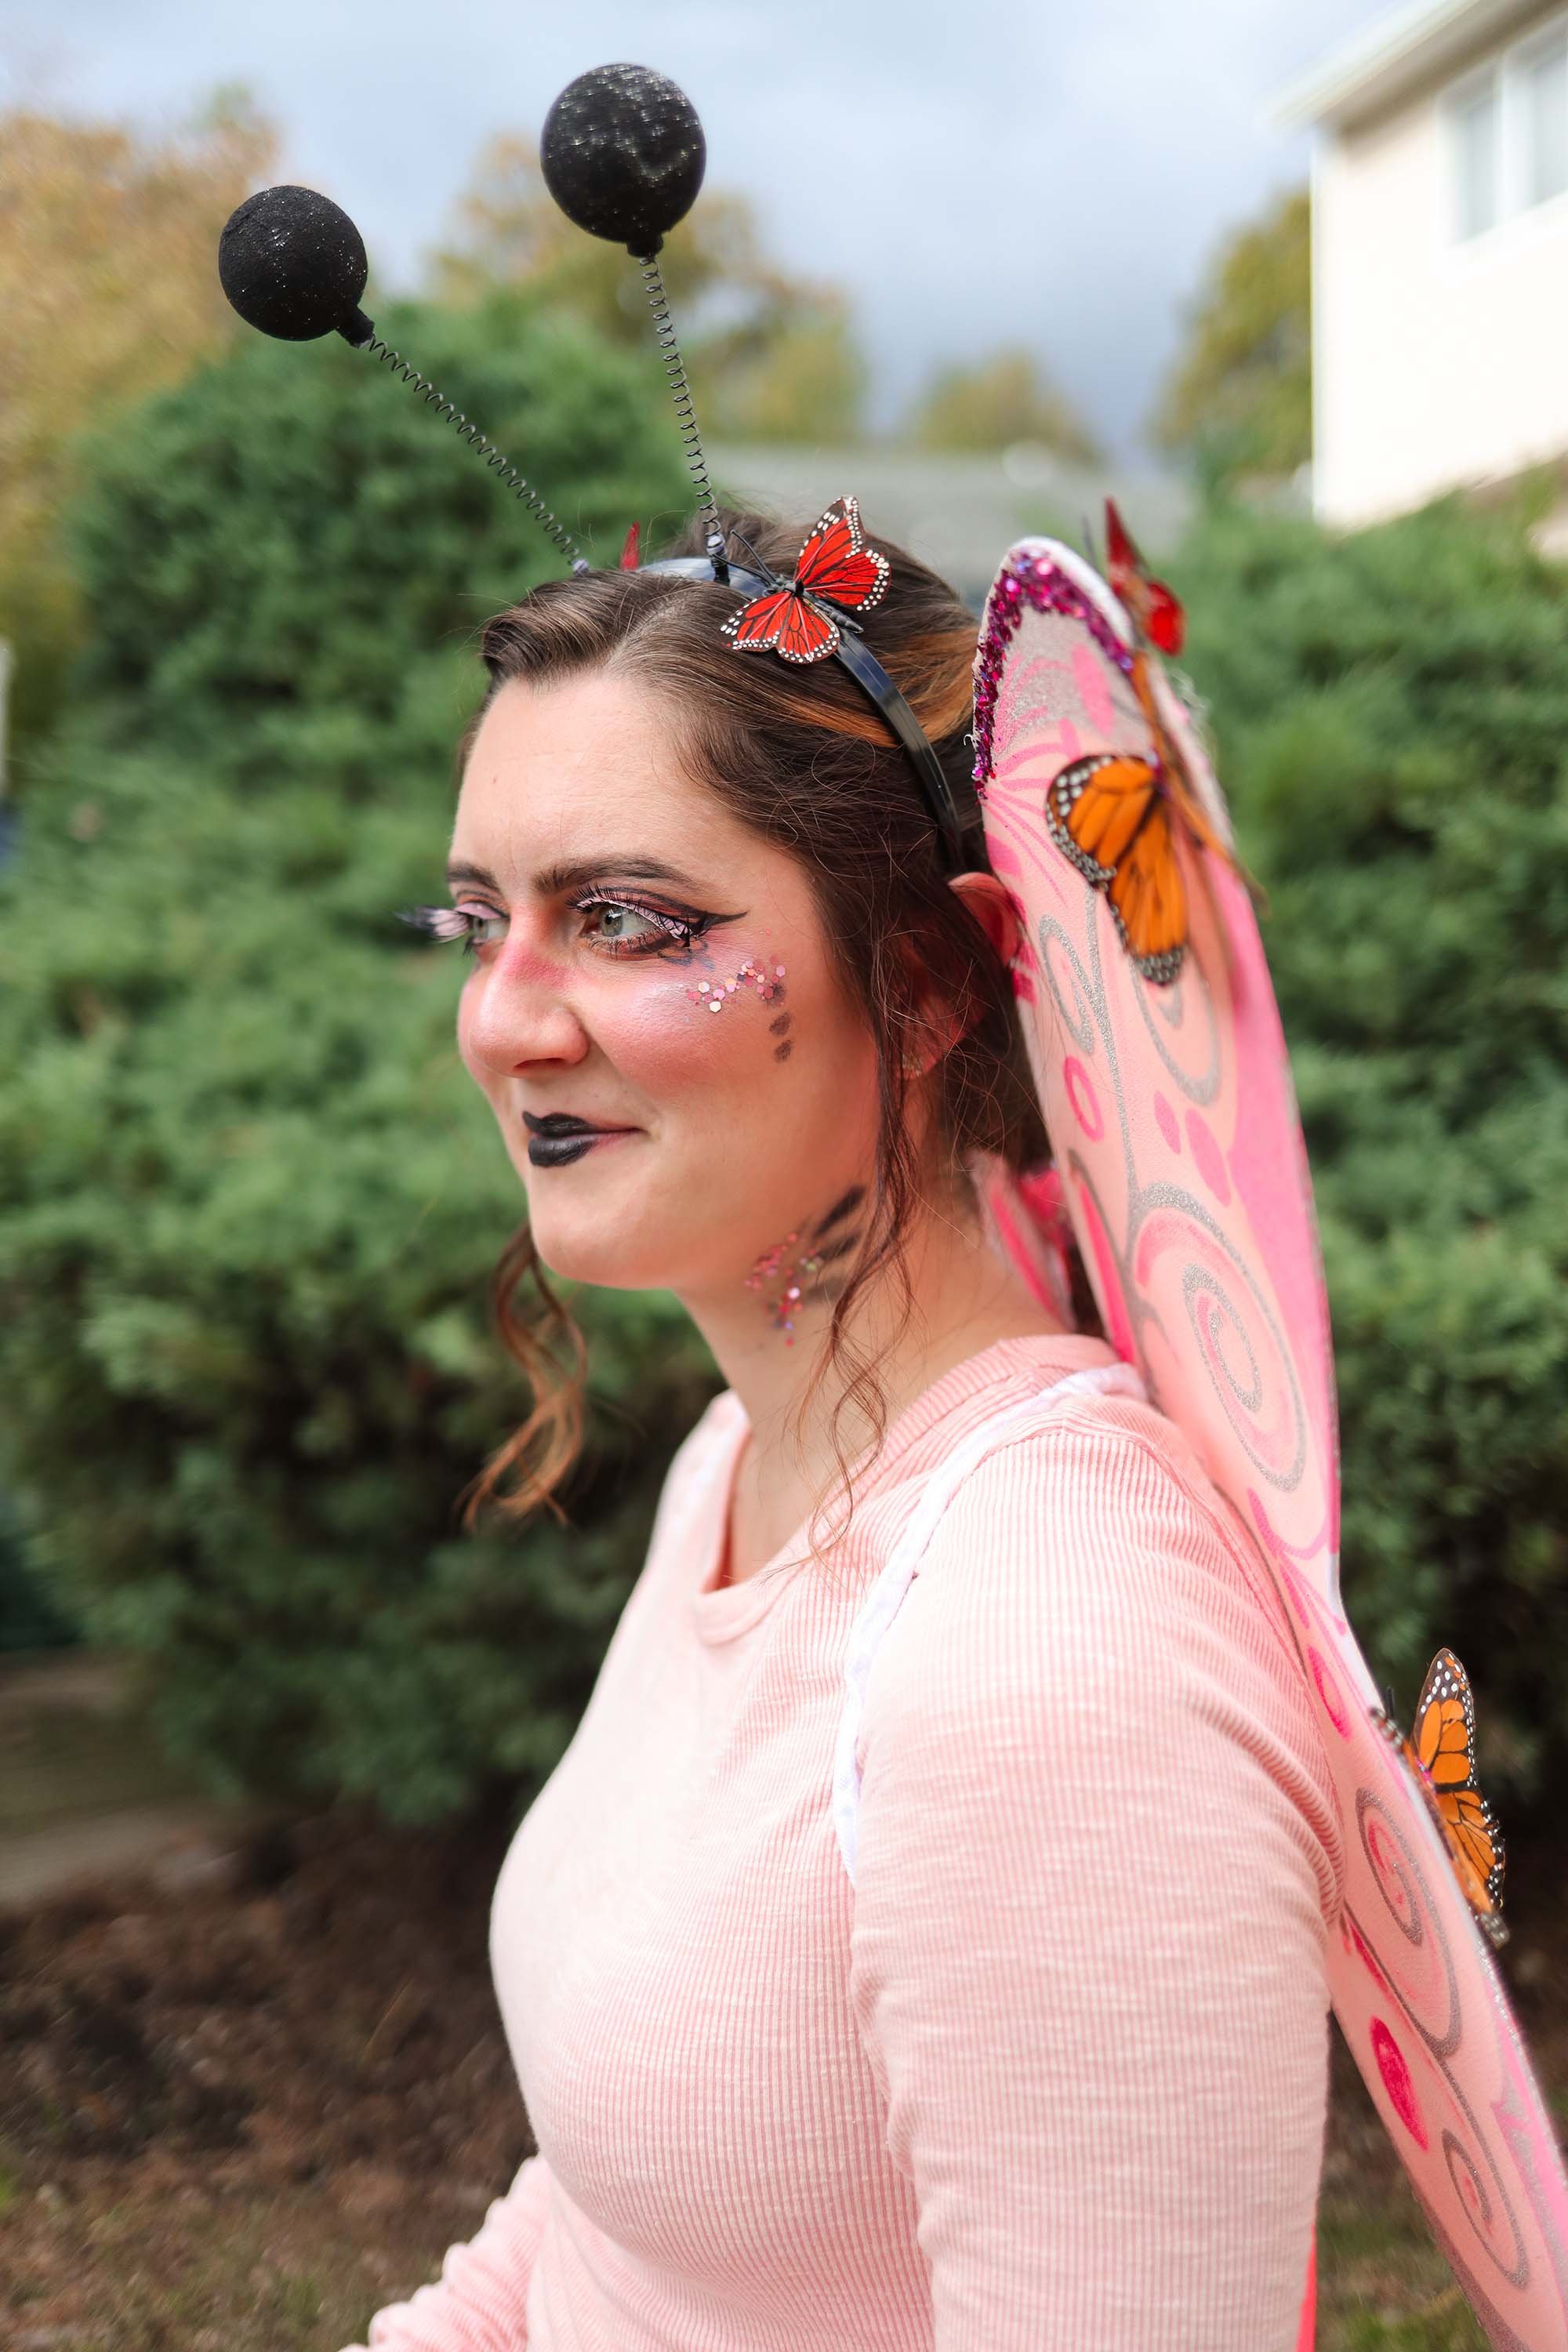
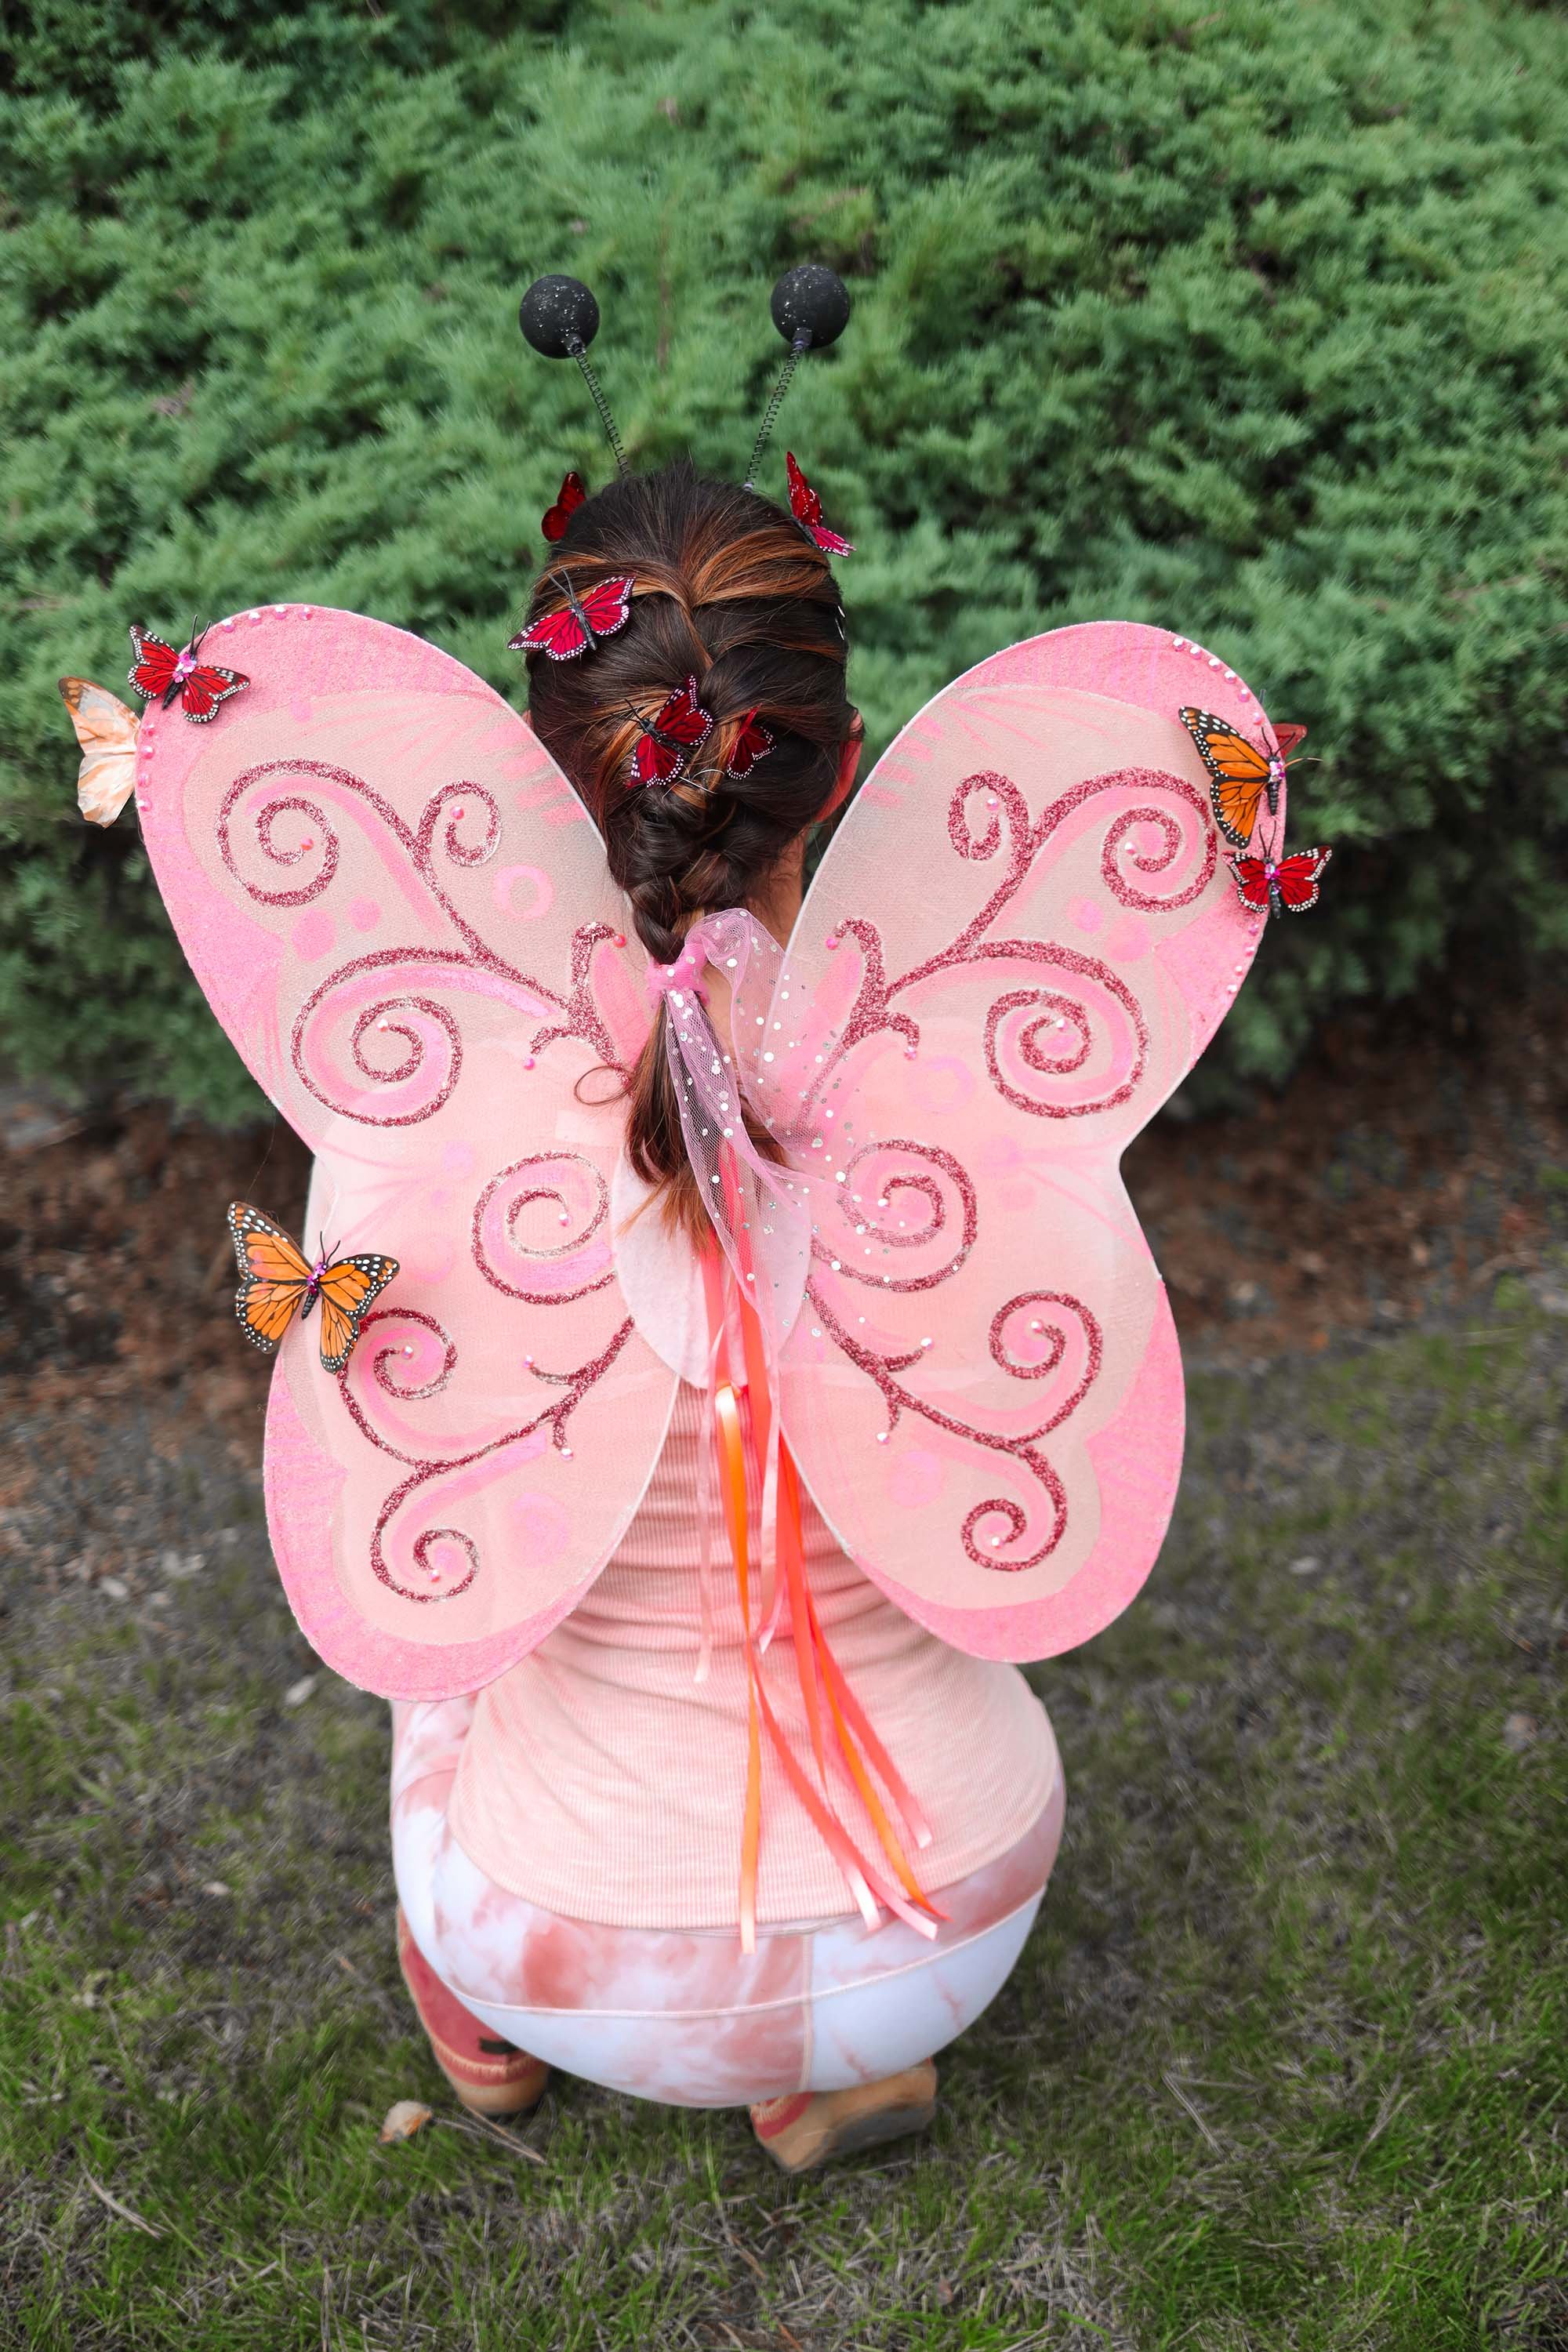
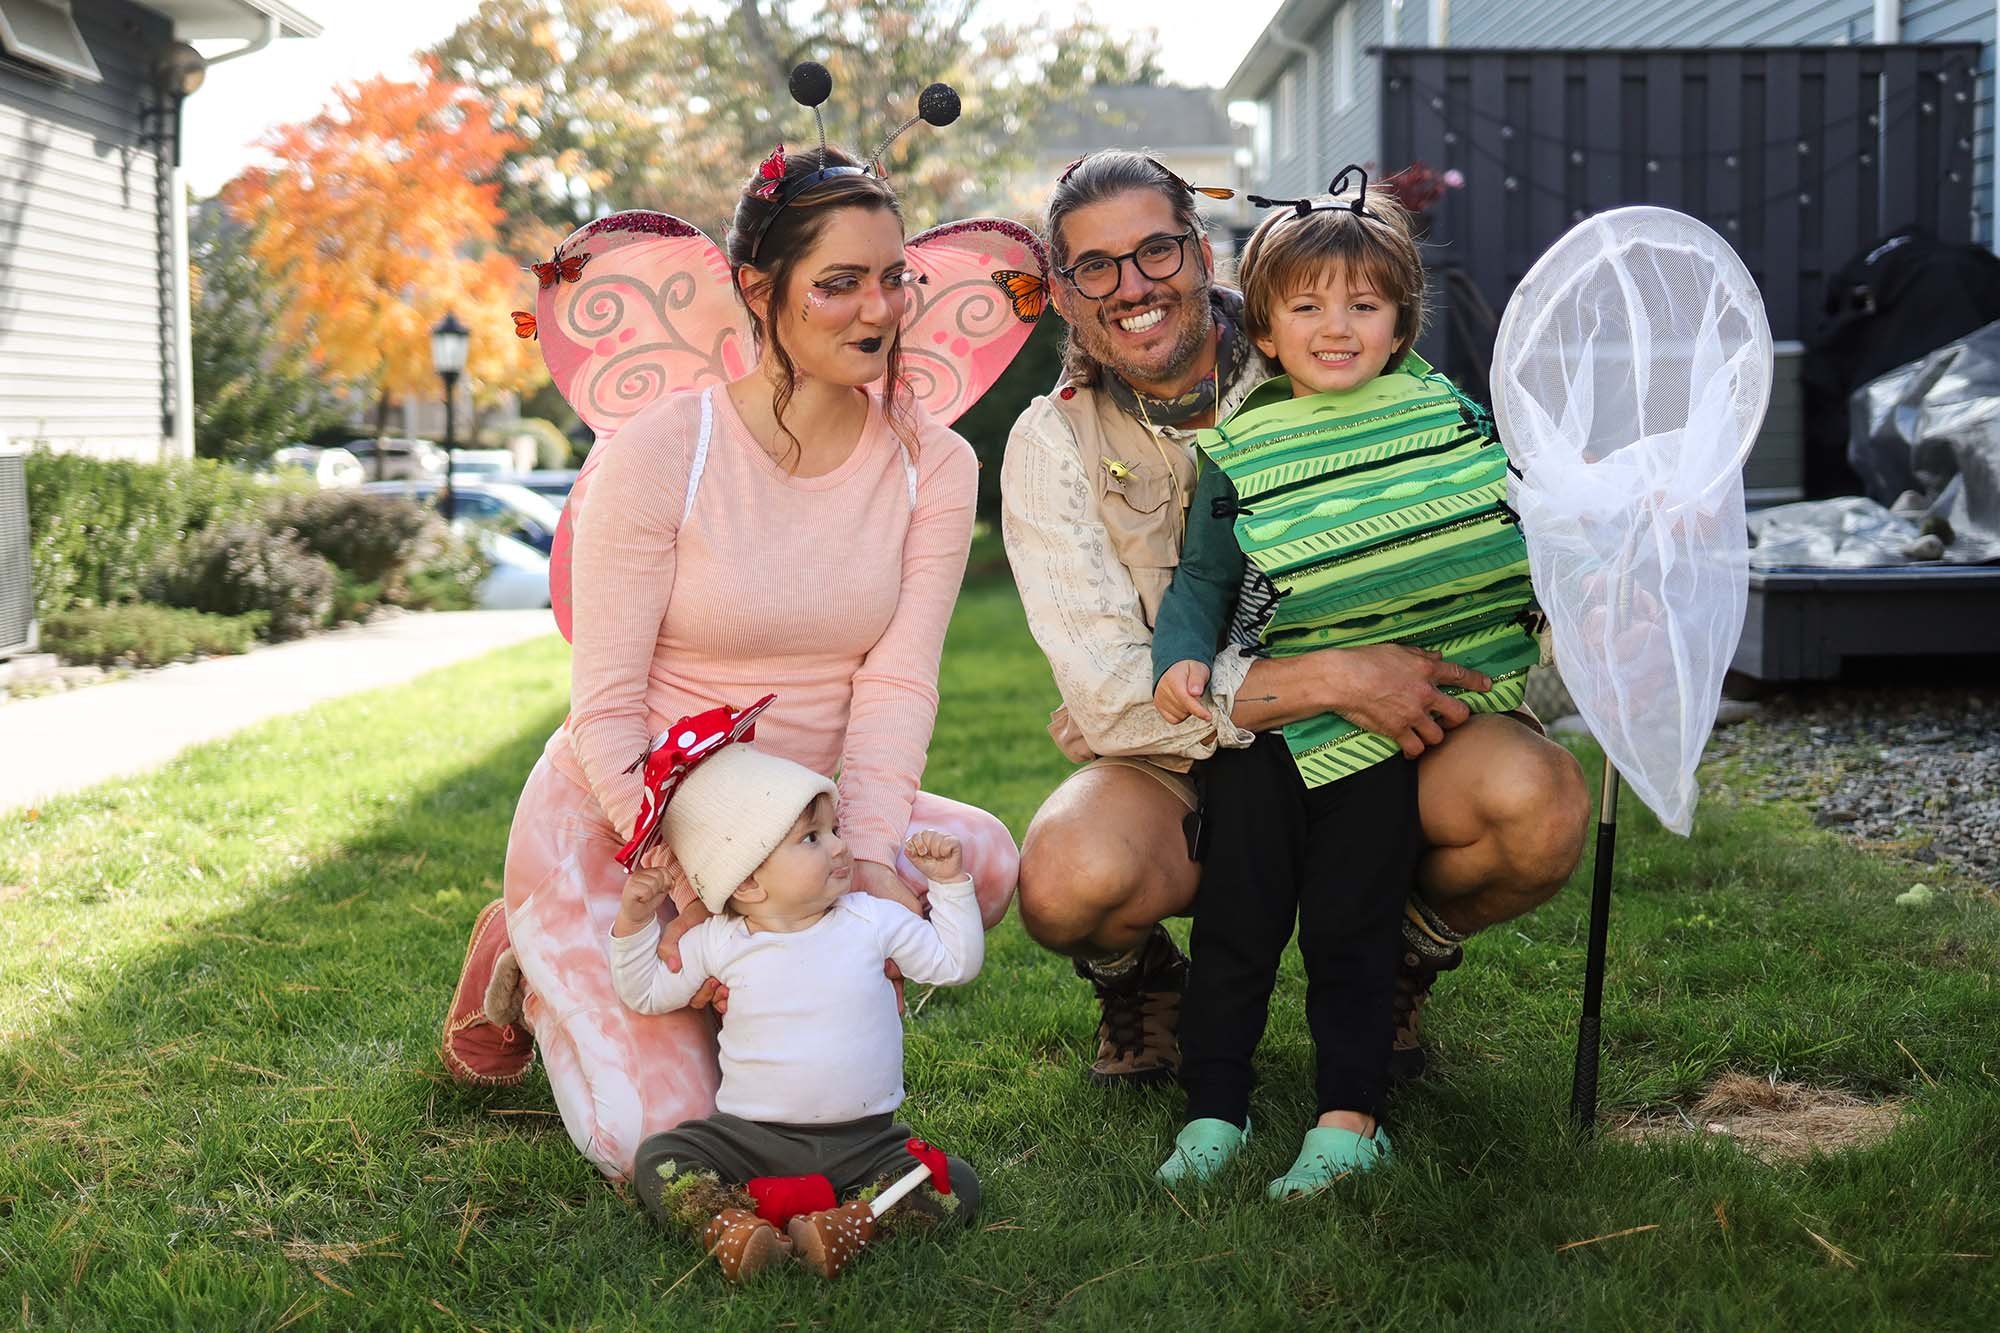
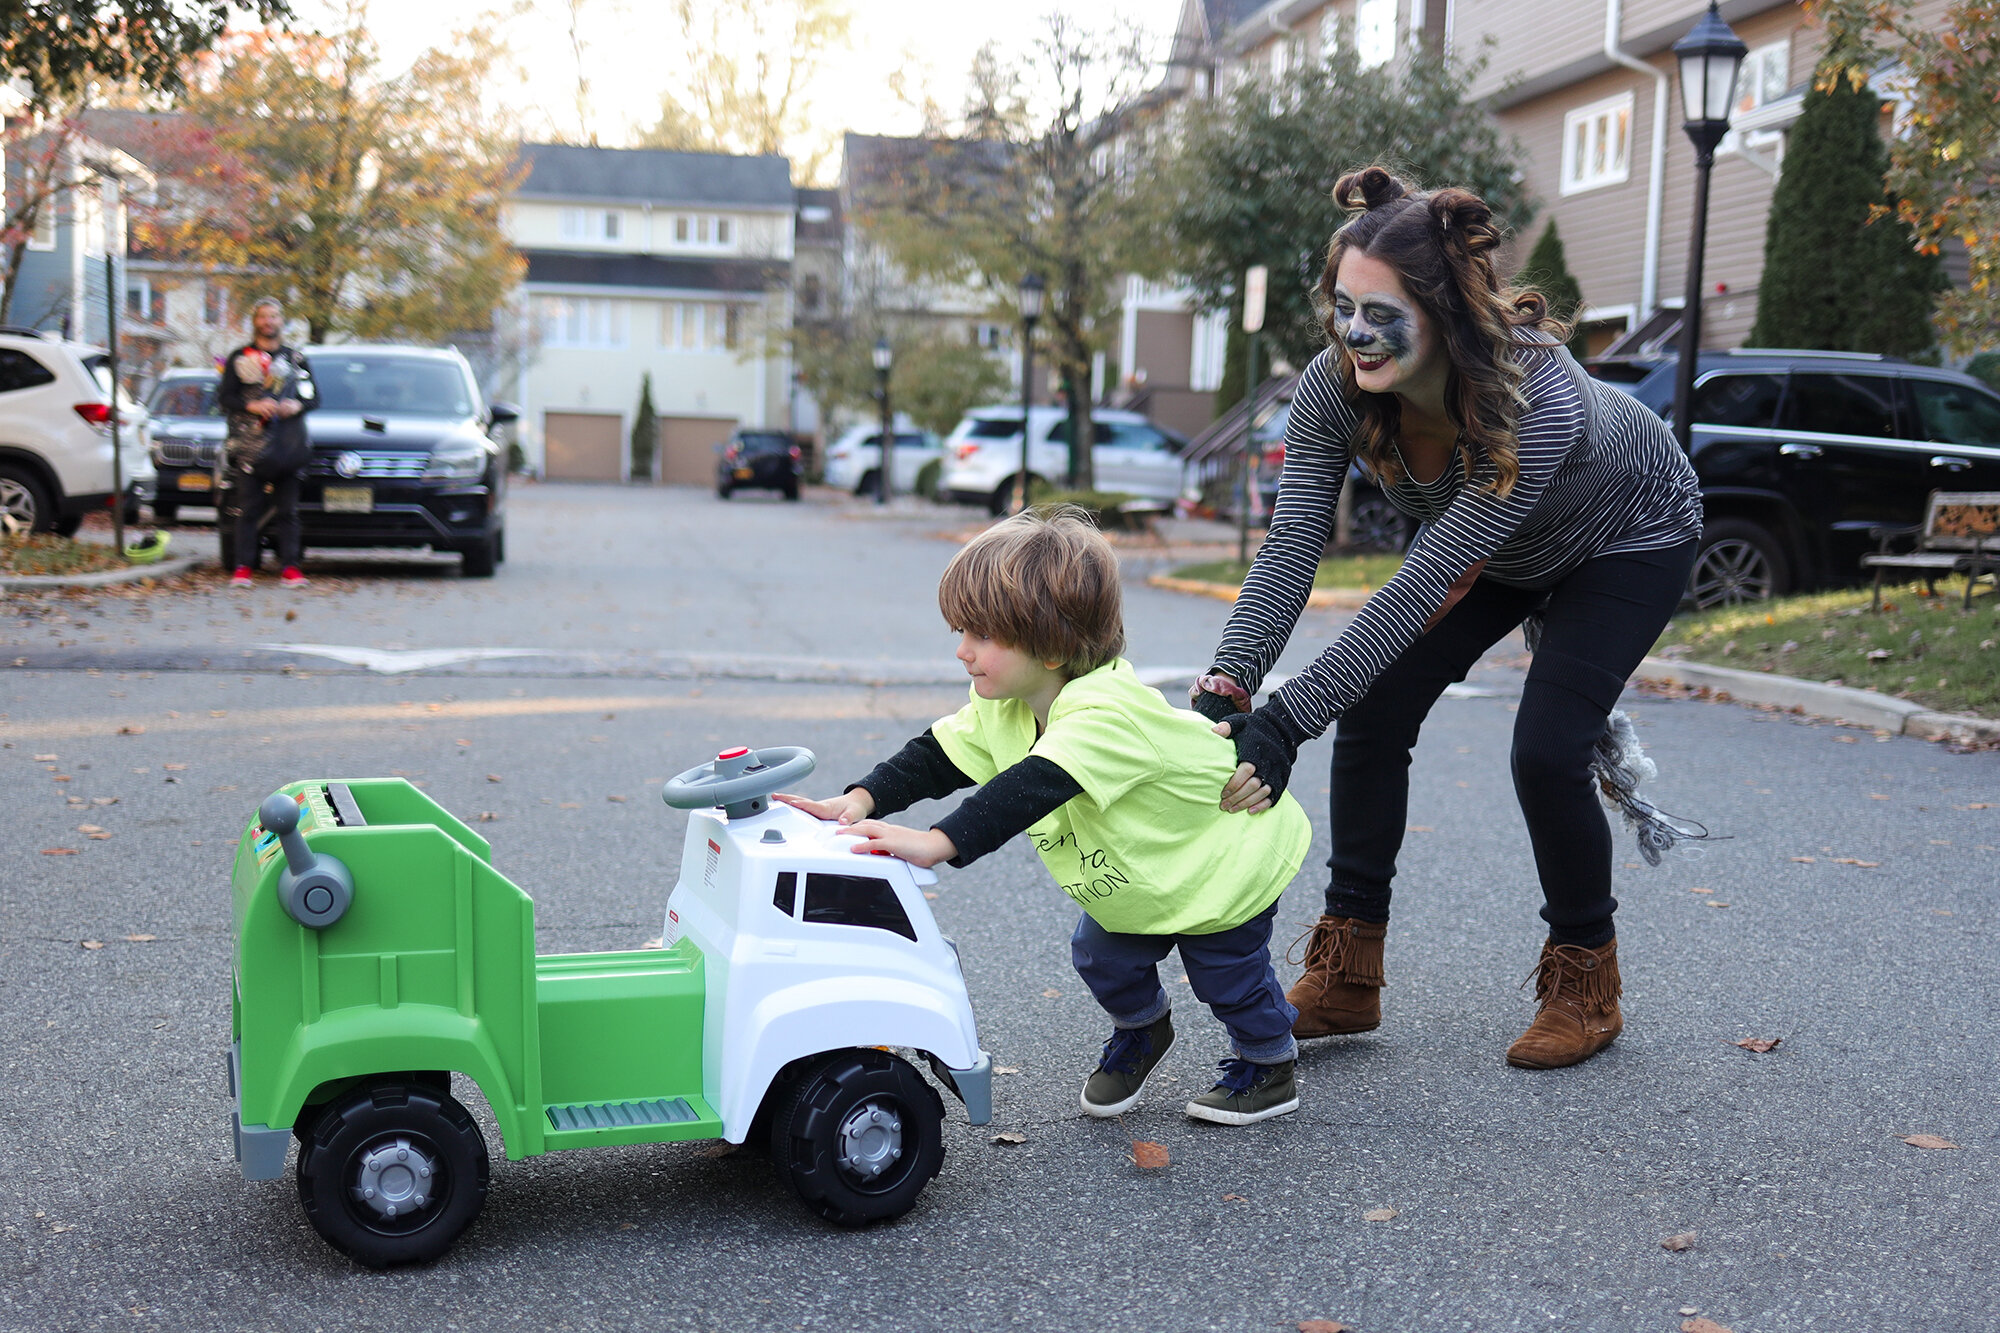
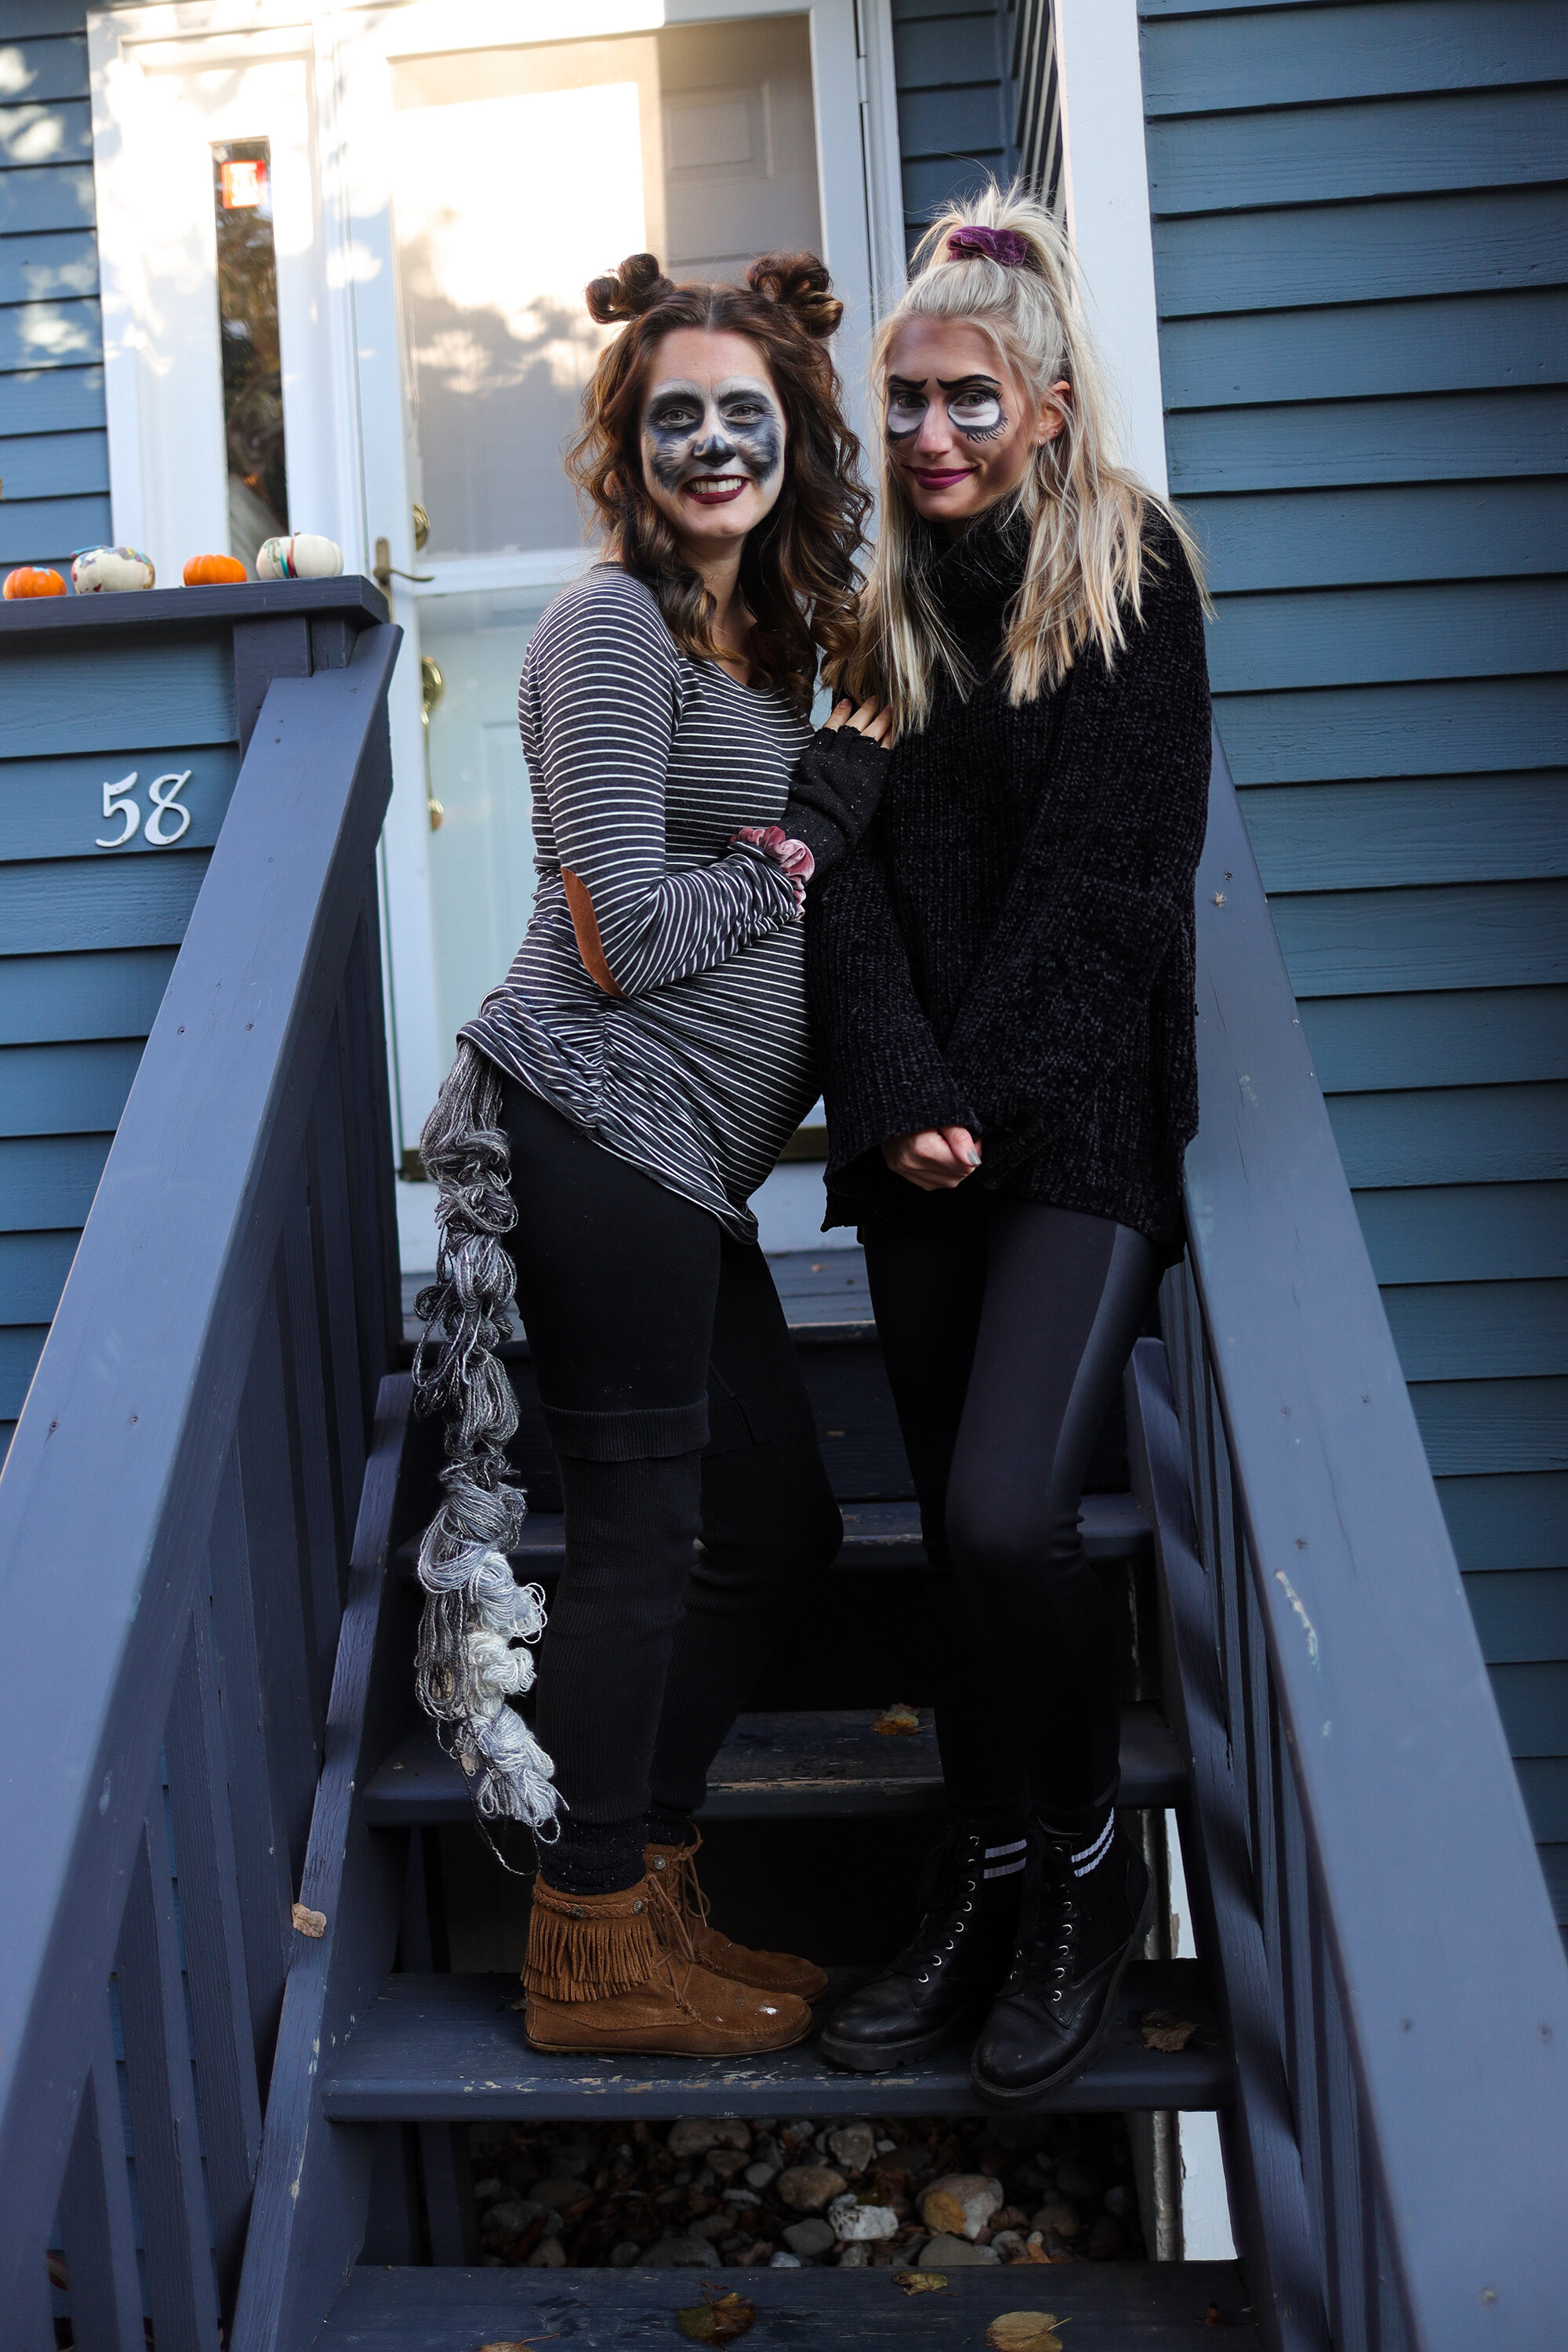
when we were bugs.

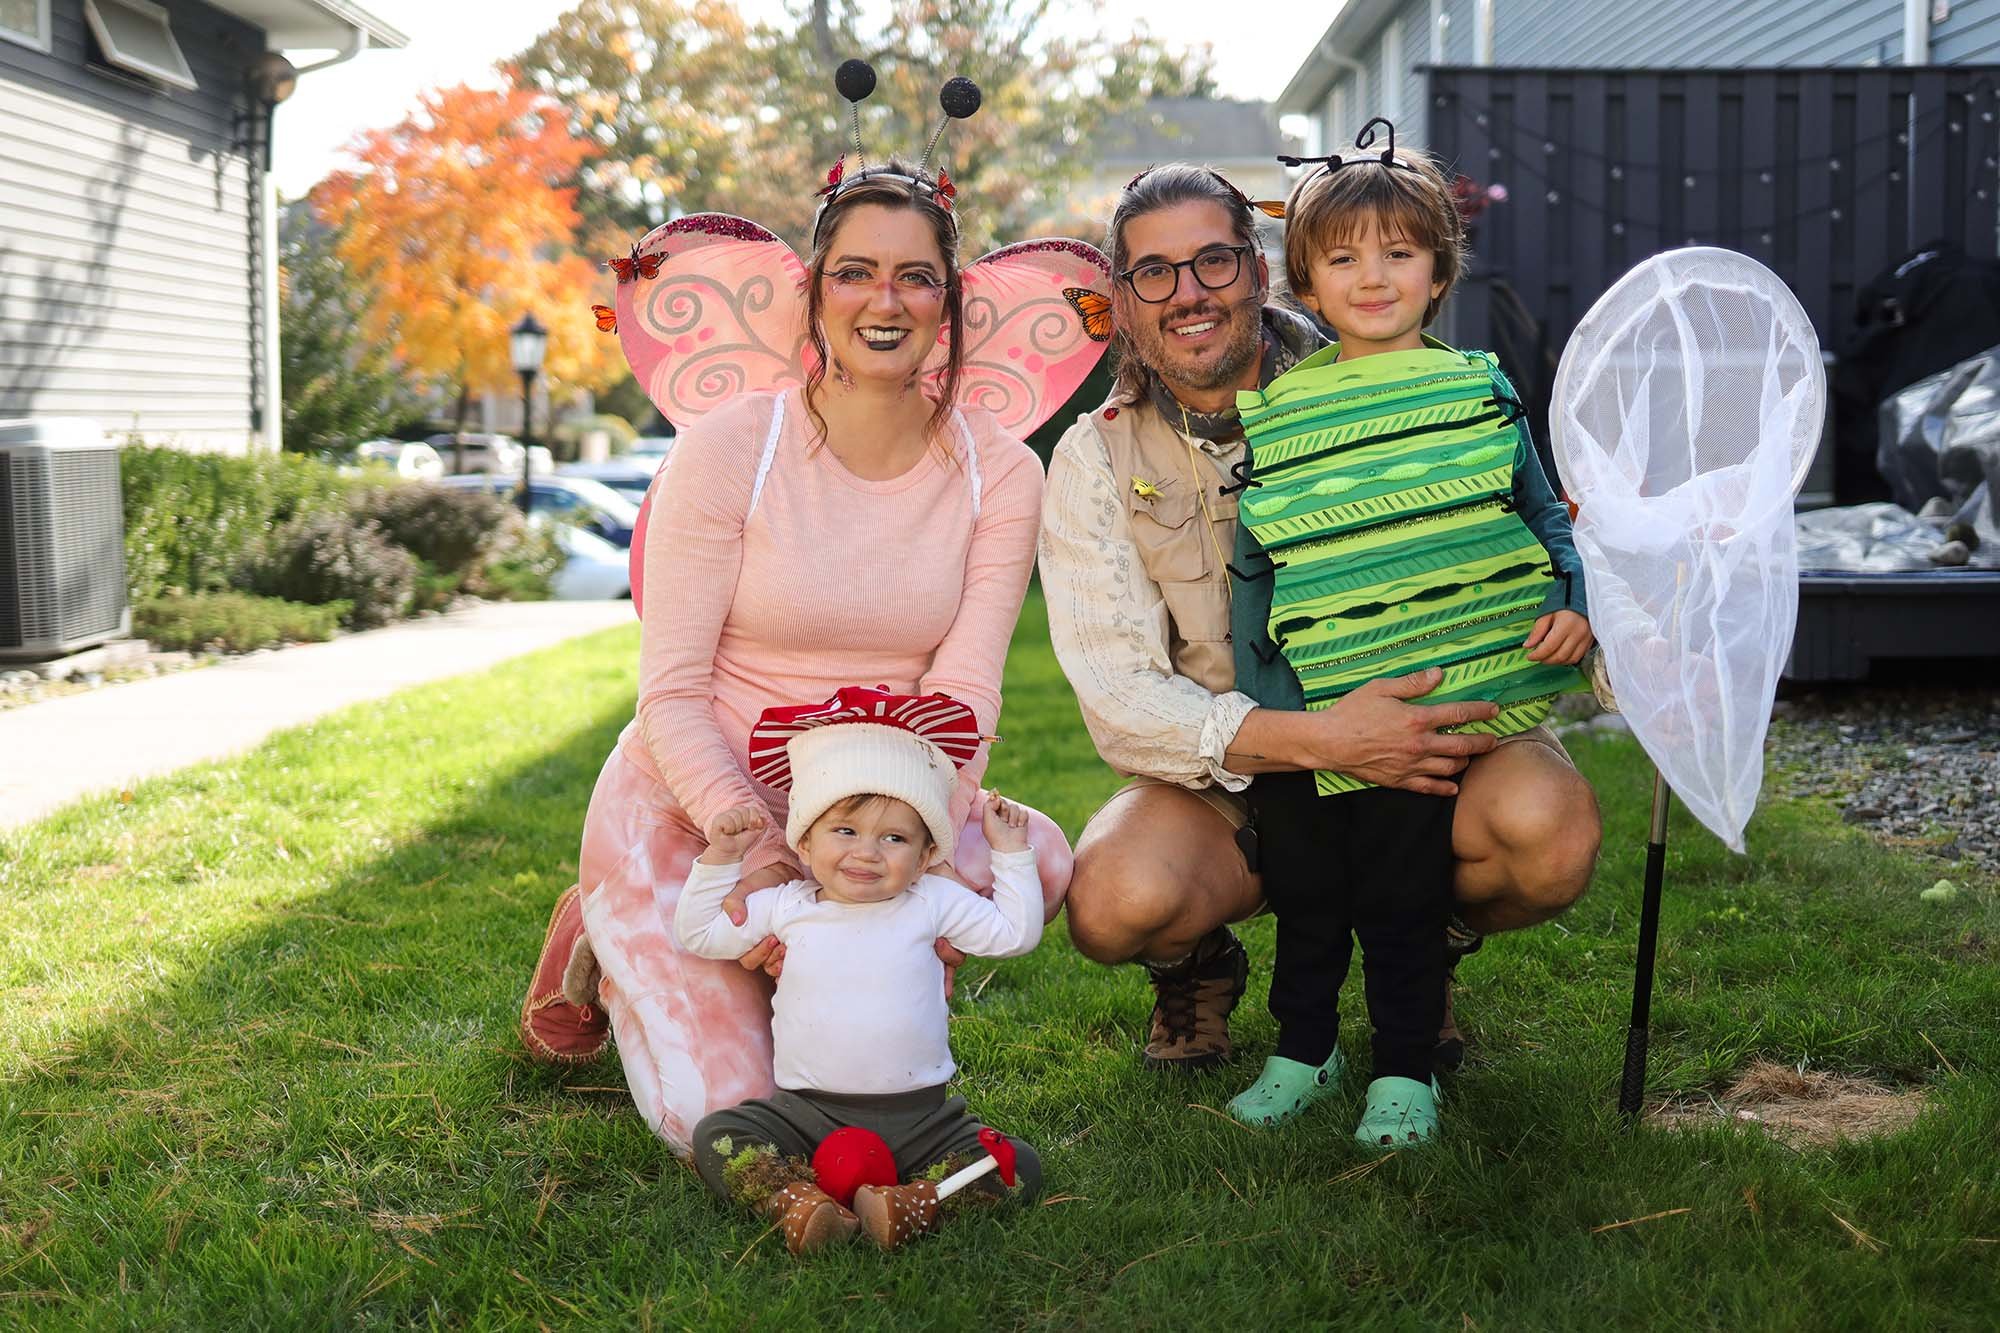
Another Halloween, another family costume!
I don’t know how many more of these we really have left. The older Logan gets the more likely he is to want to wear some random costume like paw patrol or Blippi, lol who knows. So until that day comes I’ll have as much fun as I can stressing myself silly over making our costumes.
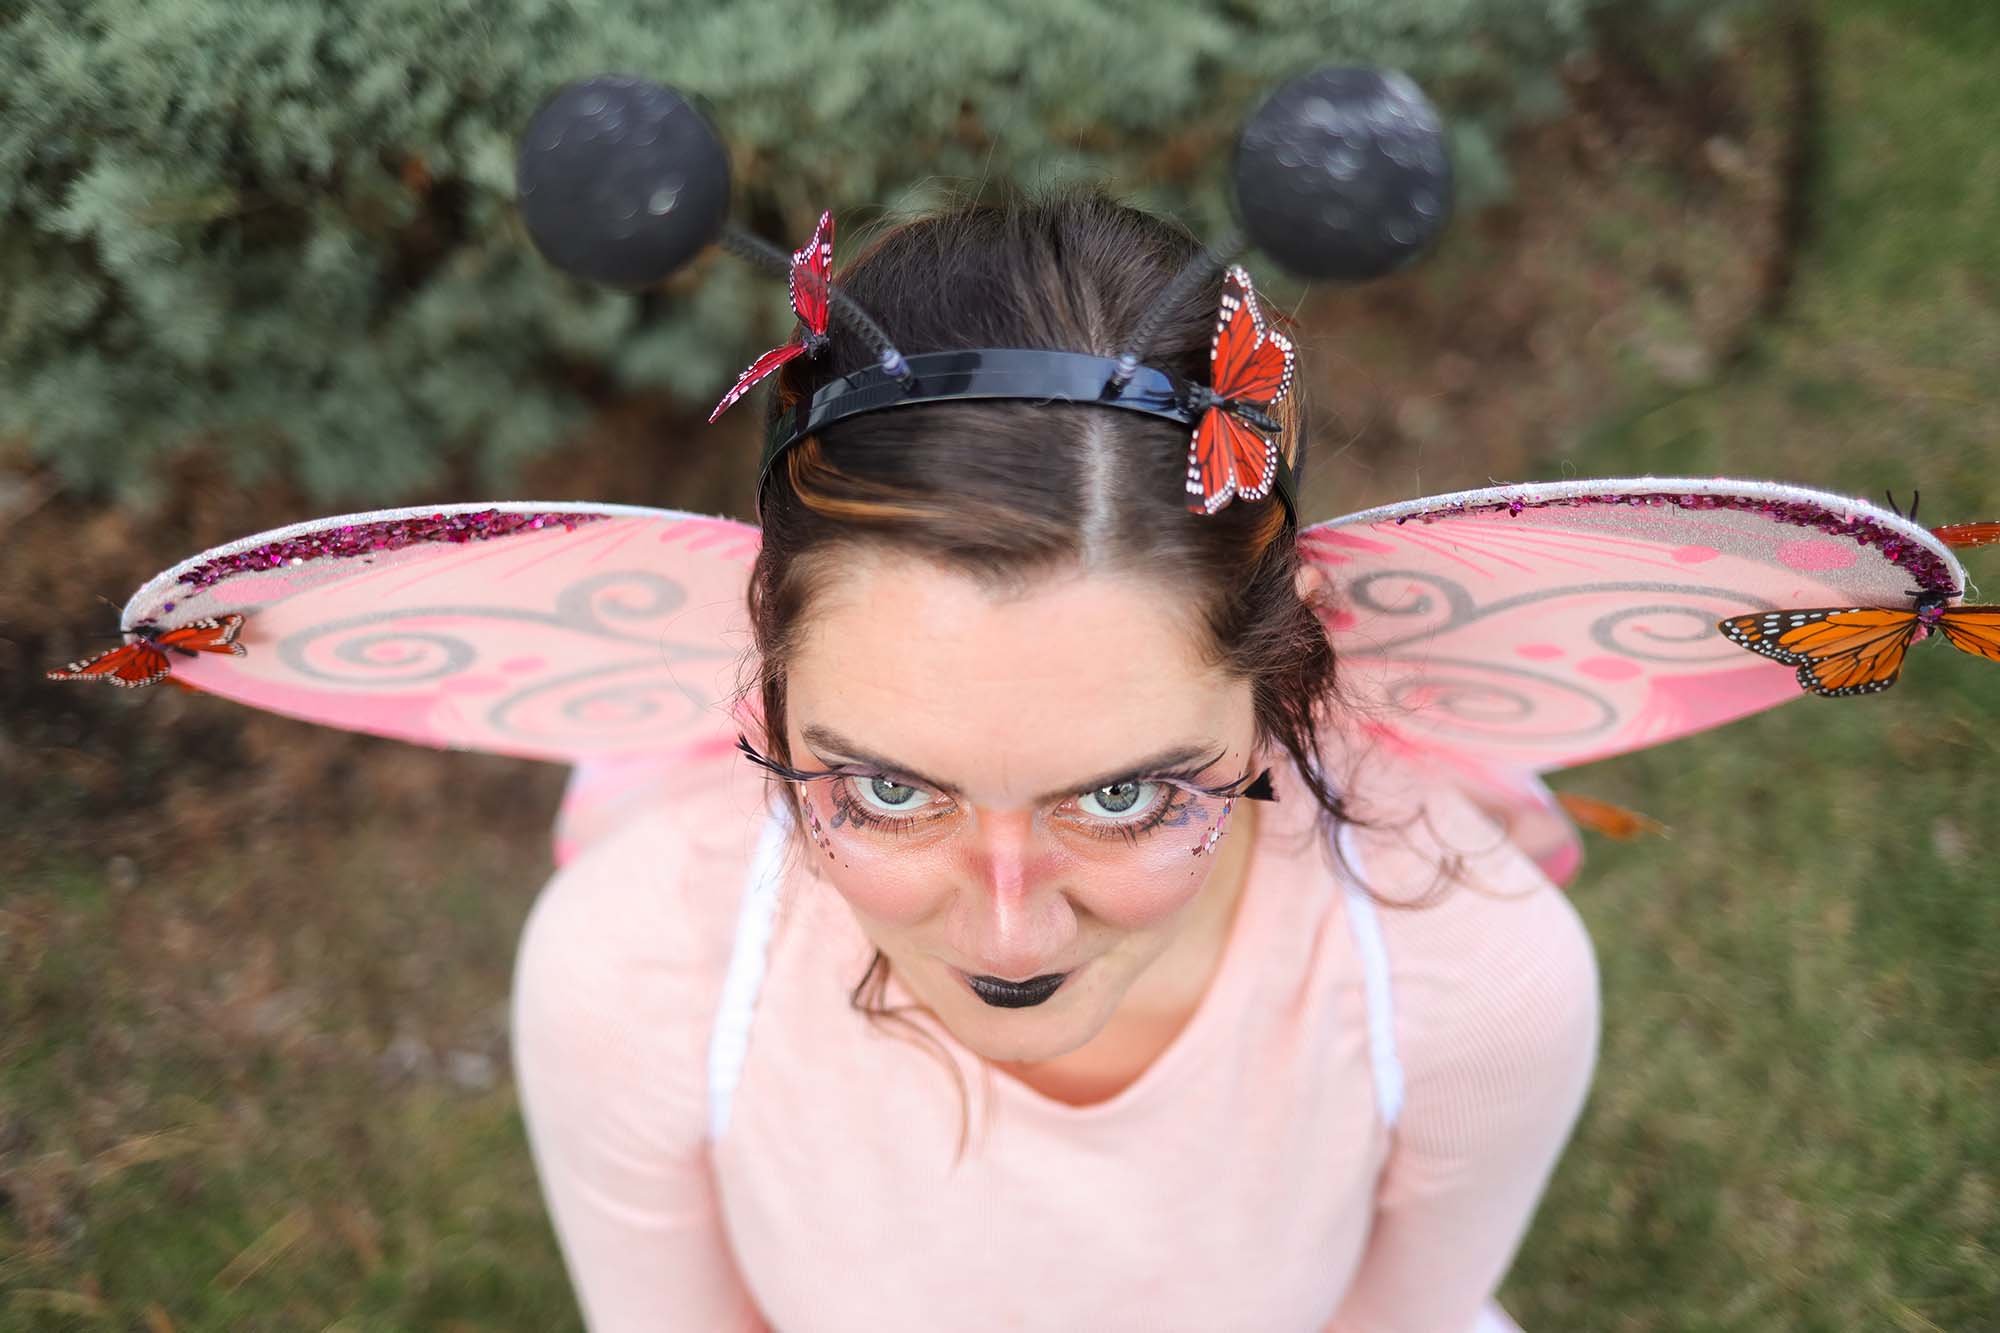
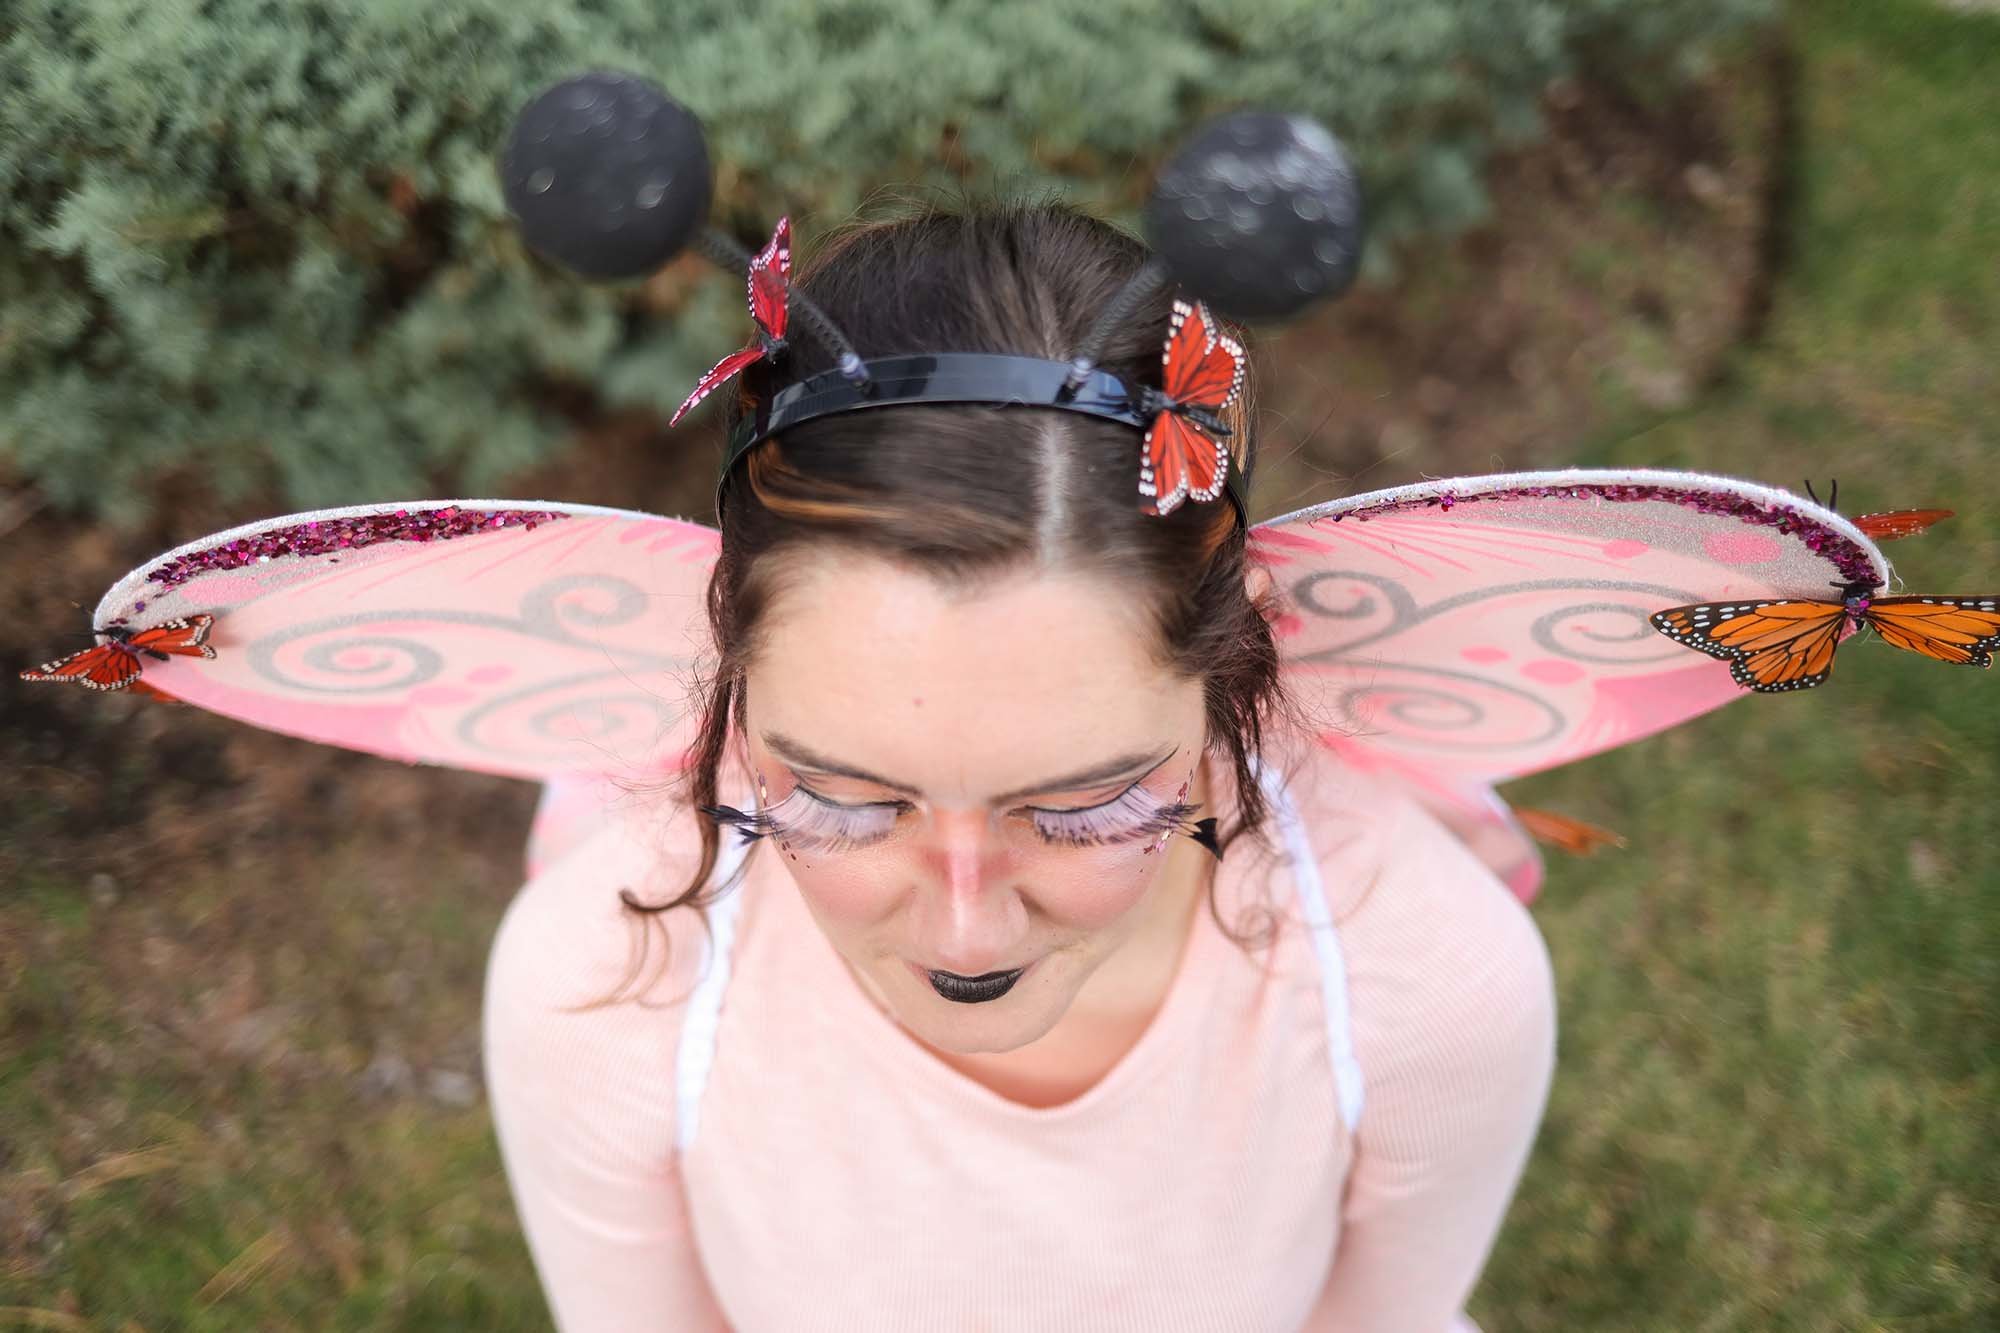
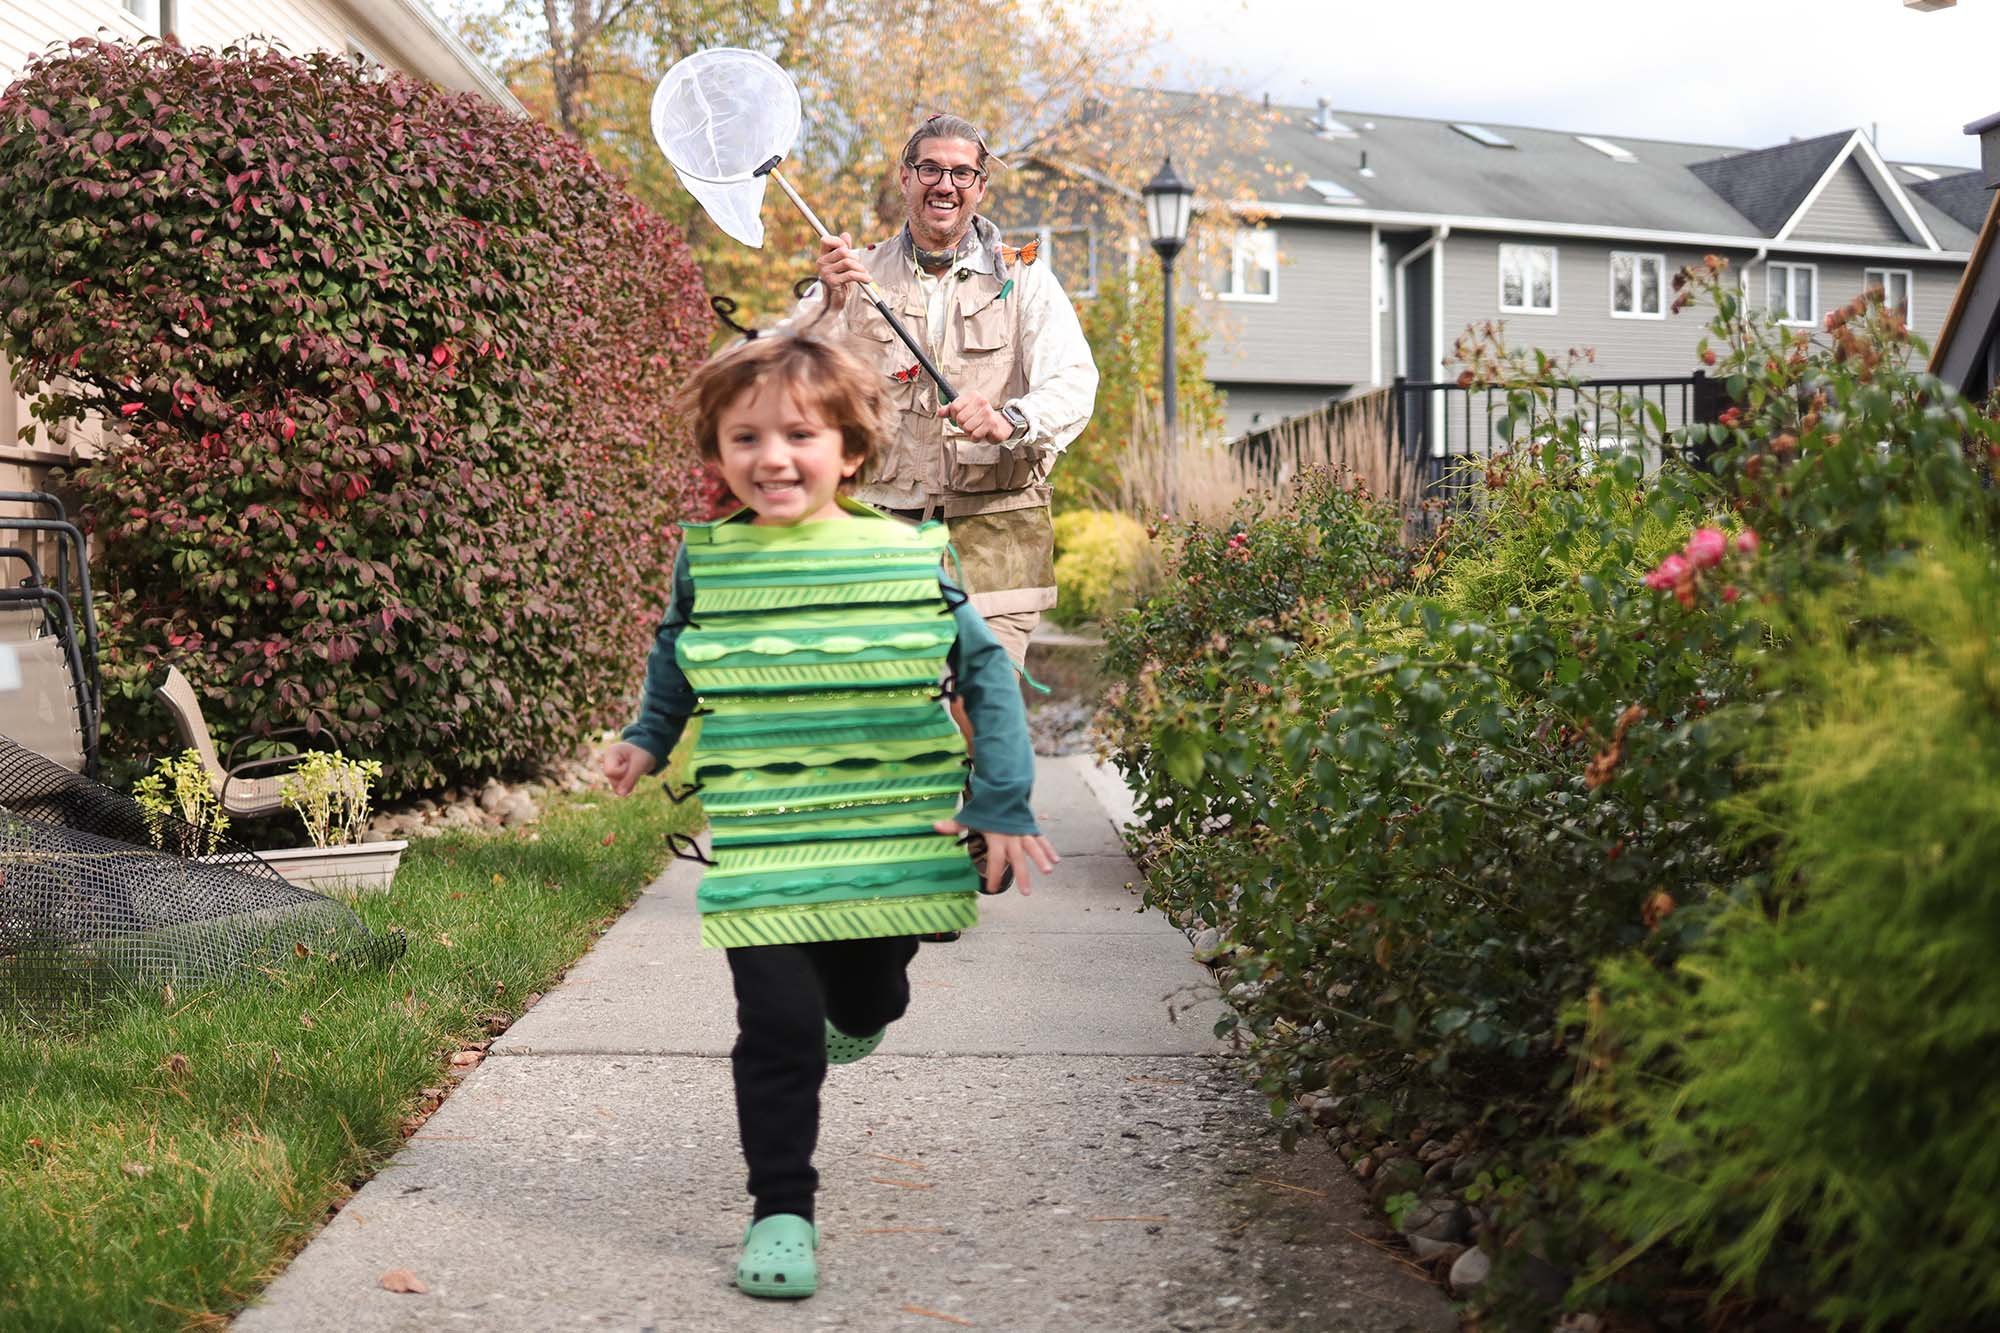
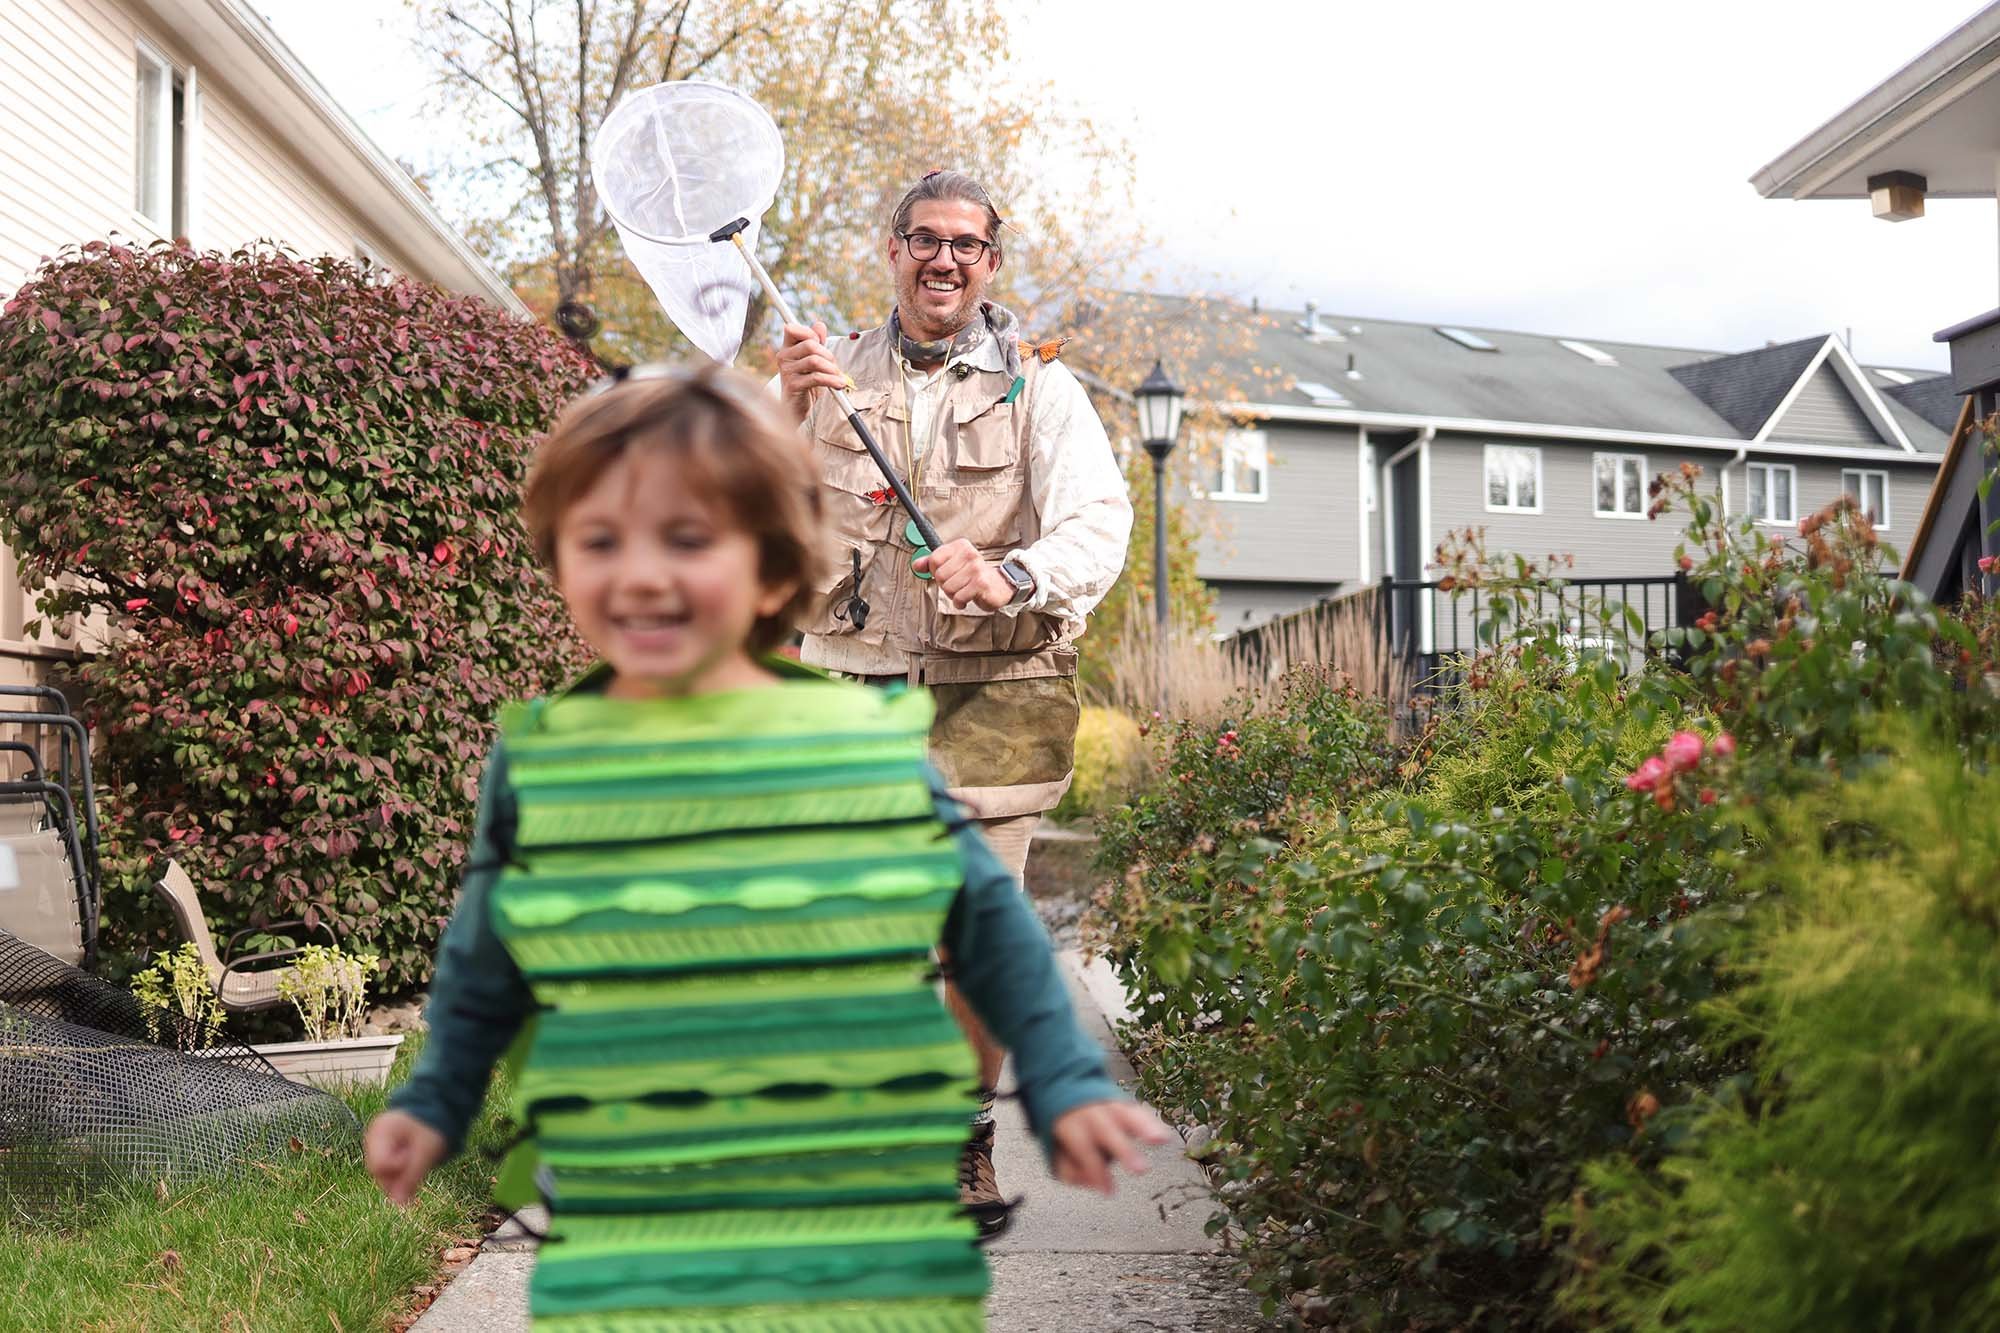
For about 2 months I was planning on making us ‘under the sea’ creatures. Logan said he wanted to be a whale, I was going to be a mermaid, Mason was going to be a jelly fish and John a shark. But I had this sneaking suspicion Logan was going to change his mind so I didn’t buy anything just yet. I researched and saved a bunch of inspiration on pinterest. But I held off. Then like 2 weeks before Halloween I said to Logan “so you’re being a whale for Halloween, right?’ and he replied with, “No, I don’t want to be a whale!” and pouted, hard. So I asked what he wanted to be instead and he thought before saying “ummmmmm a caterpillar.” And that was it. We were bugs.
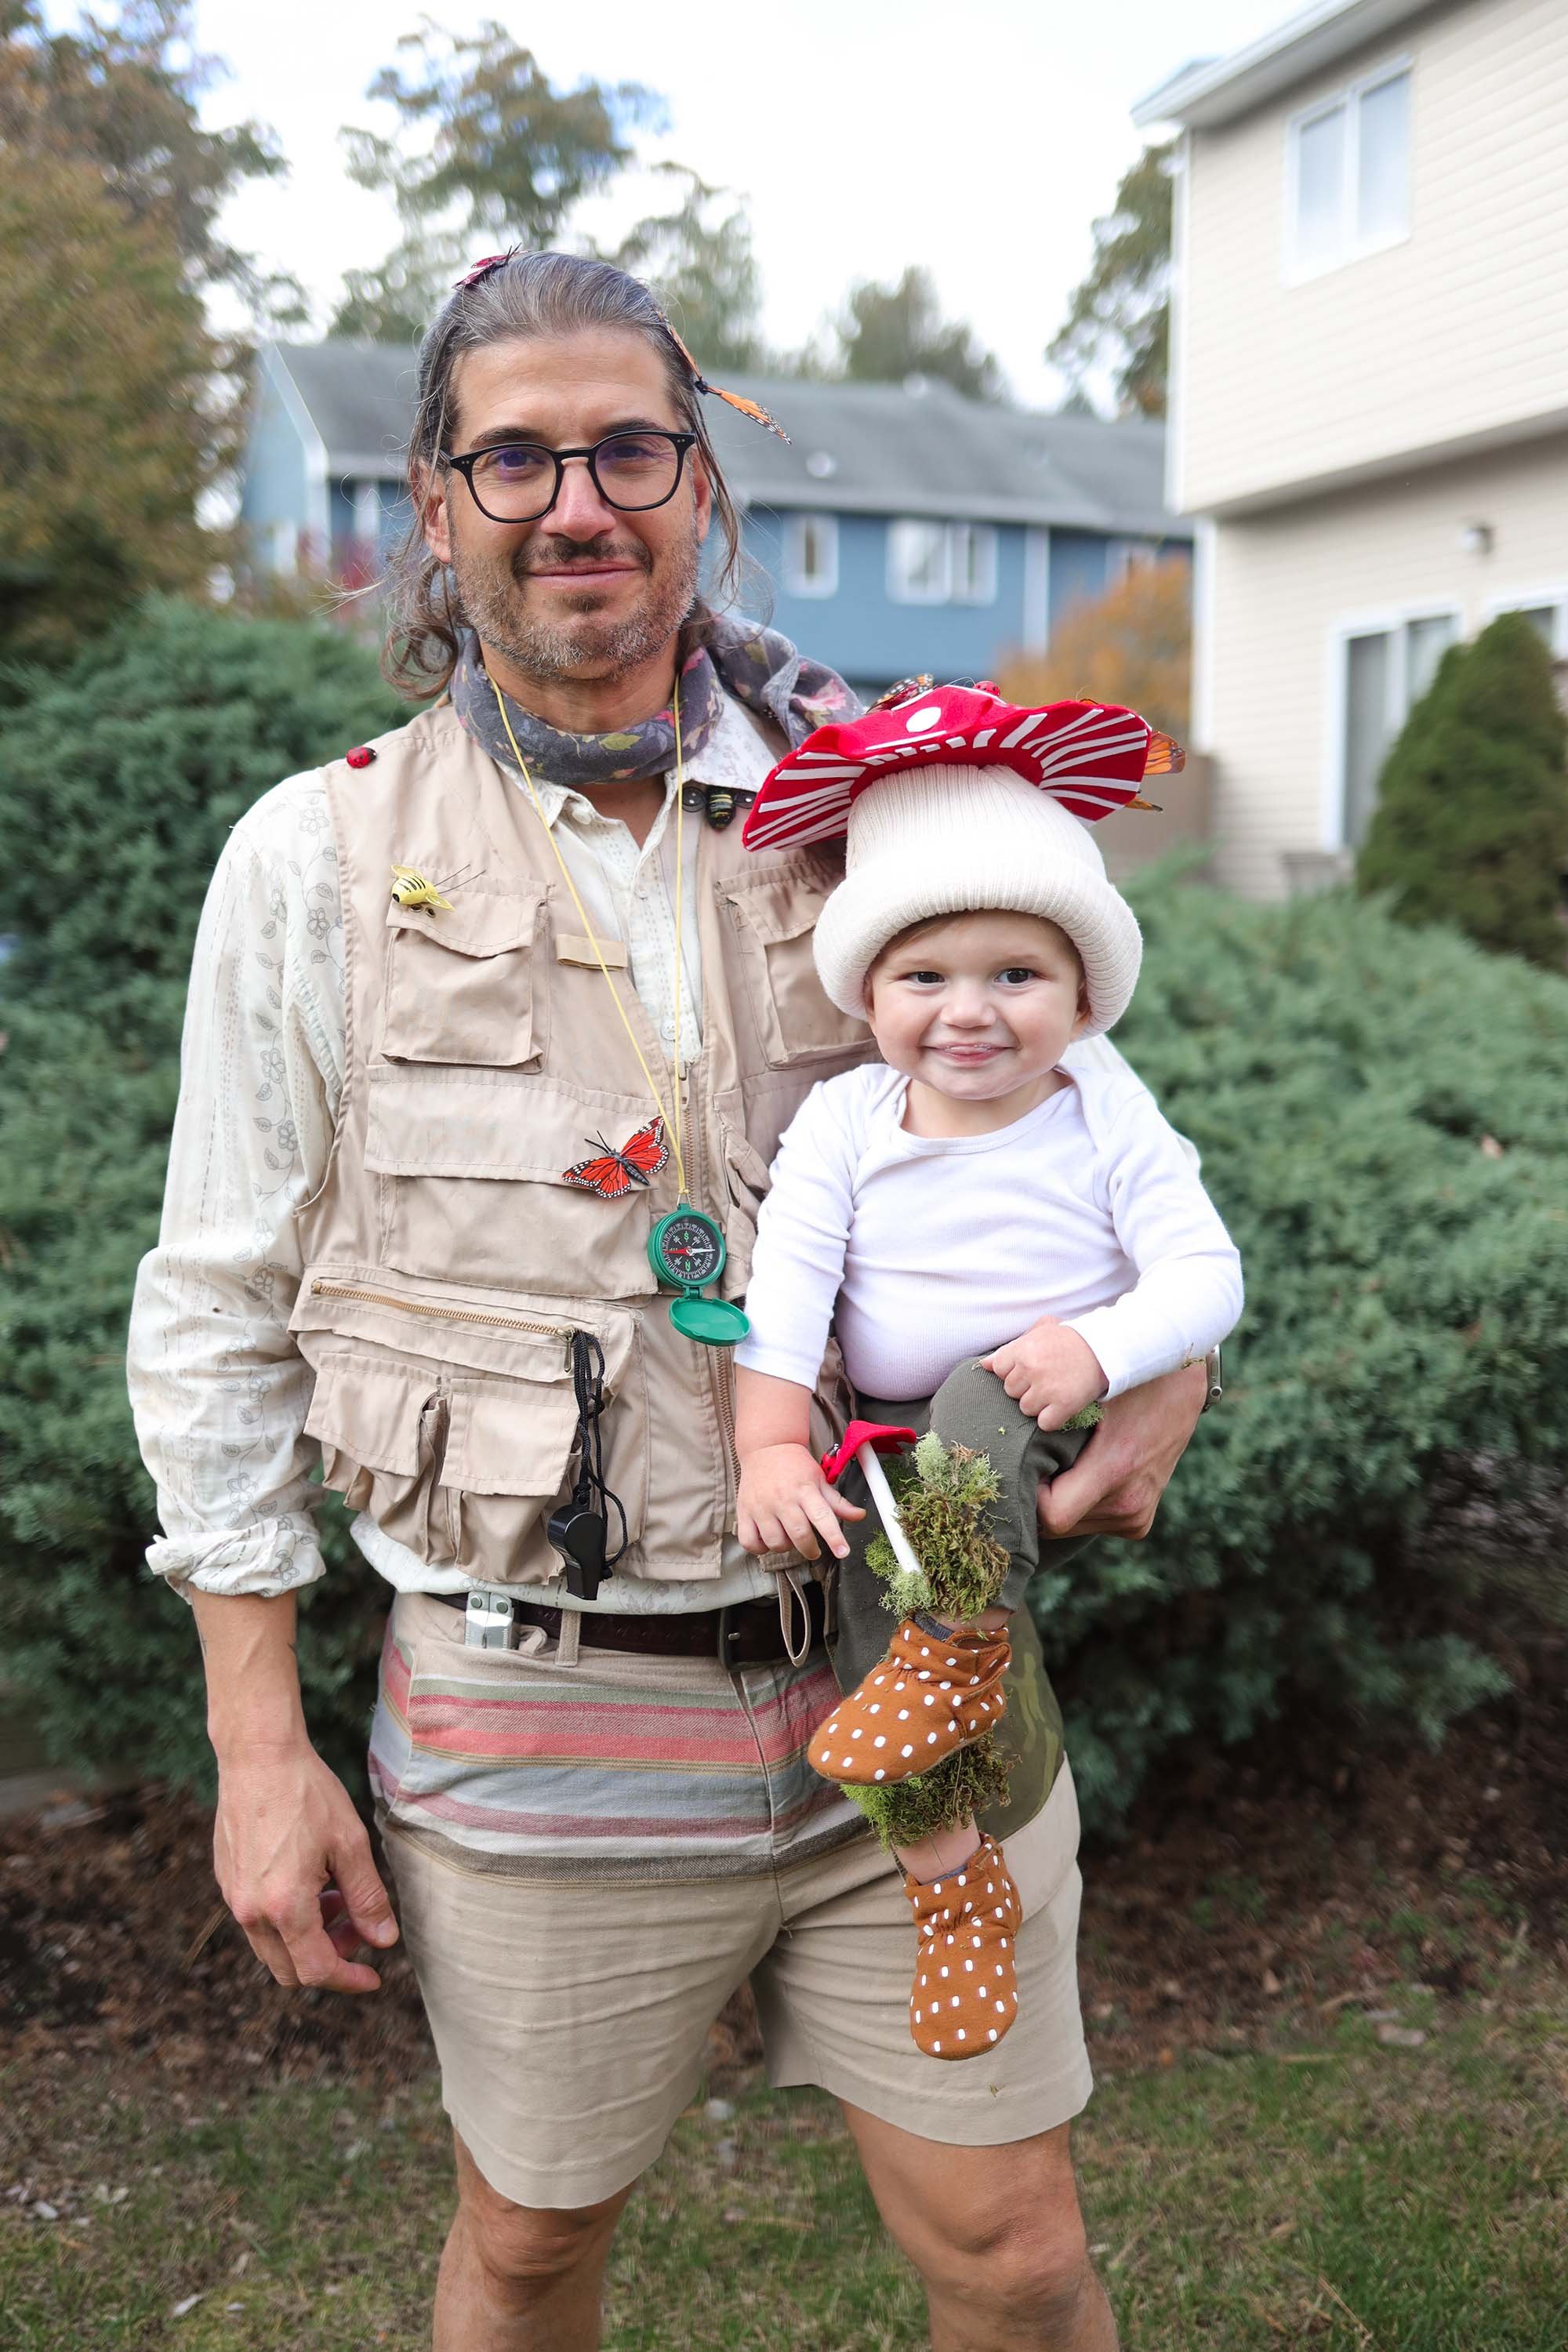
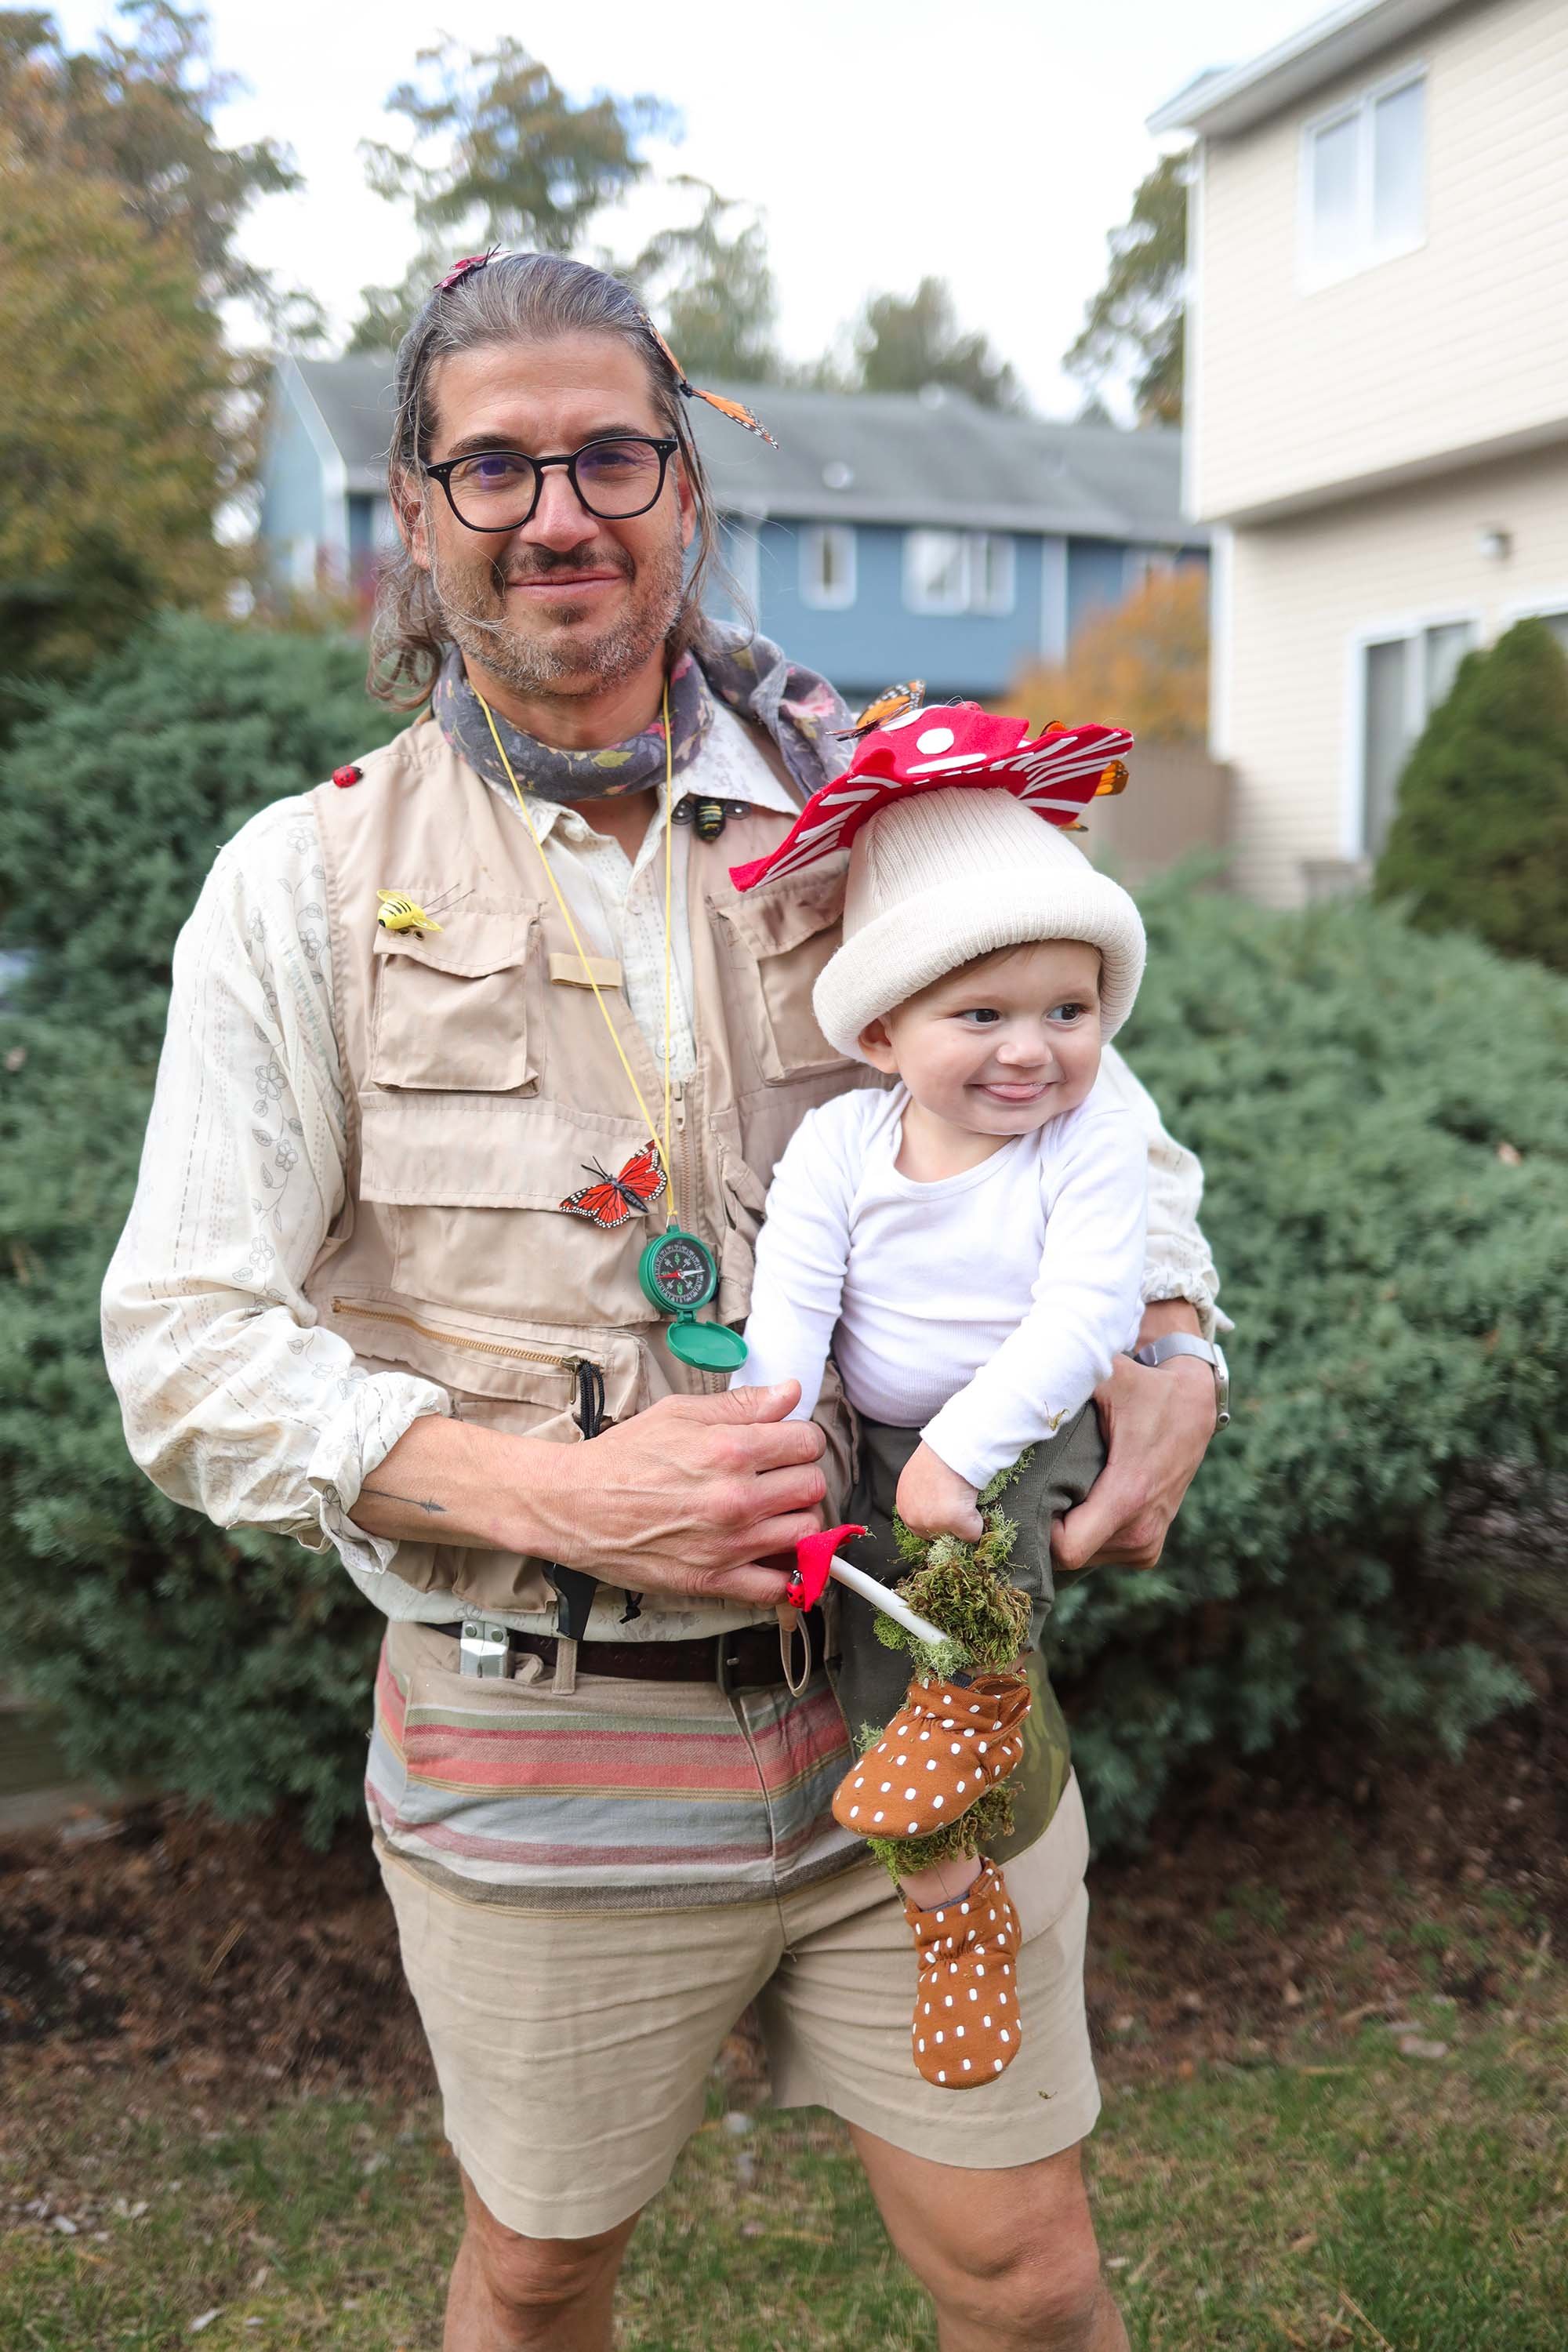
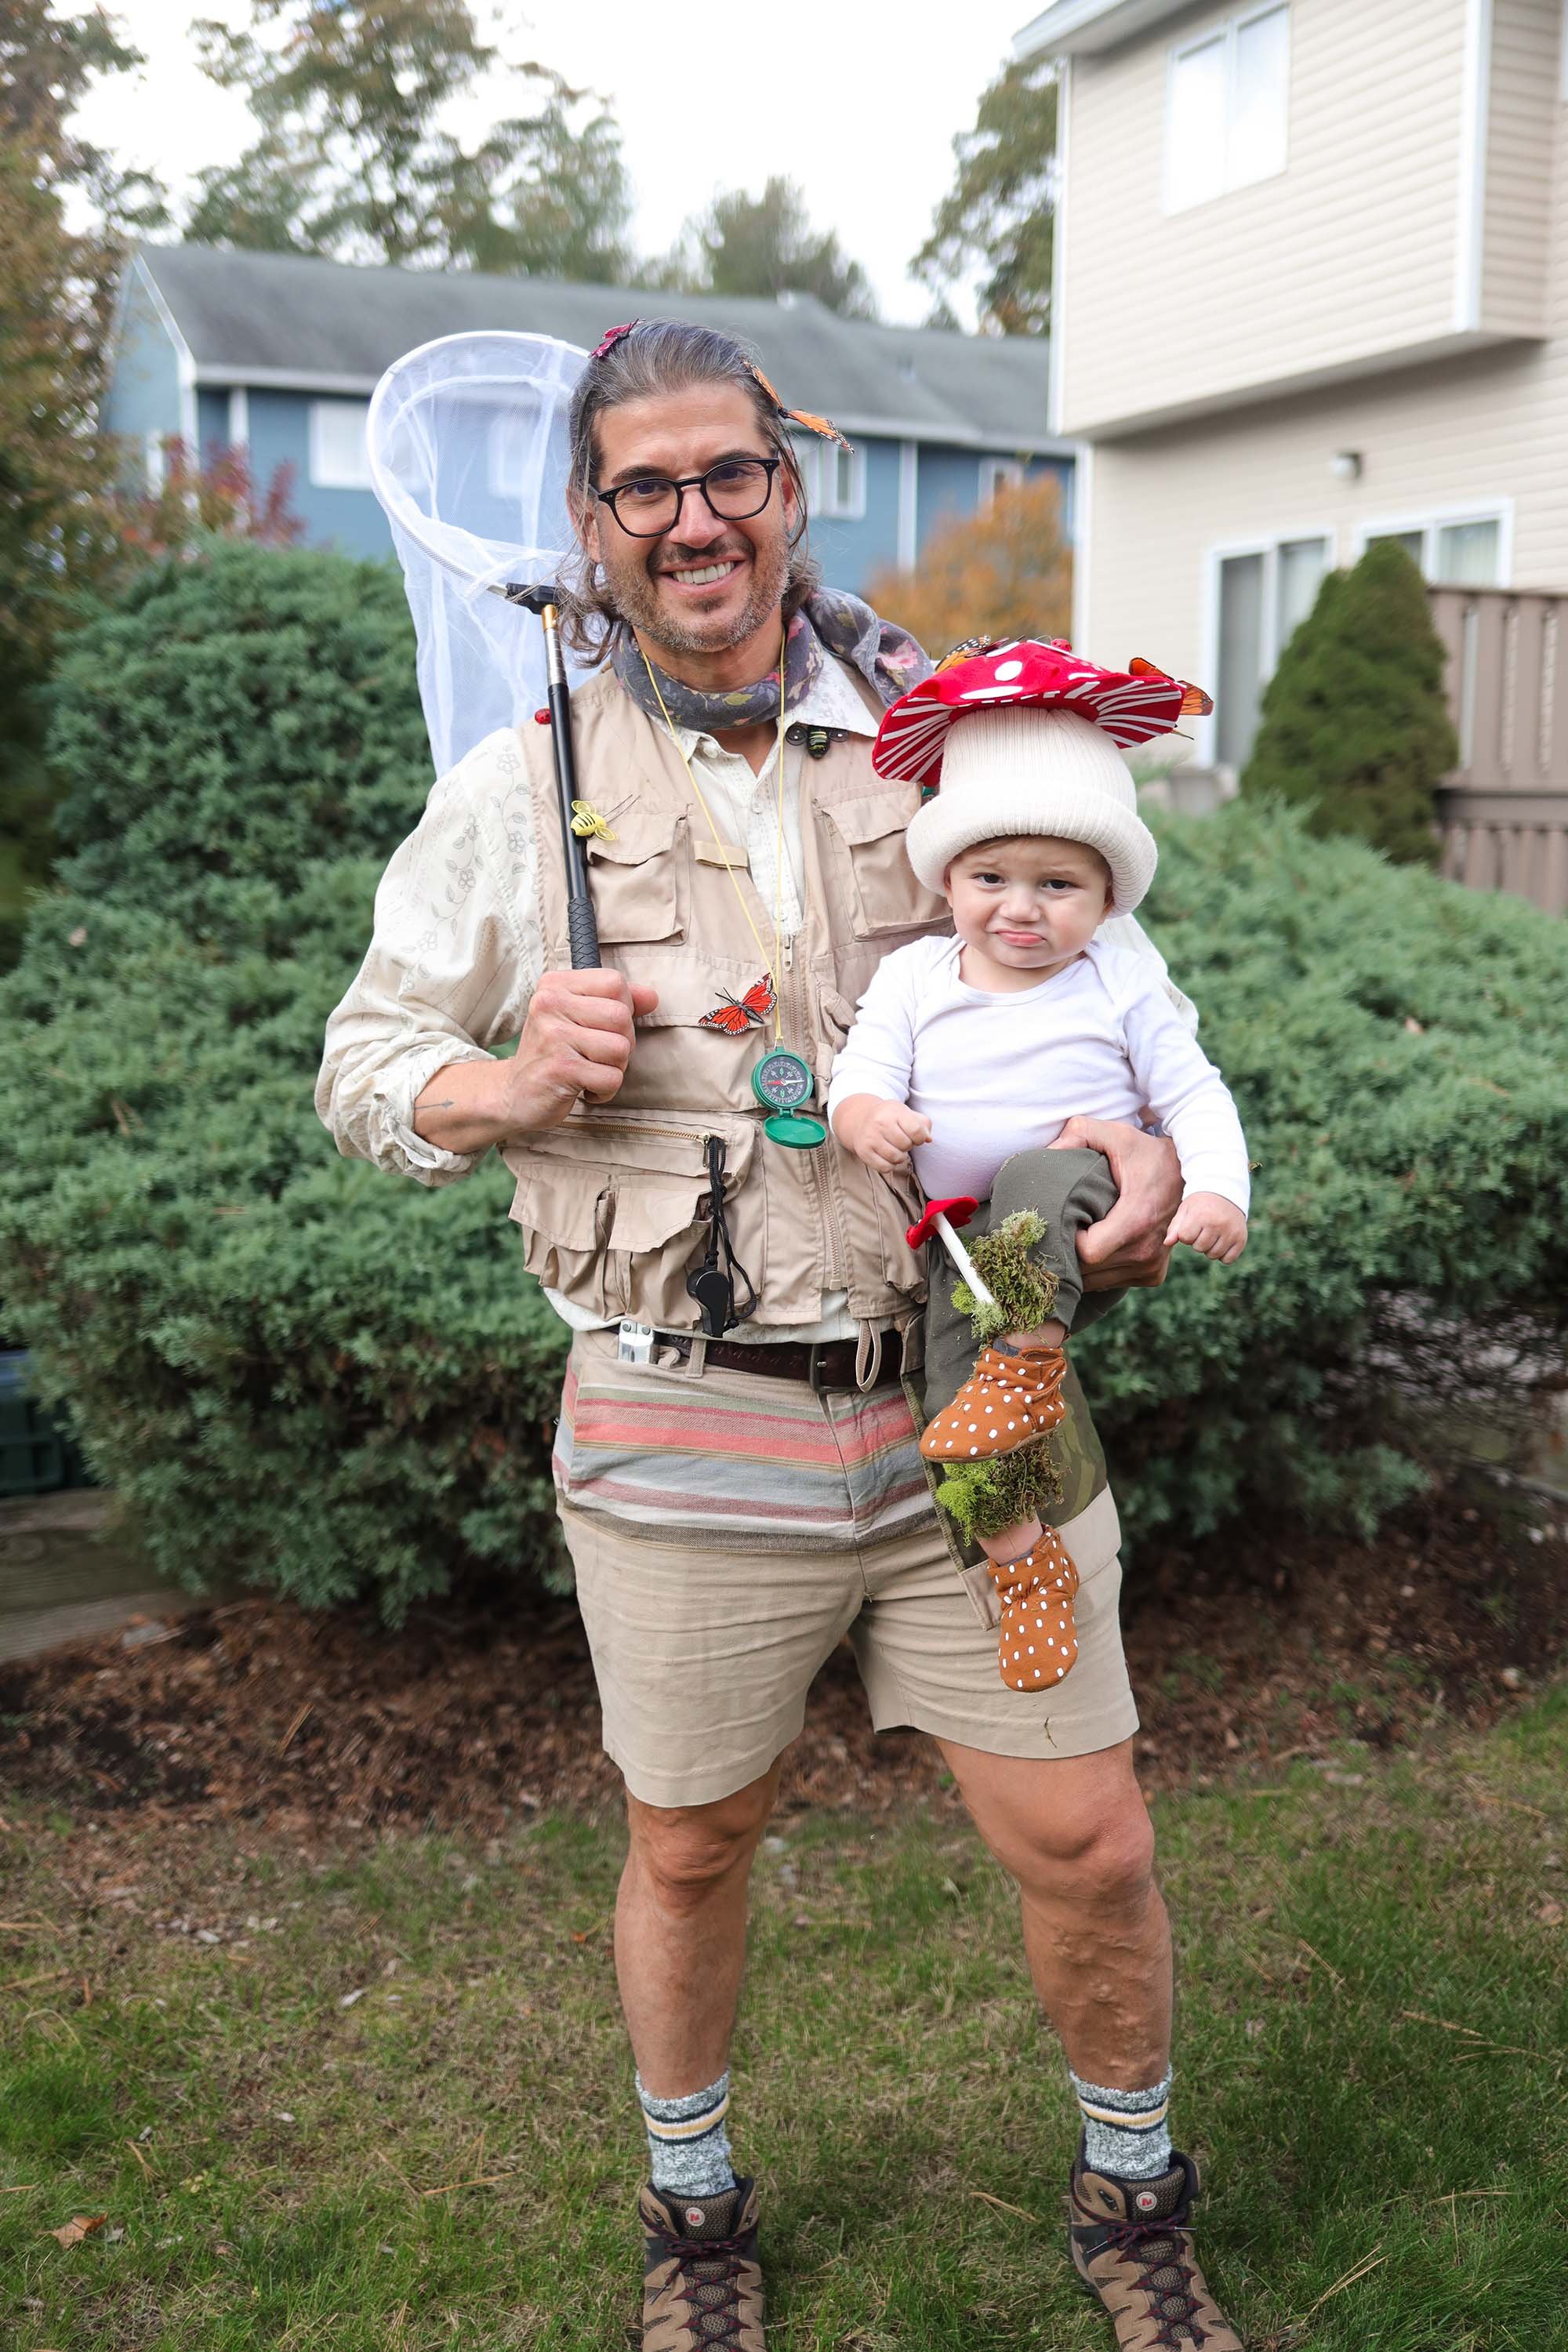
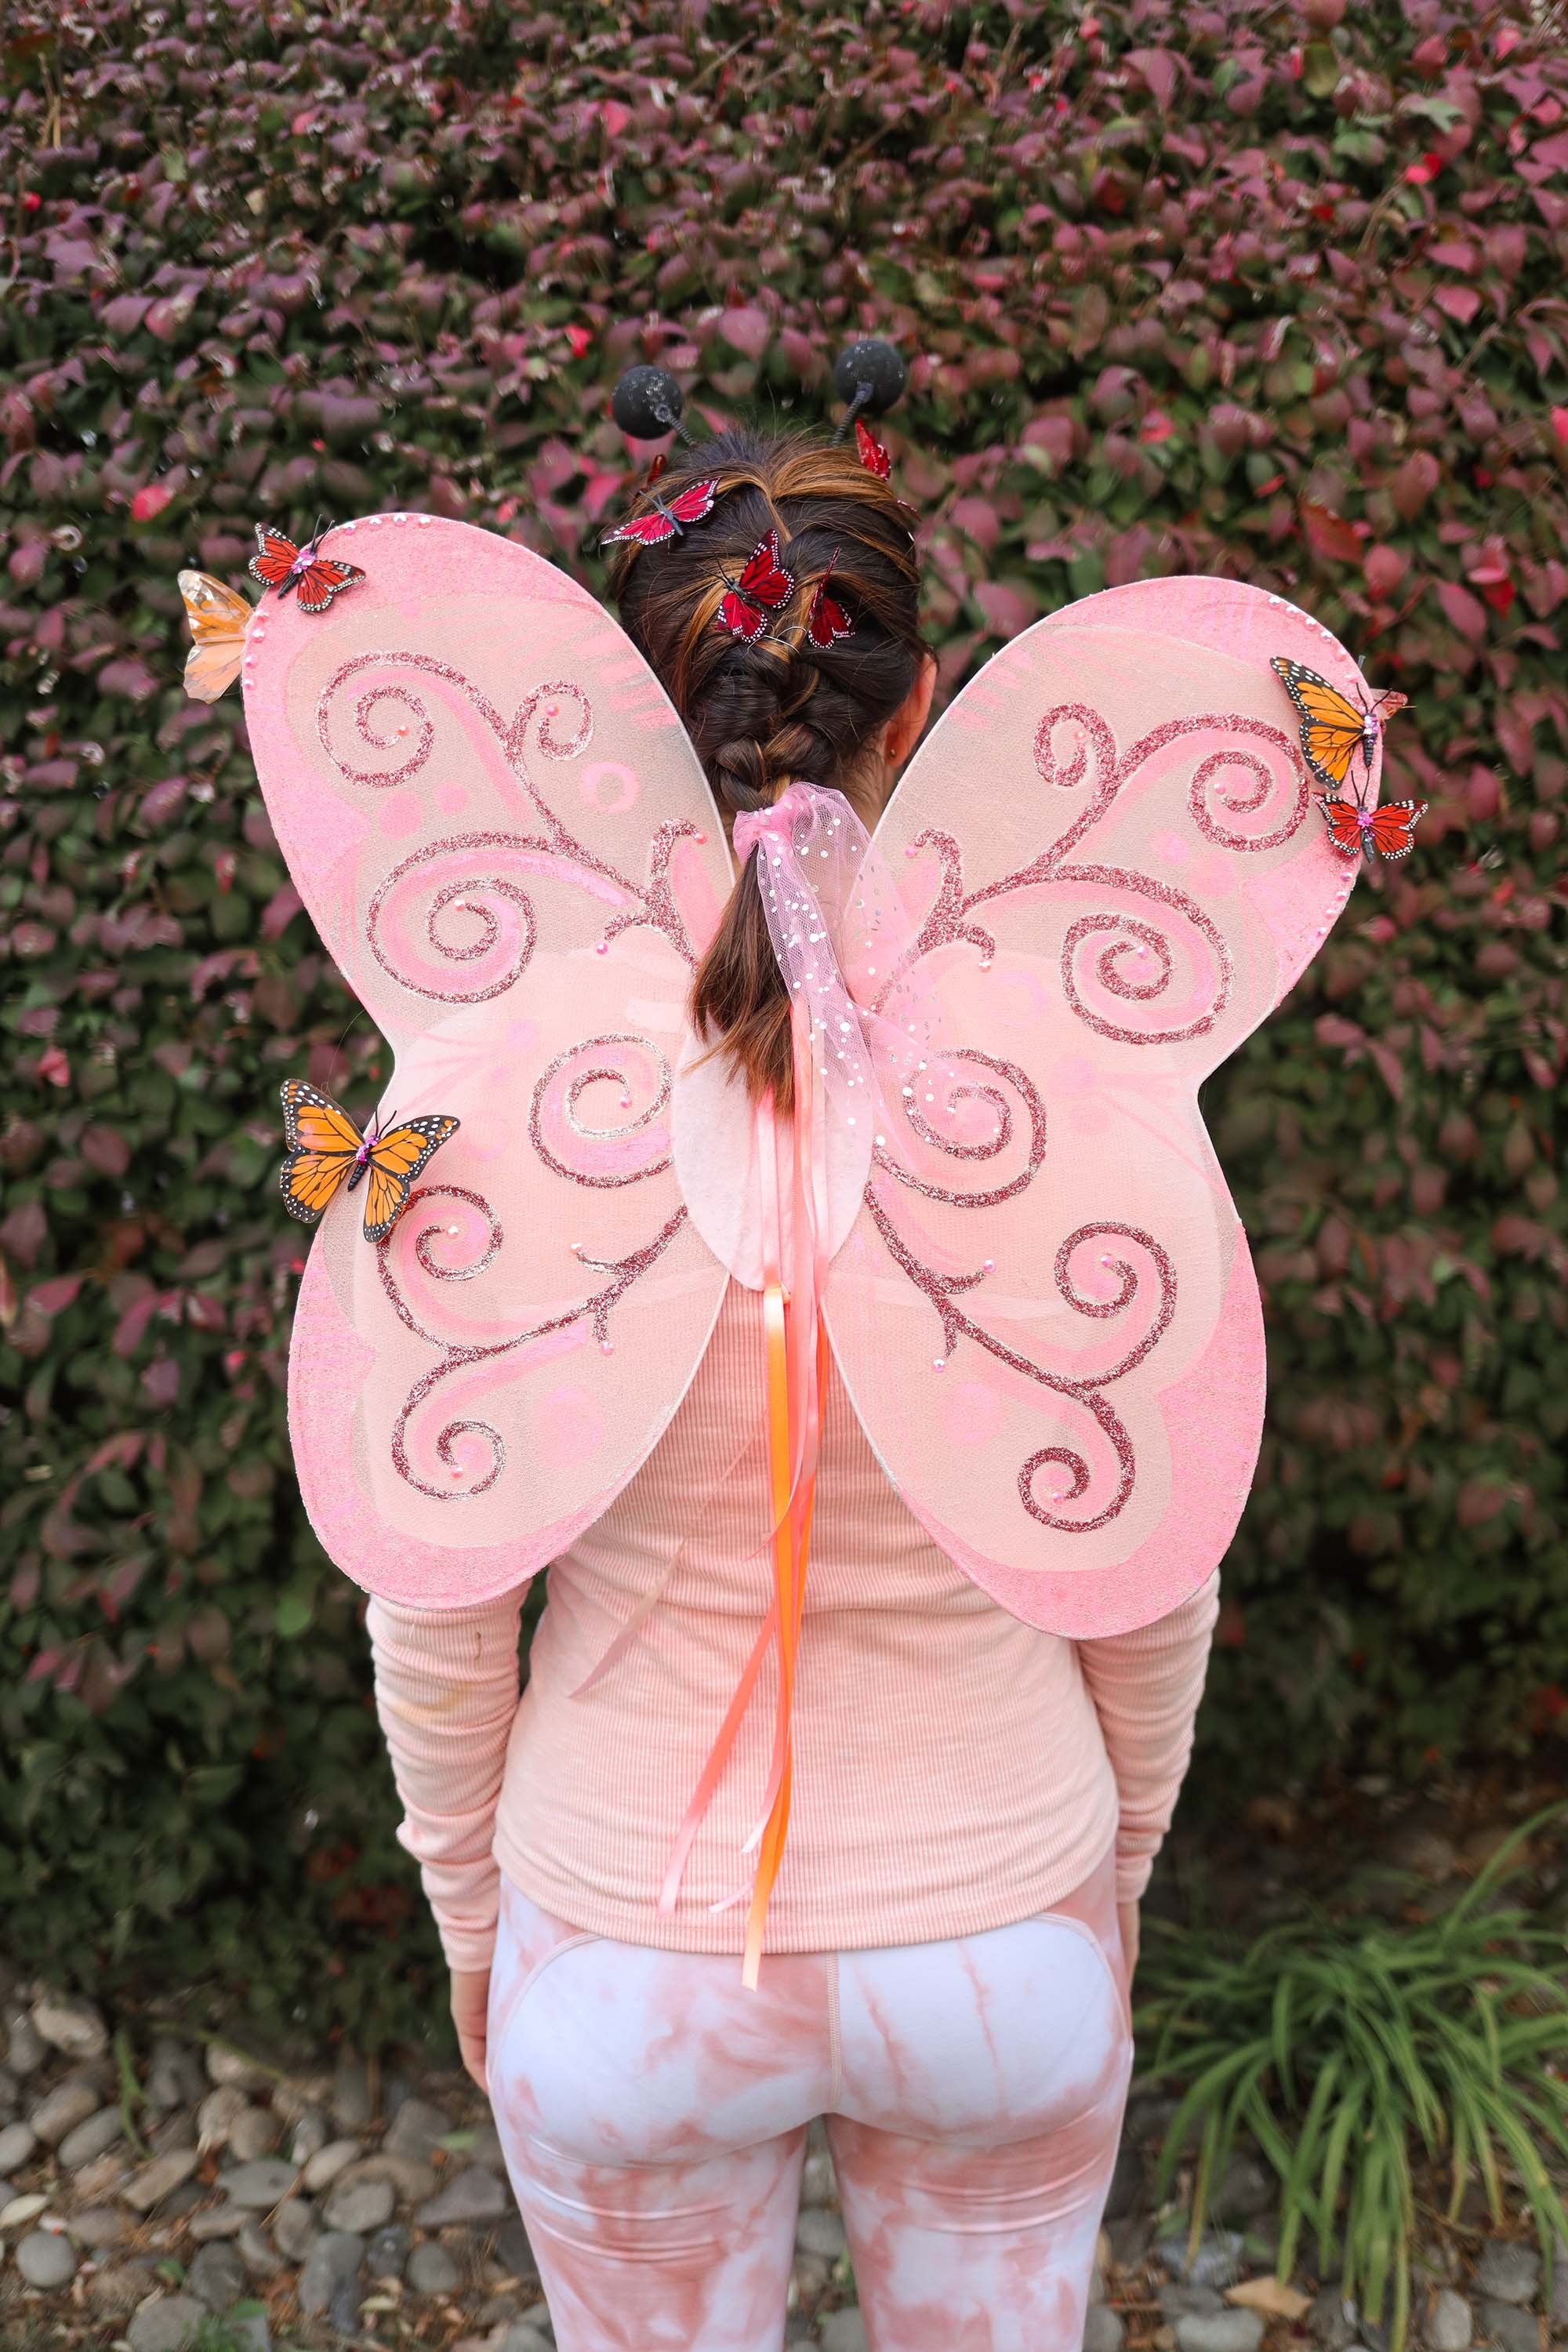
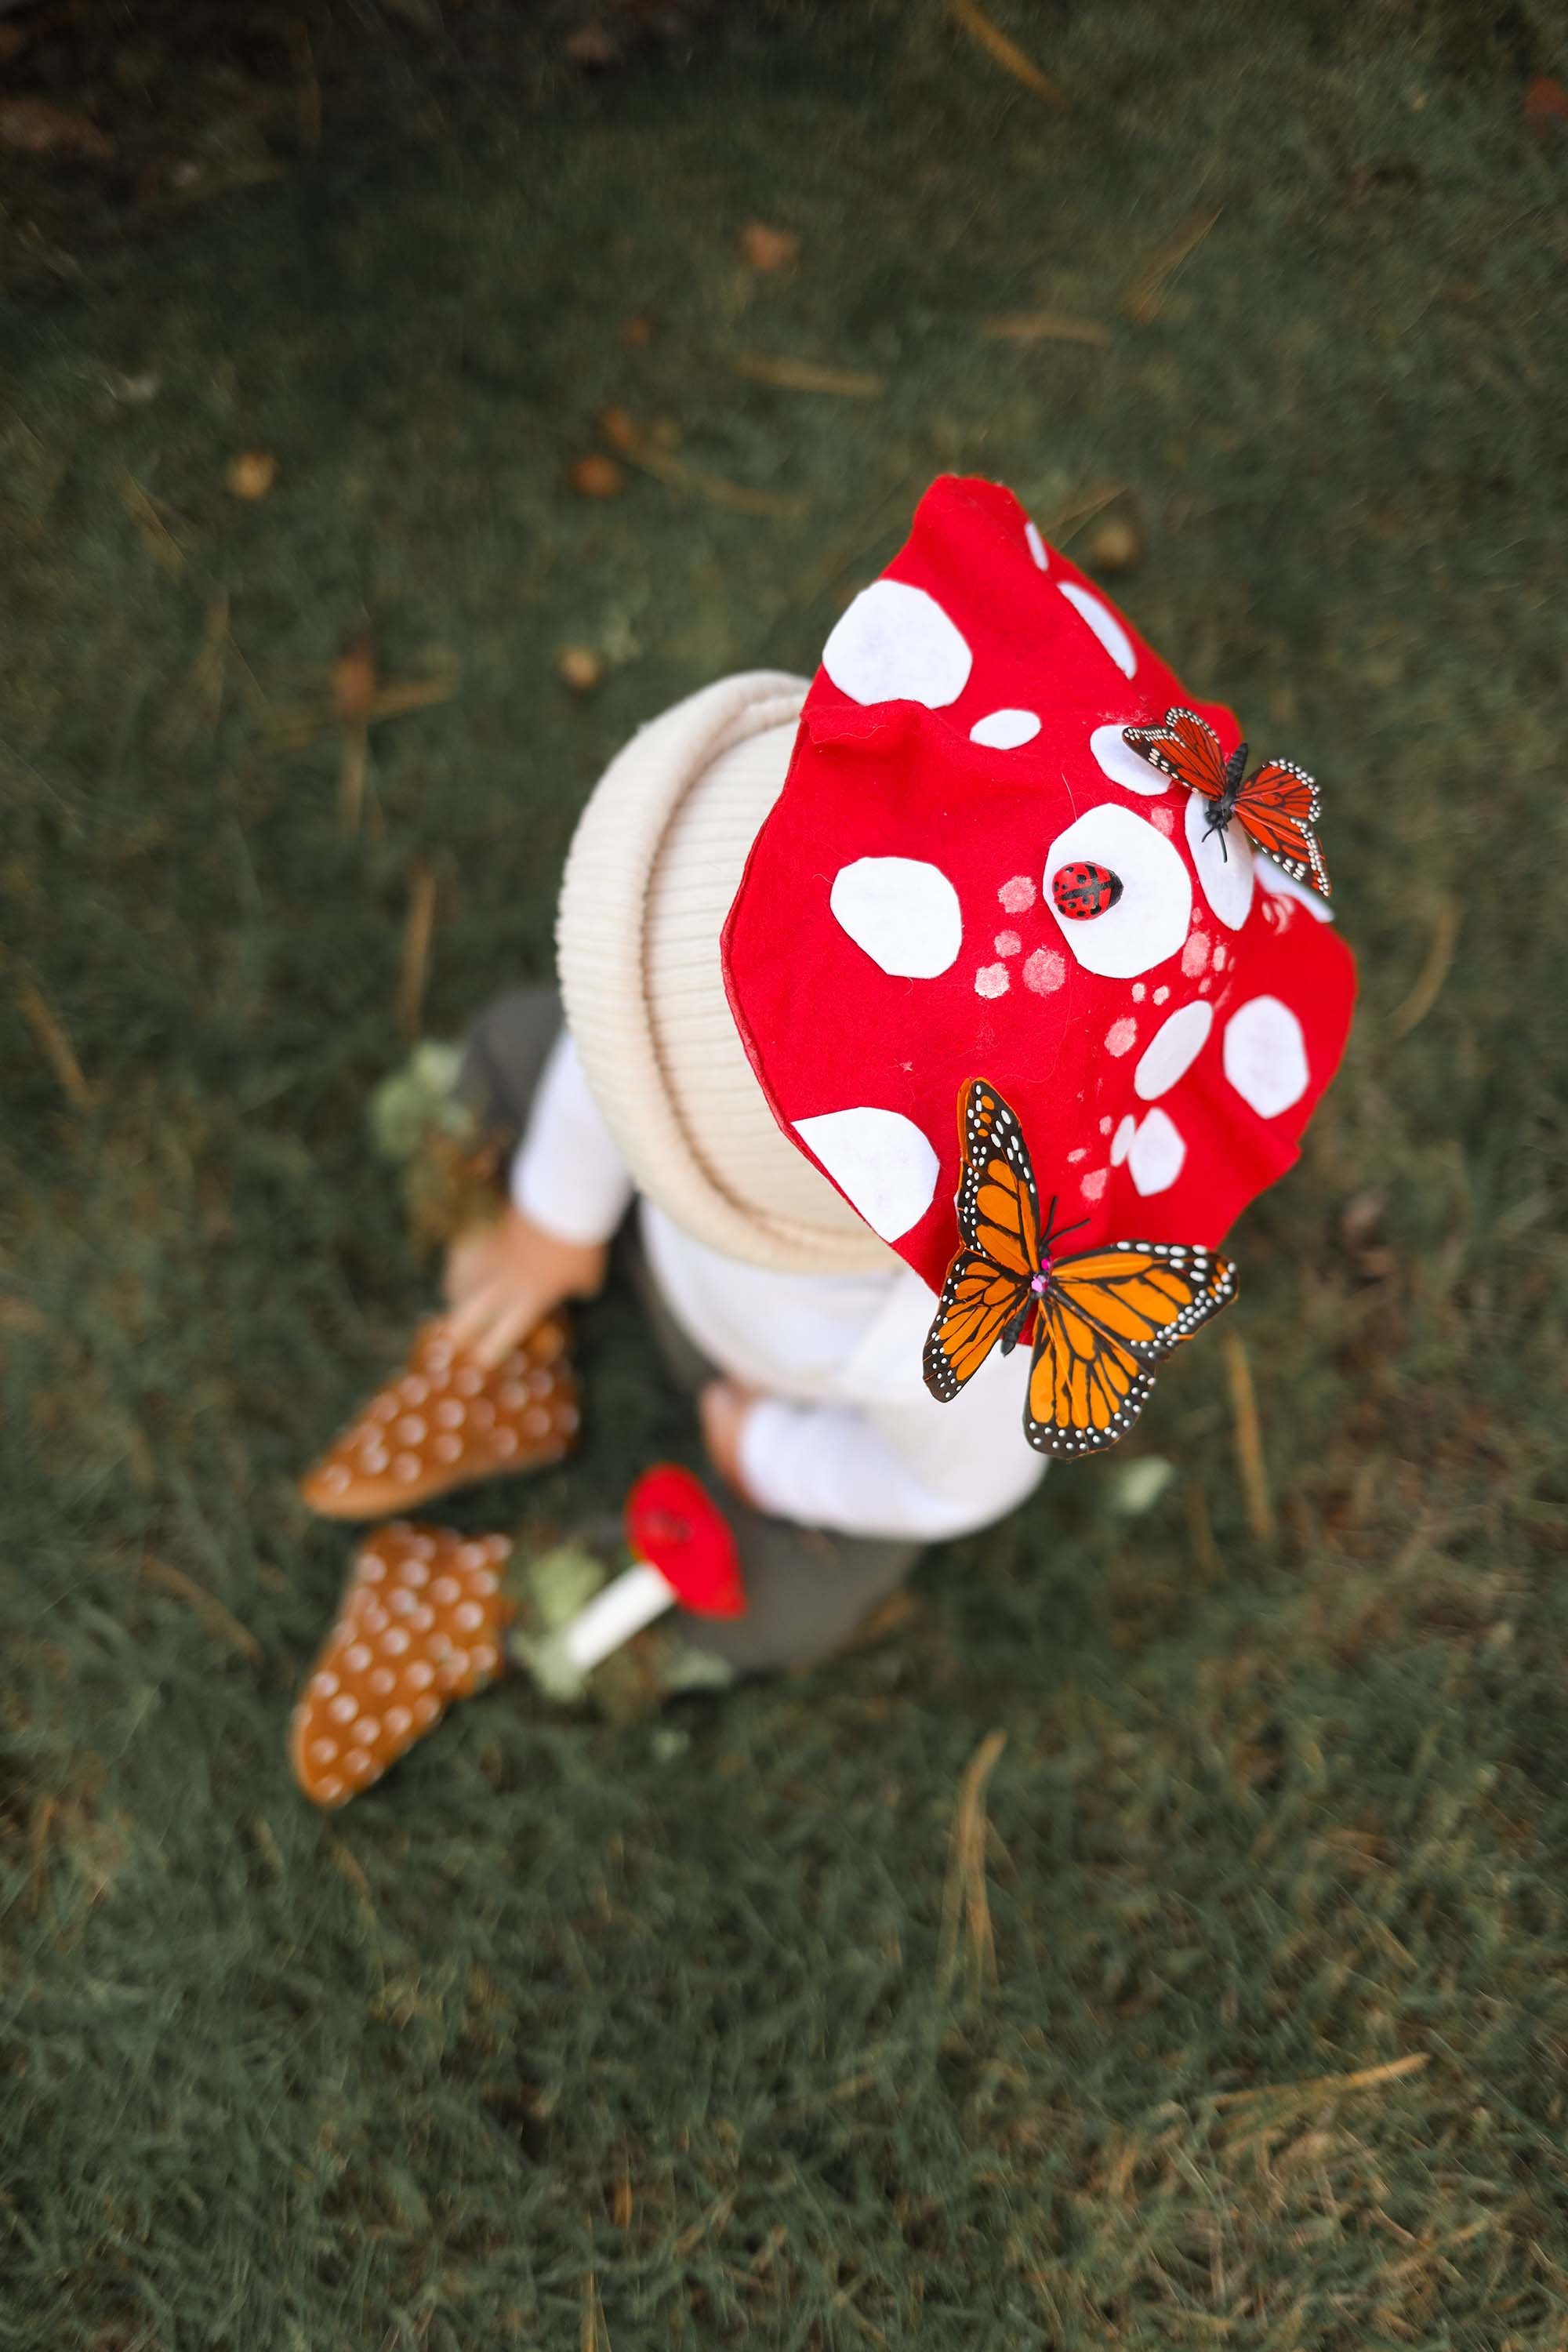
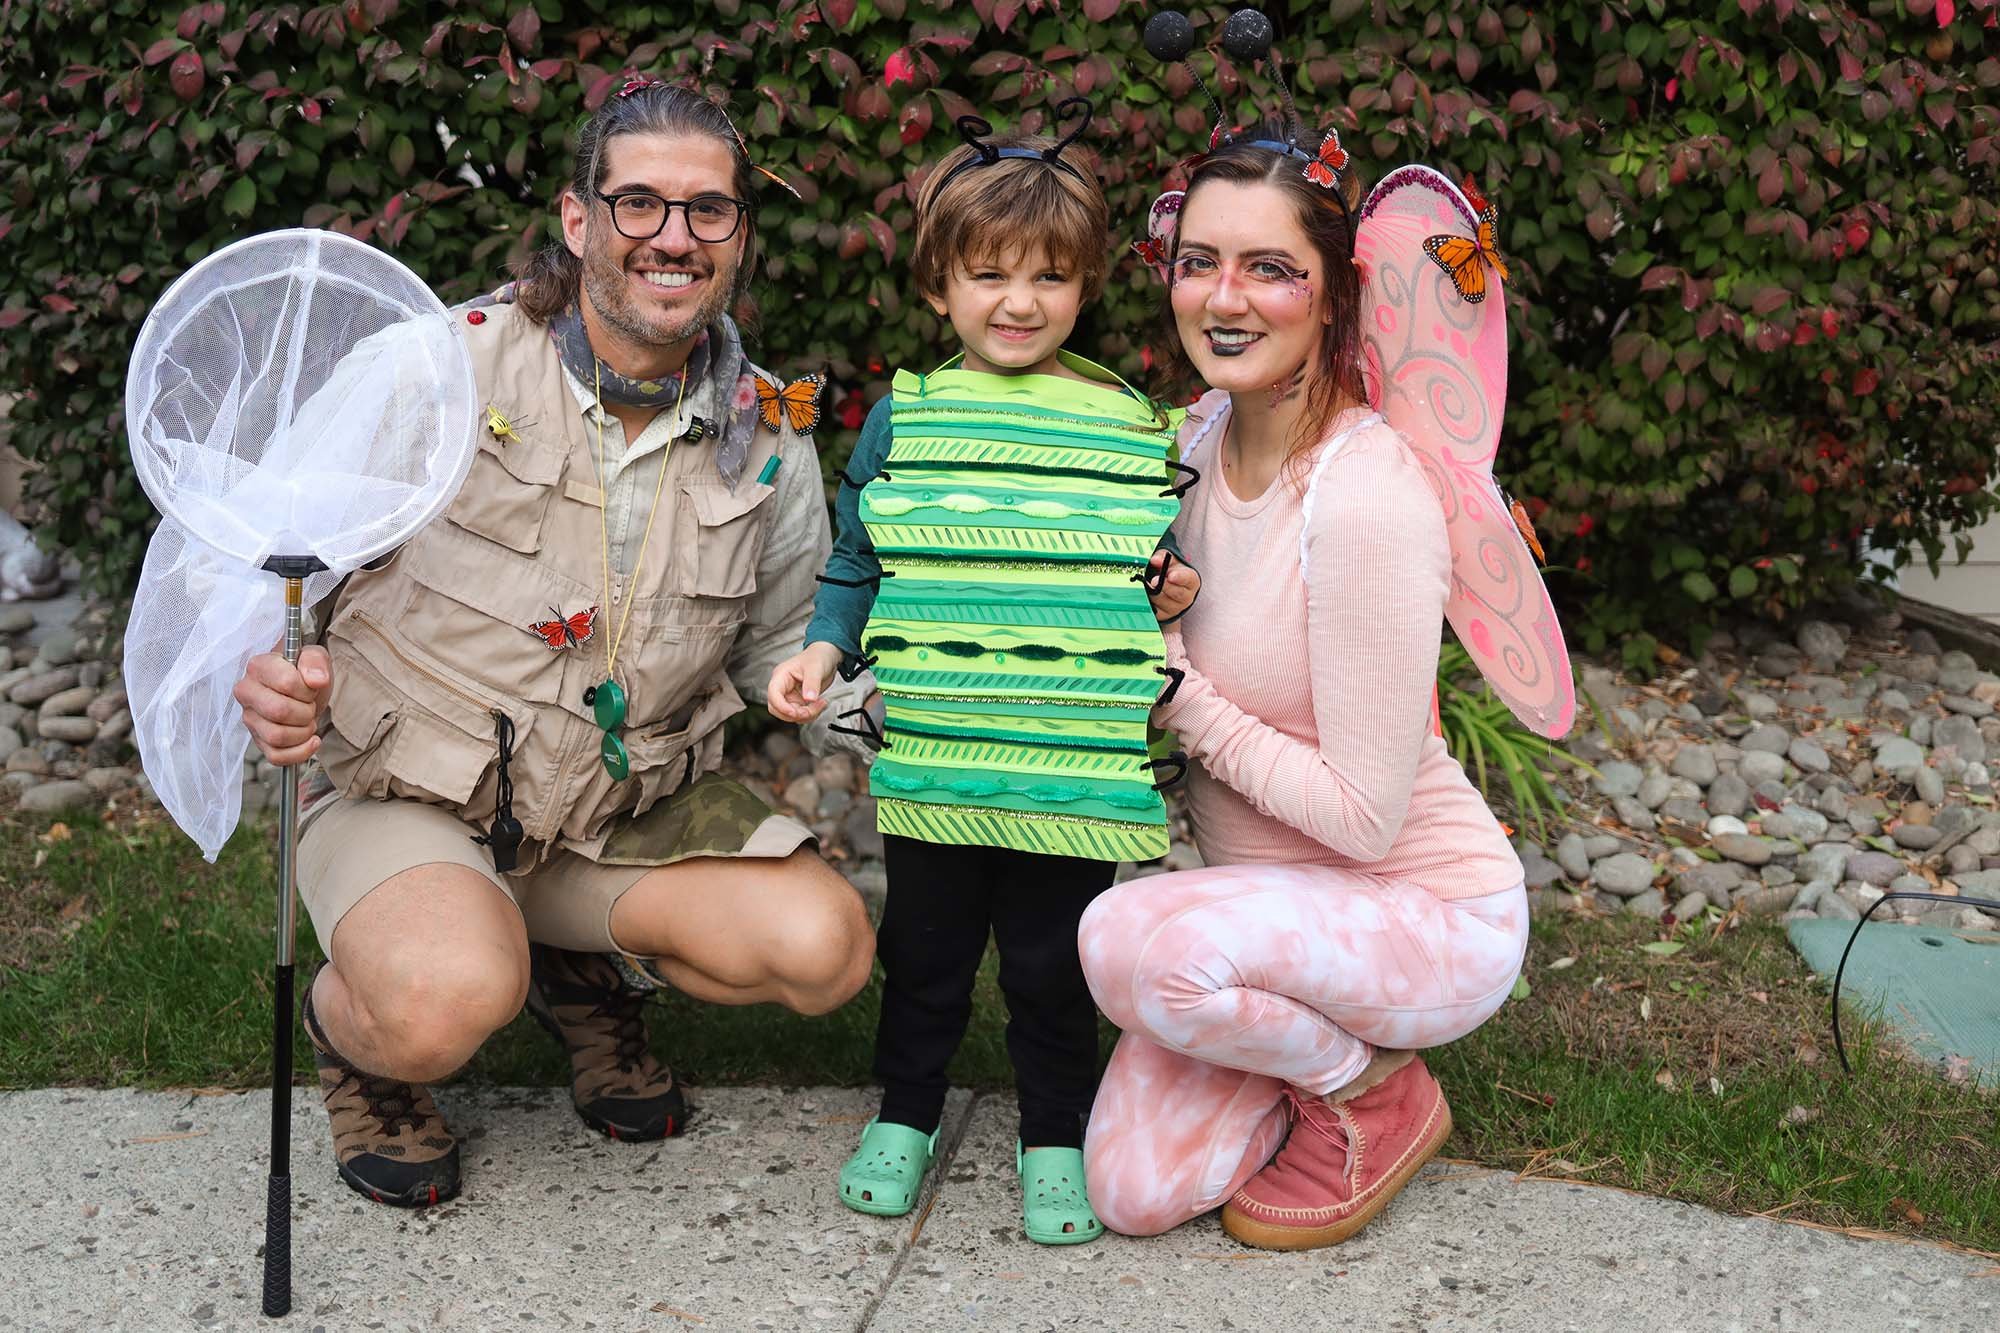
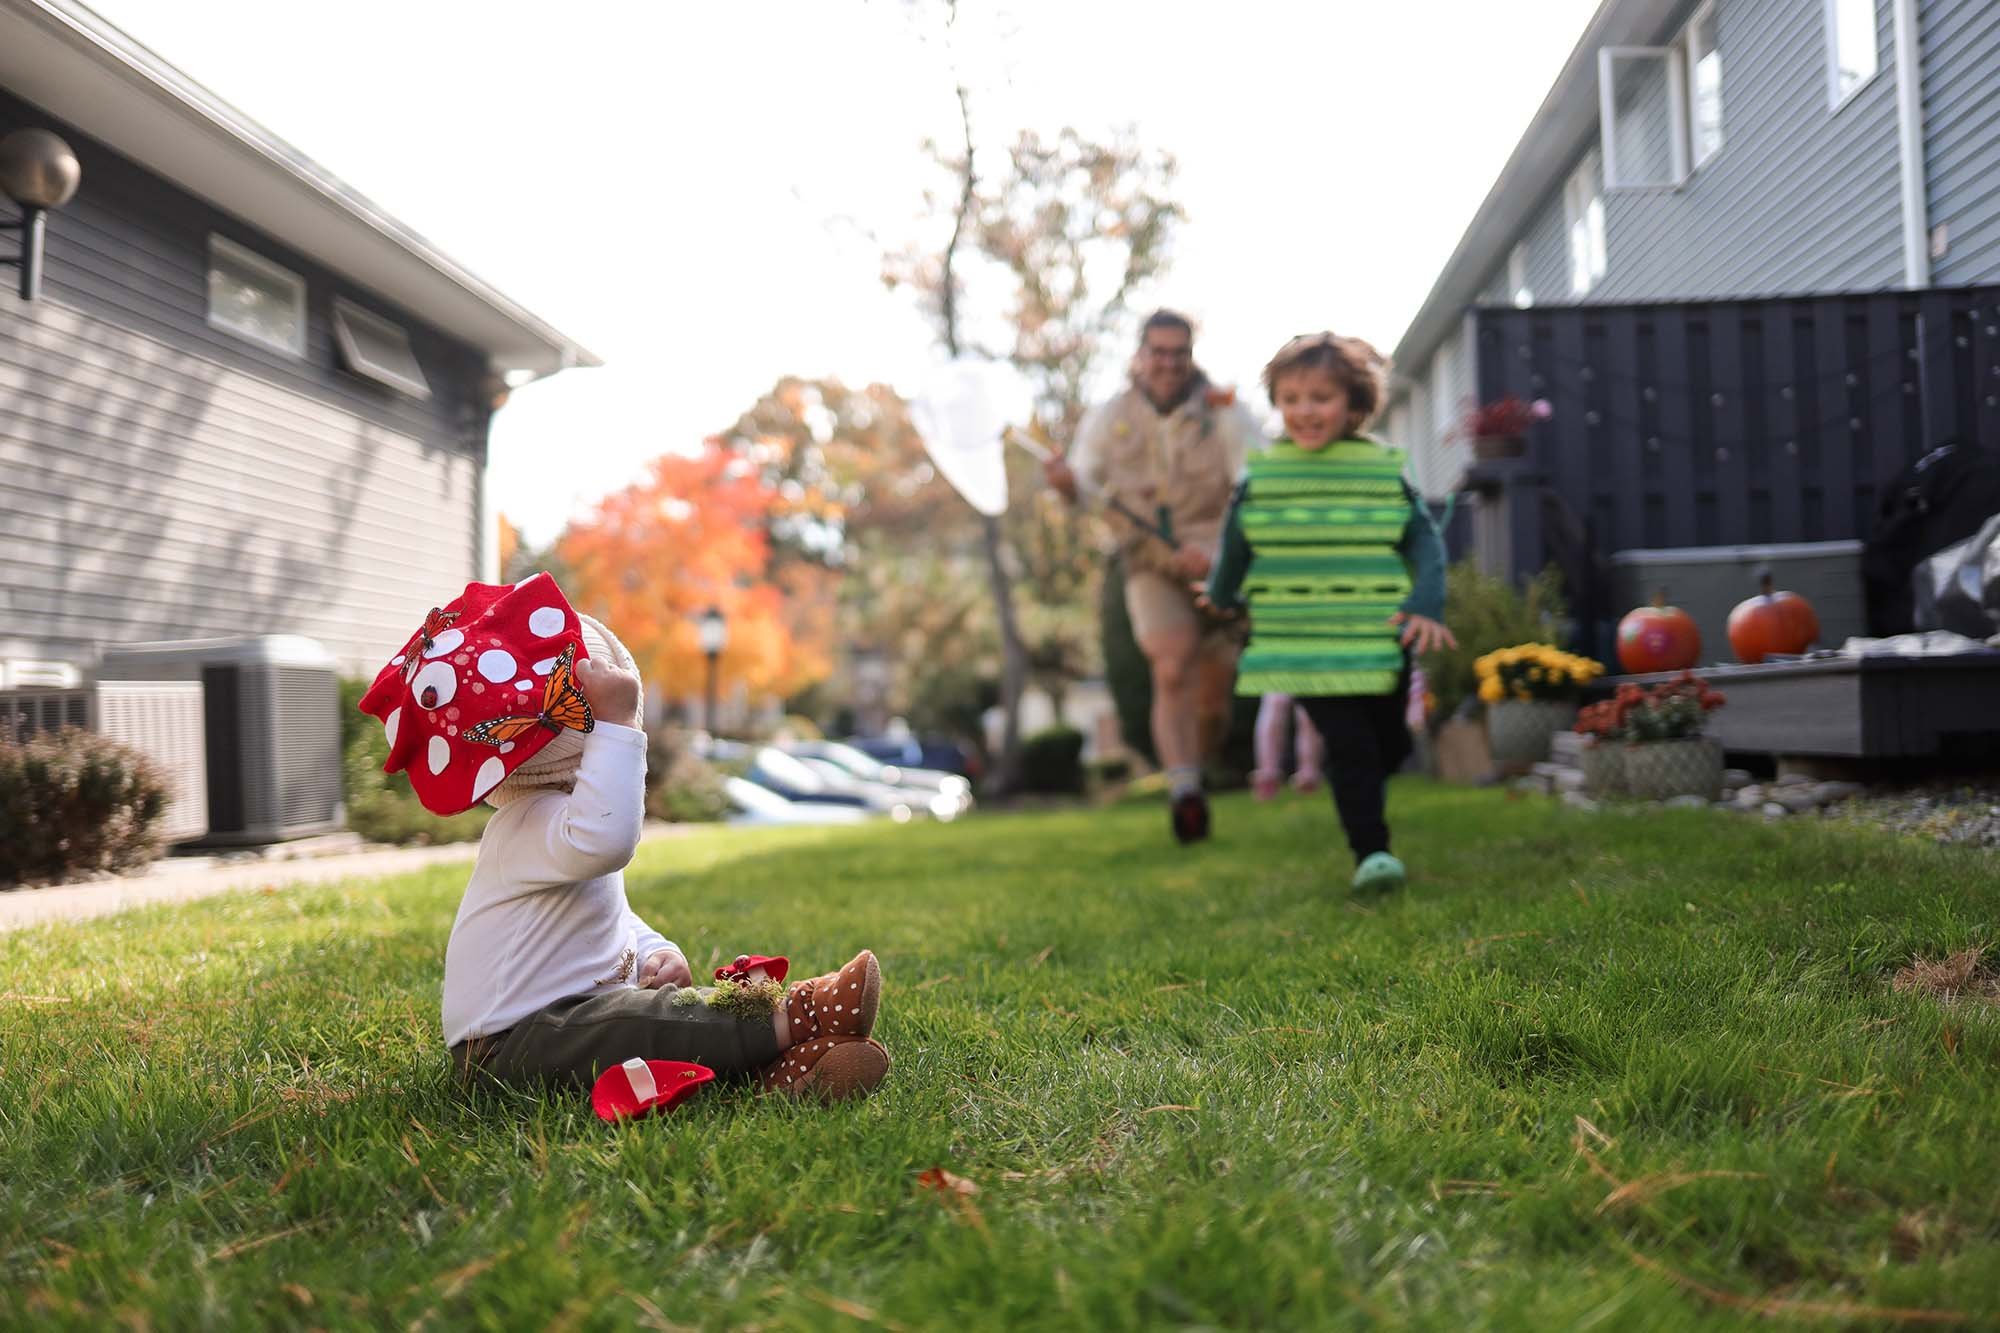
I was obviously a butterfly, because duh. So pretty and glitter would be acceptable. At first I was going to make Mason a spider but then I was like ew gross. A mushroom would be so much more fun. And then John needed to choose a bug. But he’s a difficult one, that man. One of us decided he was going to be the bug catcher and it was perfect. Until I remembered I had to somehow create a caterpillar costume in 2 weeks and I am already always strapped for time.
I have to say, if I could do it again, I would totally do the caterpillar costume differently. I think I would have enjoyed sewing some alternating felt strips in different shades of green, onto an actual shirt, for comfort purposes. And then doing the same thing on a pair of pants. But I panicked slightly and started making this tent style thing where the front and back were attached at the shoulders with yard and we slipped it over Logan’s head to get on. It was super DIY style like not professional looking at all. I could also have made him a face mask with the hungry caterpillar colors and vibes? But it’s never a guarantee kids will wear something on their face for very long or at all. So the little pip cleaner head piece was fine.
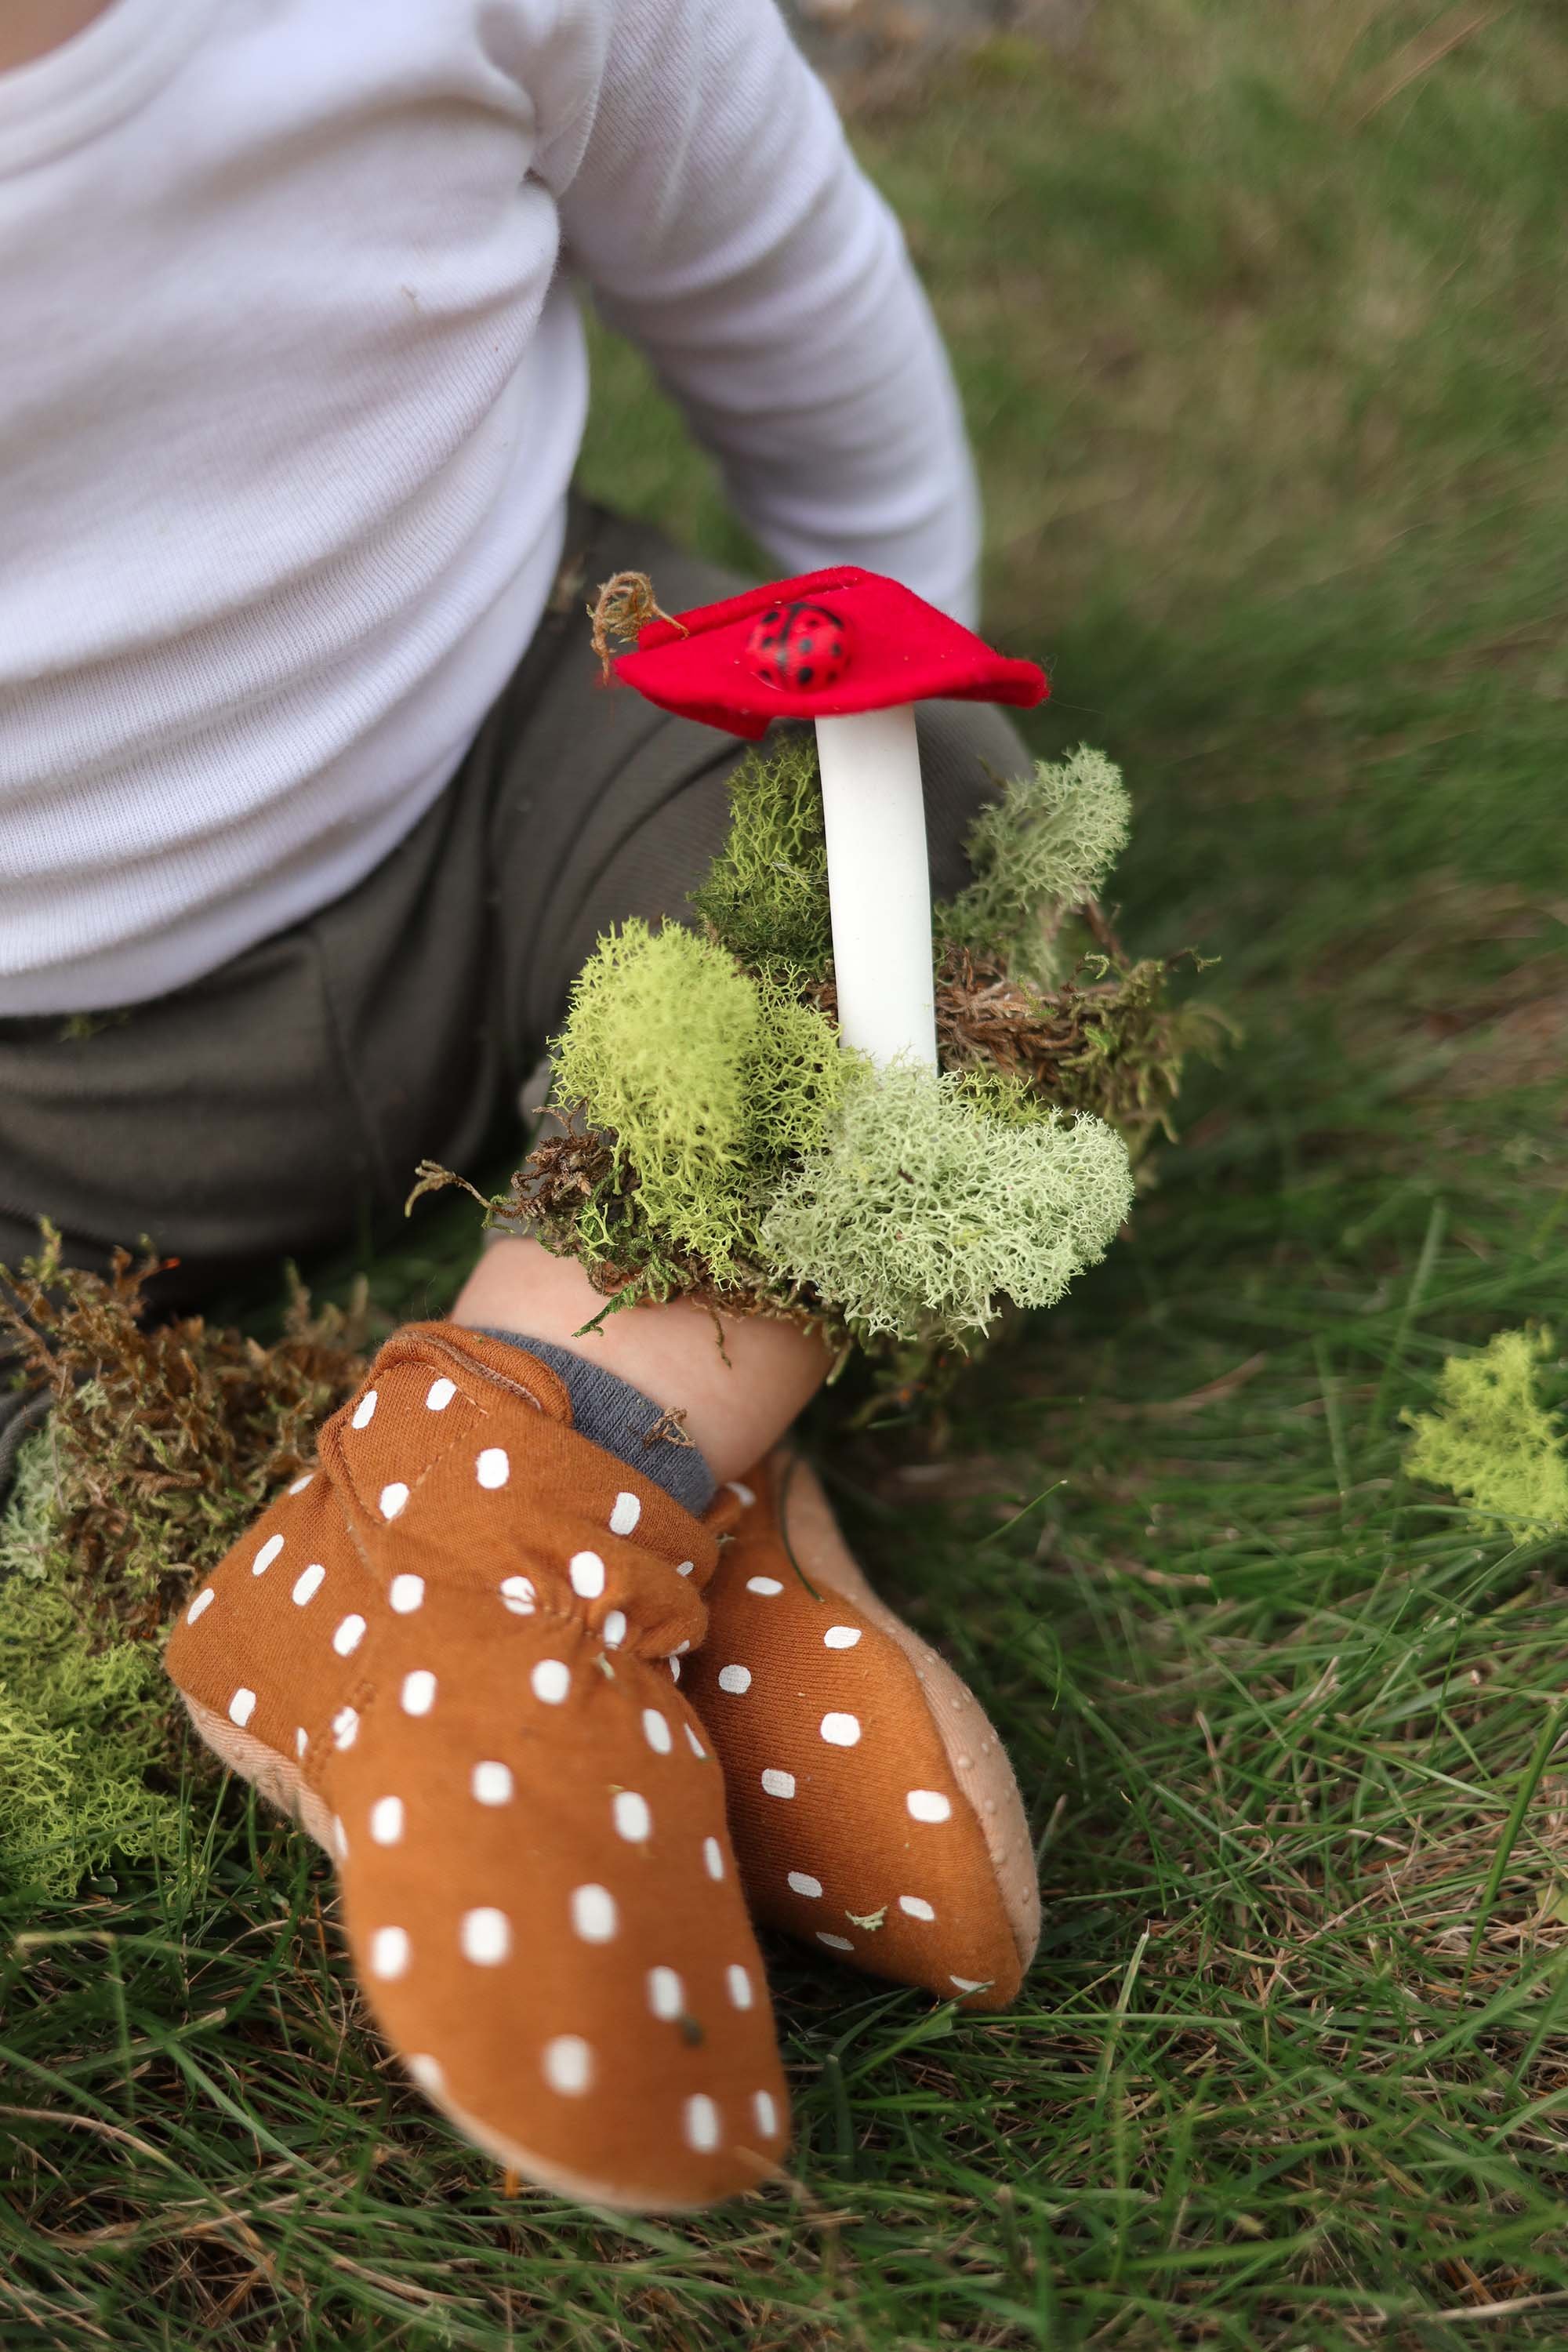
Mason’s costume was exactly how I imagined it which was so satisfying. I just had this idea with felt on a beanie and as I walked around the craft store I found all the bits I needed to make it come to fruition. The little moss hot glued to the bottom of some green leggings from old navy were the perfect detail to really sell the costume. And then I last minute made my own little tiny felt mushrooms that I hot glued with the moss and it was just beyond adorable. Now you must know, within twenty minutes Mason ripped off most of the moss from his pants, definitely the little mushrooms and also started smashing his little mushroom beanie. But we got our photos for the memories before he fully tore it to shreds.
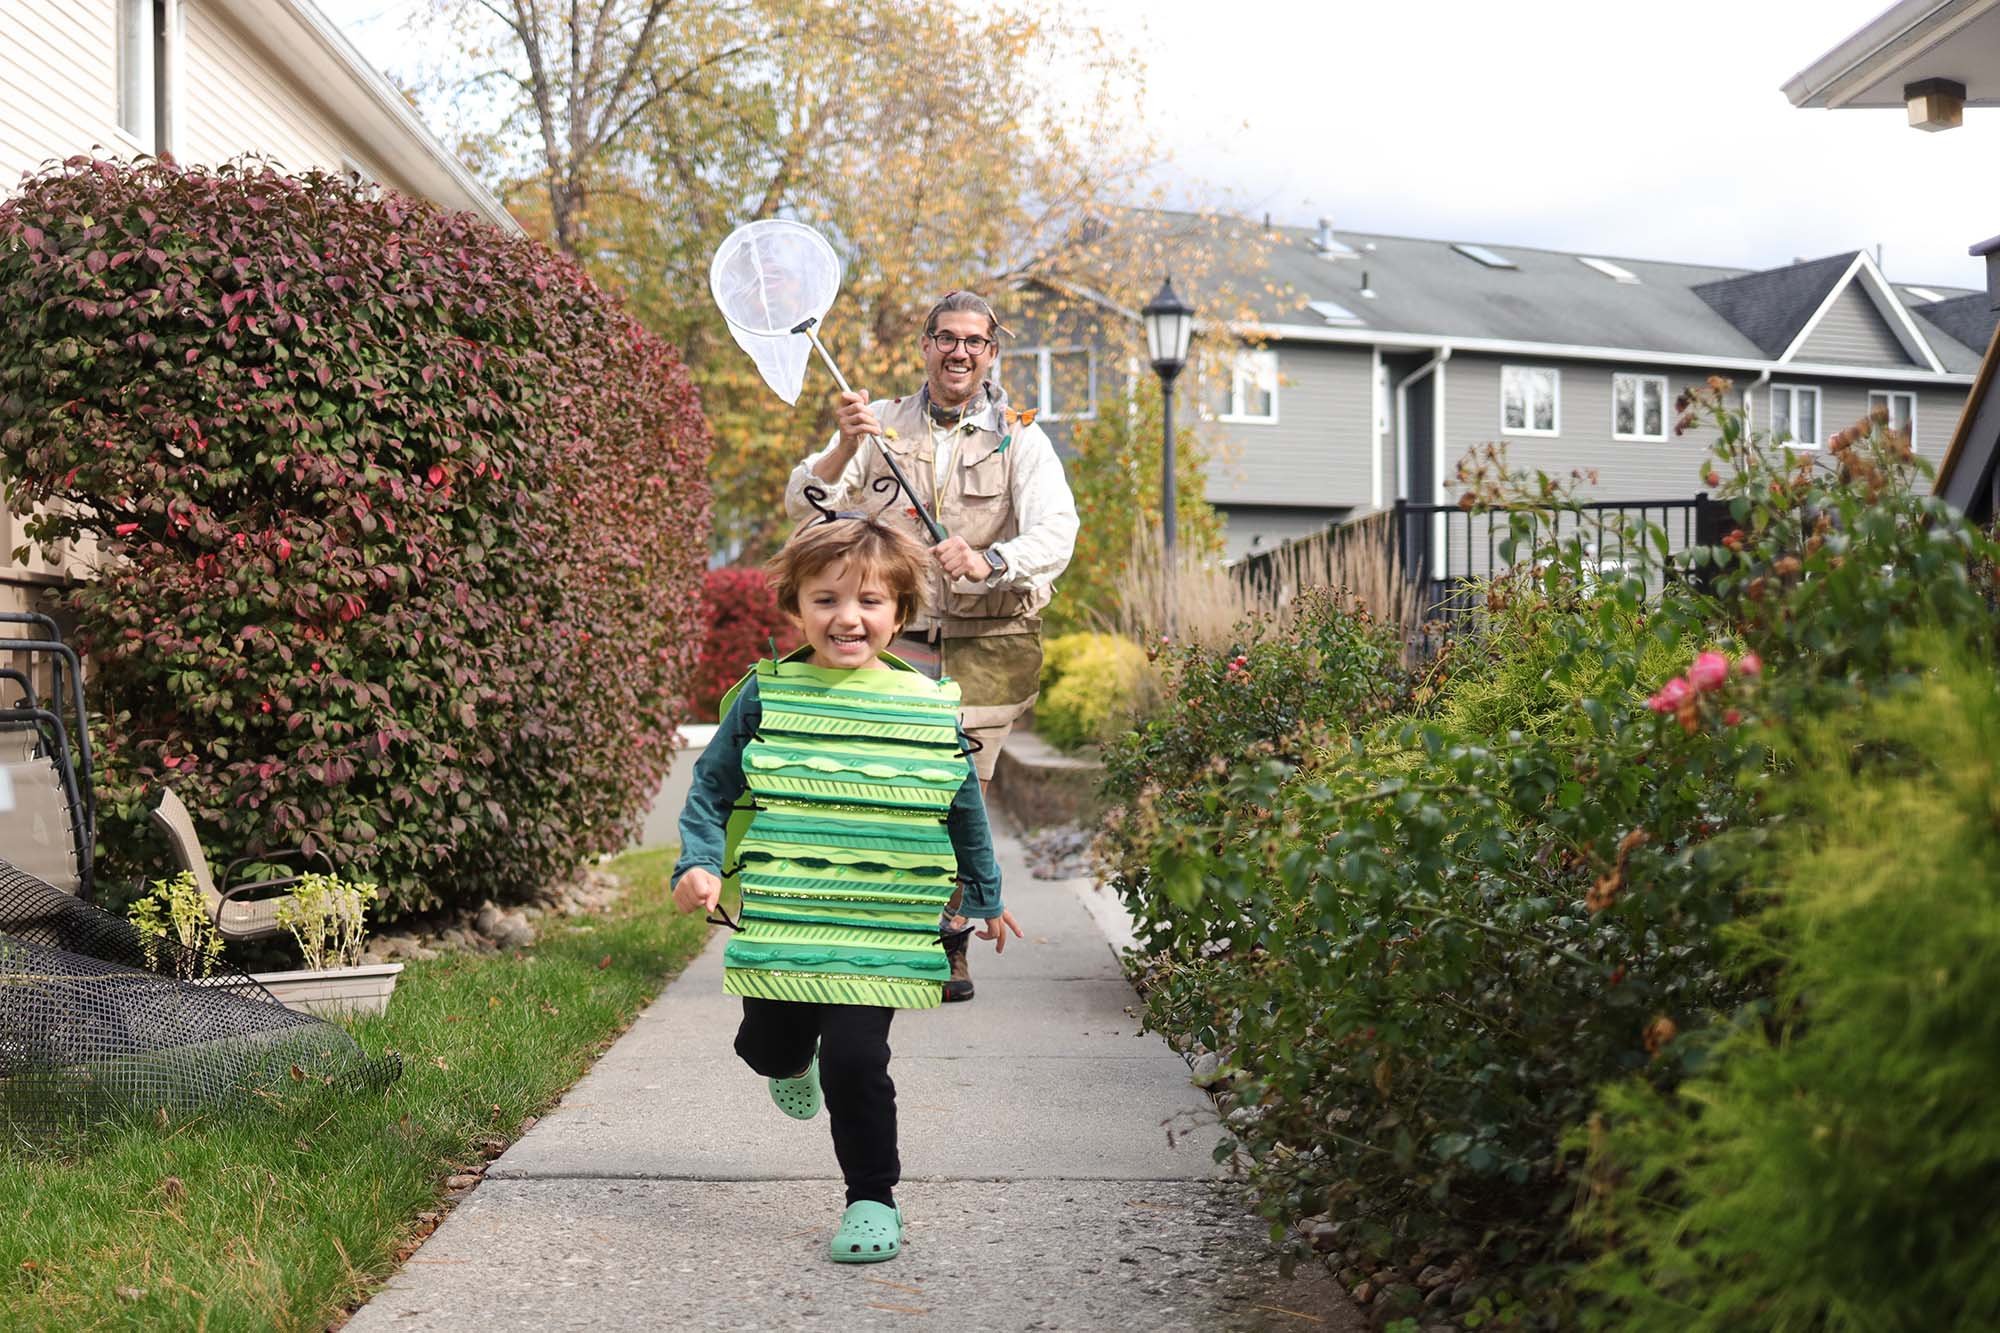
John’s costume was probably the easiest since it did not involve time consuming labor or any makeup (finally!) The only issue was last minute we could not find an inexpensive vest. I was not about to spend upwards of $50 on a vest that he would wear for 5 hours. And with our limited time frame, even Amazon was not saving us! Shocker, I know. Shipping delays are real. I stopped by my Nanny and Grandpa’s house and mentioned the dilemma. Five minutes later my Nanny walks in from the garage with my grandpa’s old fly fishing vest. It could not have been more perfect, I nearly cried. And it was just so cute that it was his! Love that part so much. Practically vintage, I’d say. So I went and hot glued a few cute little fake butterflies and other bugs and John added in his own bug catching accessories. Binoculars, a net and a compass. Why do you need a compass to catch bugs? I don’t know. Anyway…
All in all, Halloween was very fun and it was the first so far where Logan understood that you walked up to the door with your little pail and said “trick or treat!” to whoever answered the door and then you got candy. So that was adorable to watch and it forced me to take a walk around the entire neighborhood, which is a decent size. Cardio points for me. While I was decked out as a butterfly. Bonus points there.
Some photos below of our bug adventure!


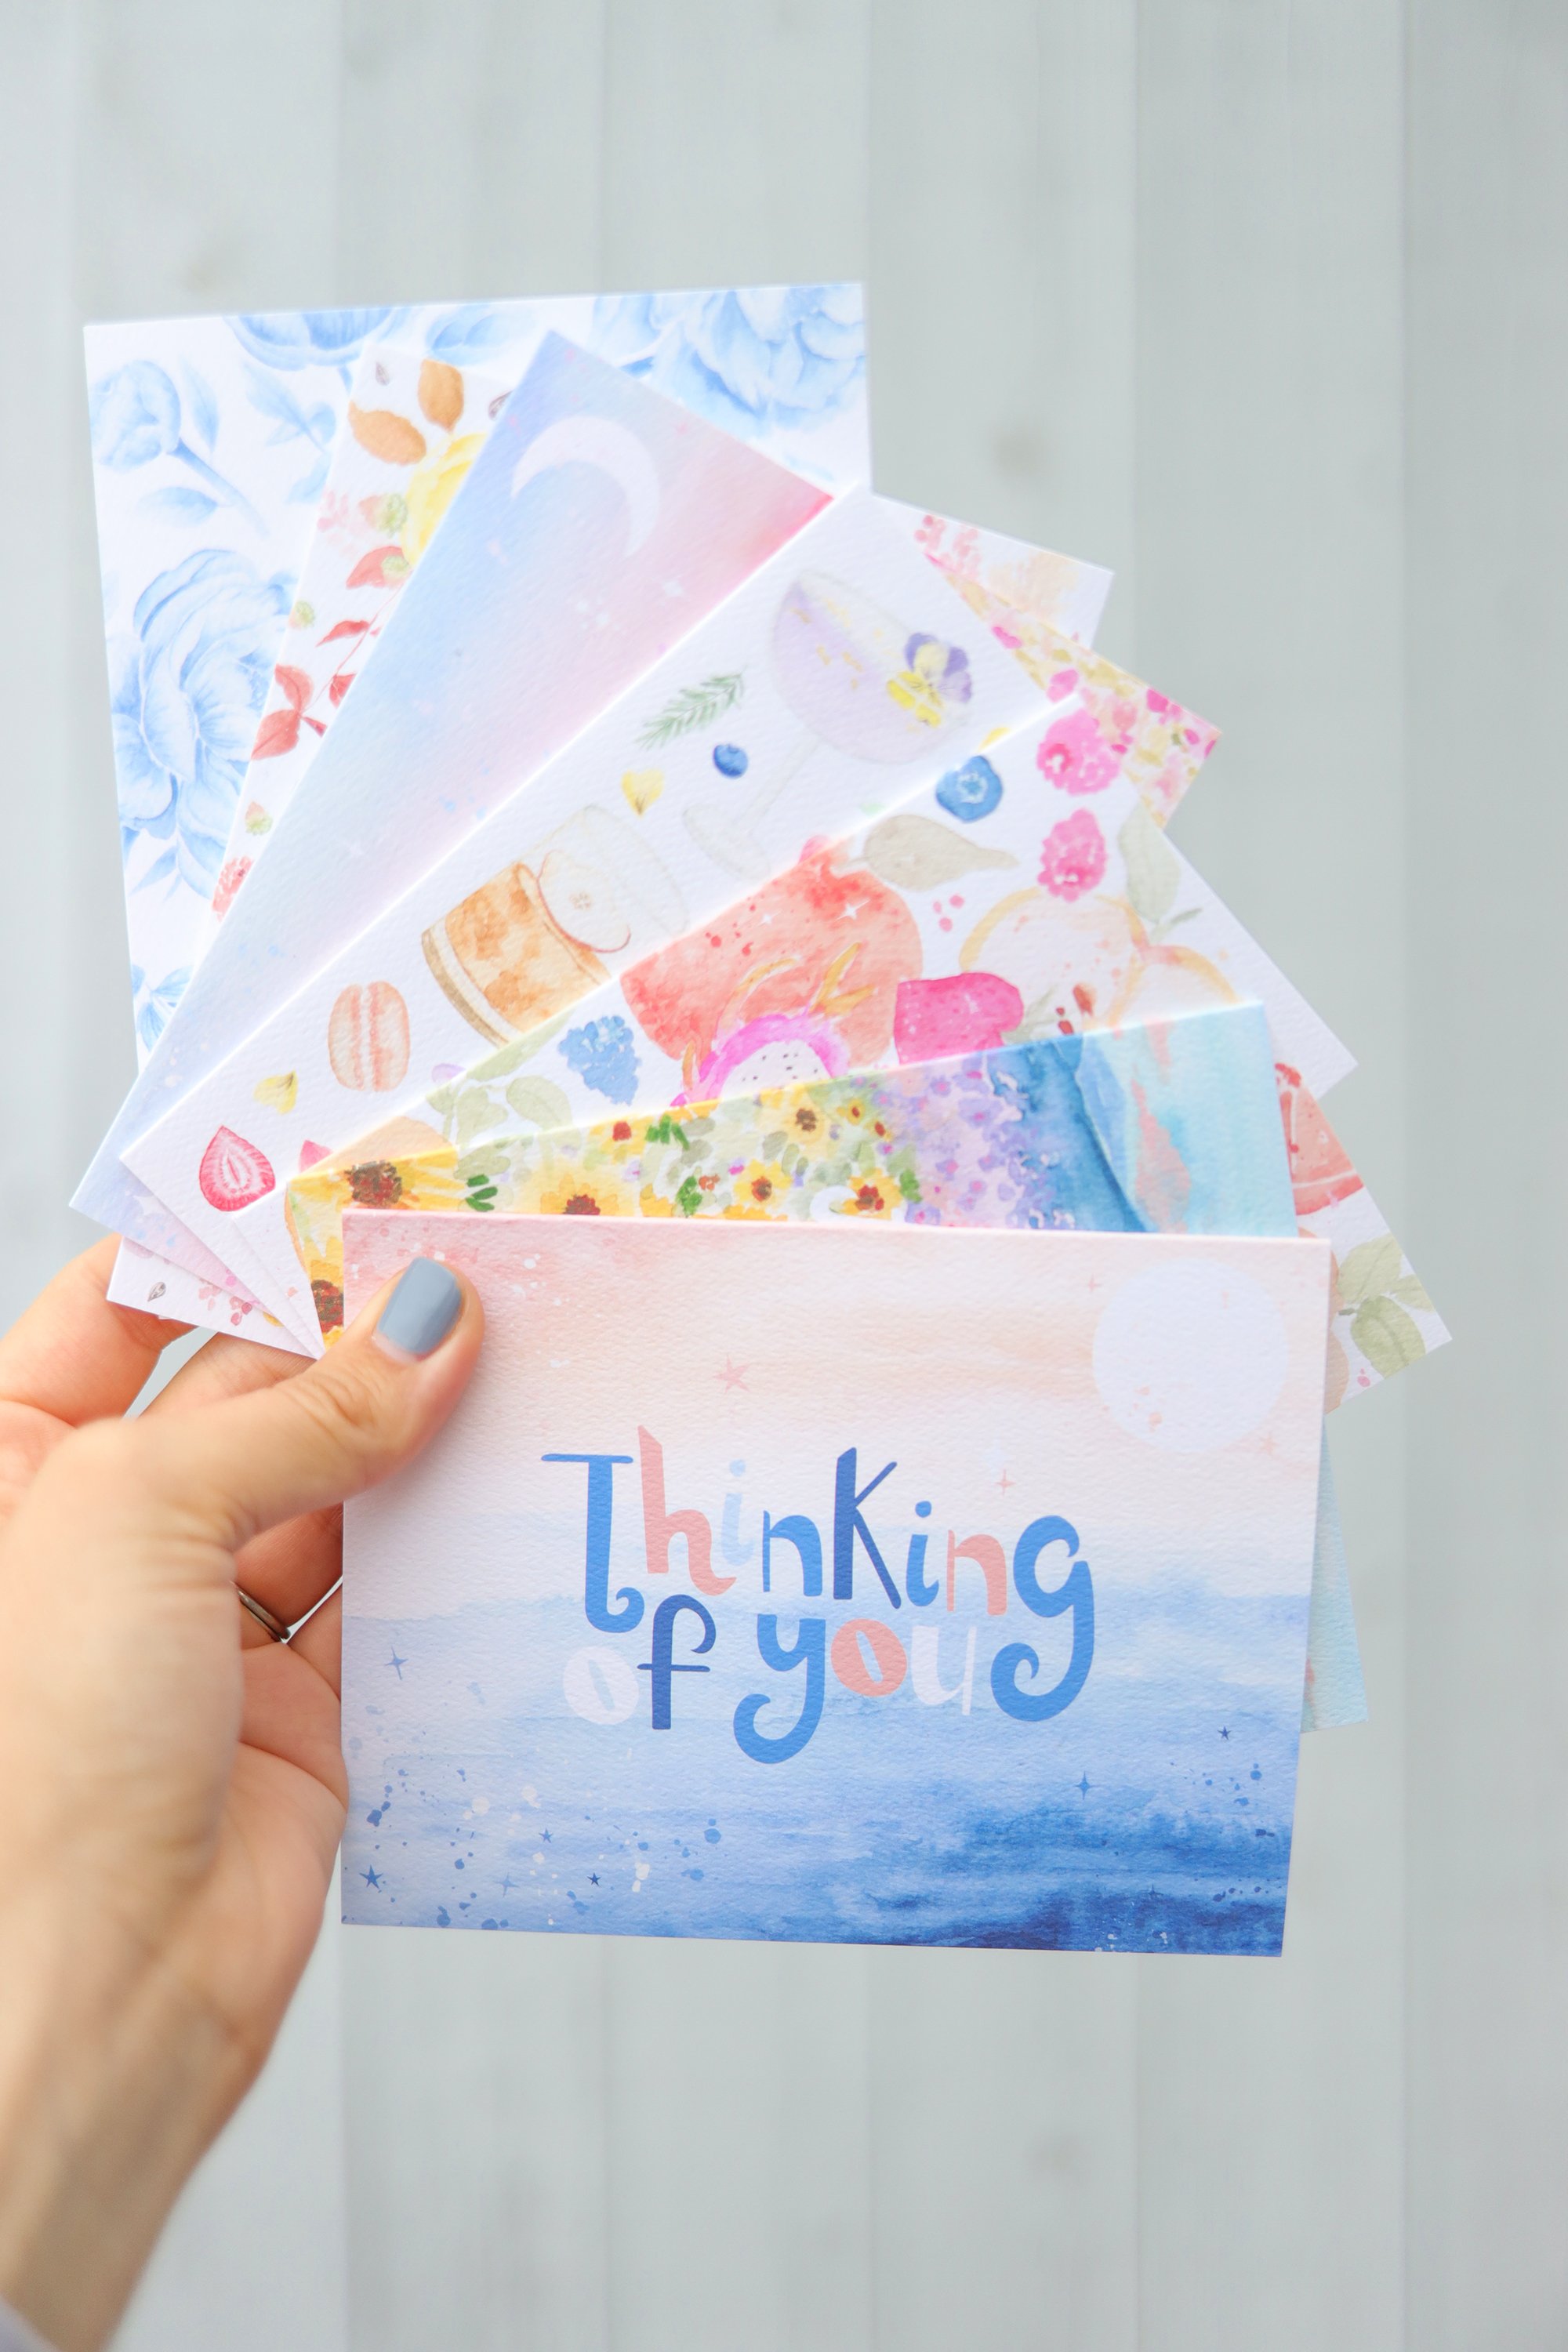
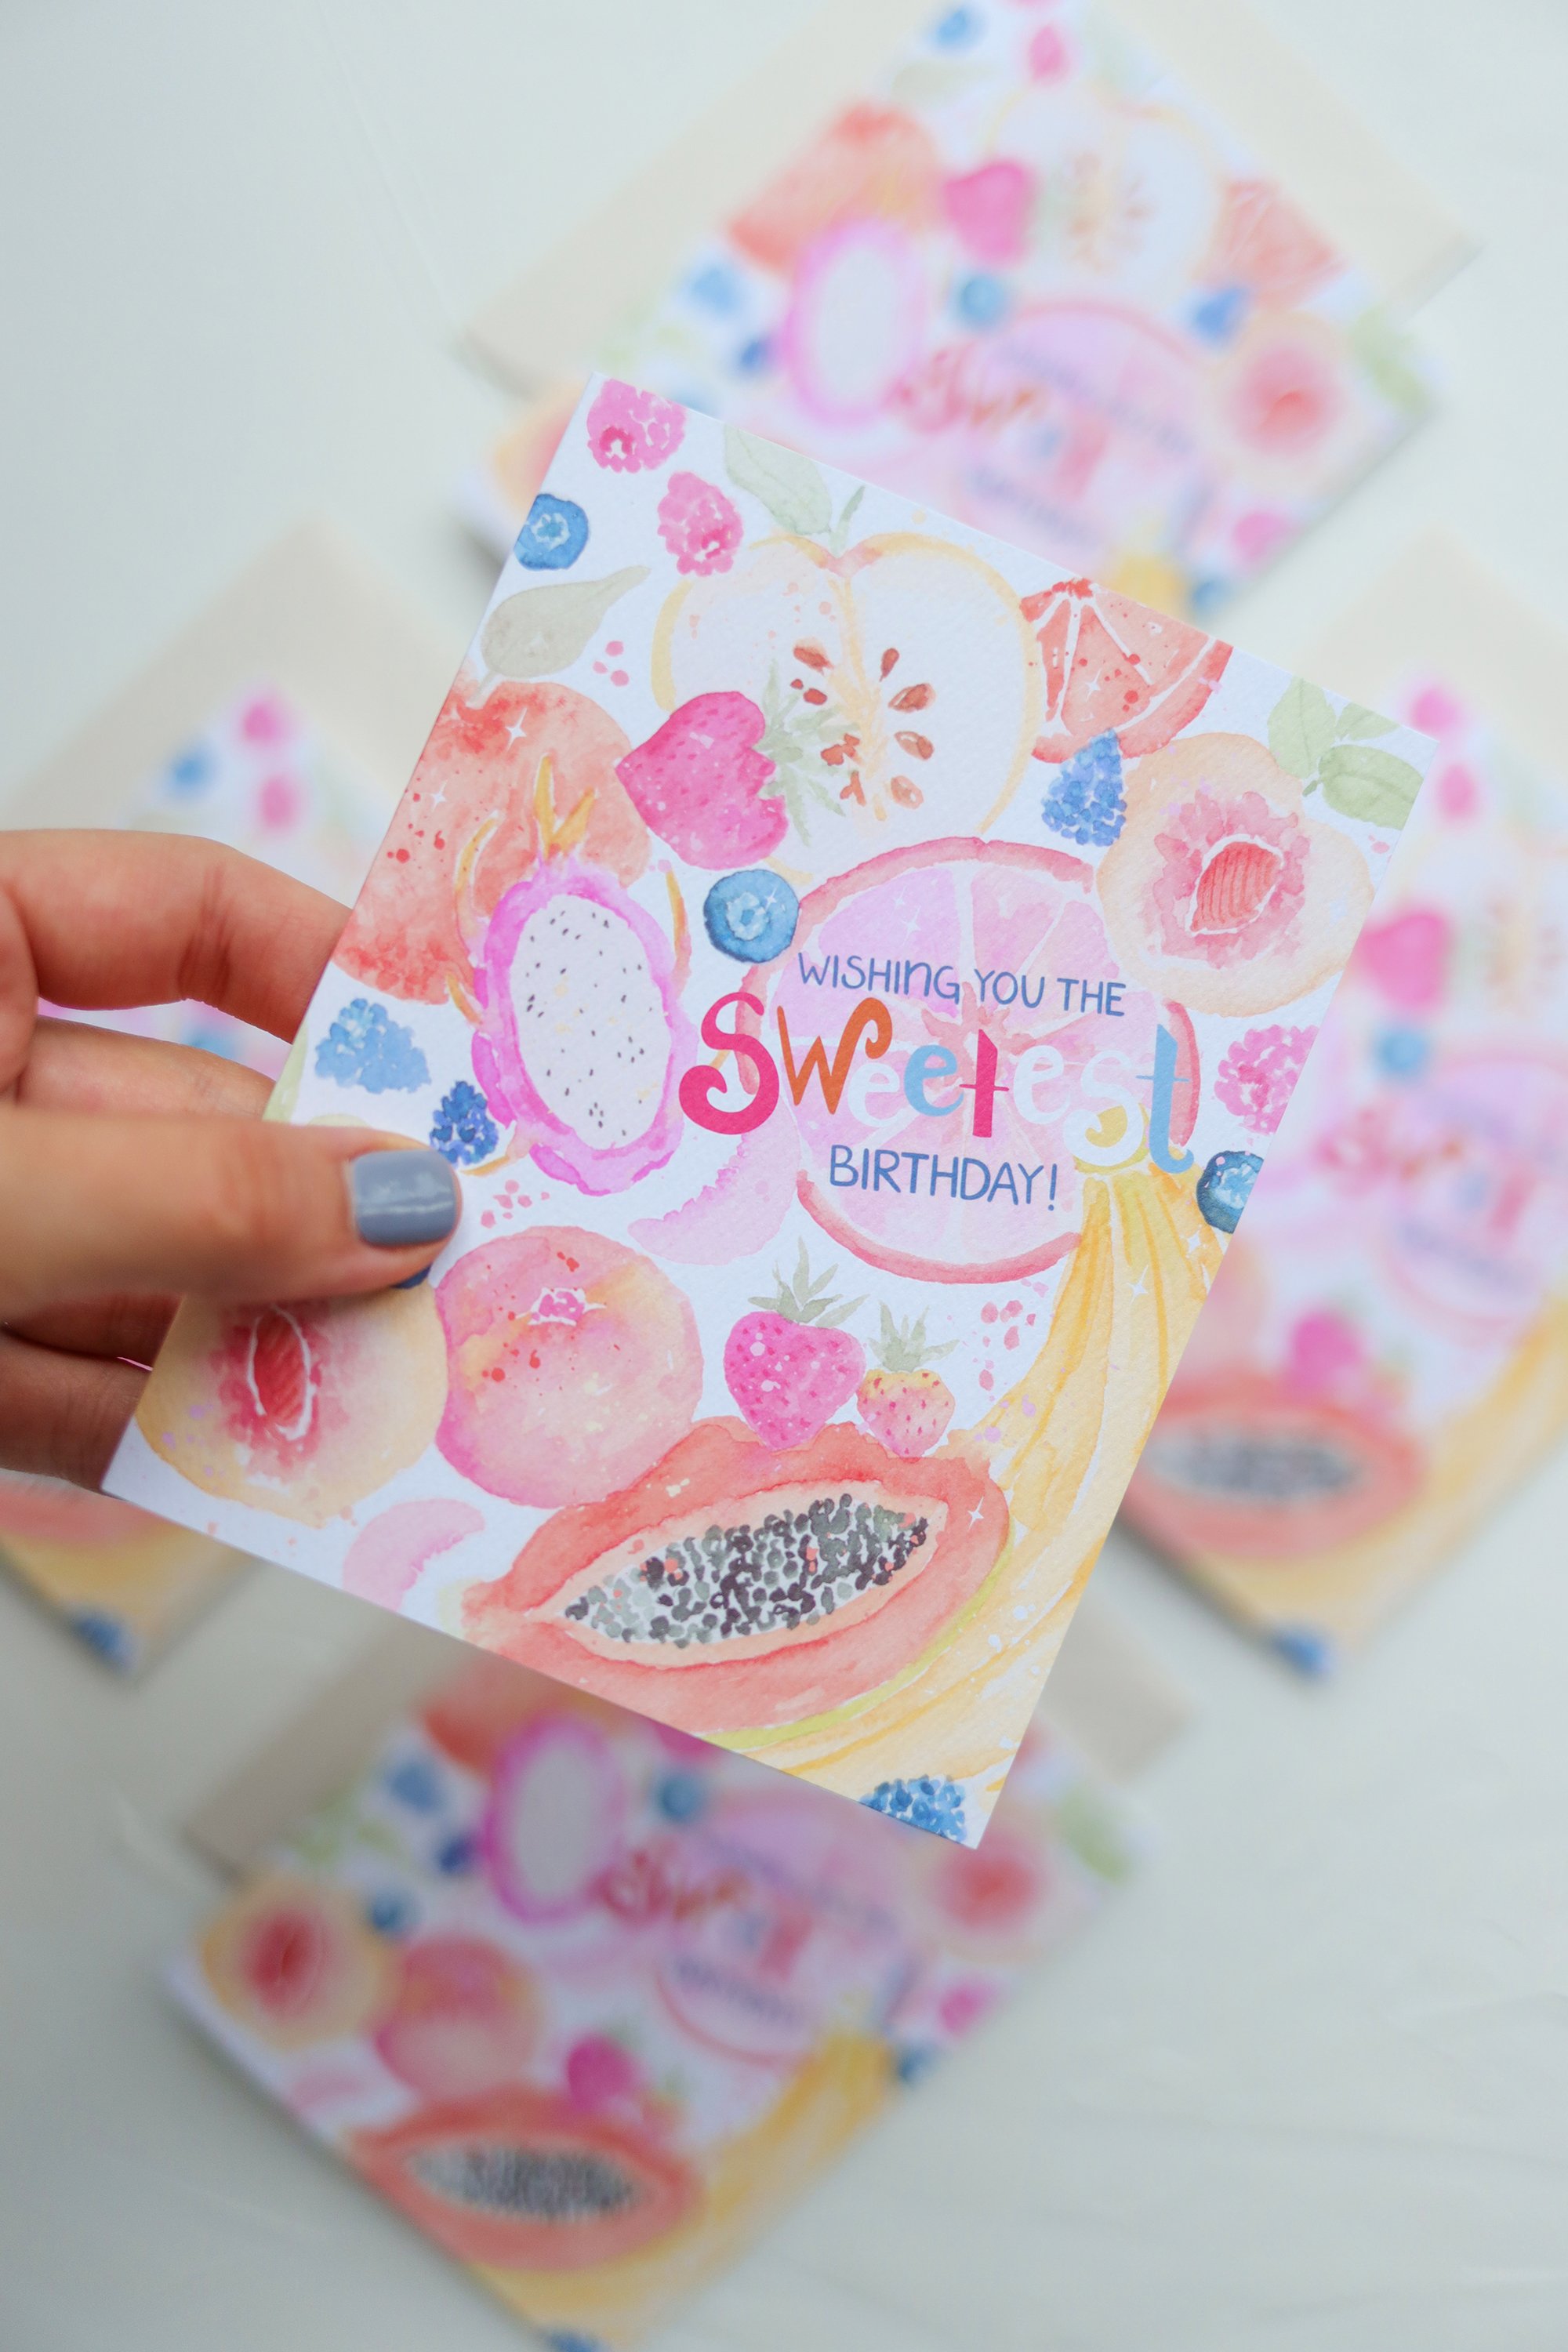
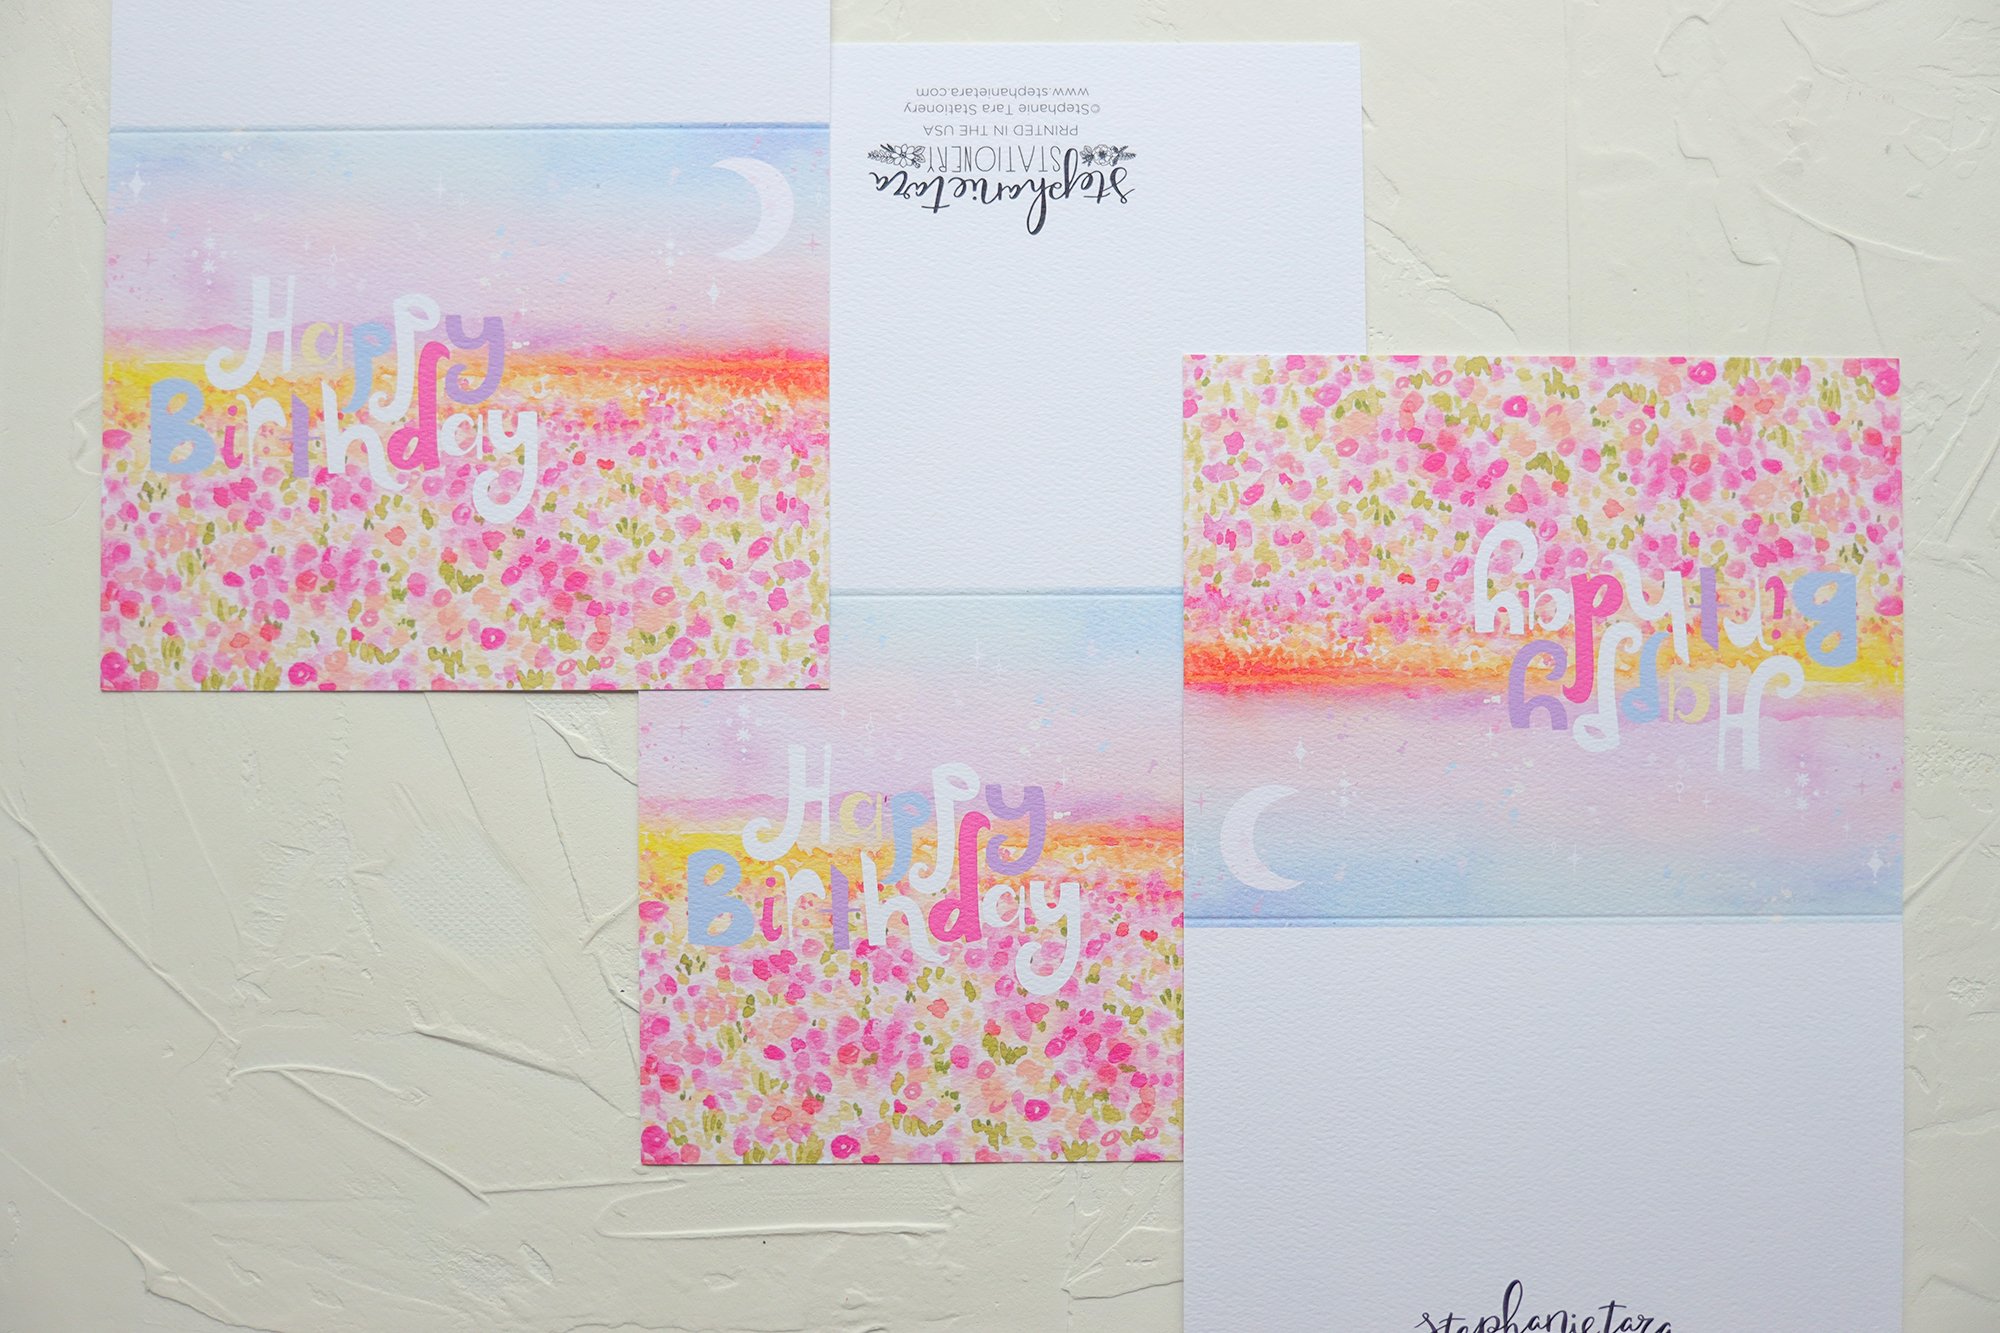
go ahead, steal these…
Making your life easier one sentiment at a time…

How many of you struggle with writing birthday cards? Does that big, blank page look oh so daunting and large and you’re filled with dread at the thought of filling it up? I’m here to save you with some sweet, sentiments that you can easily personalize! Also hot tip, start lower down from the top and just write a little larger than usual ;)
option 1: standard sentiment…
“Happy birthday to the absolute best ( fill in title here, ie: friend, mom, sister, etc) ! I’m so grateful to have you in my life and can always count on your for a (fill in the blank, ie: great time, grand adventure, helpful chat, etc). I wish you all the best things this year and hope you have a special day!”
option 2: sort of silly sentiment…
“Woohoo, it’s your birthday! You definitely deserve all the cake, ice cream, presents, singing and fun that you can get! Have the best day ever!”
option 3: short and sweet…
“Happy, happy birthday! Wishing you all the best today and I hope your wishes come true!”
I hope that was helpful! Now go stock up on a bunch of birthday cards so you’re fully prepared for any birthday that sneaks up on you! Grab a bundle of 10 for $35 and they ship free and save you a bunch of money! Win win <3


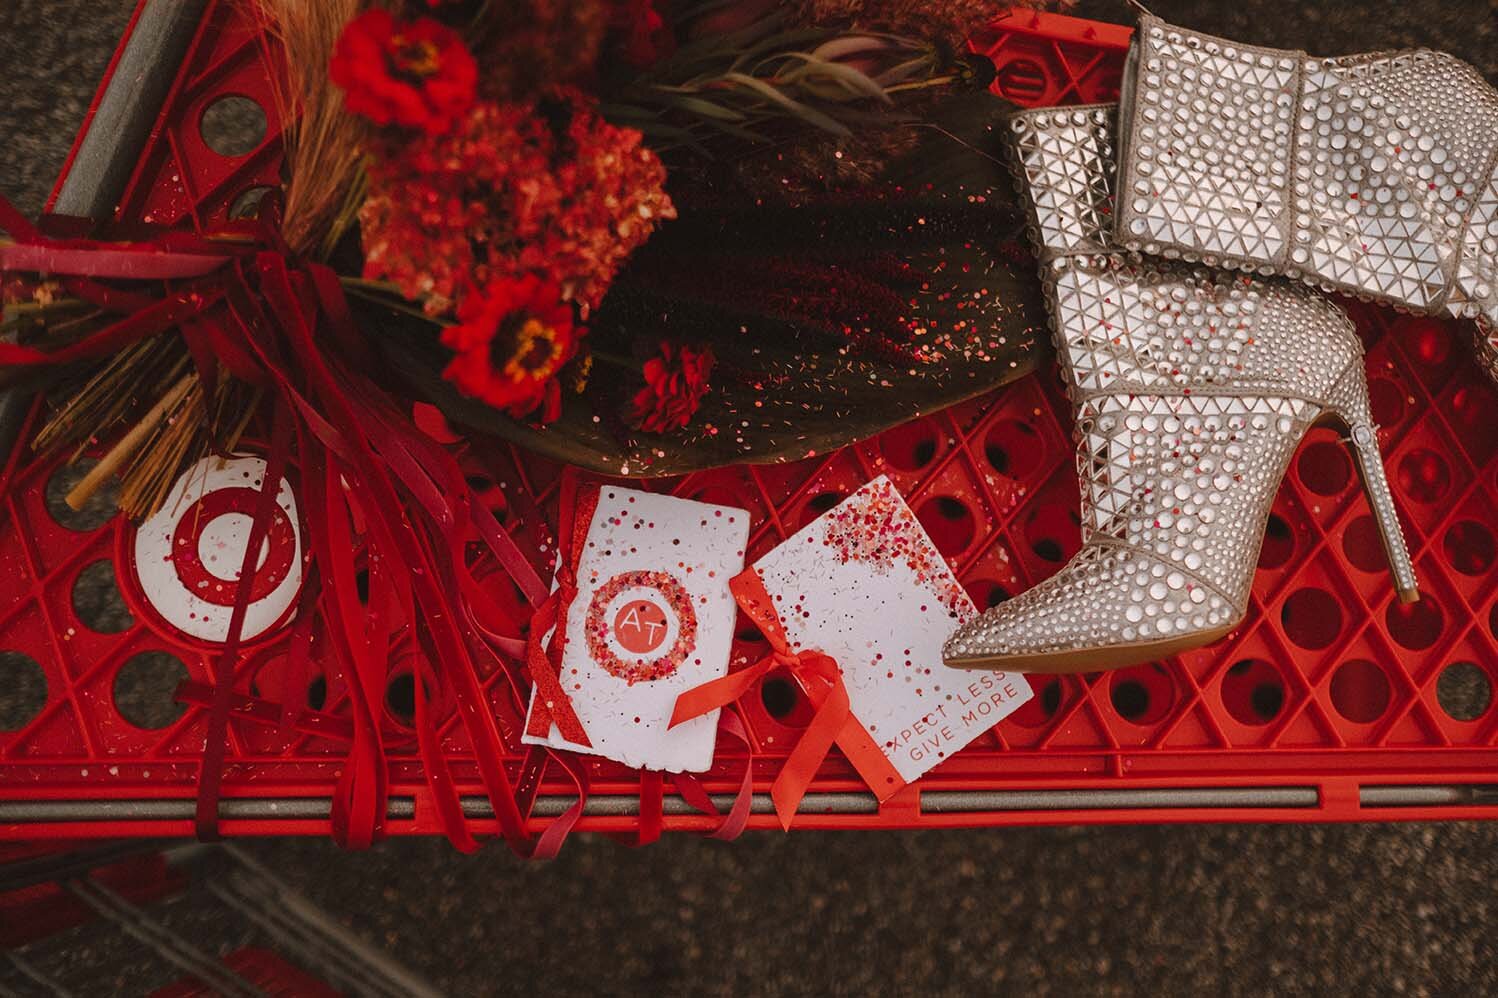
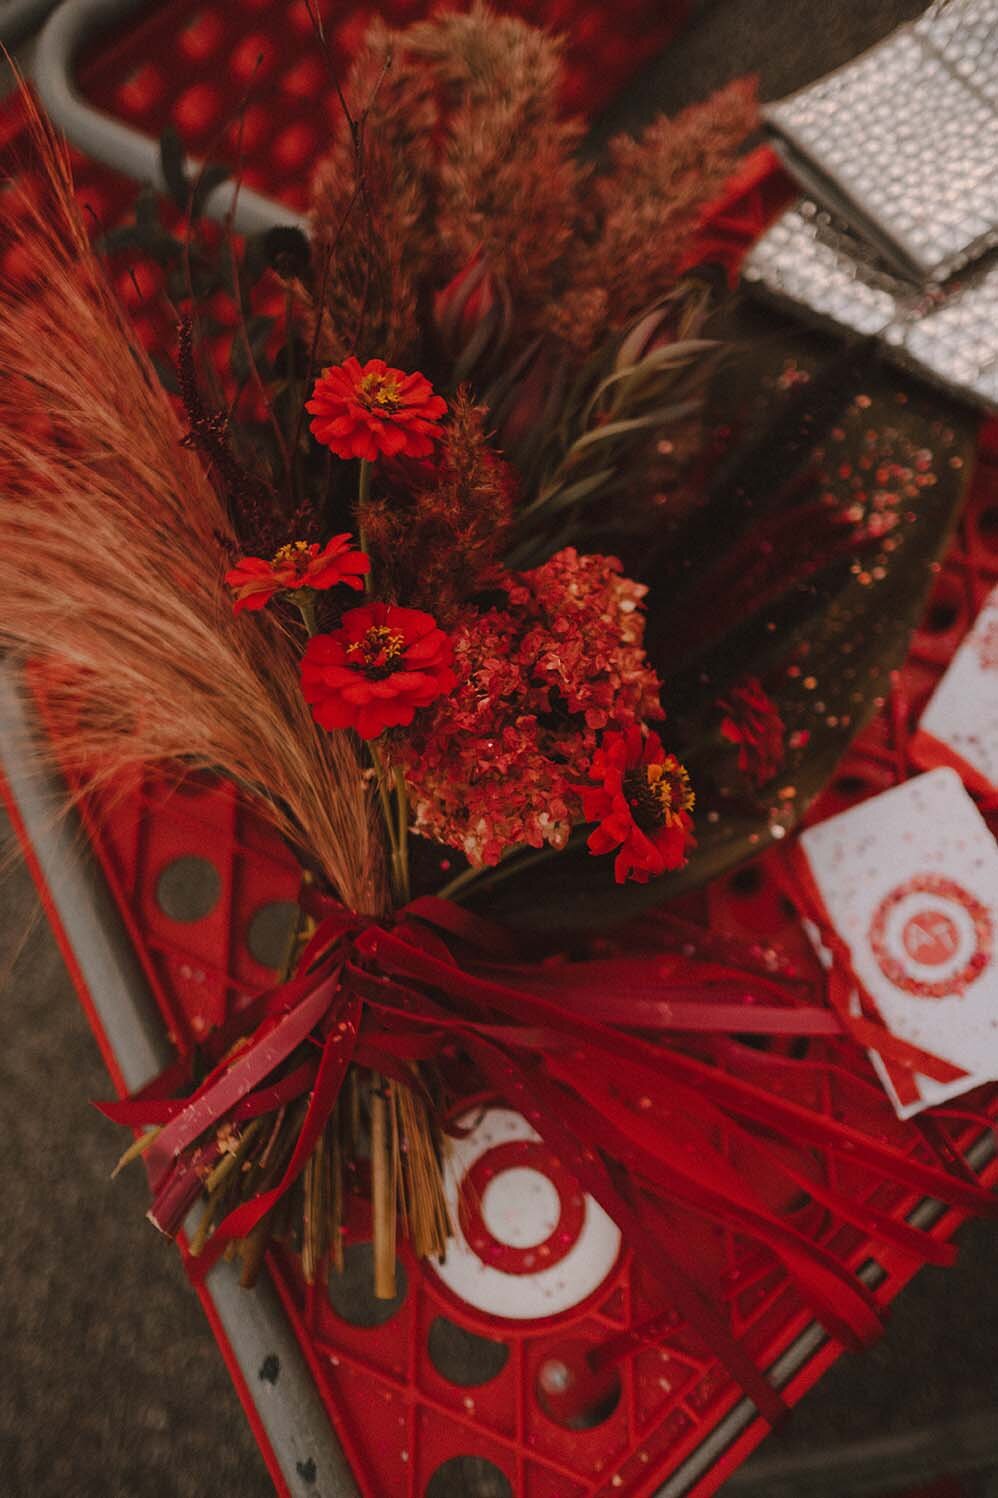
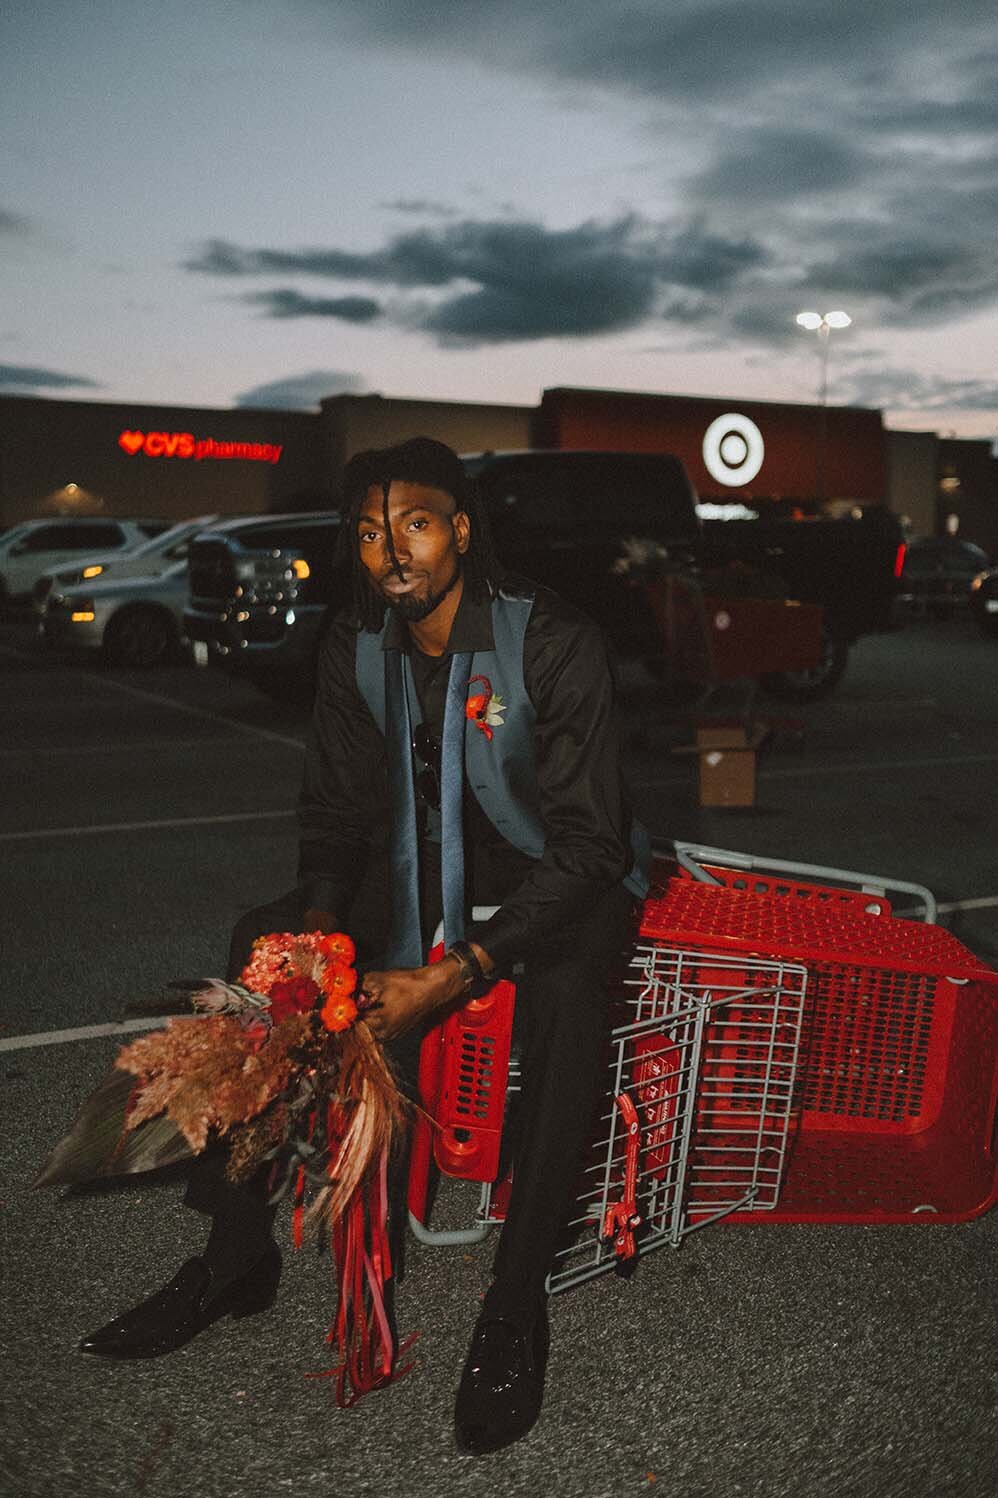
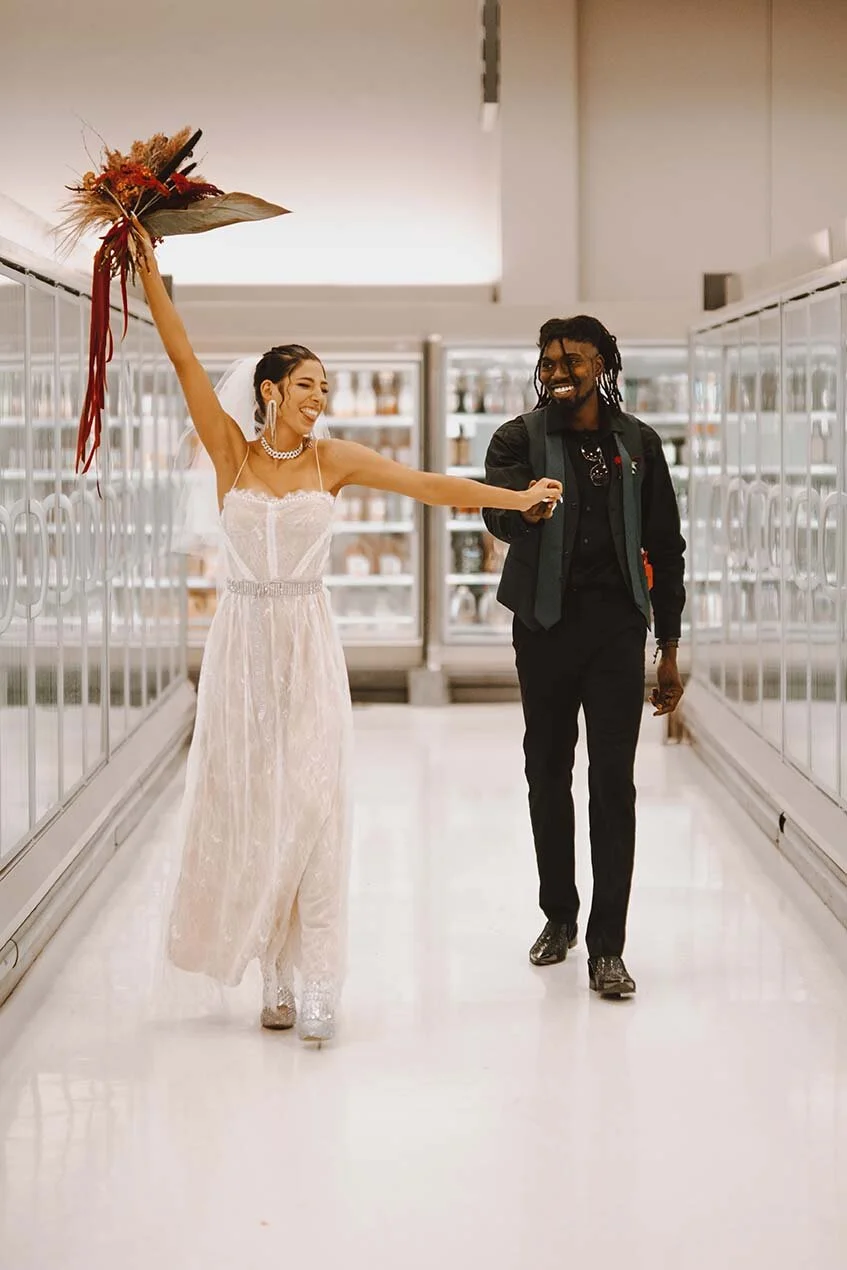
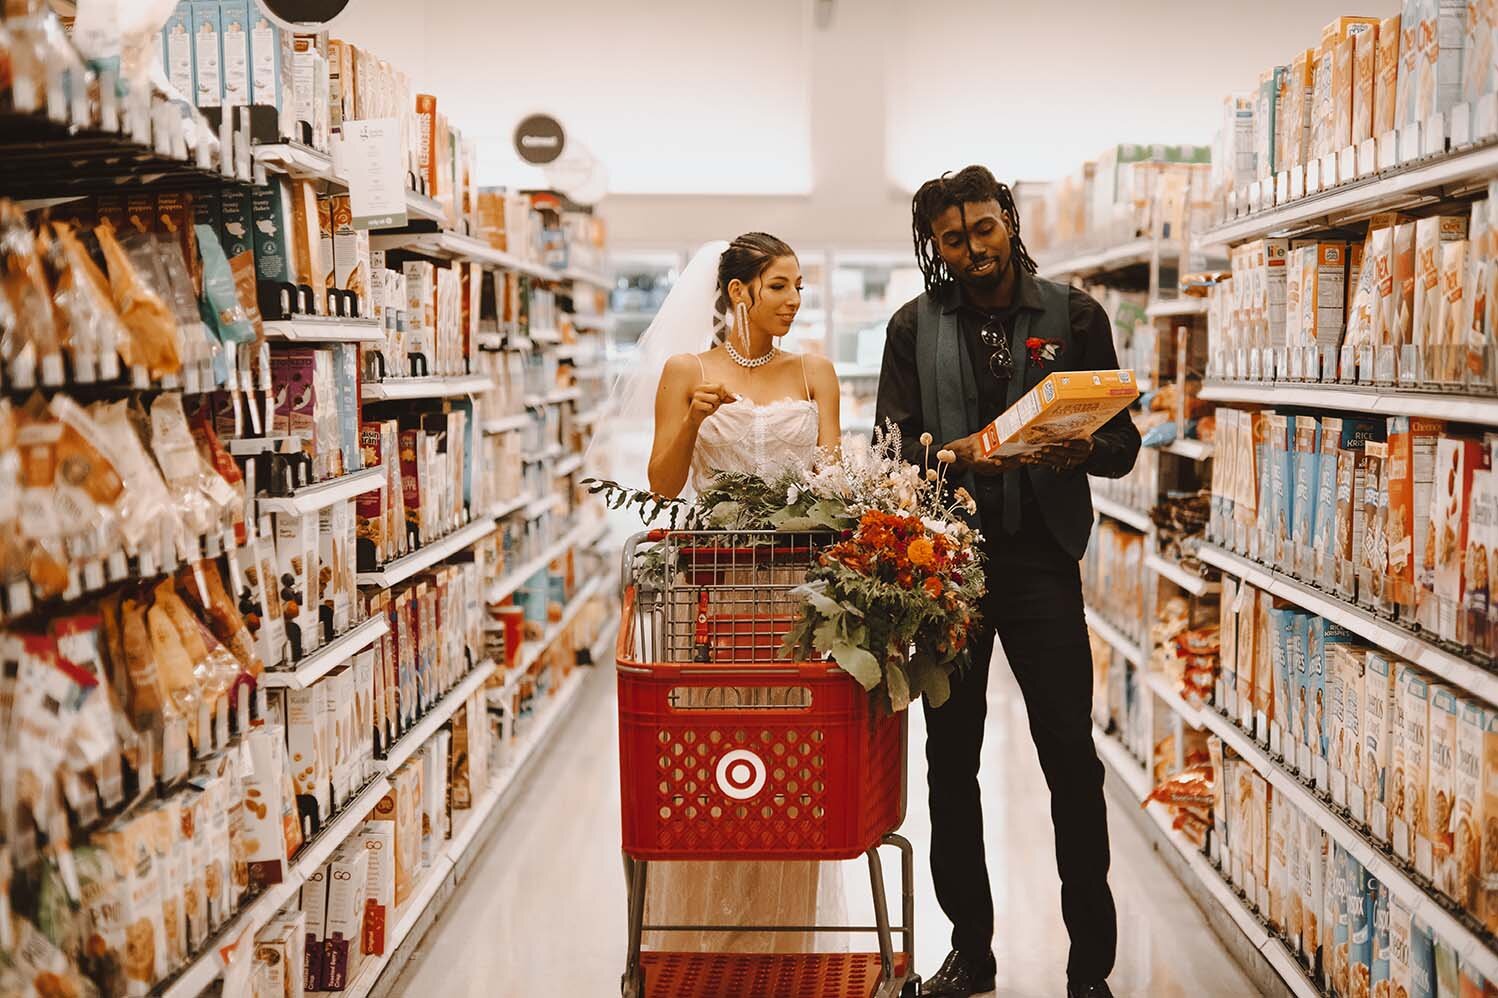
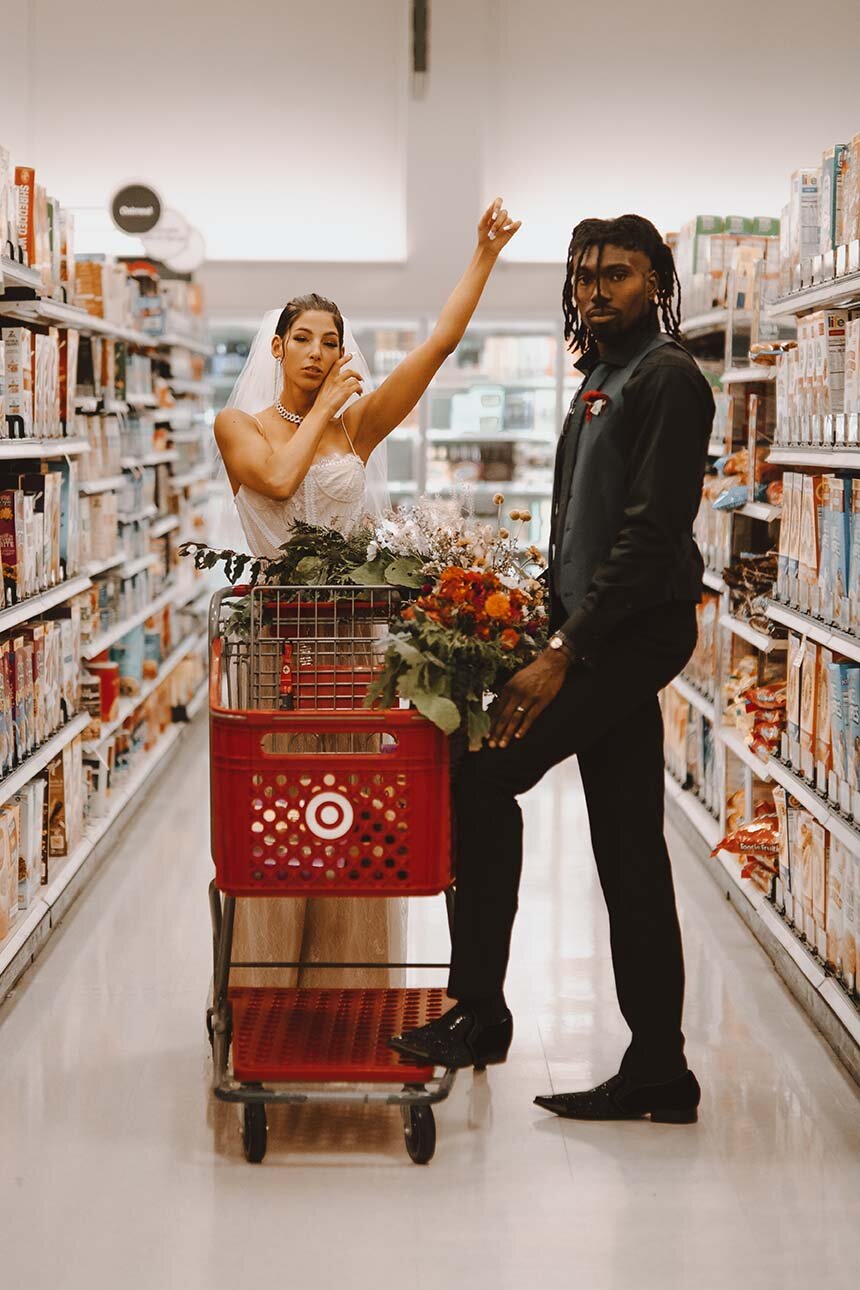
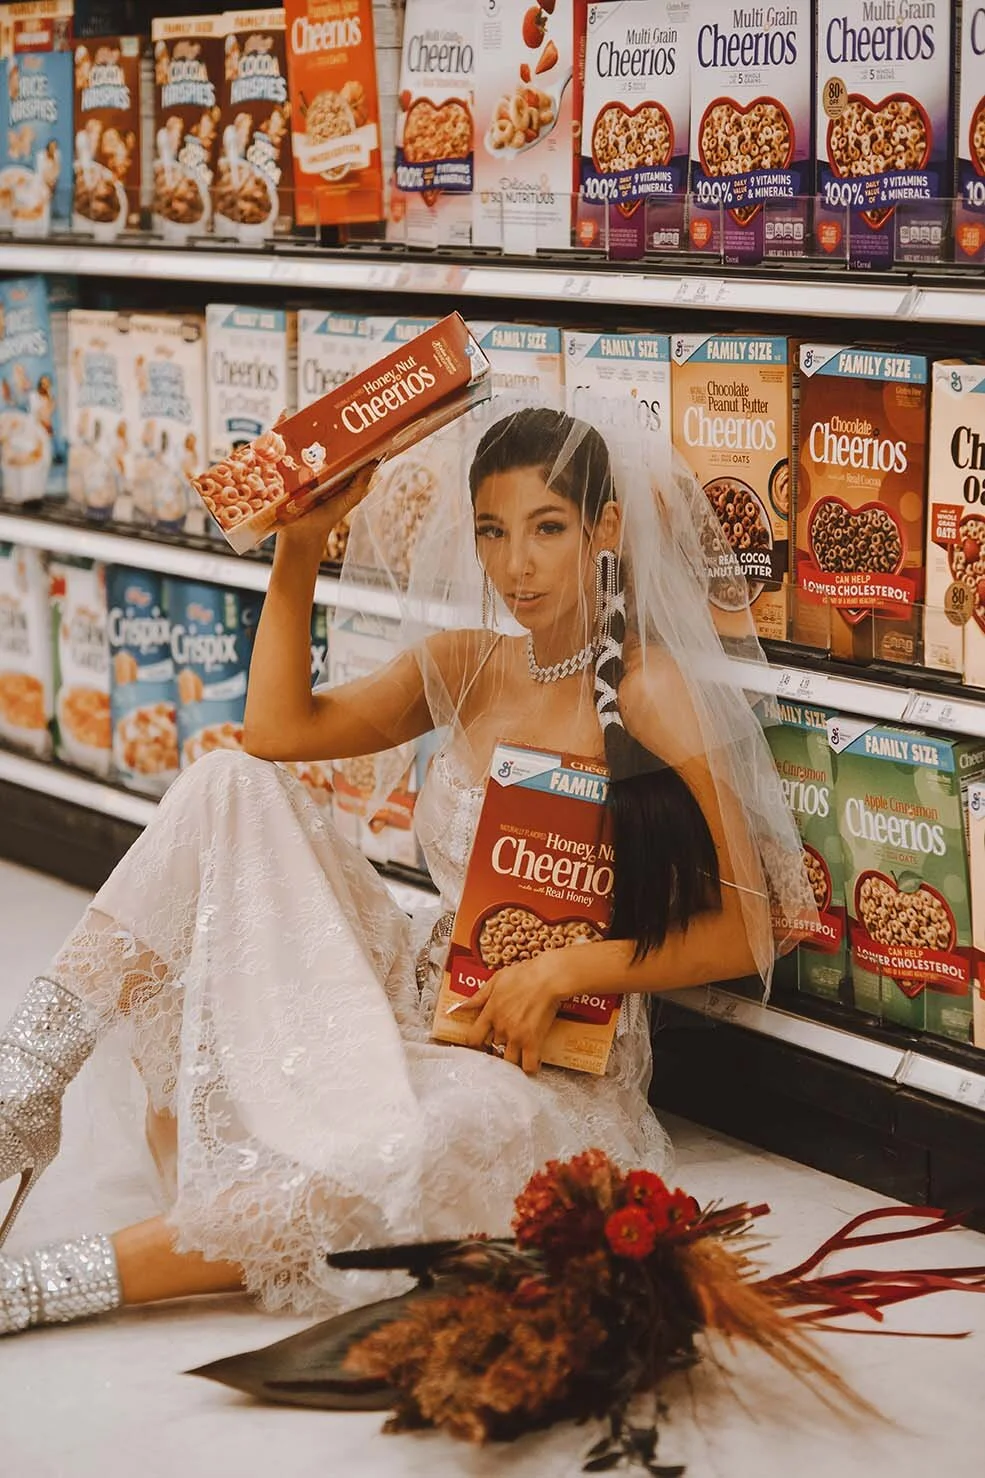
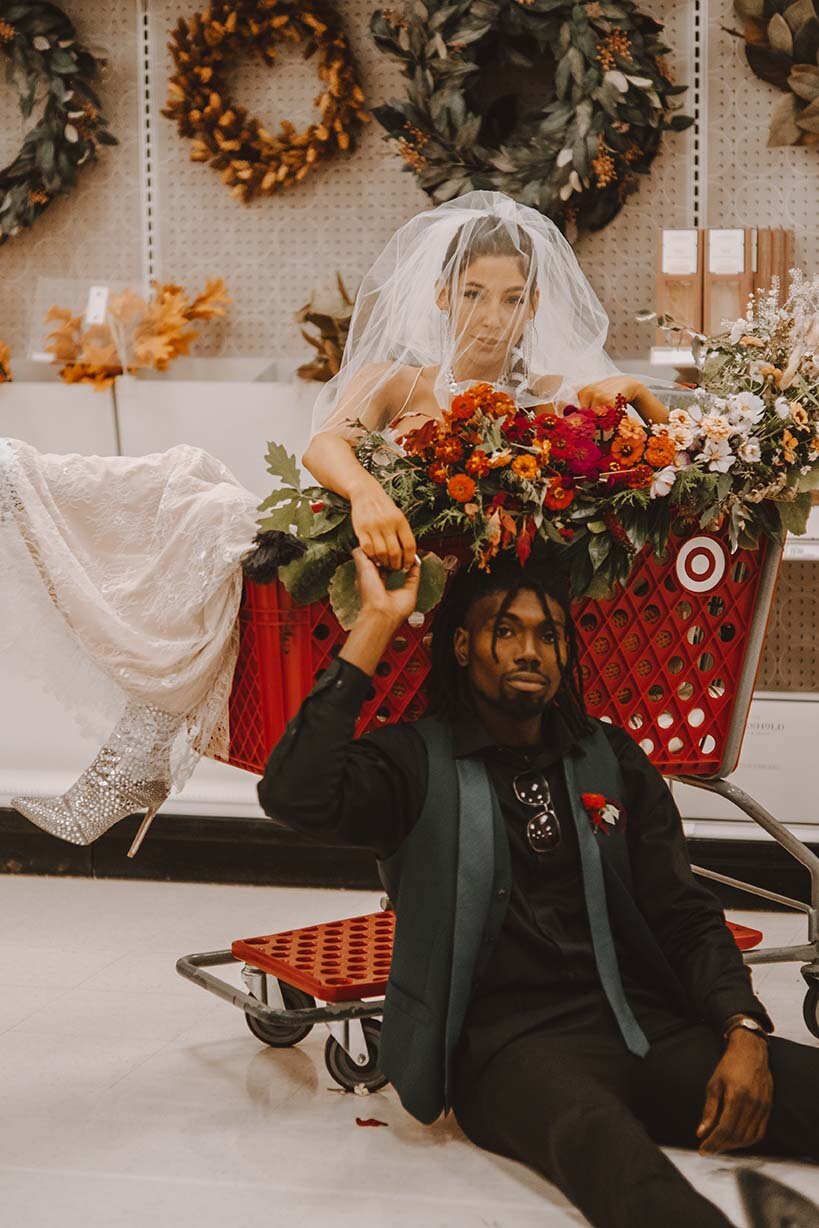
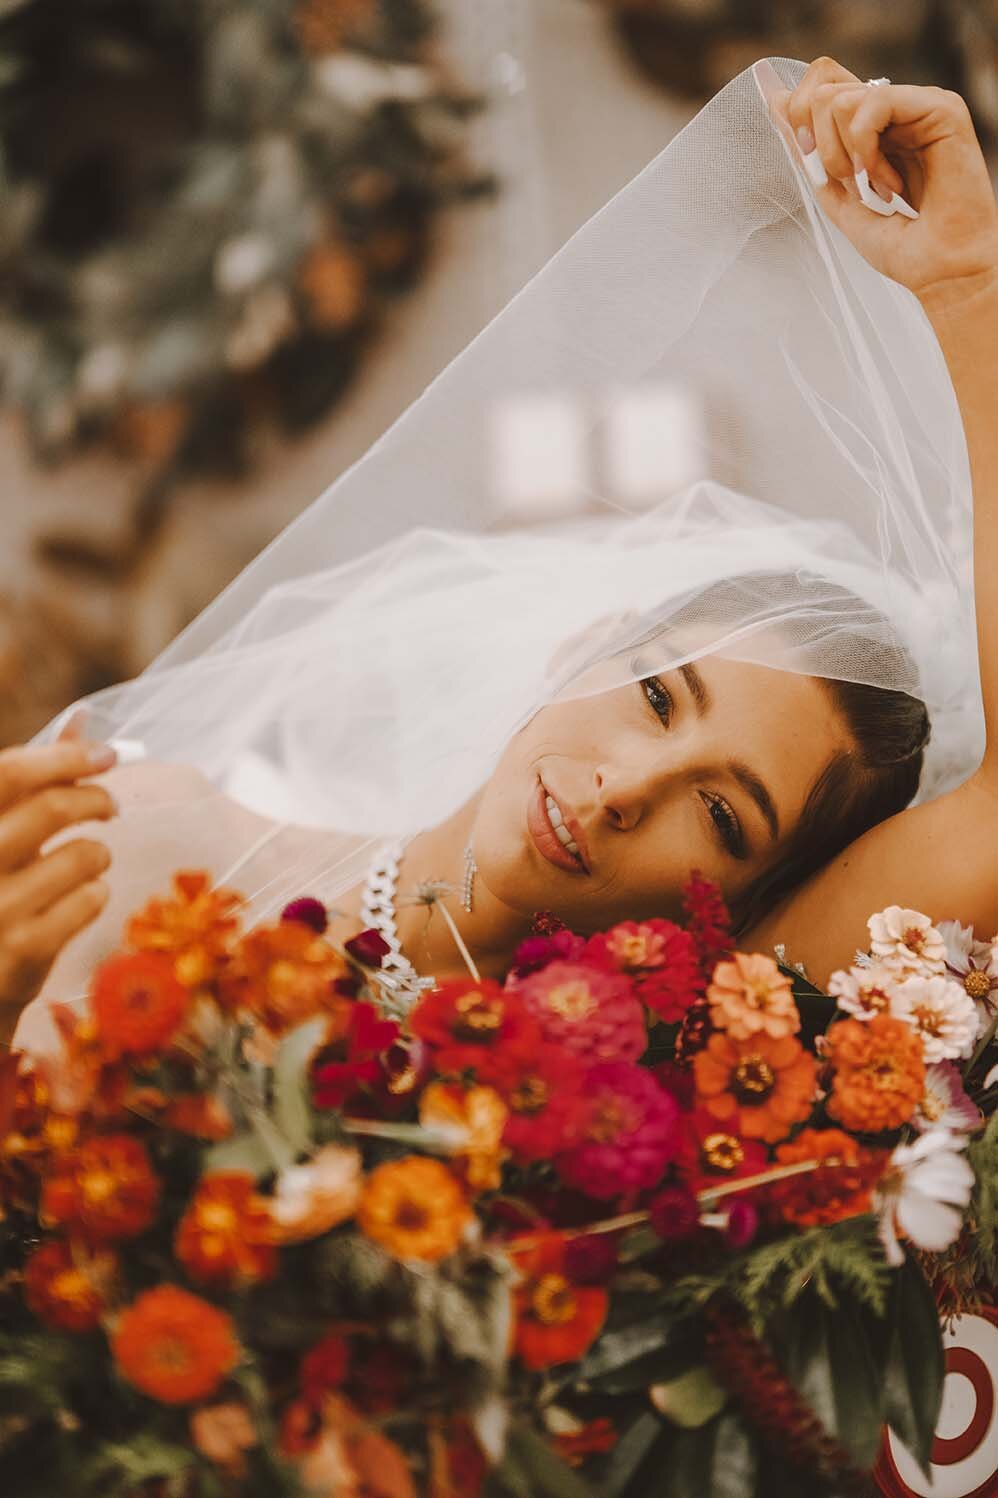
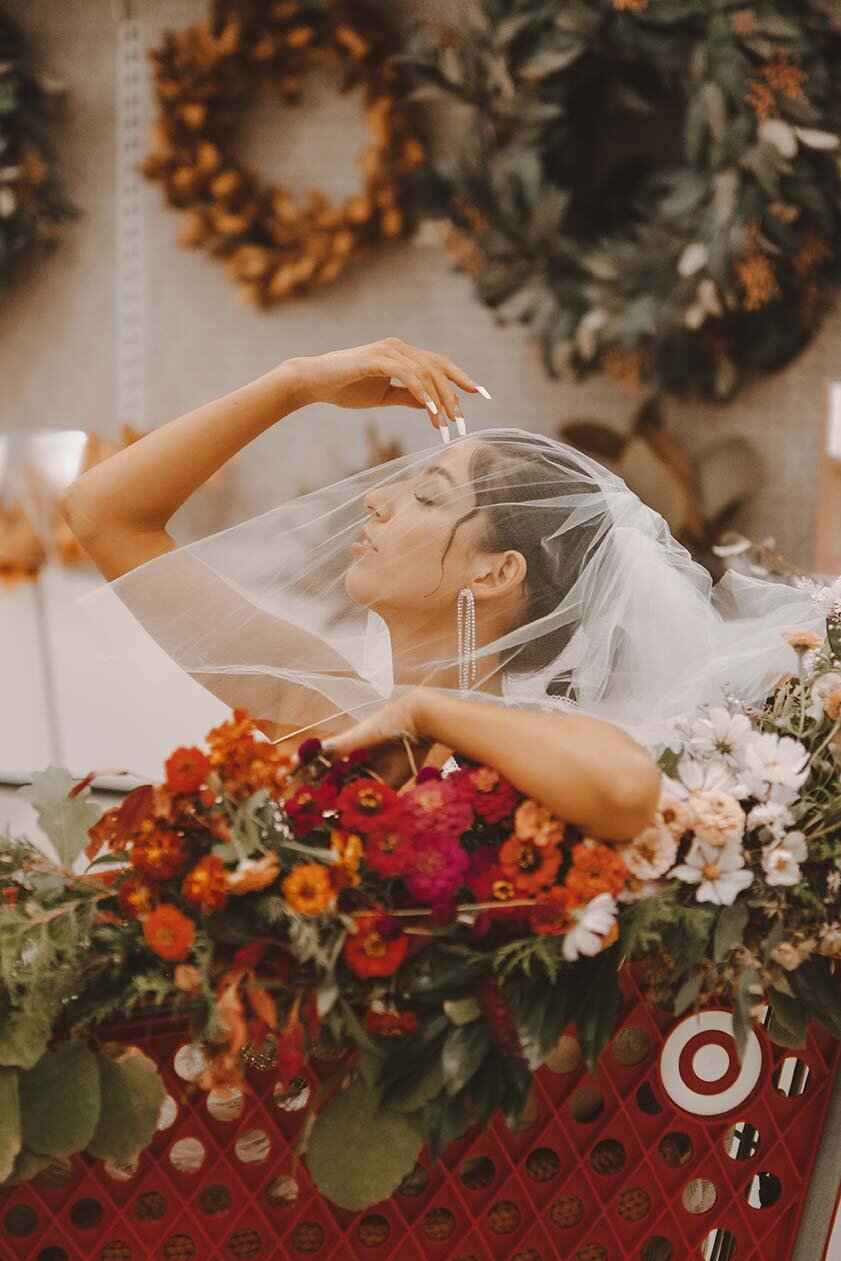
styled shoot, Target
You will love Target even more than you did before after you see this…

I didn’t think I could love Target more but I was wrong.
Dana from Haus and Gravity is an all time creative genius. The concepts she dreams up just get better and better. Dana has honed in on her skillset in such a stellar and impressive way. So totally unique and one of a kind ideas expose out of this talented woman’s brain and we are all just along for the gorgeous ride.
Every time she asks if I’ll participate in one of her shoots I can’t say no and this was the ultimate no exception moment. A styled wedding shoot at Target? Are you kidding me? She was not, she was very serious. And so are these bomb photos.
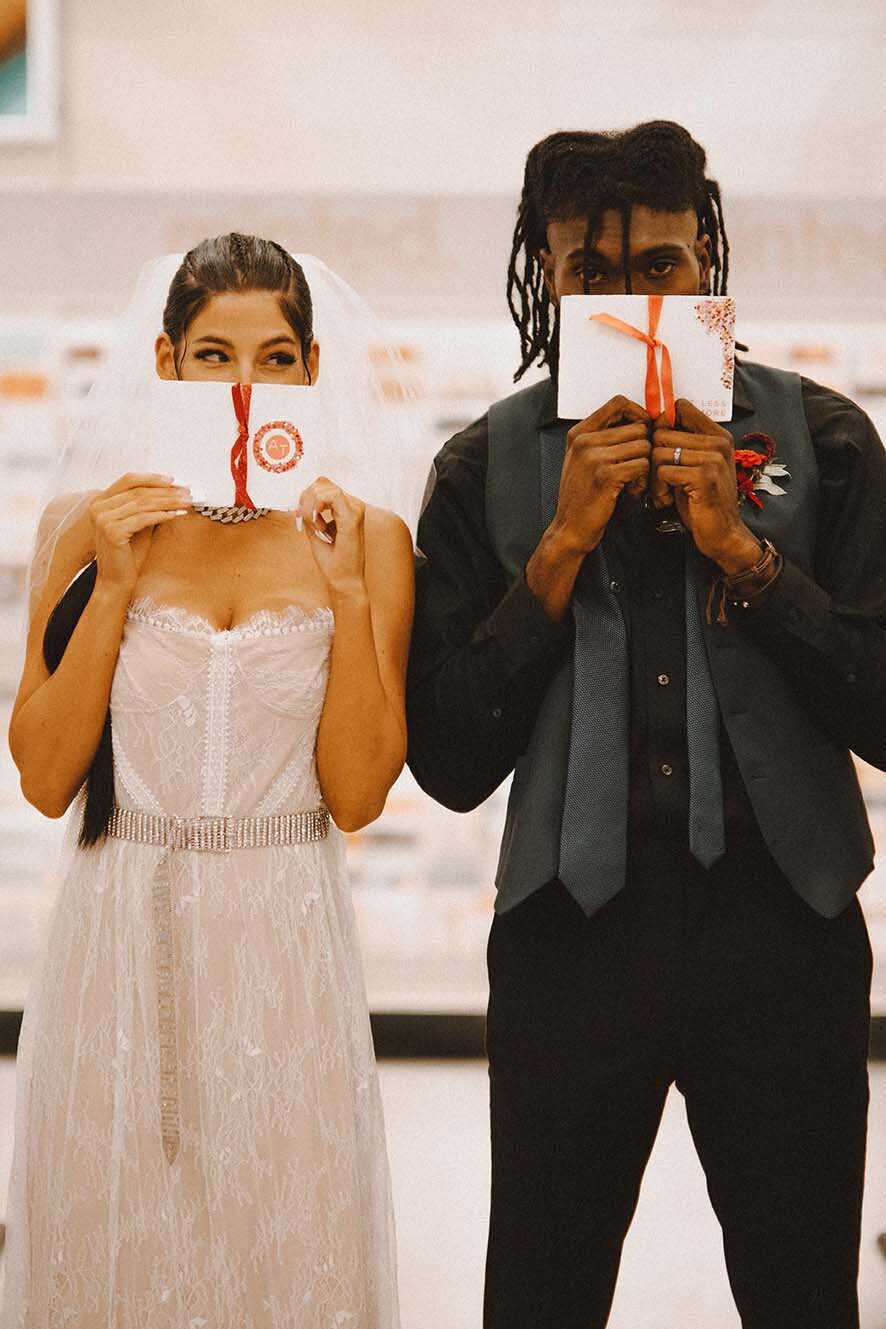
The mission: to design some target-esque vow books and what better usage of a target symbol than this exact project? And the slogan “expect more, pay less” was just absolutely perfect to switch around for our very own love at target quote, “expect less, give more.”
Vow books are the perfect detail to think outside the box on for your delectation of love! Have a cute nickname for each other? Put it on your vow books! Favorite song lyric? Put them on your vow books! Need some edgy ideas? Check out some of my in house vow book designs here.
_____________
Vendor lineup:
concept, planning + design: @hausofgravity
concept, planning, directing, photography: @sydneykerbysonphotography
florist: @cassidiecorwin
hair: @sparkle_n_shine _hair
vow books; @stephanietarastationery
models: @ms_zandraan @sigshalome


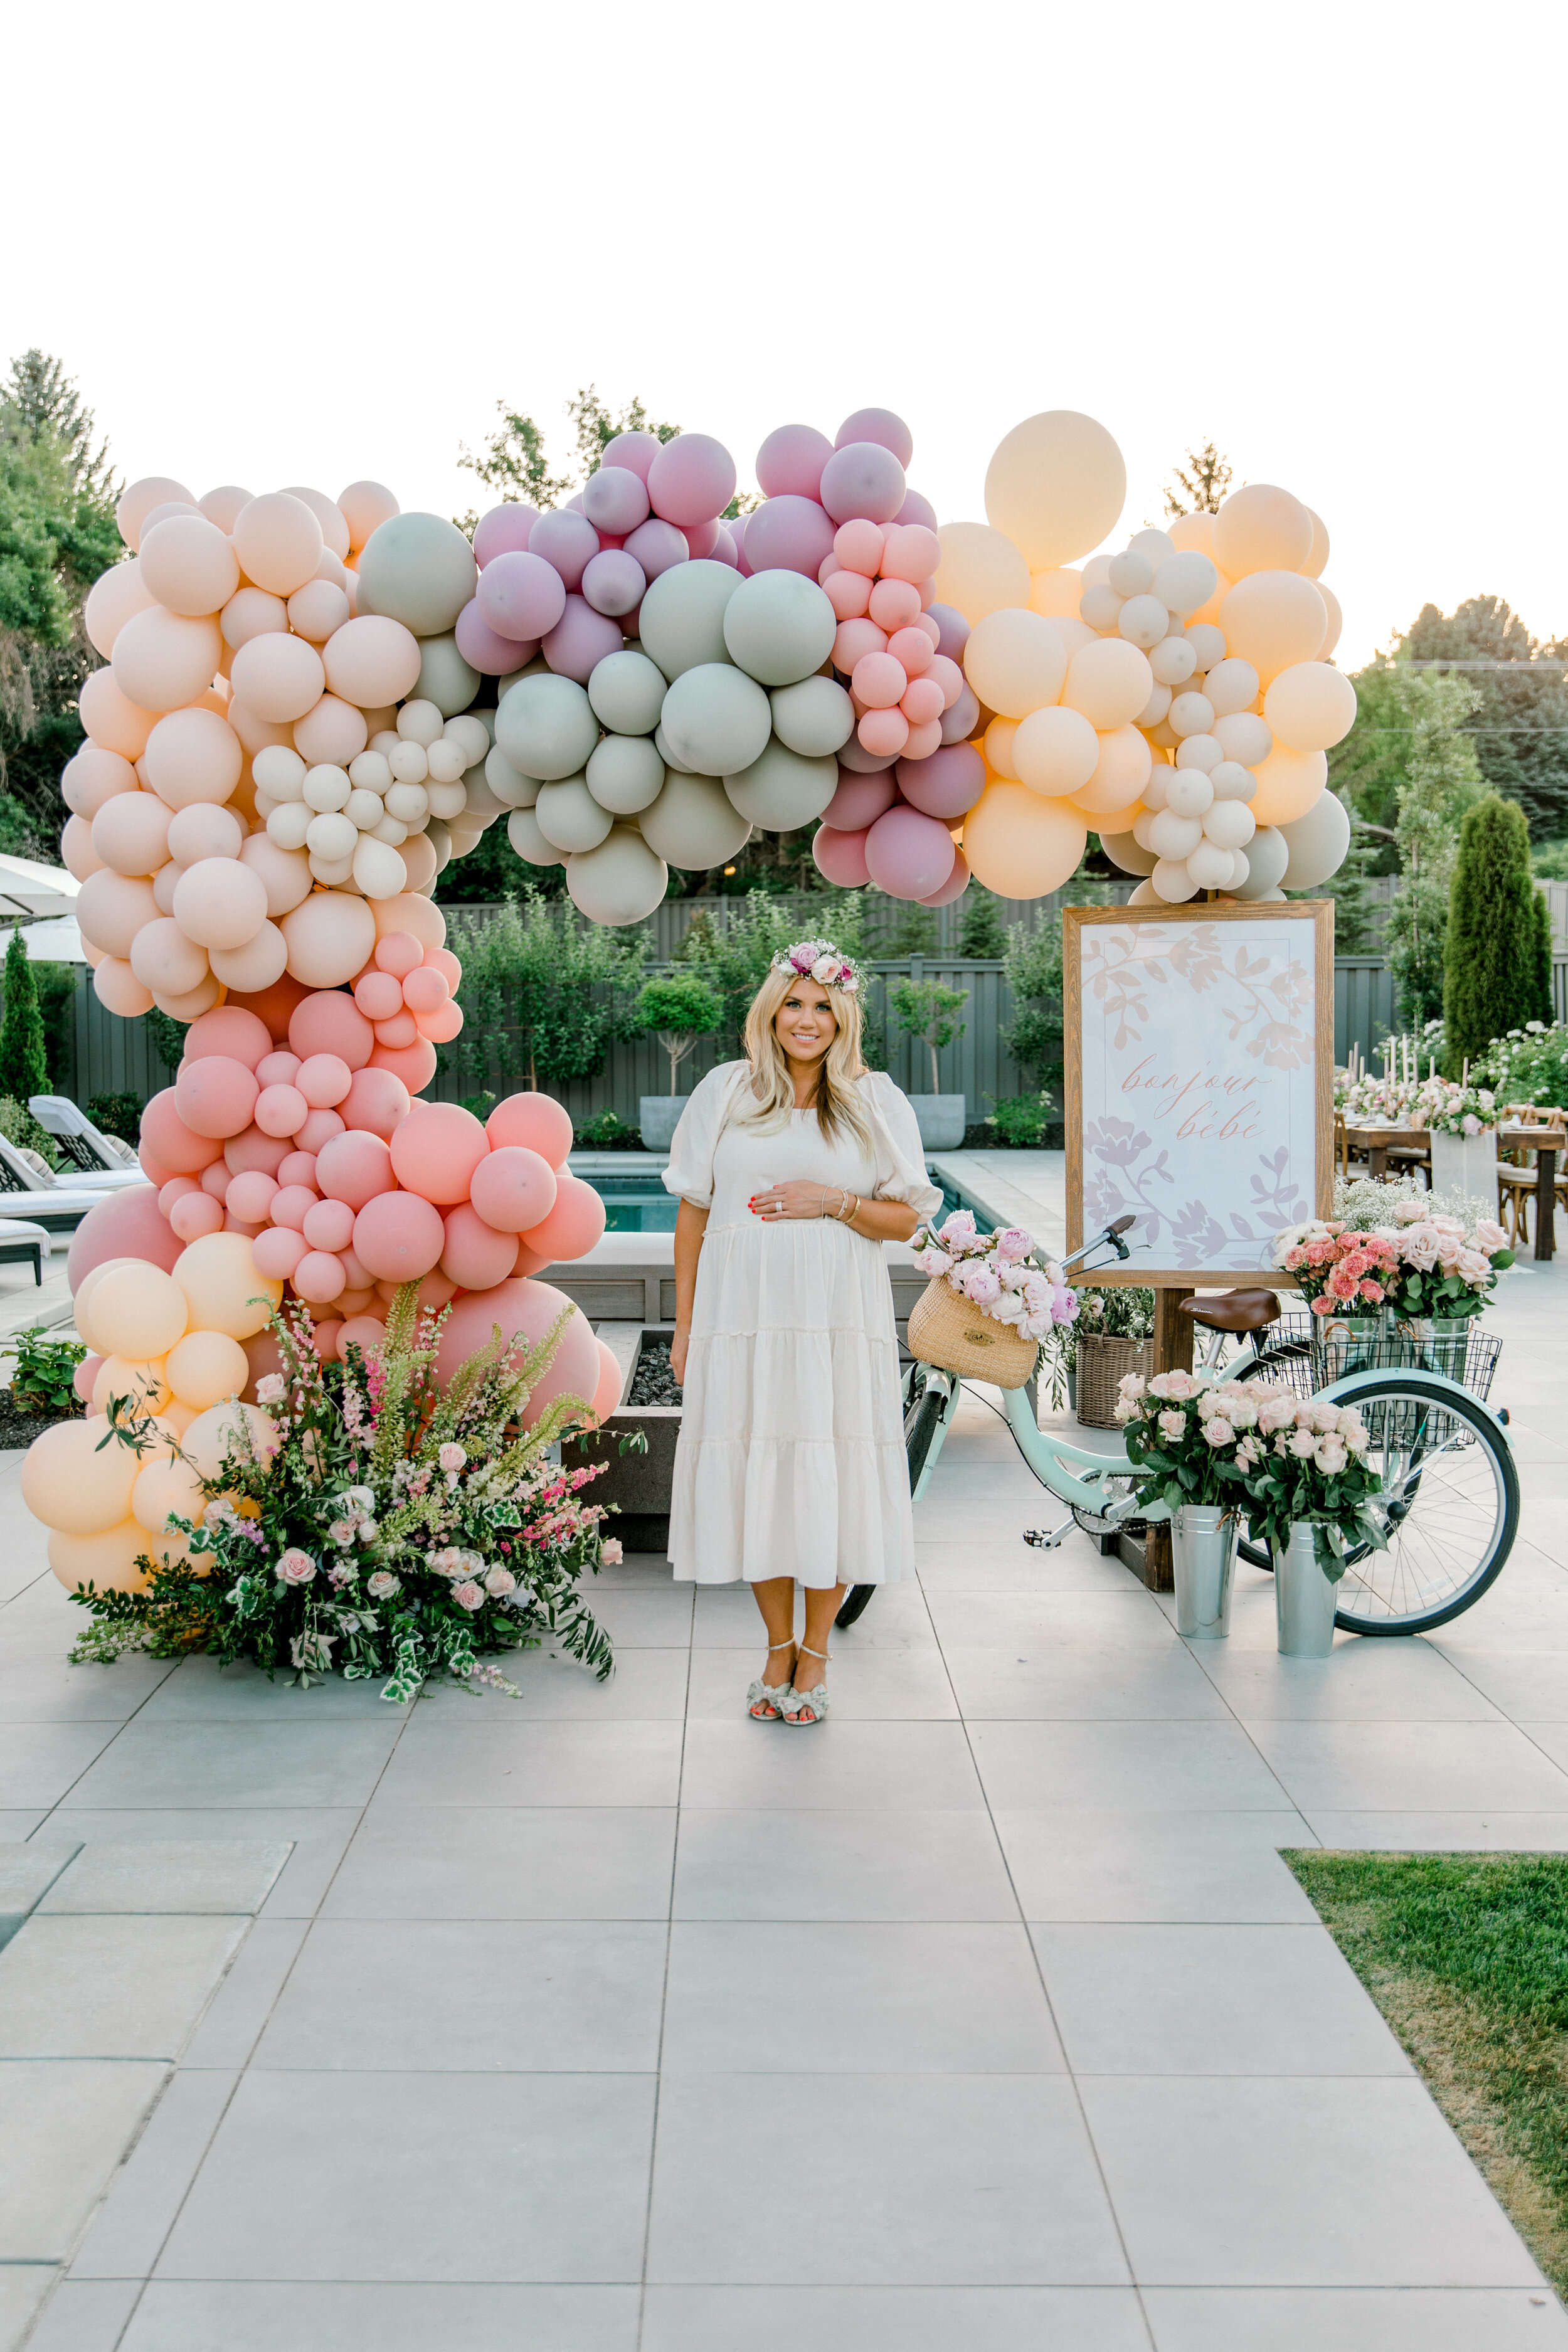
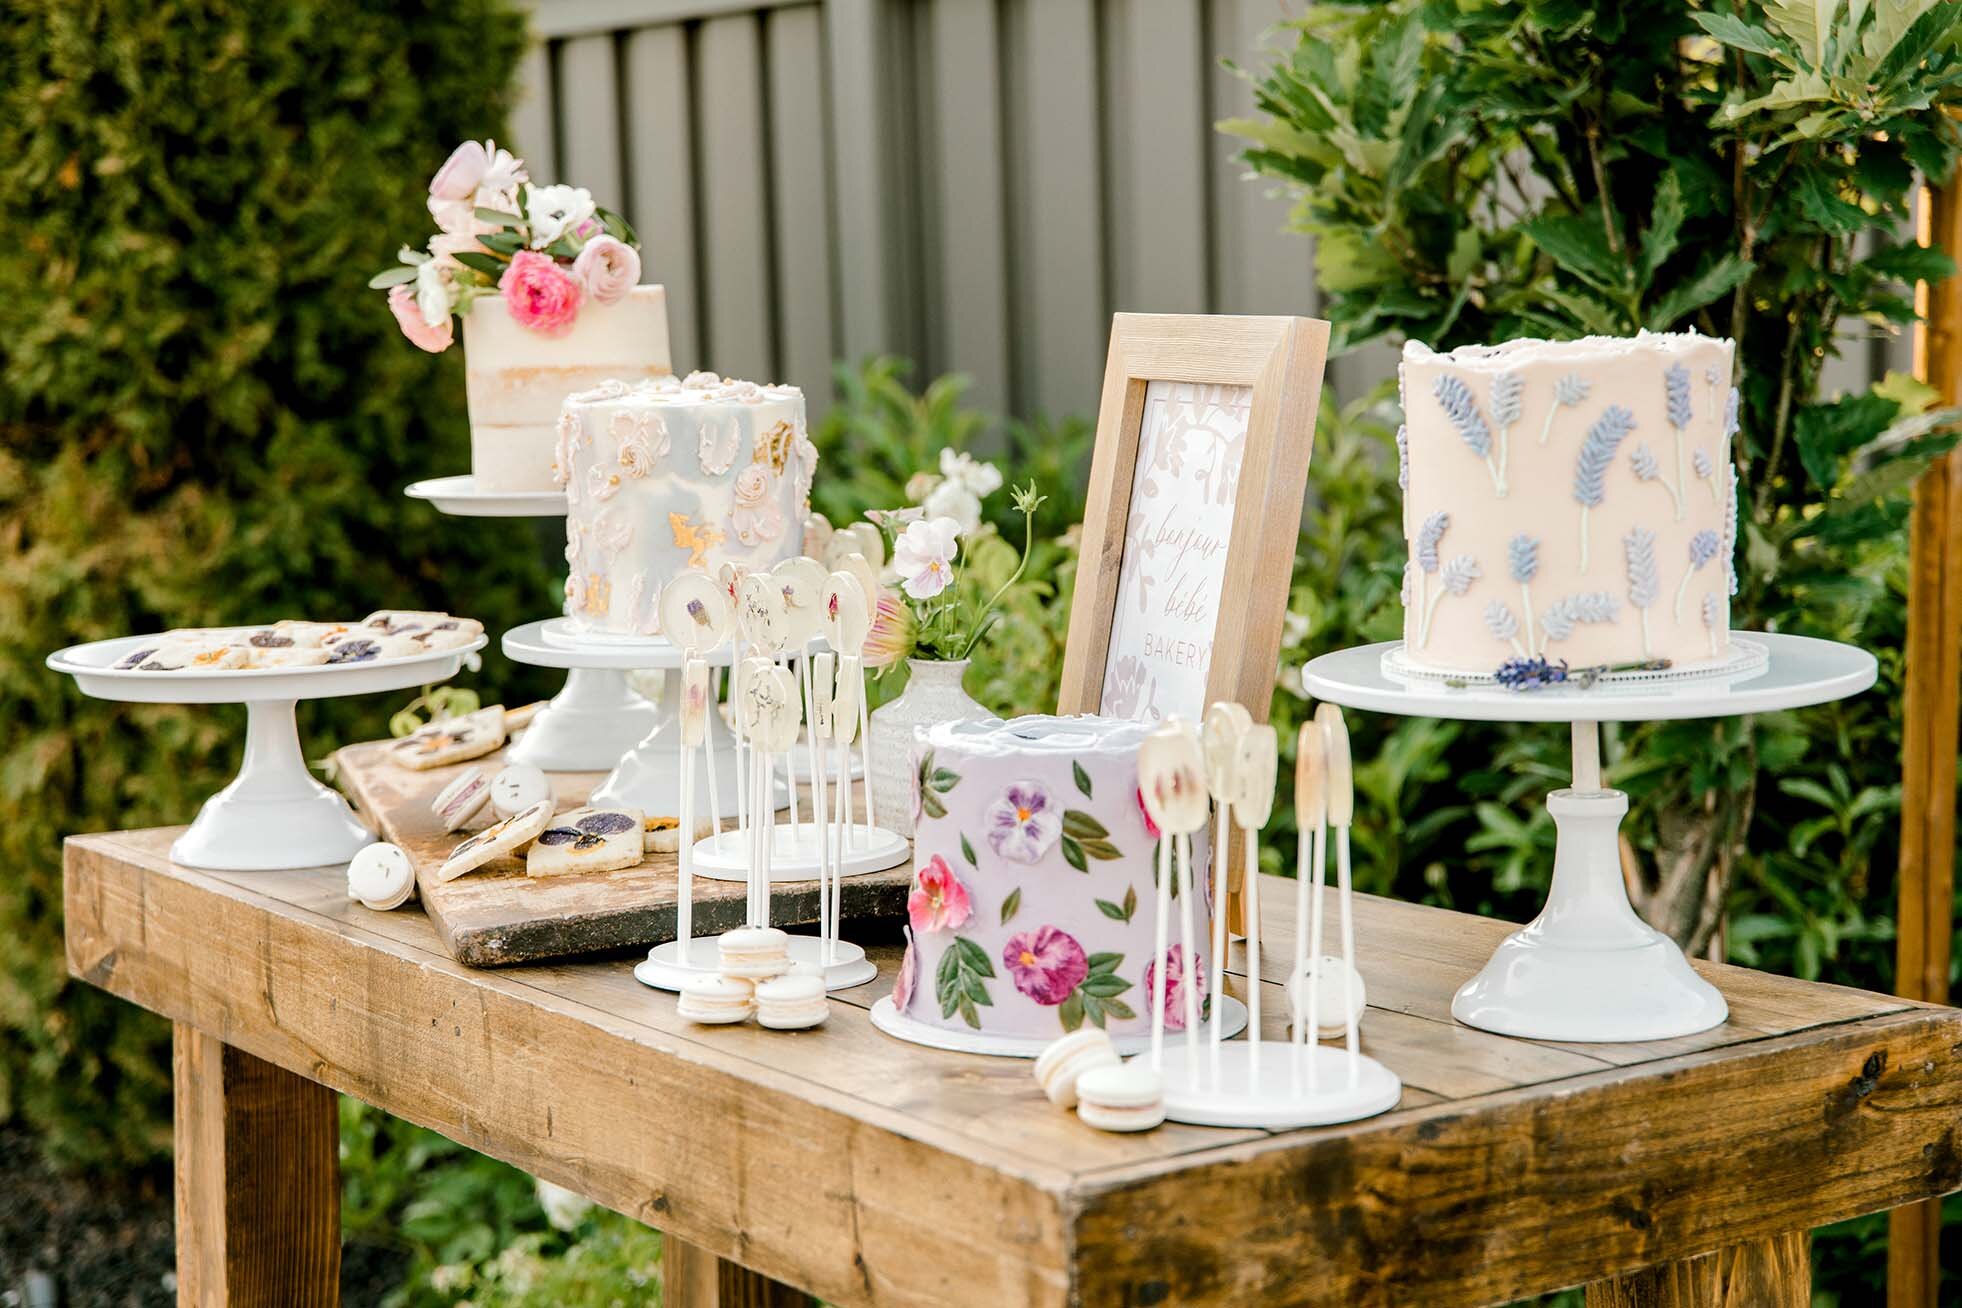
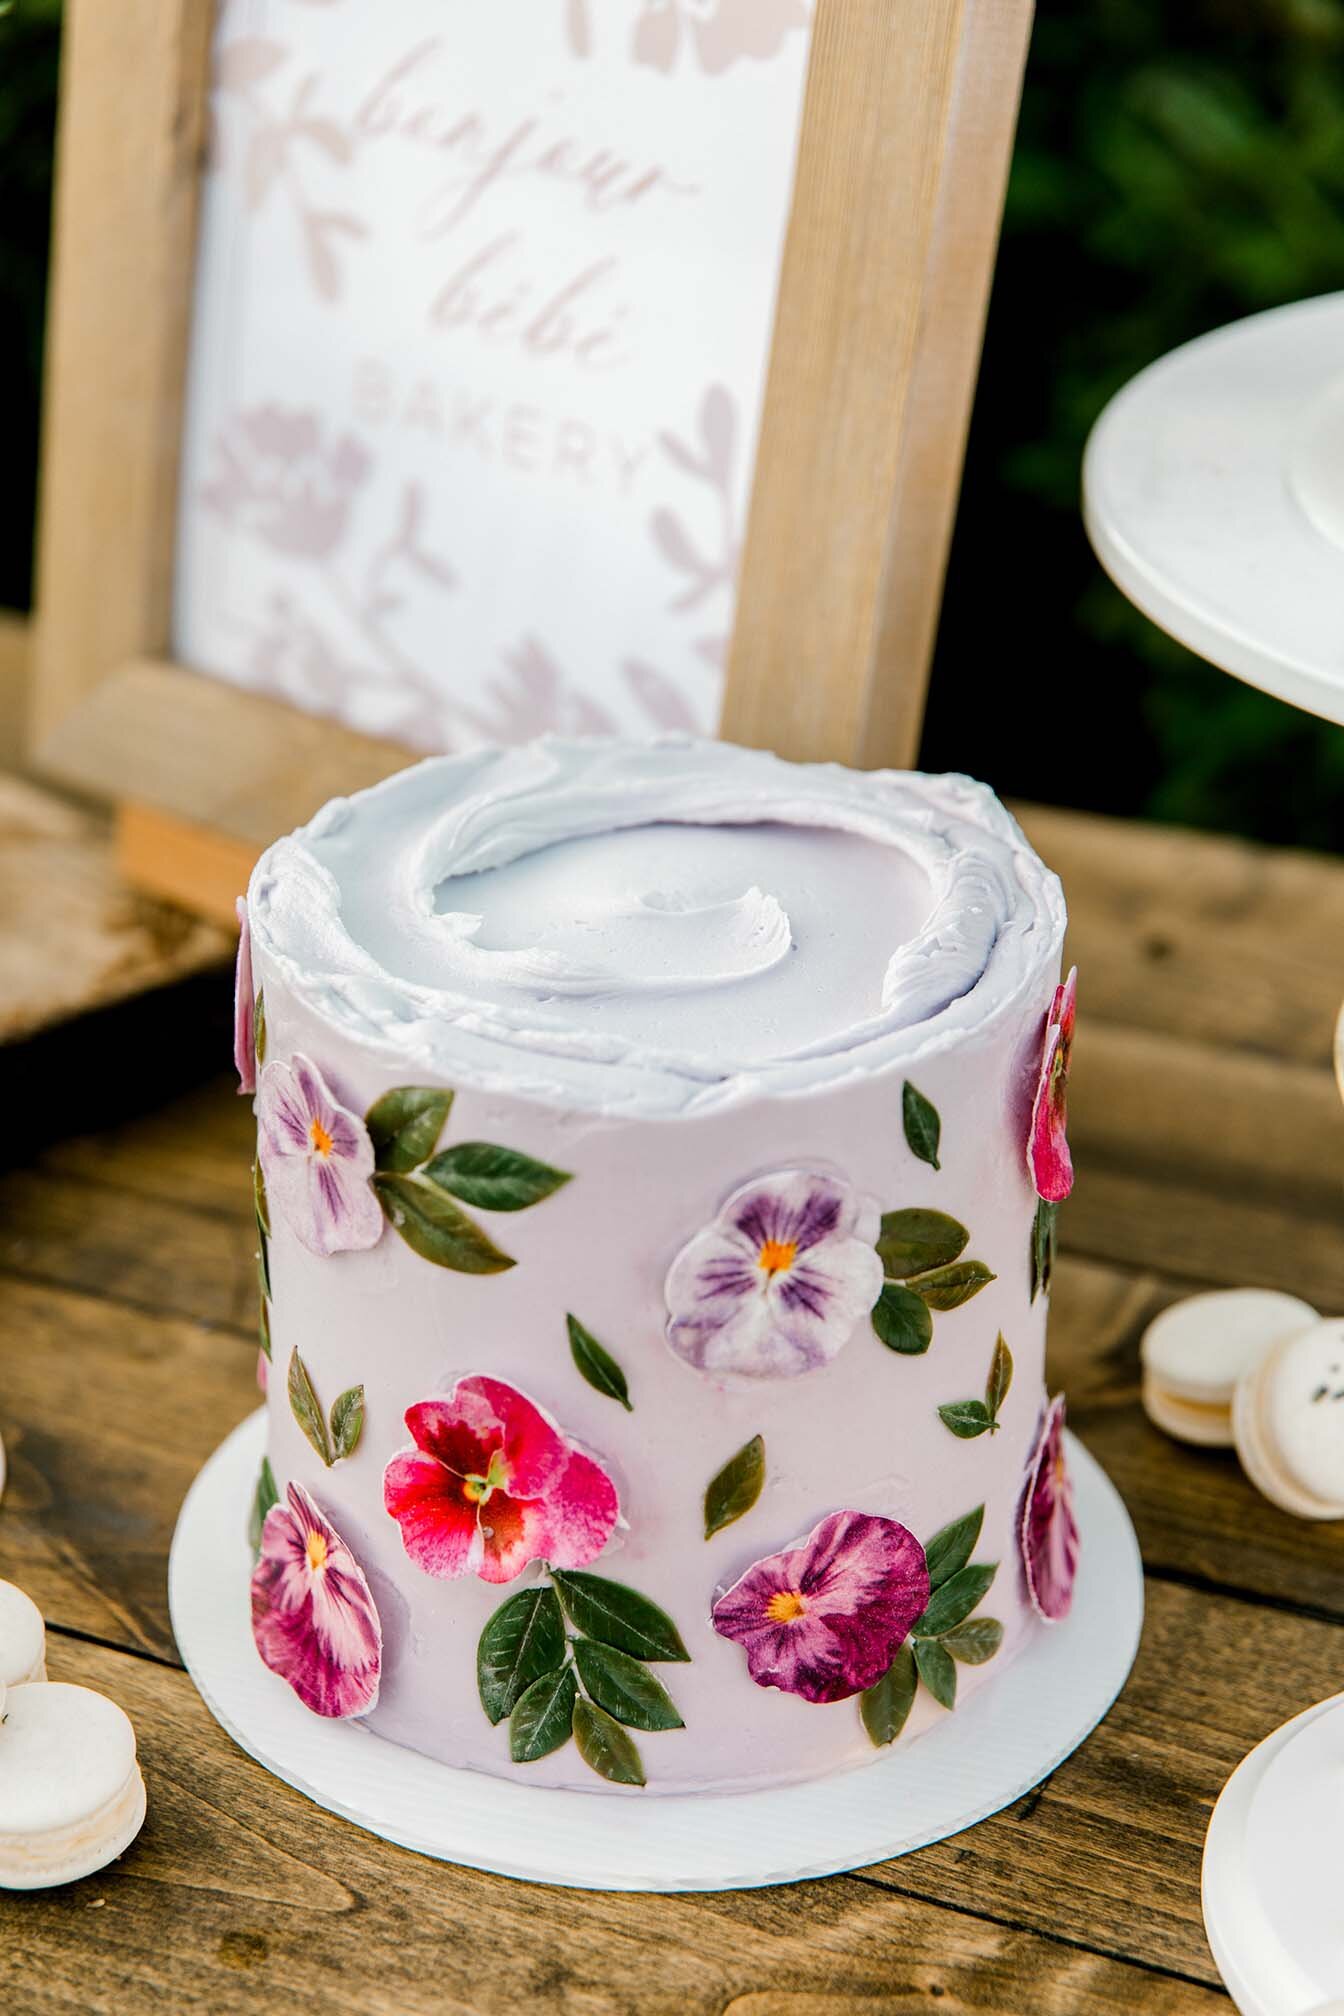
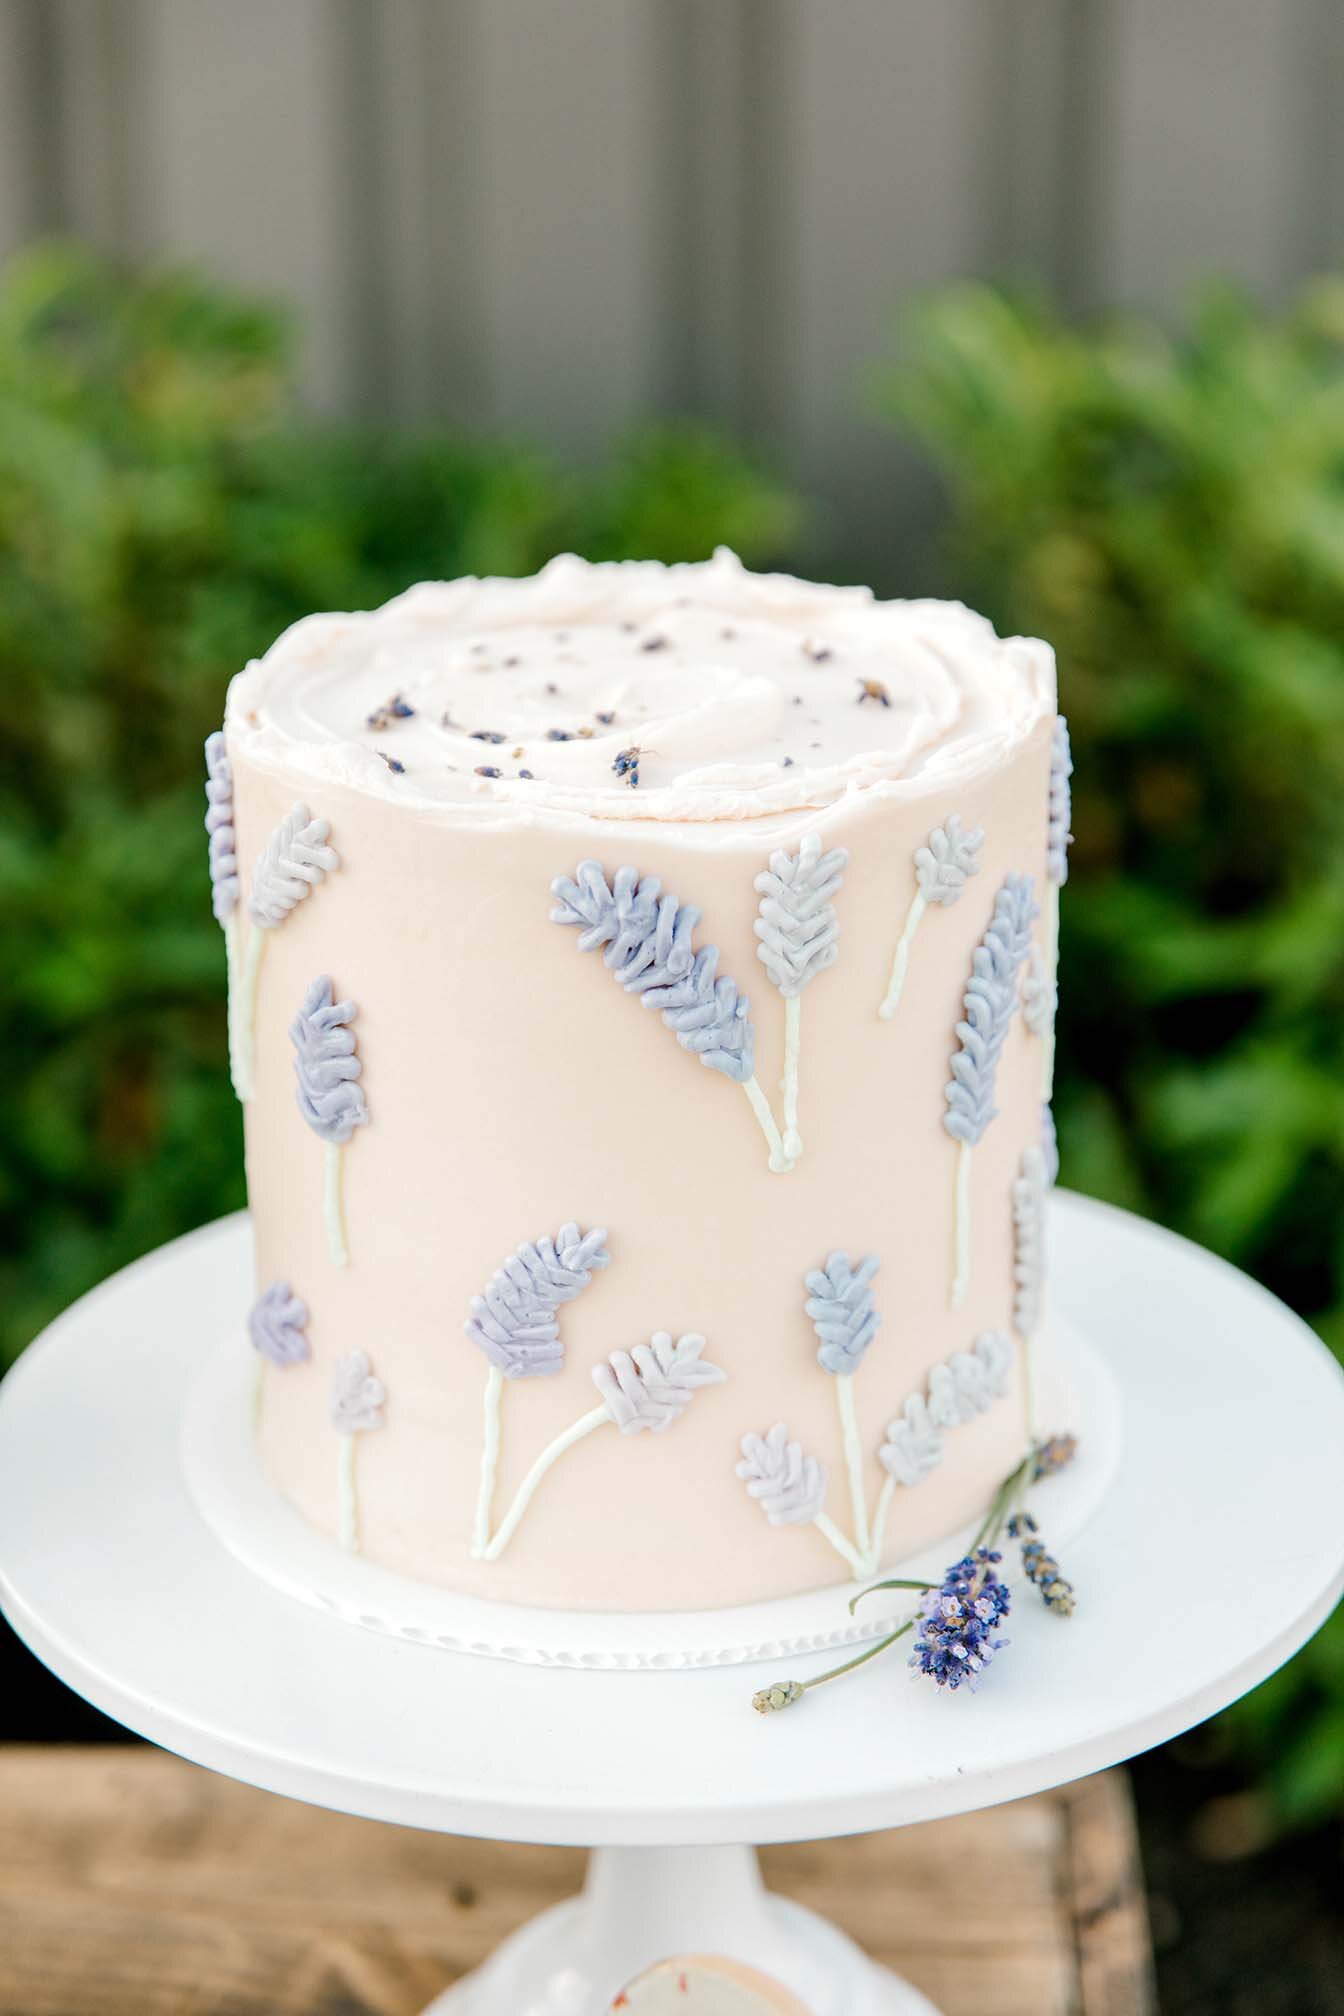
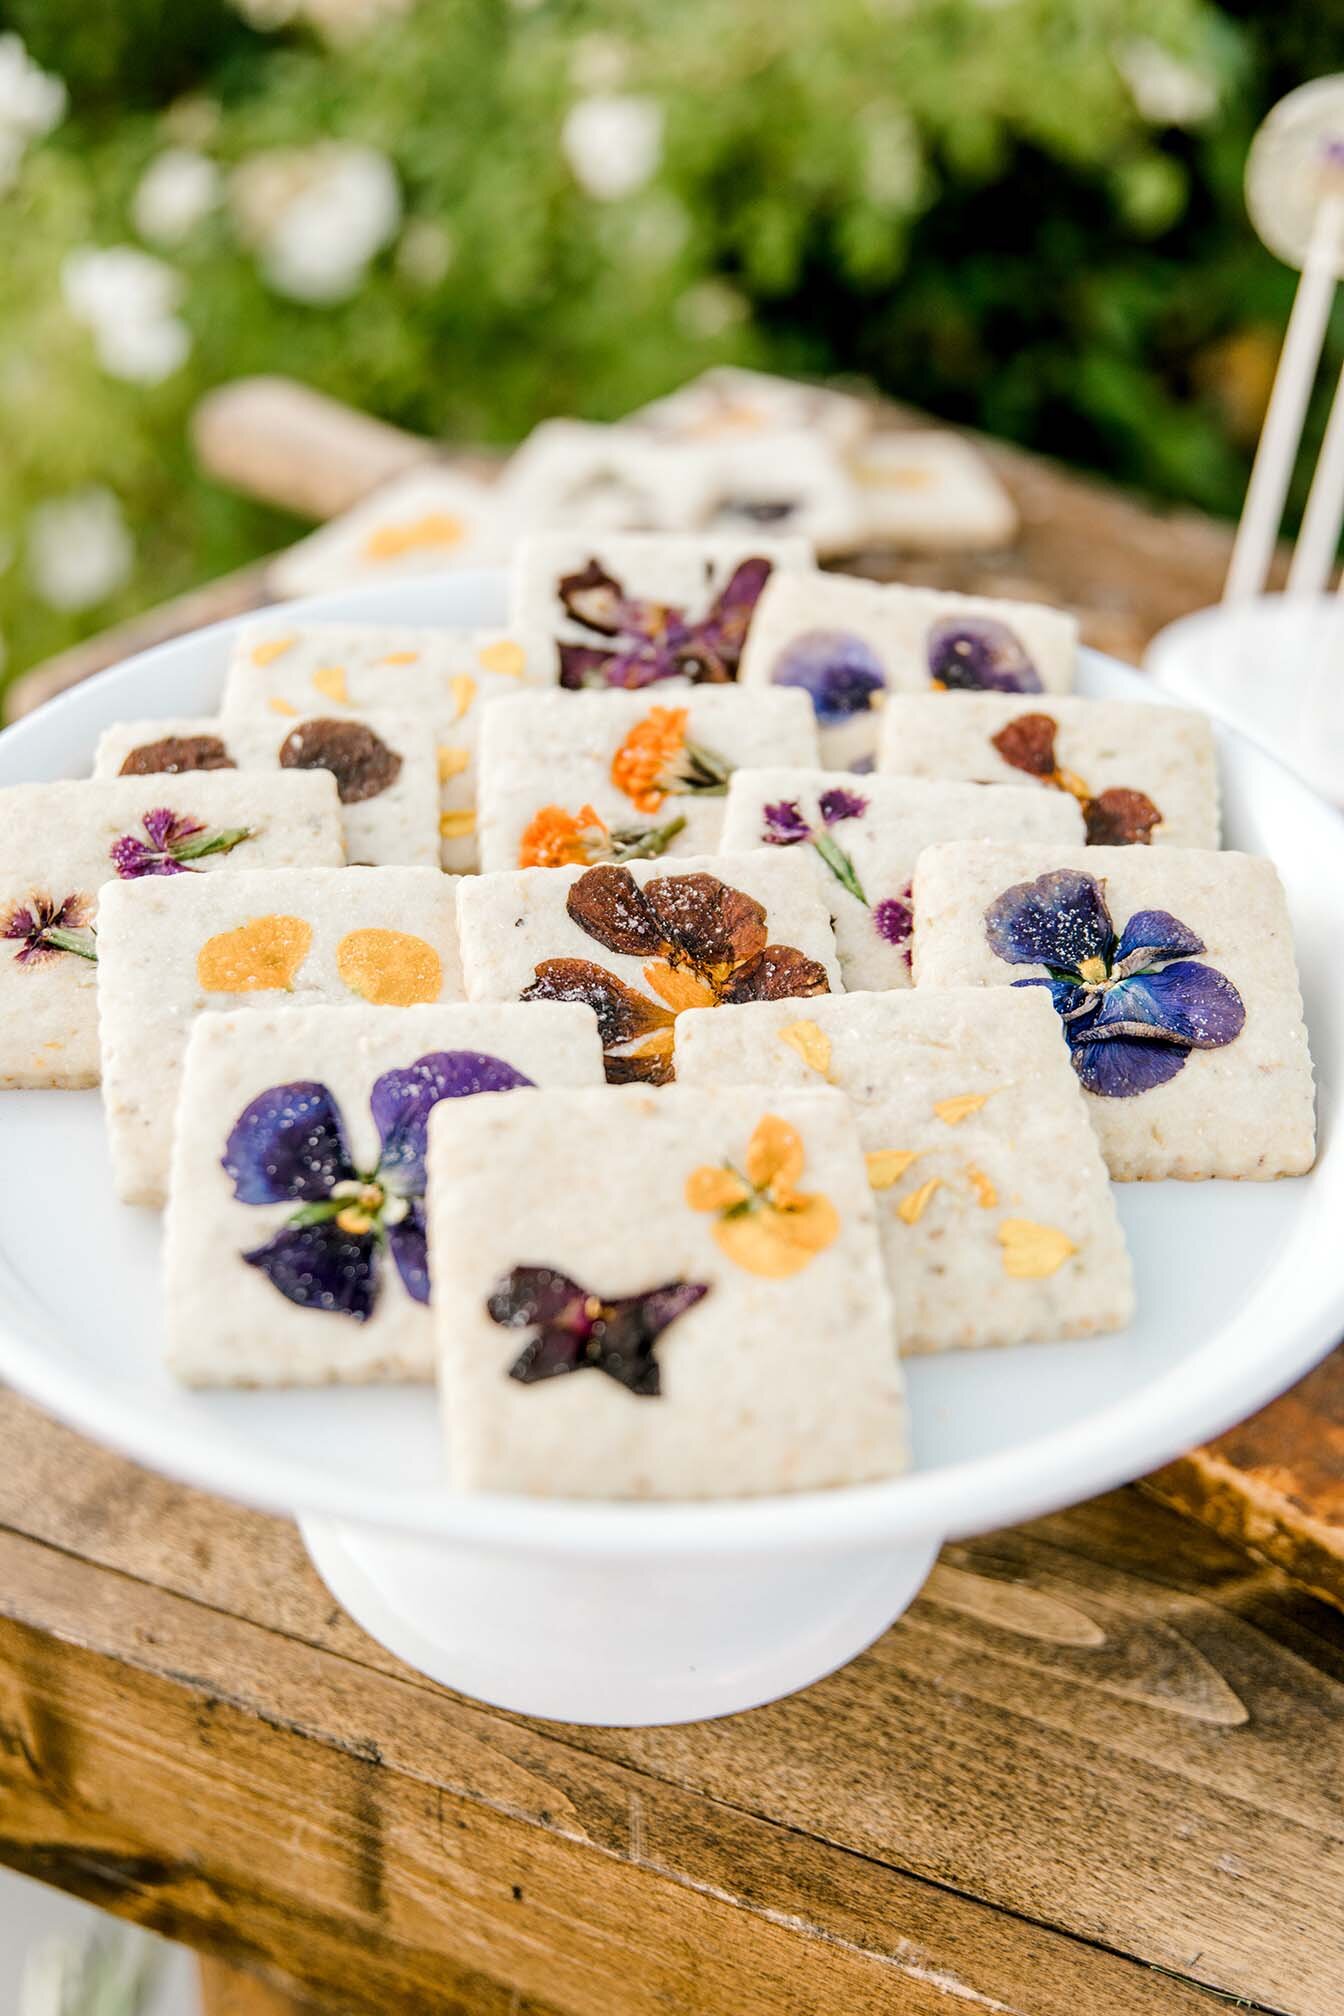
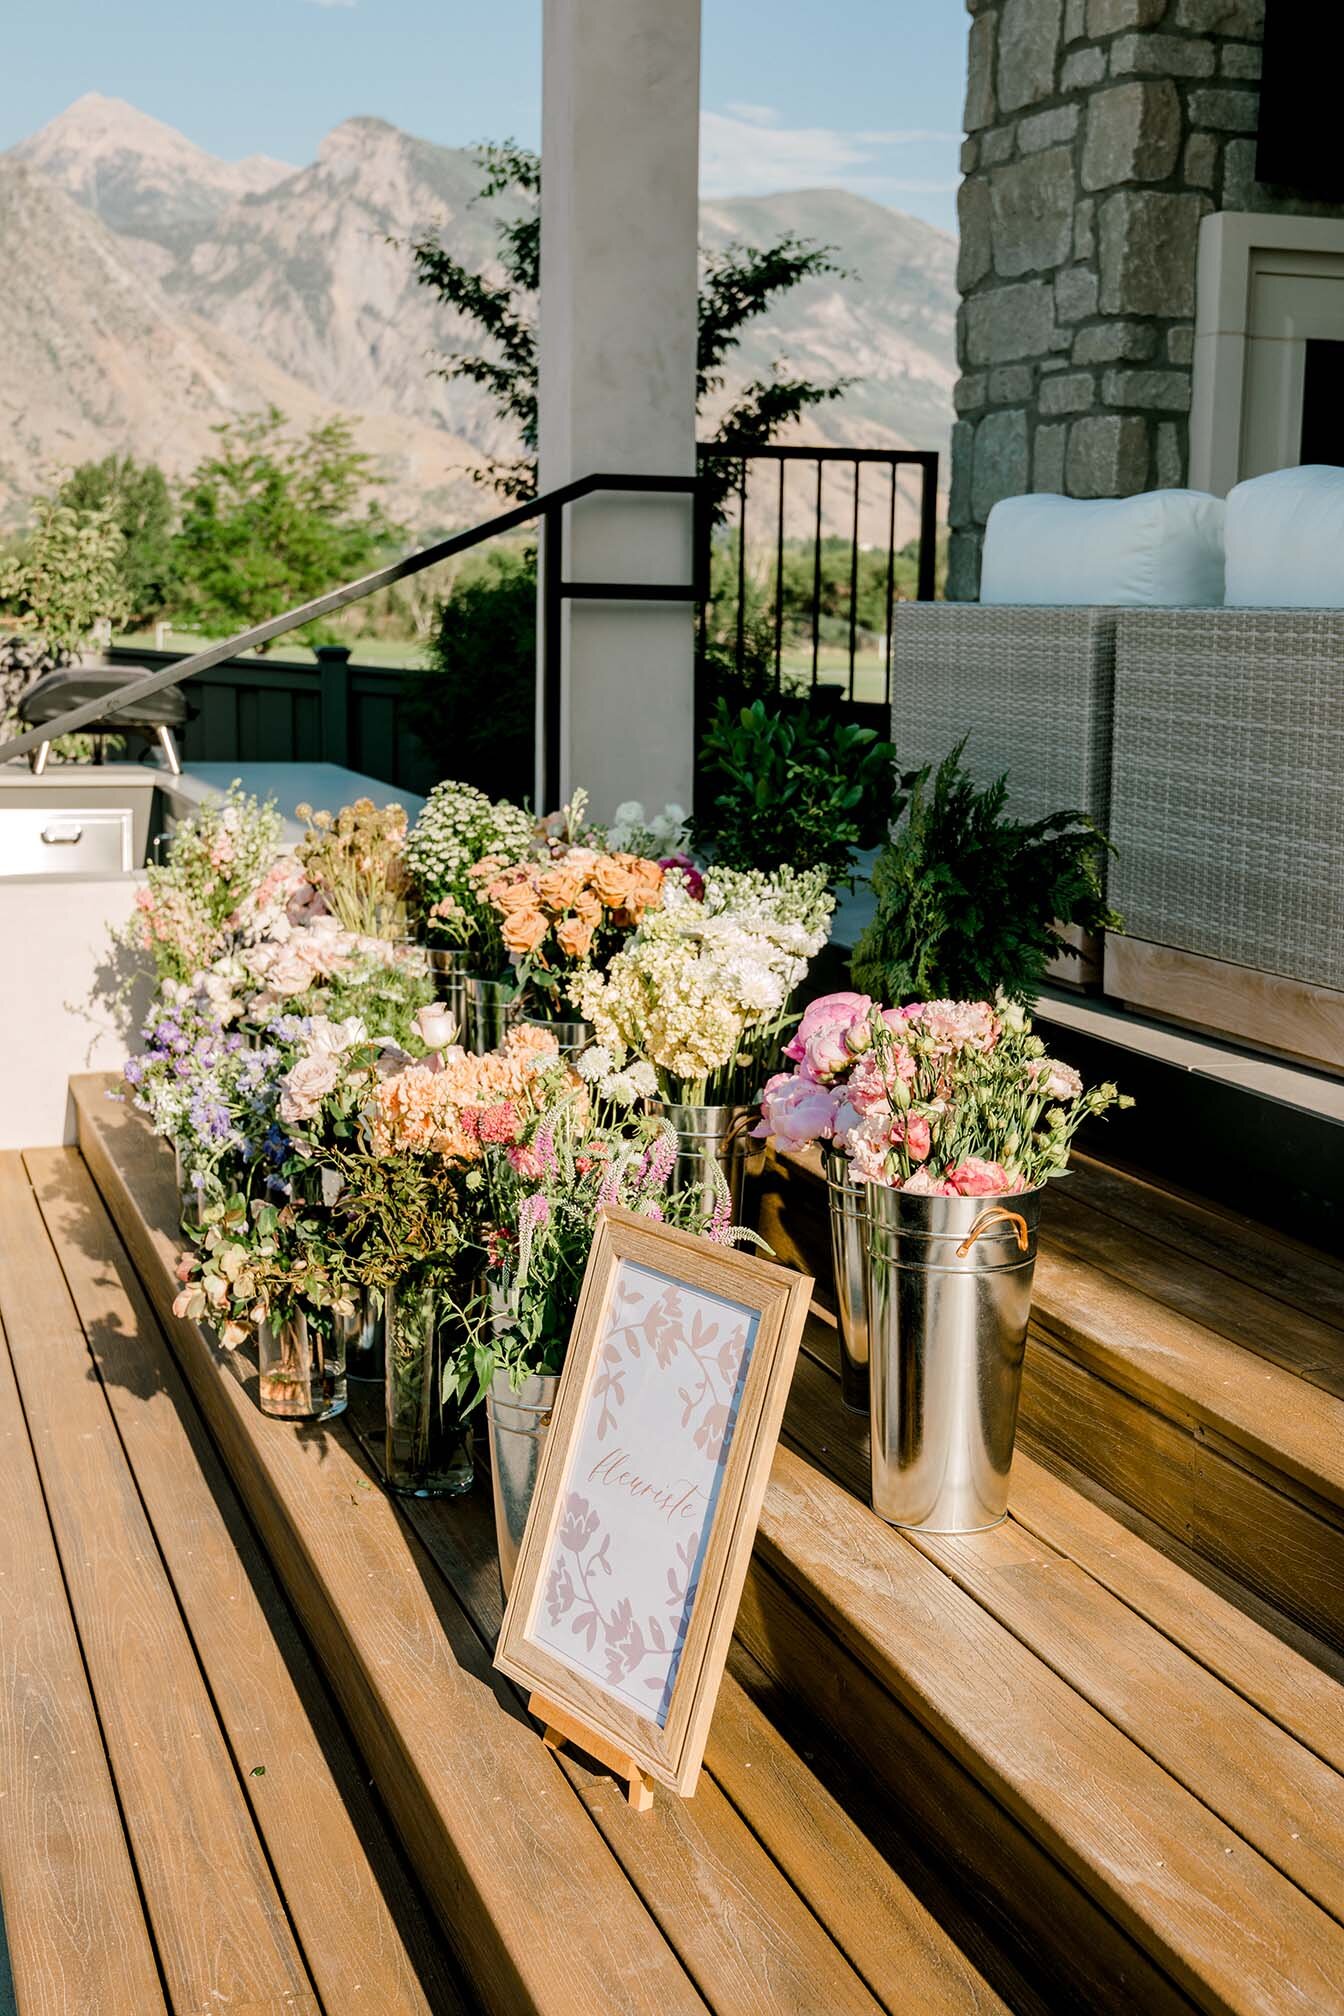
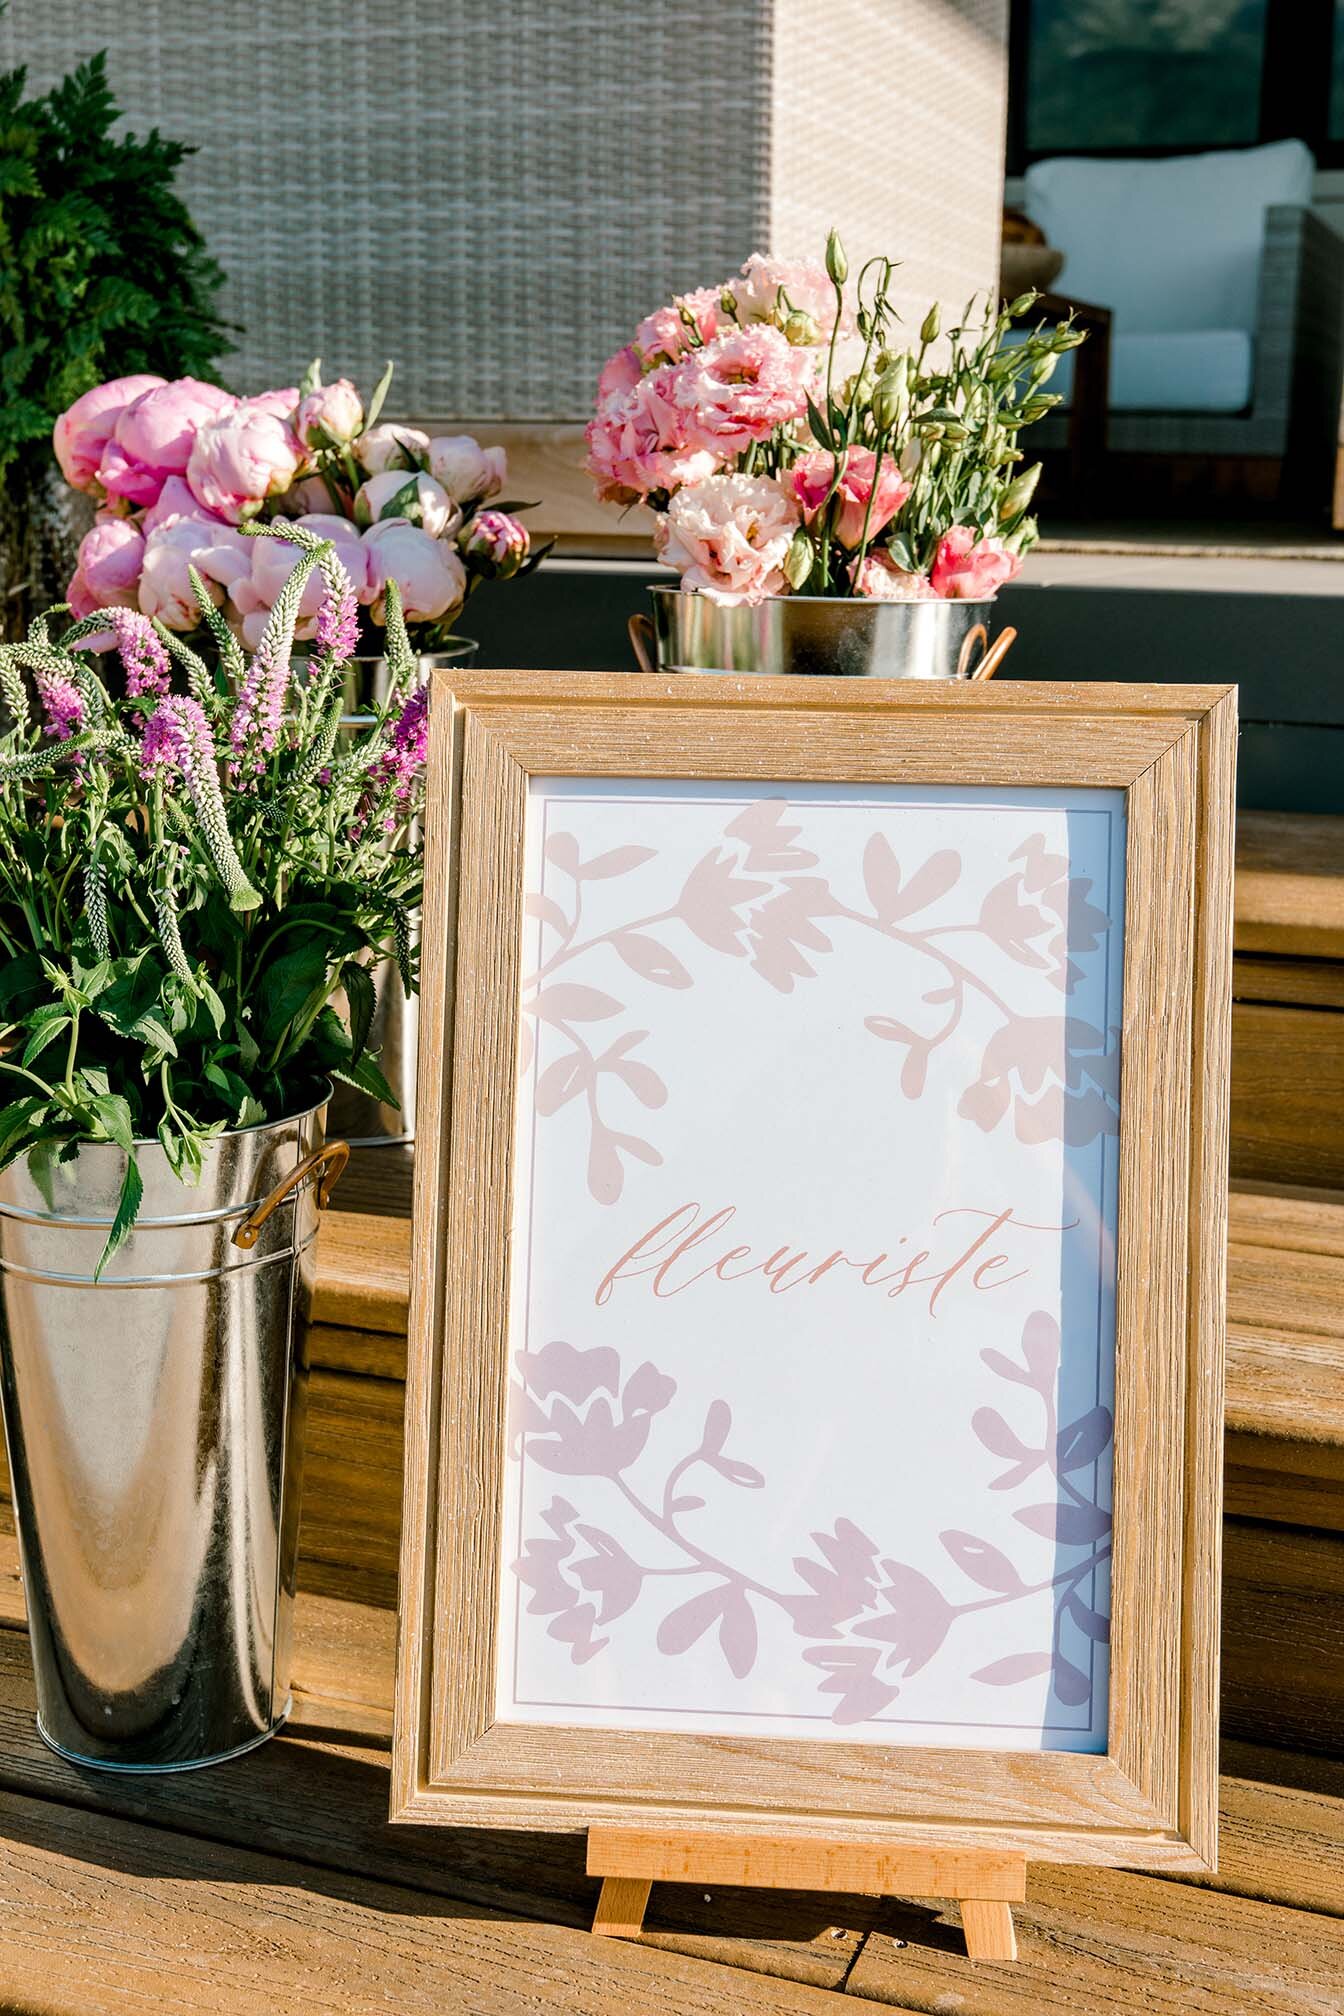
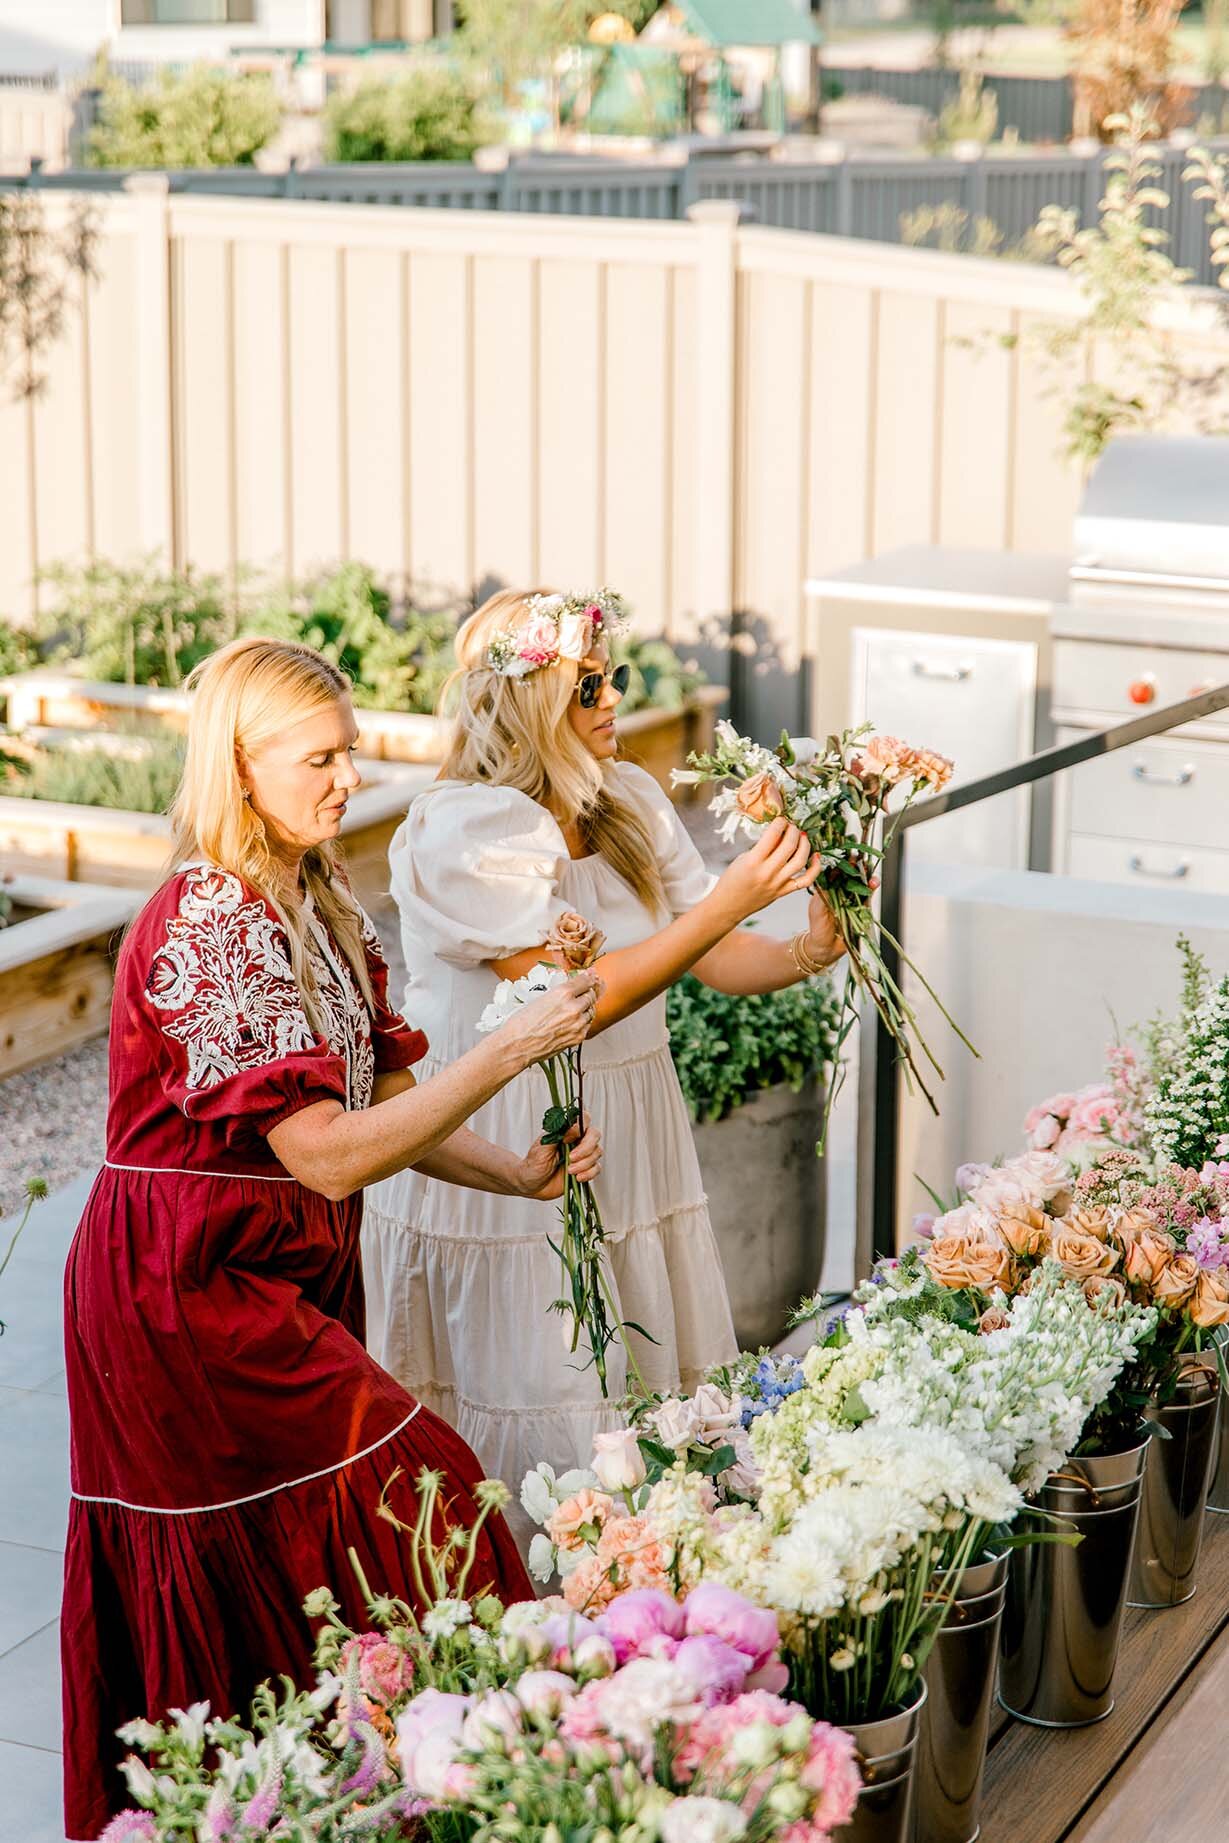
Bonjour bébé shower
All the details from the special baby shower for Shea McGee from Studio McGee right this way!

So I have this thing with intimate soirées…
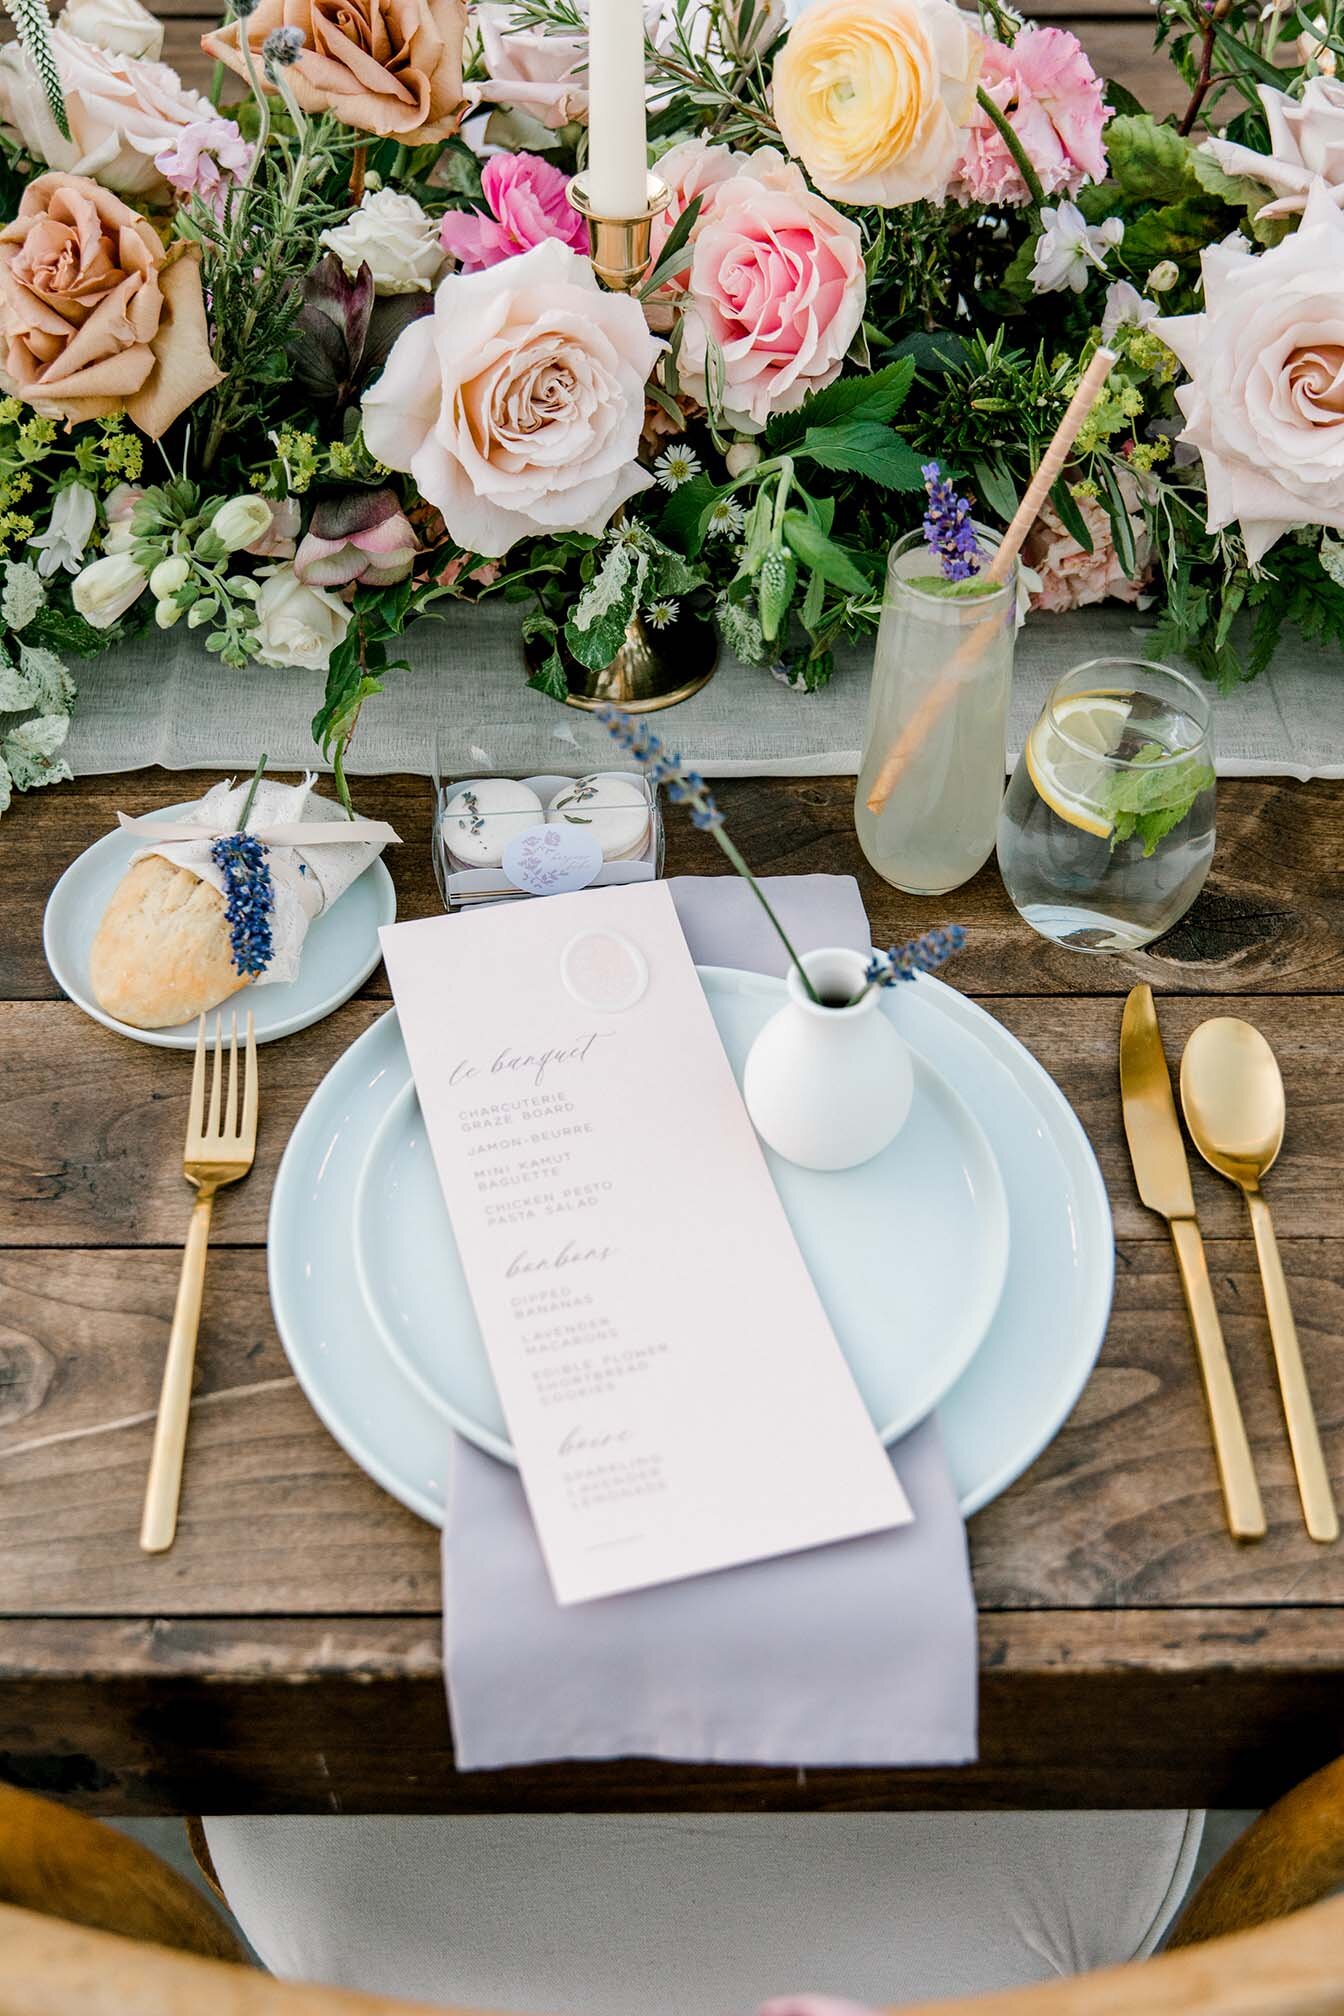
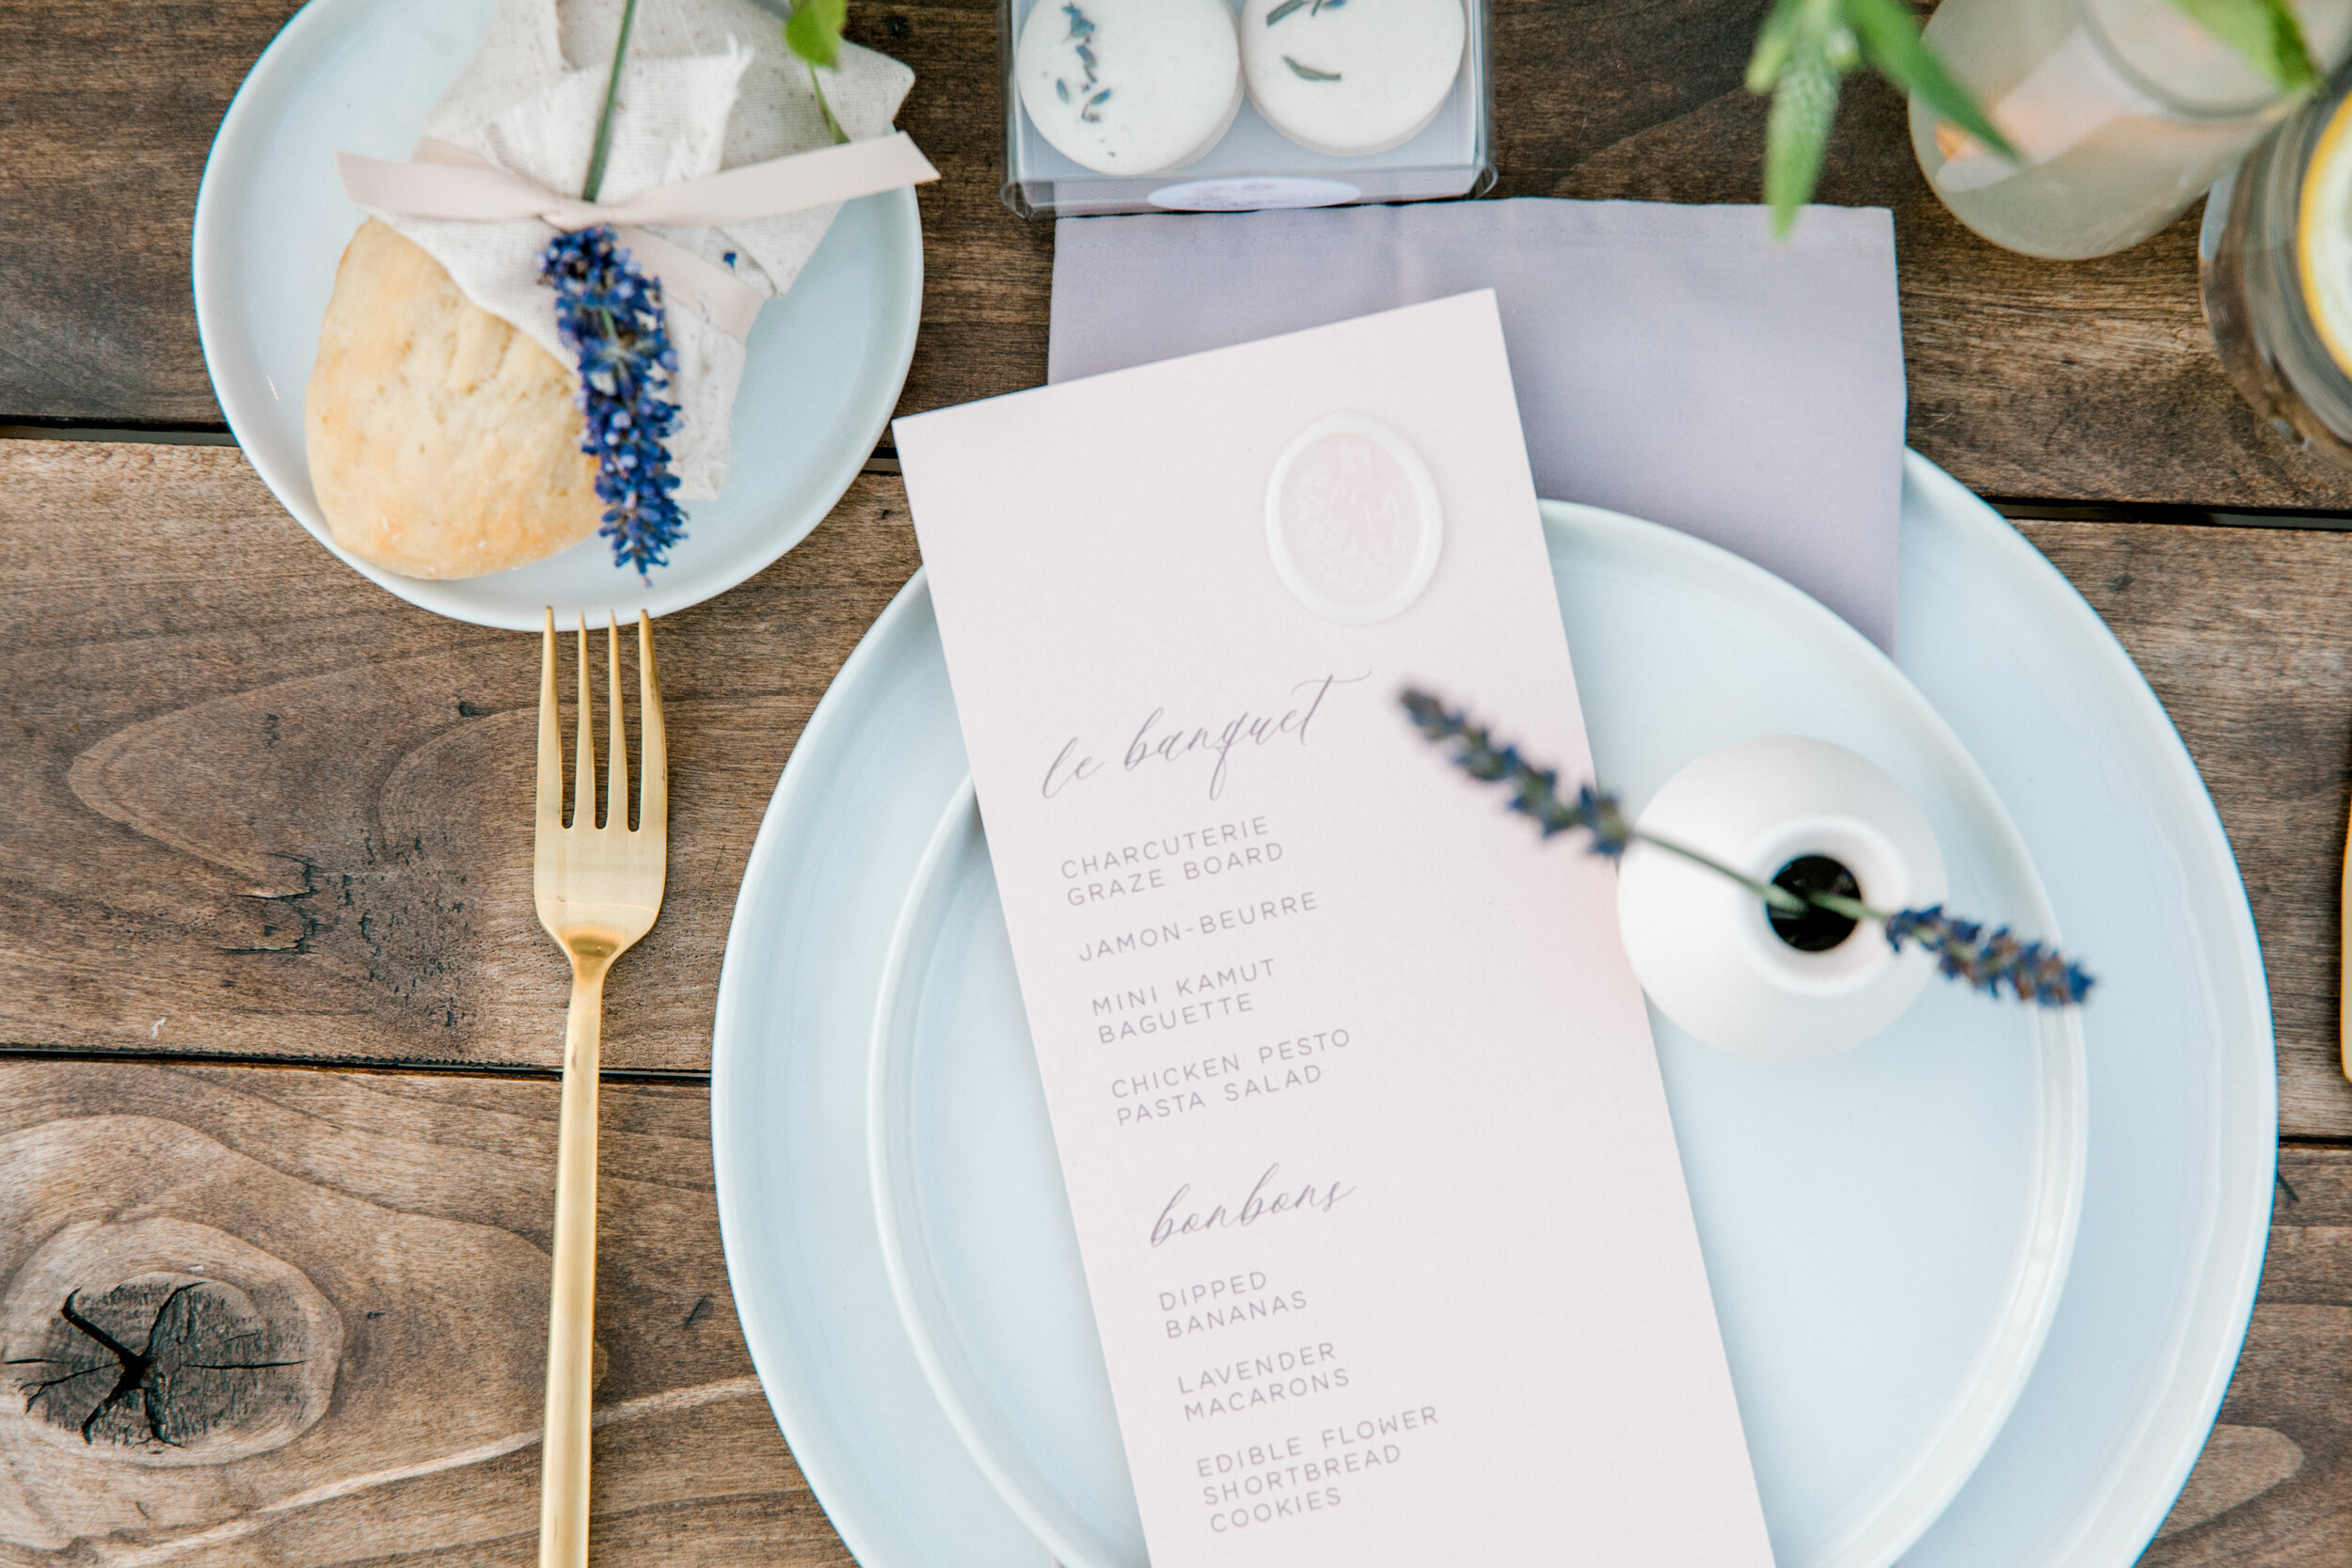
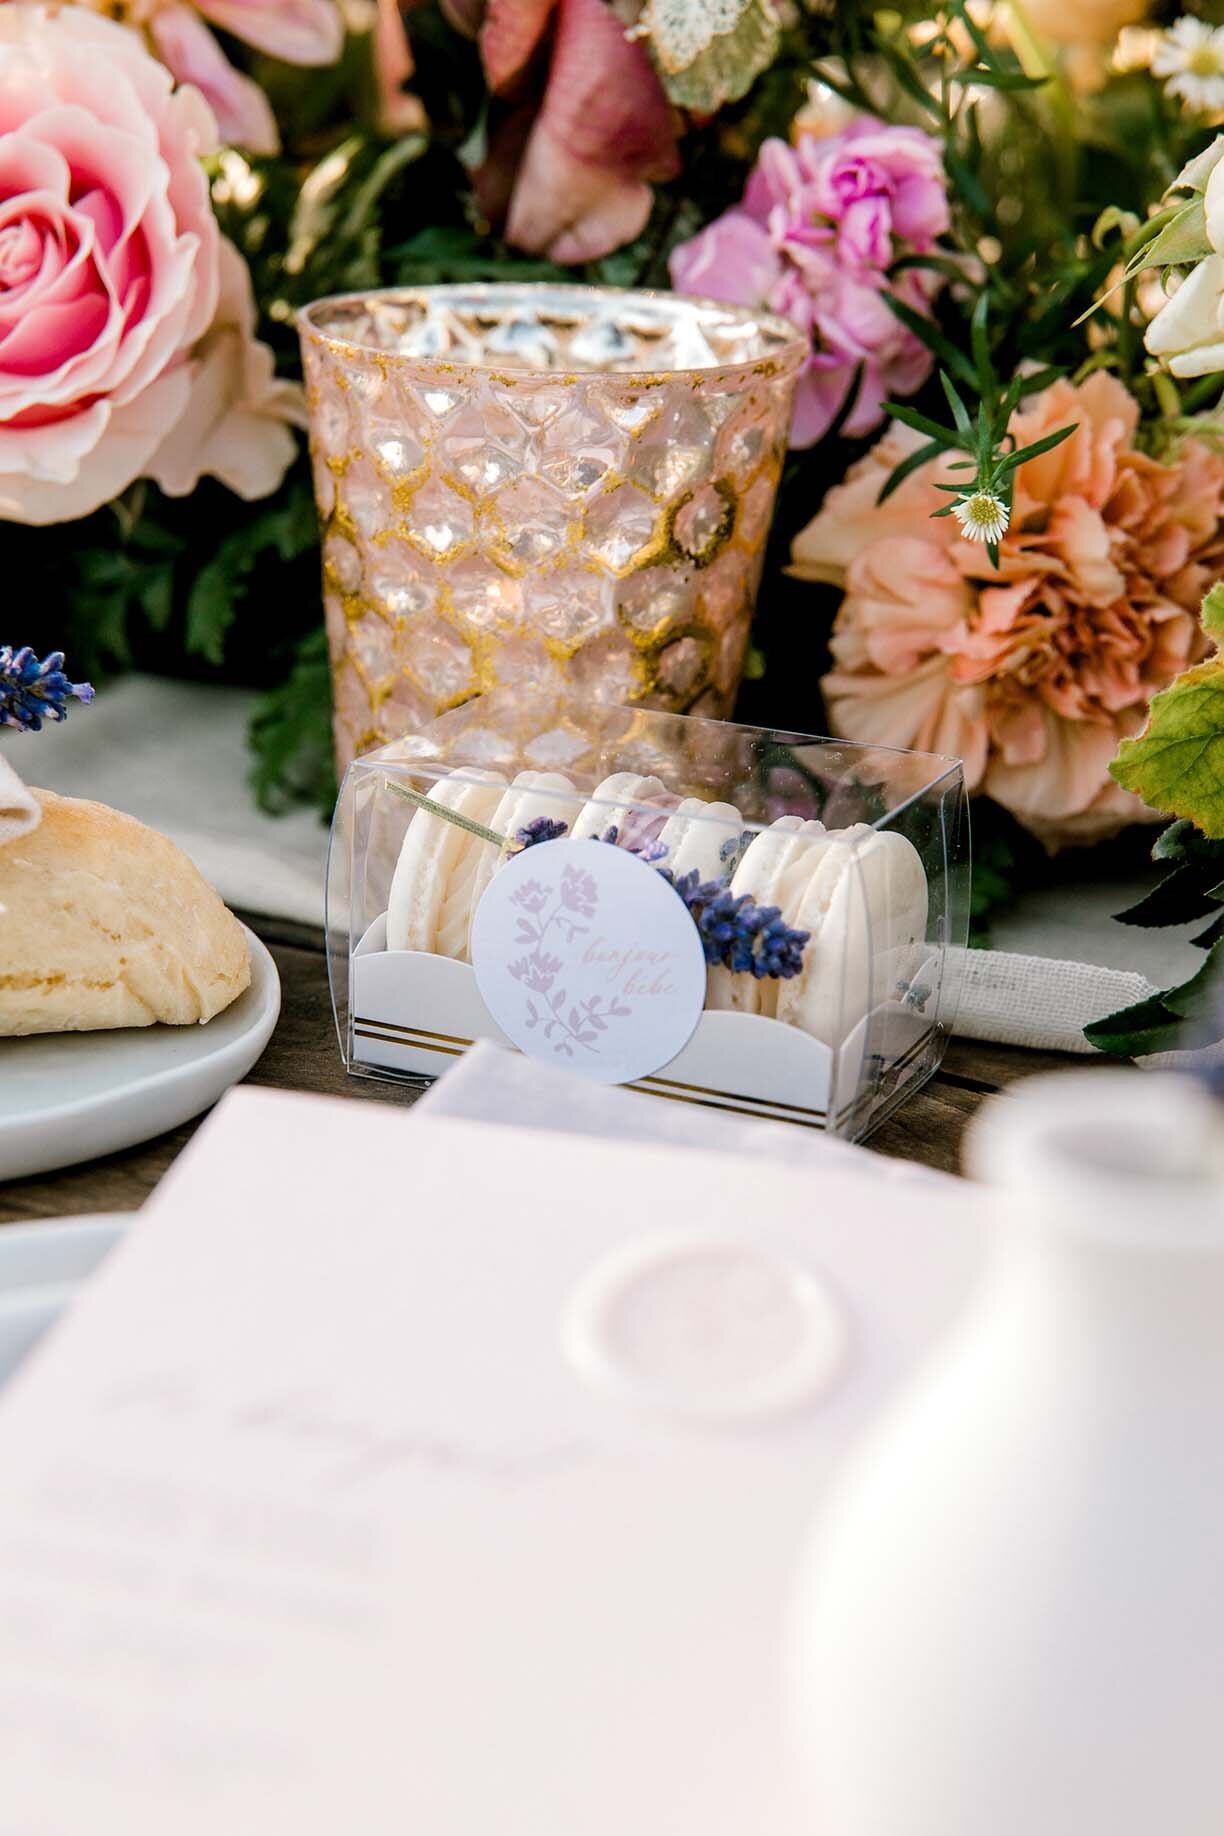
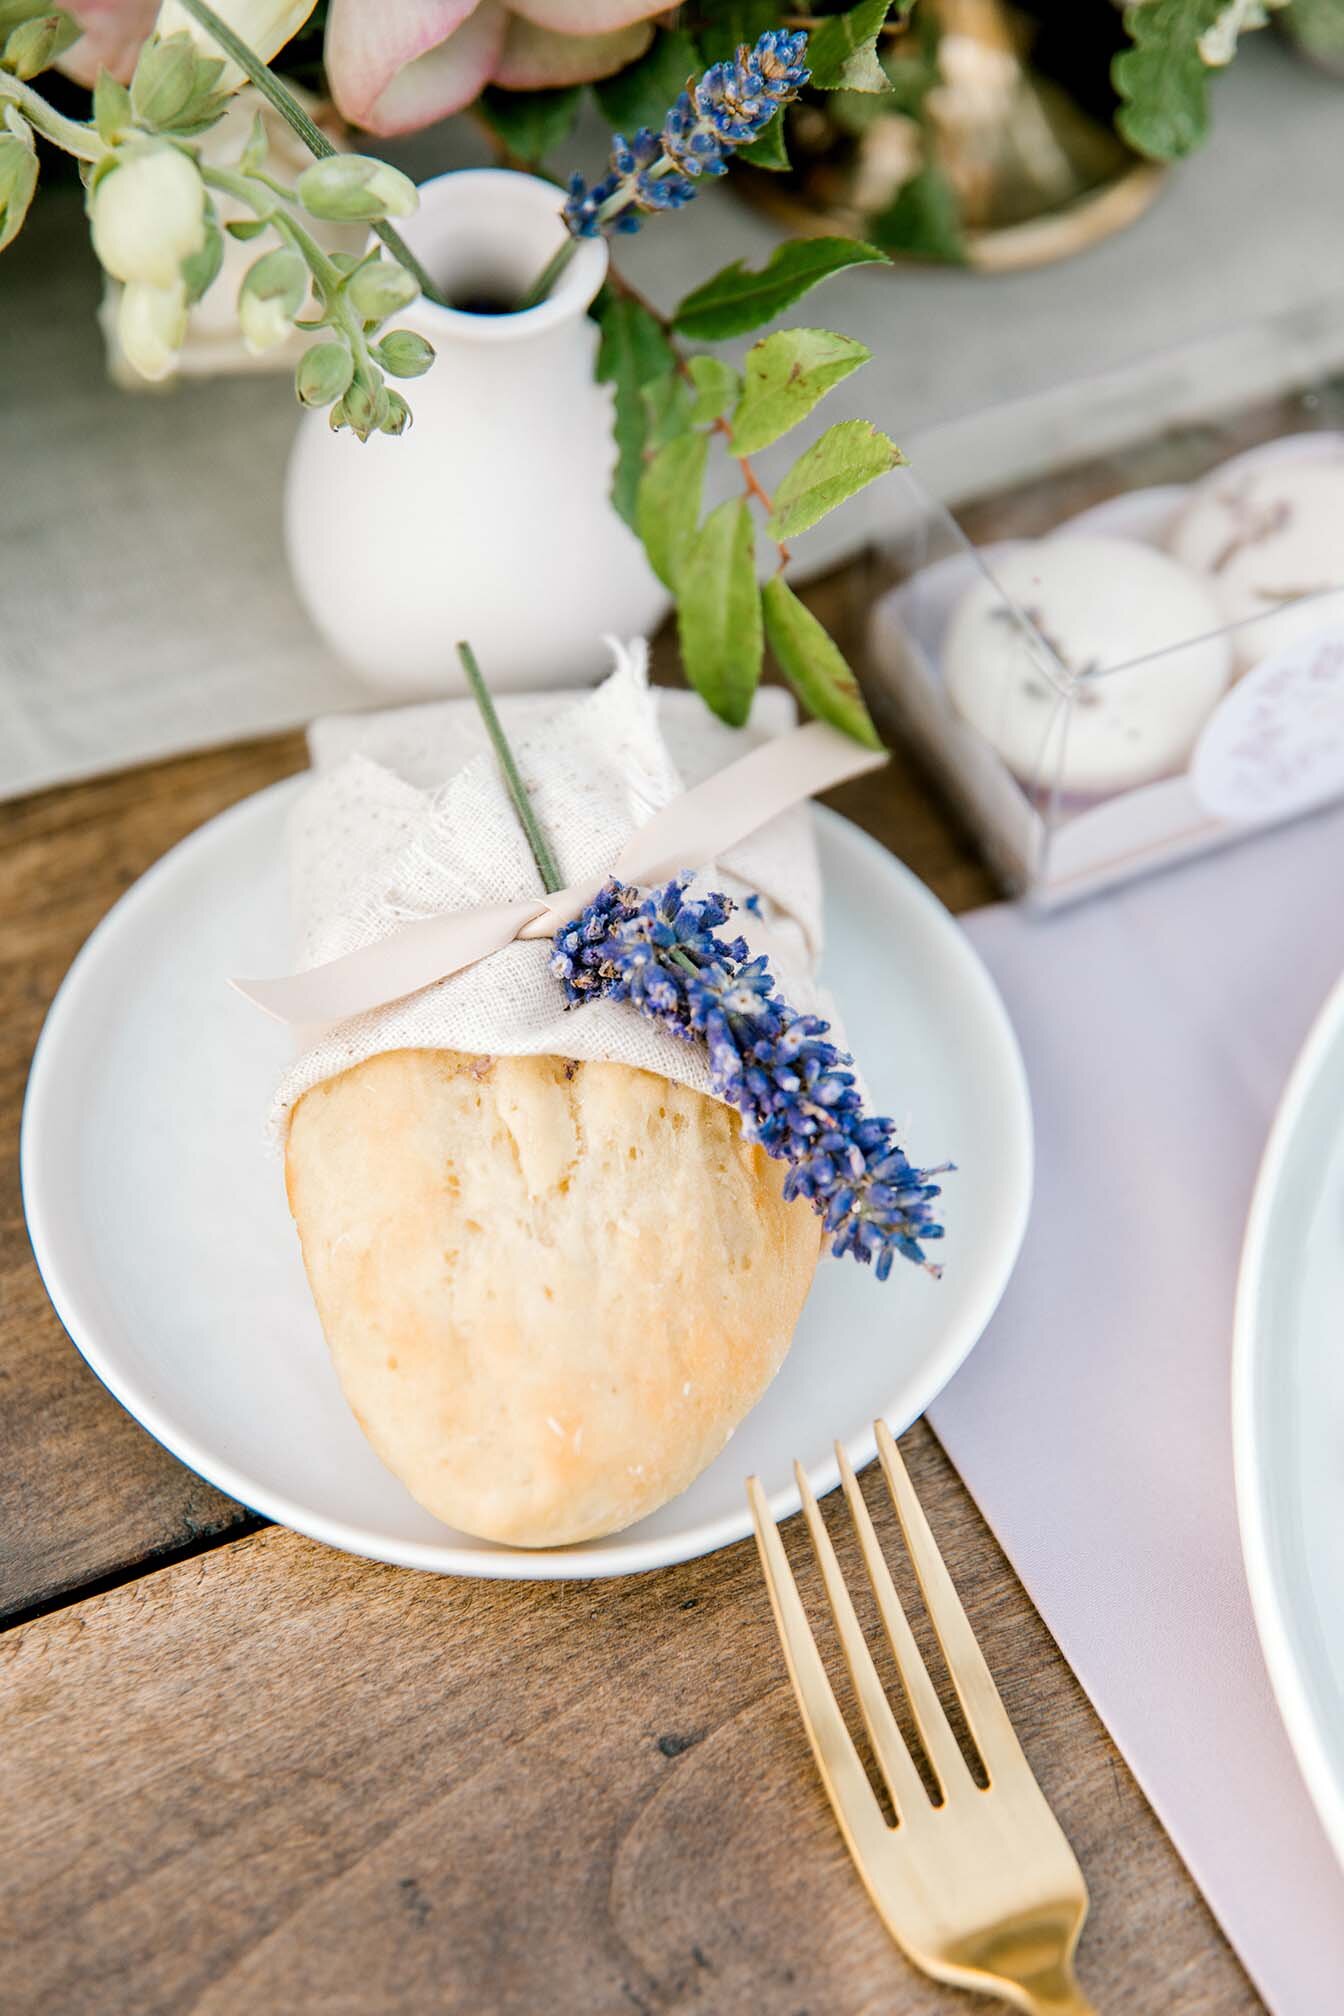
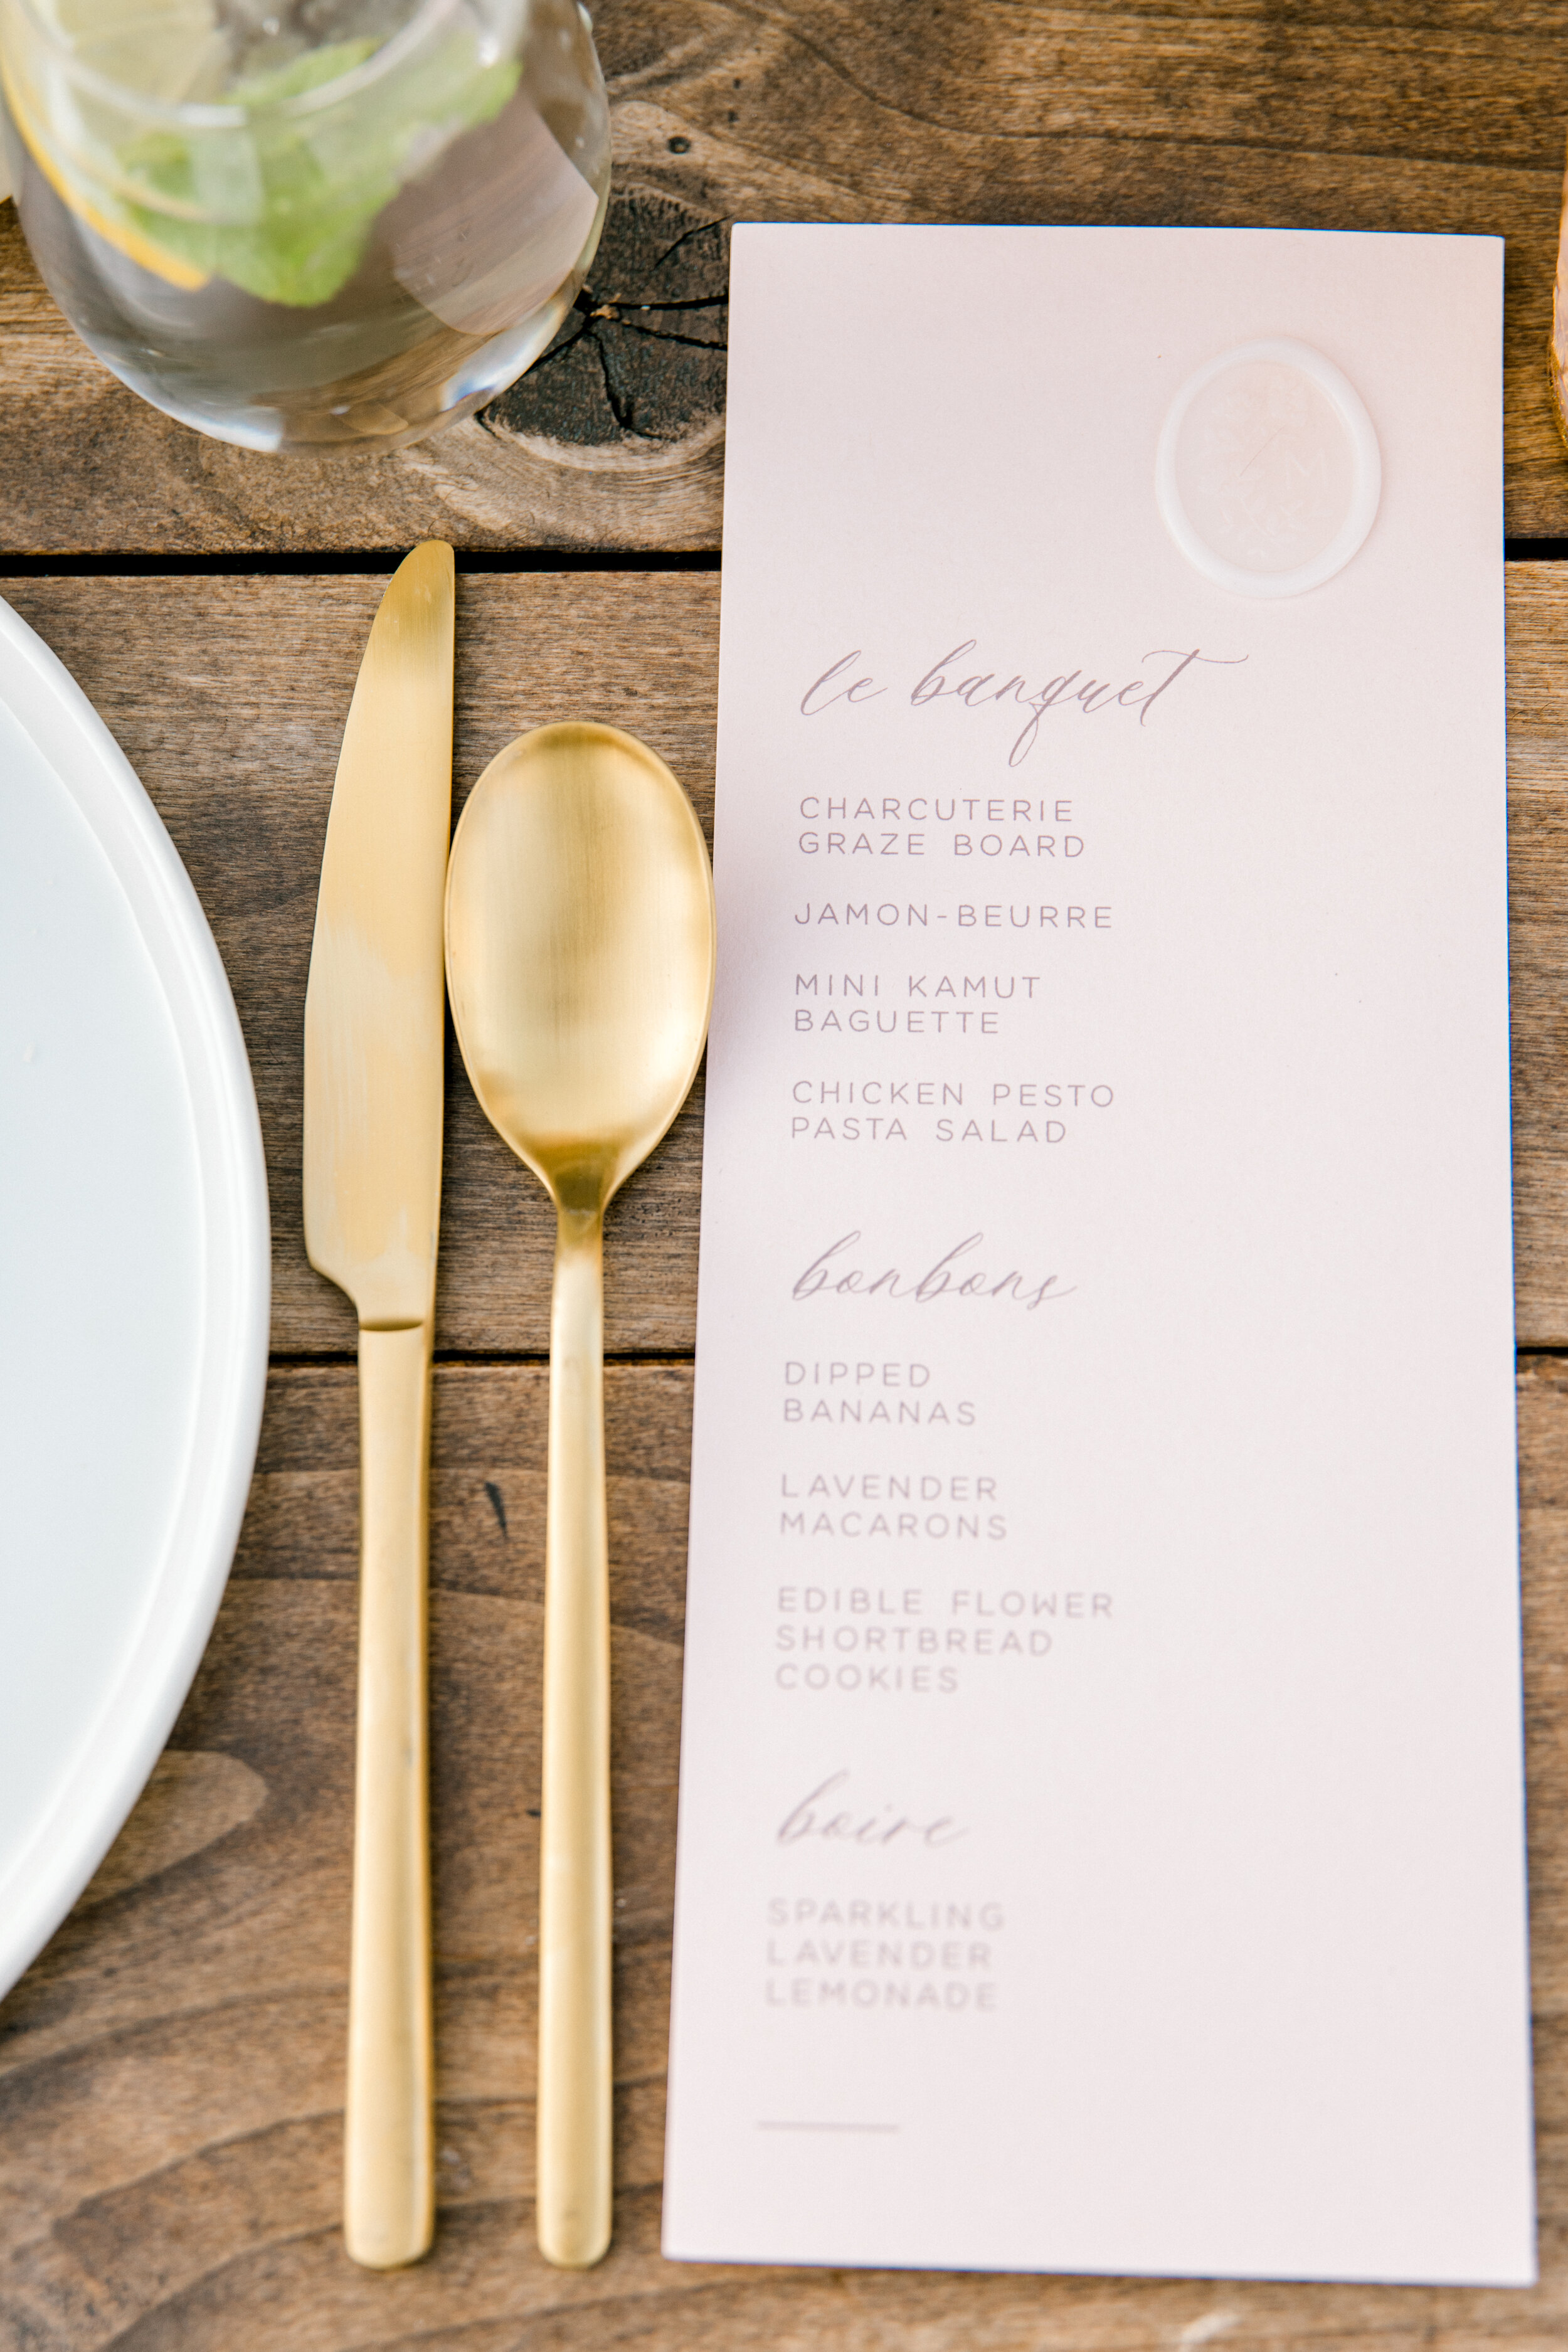
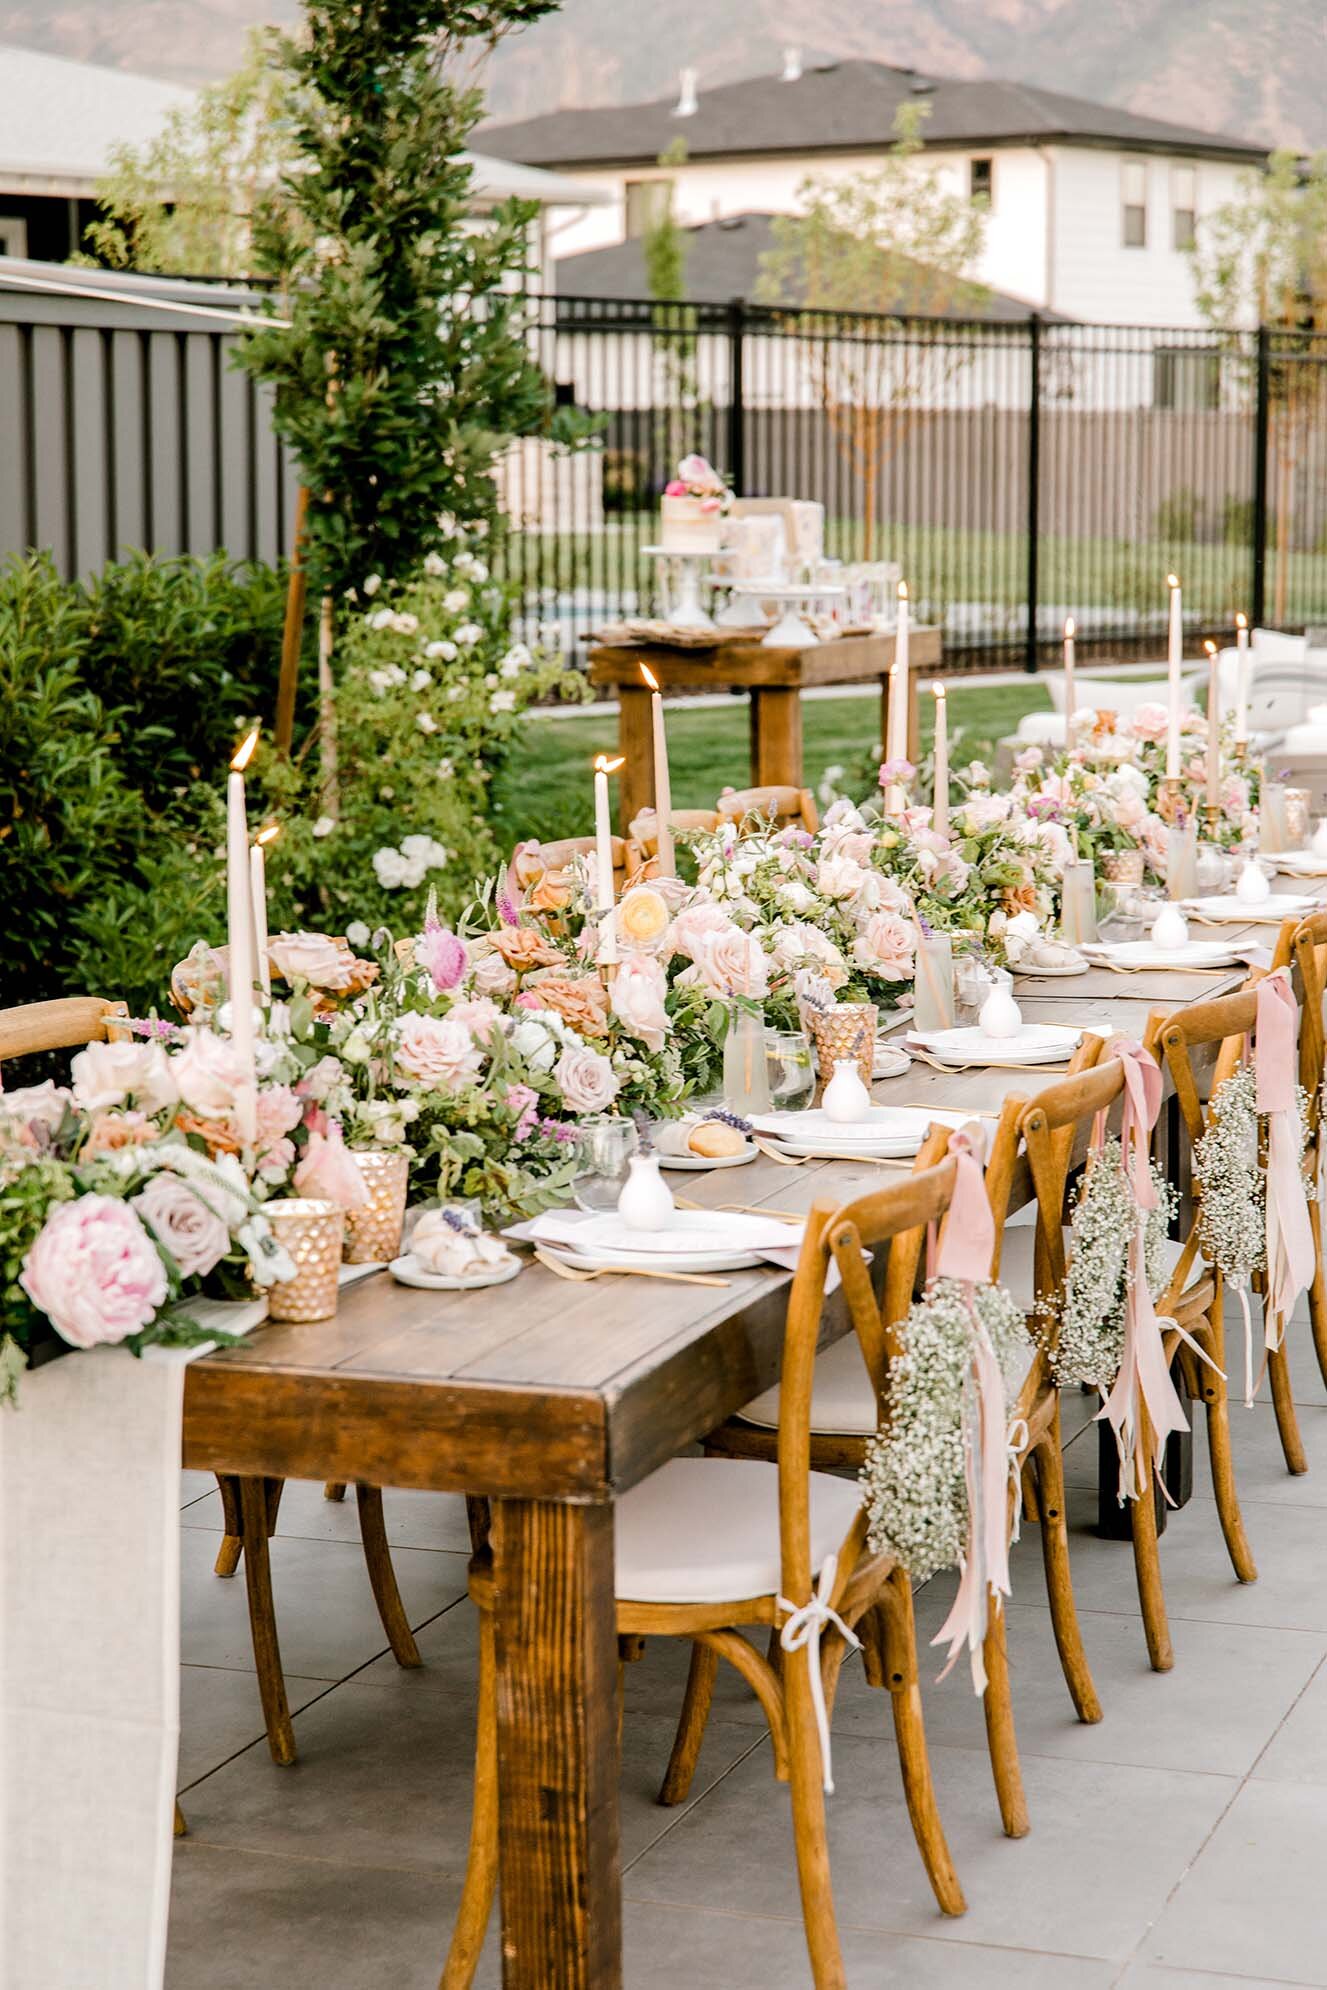
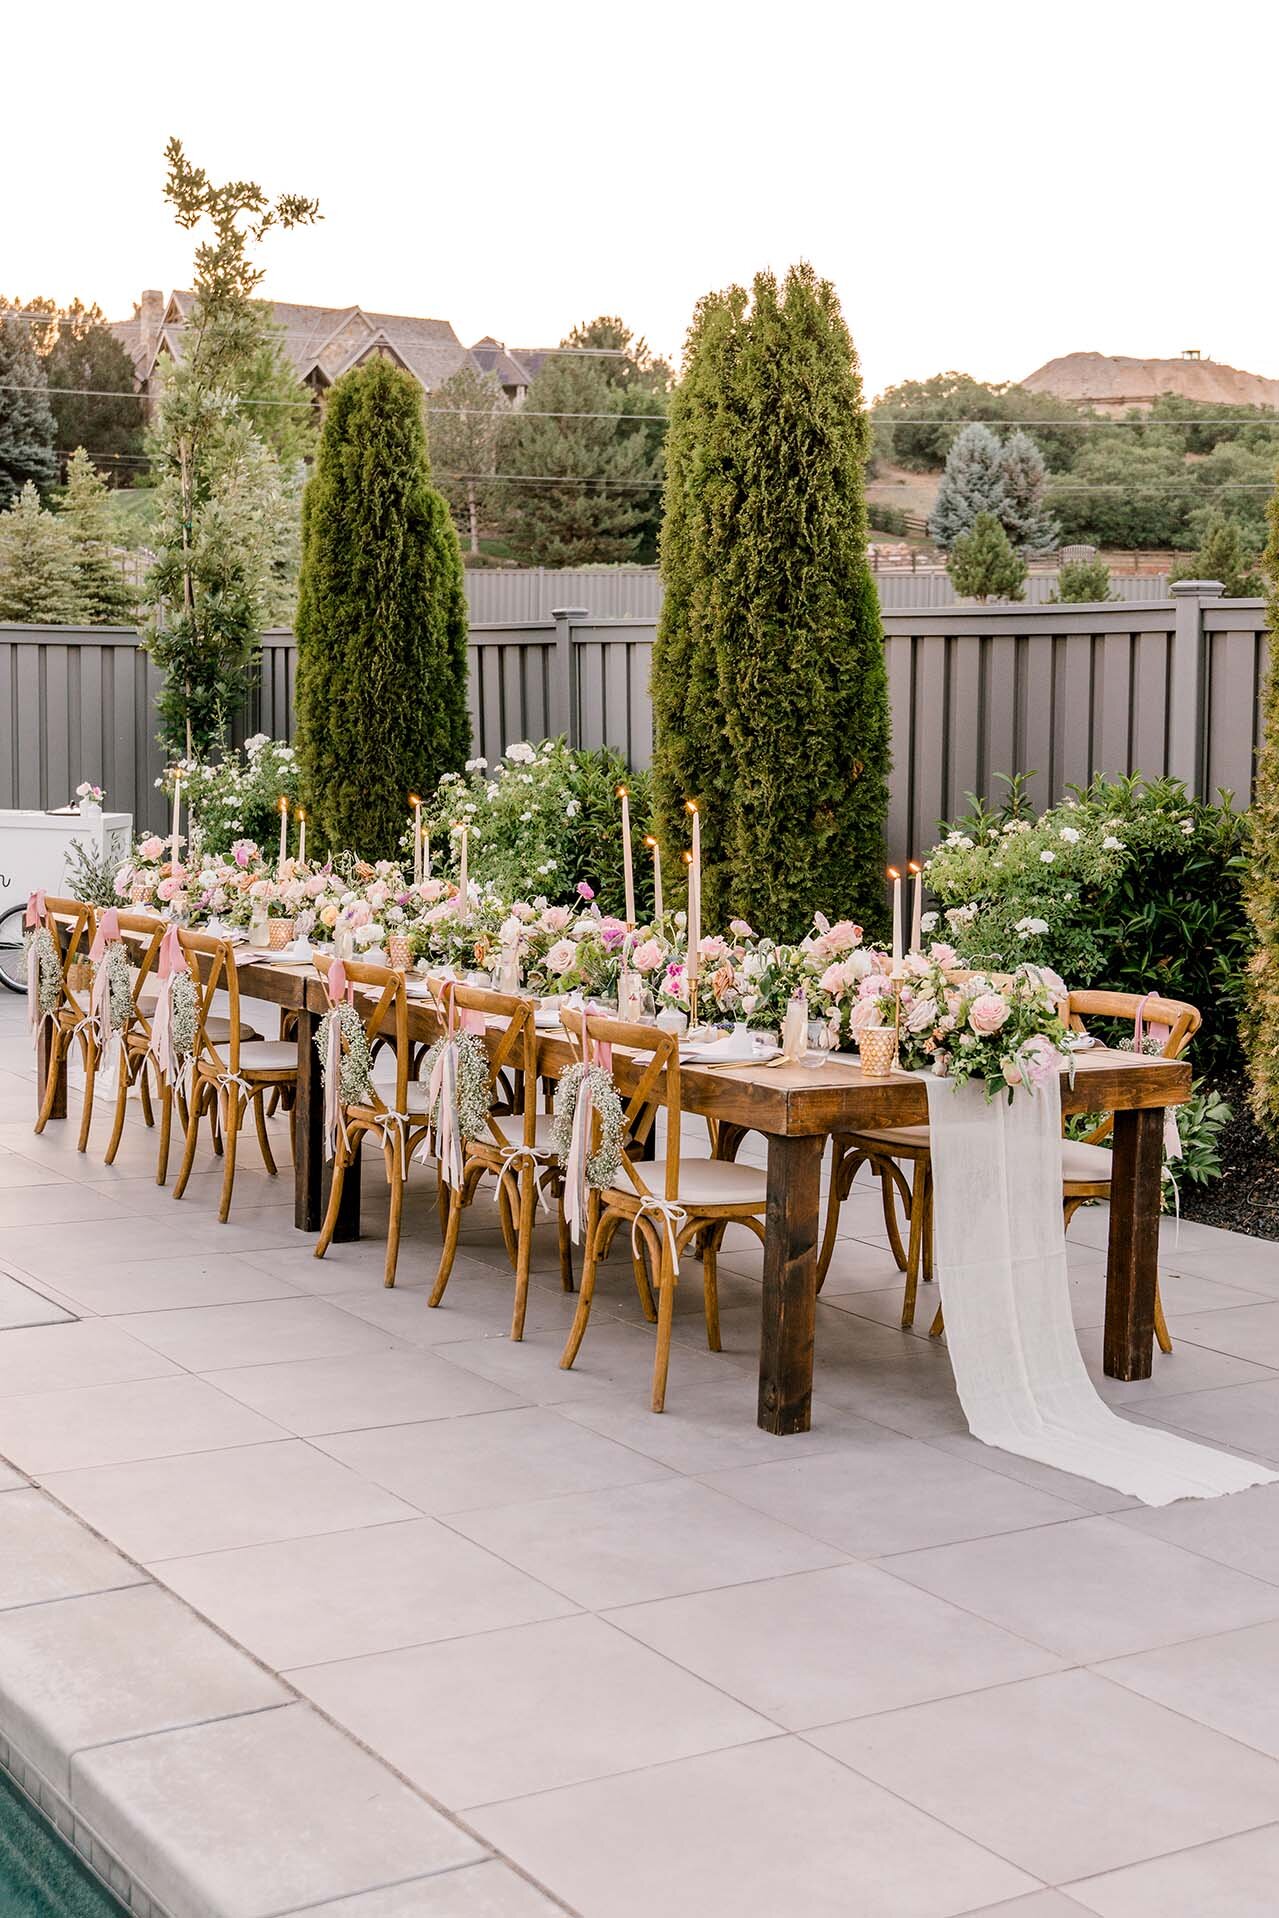
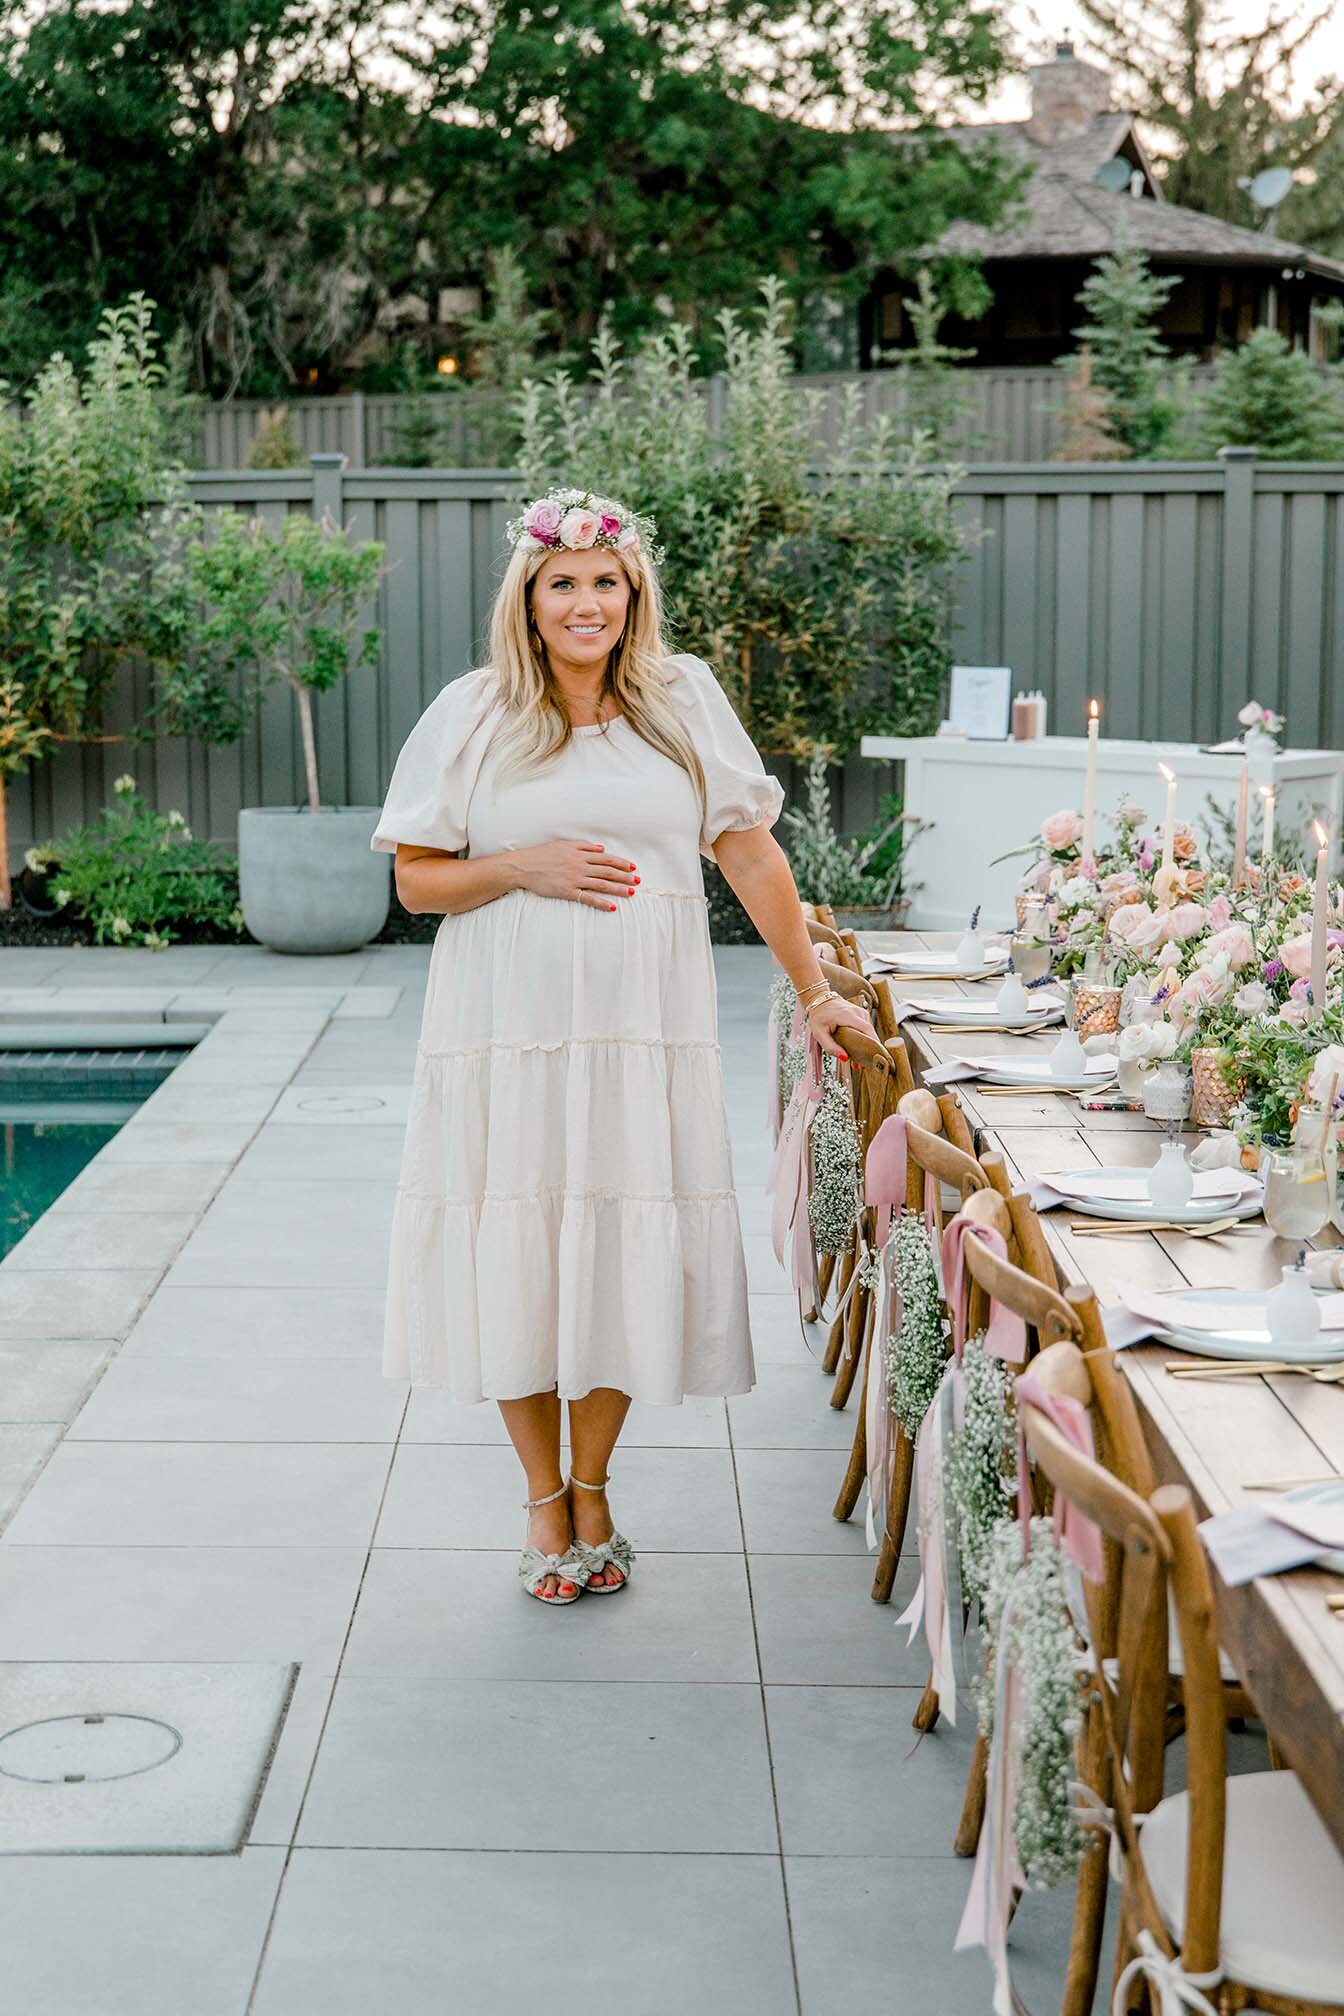
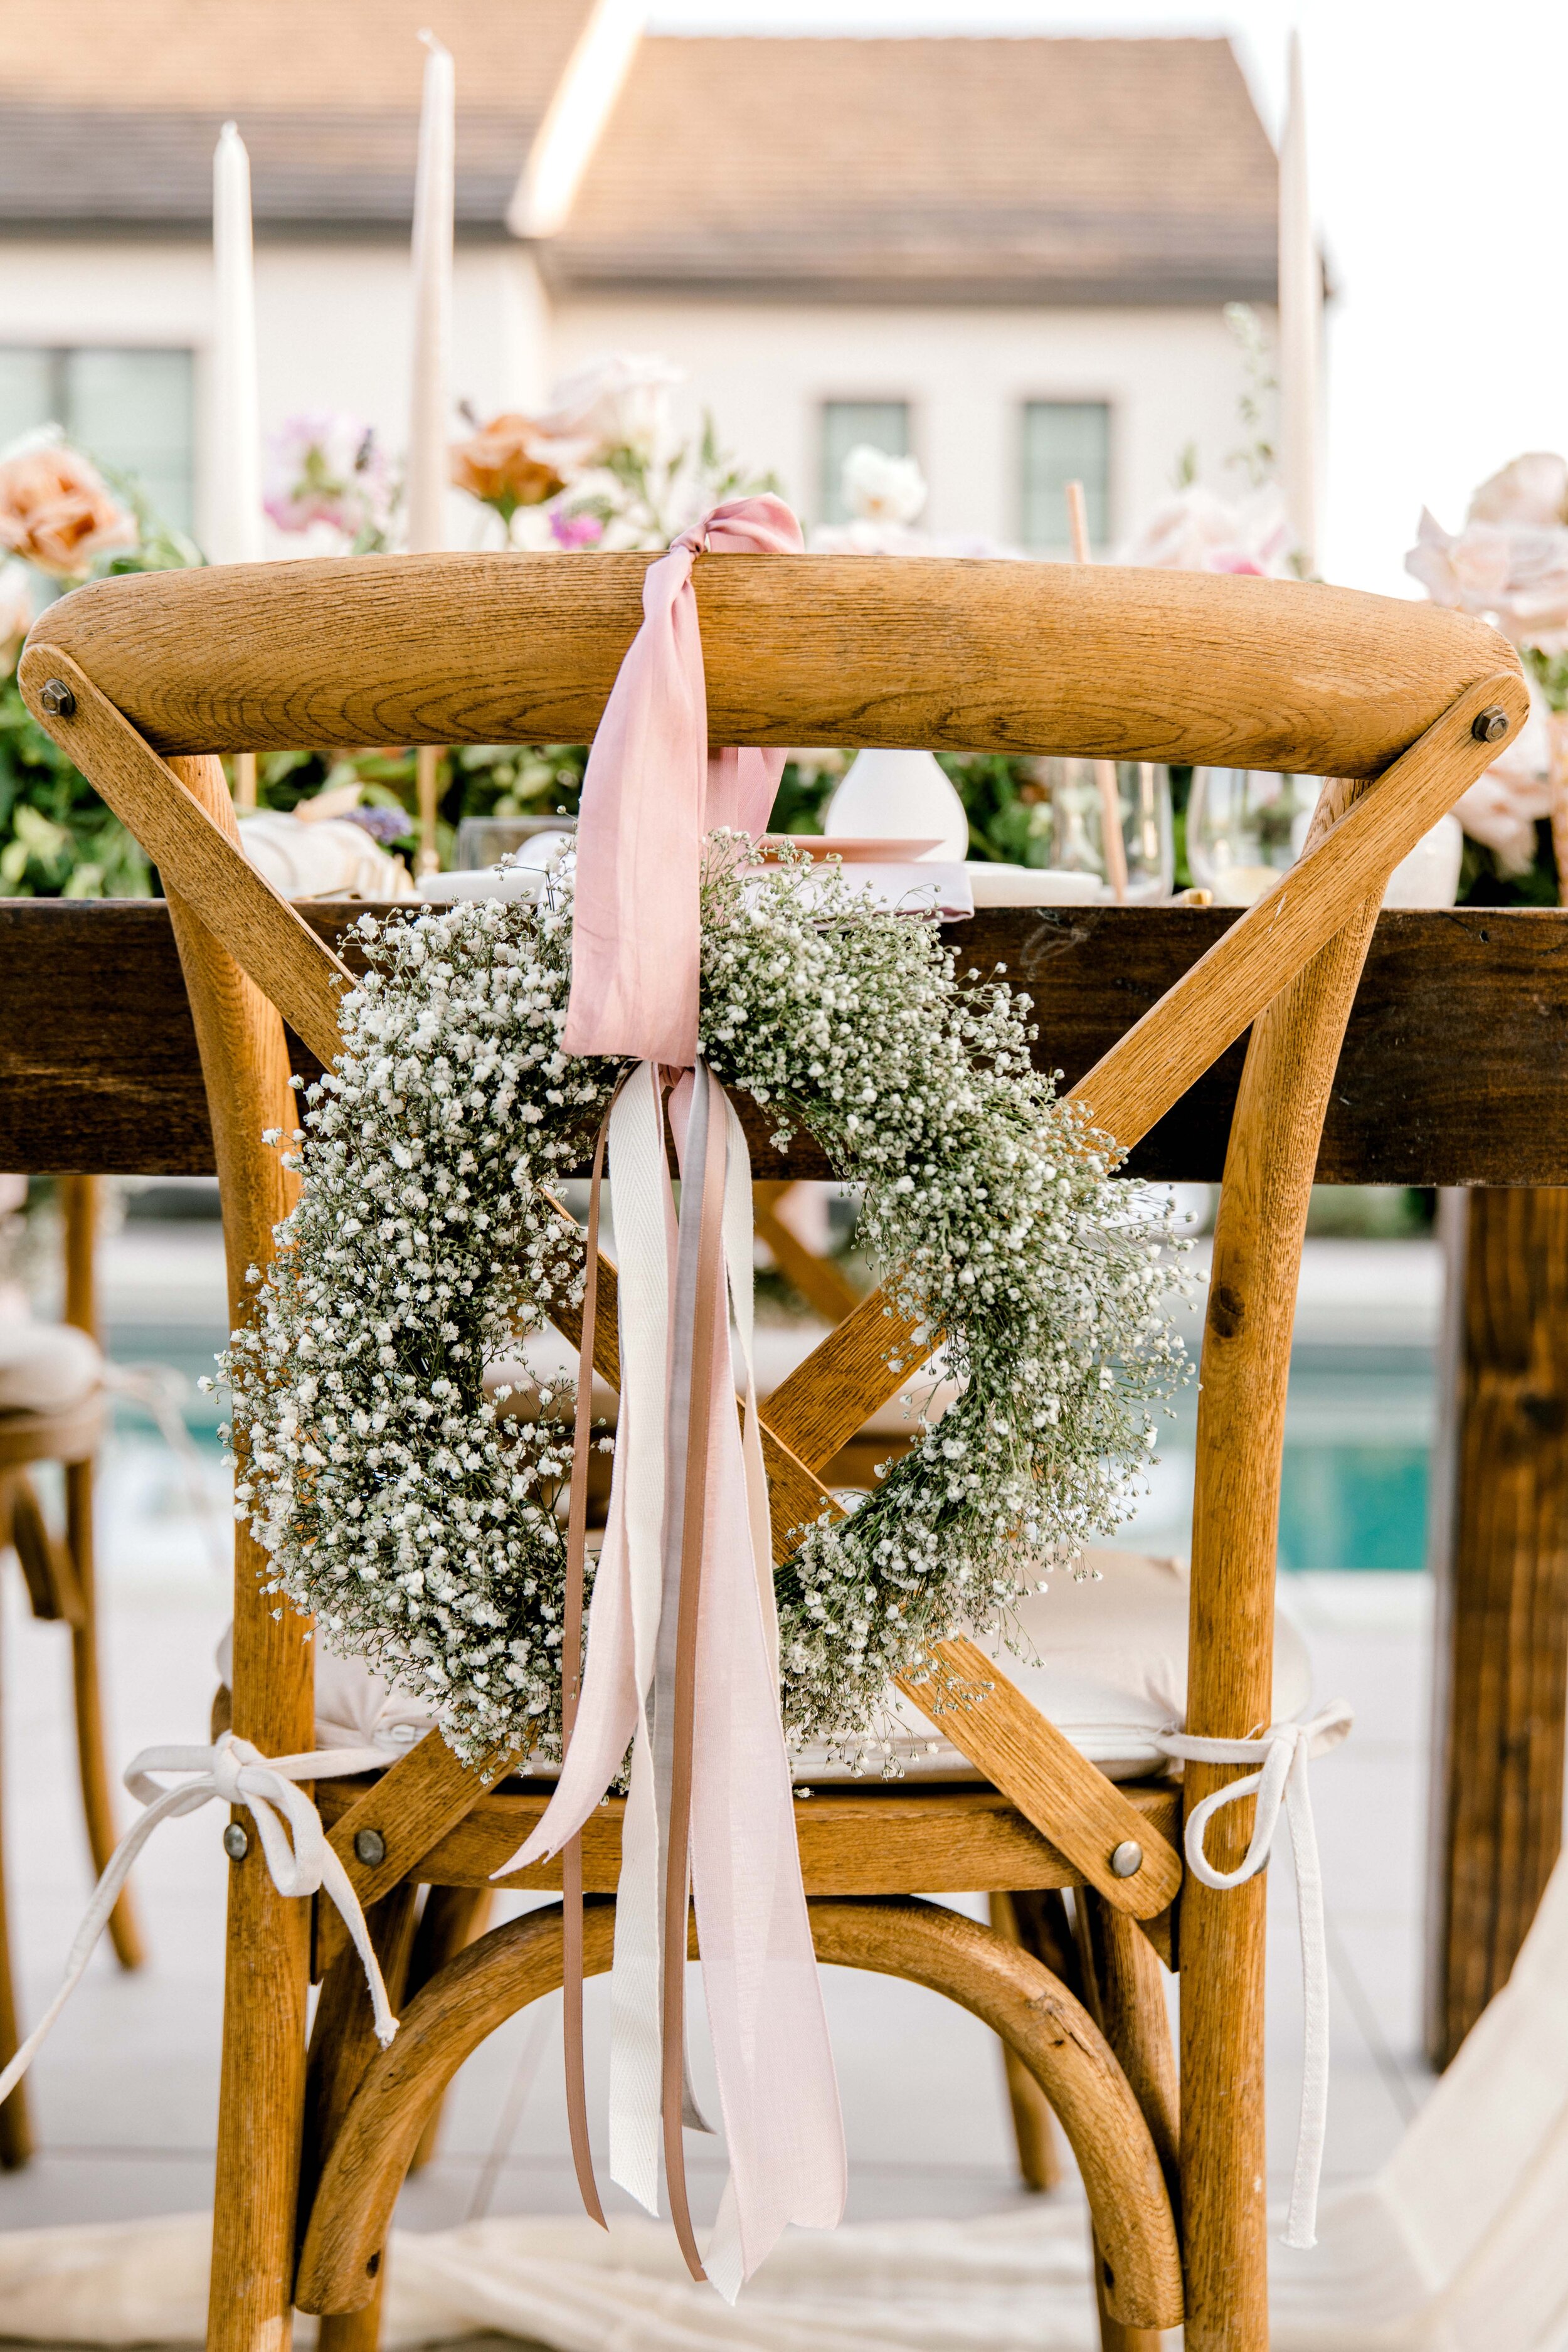
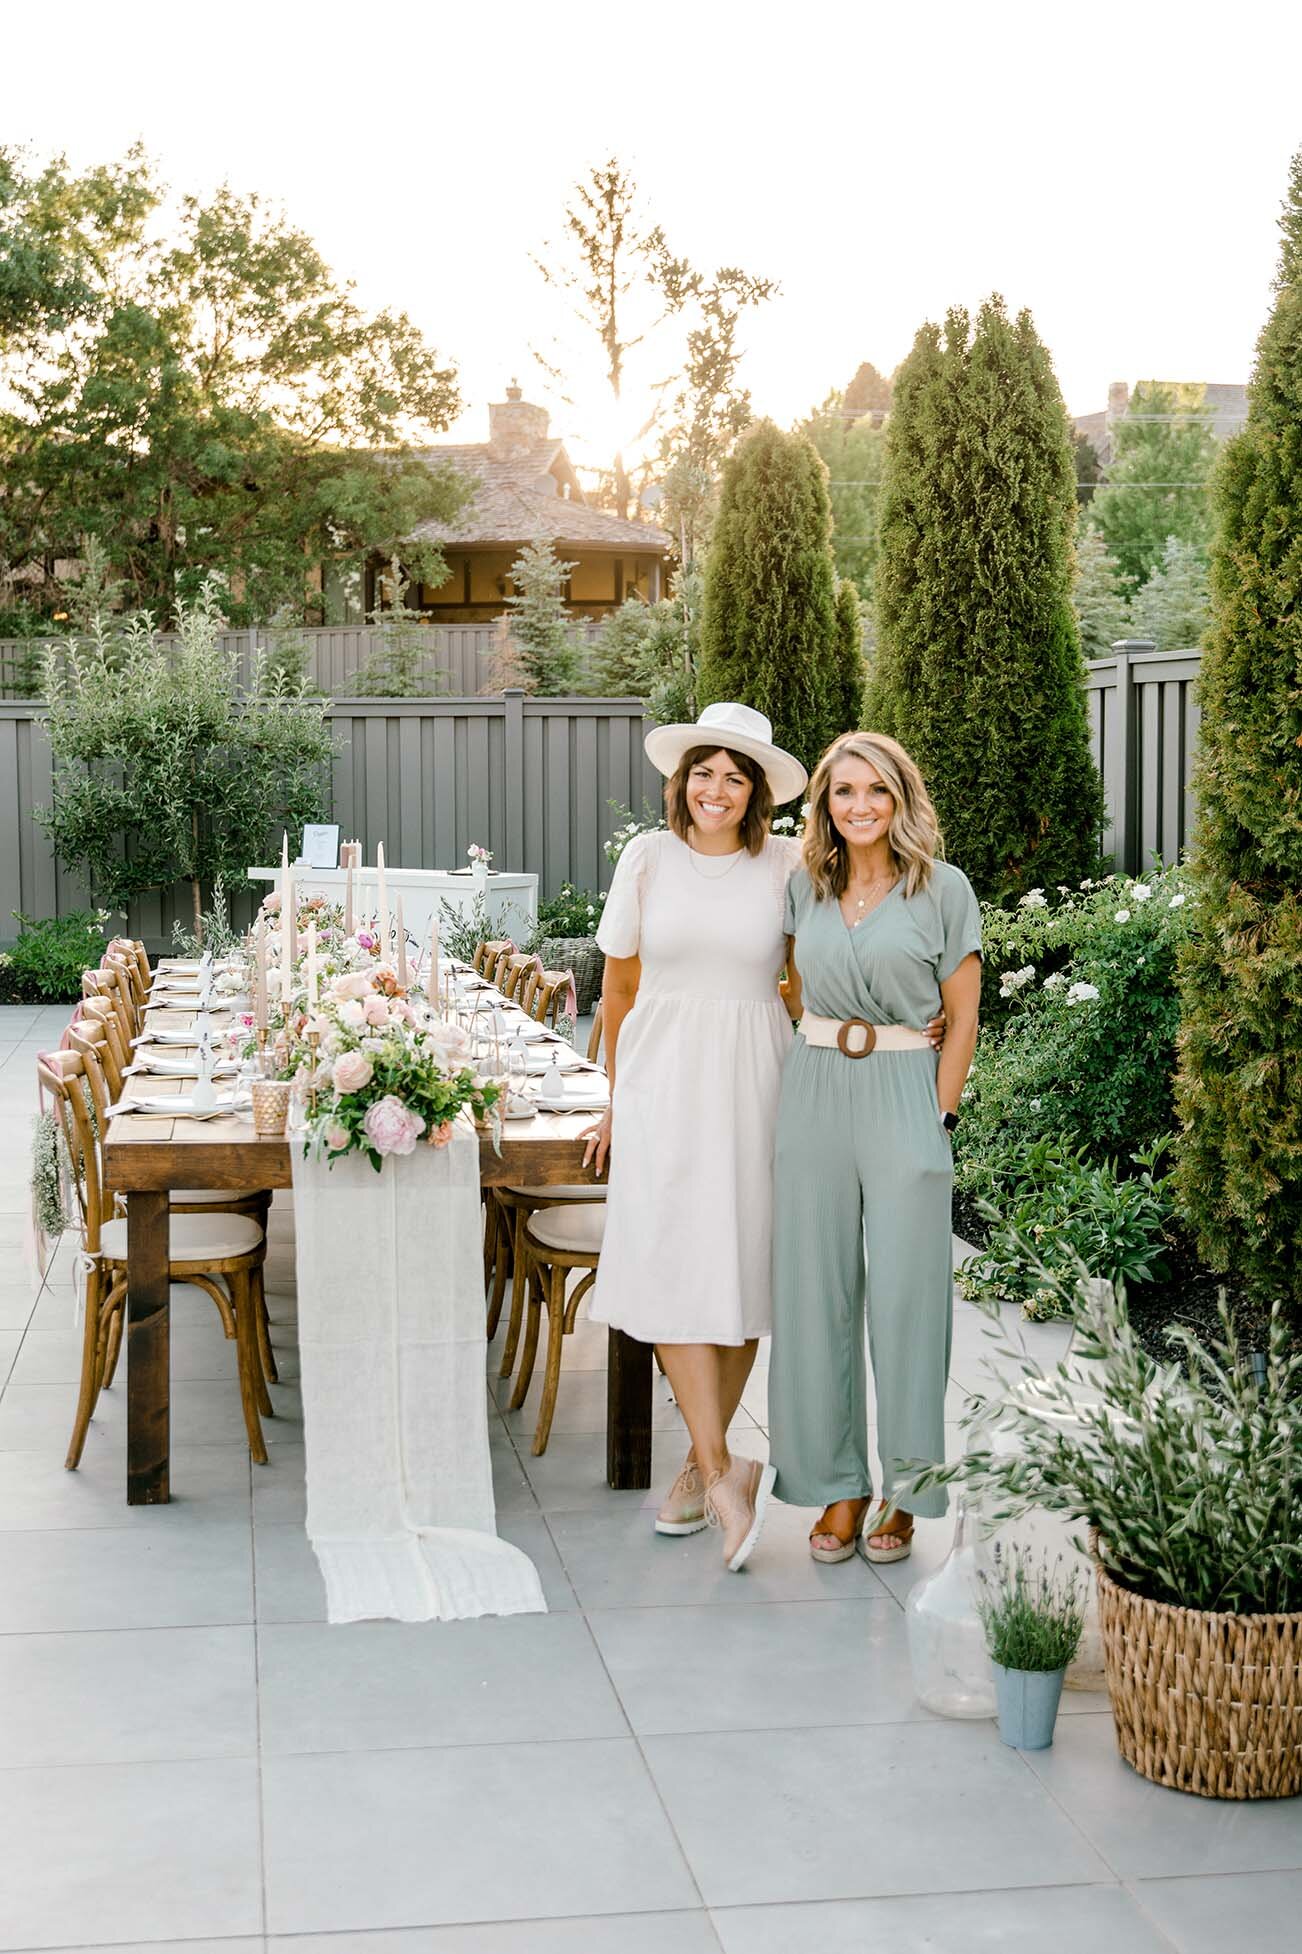
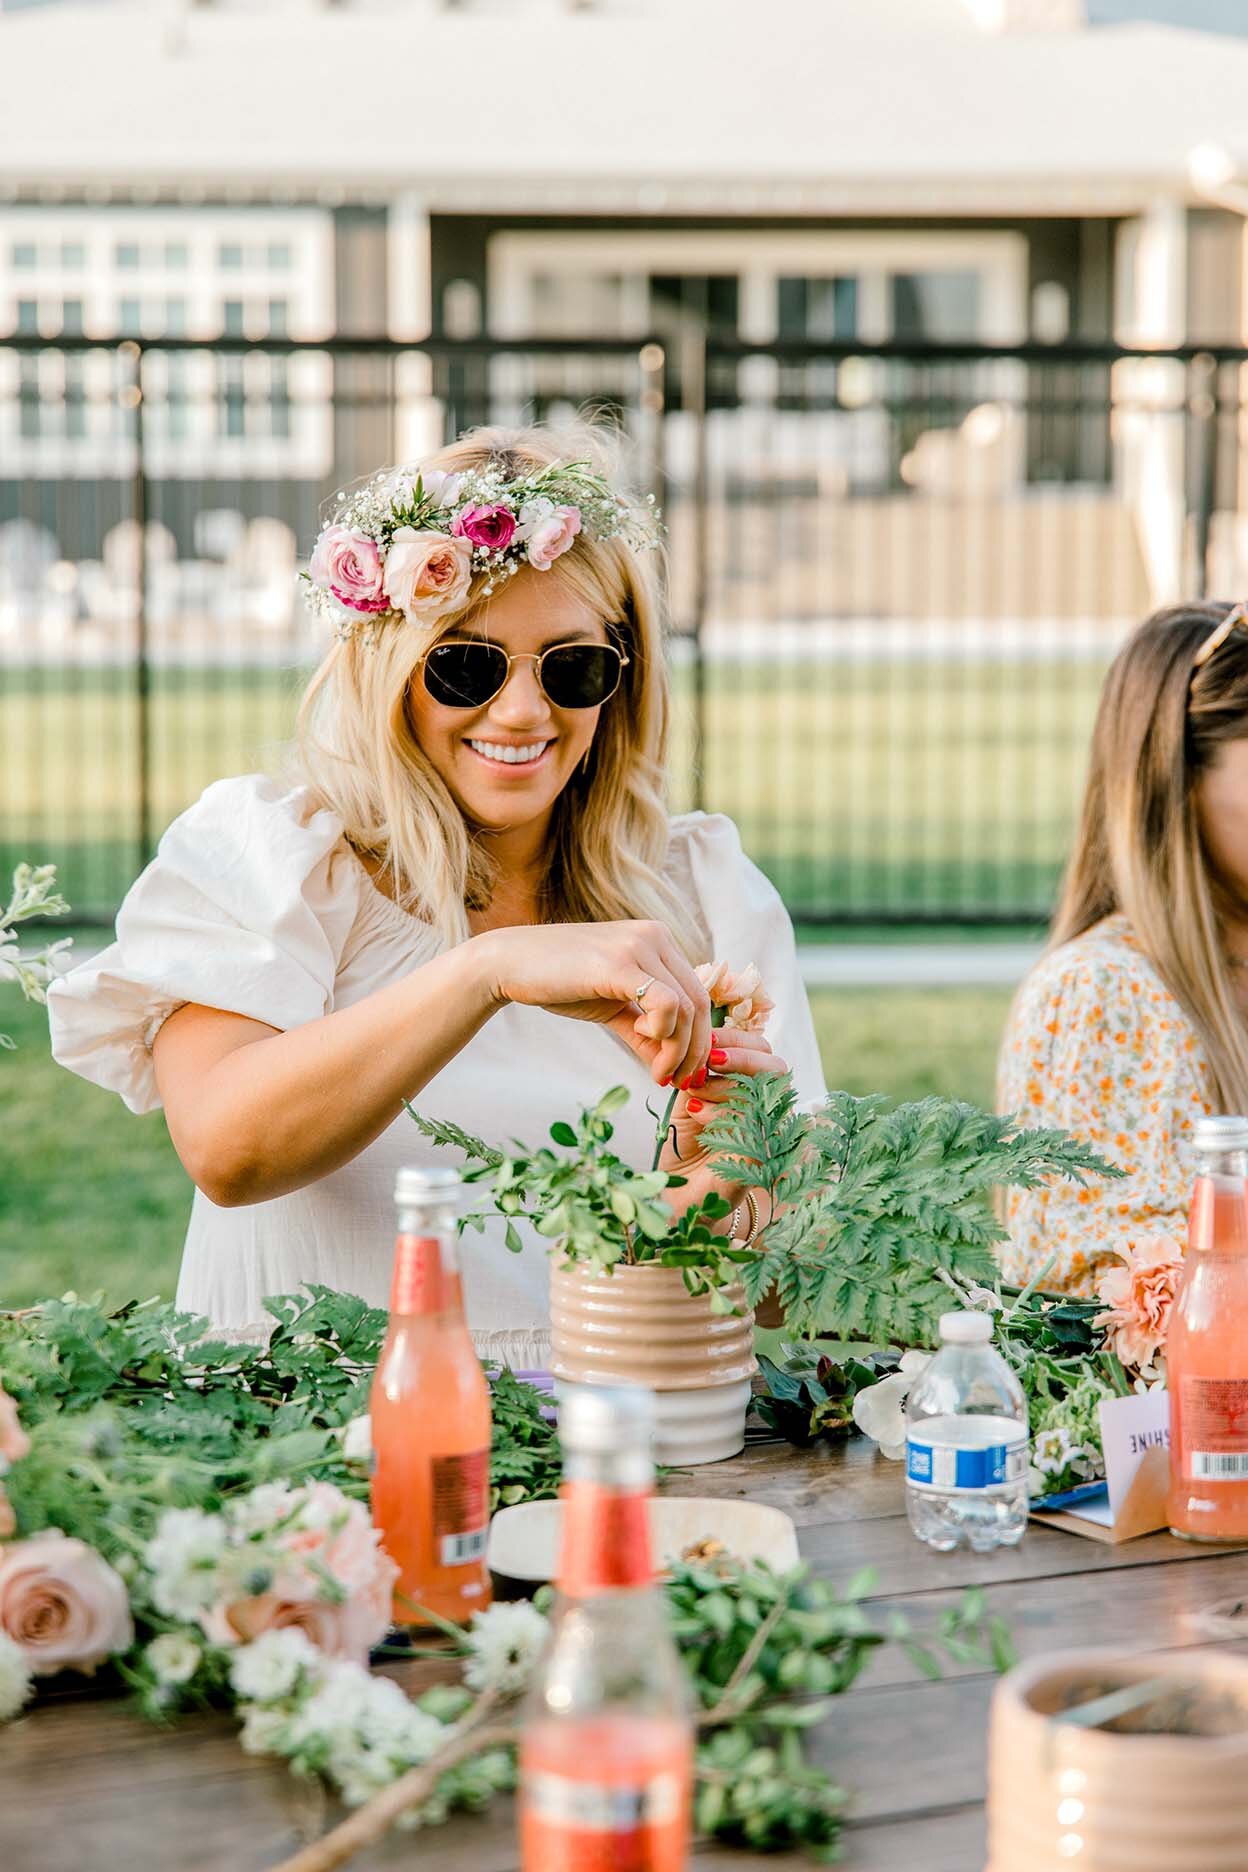
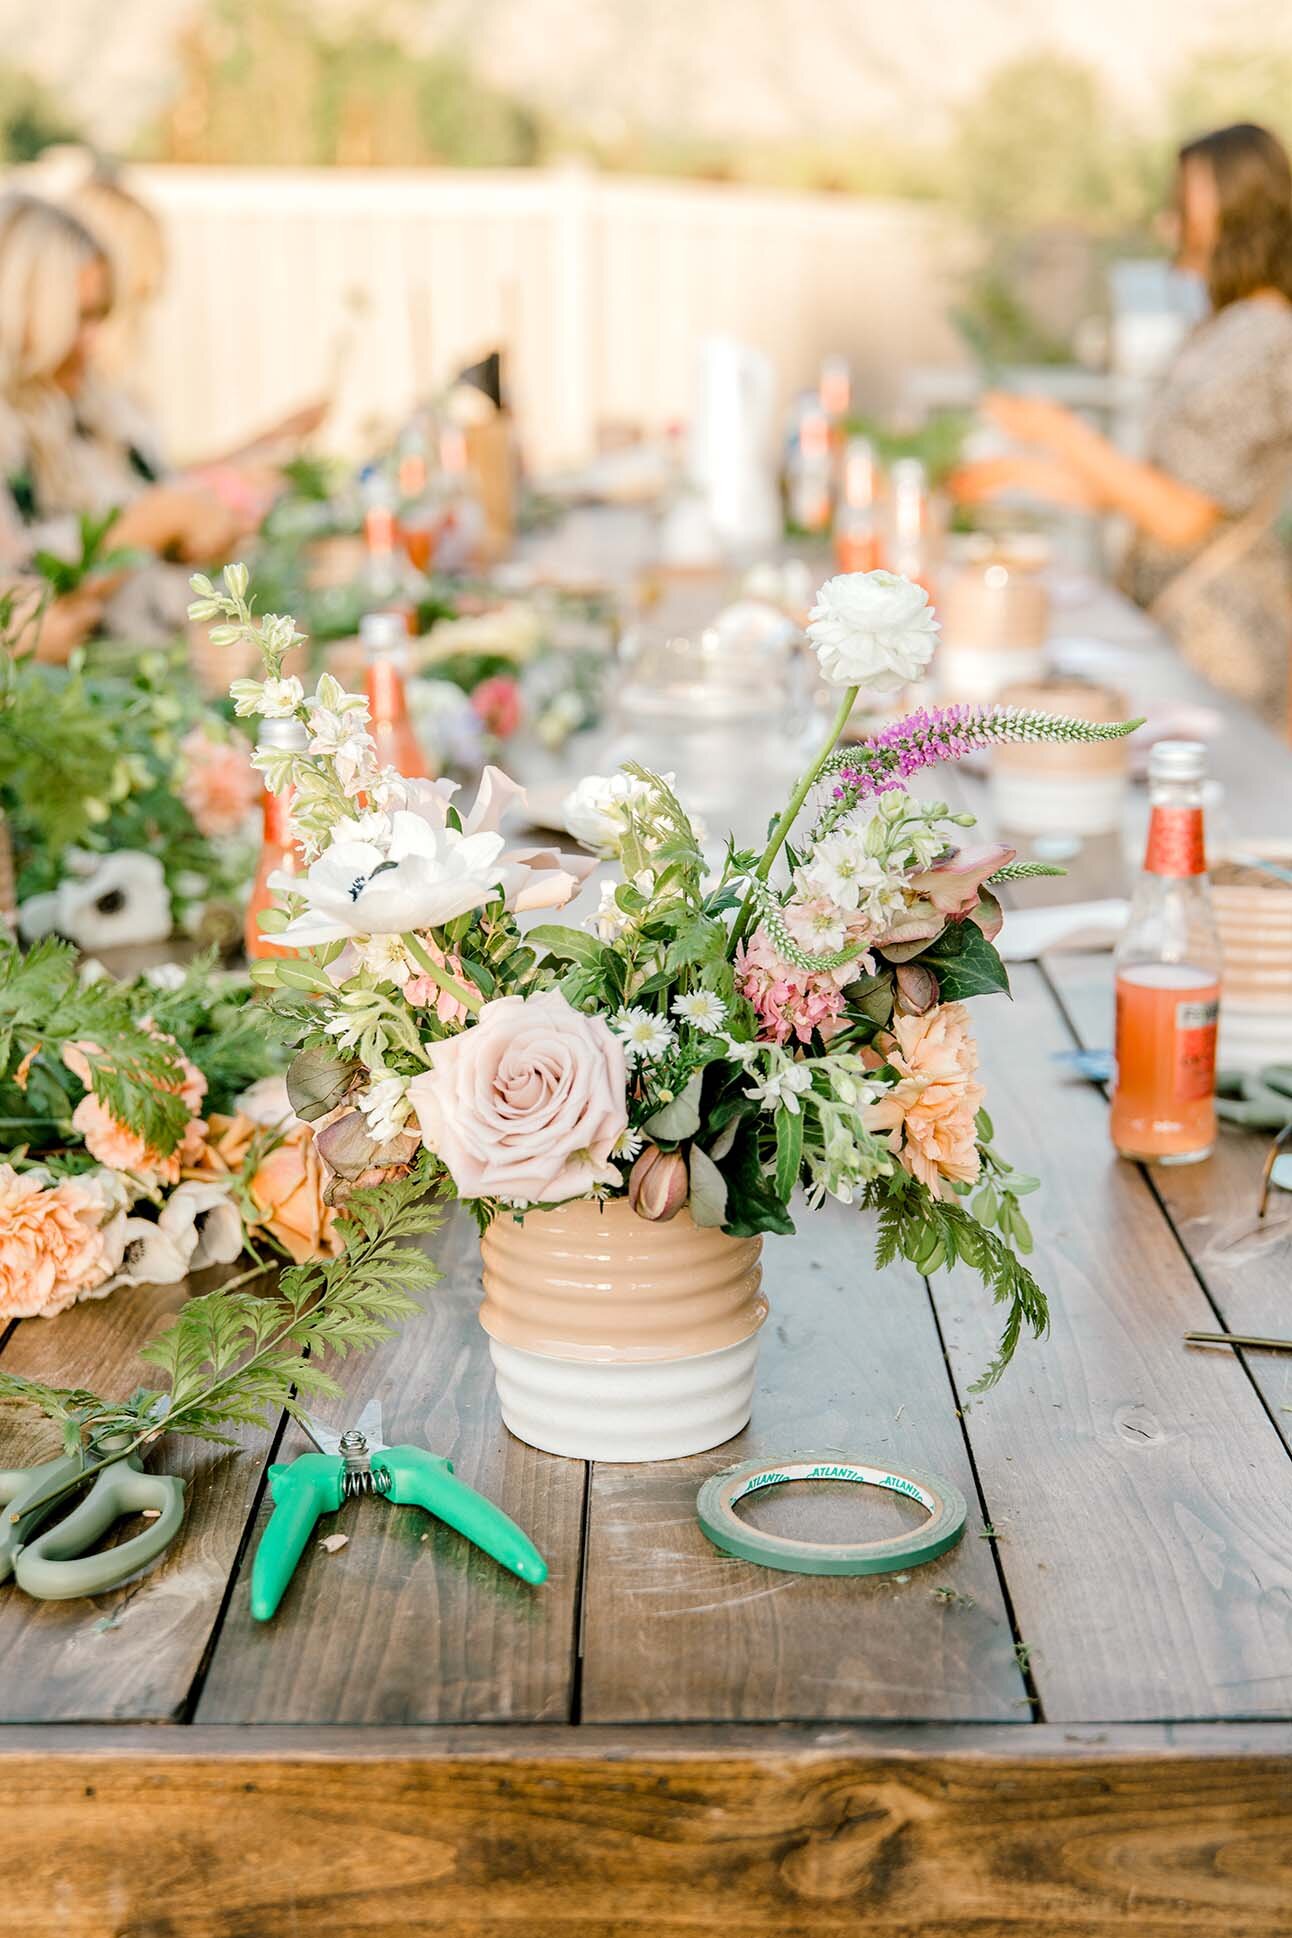
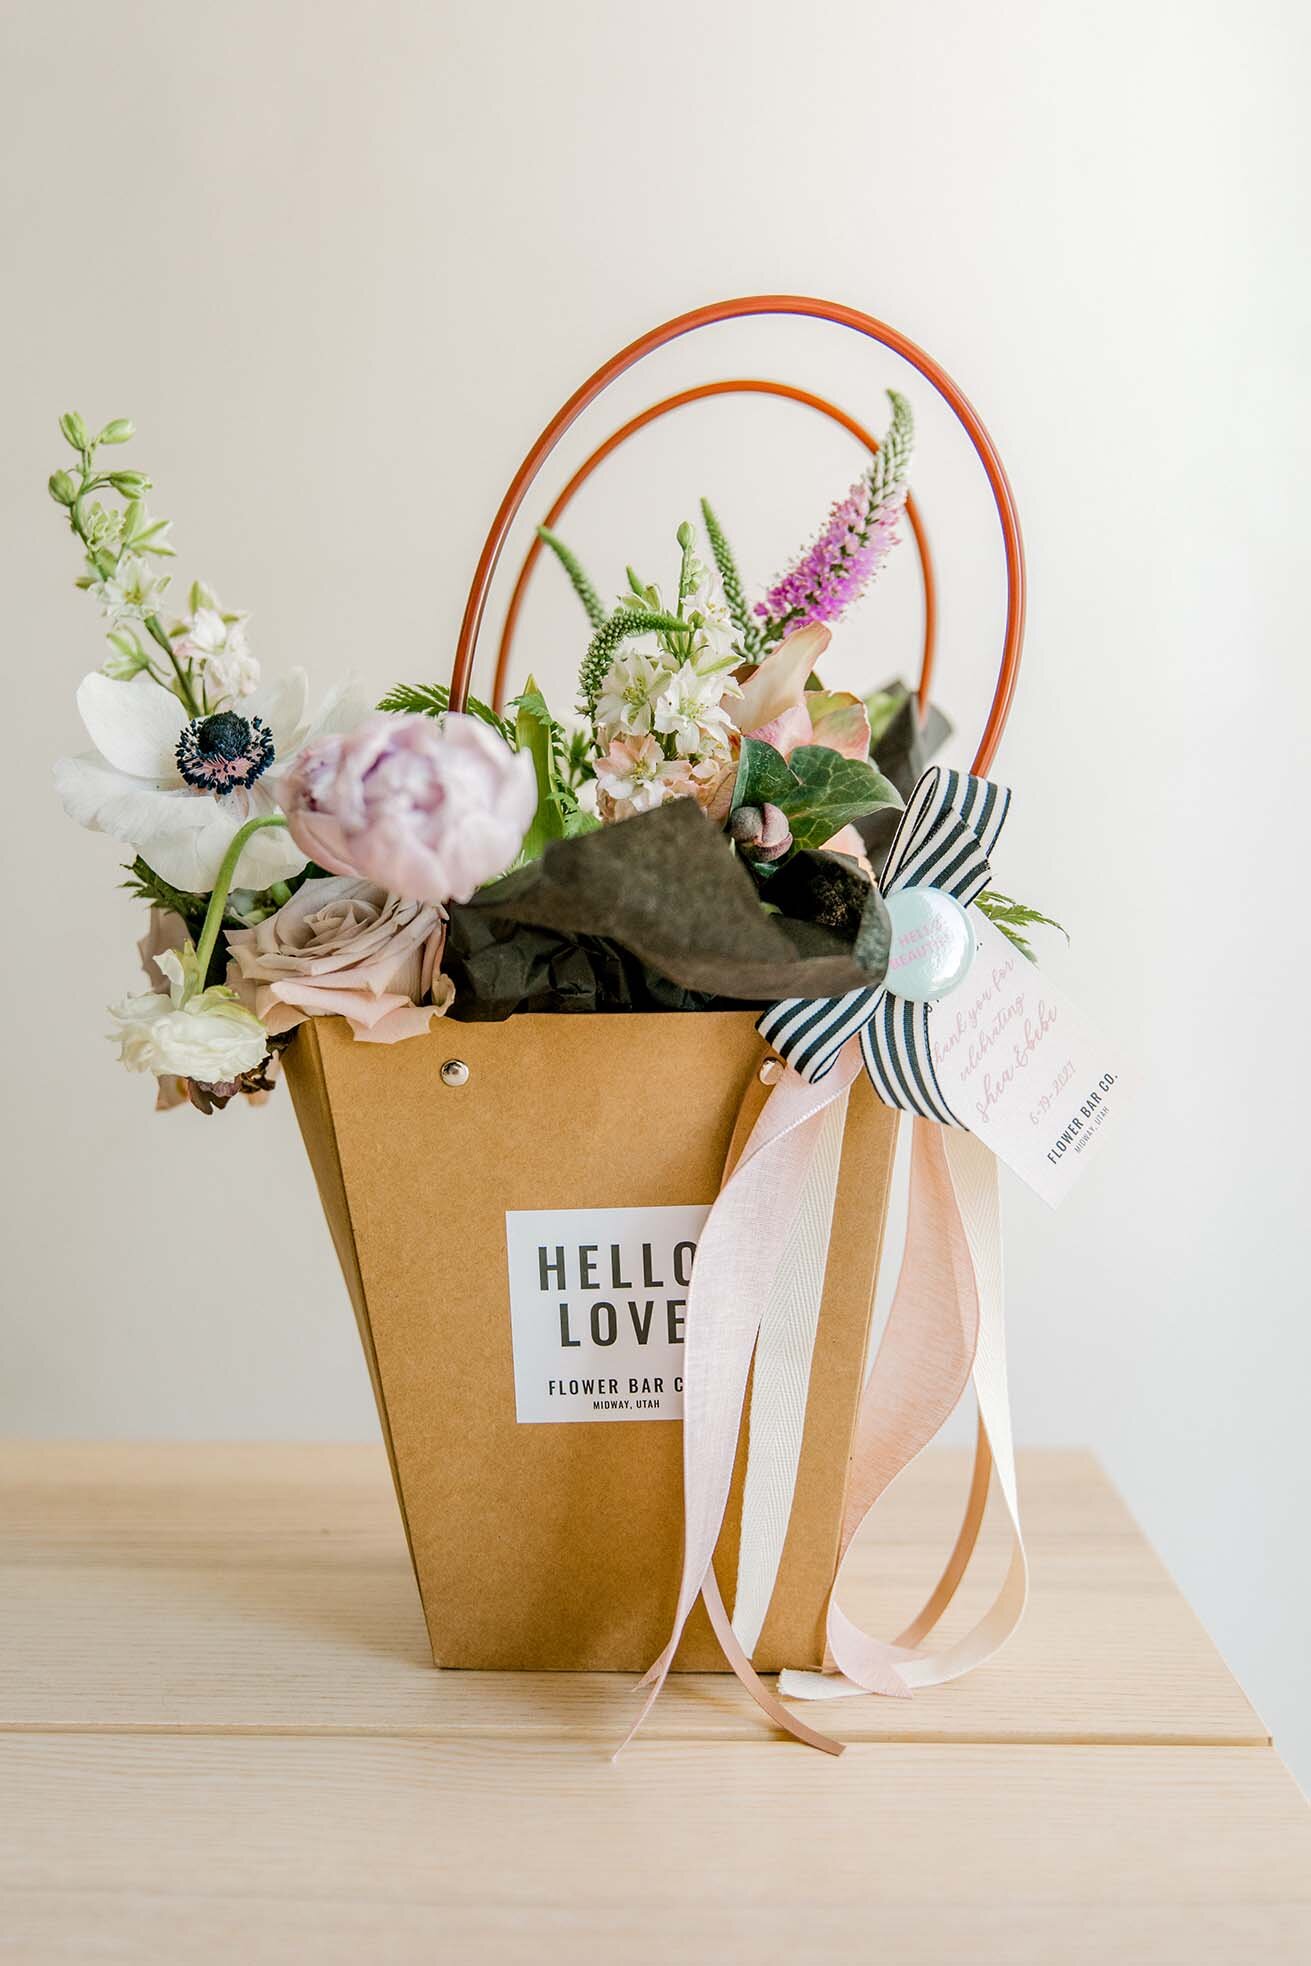
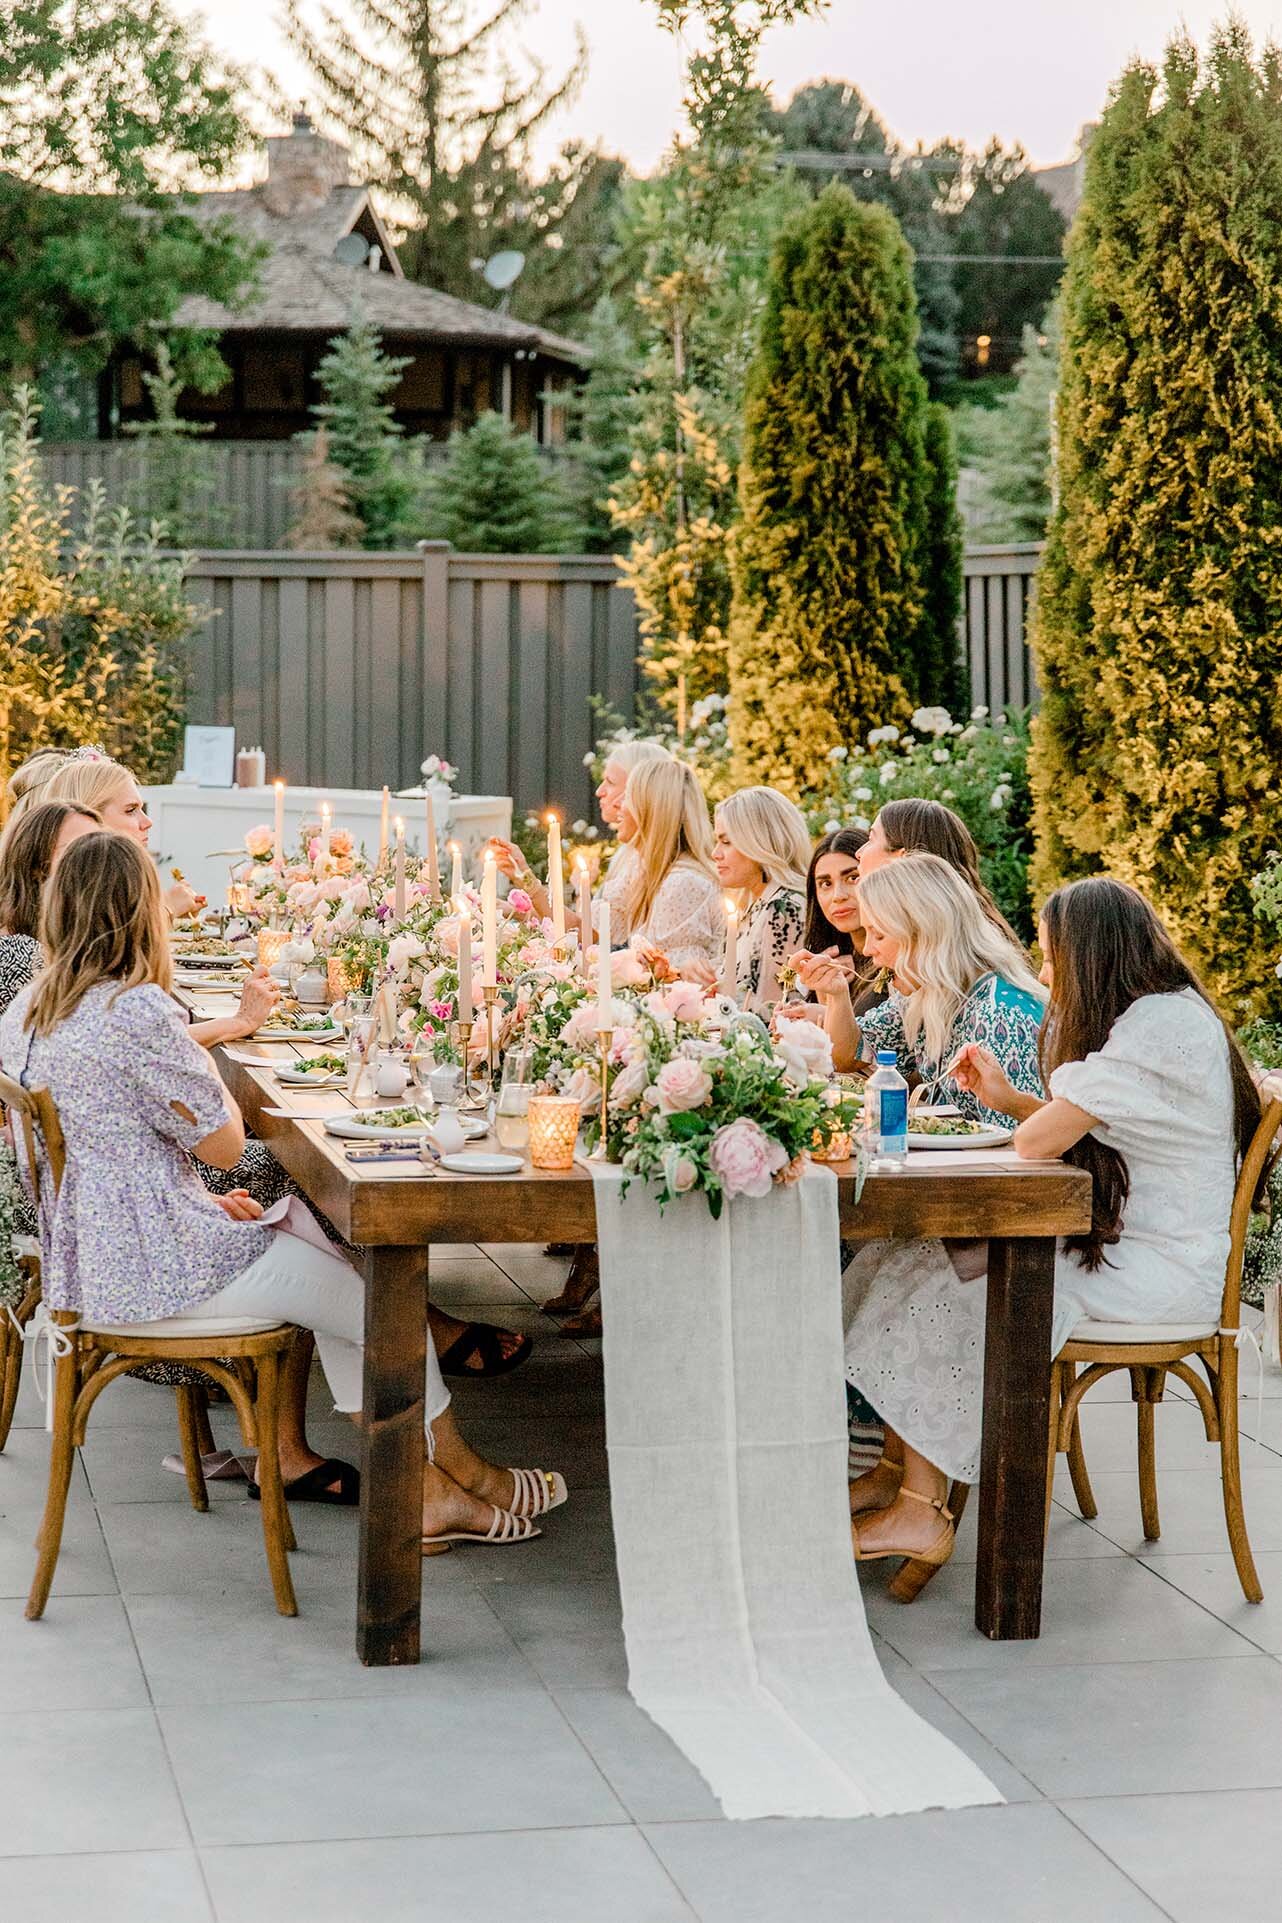
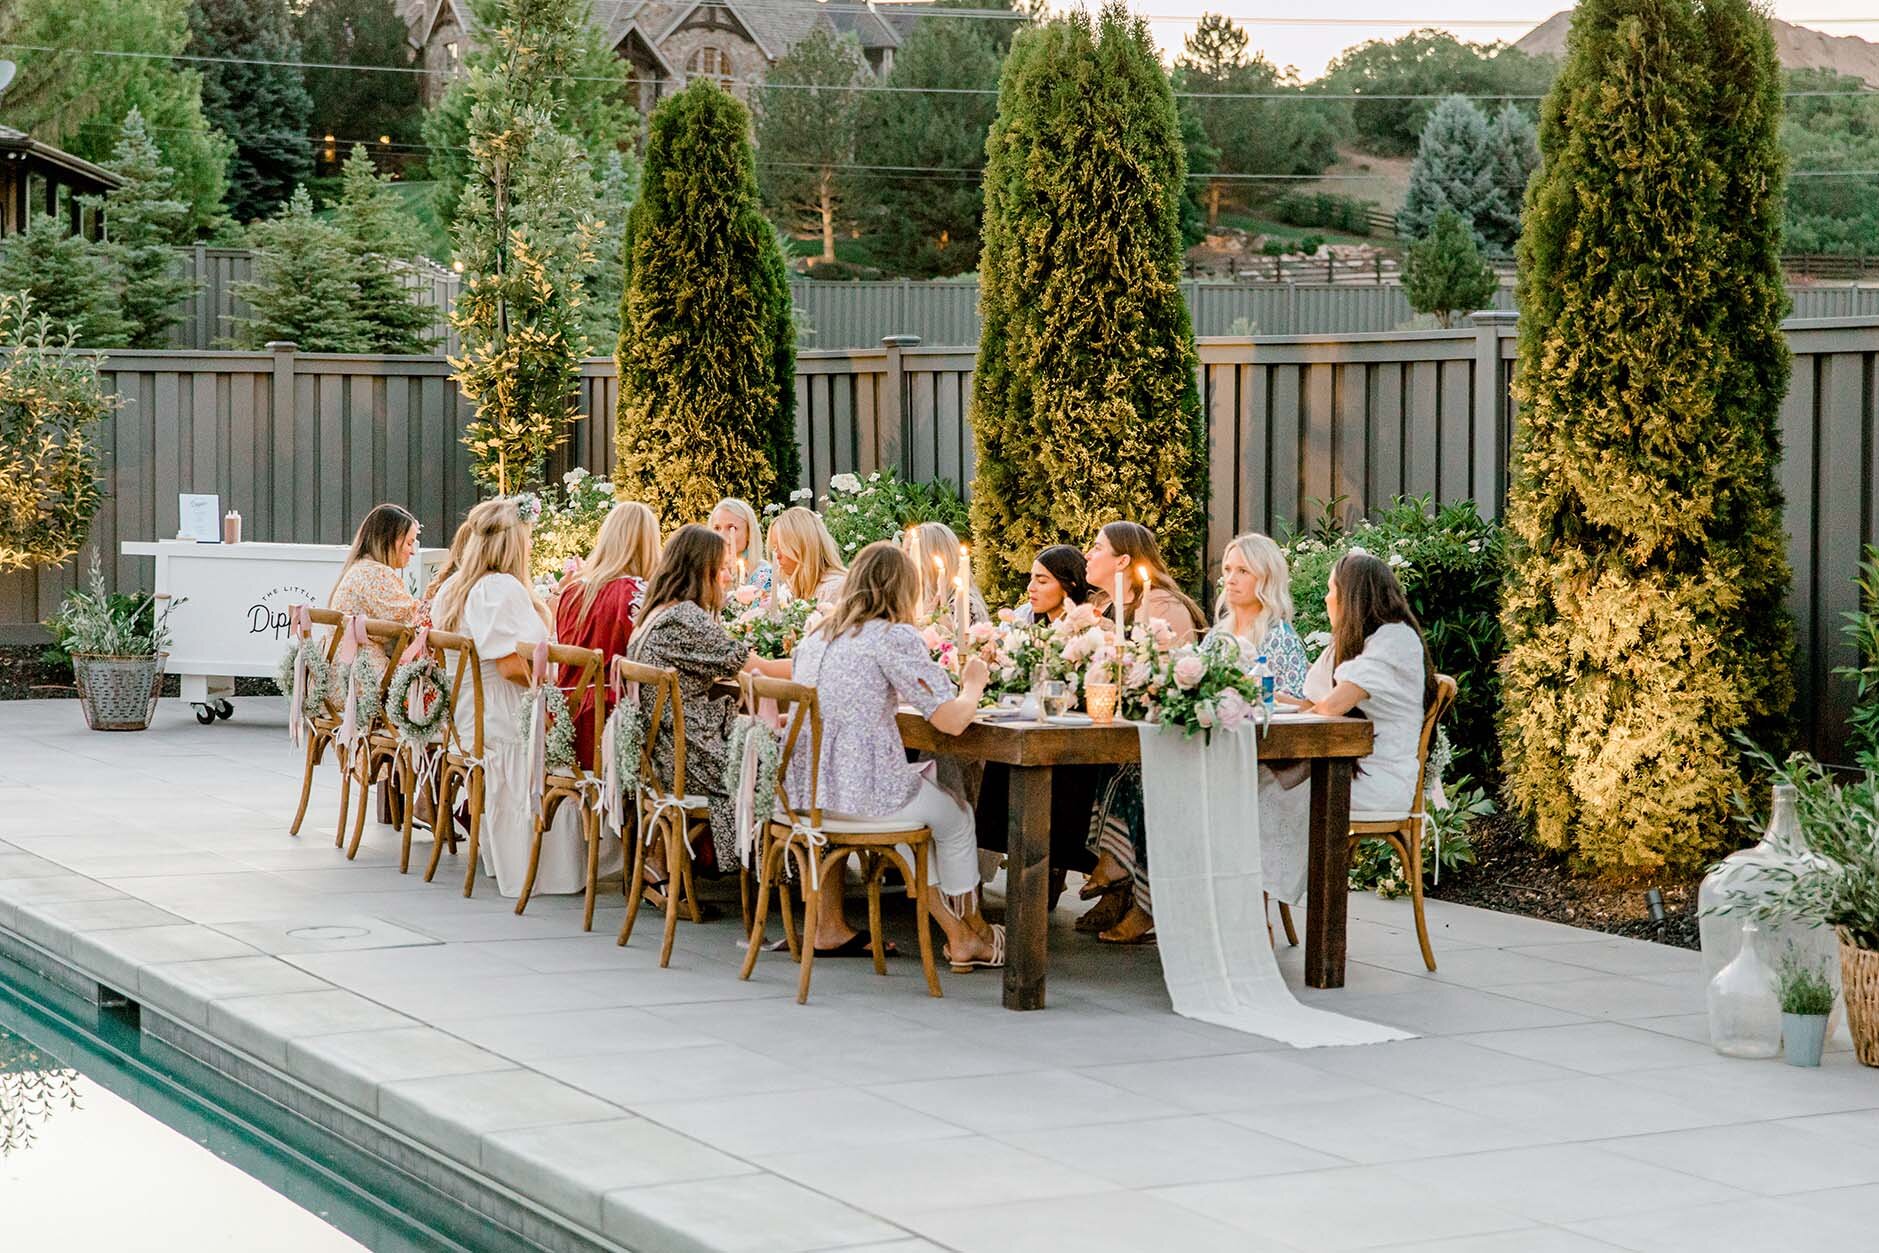
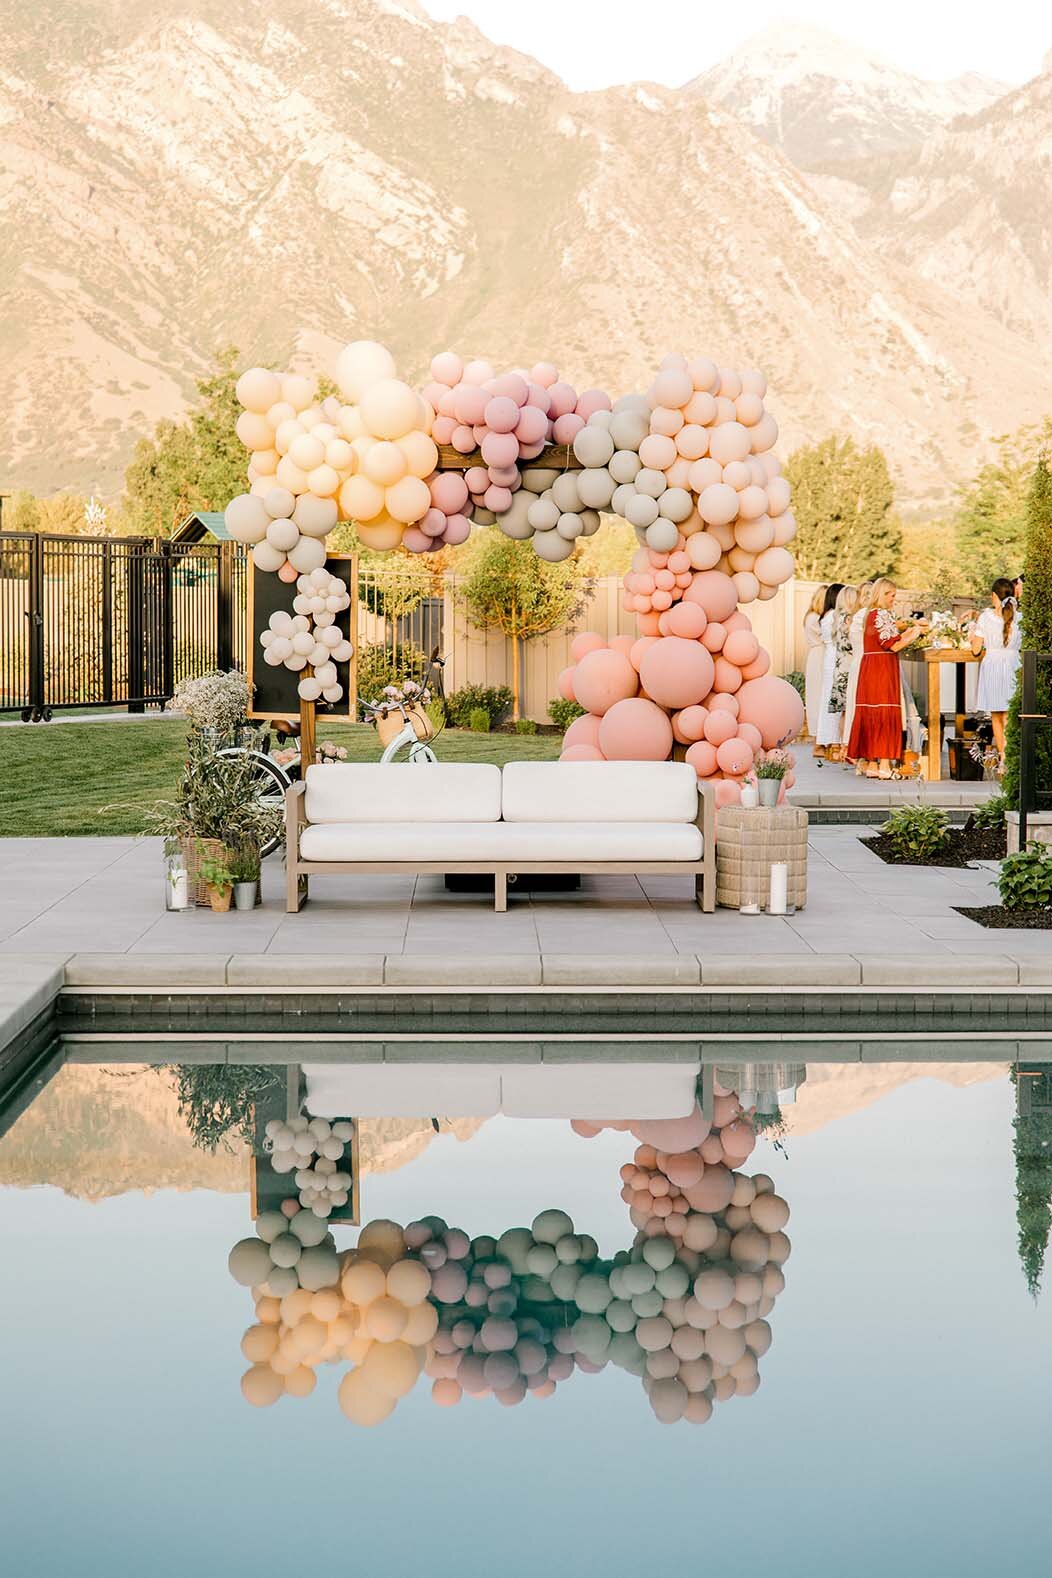
First of all, the word “soirée” immediately makes me think of the classiest, most well thought out little gathering with only the best food and drinks ever. So when Jamie + Rachel from The Revelry Co asked if I would design custom signage and stationery for Shea McGee’s bonjour bébé themed baby shower I was like, UHM DUH! What an honor and a privilege it was to see my creations amongst such beauty and such a talent as Shea! Her gorgeous outdoor patio space where the shower was held is jaw dropping on it’s own but then throw in all these talented vendors and watch their vision come to life out there and woah. Astonishing.
I feel beyond blessed to have made a connection with Jamie + Rachel a few years back and to continue to be able to work with them to this day! These two hard working ladies are mom’s of 8 kids combined! They put together the sweetest moments and so many times it’s with their kids and families at the forefront of the celebration. Life as we know, can be a nightmare sometimes so I believe we have to make the most of each special moment. And sometimes that means creating an insane ice cream sundae party in your backyard for your kids, just because its the first day of summer. Or making an entire balloon garland and putting it up in your living room because your child turned 3. It’s that little extra effort, that detail, that makes everything just a tad more special. Plus the photos you’ll get from that day that live on will be so much more fun to look back on!
Invest in the memories <3
_______________
Vendors Lineup
Party Styling, design + planning: @therevelryco
Host: @thebuyguide
Florals: @flowerbarco
Photography: @Aubrey_taiese
Menu and stationery design: yours truly
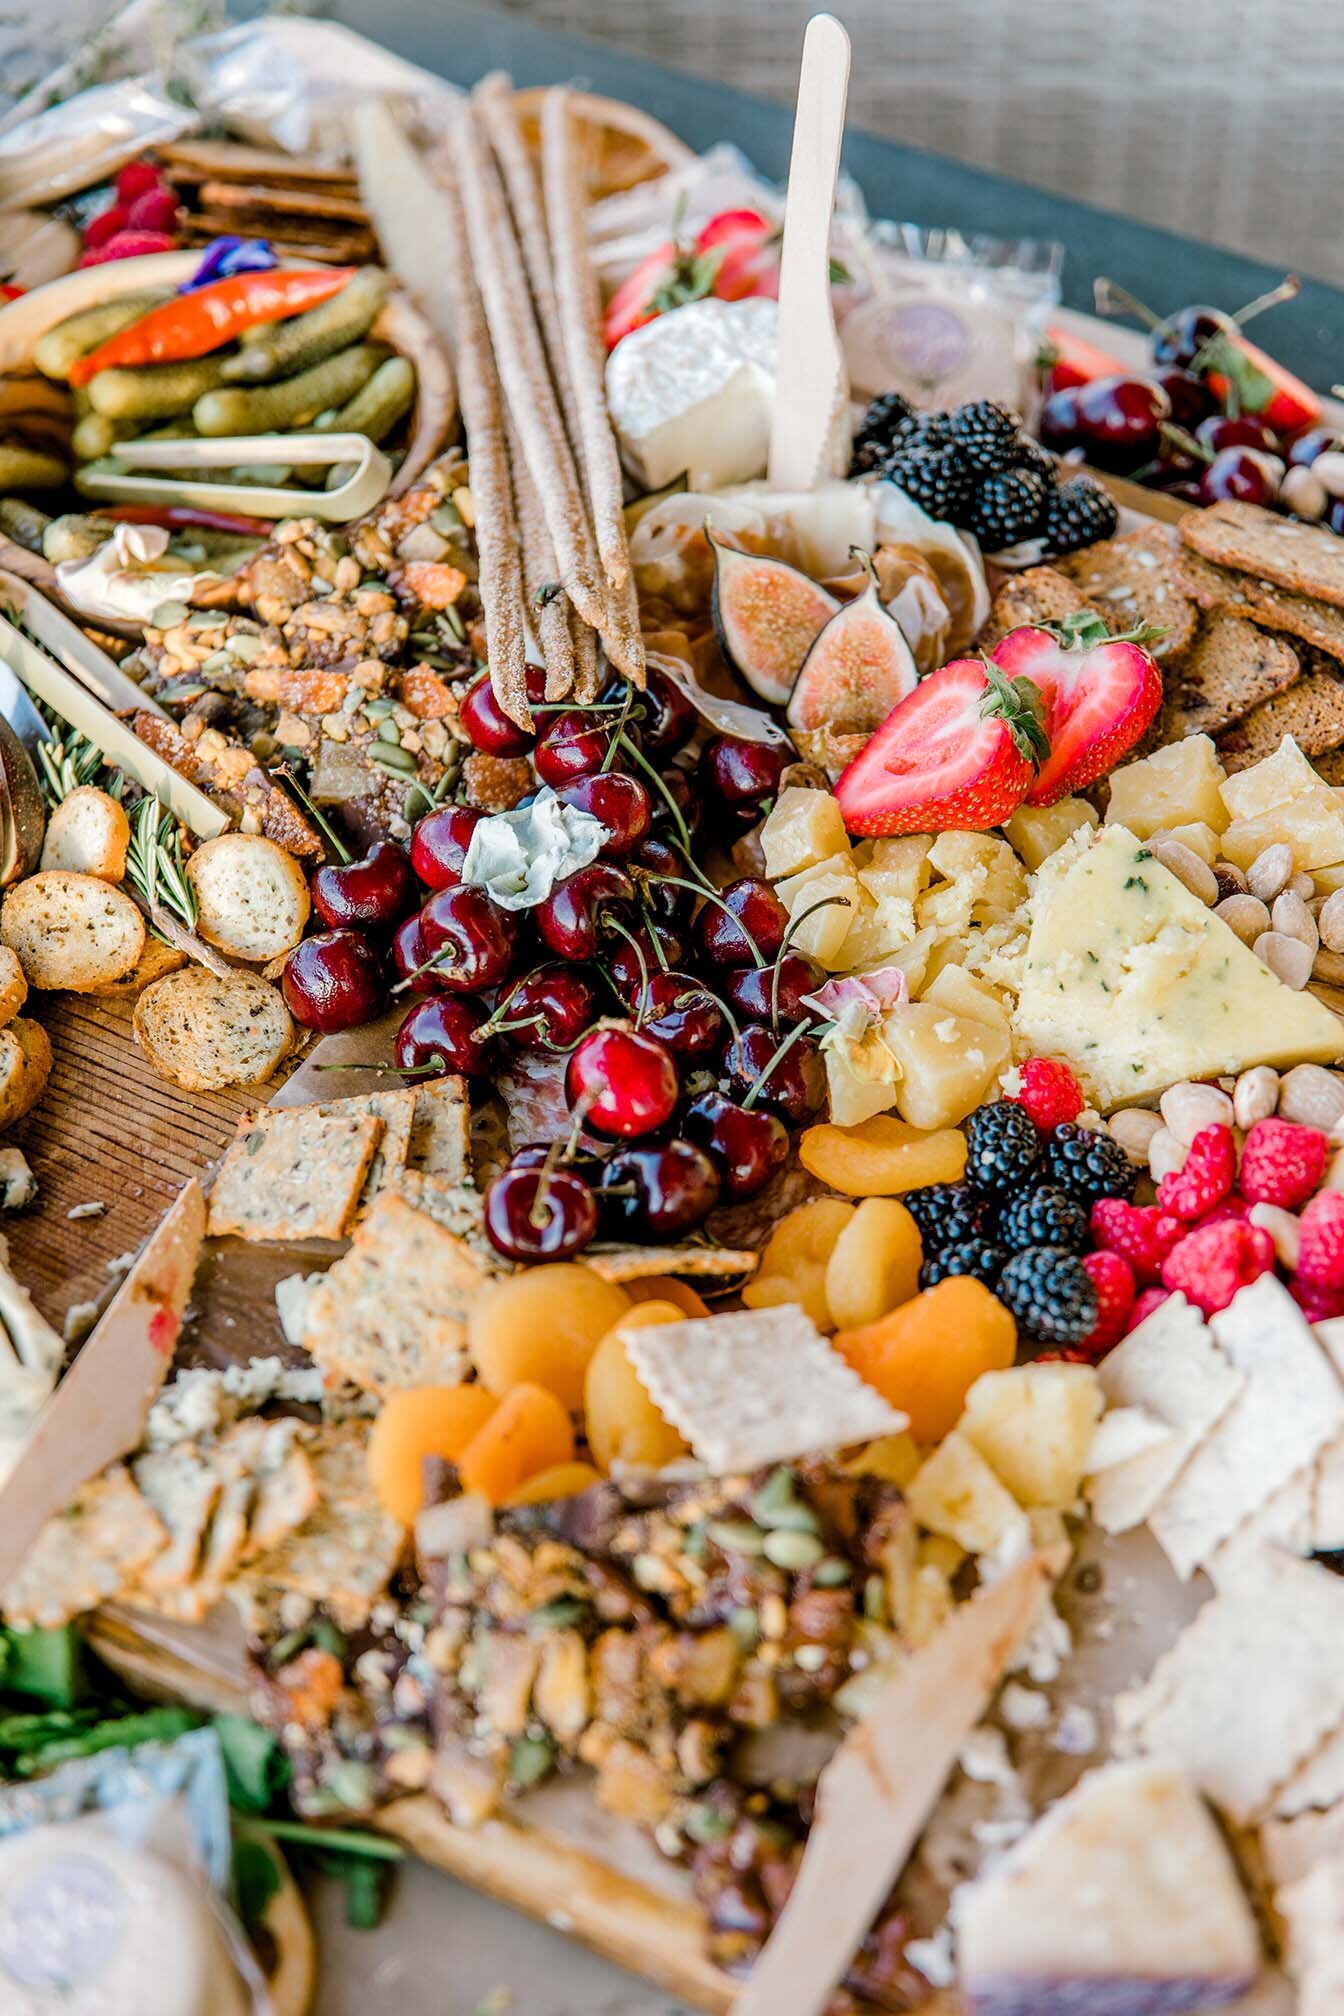
Graze board: @savorynsweetinc
Catering: @la.lu.bru
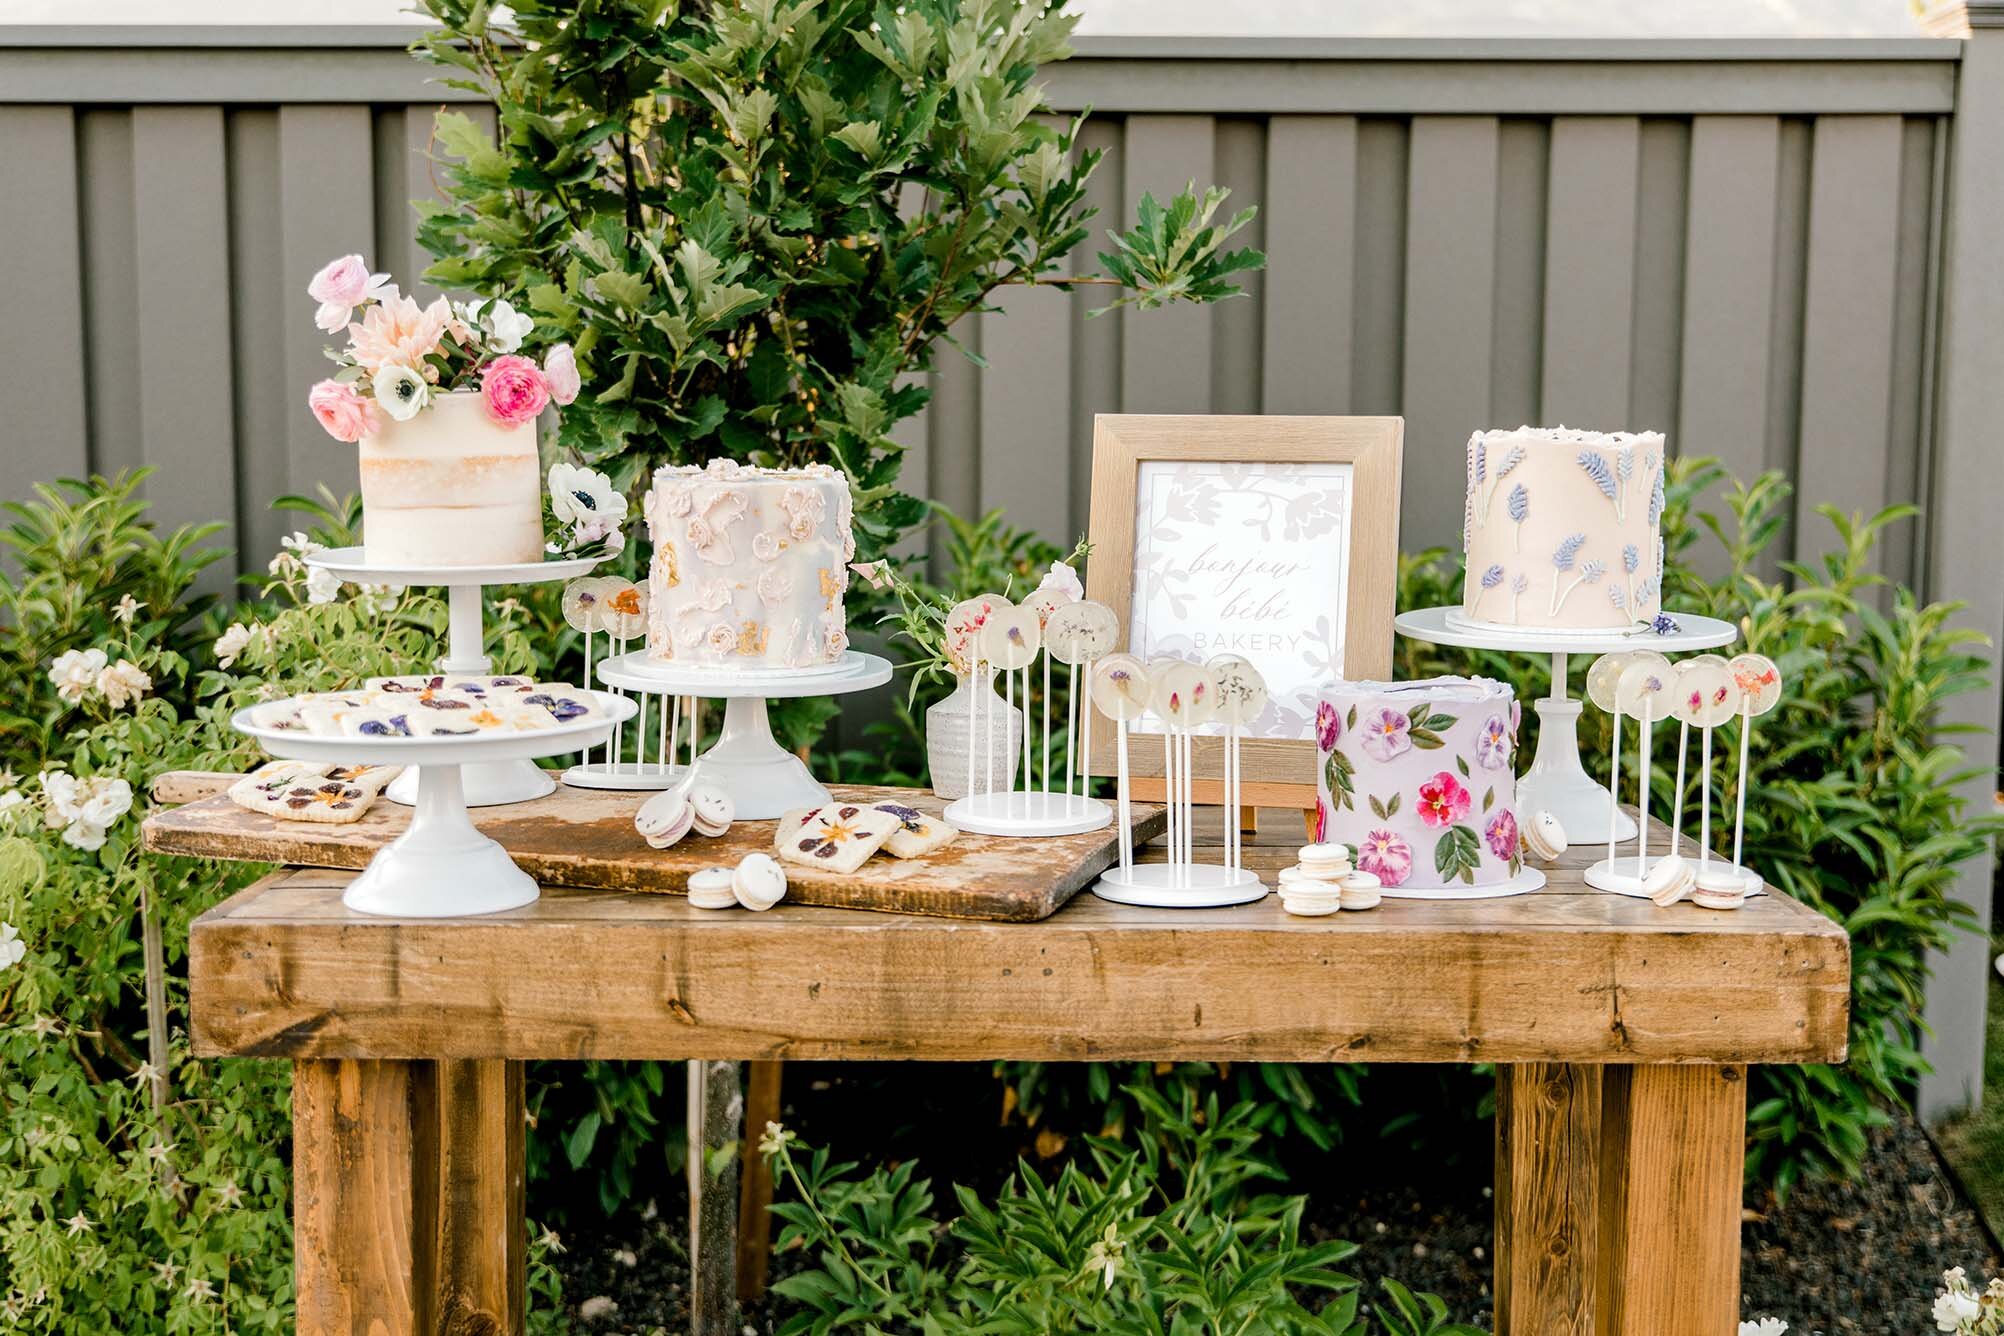
Dessert cart: @lildipbananas
Cakes: @livingbeautahfully
Macarons, cookies + suckers: @cakepartyco
Balloons: @therevelryco
Furniture rentals: @alpineevents.co
Prop rentals: @fernwehlifestyles
Momma: Shea McGee from @studiomcgee

Interested in working together on custom stationery for your event? Email me!
info@stephanietara.com

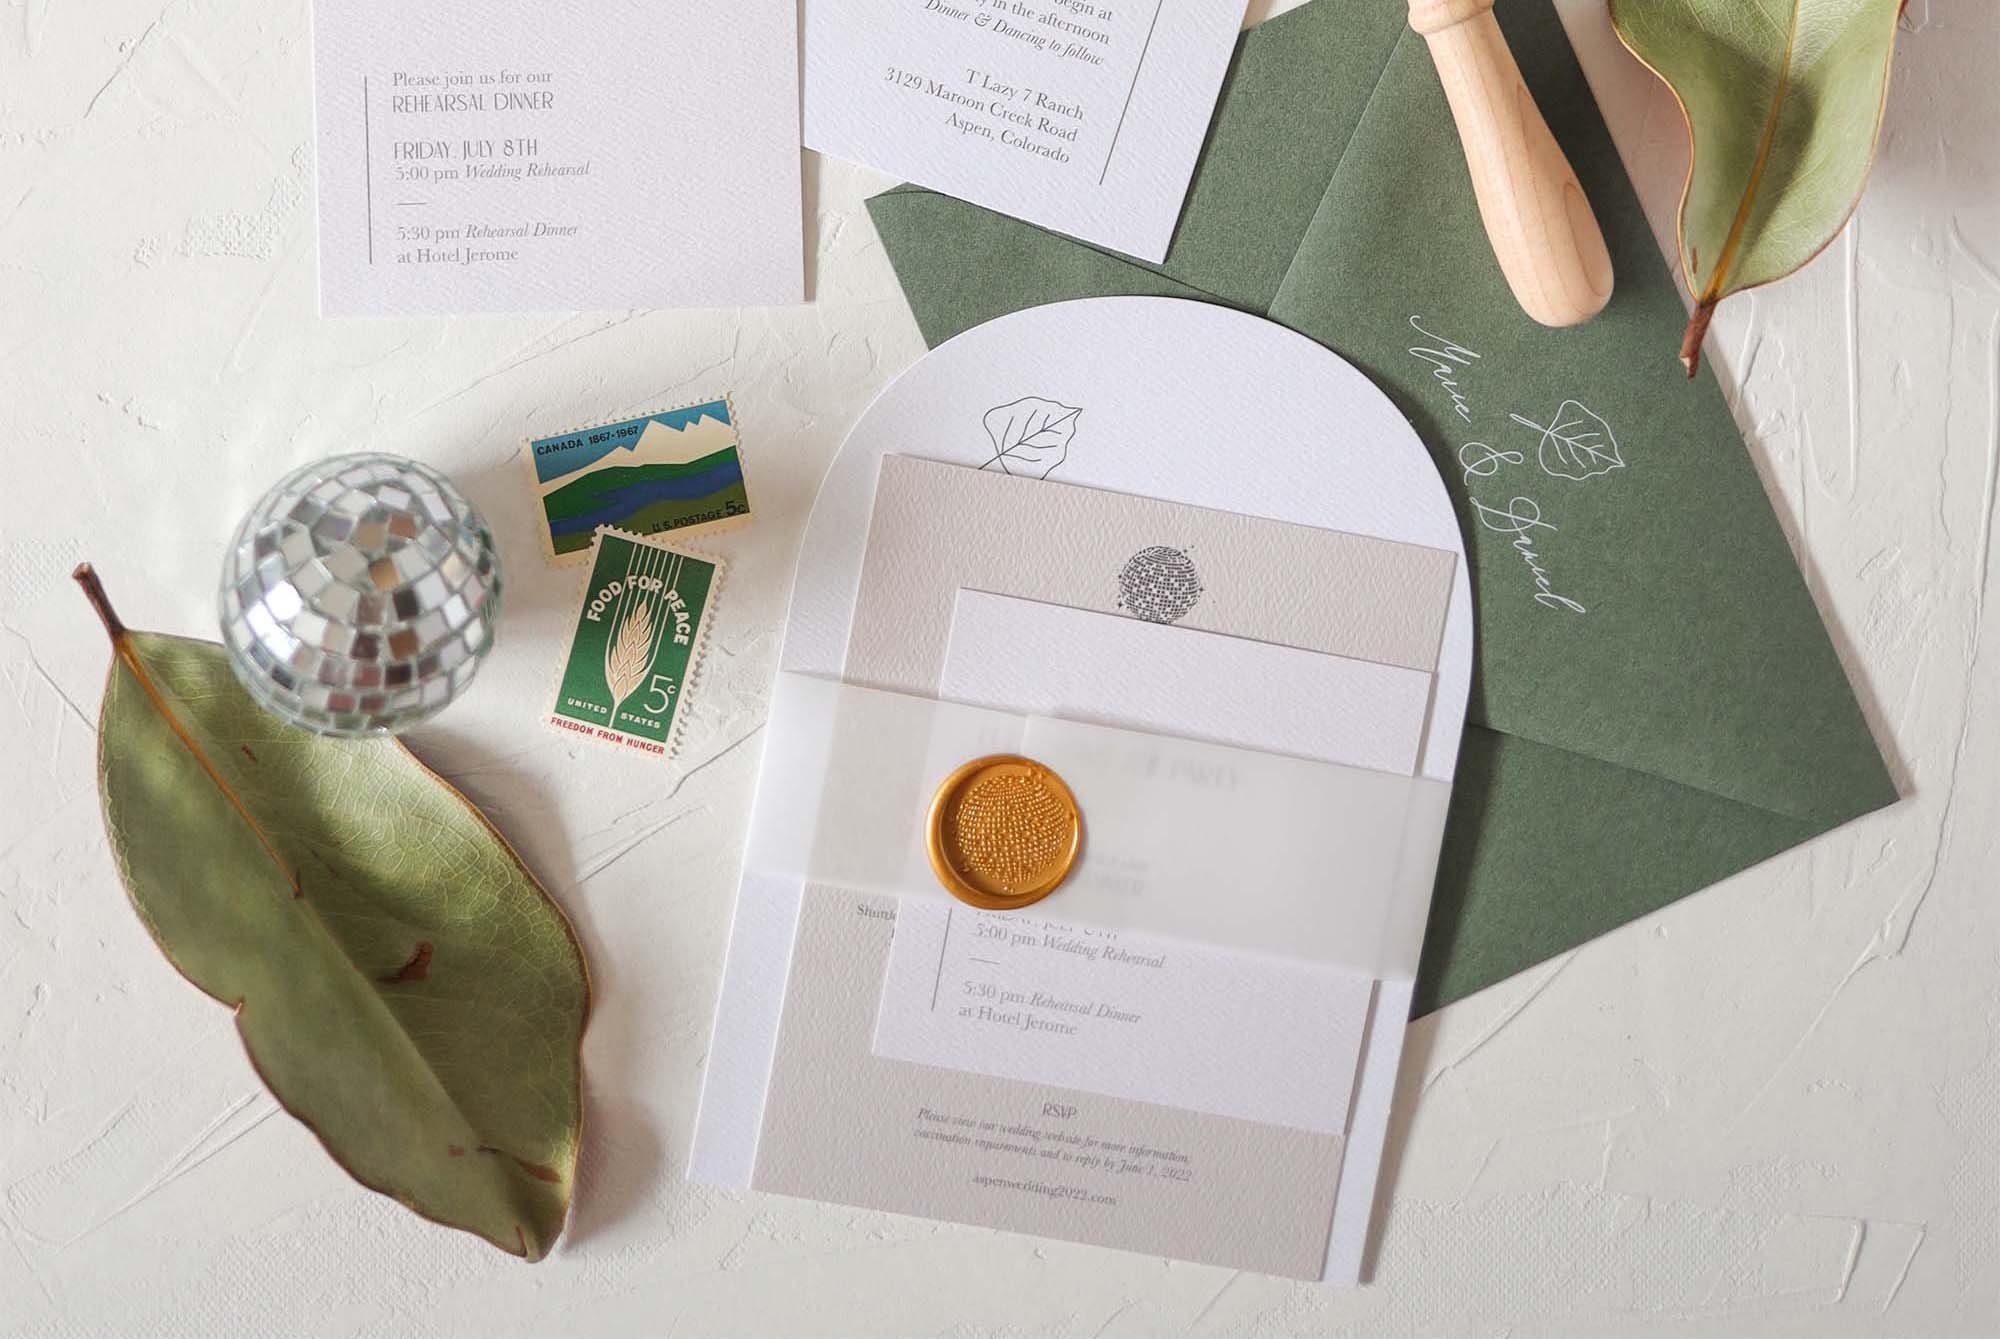
custom wax seal stamps
What is a wax seal and how do you design one and where can I get one?…all these questions answered here!
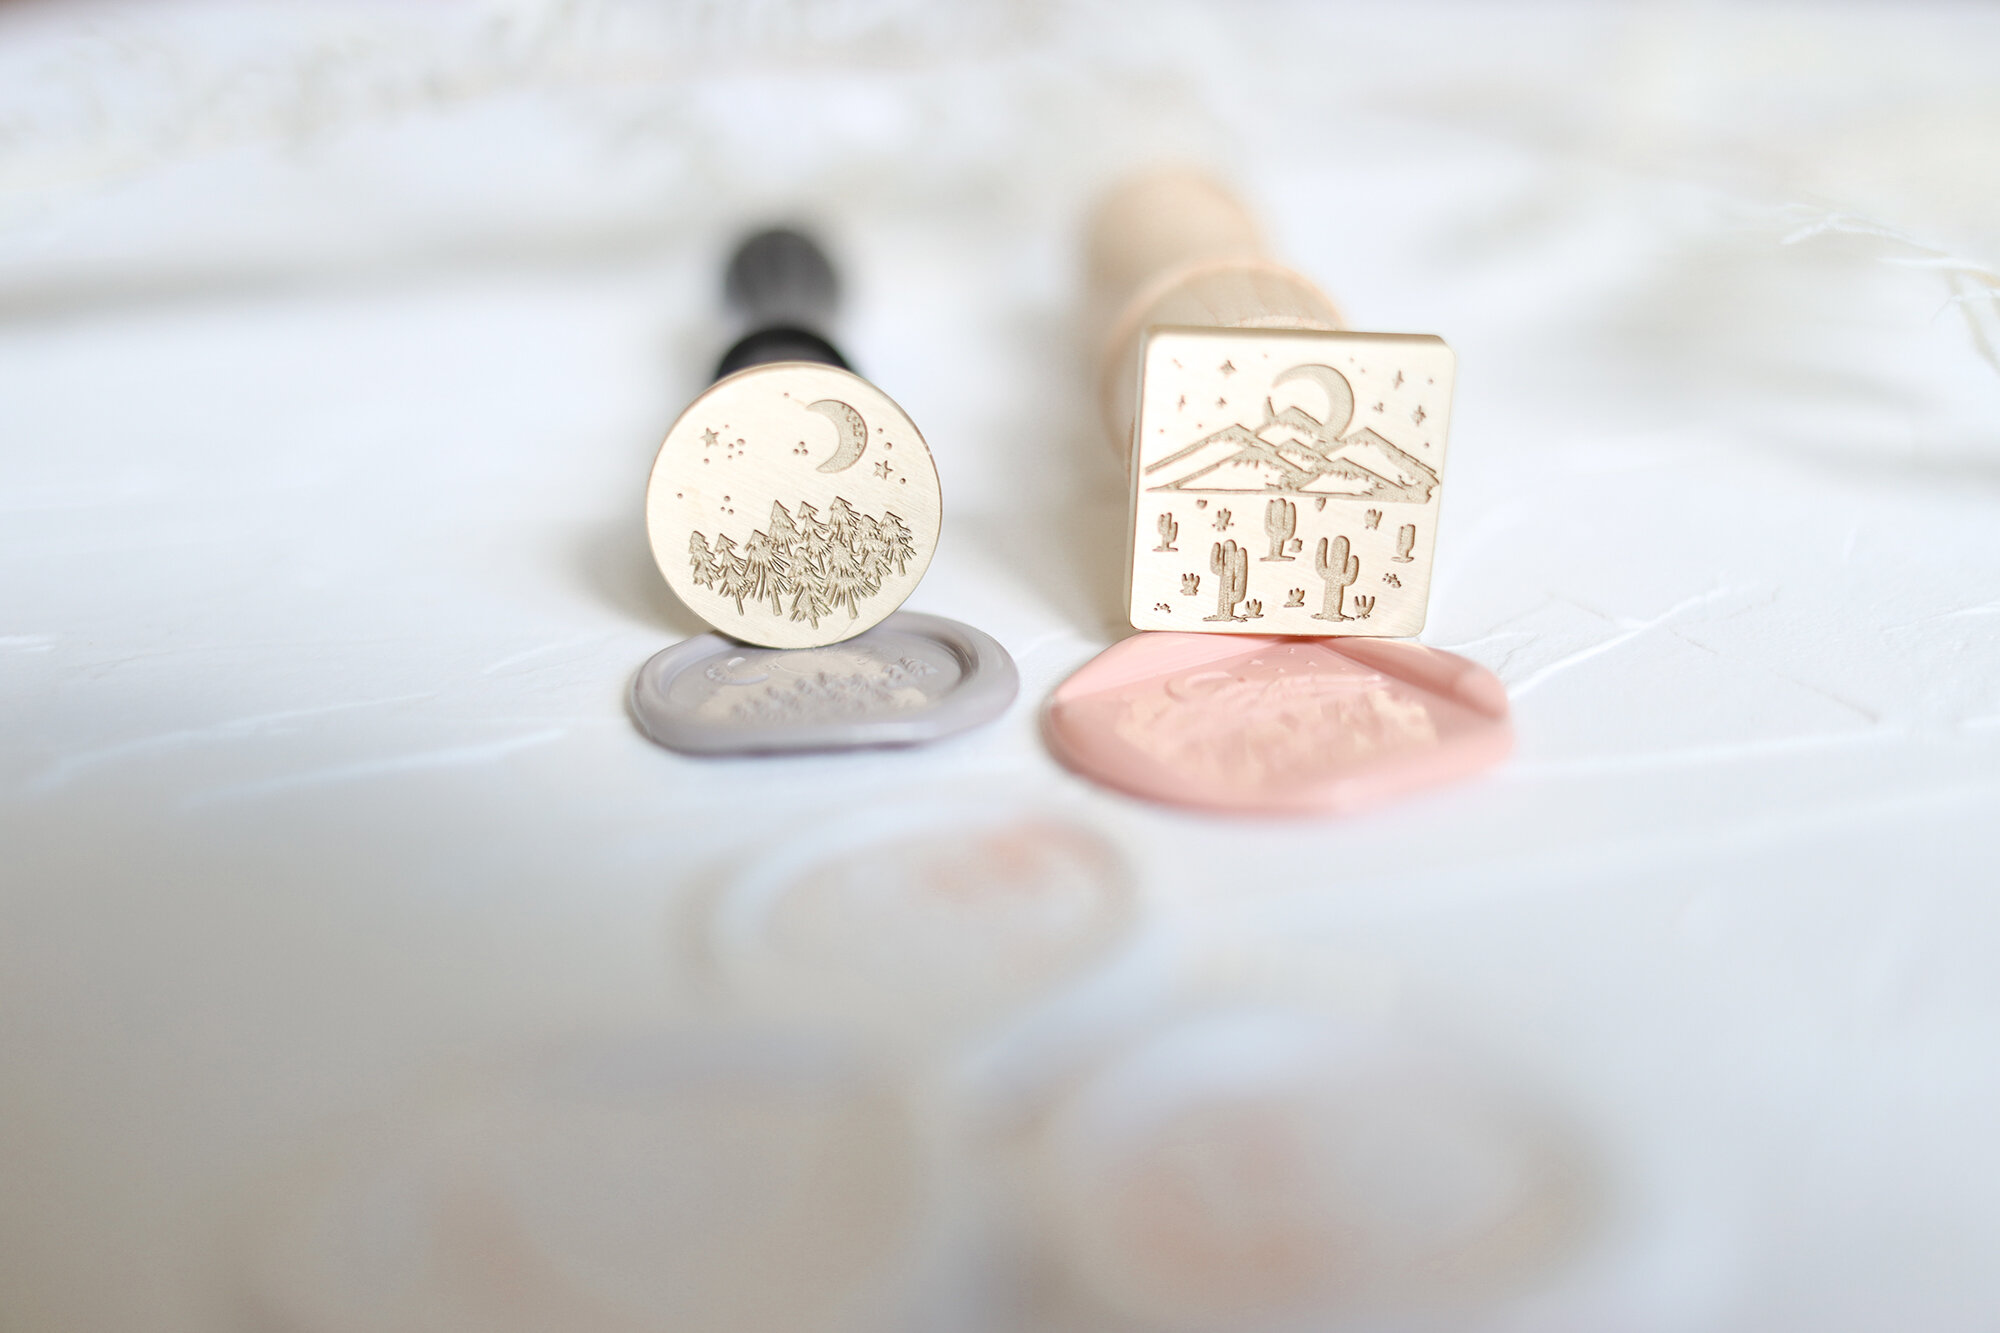
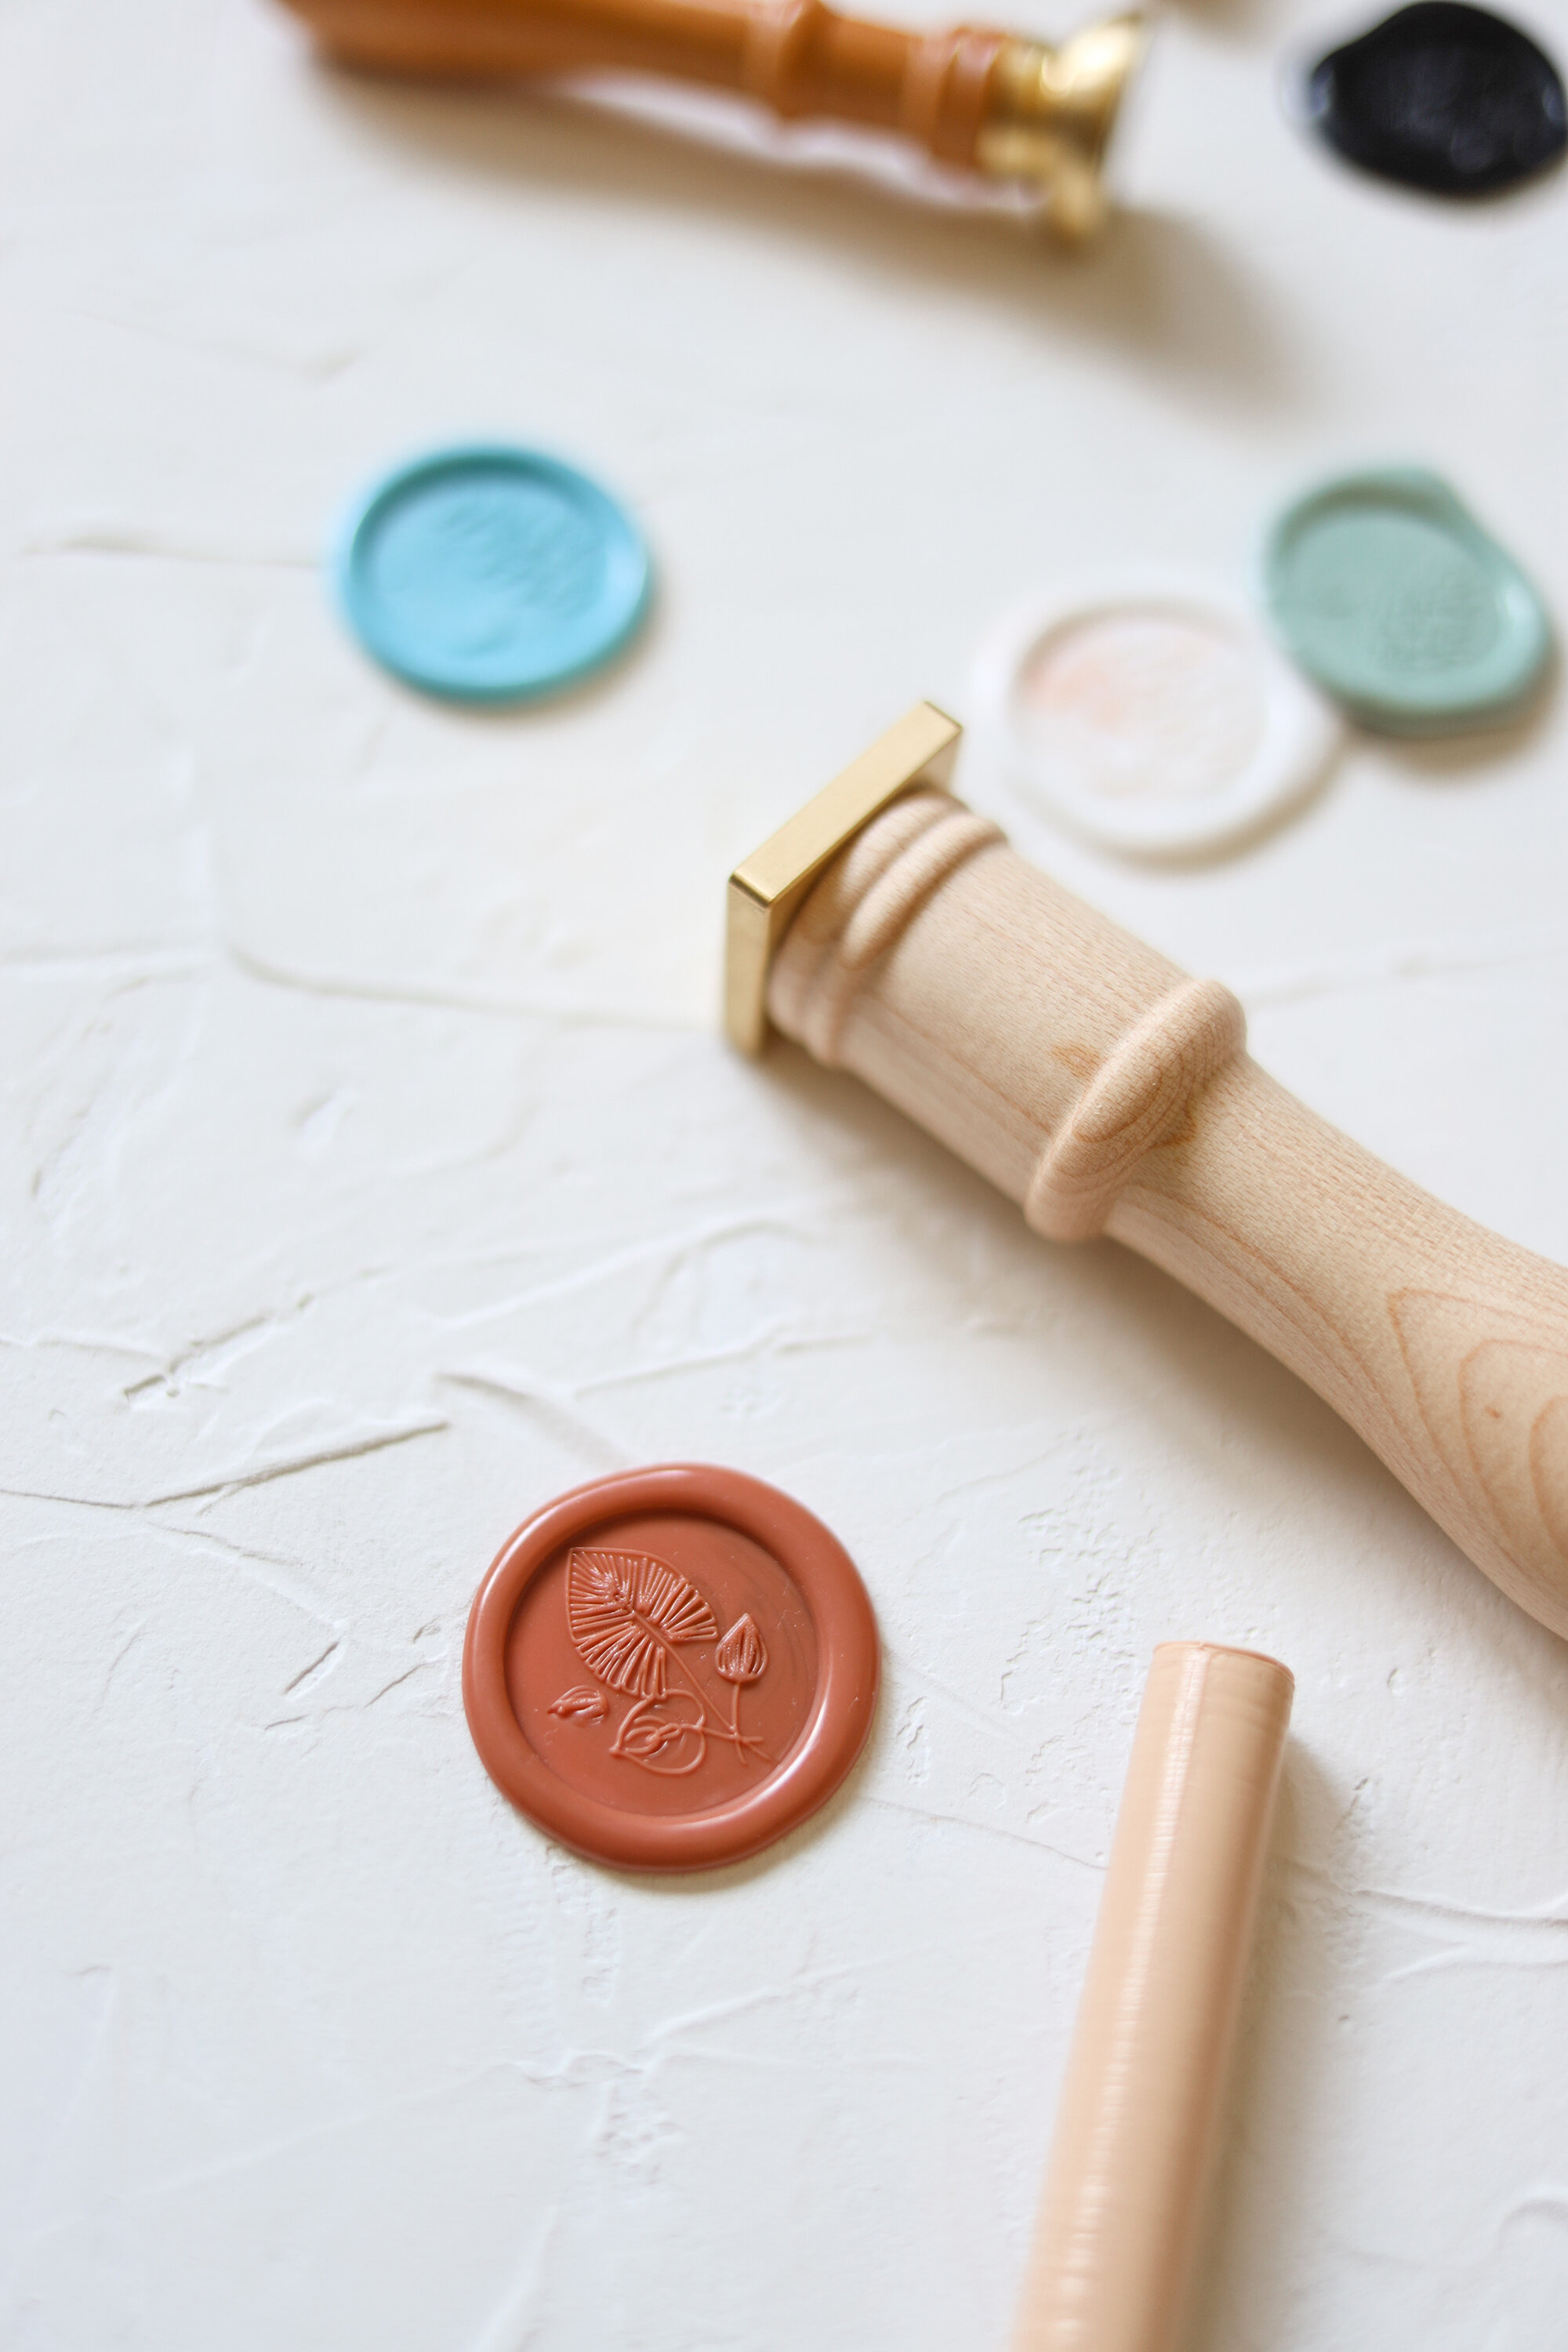
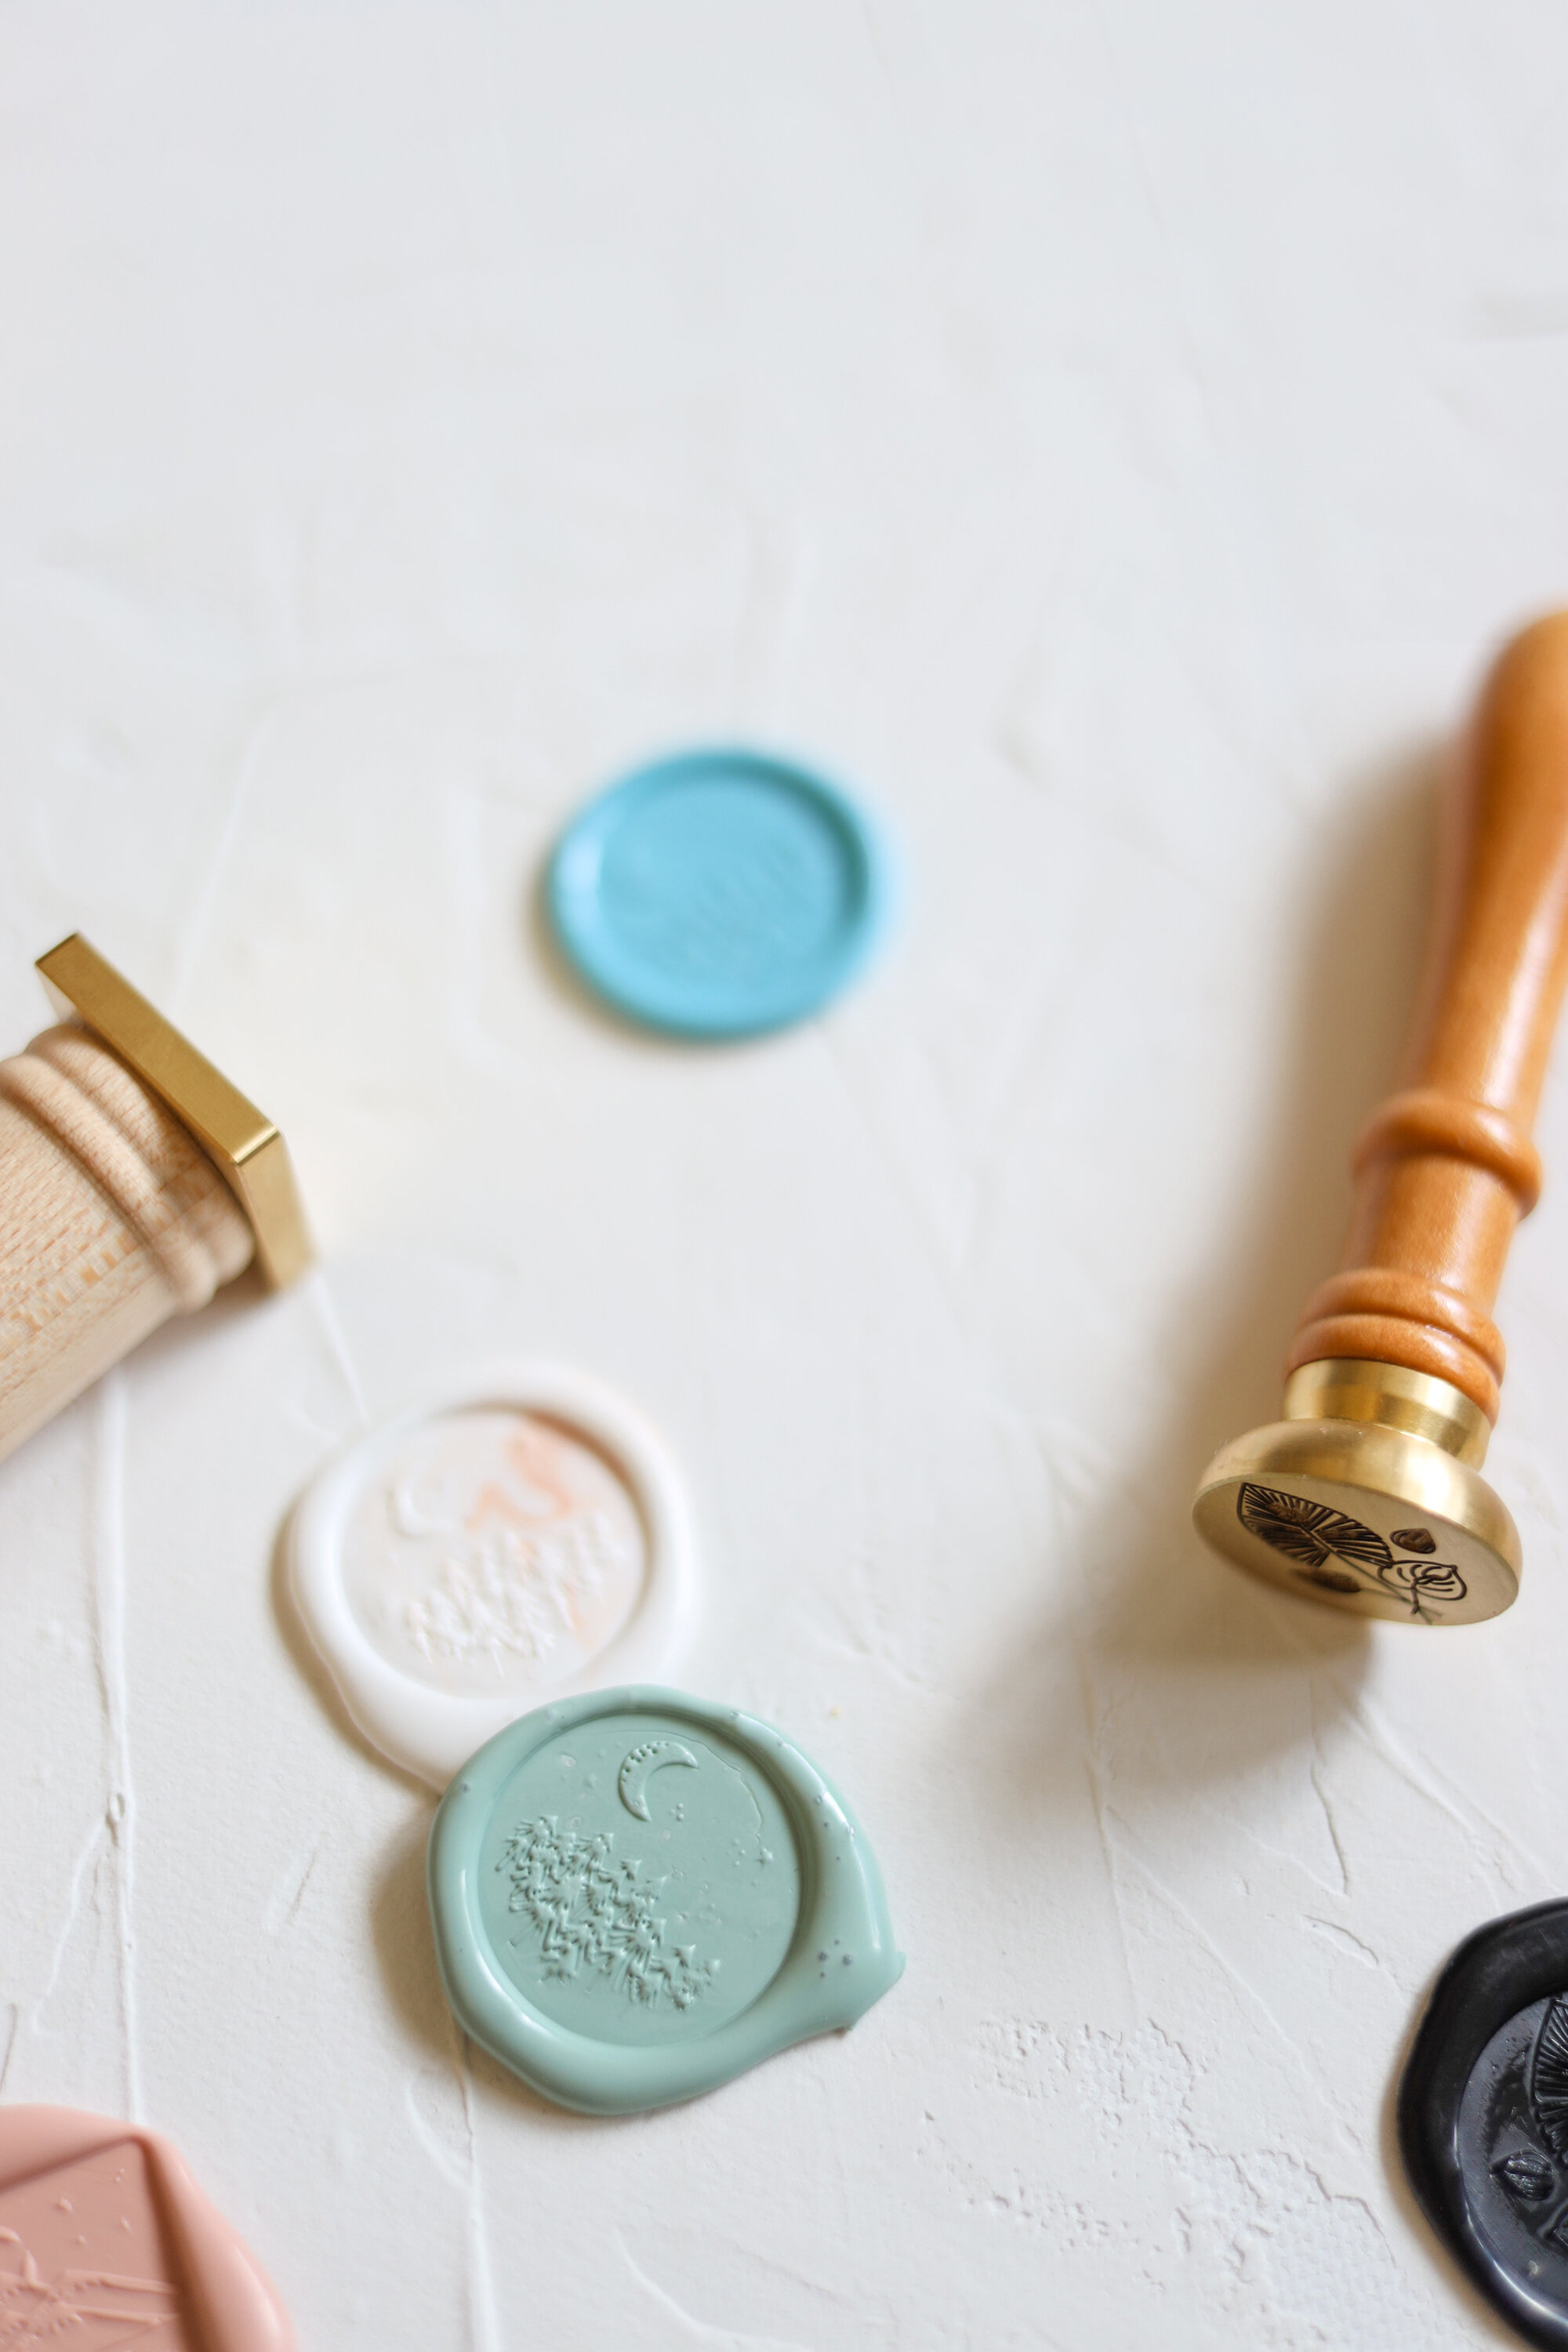
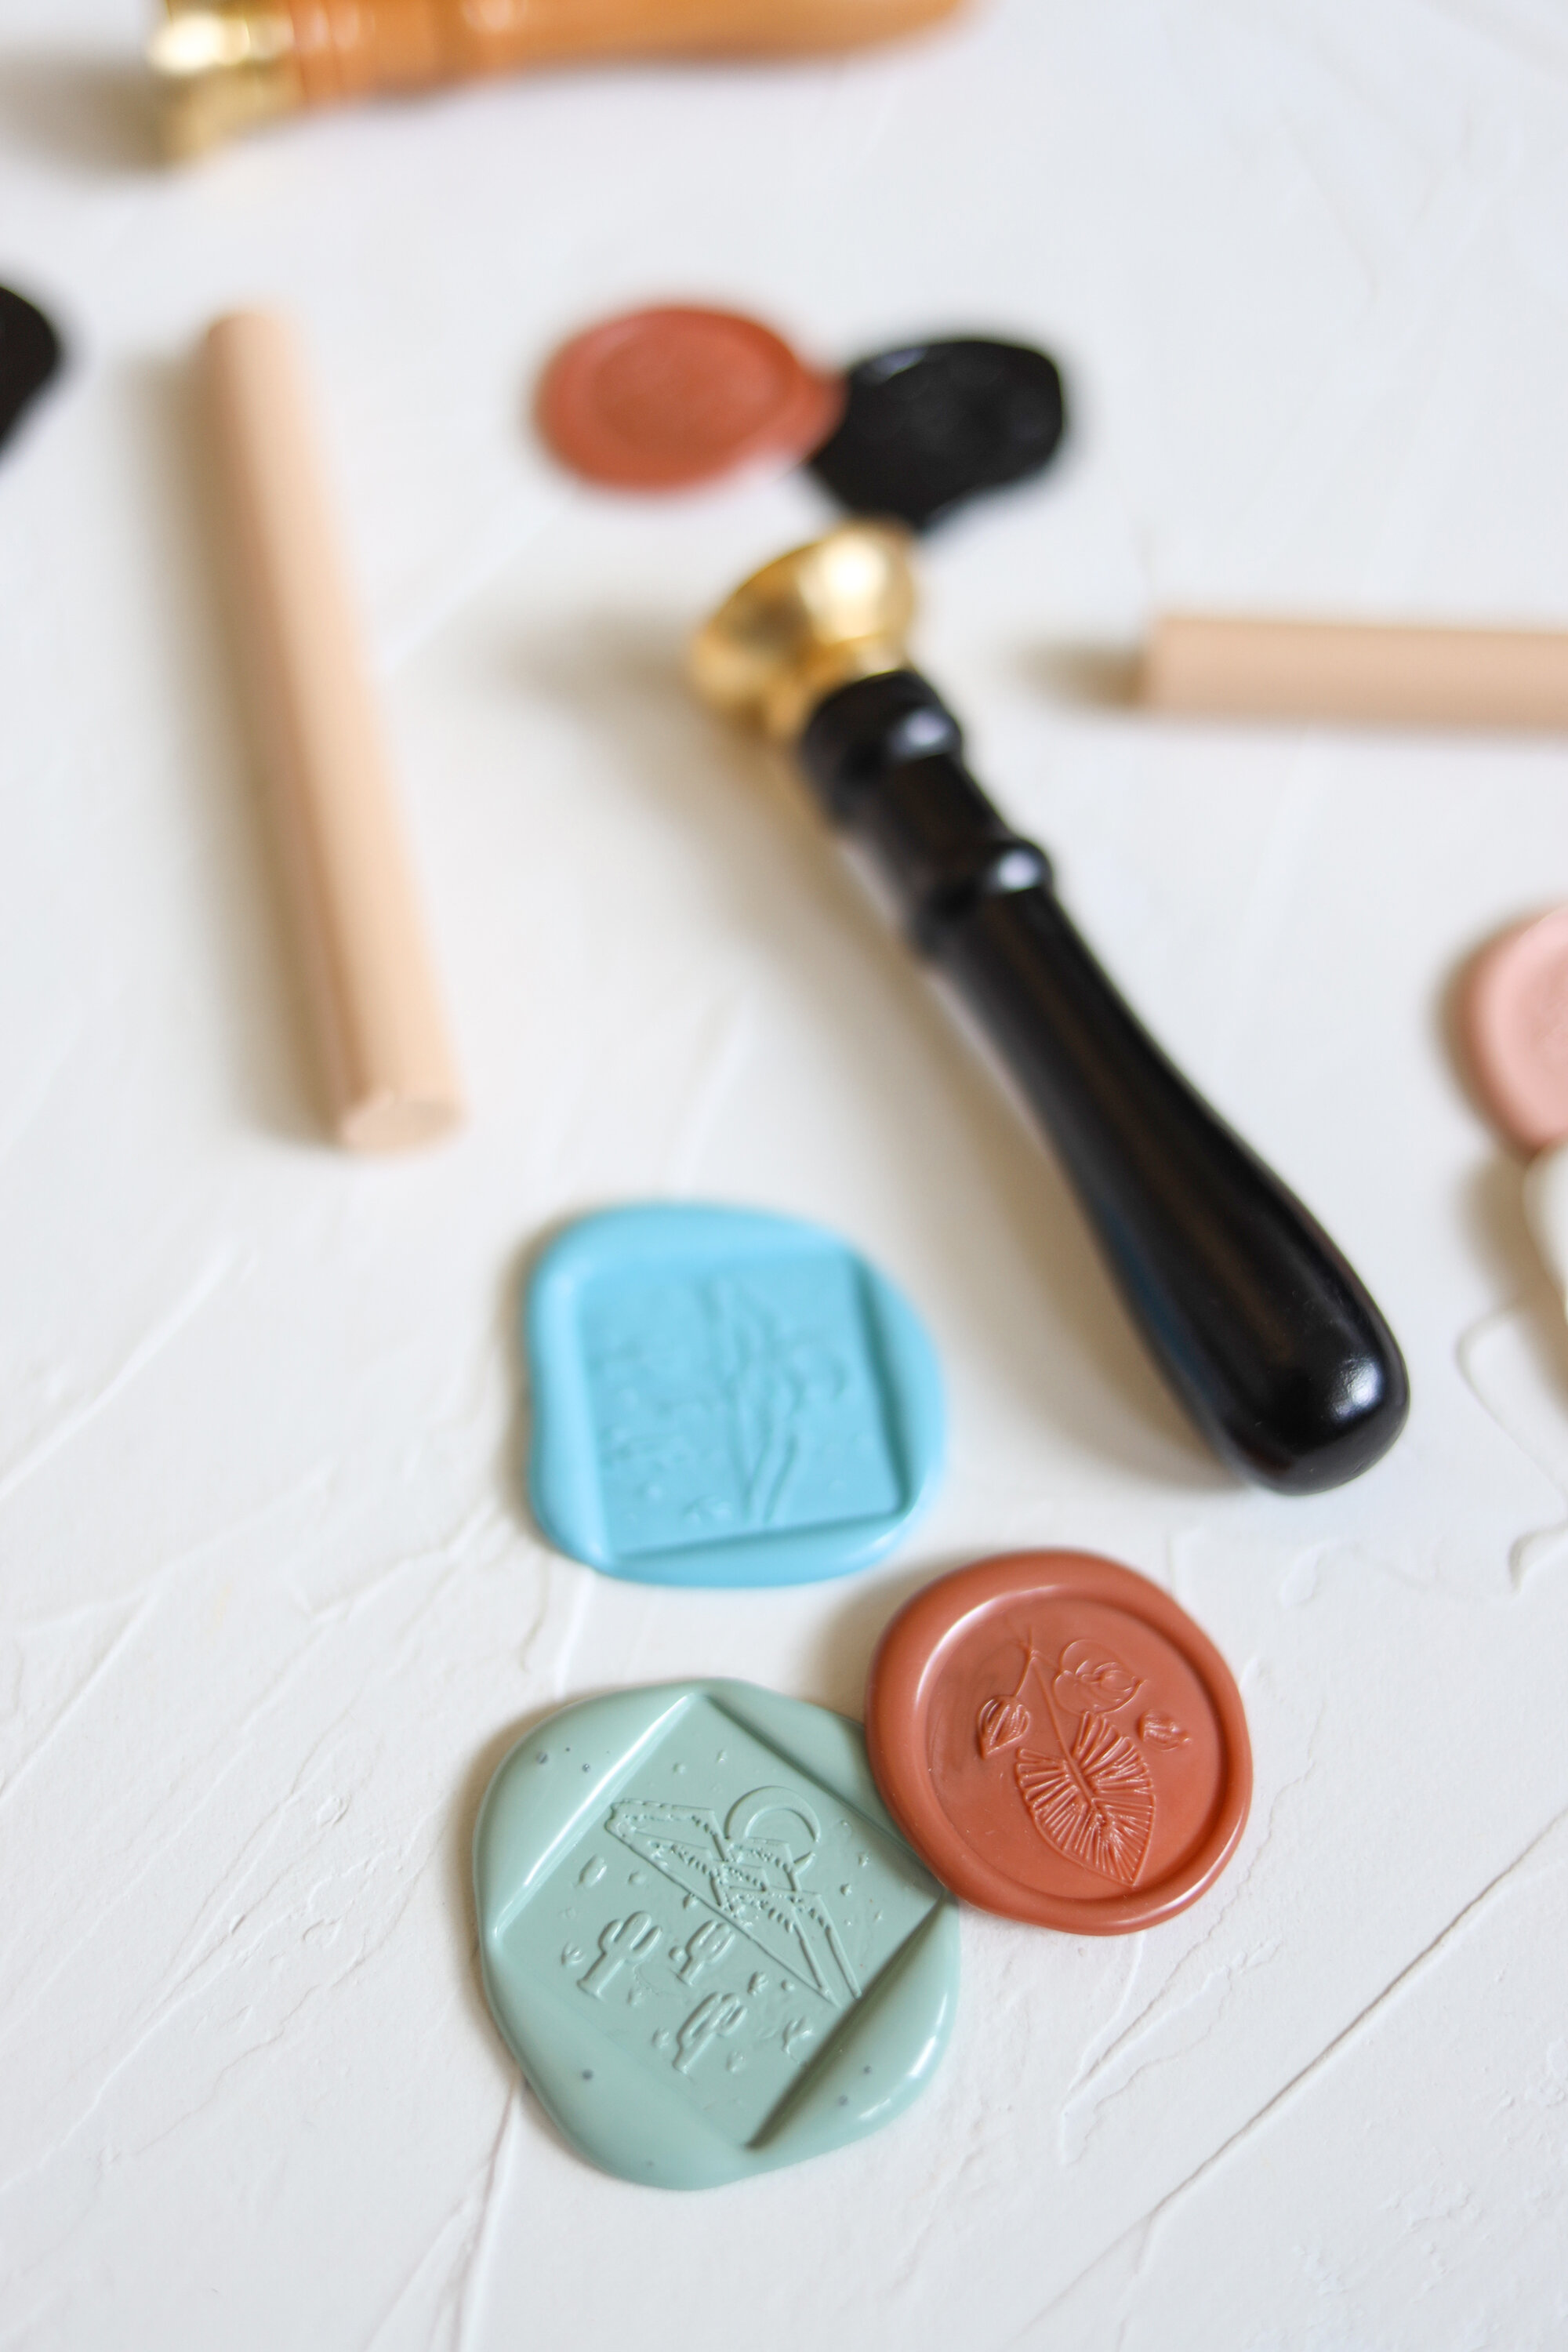
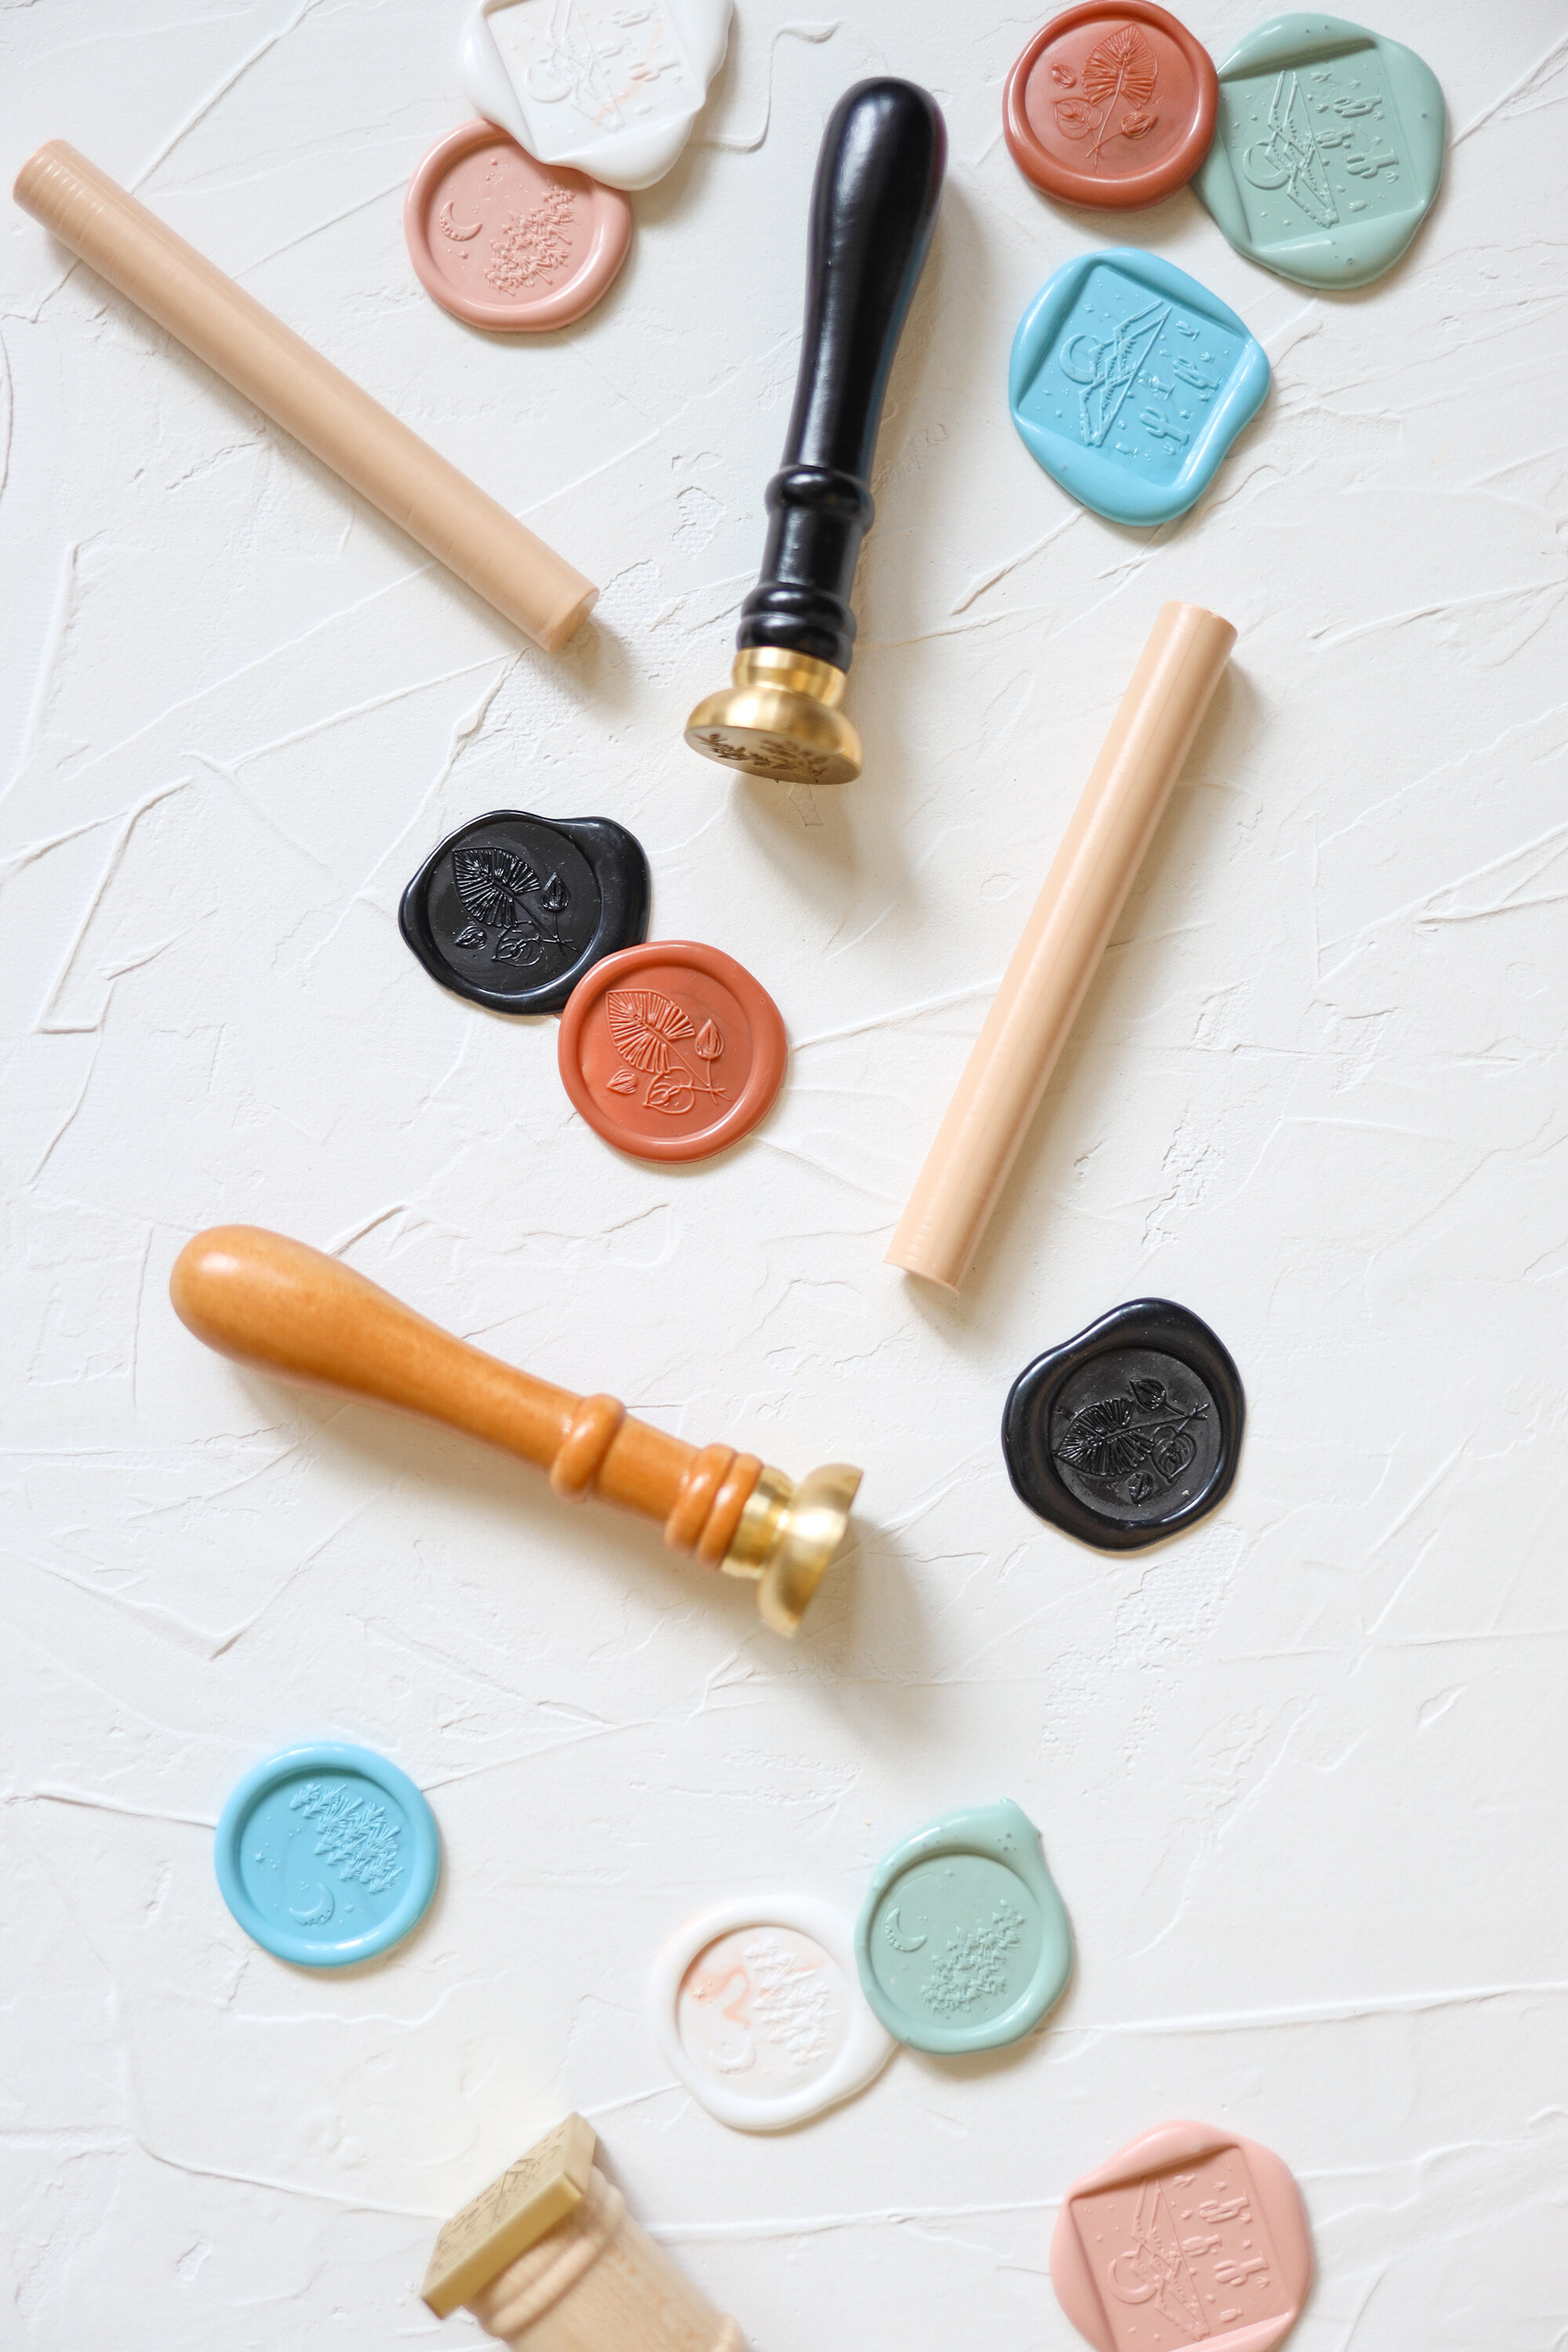
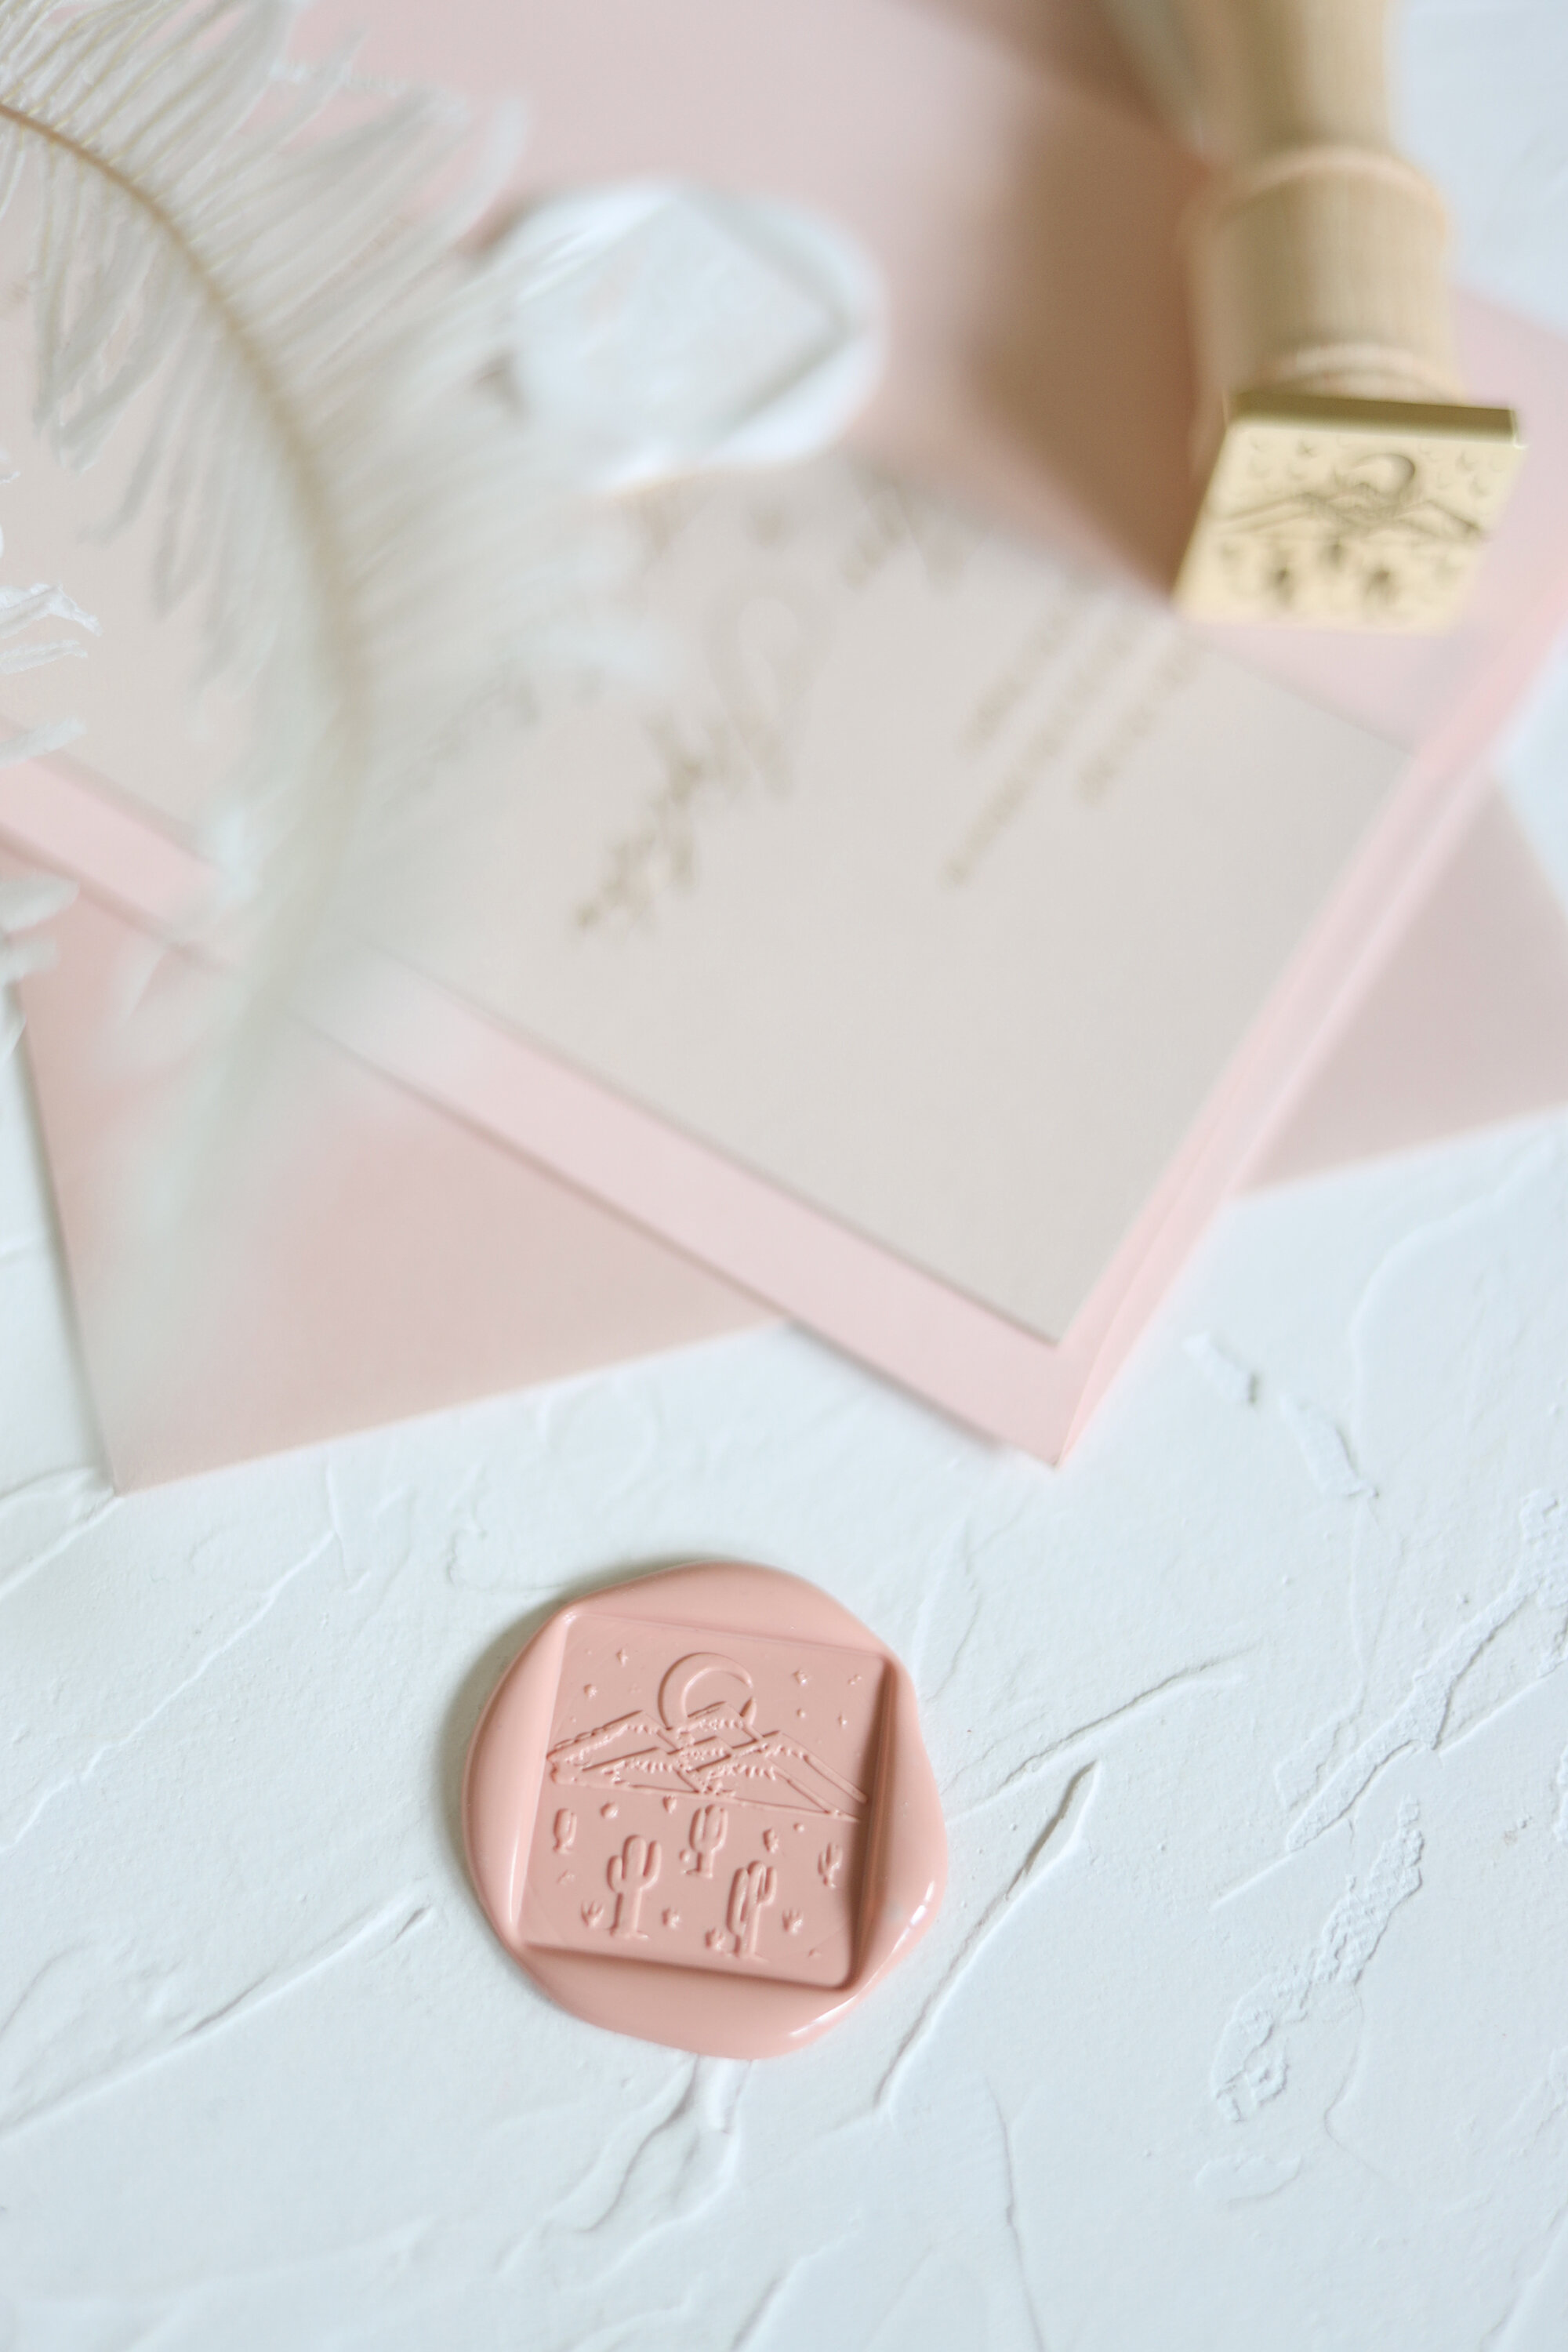
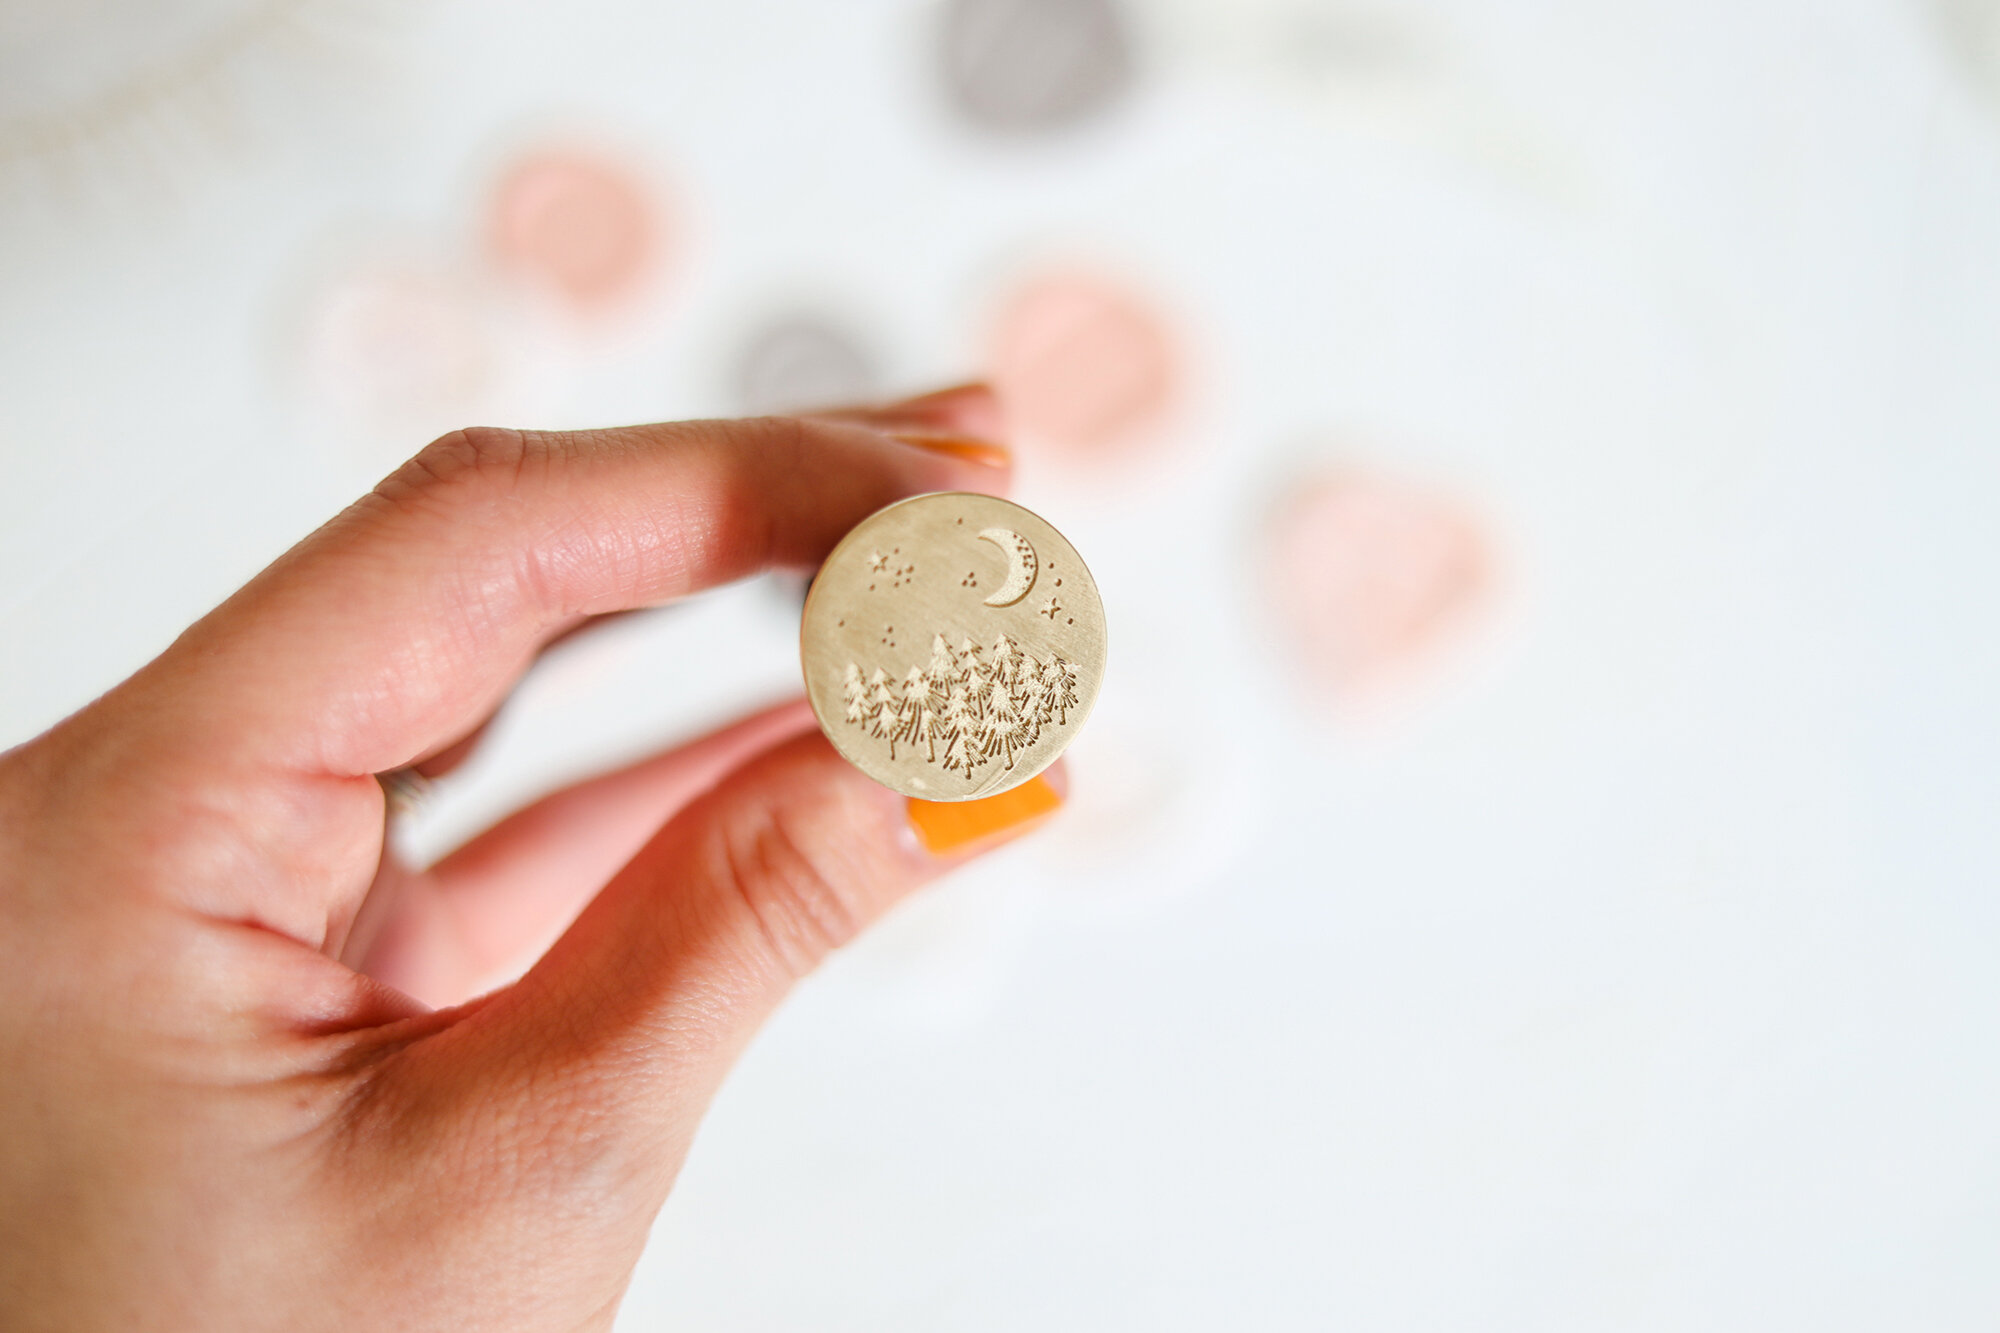
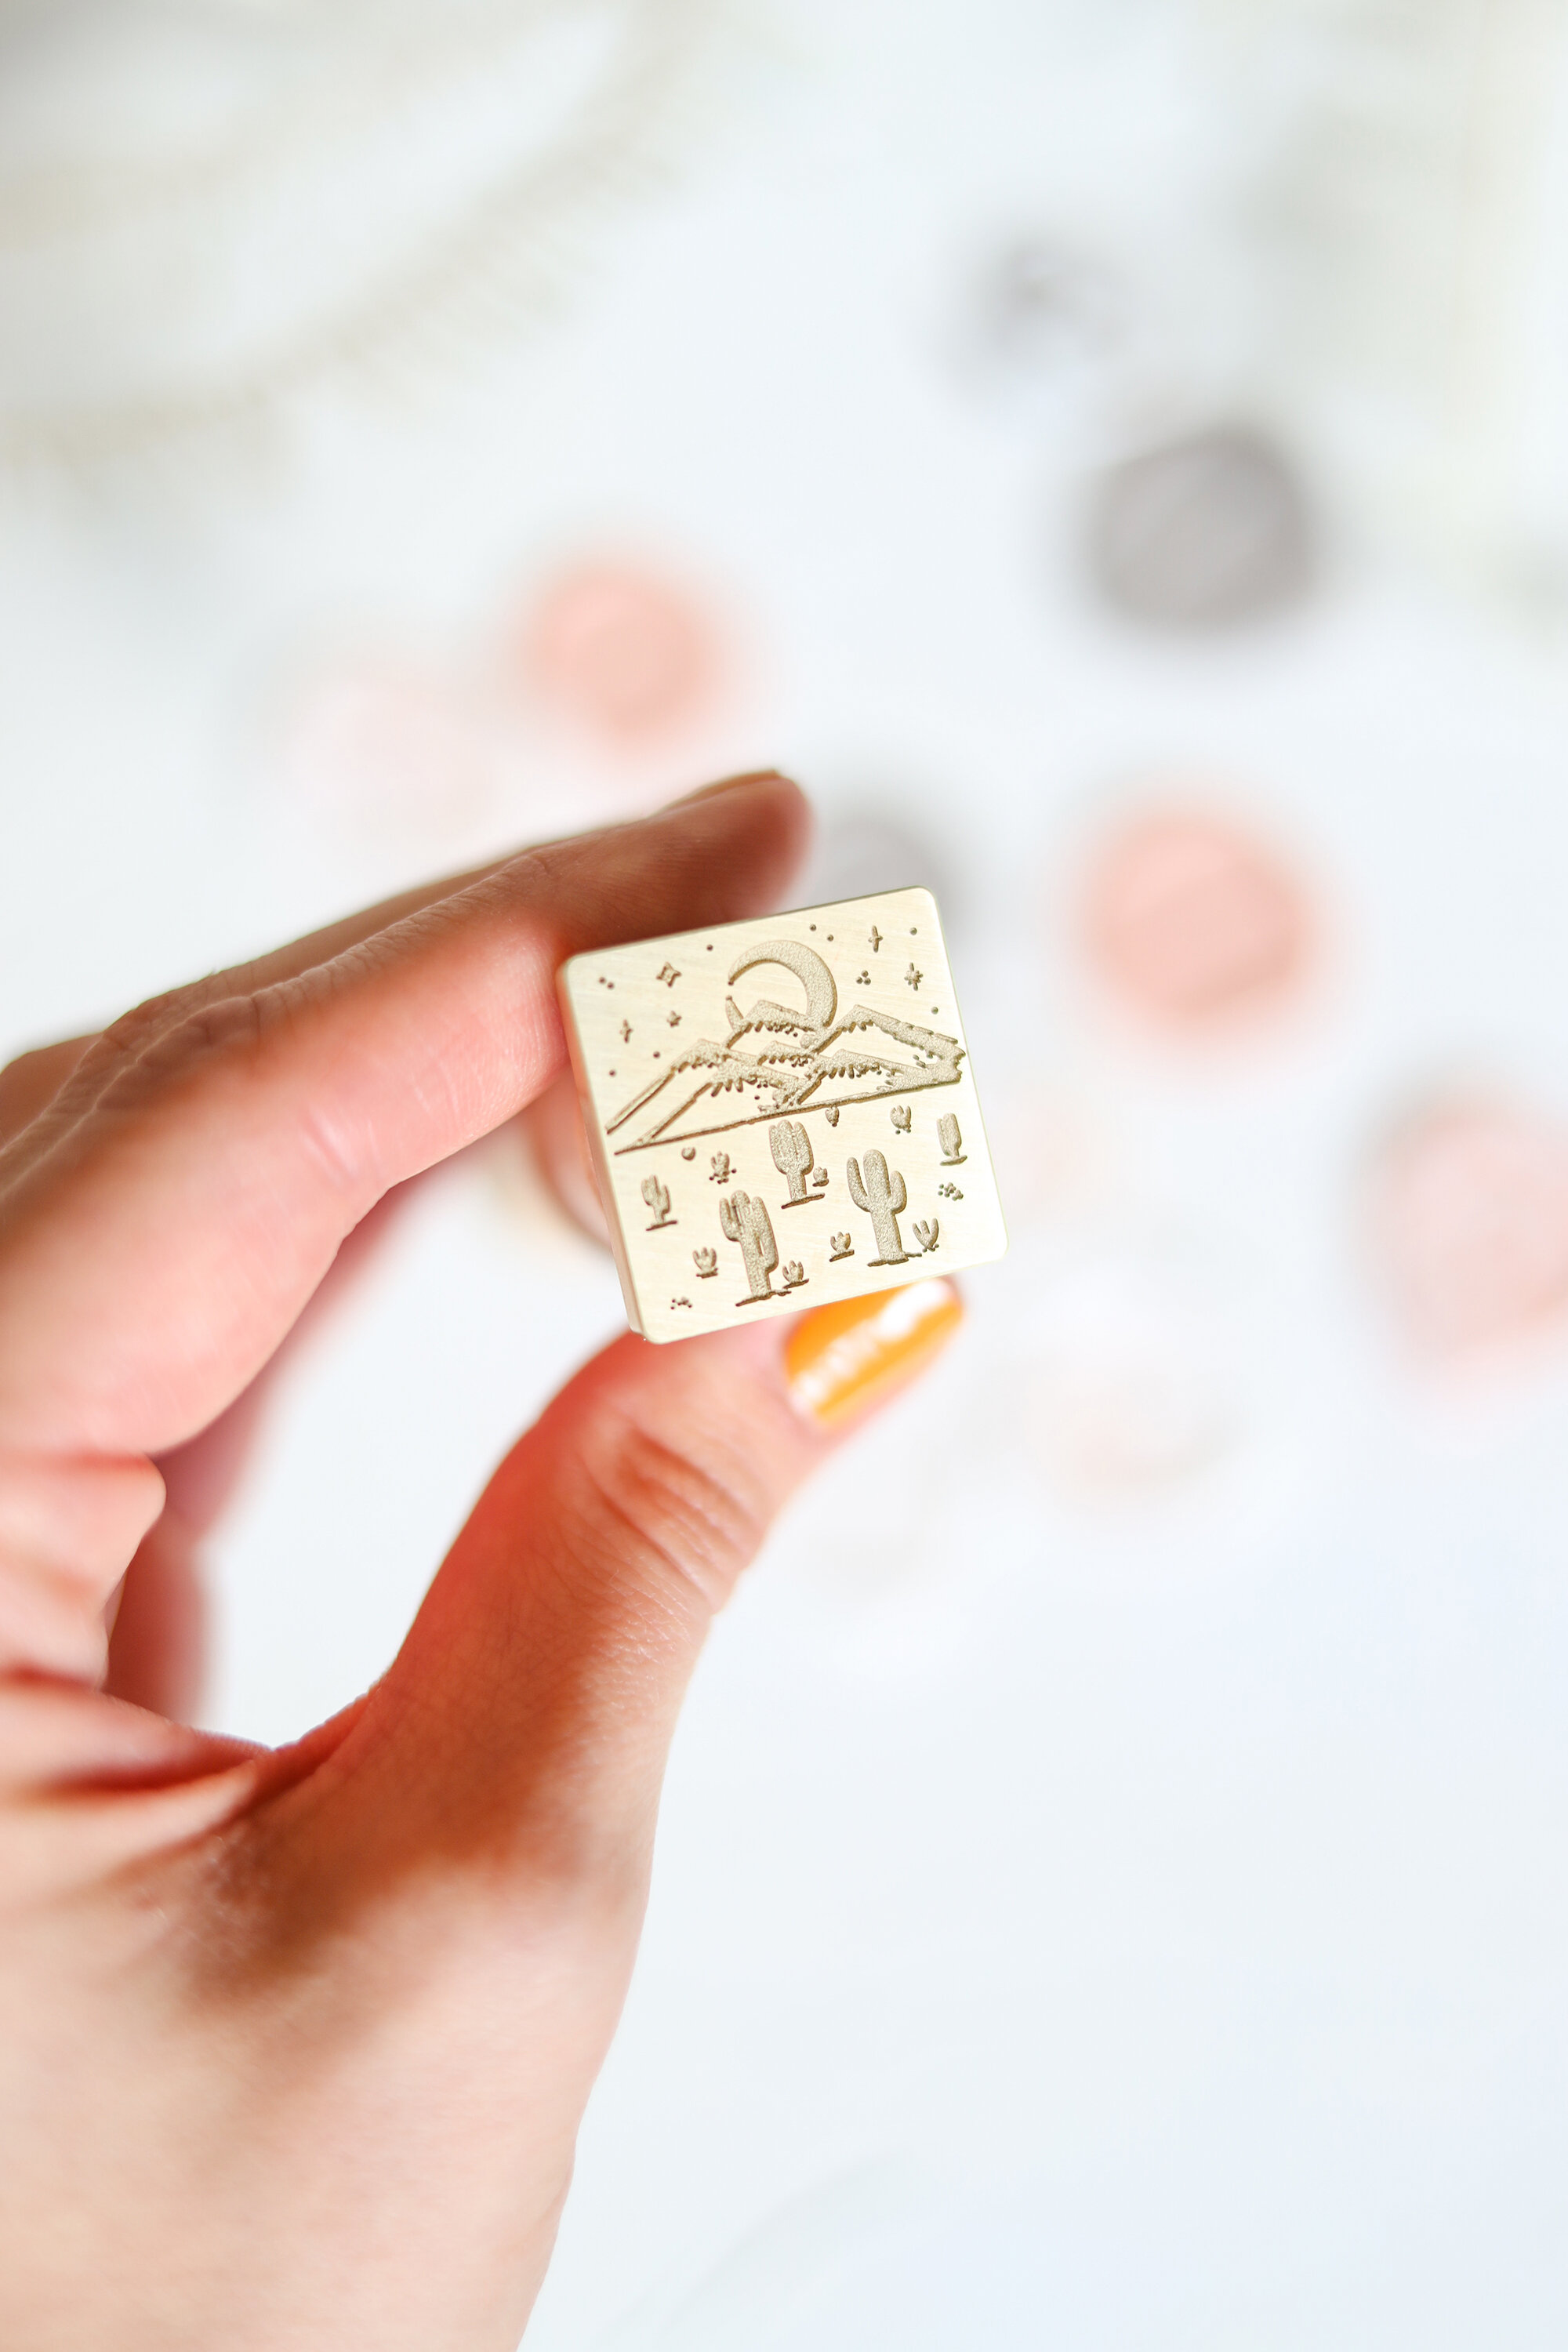
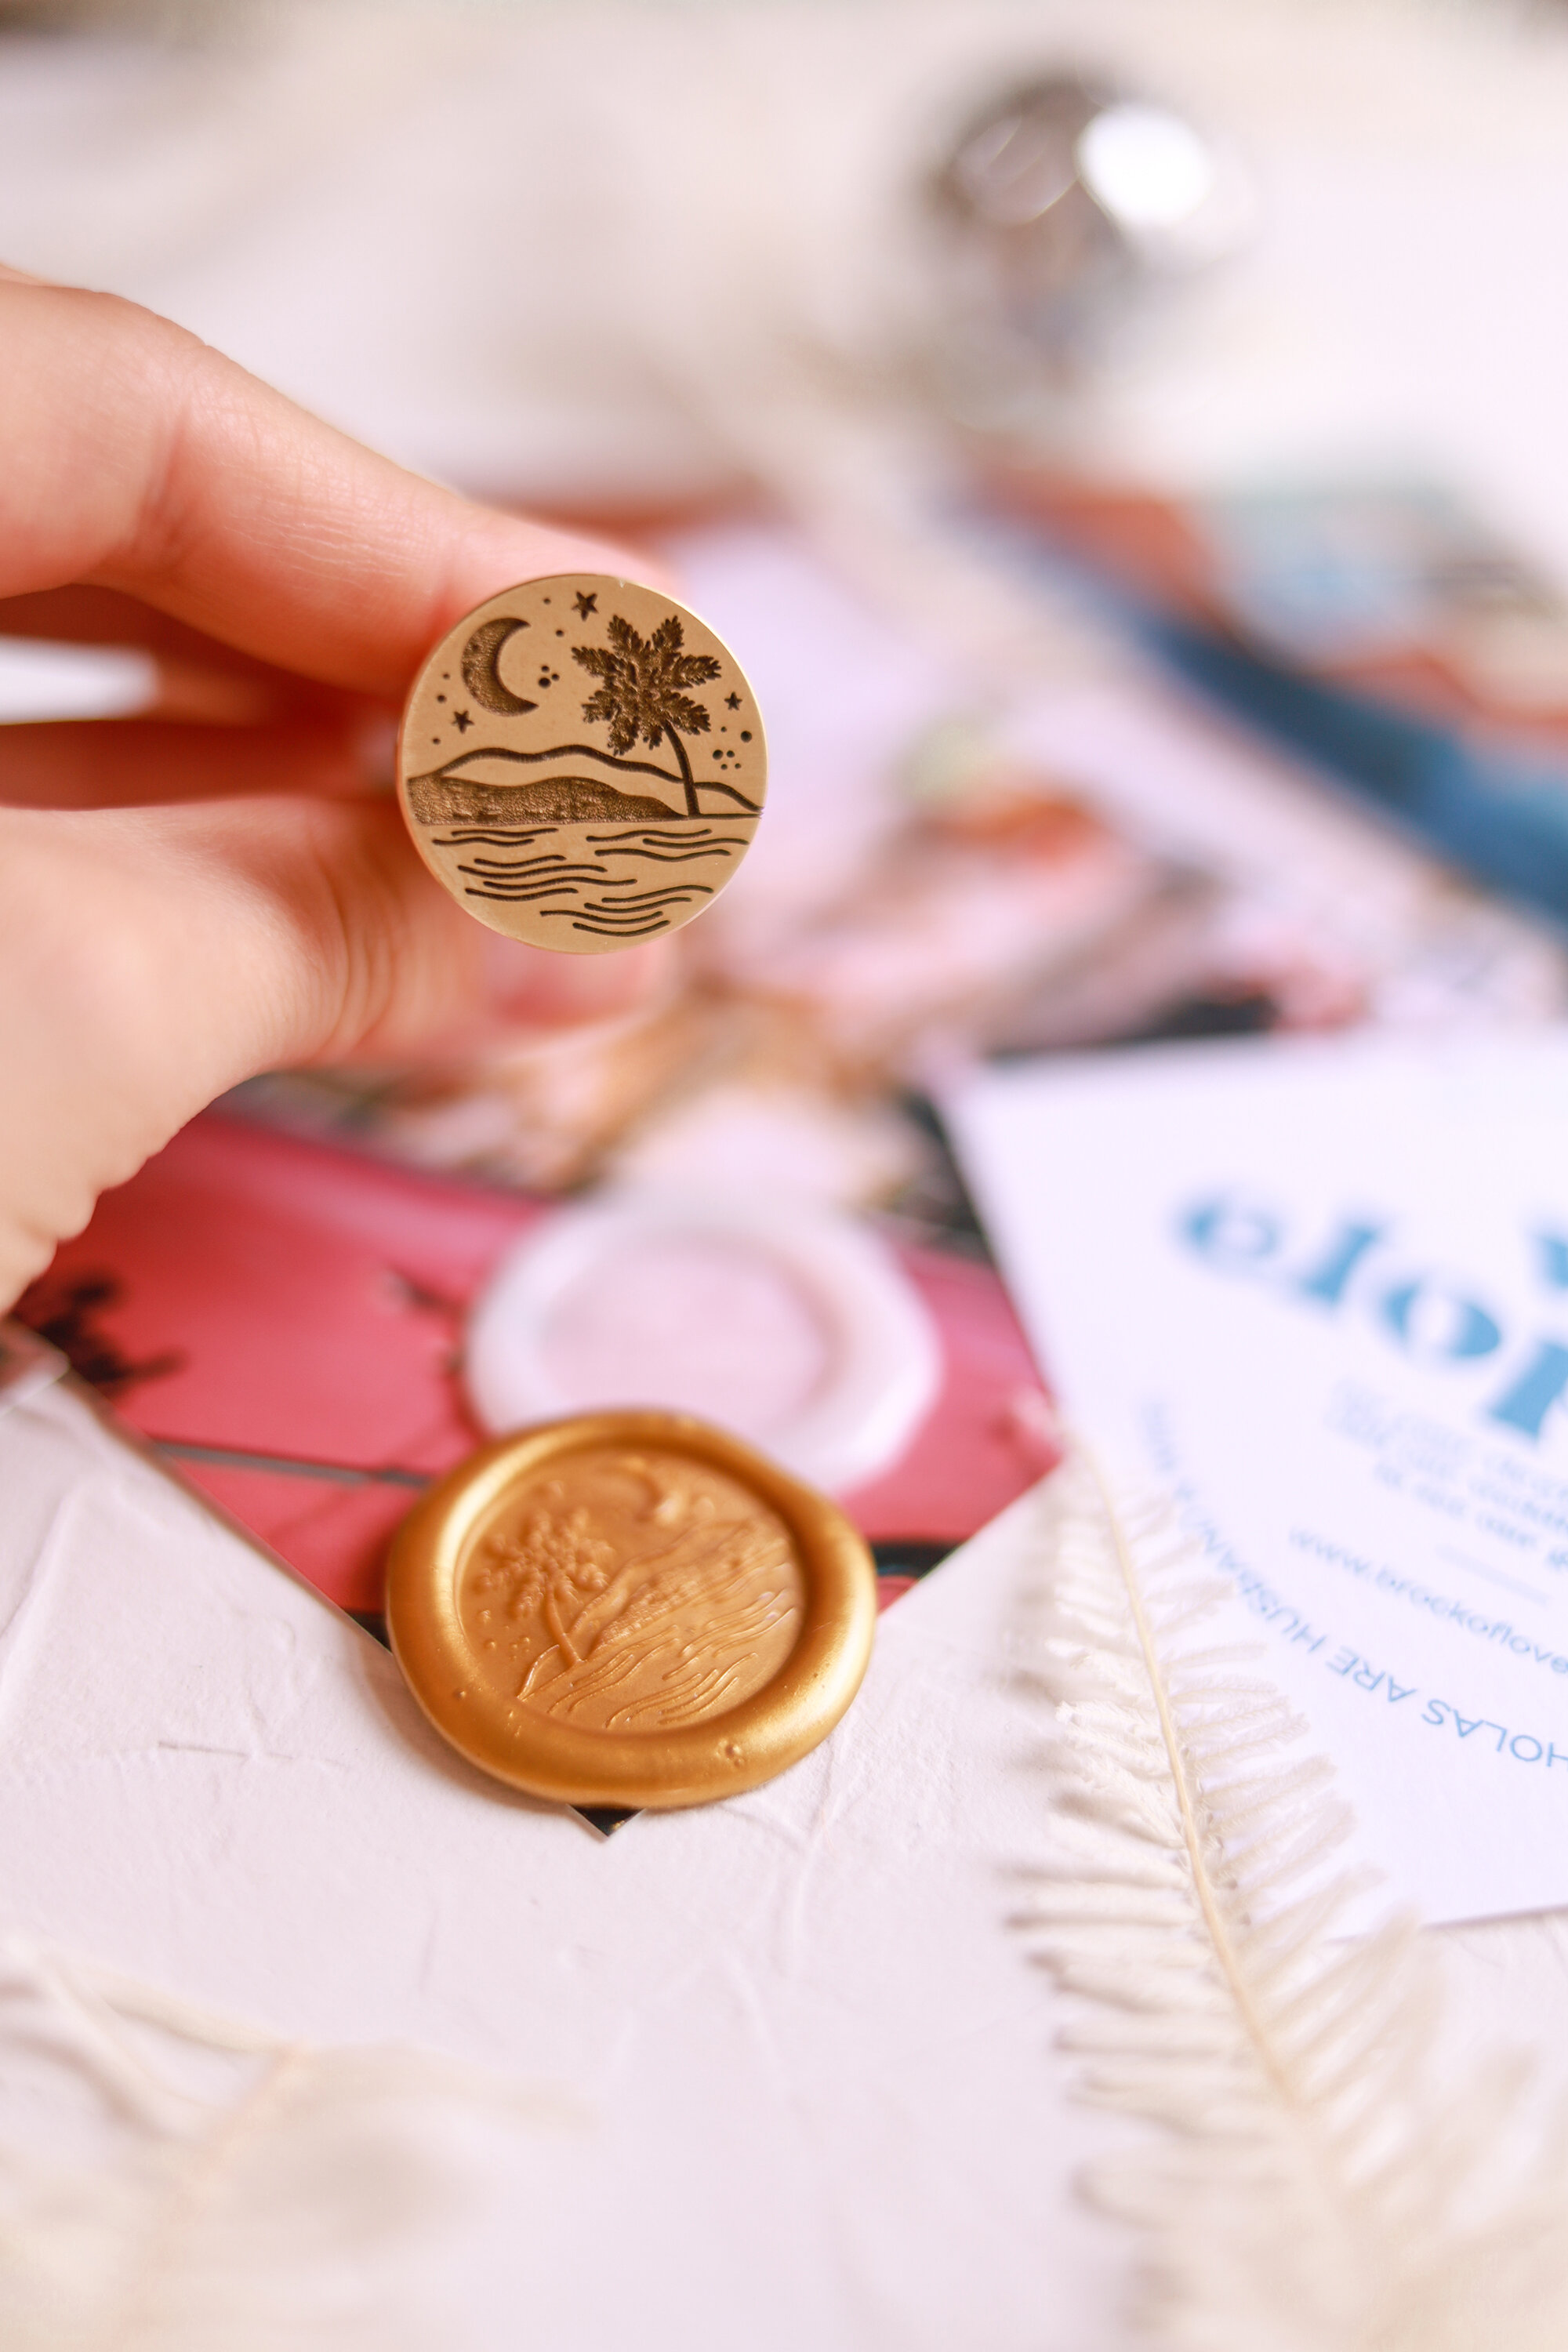
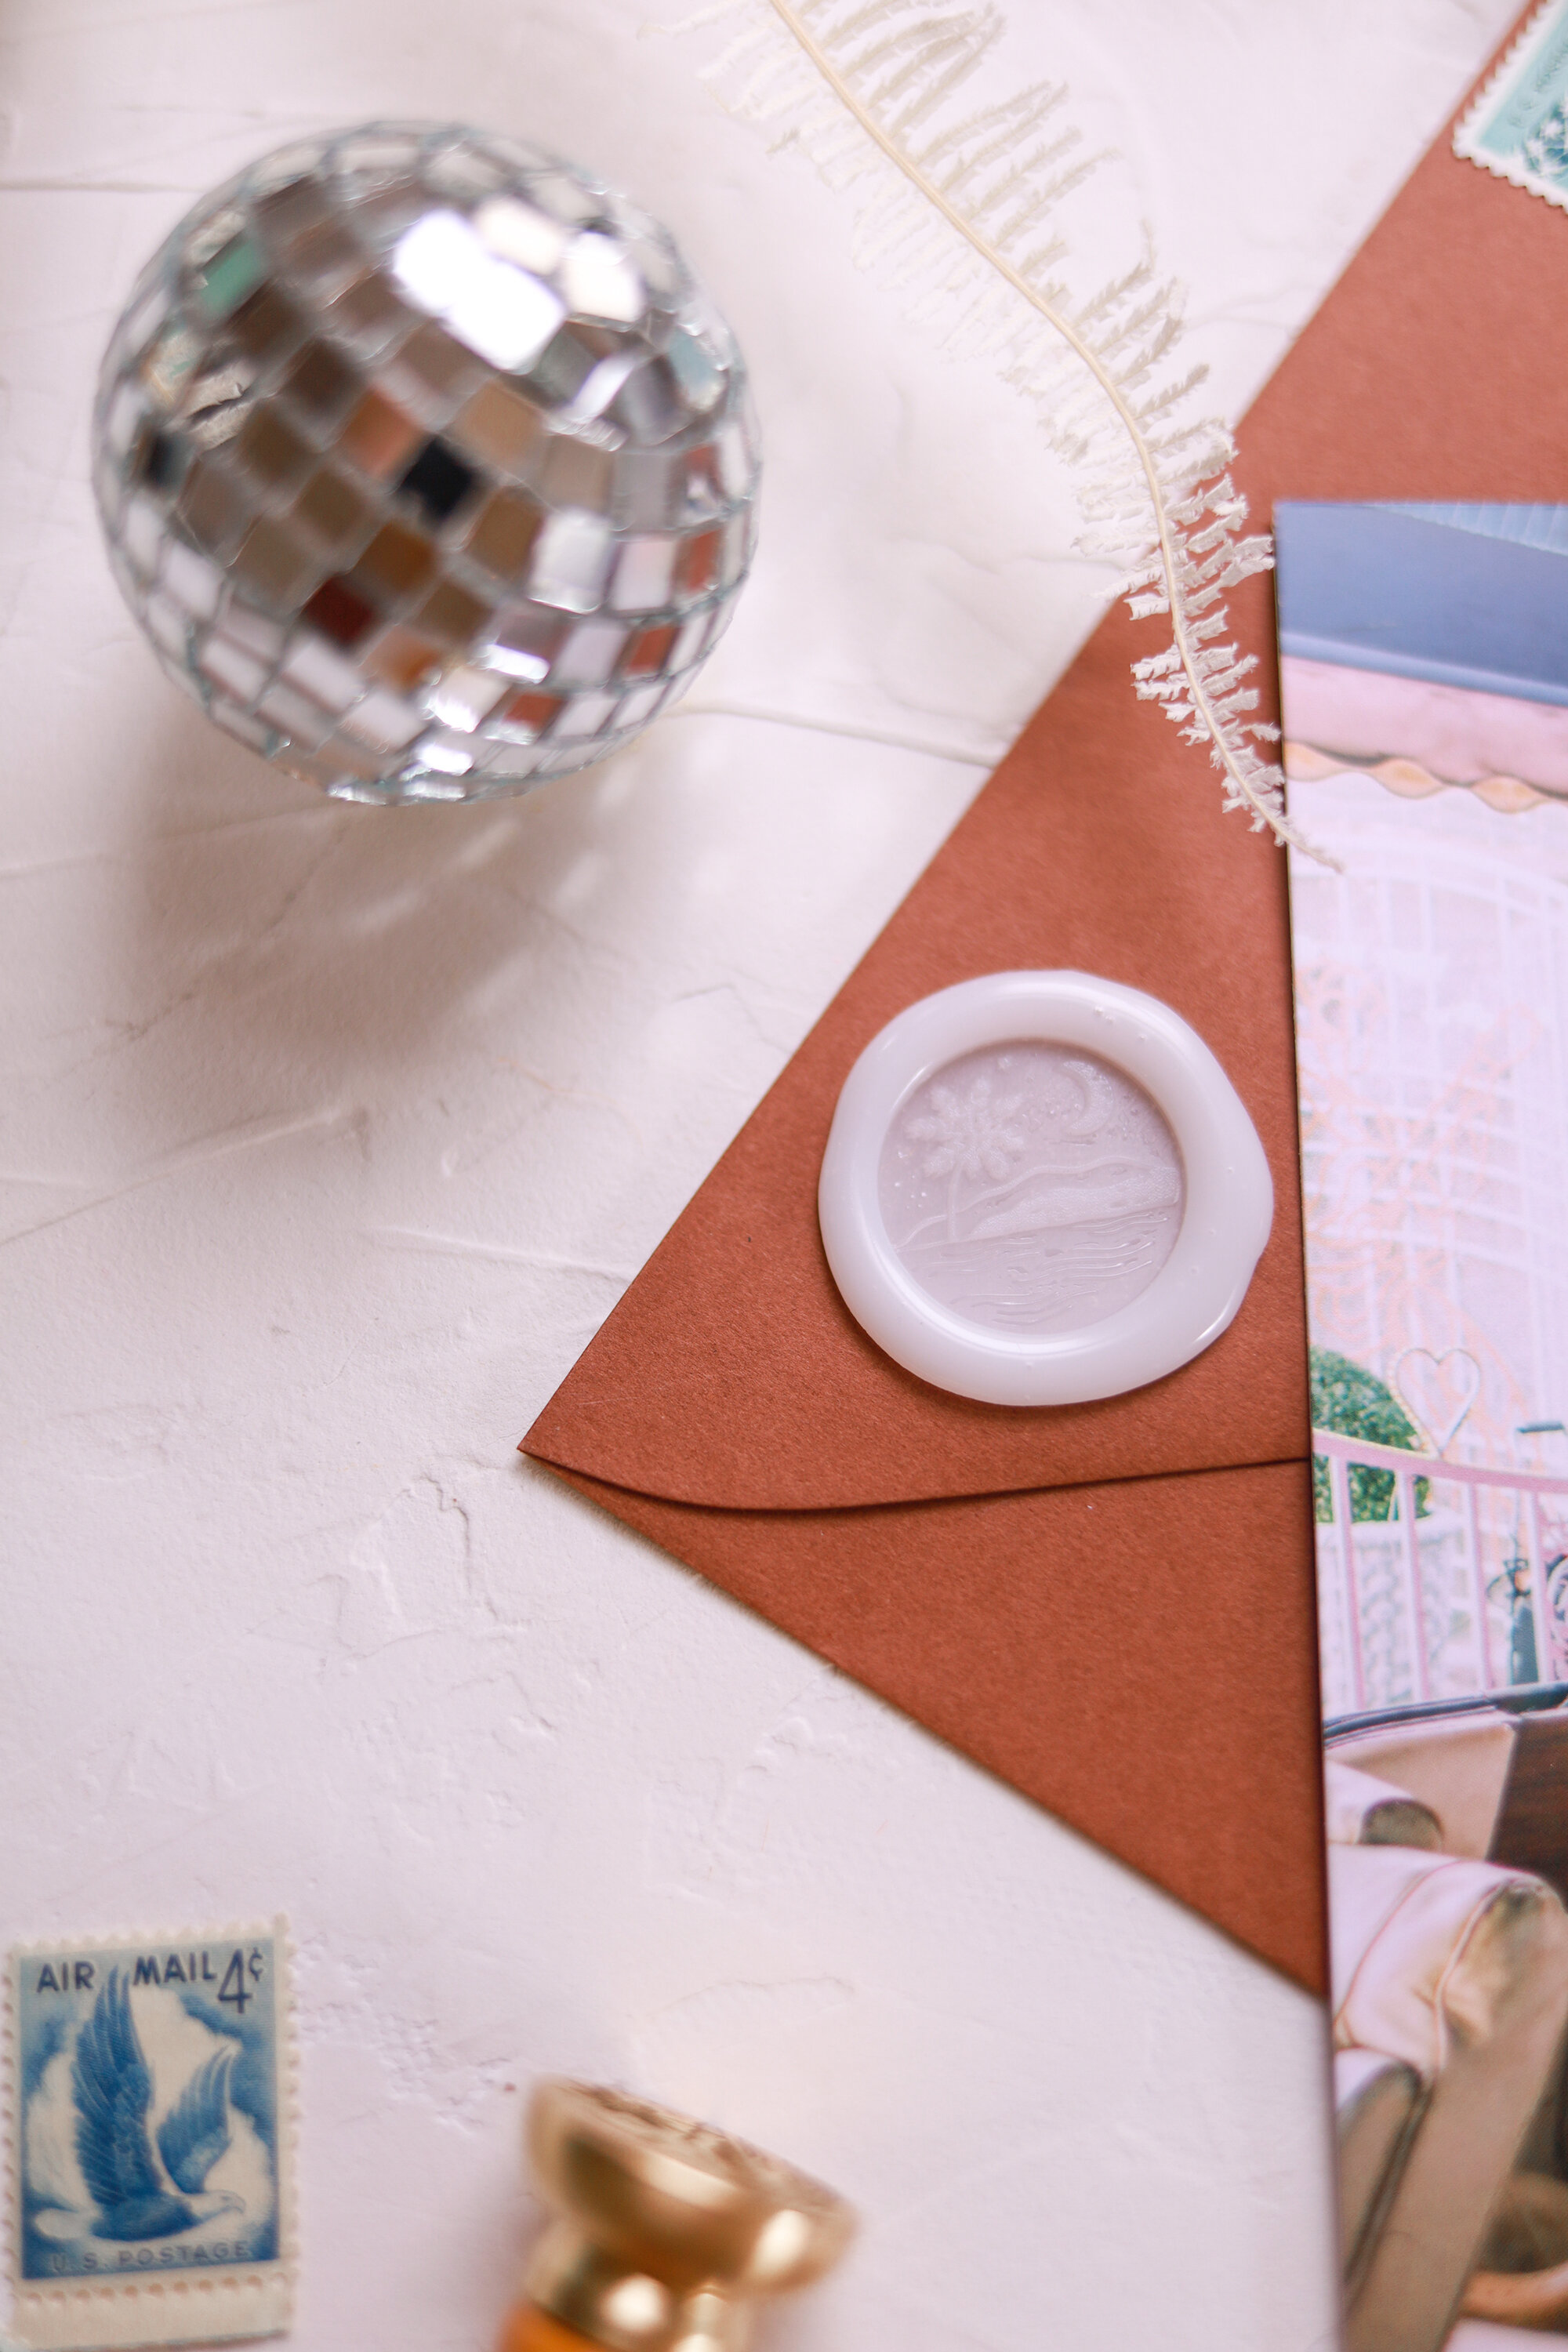
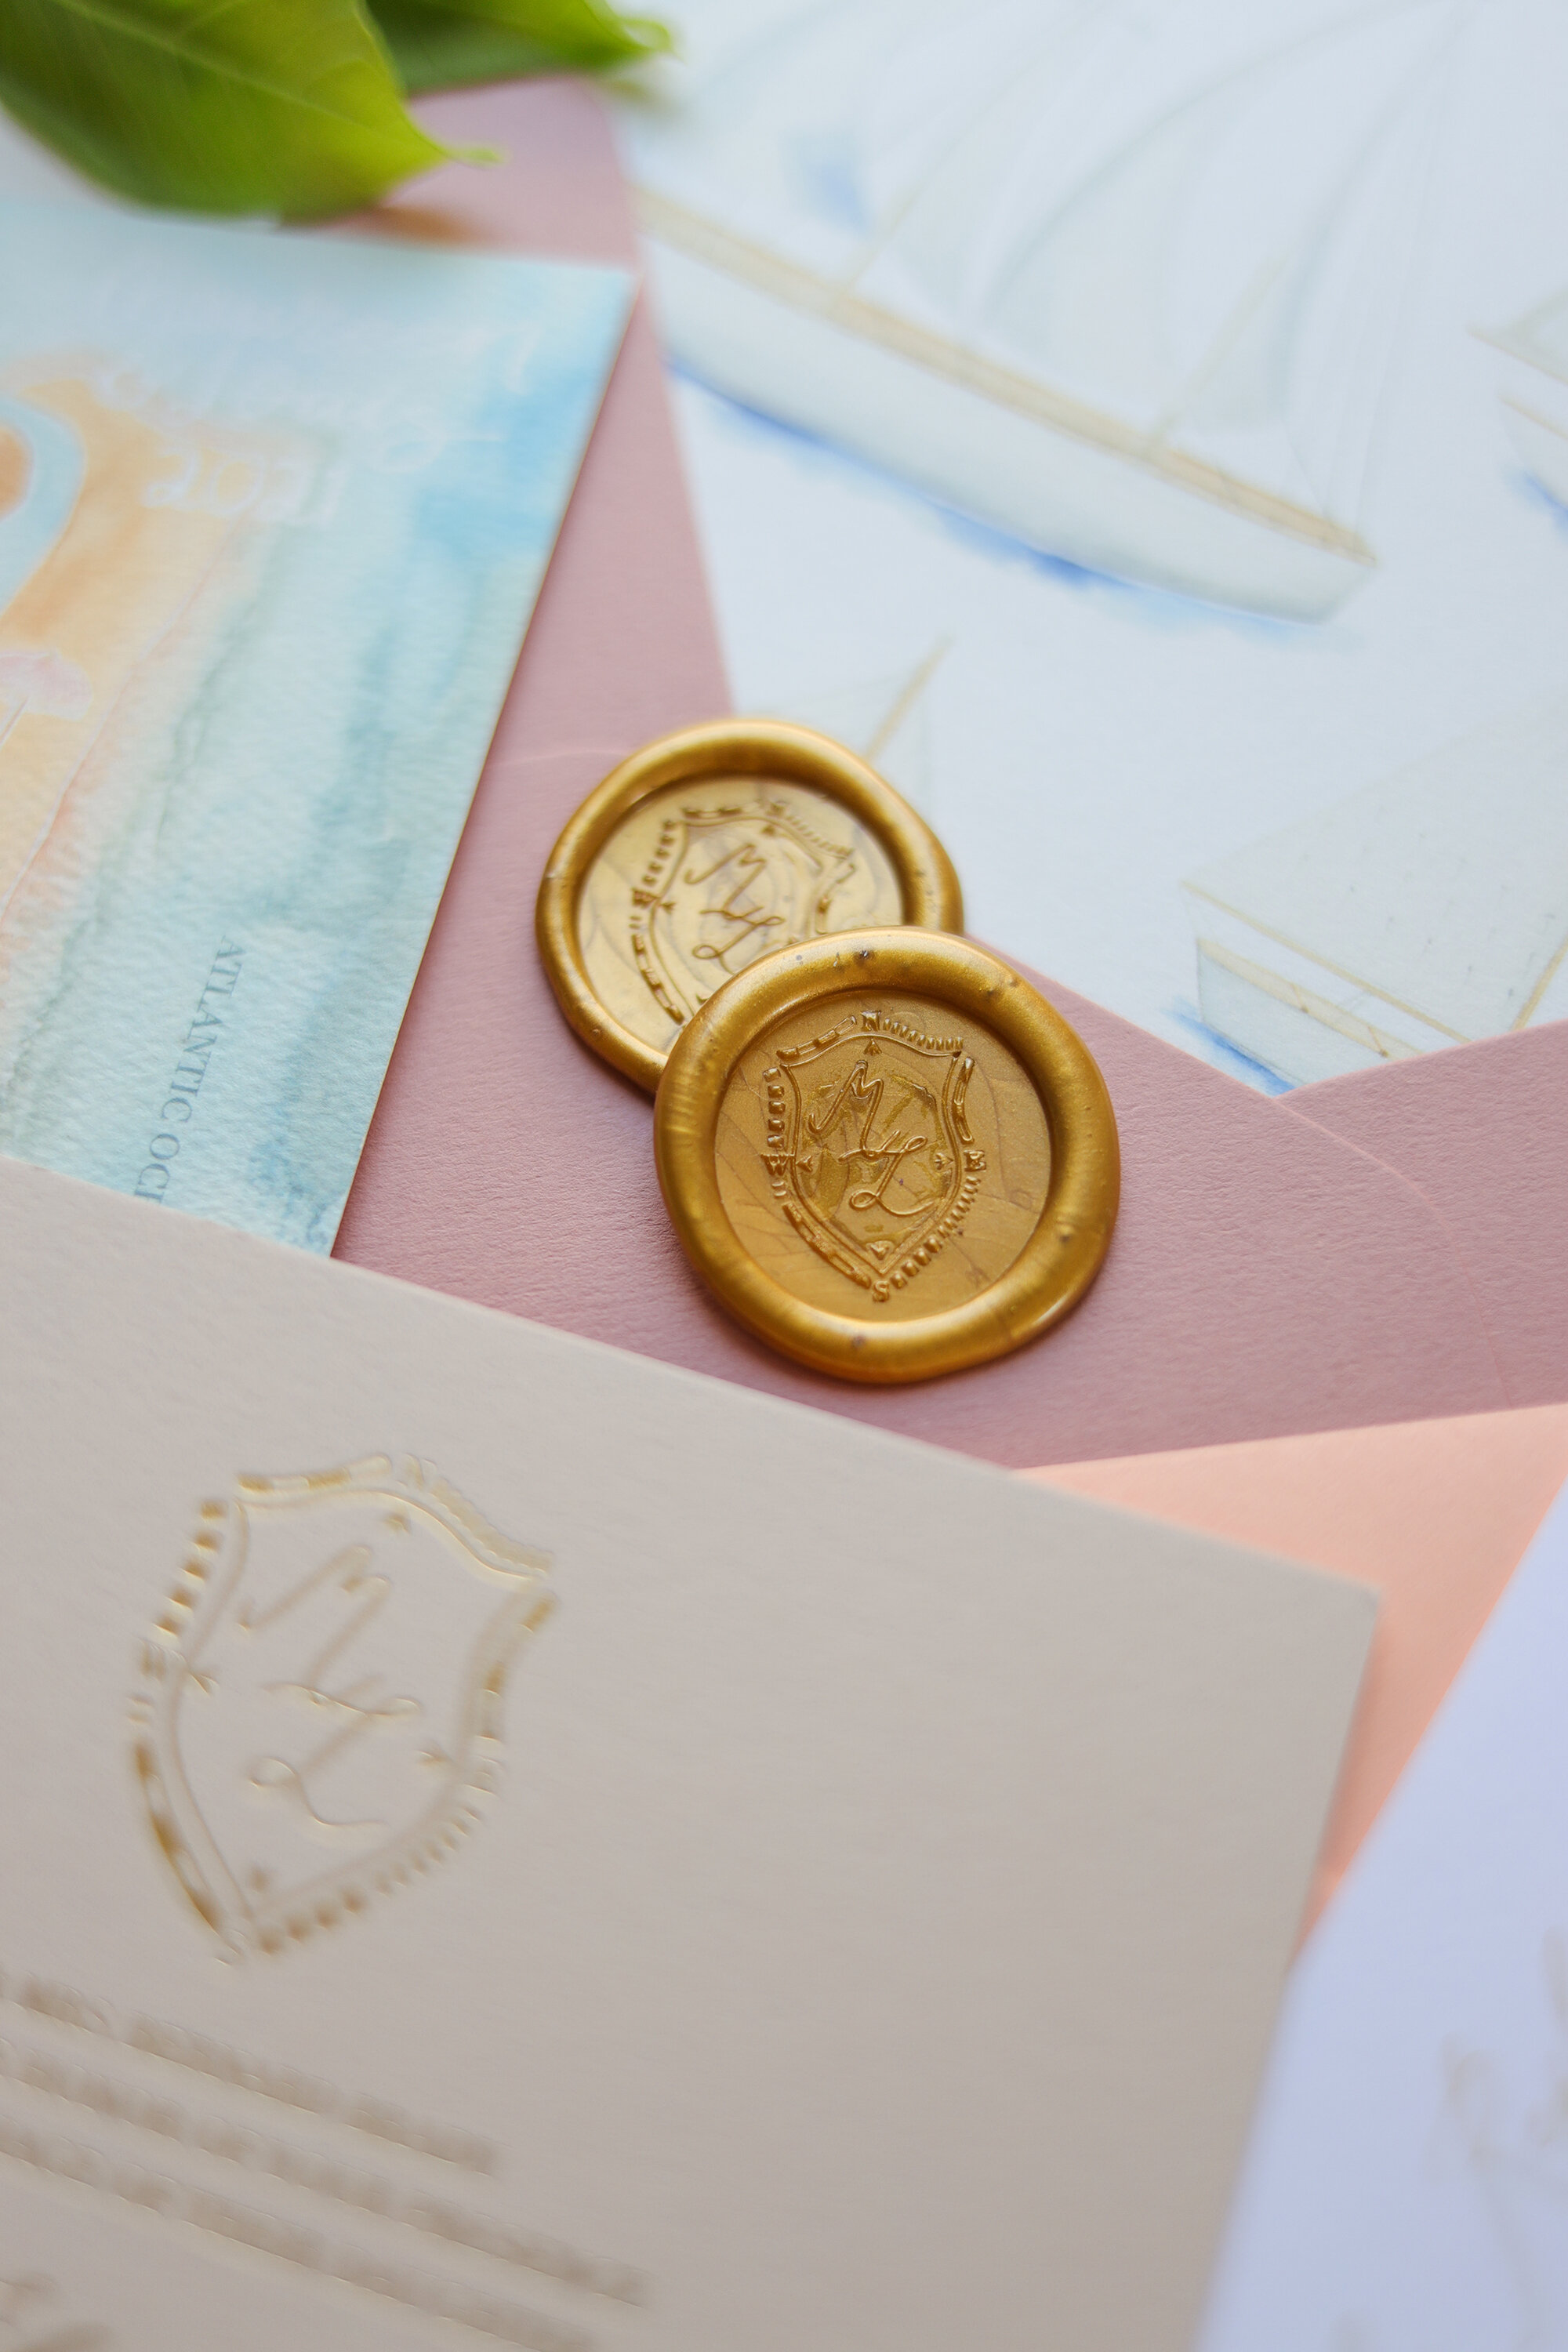
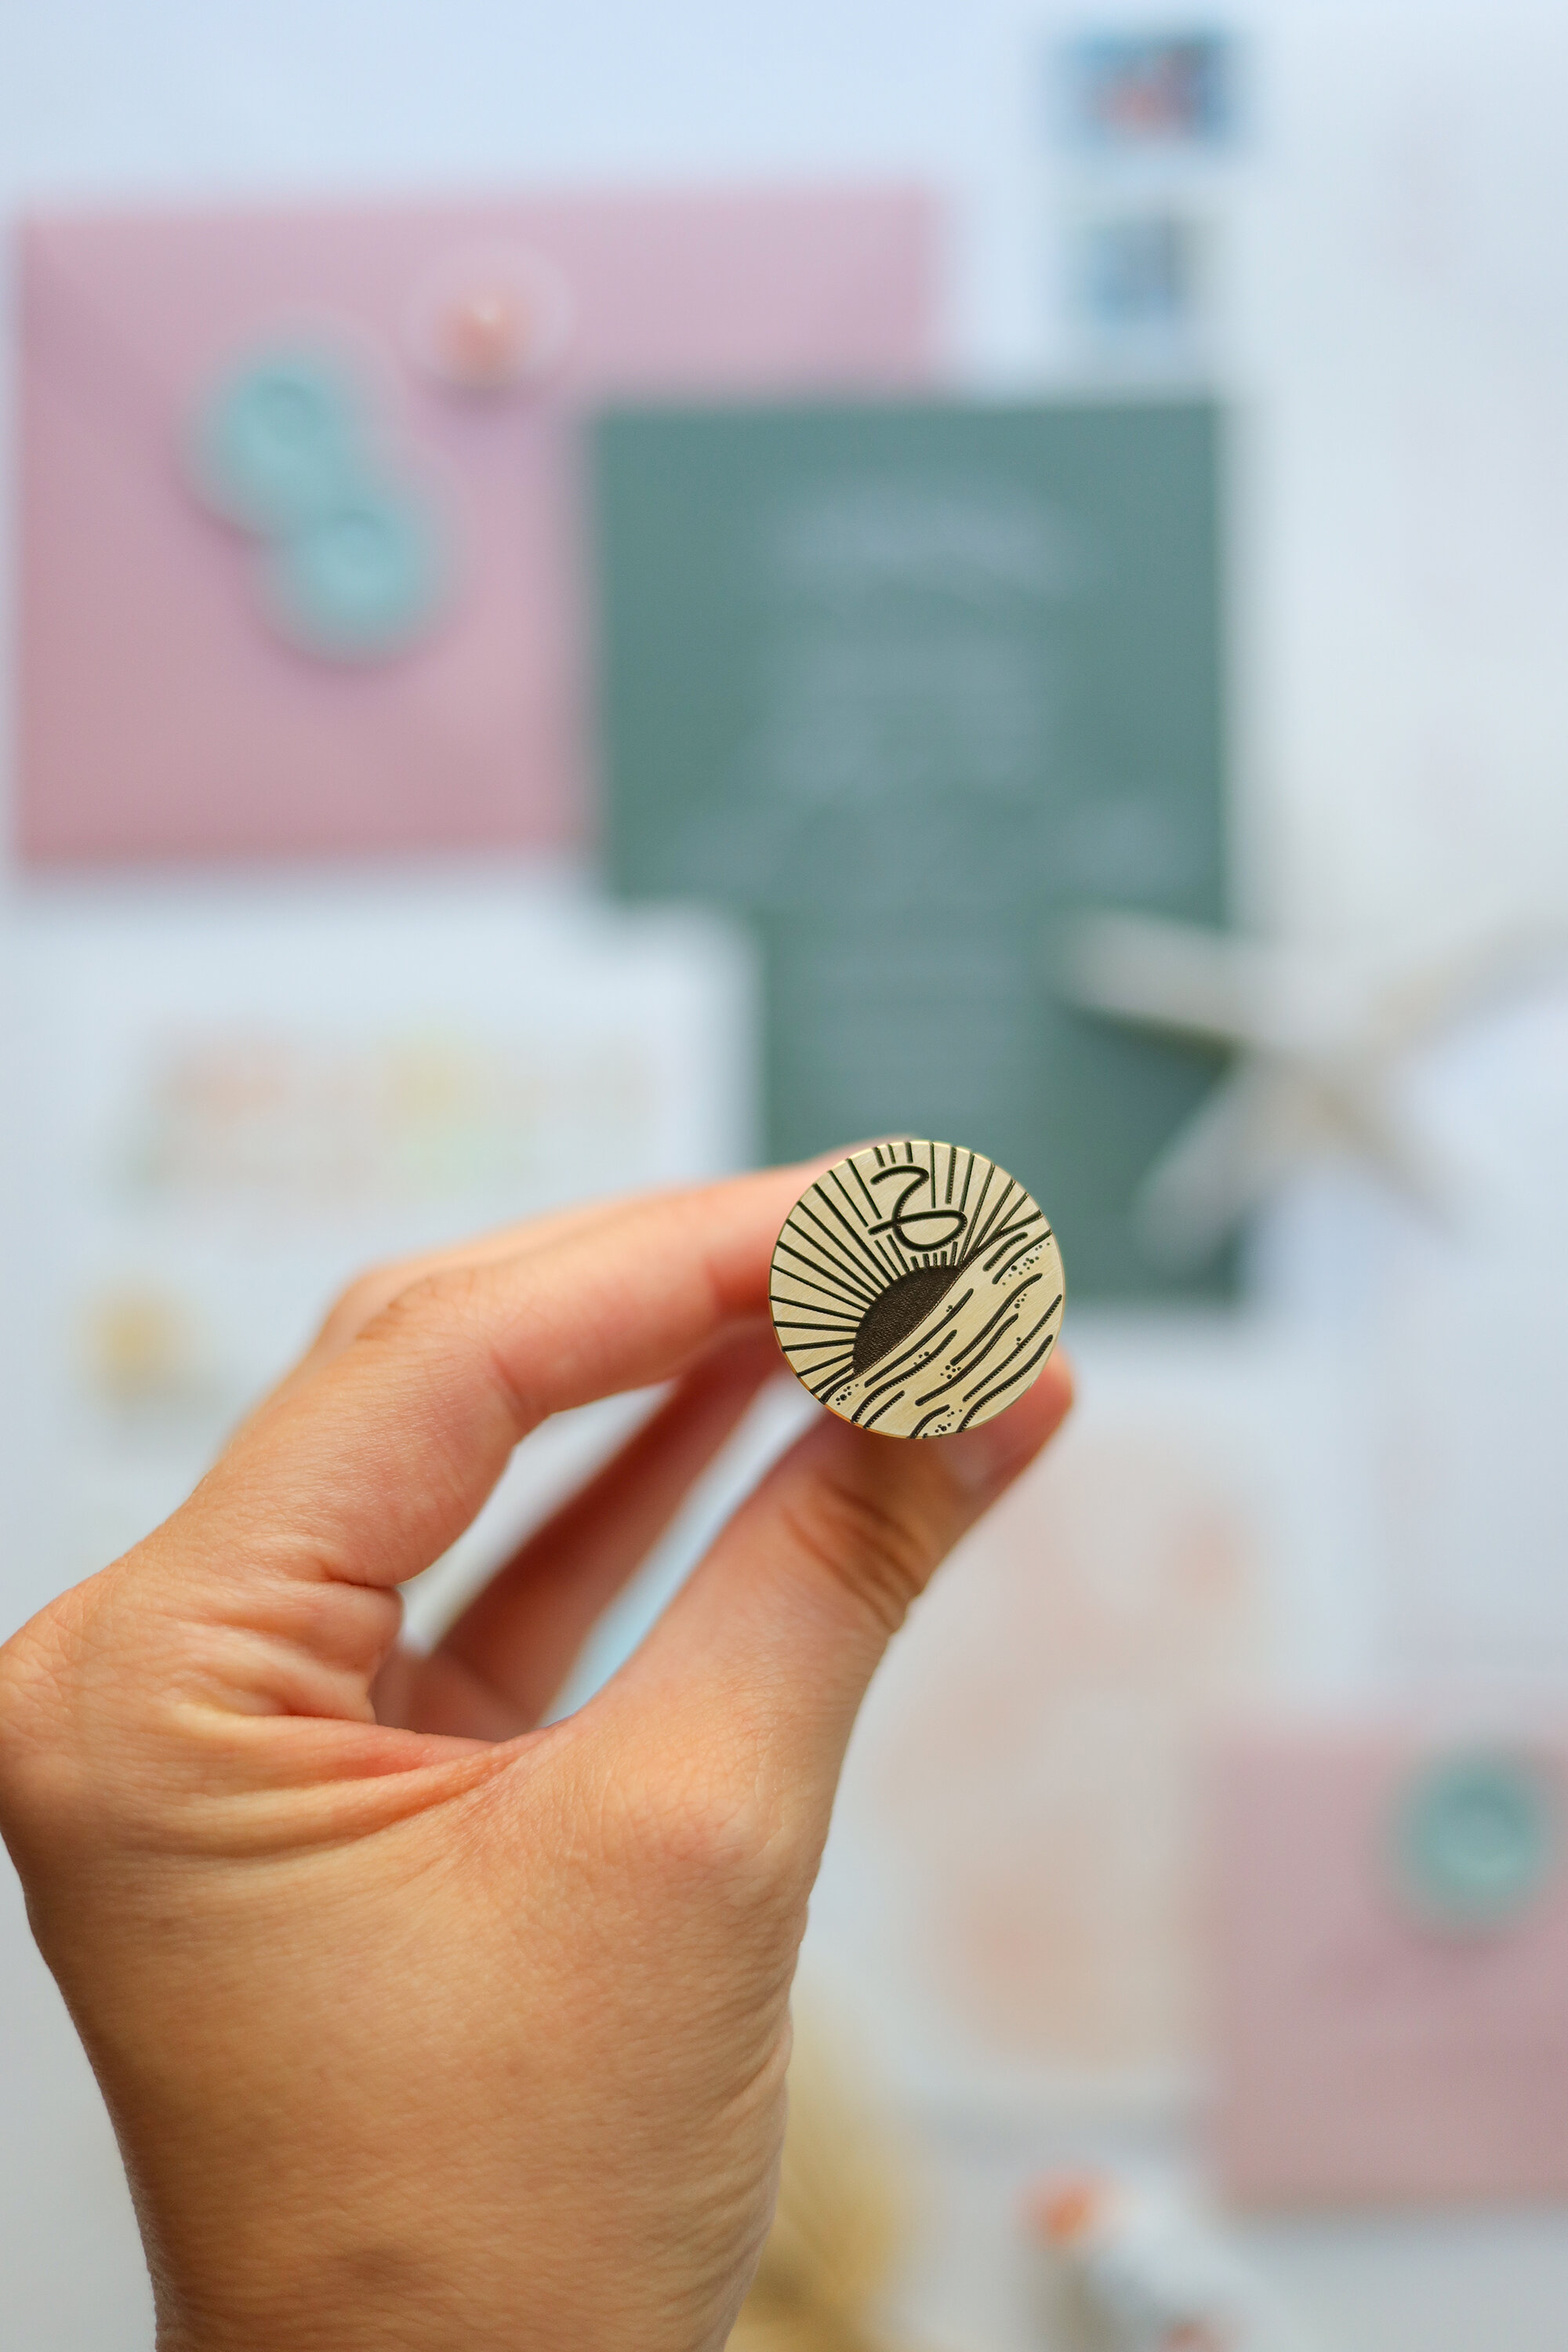
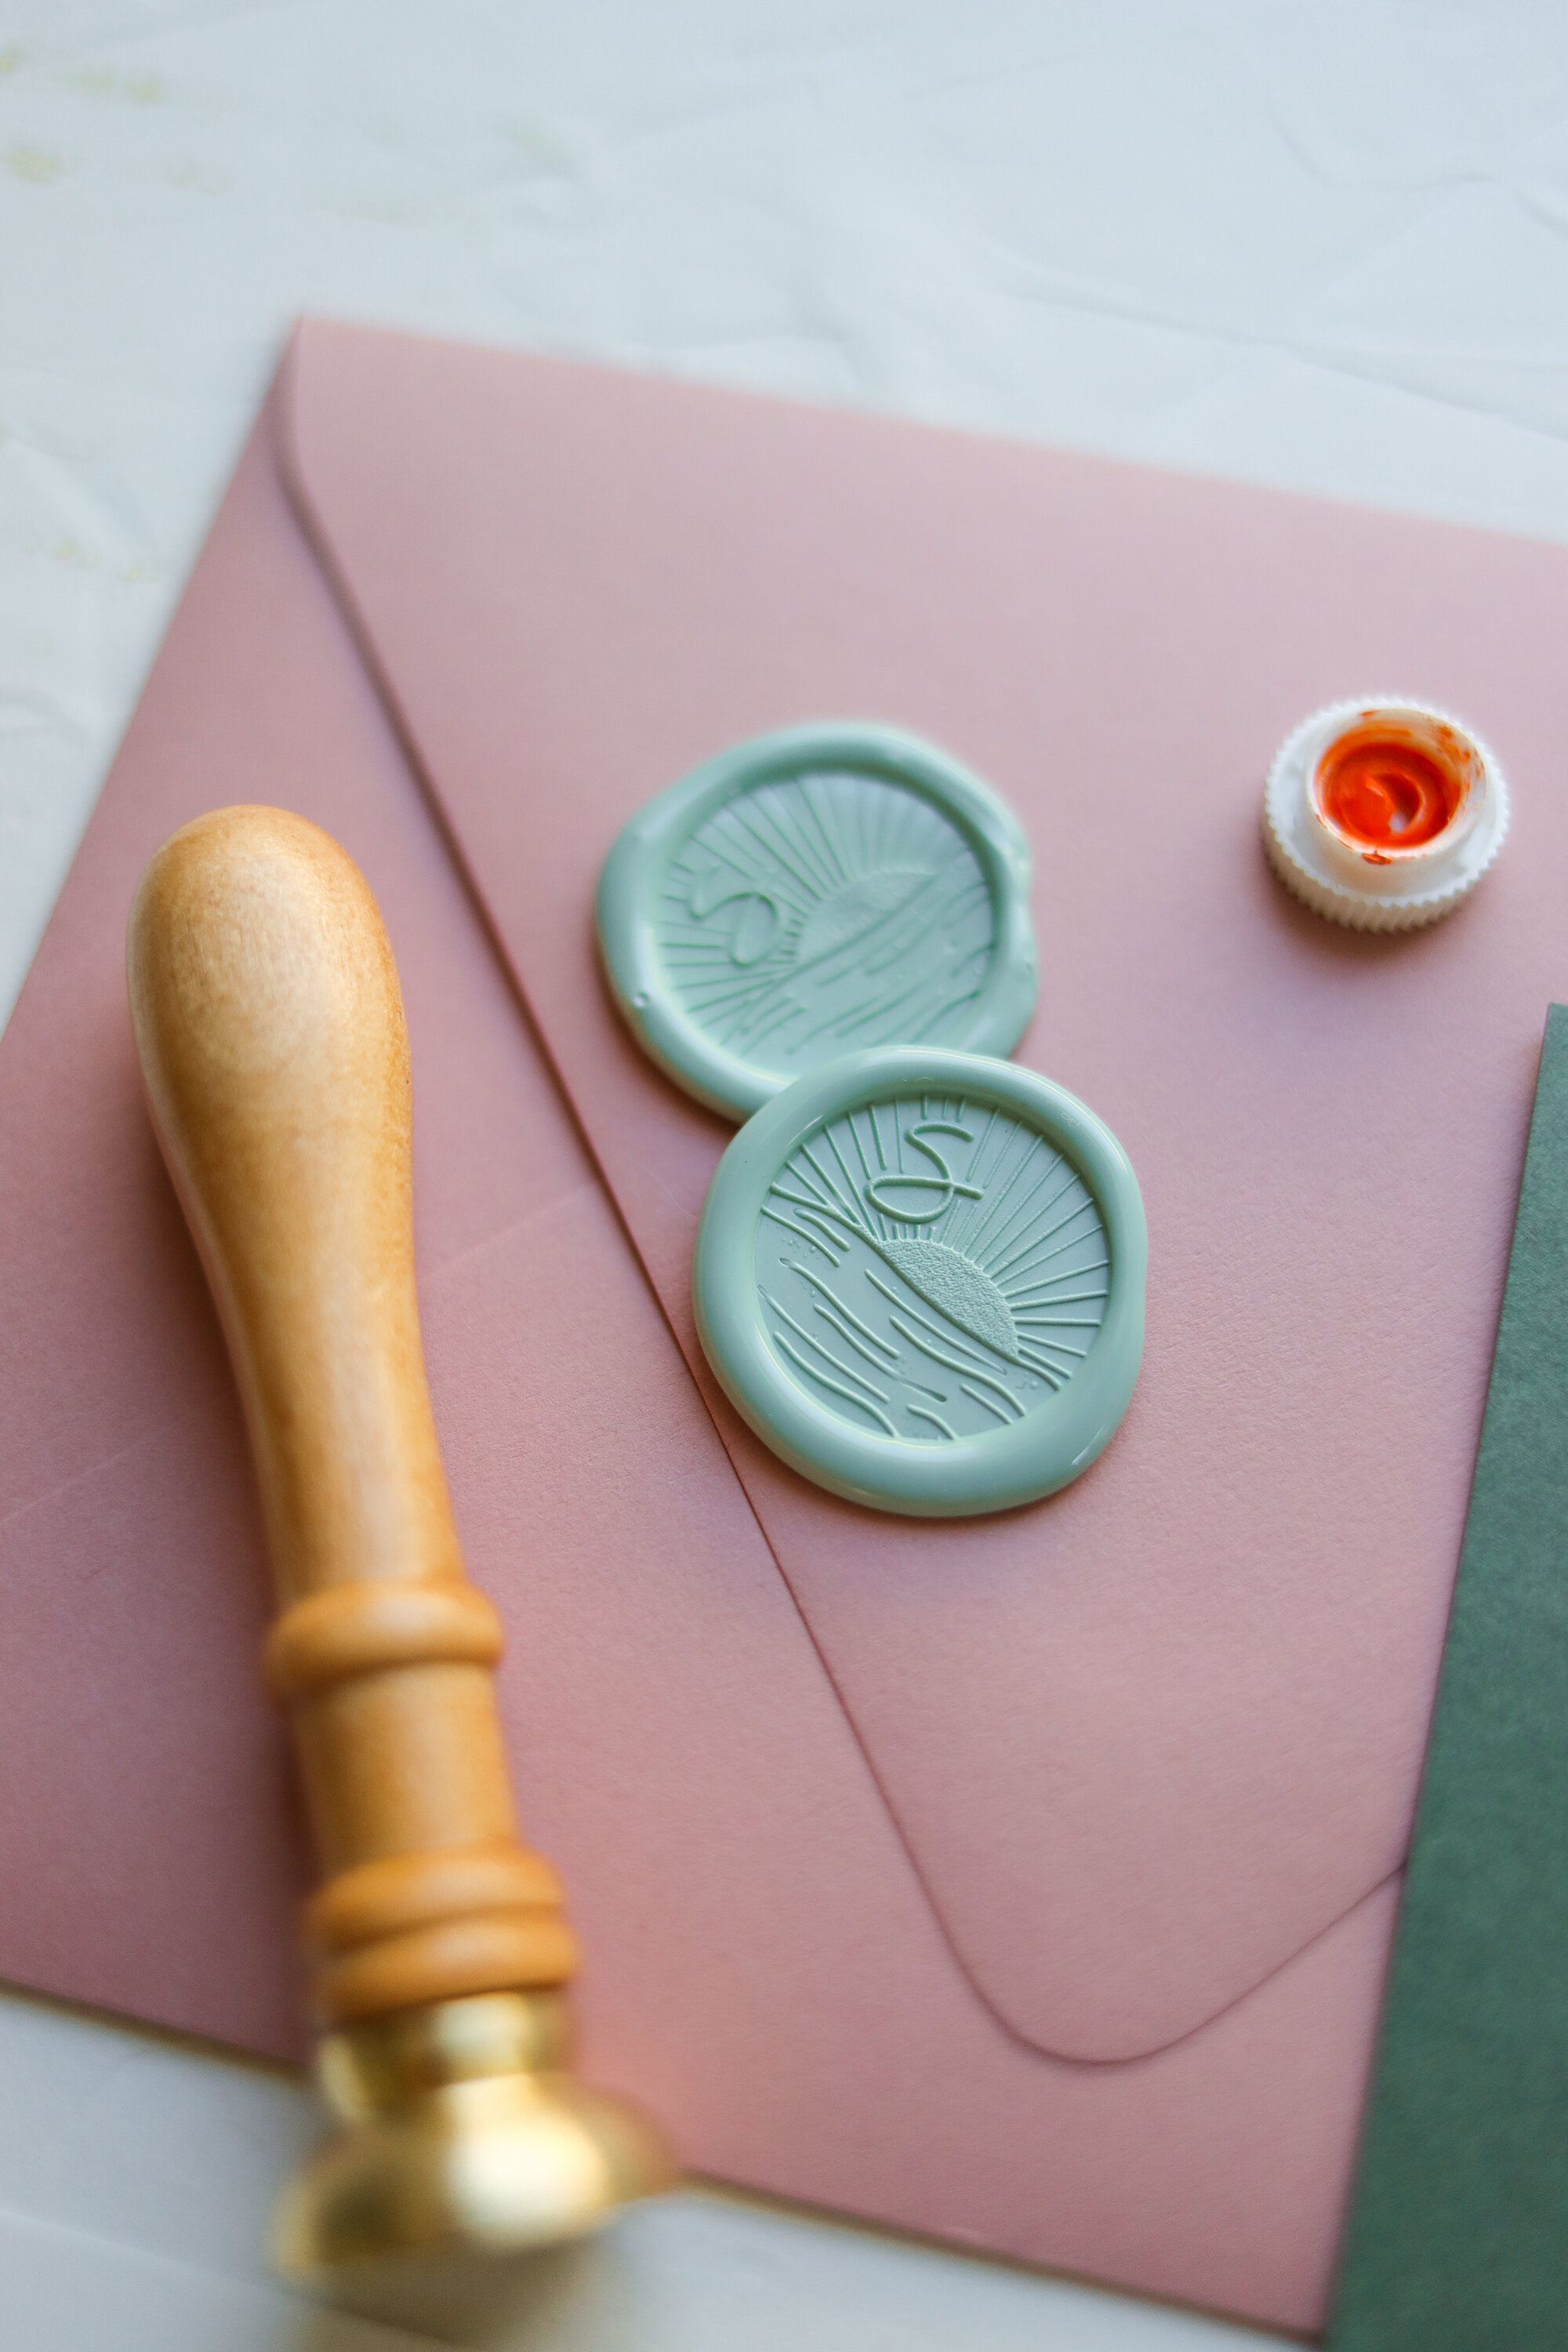
left: Stephanie Tara’s signature ‘Hudson Valley Forest’ stamp | right: Stephanie Tara’s signature ‘Desert Moon’ stamp
So I have this thing with wax seals…
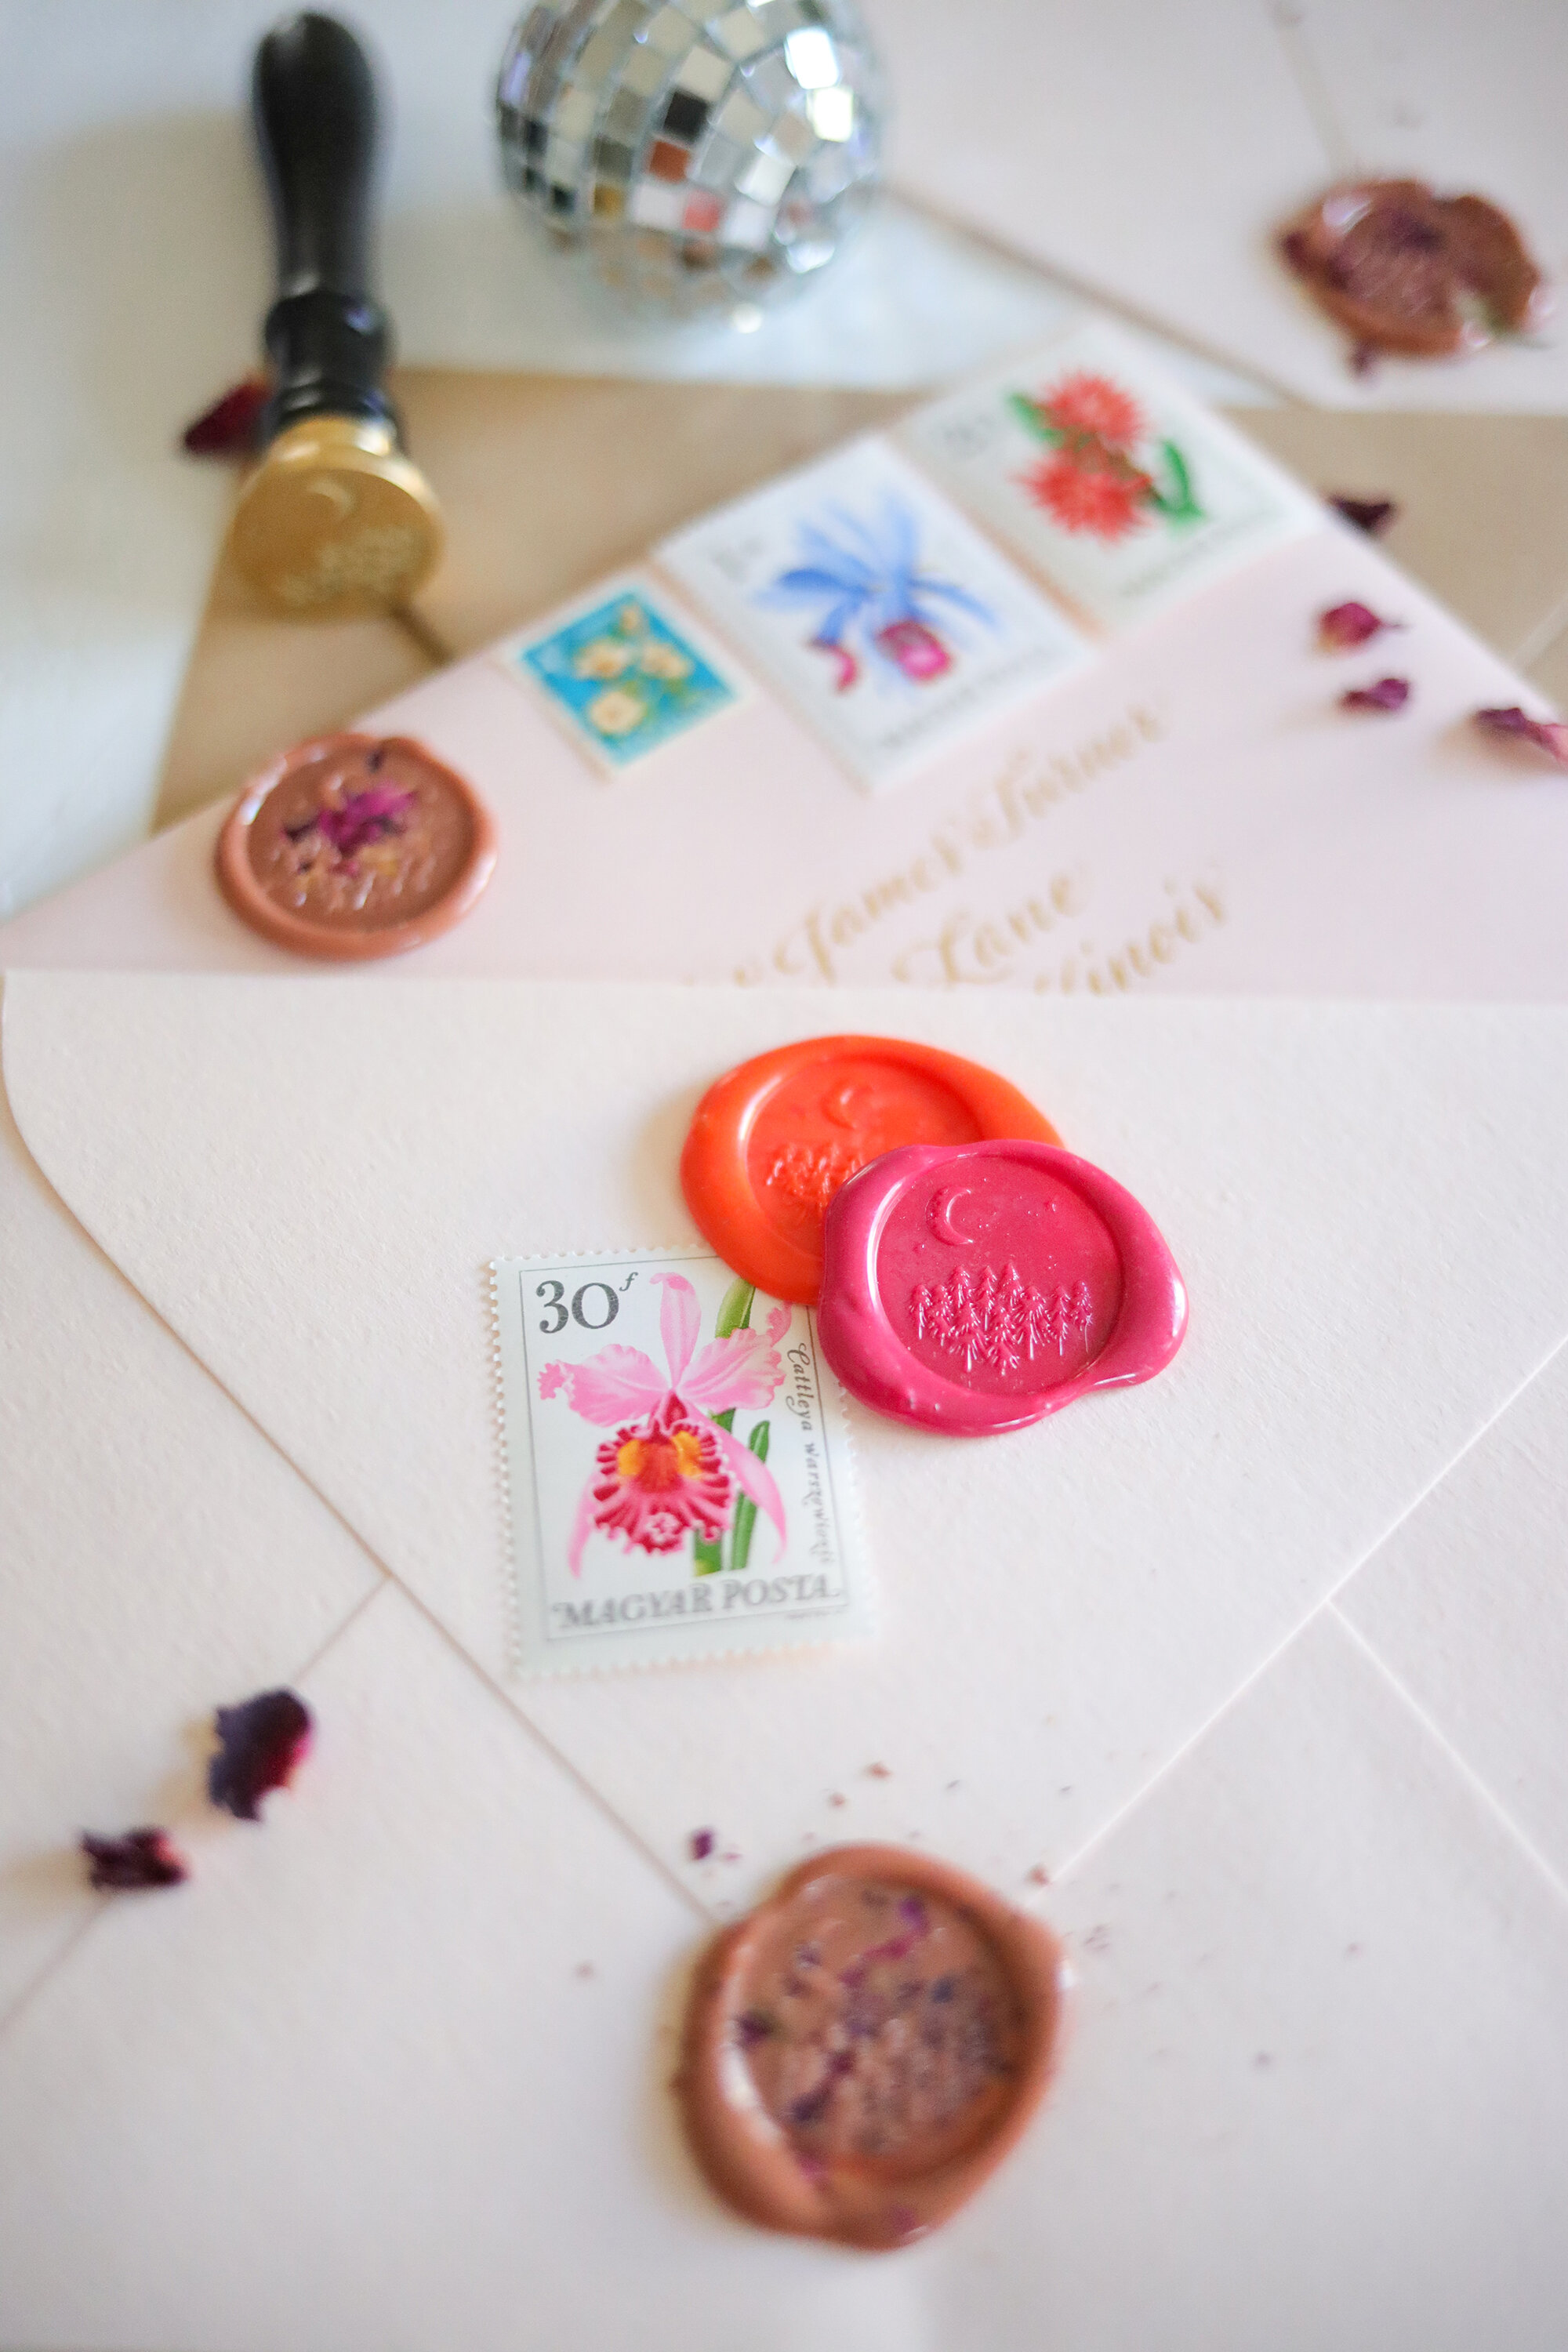
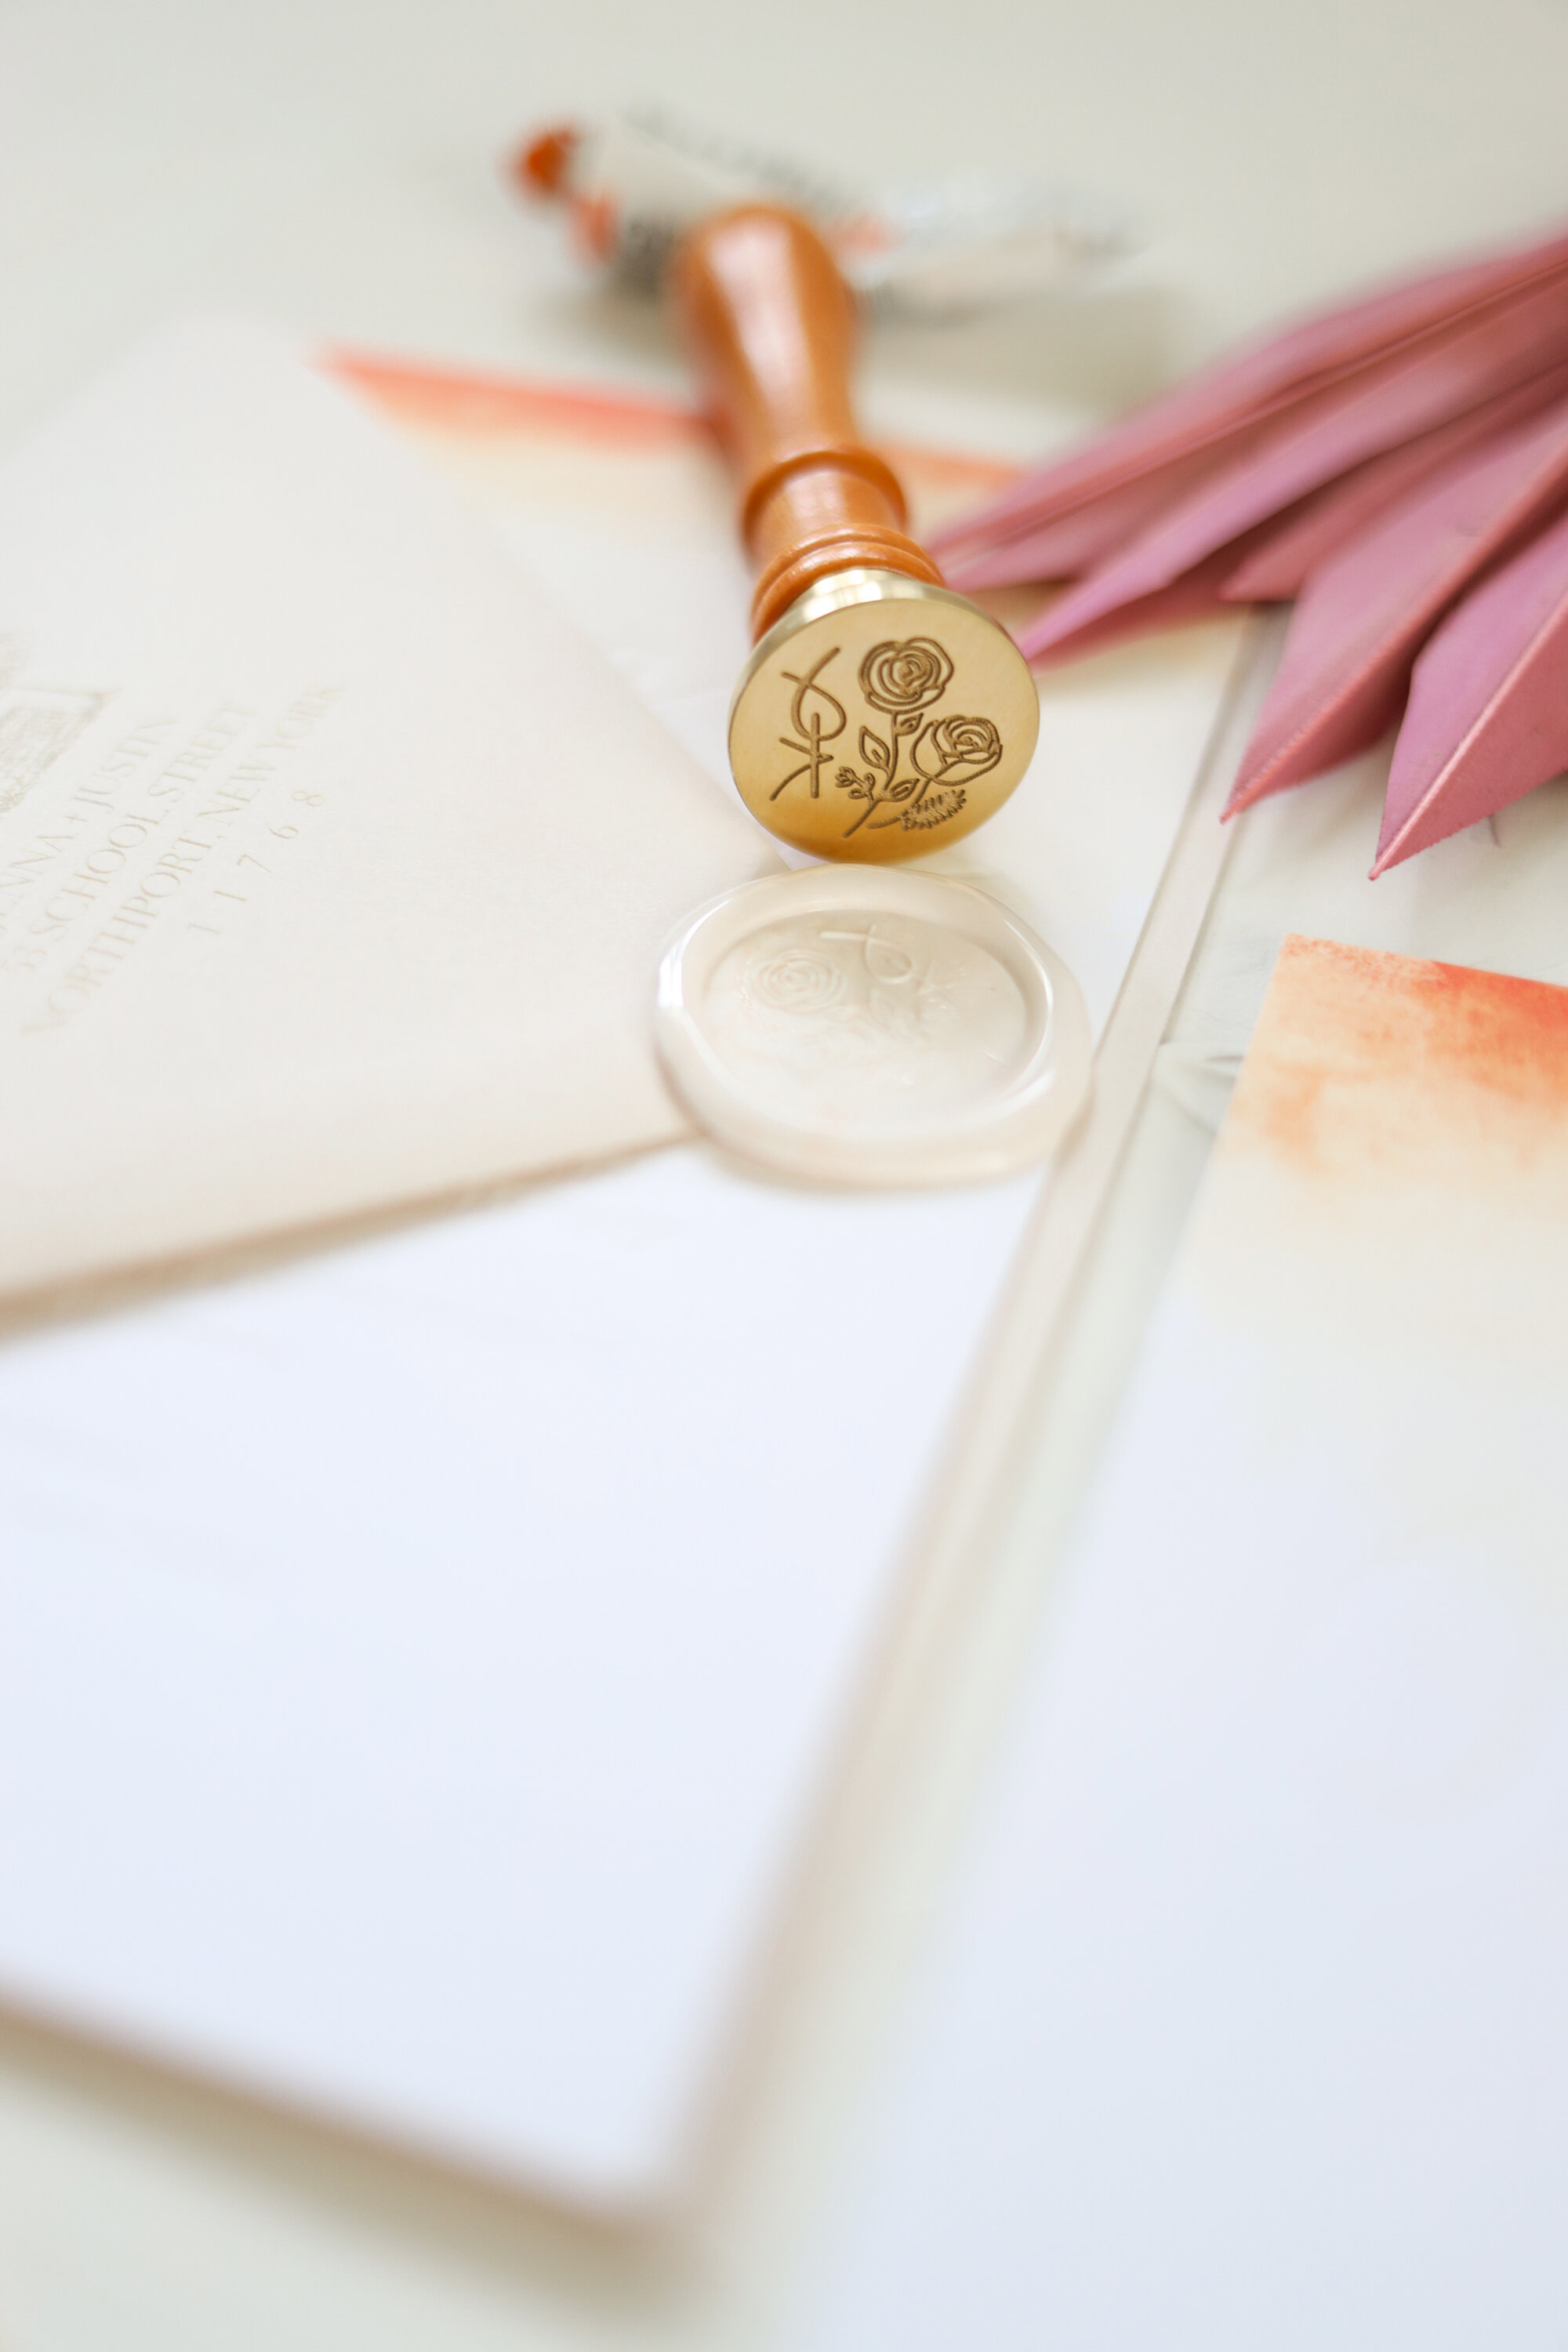
Wax seal stamps add a touch of royalty and pizazz to beautiful stationery and can totally glam up a simple card. It’s all in the details for me and this detail is an heirloom that lives on and on. The act of melting the wax or using the wax seal gun and watching the beautiful colors pool and swirl into a little circle before pressing the delicate stamp in to make an impression is so calming. If you don’t like meditating, just stamp wax seals and you’ll automatically feel at peace.
When would you use your wax seal stamp outside of wedding invitations? Use them for your thank you cards. Holiday cards for years to come. Bridal or baby shower cards. anniversary cards for your SO. There is no card really that wouldn’t be made just a little more special with your stamp.
Fun story - This summer I had the honor of designing stationery for Shea McGee’s bonjour bebe themed baby shower! It was a blast. I worked with the sweetest event planner / stylists from The Revelry Co. , Jamie + Rachel. They are so talented! I love every little thing they do. I designed a special custom wax seal stamp that had the first initial of Shea’s baby girl, paired with a French floral wreath. At the time of the shower, no one knew her name yet so it was extra special to have that super special secret detail. The stamp was used on each menu card in a classic oval shape and really added a personal touch to the gorgeous table. For more details from the baby shower, you can see the whole blog post here.
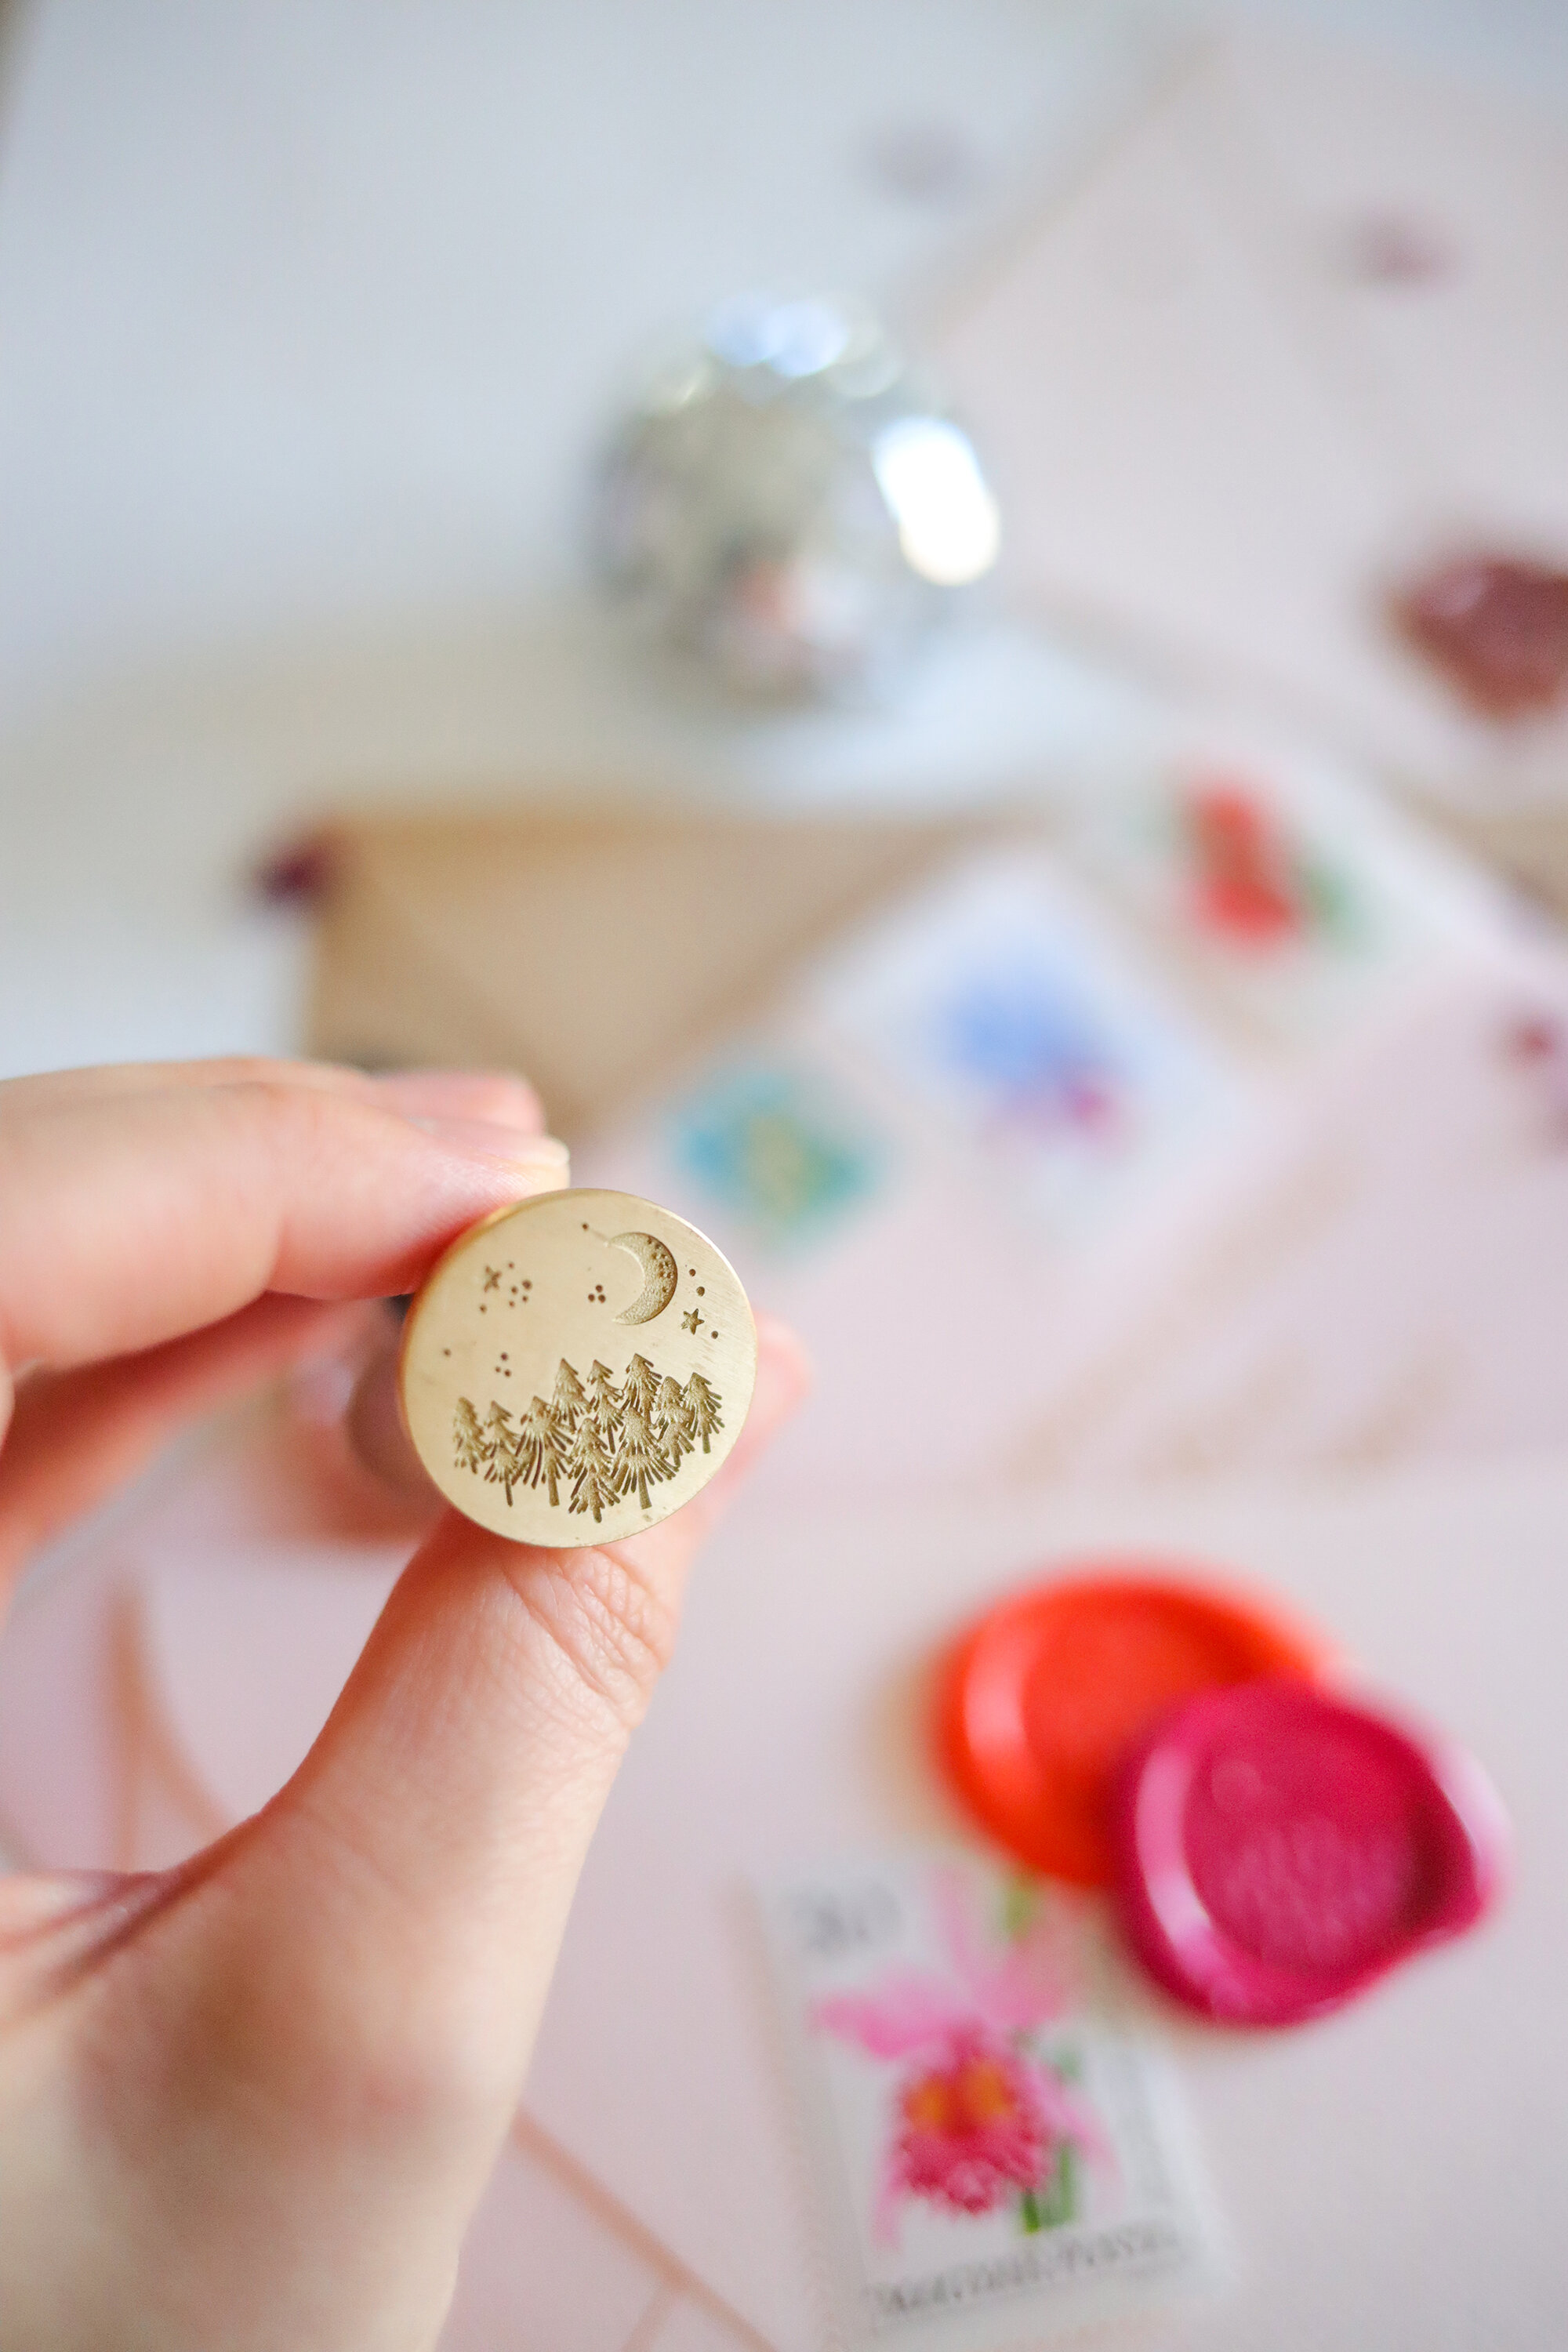
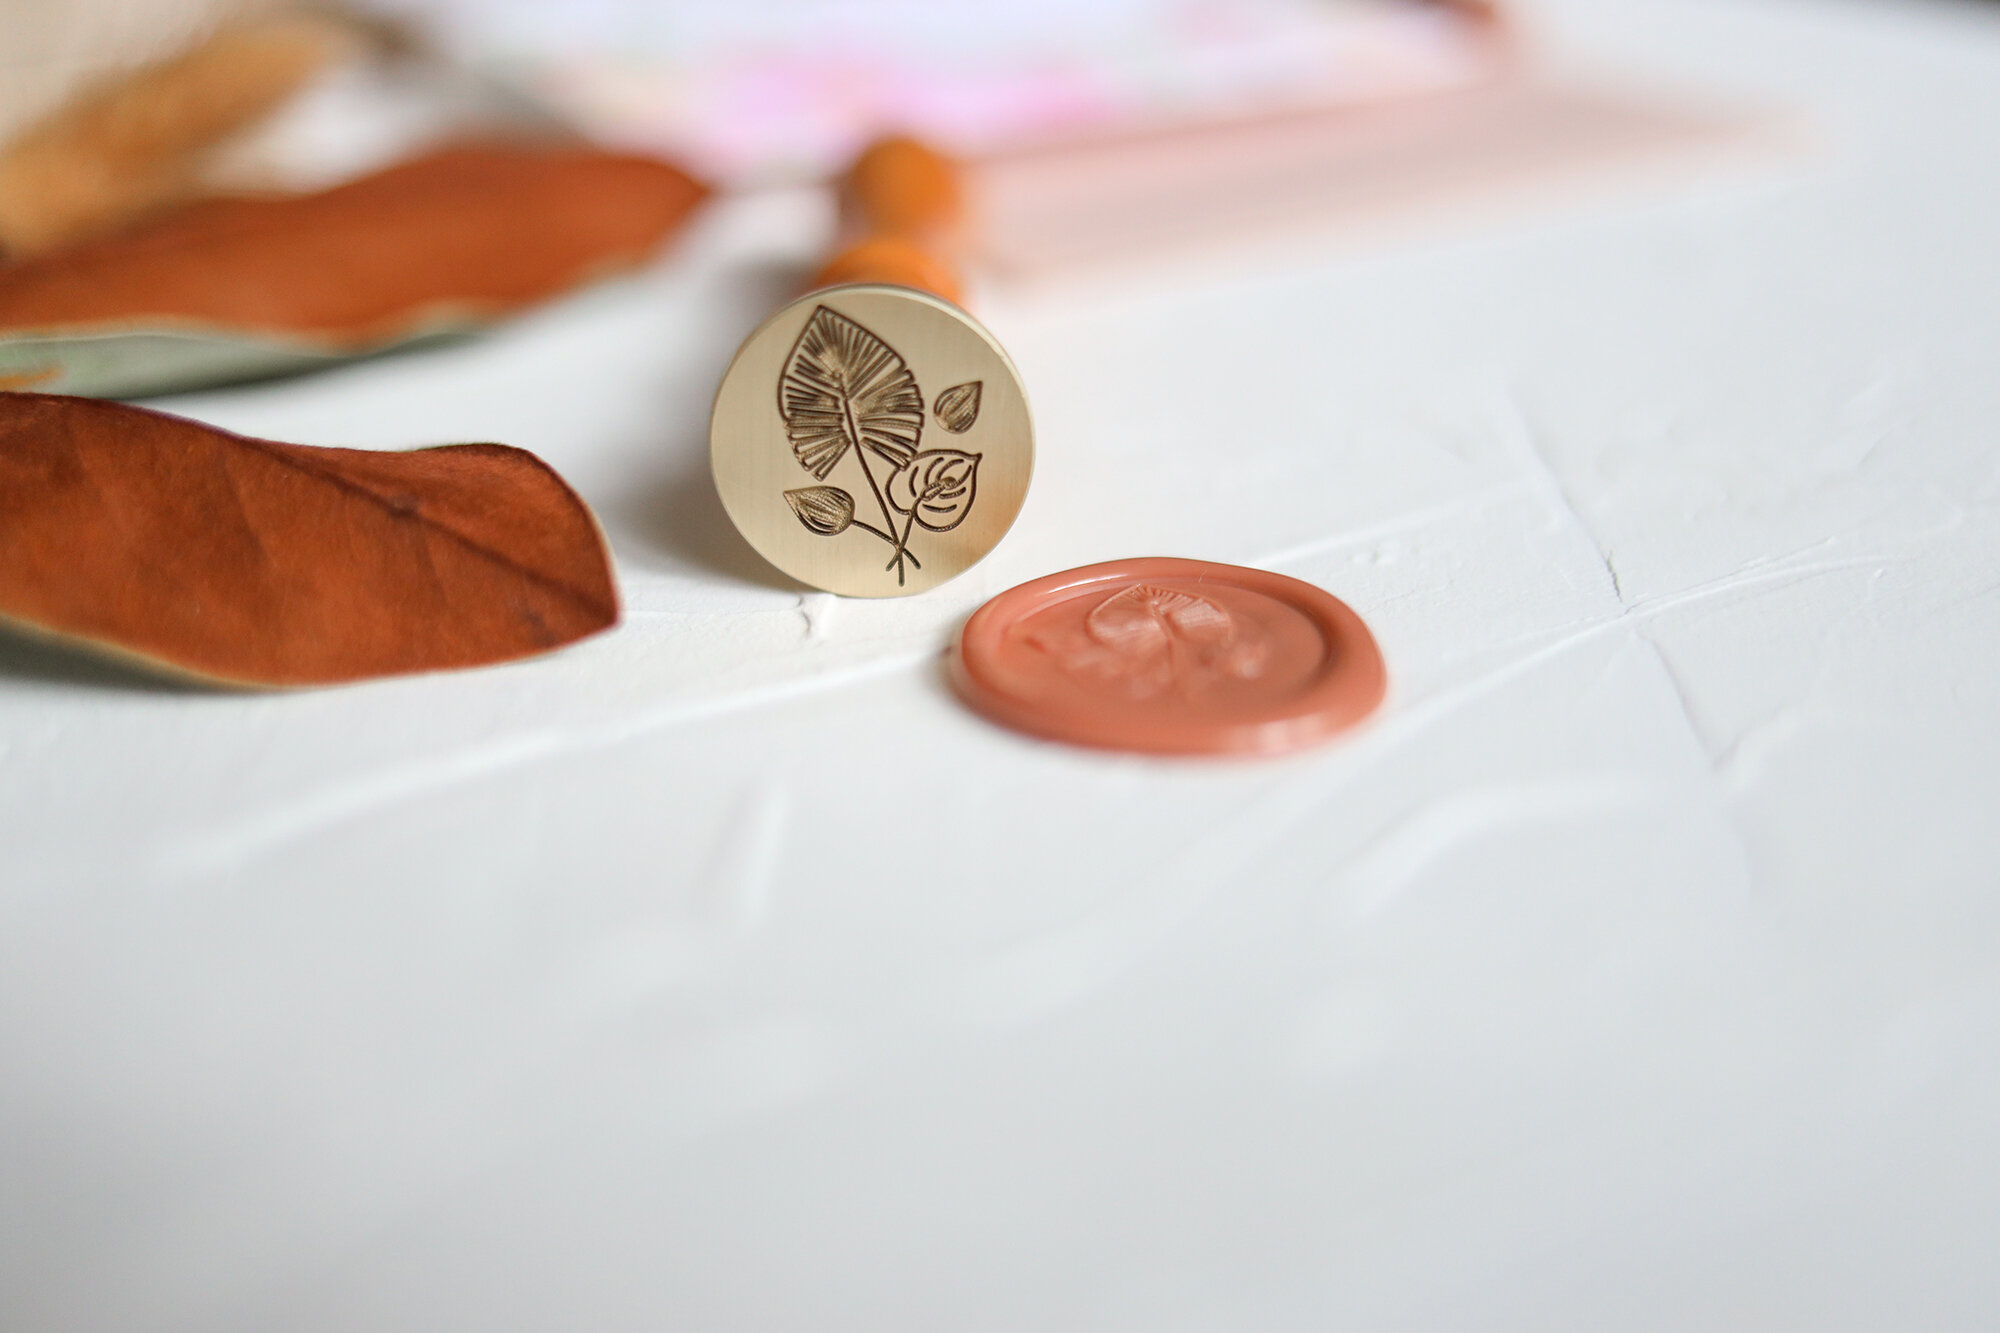
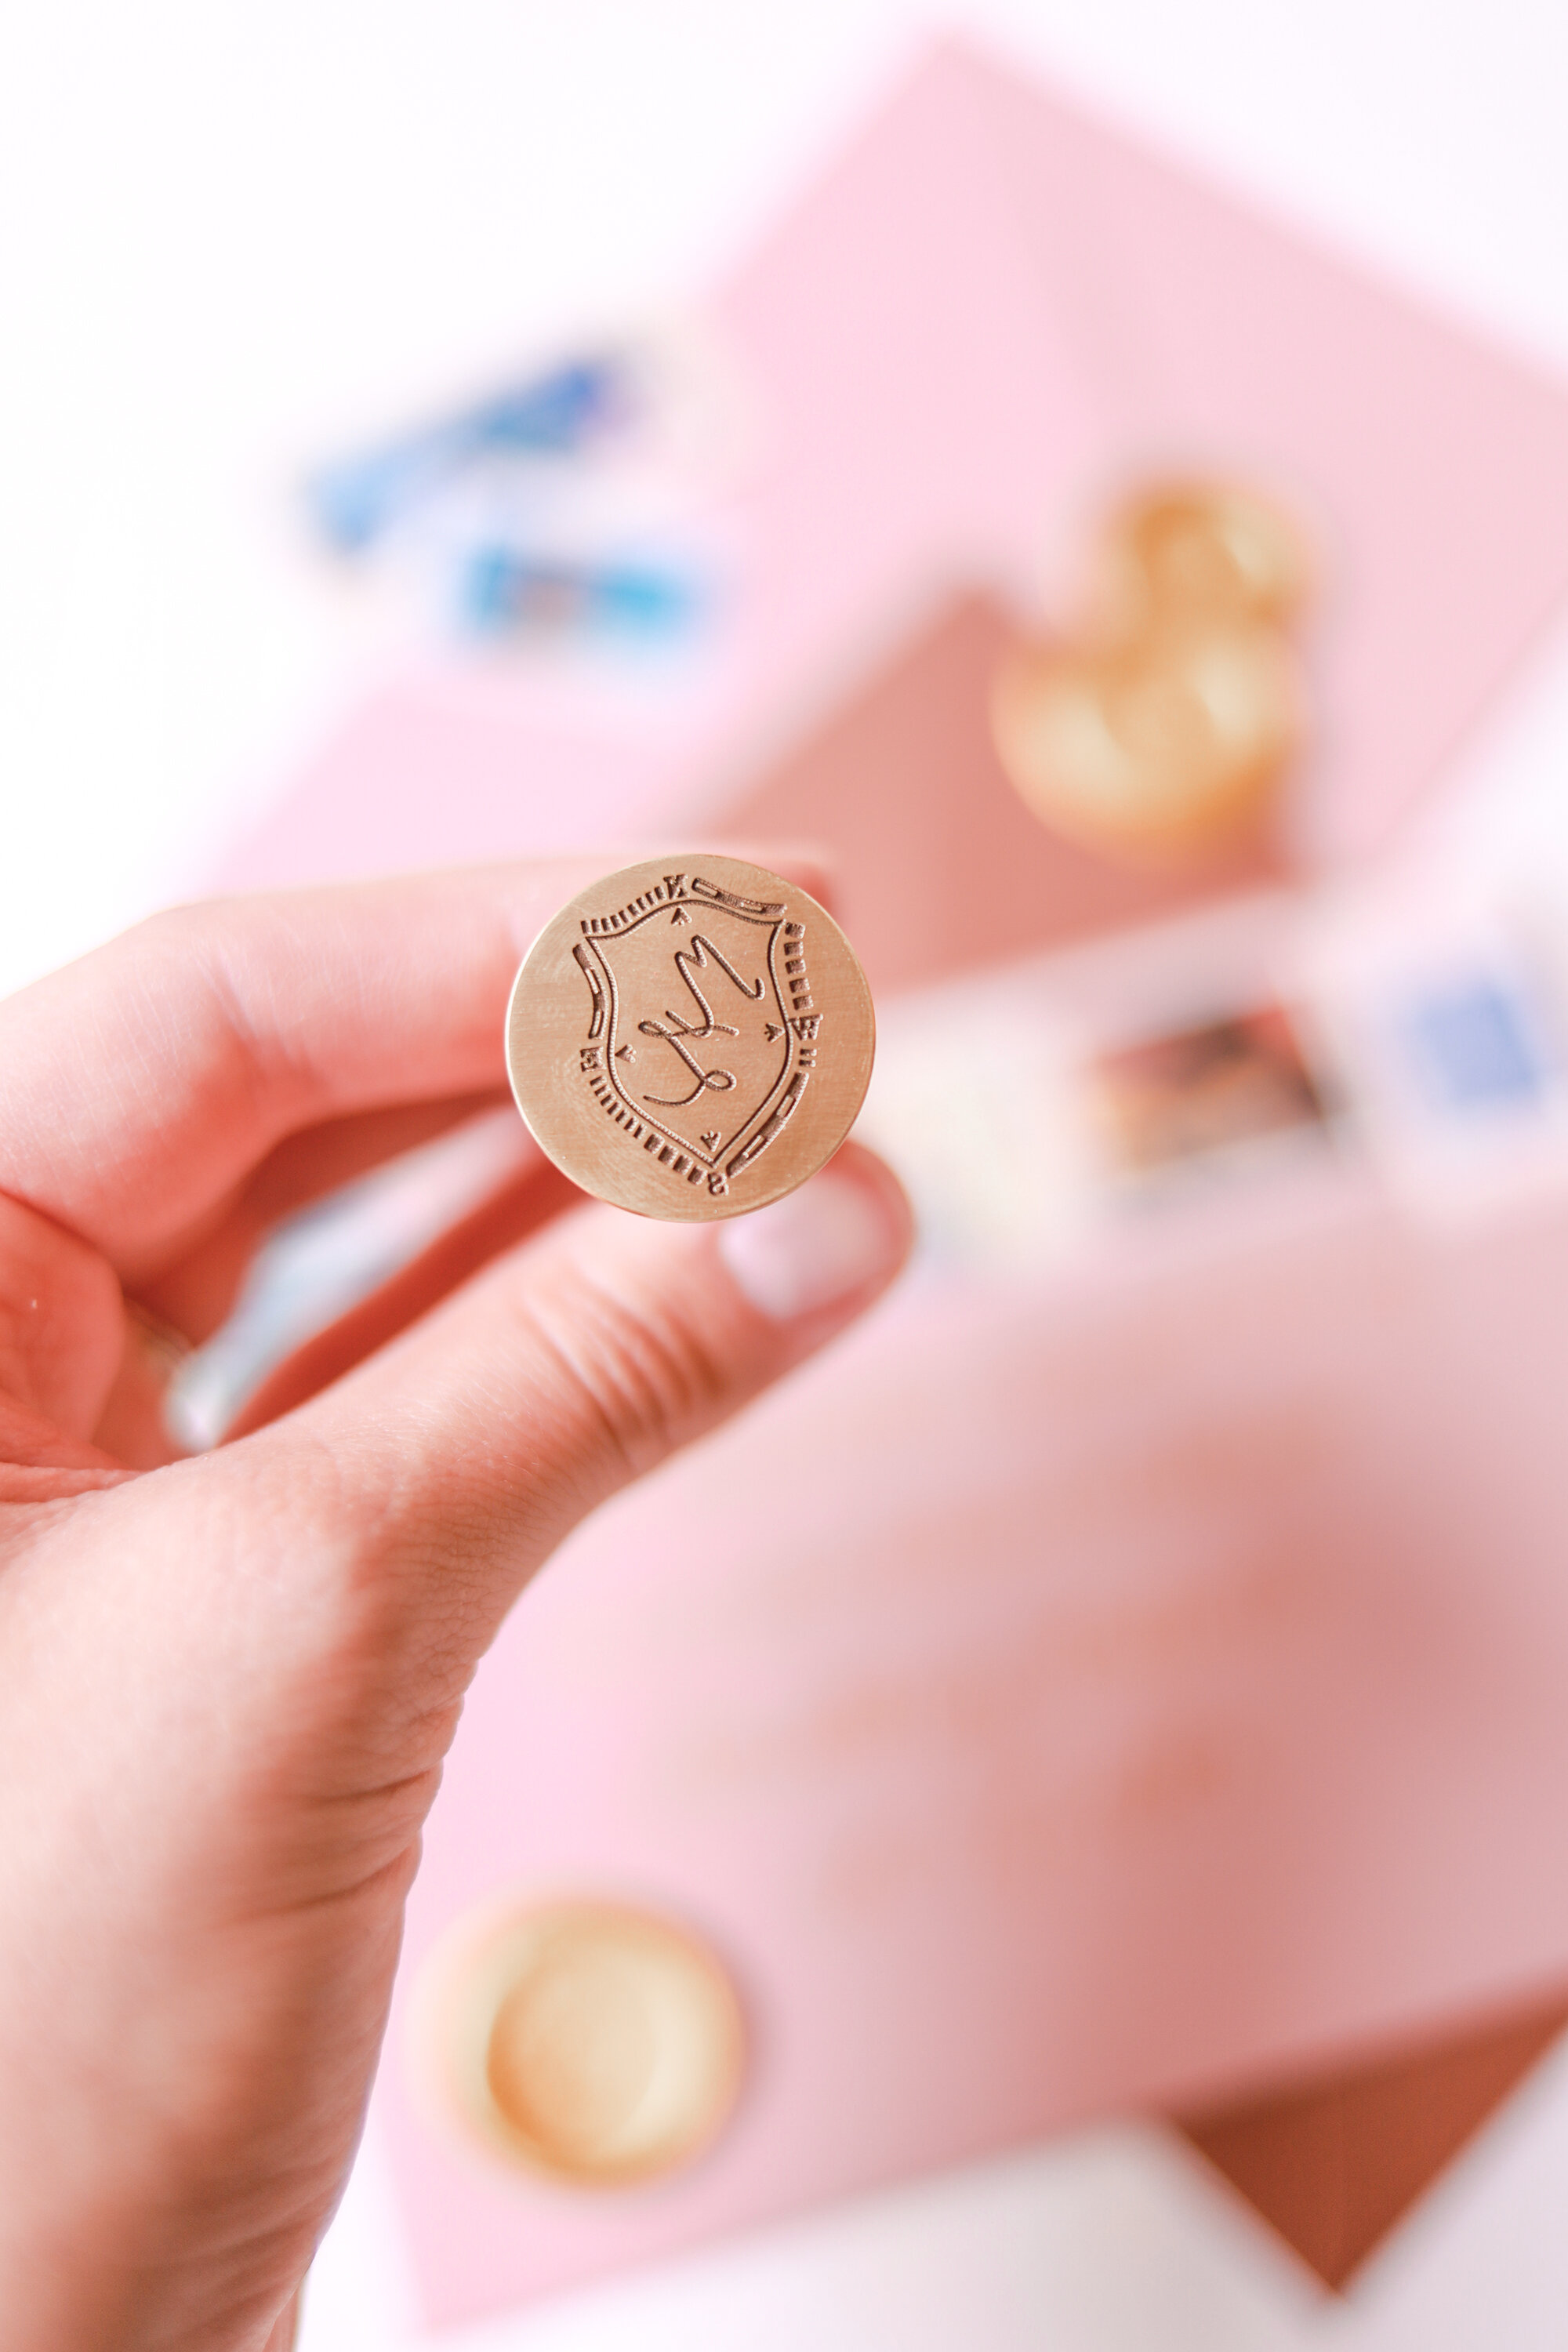
How do you get your very own wax seal stamp? Well I’ll tell you. It’s an all inclusive process beginning with your story. I love to hear about how you and your SO met, where you love to go, what you love to do together, what you have in common and of course, all the details of your wedding day and what kind of vibe you’re going for. That’s where the secret sauce lies. I then build your whole stationery set around those special details and with it is born your very own, custom wax seal stamp. It can be a landscape, a crest, a floral, an animal, a house, shall I go on? You name it and it can be turned into a wax seal stamp!
Once I hear your story and gather all the above details, I will work up a few sketches as options for you to choose from. I’ll give you my professional input but in the end it’s always your choice. After you choose your favorite sketch, I format the drawing to be sent to the production team and your stamp is made! You can choose from a variety of sealing stick colors and I’ll provide you with everything you’ll need to use your stamper! A low temp sealing gun, a pack of wax seal sticks and your stamper. Then you just have to stop yourself from using it on every piece of paper you pass…or don’t ;) GO CRAZY!
Want to chat about your custom wax seal stamp?
Email me! info@stephanietara.com


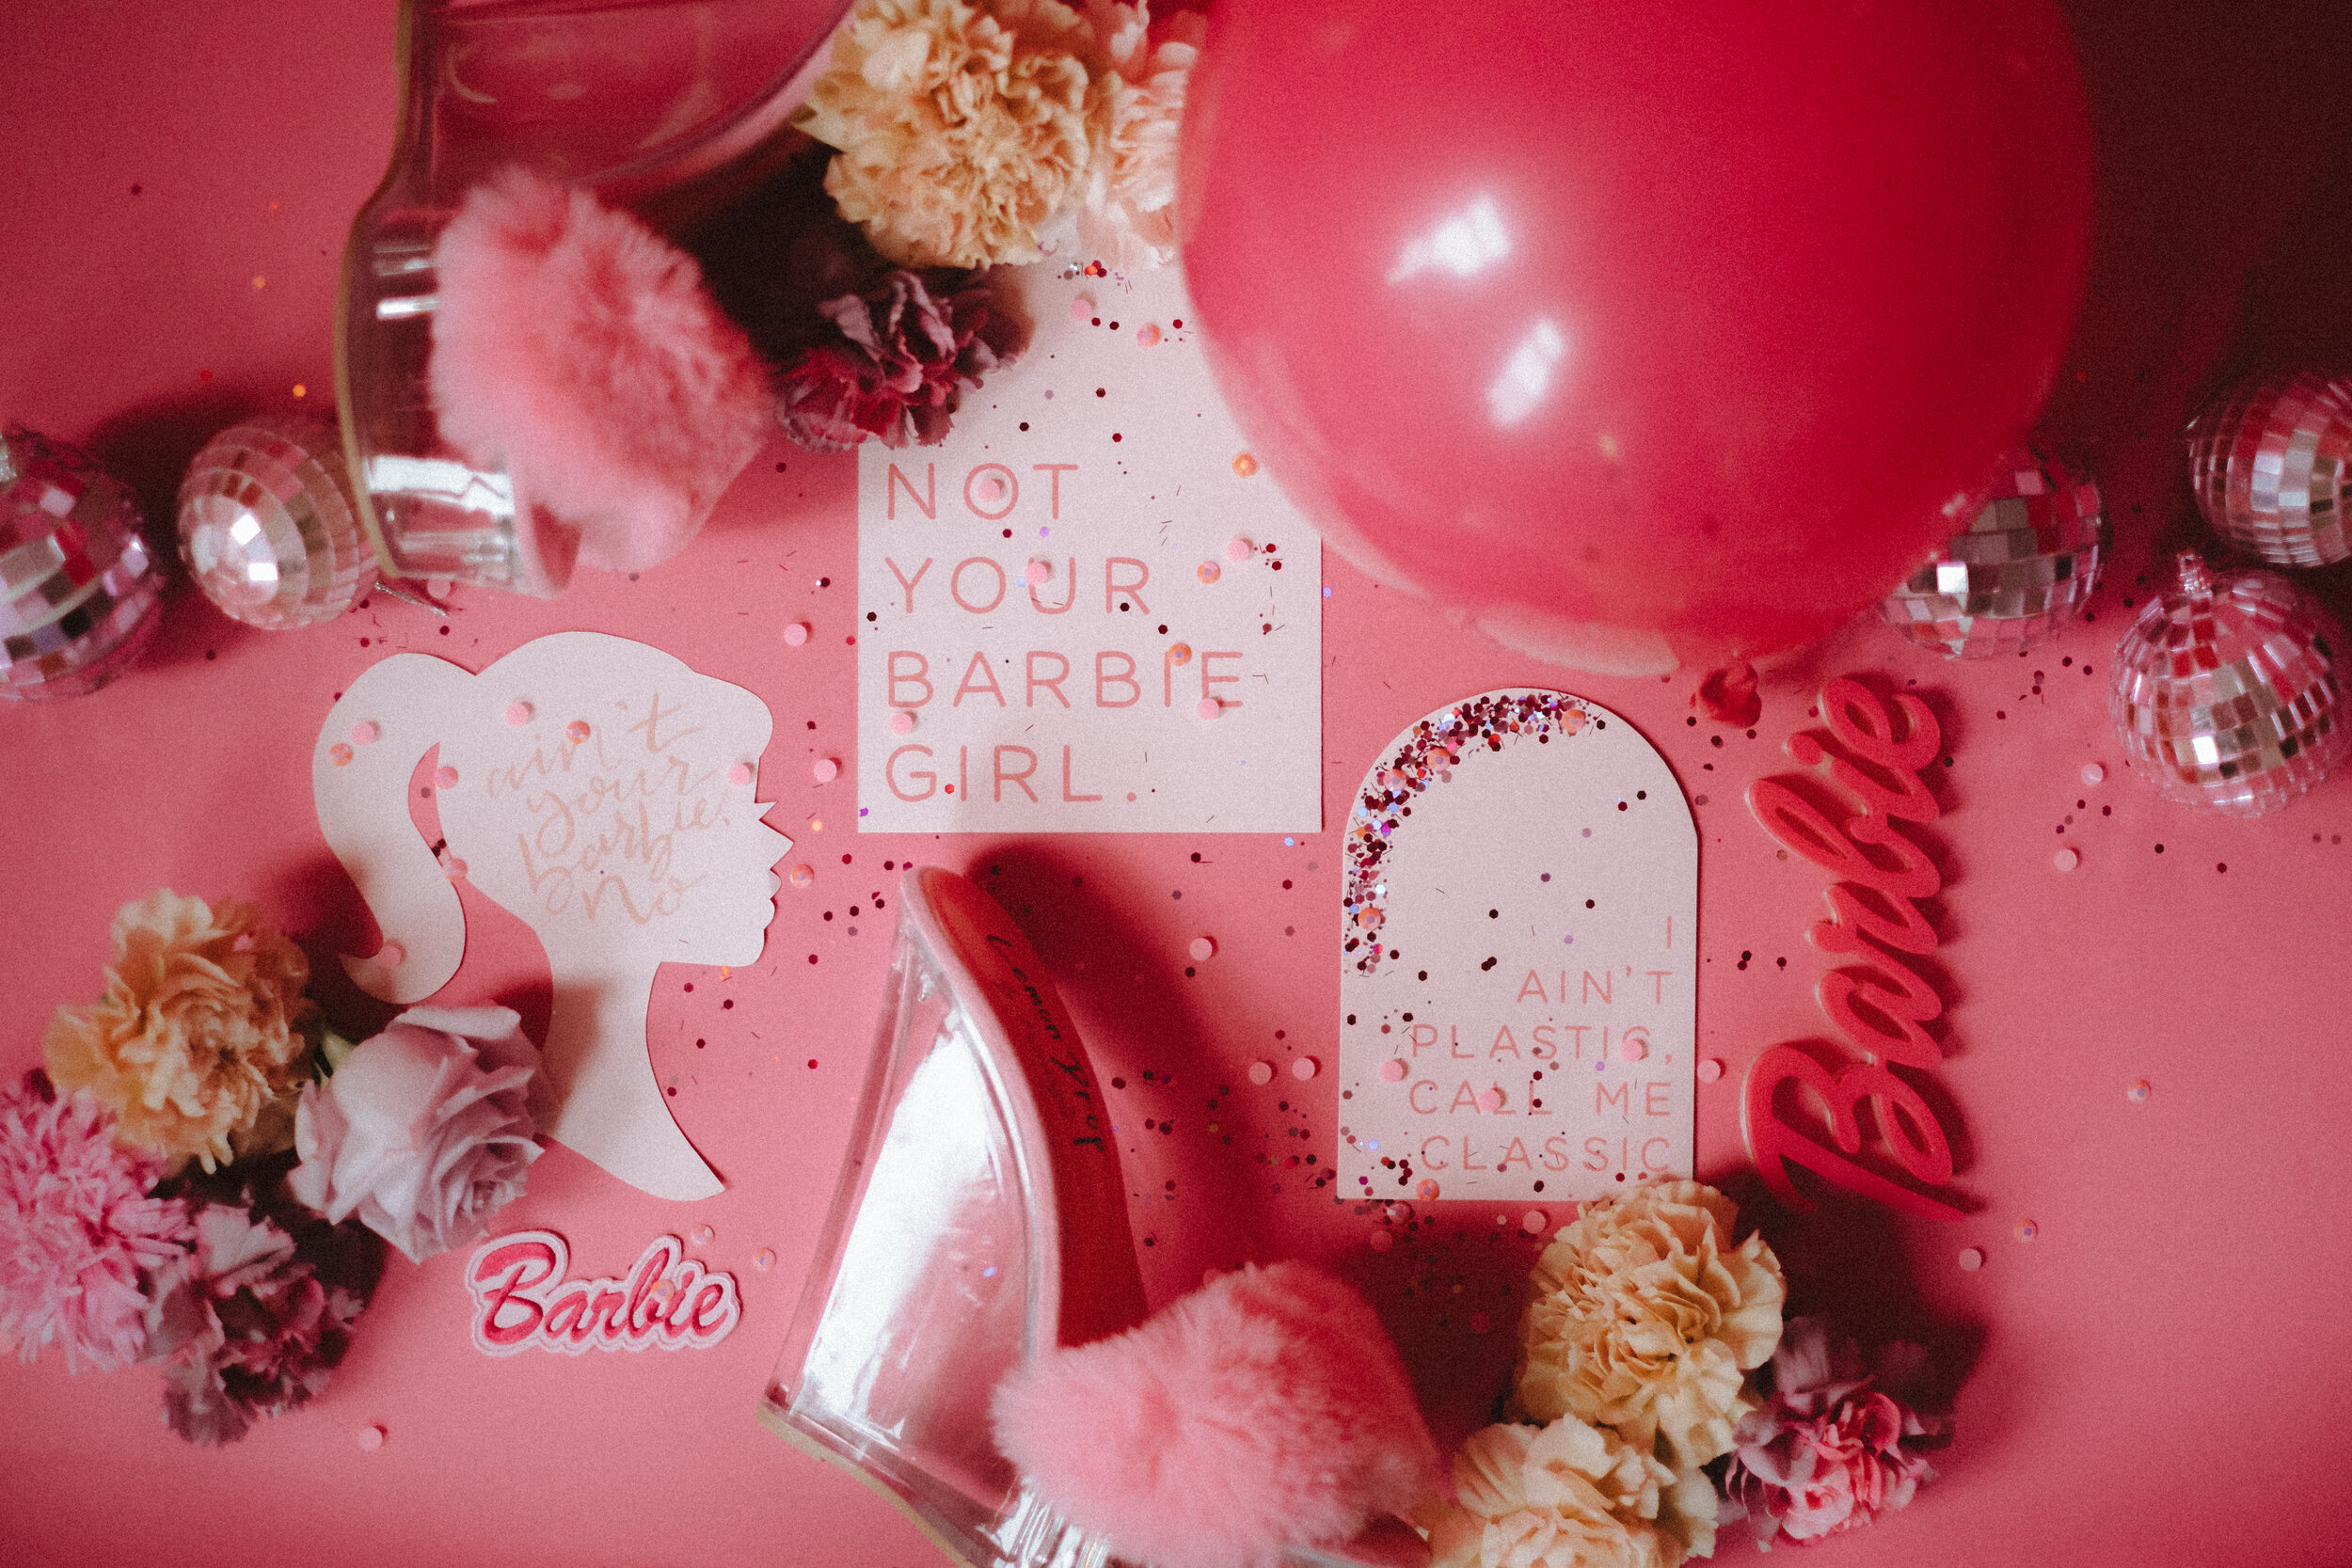
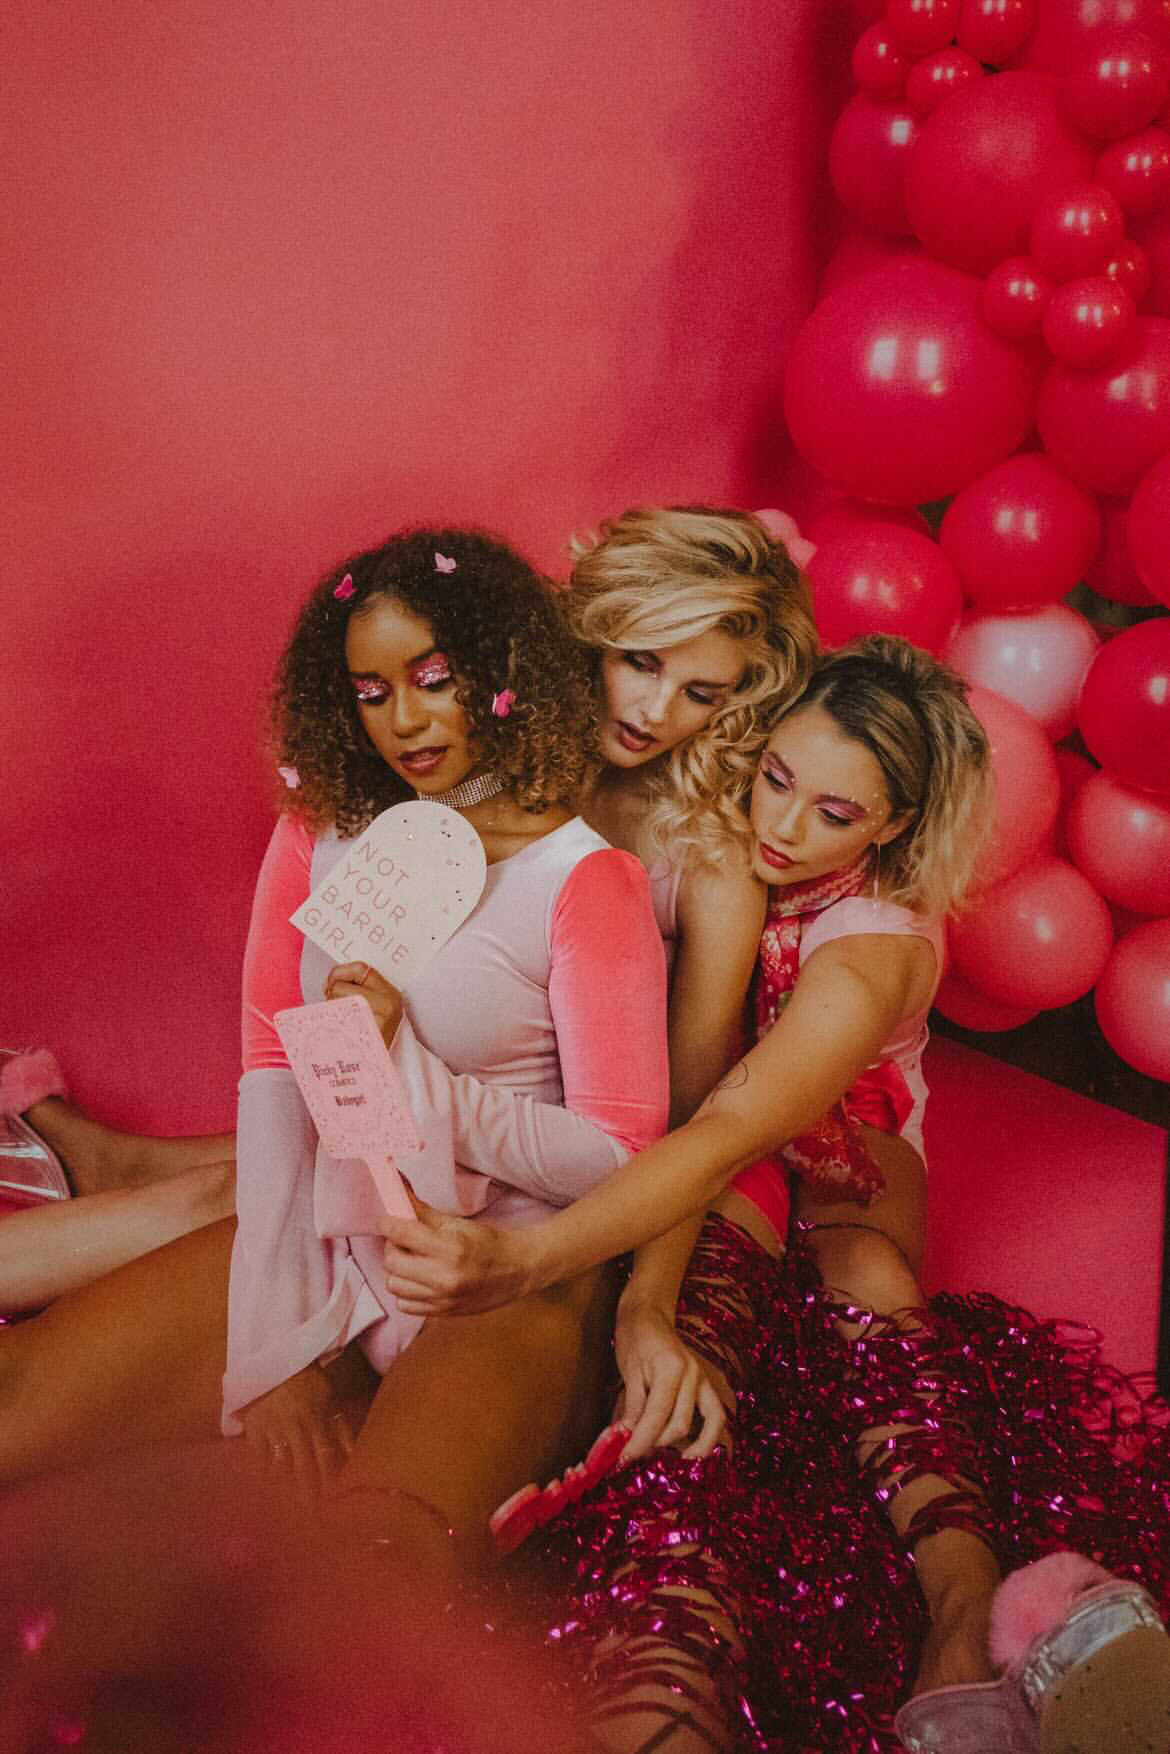
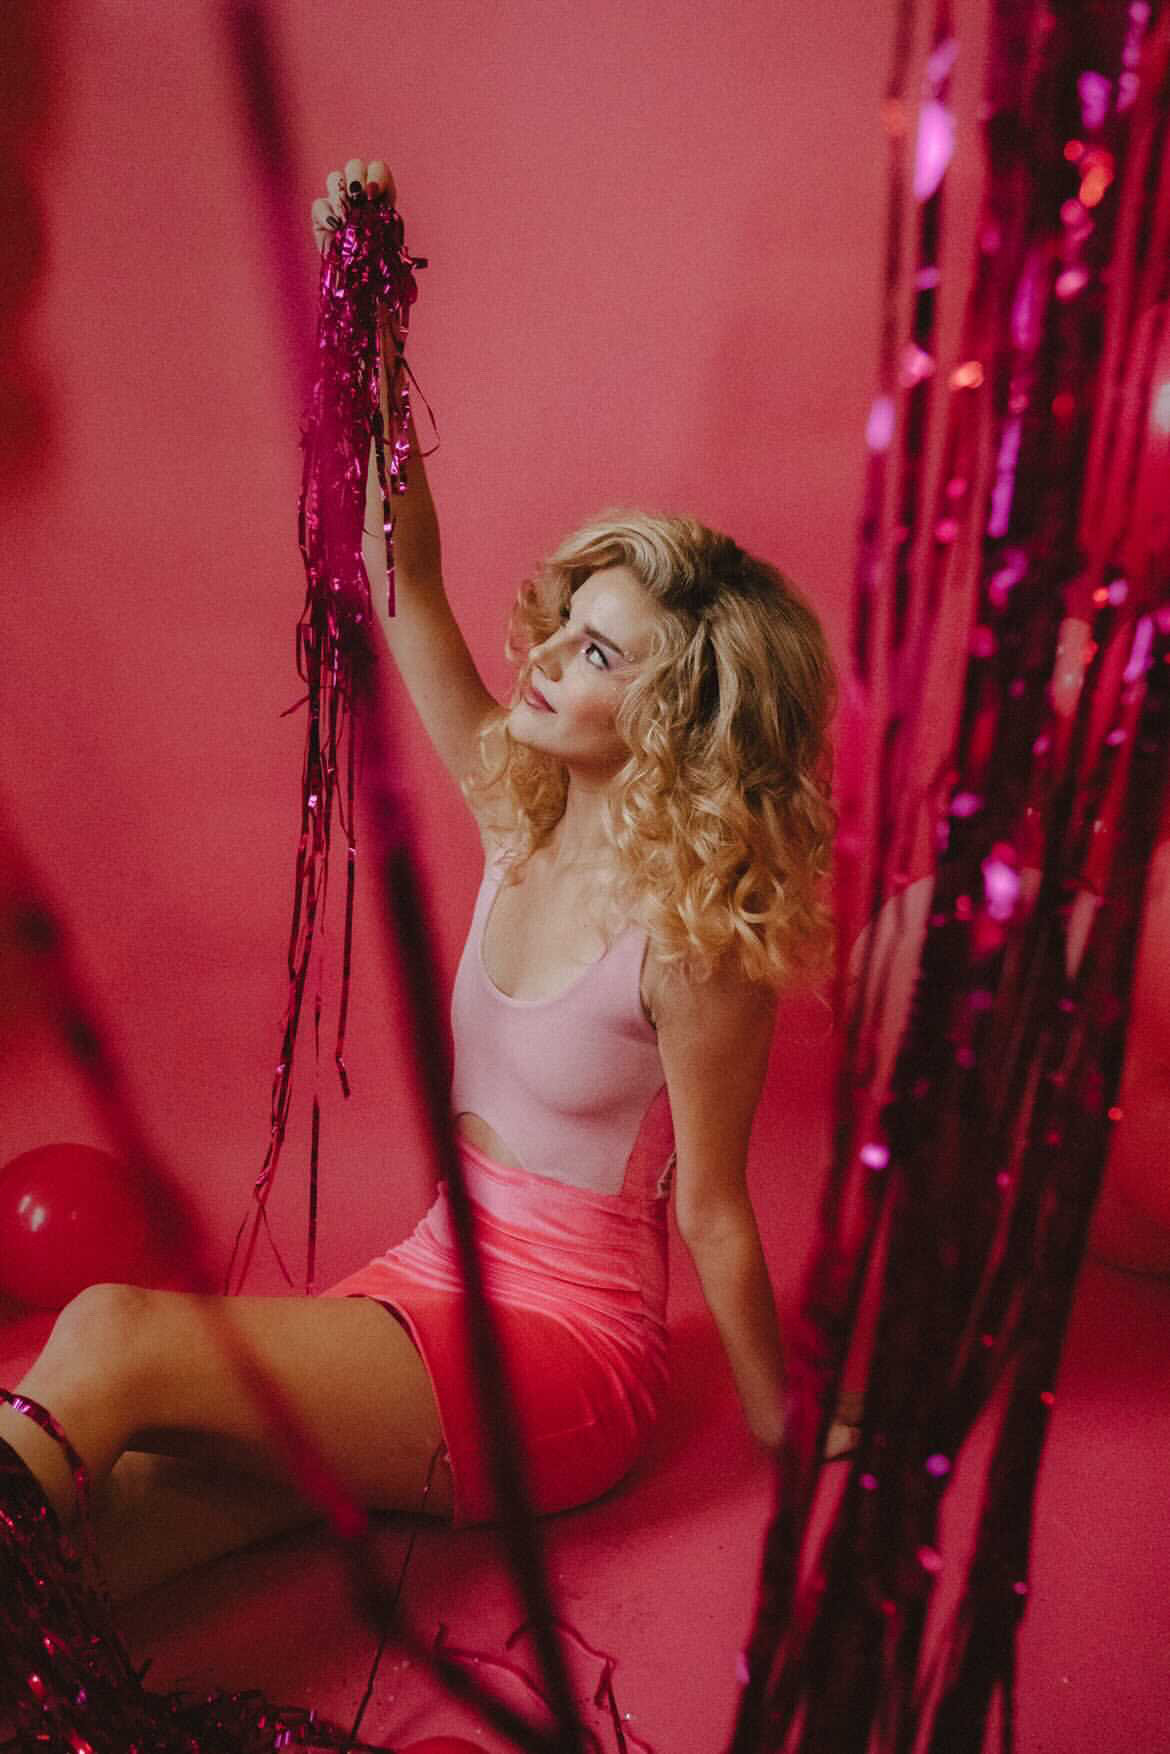
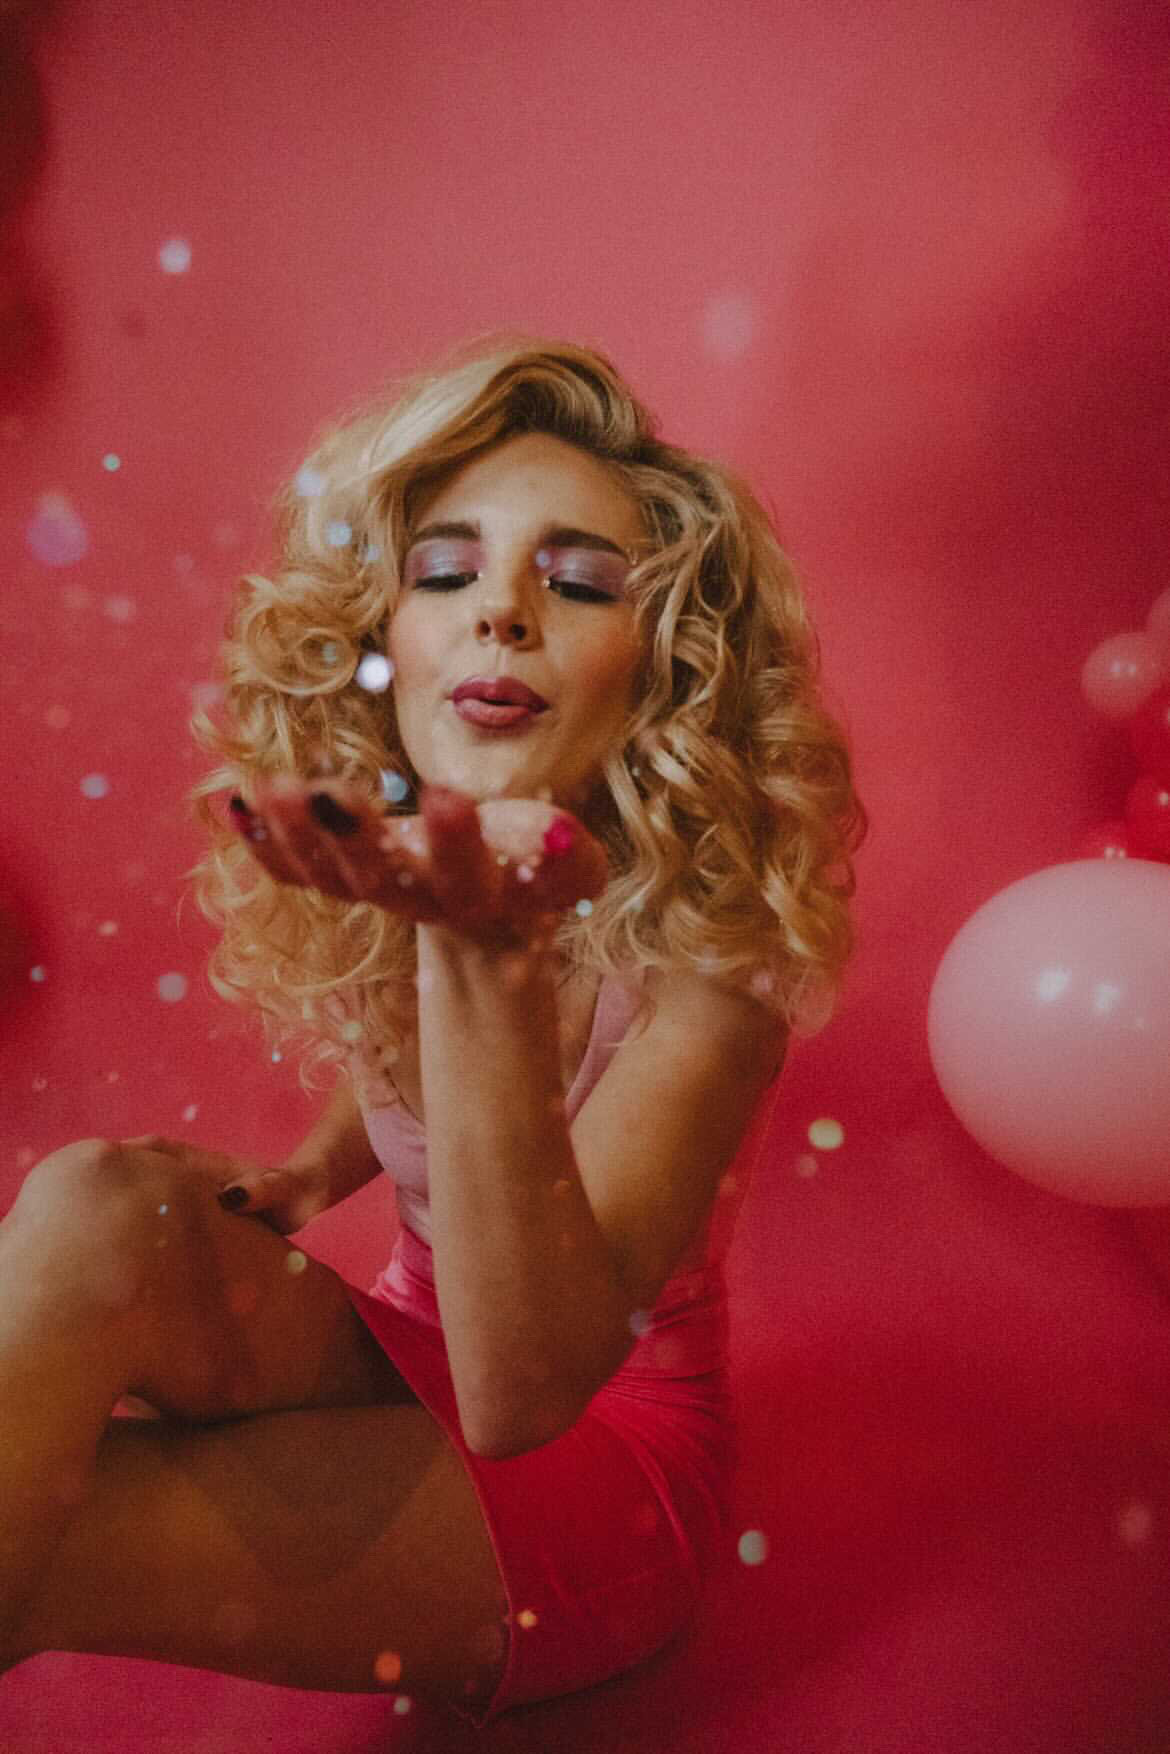
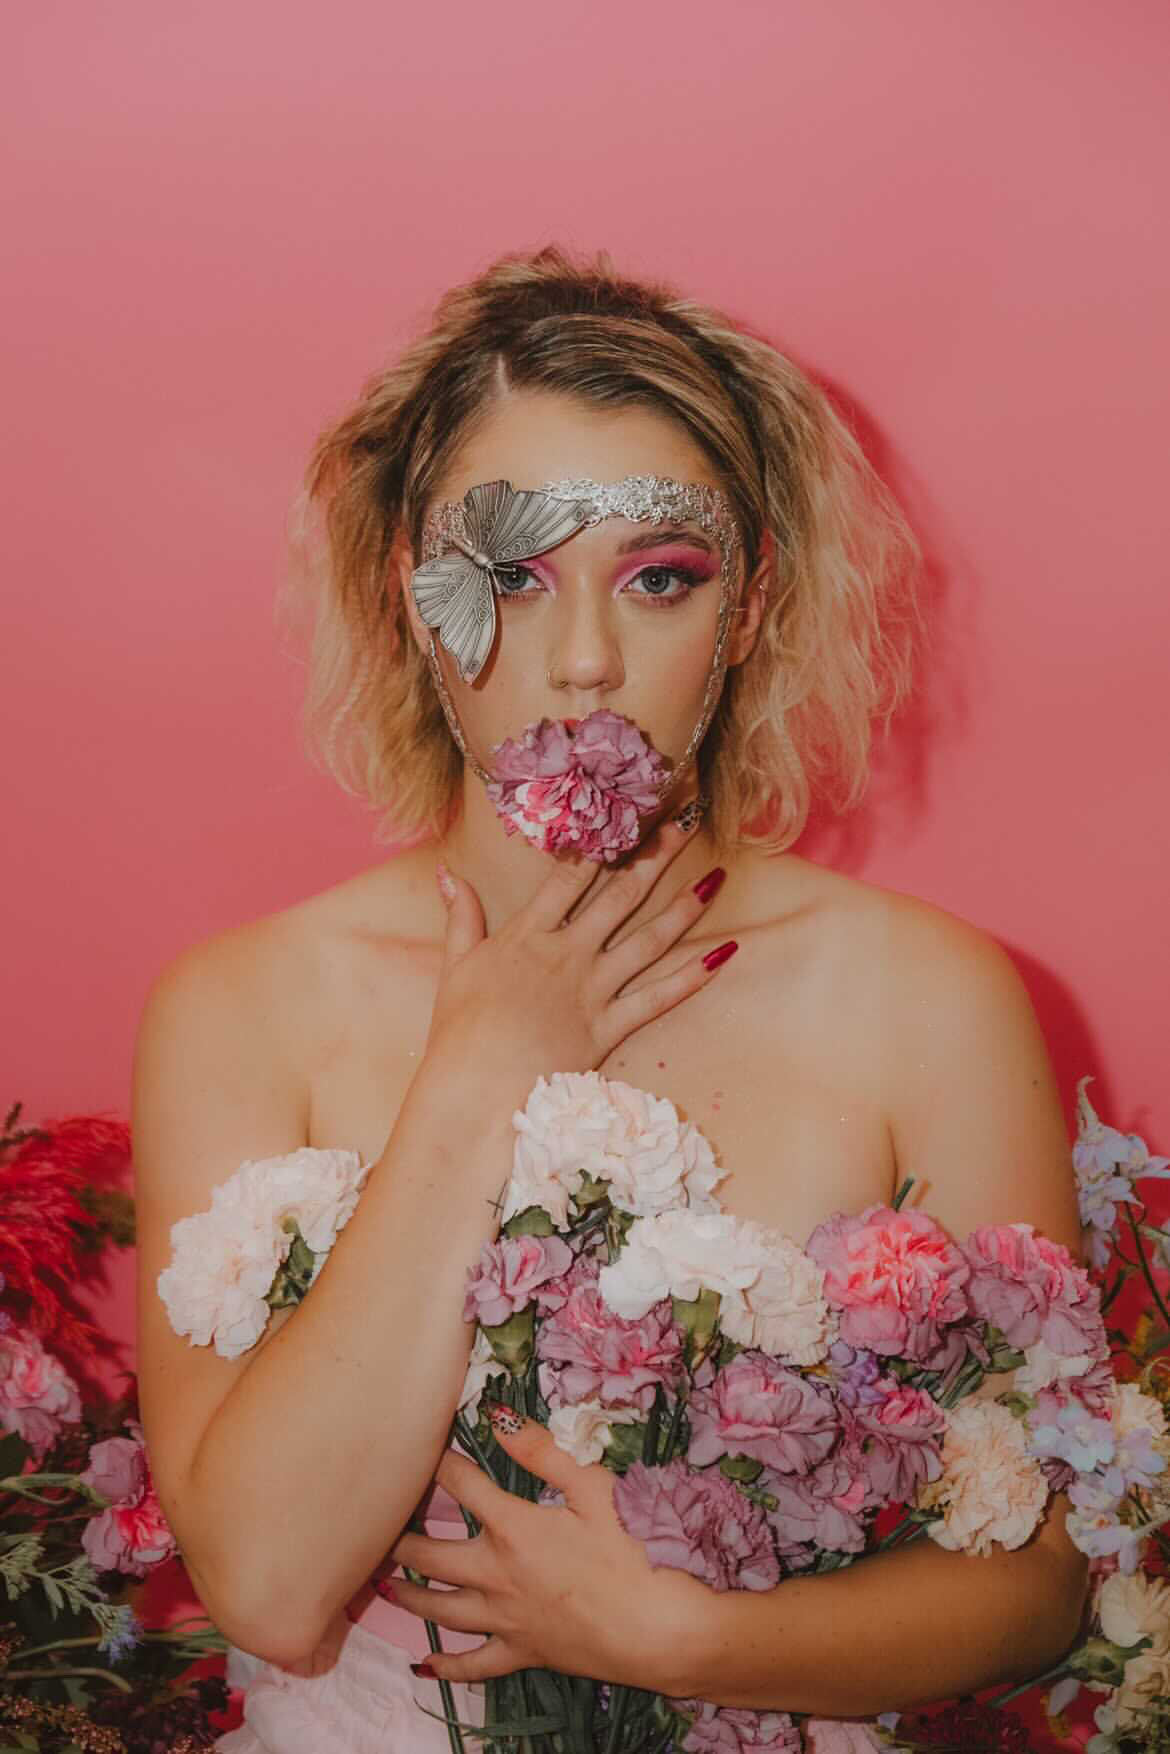
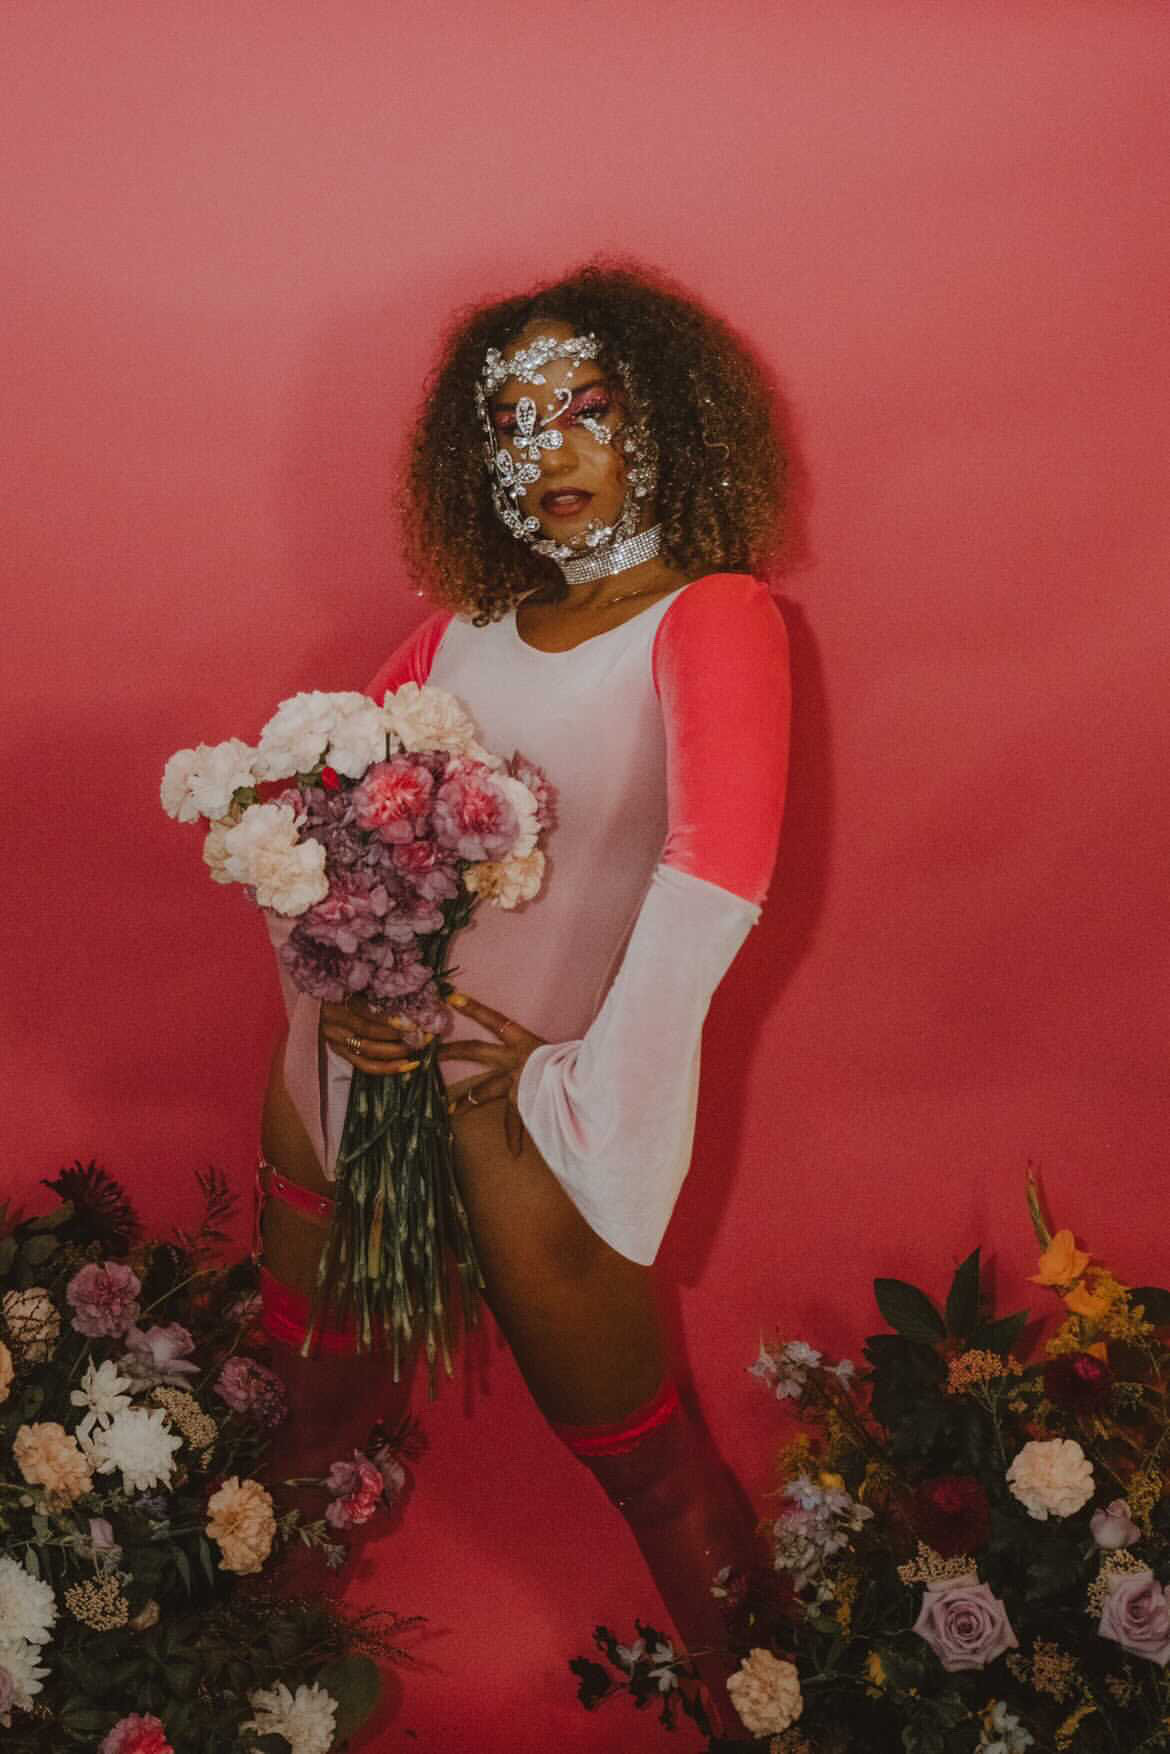
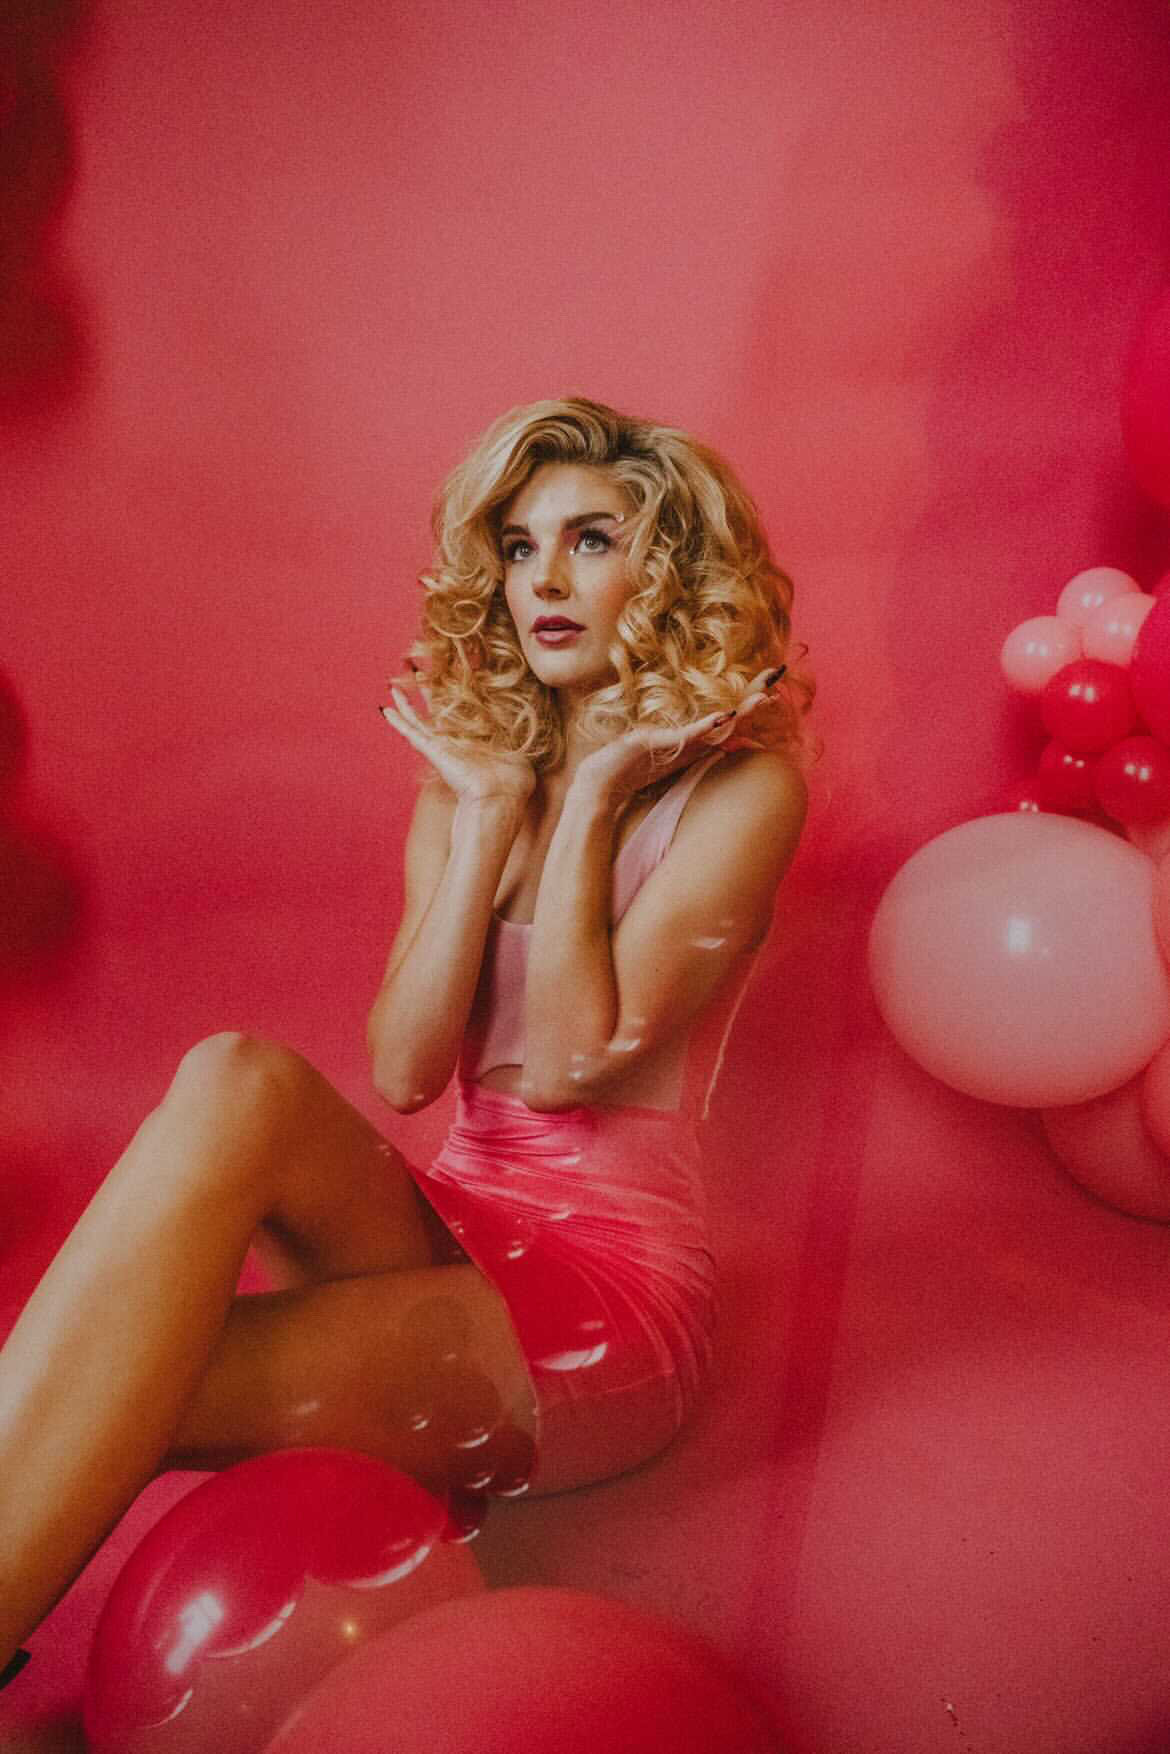
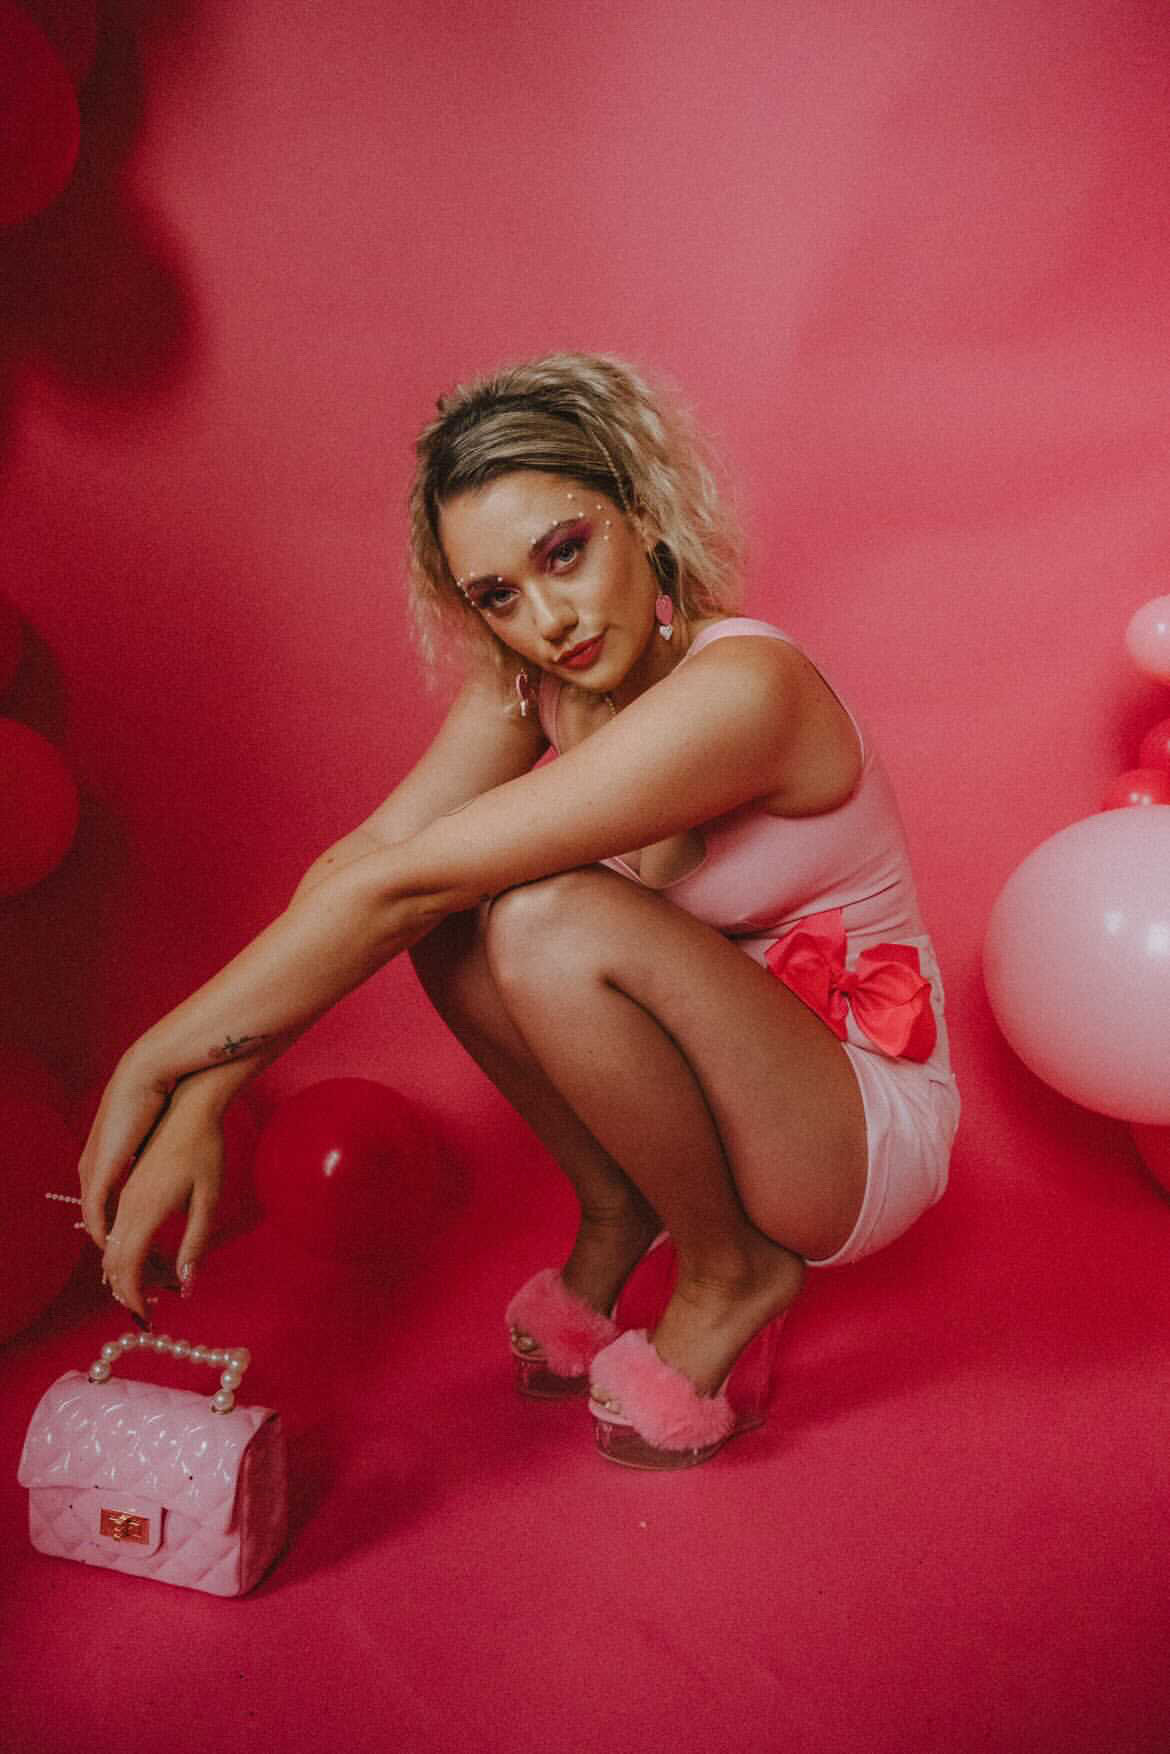
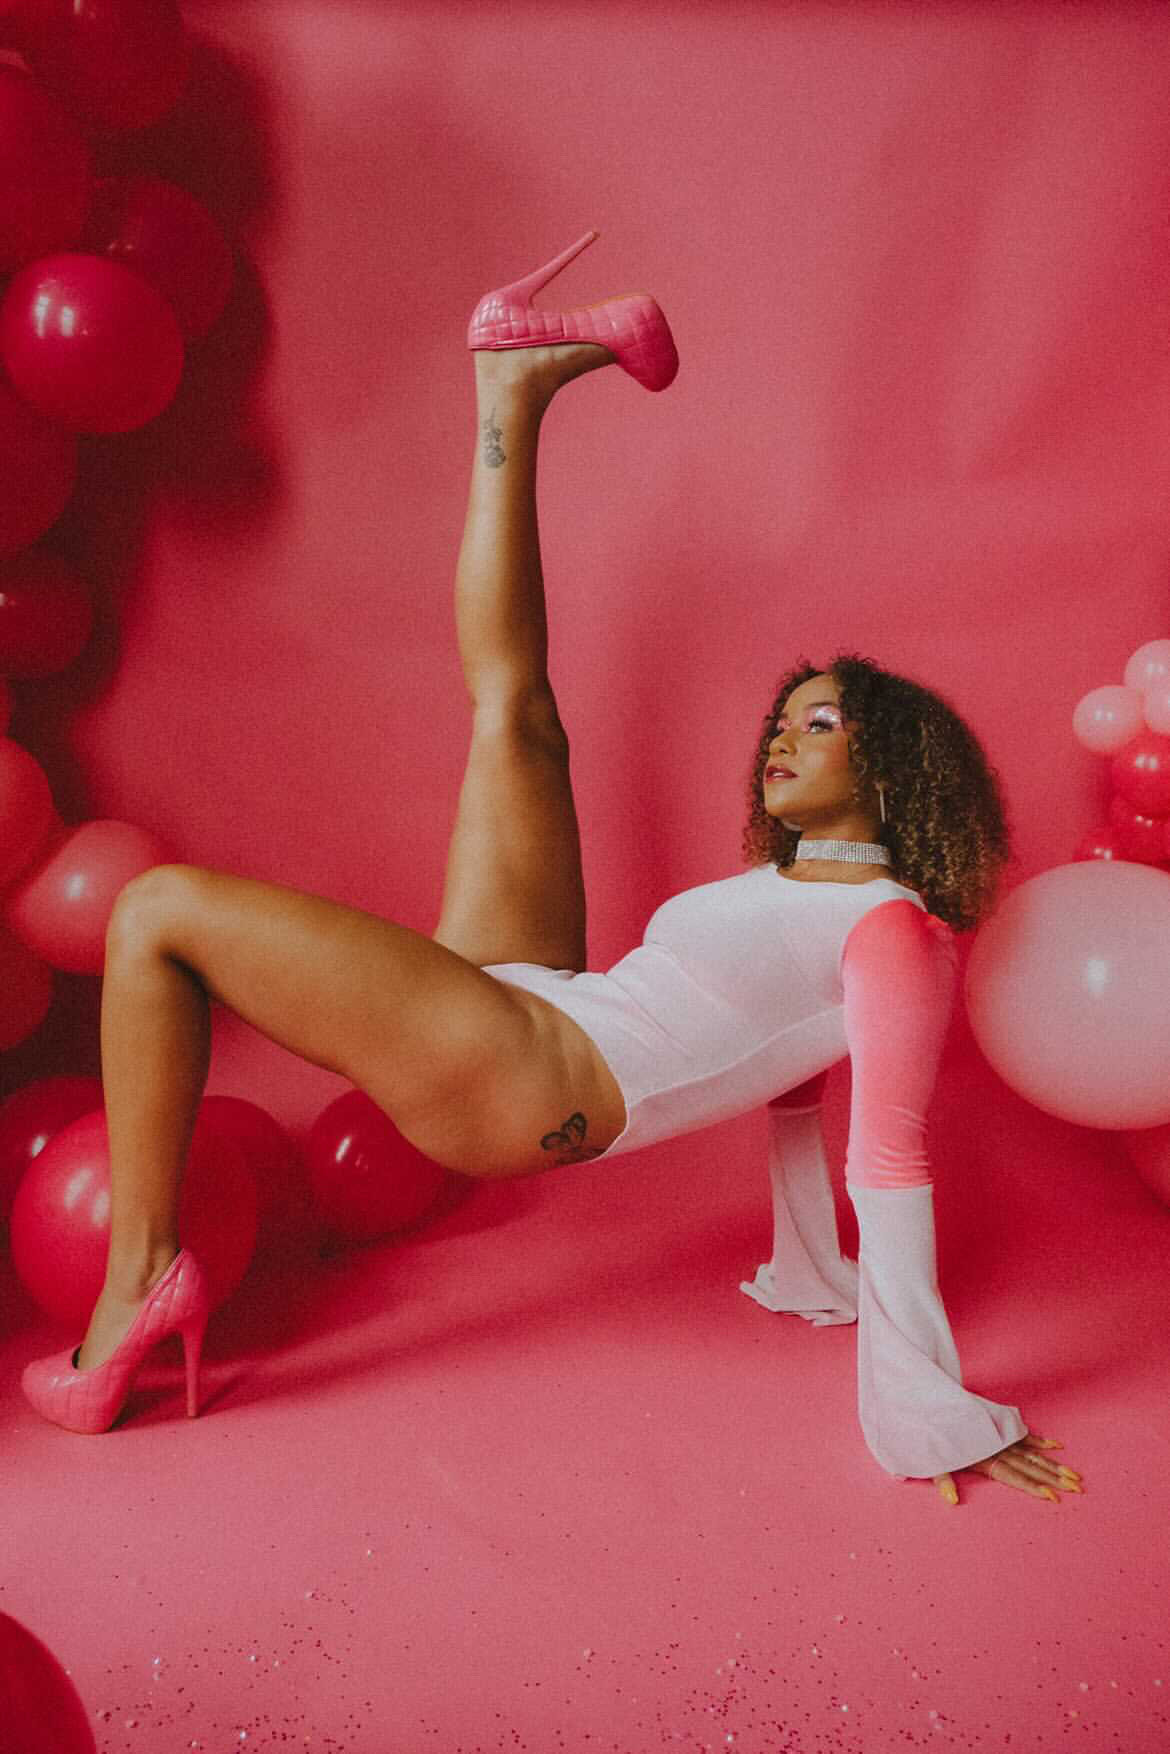
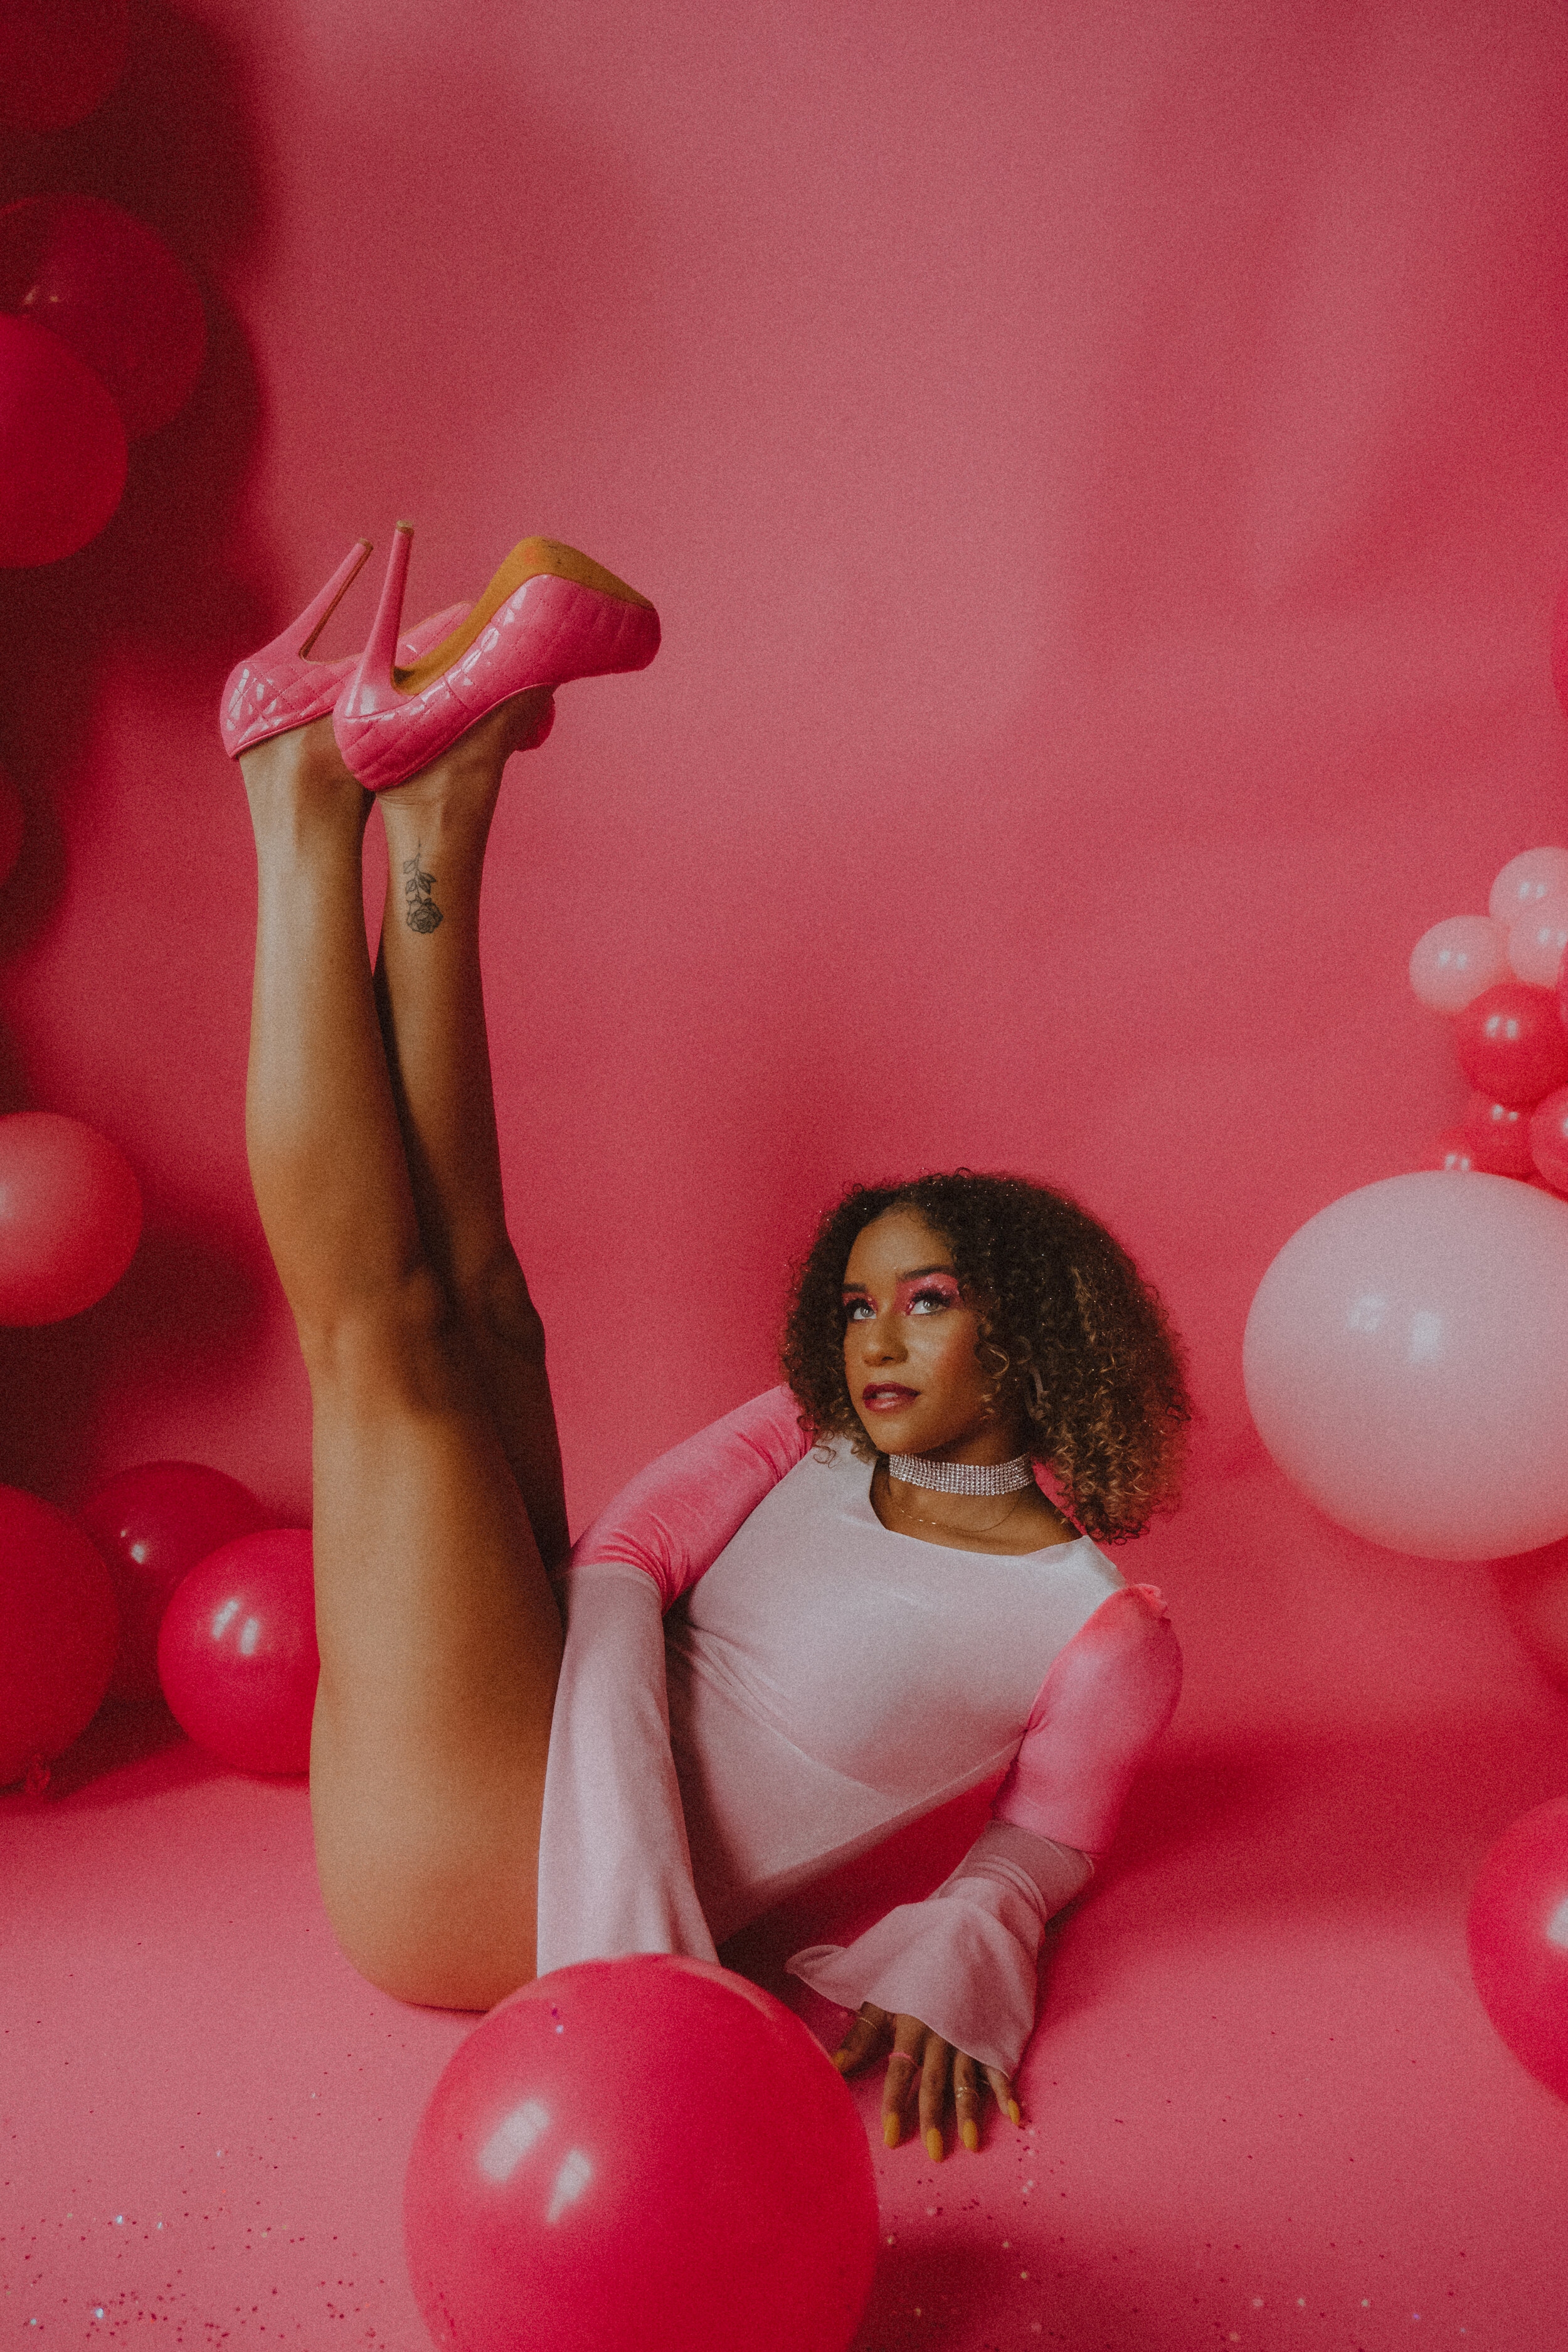
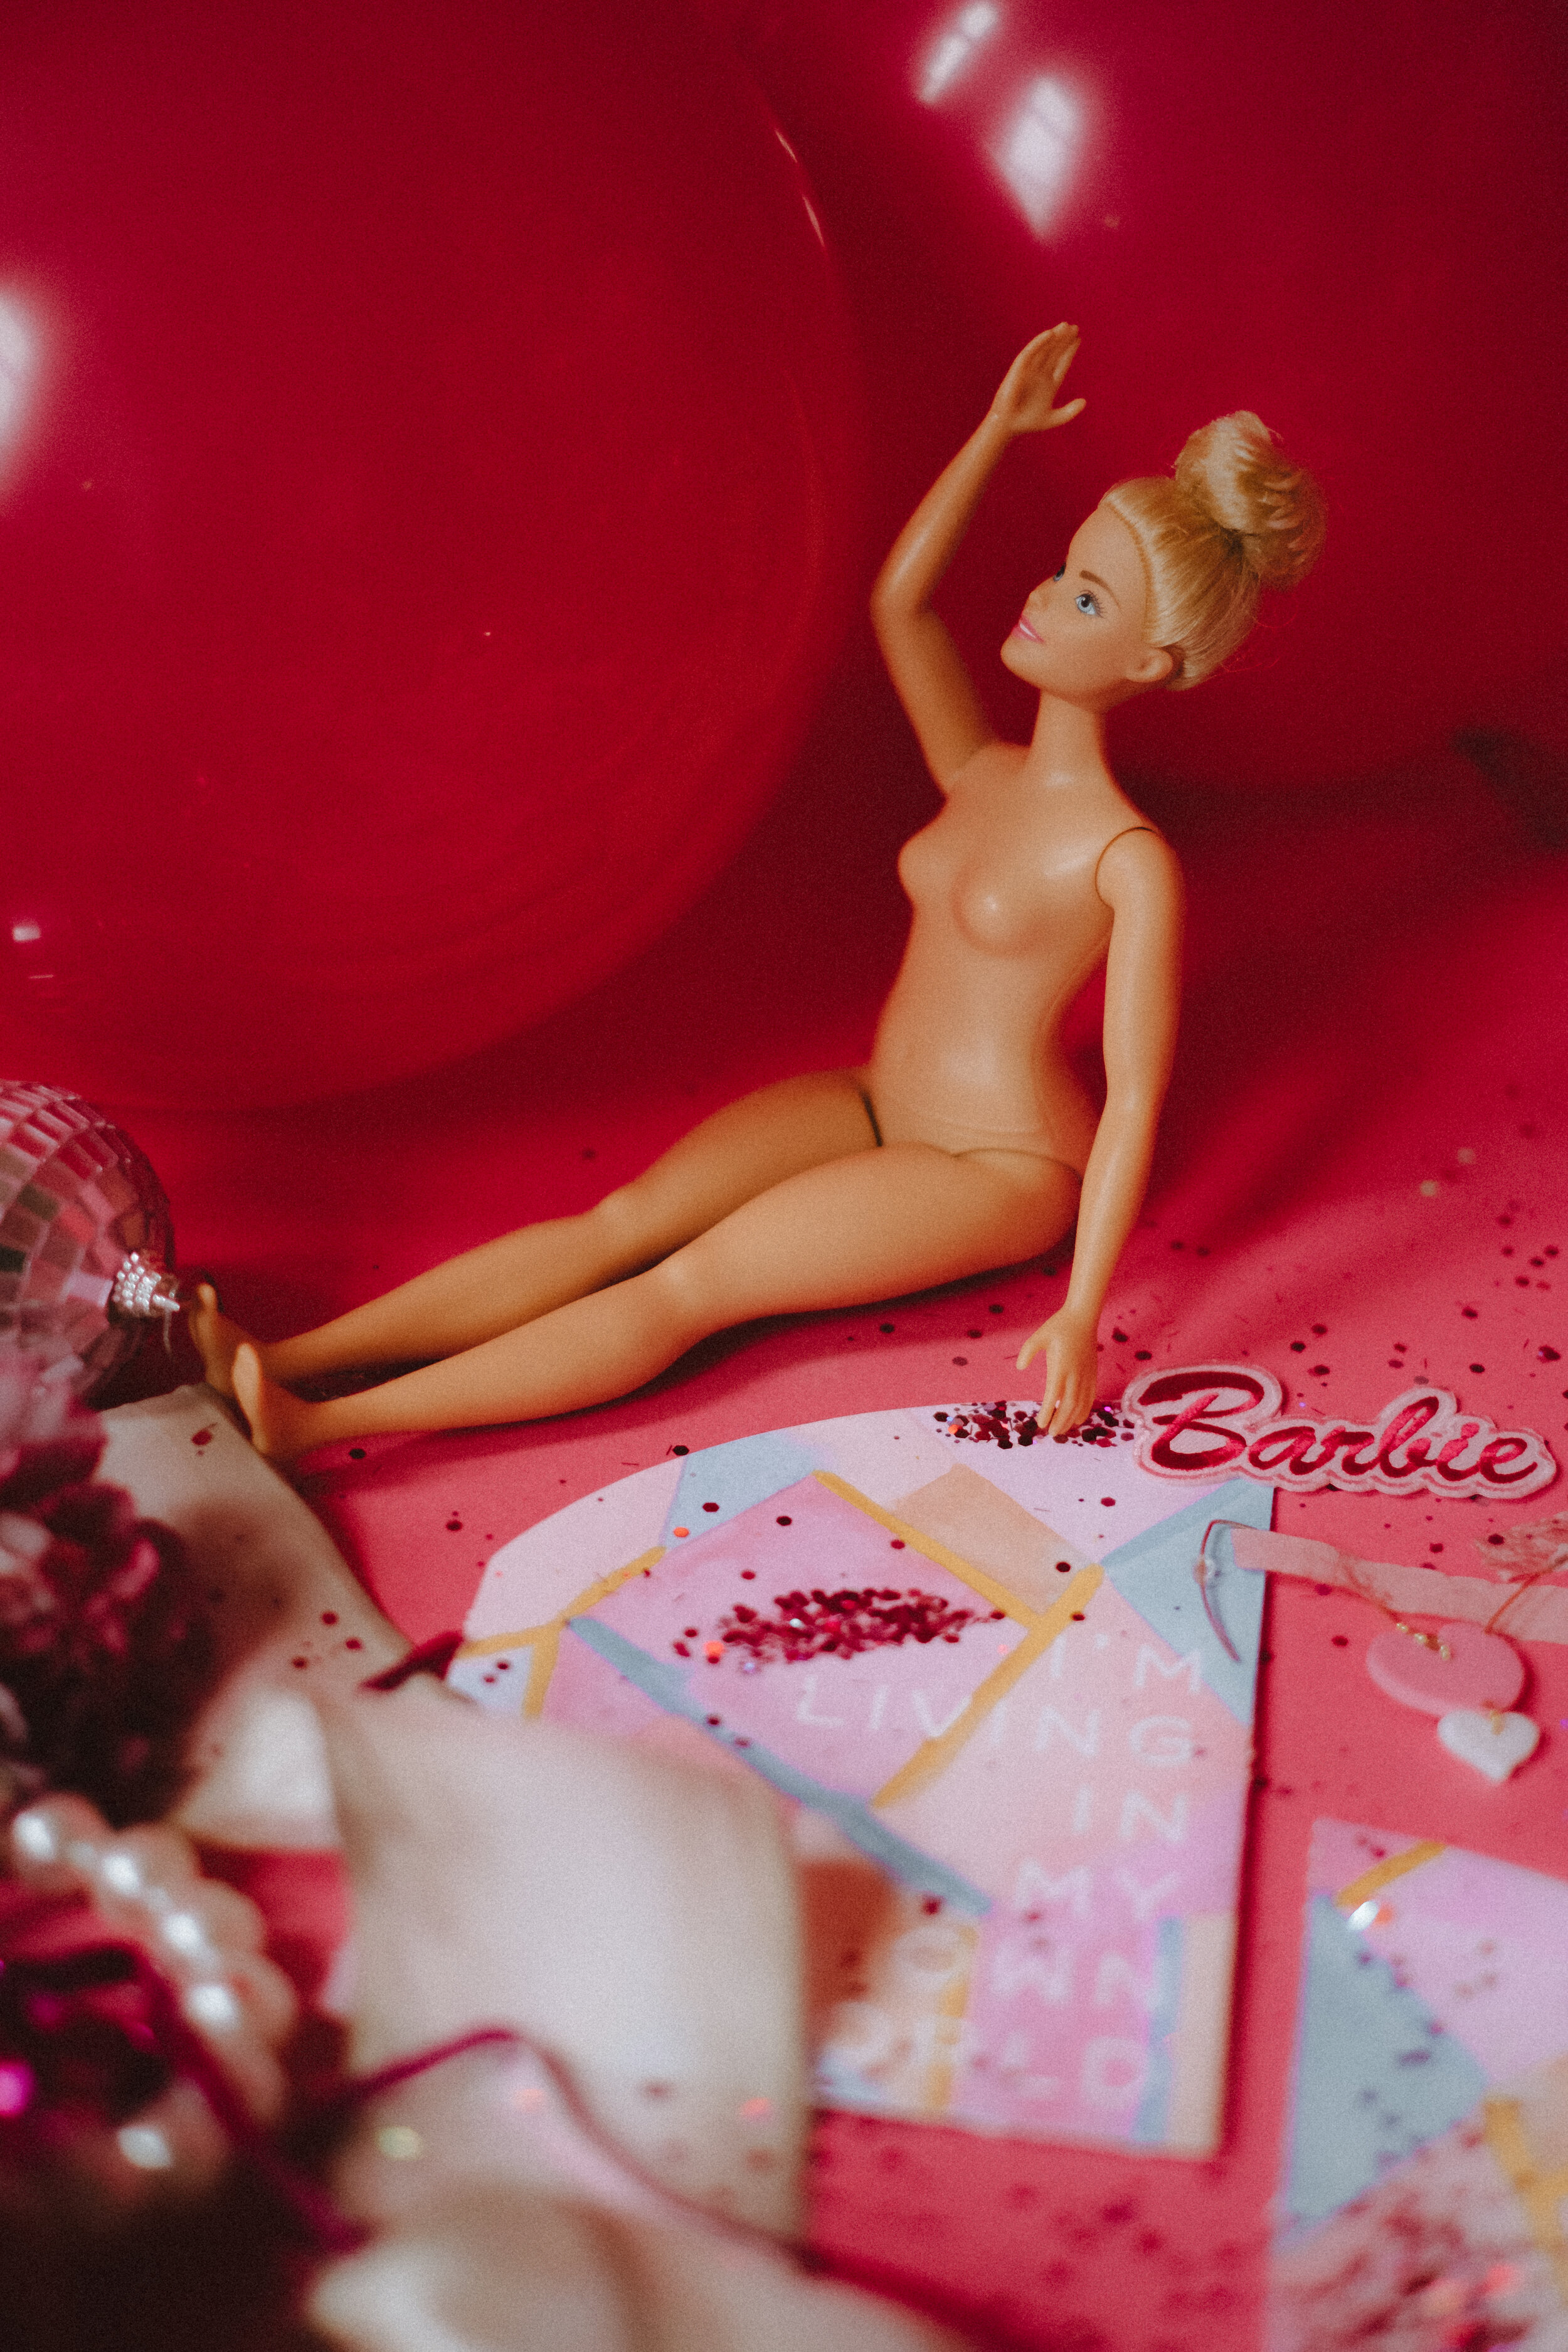
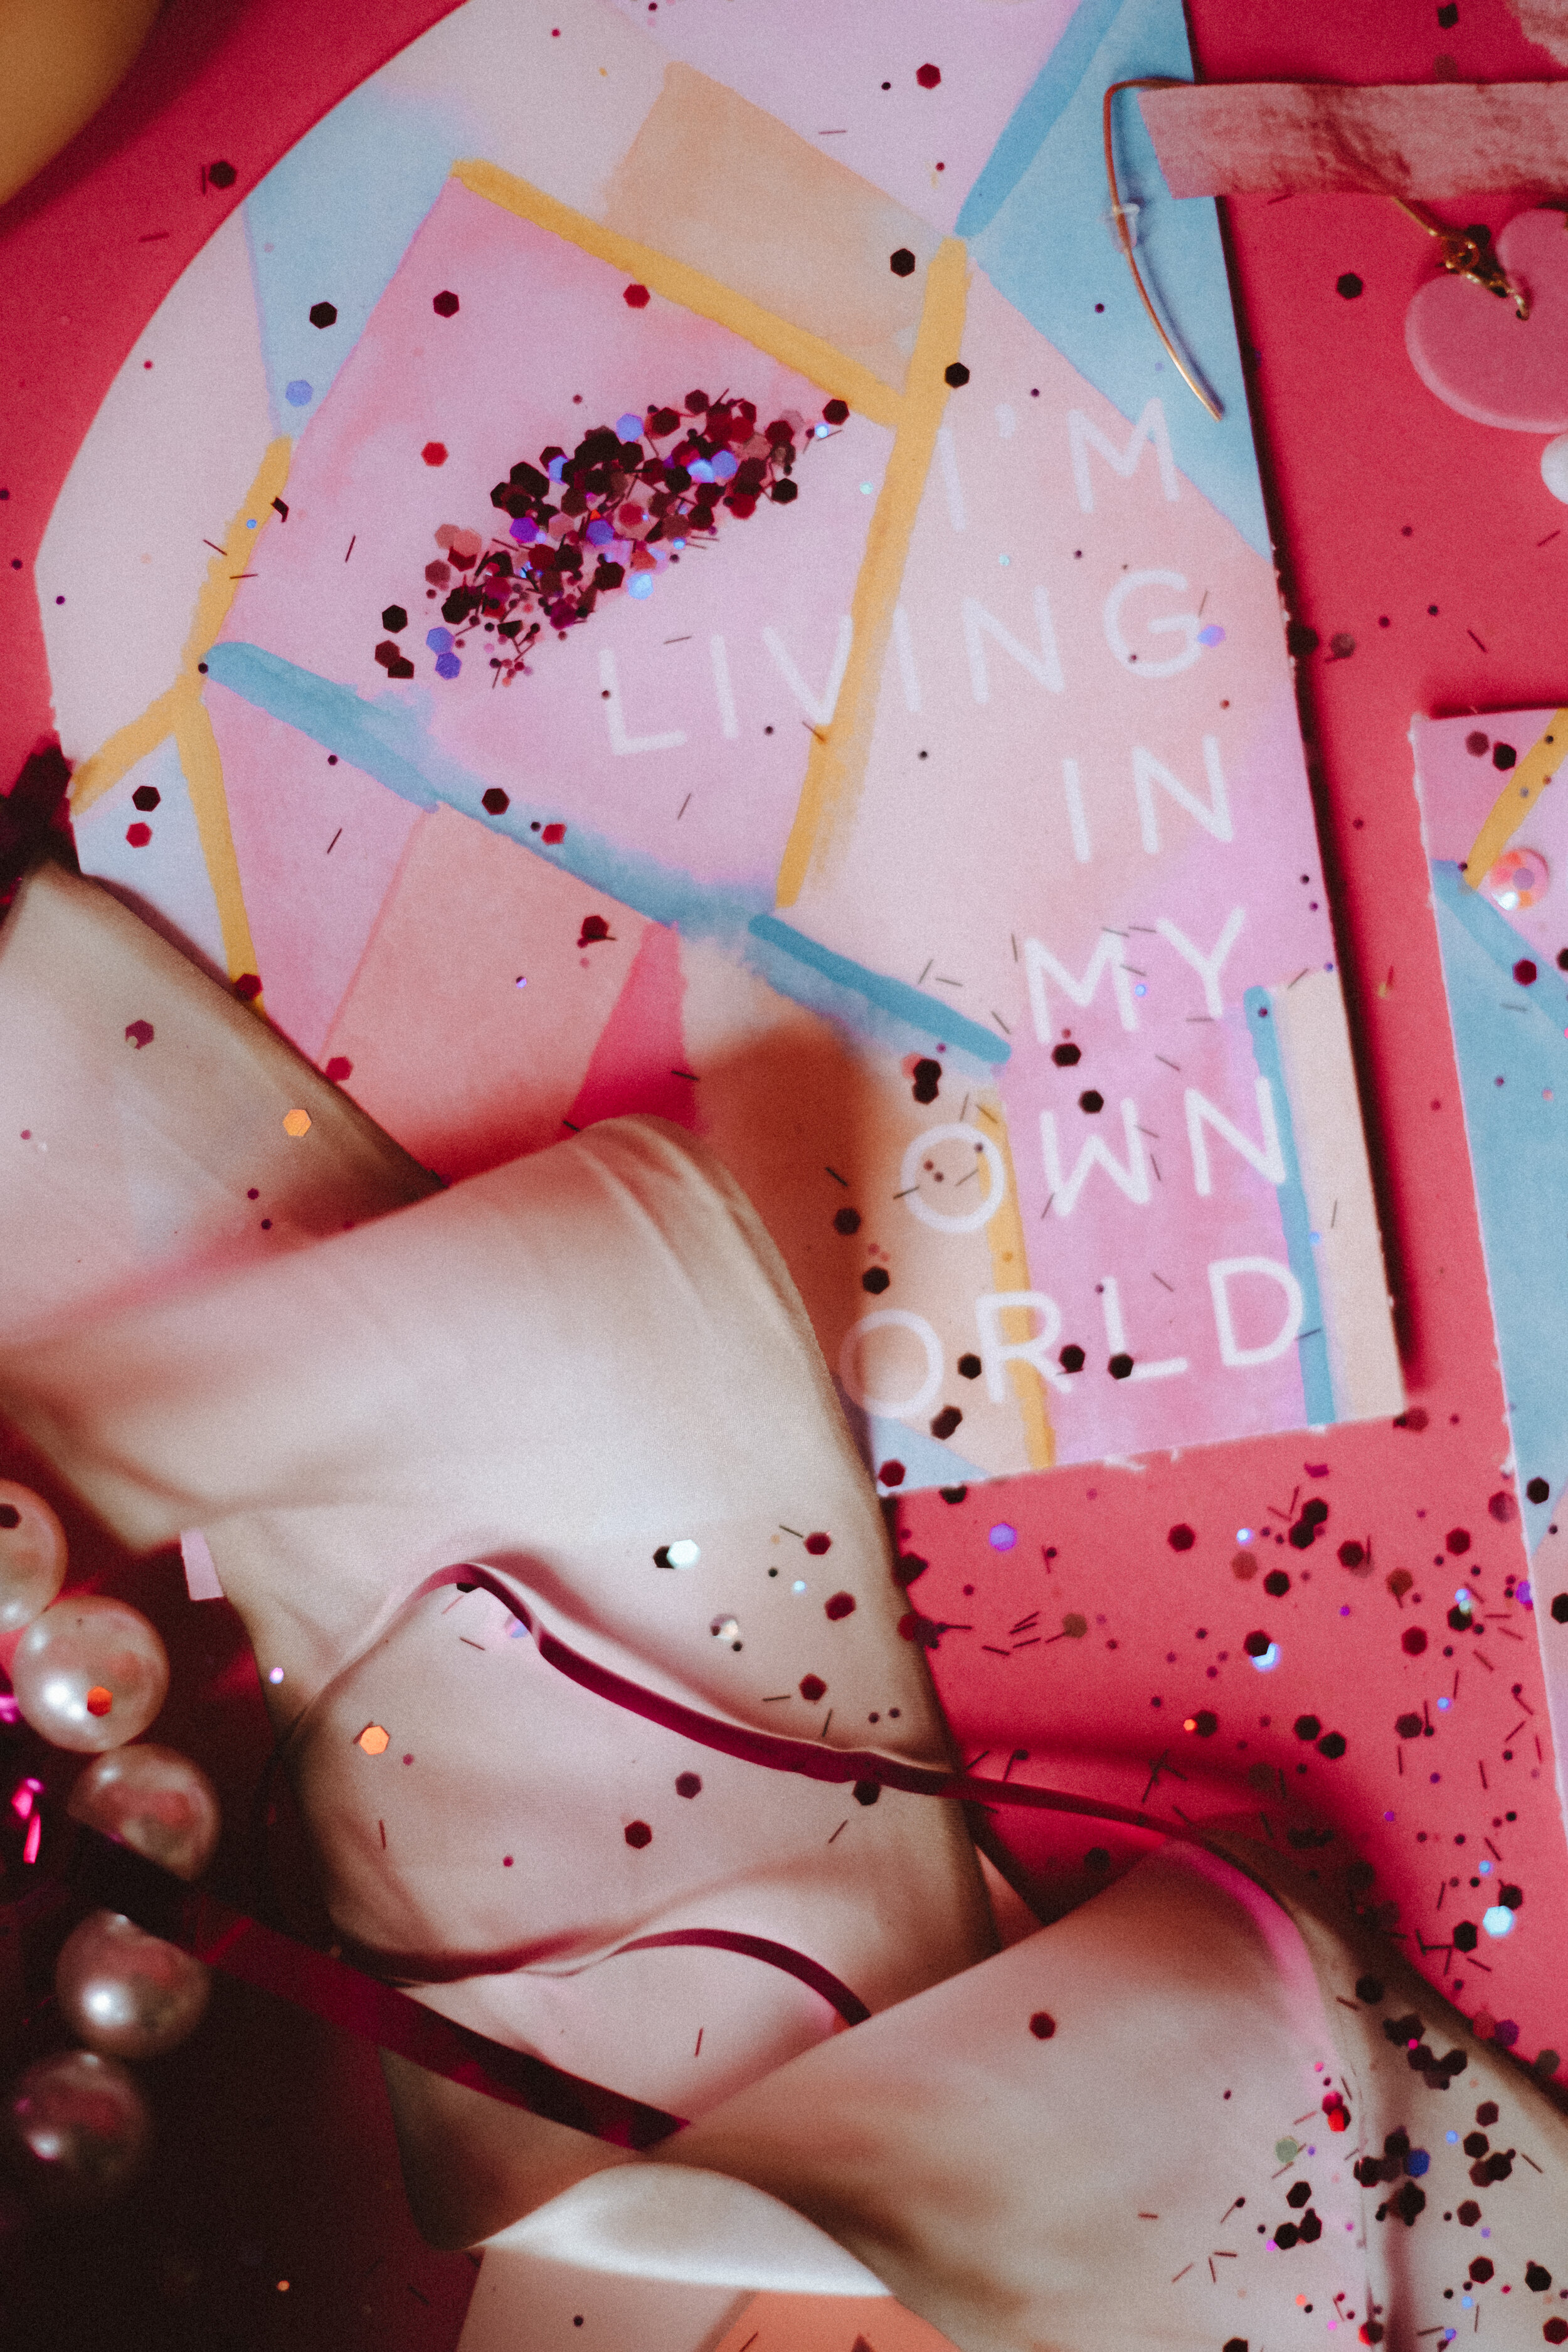
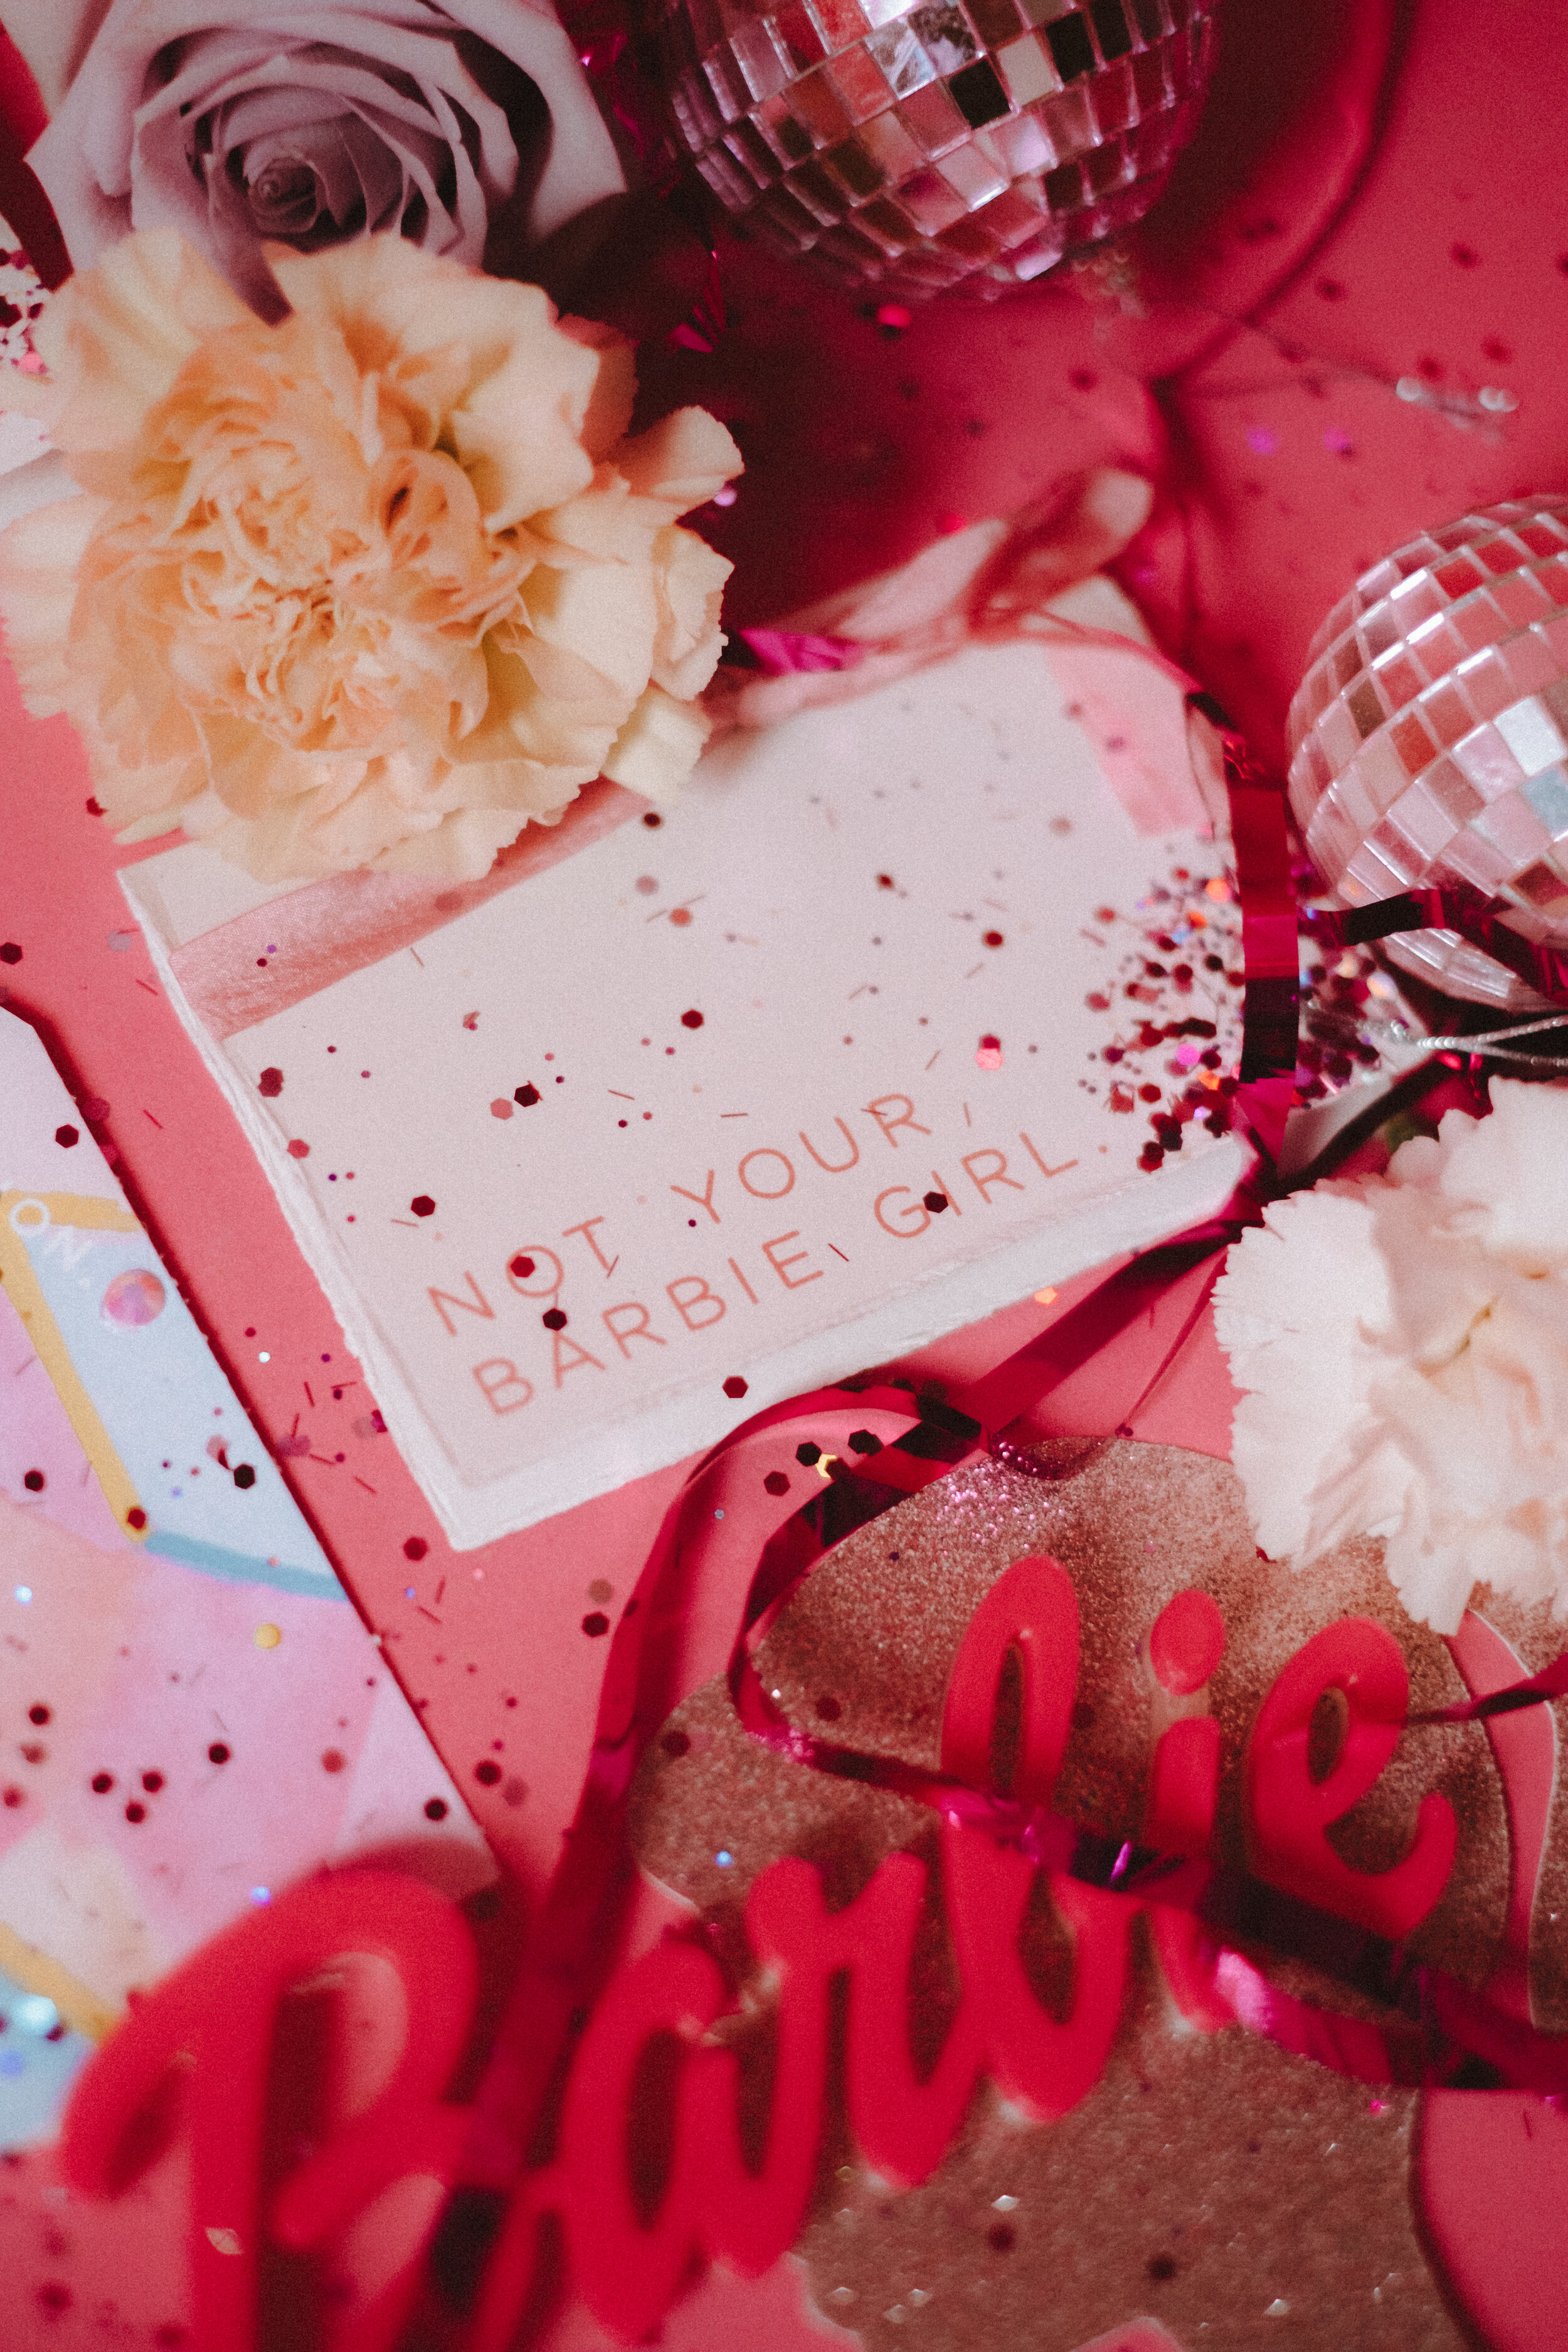
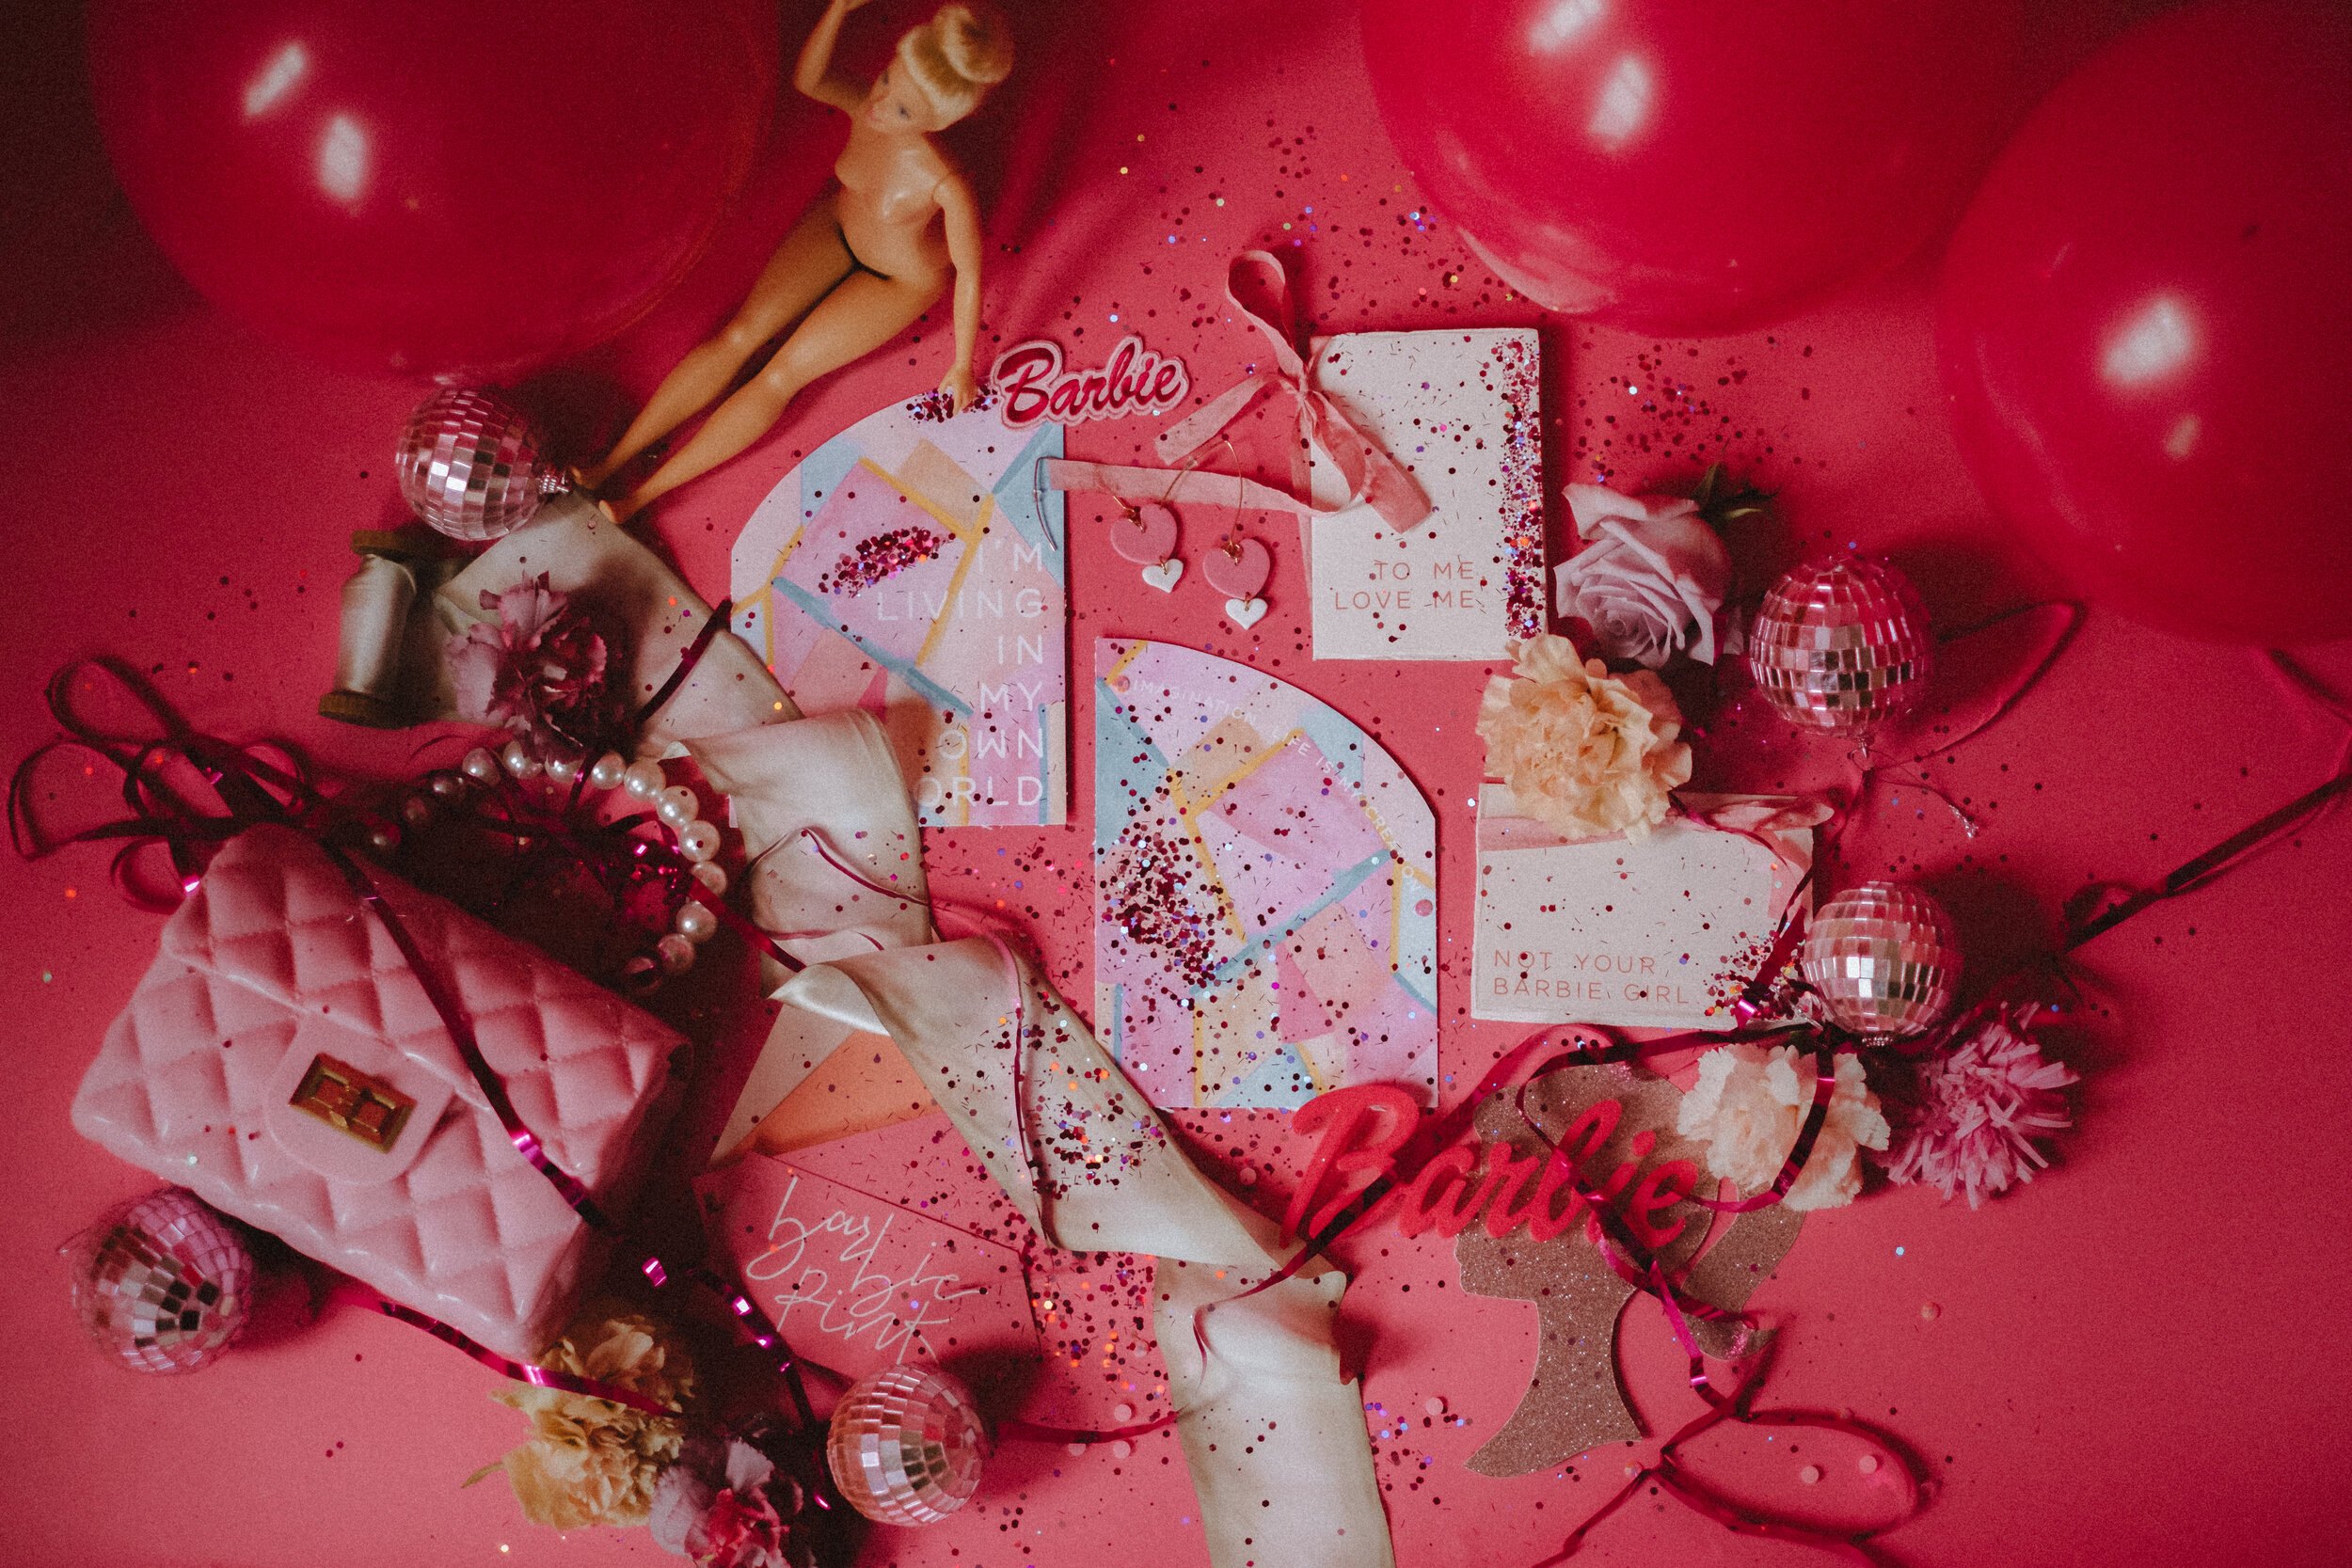
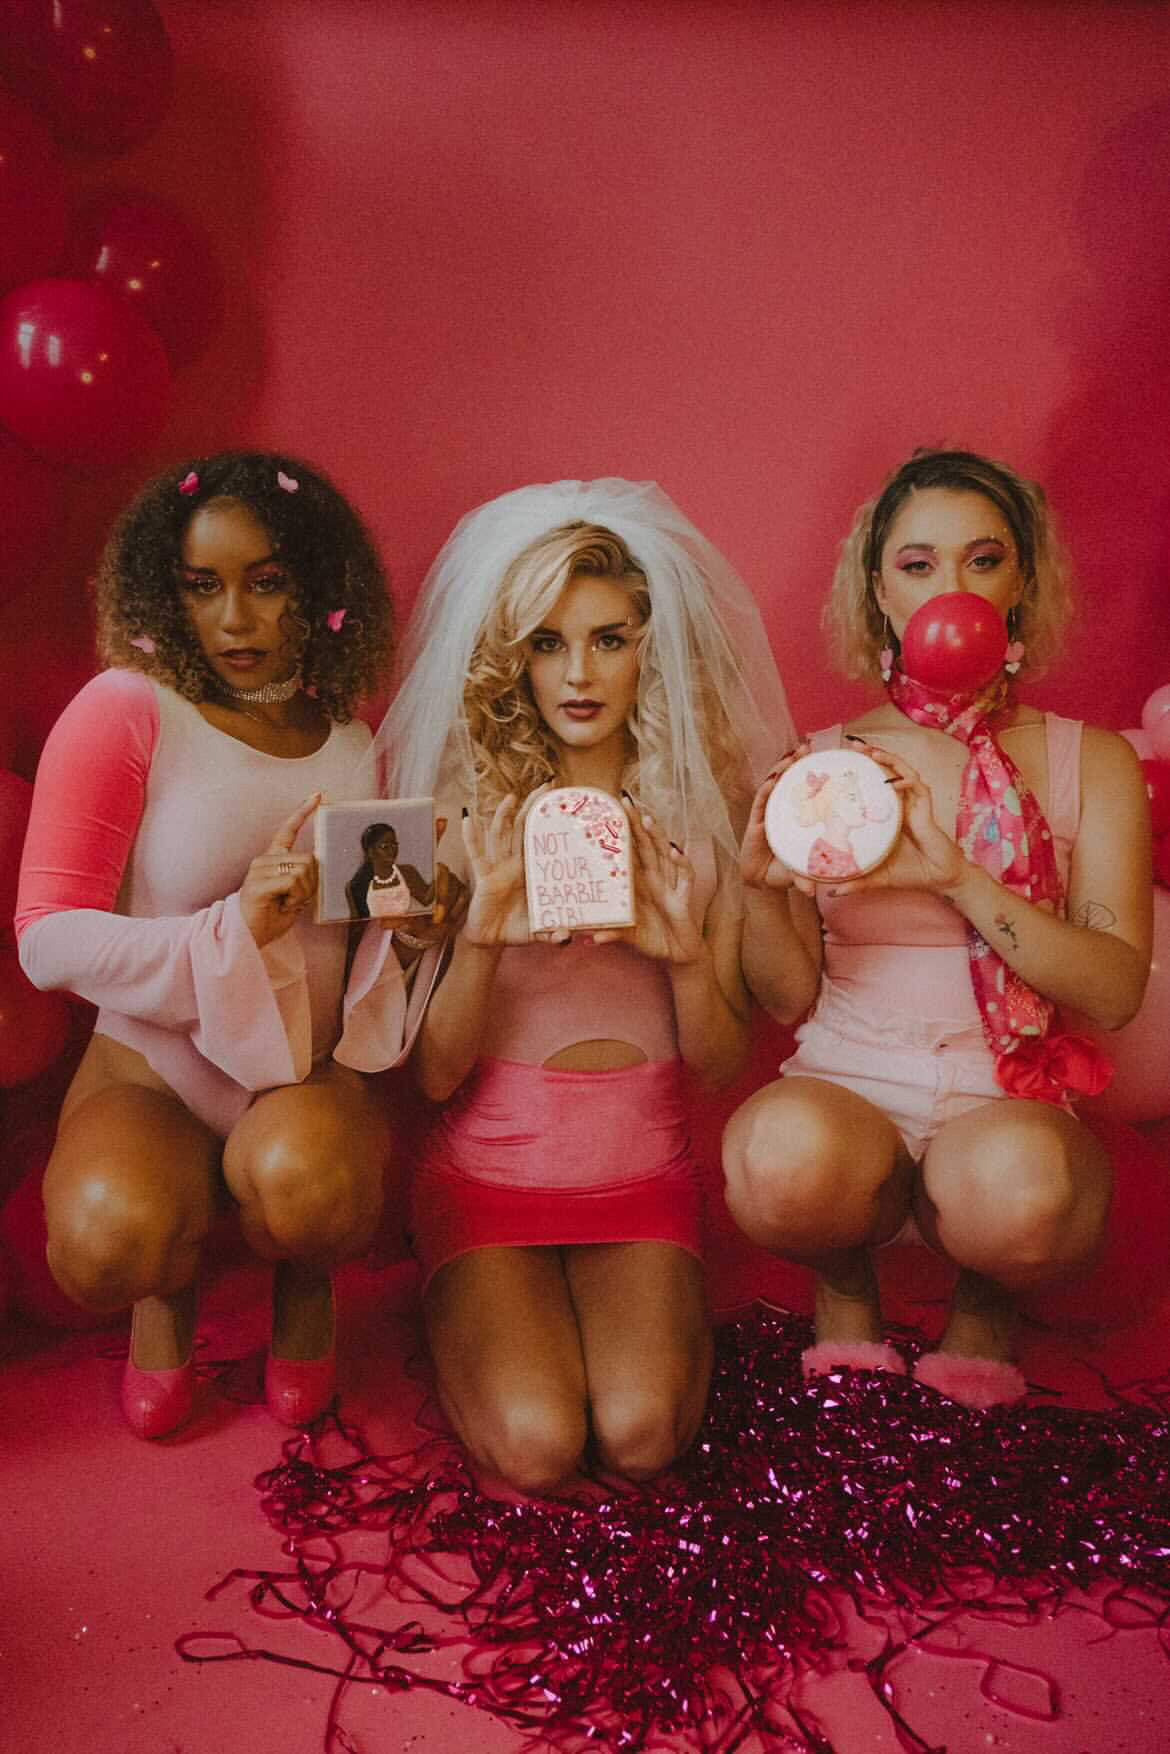
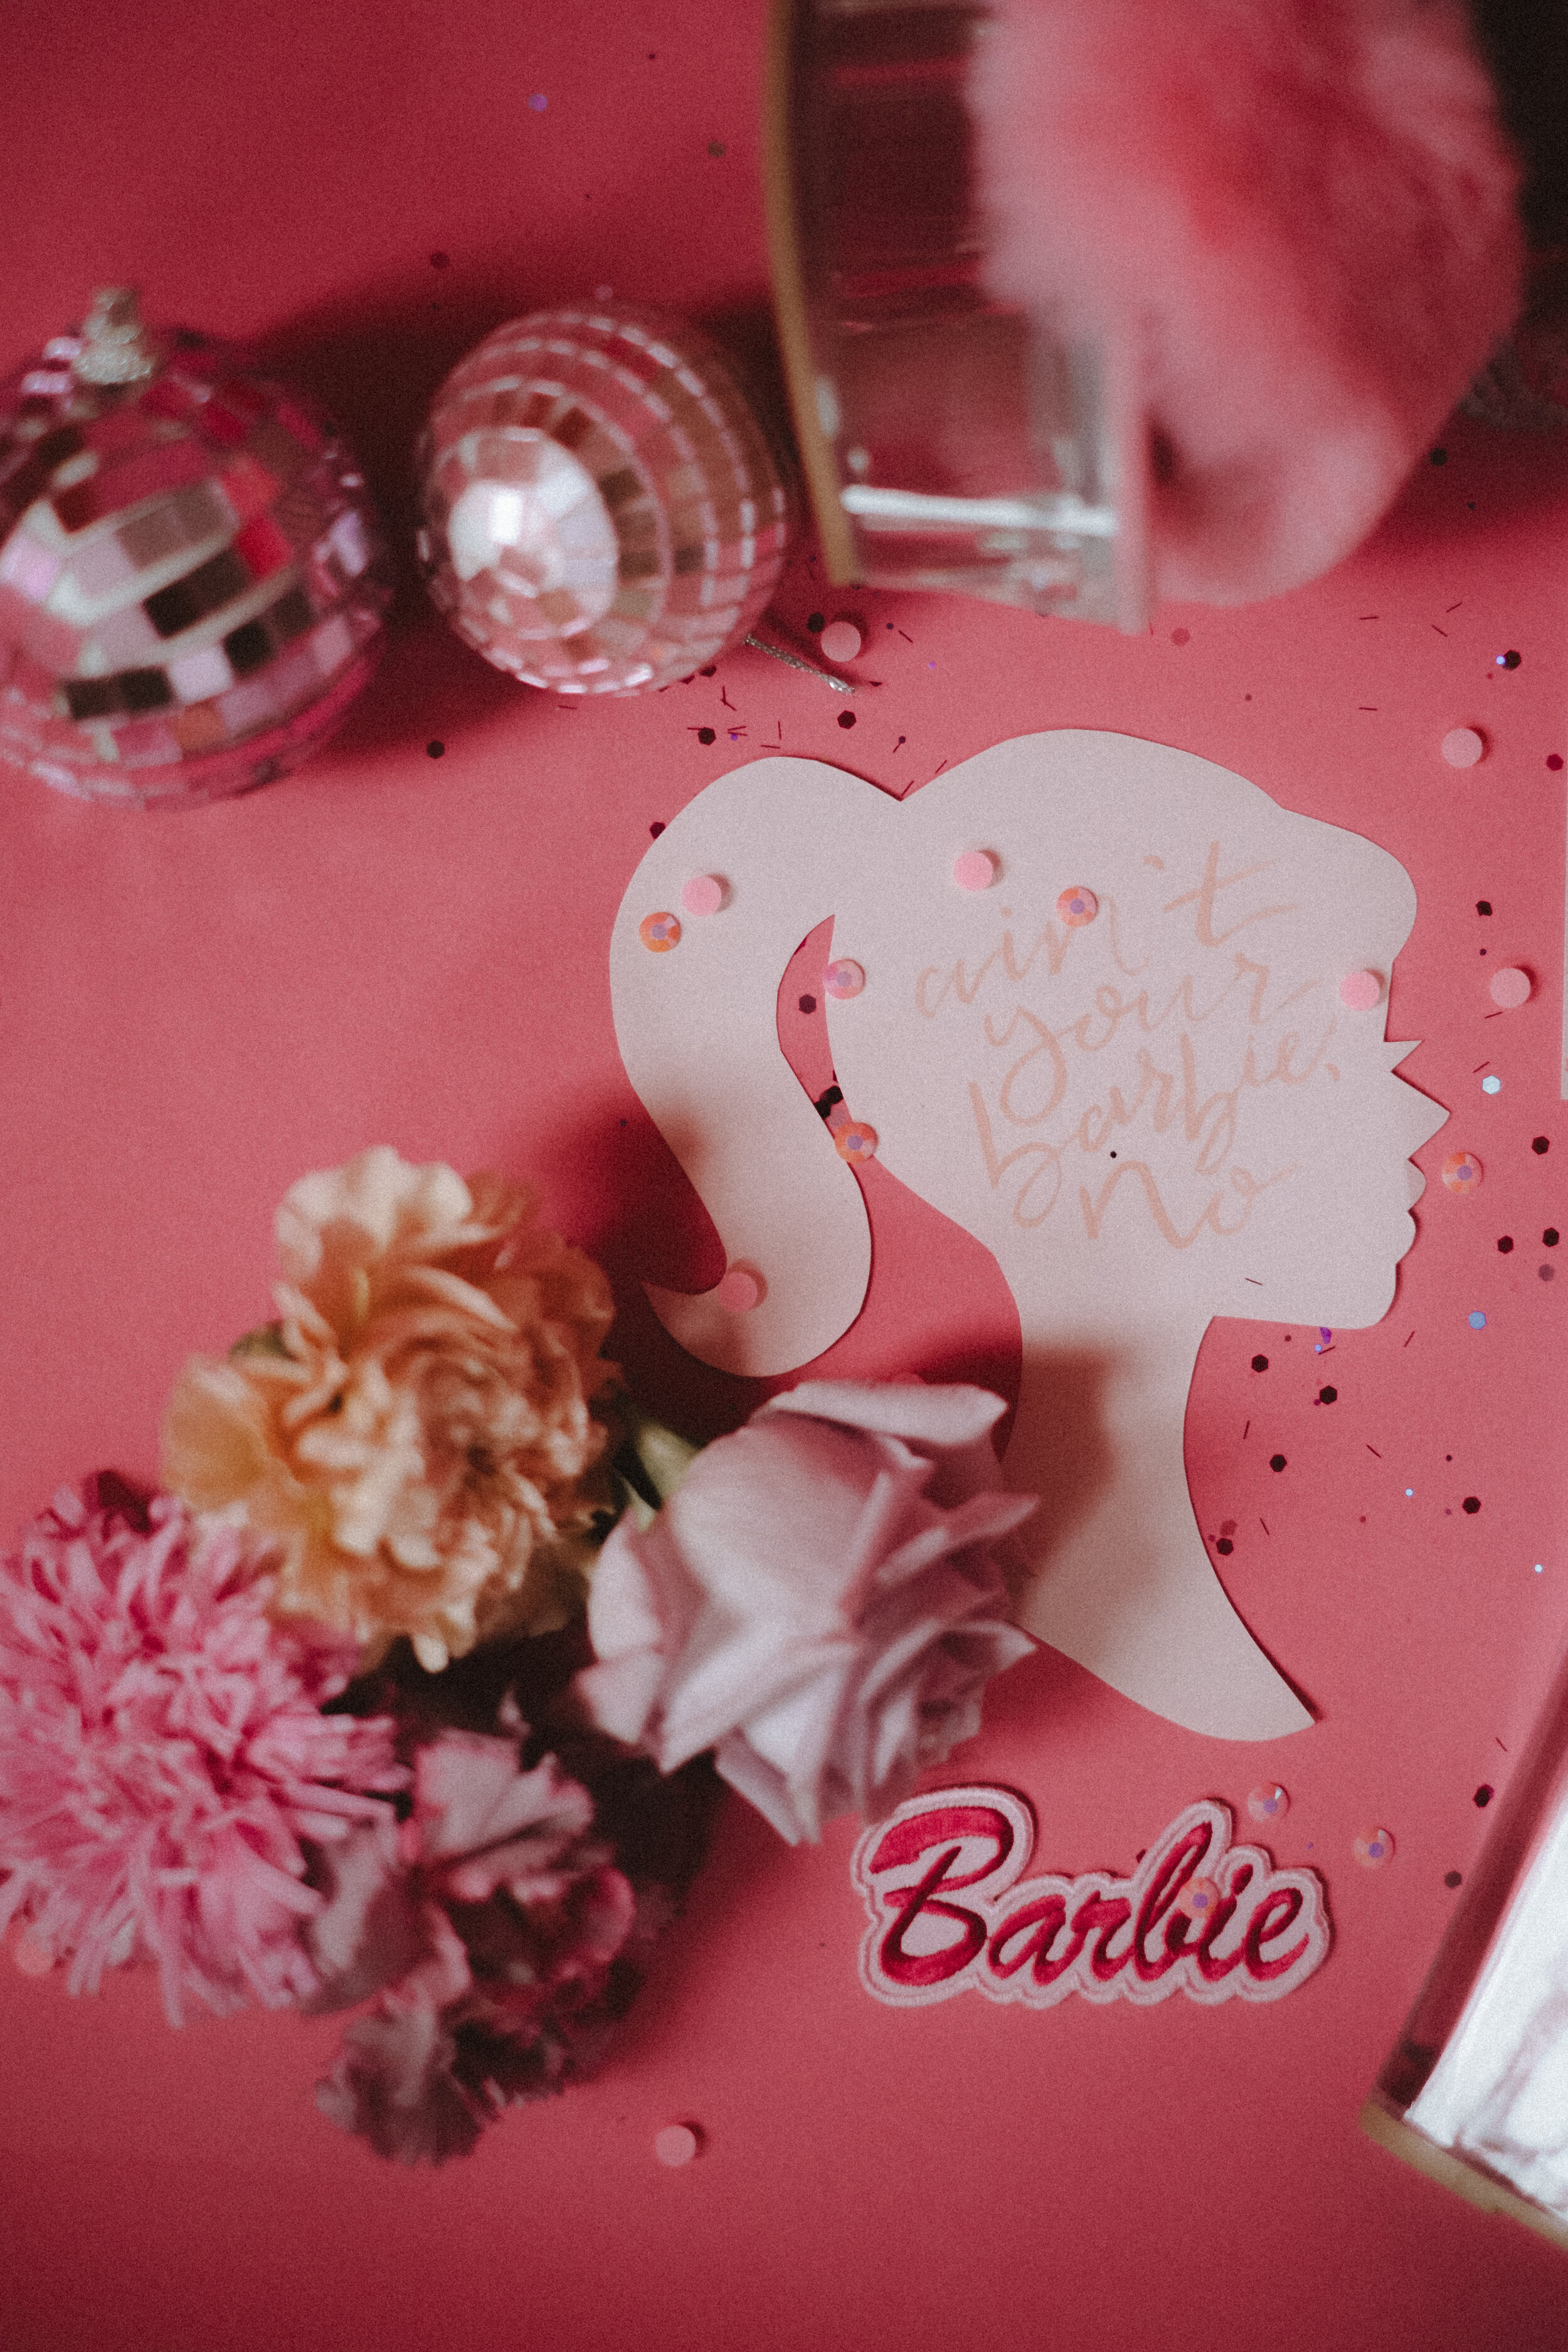
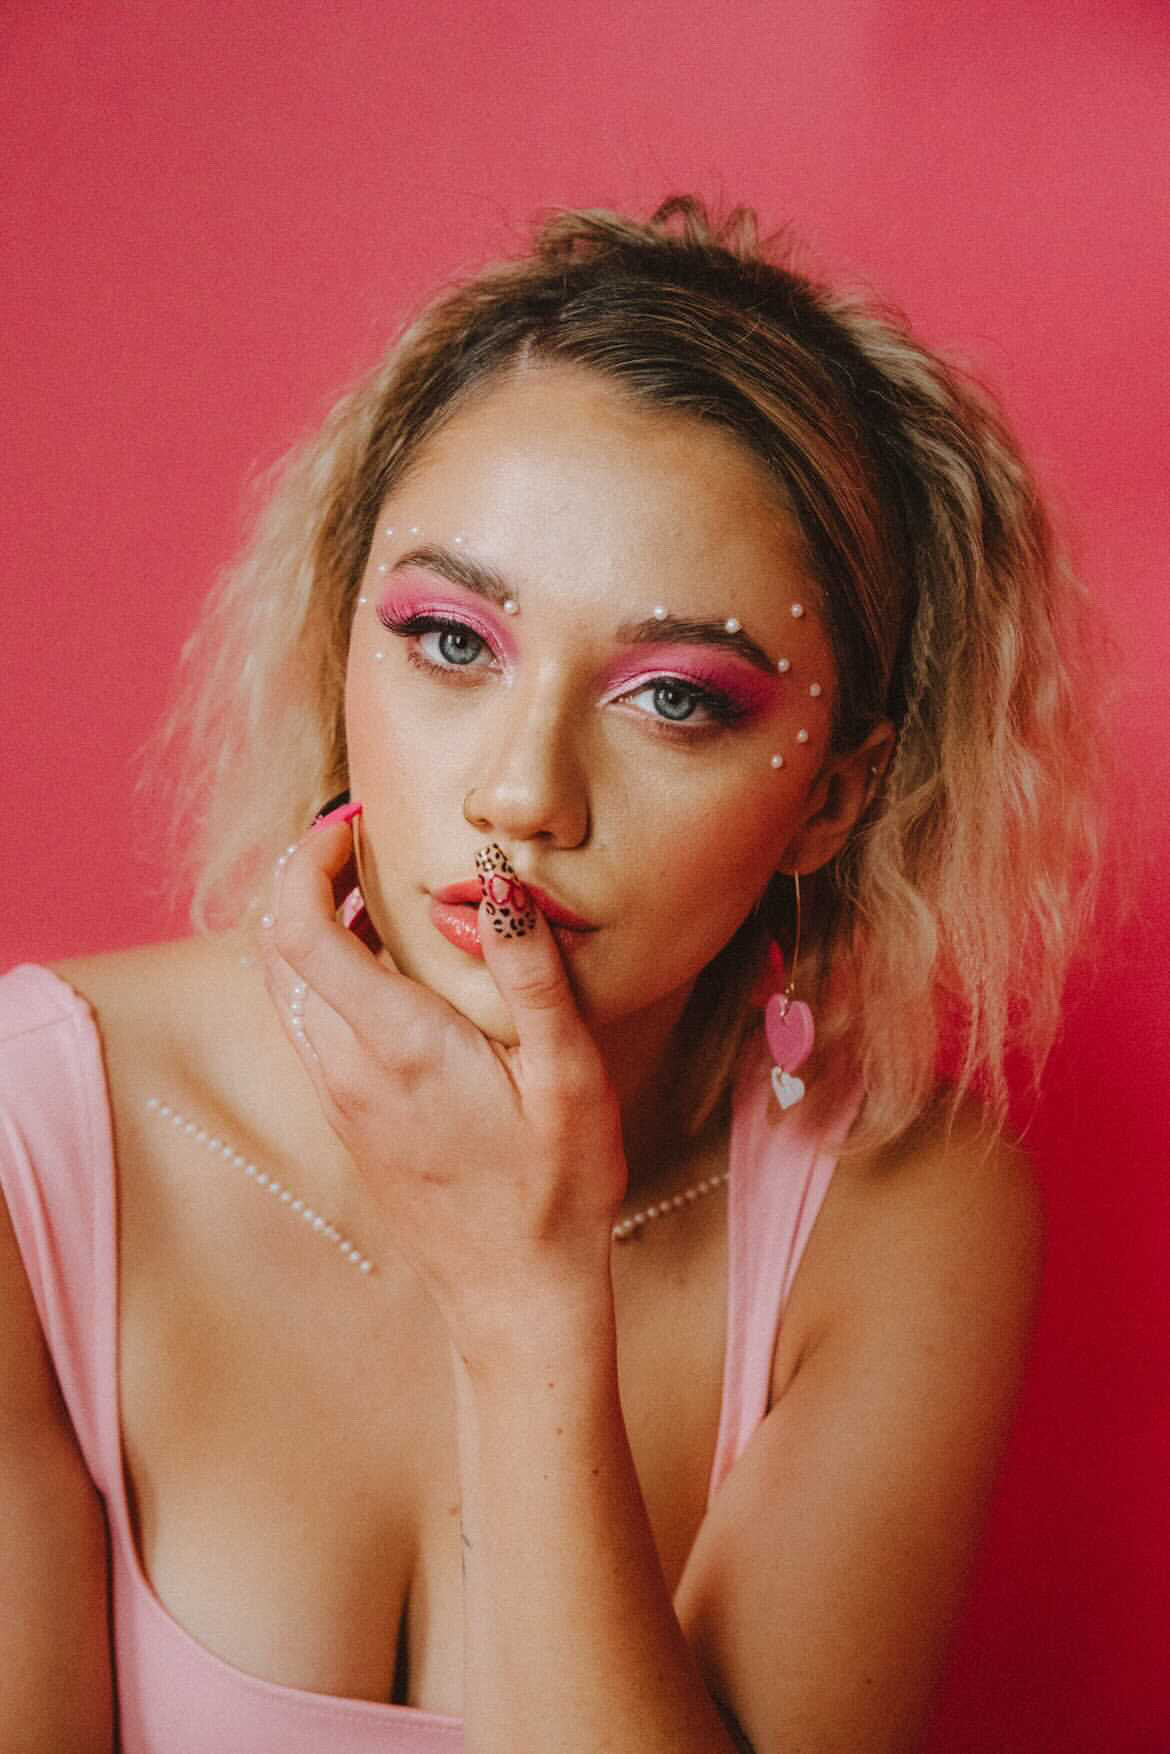
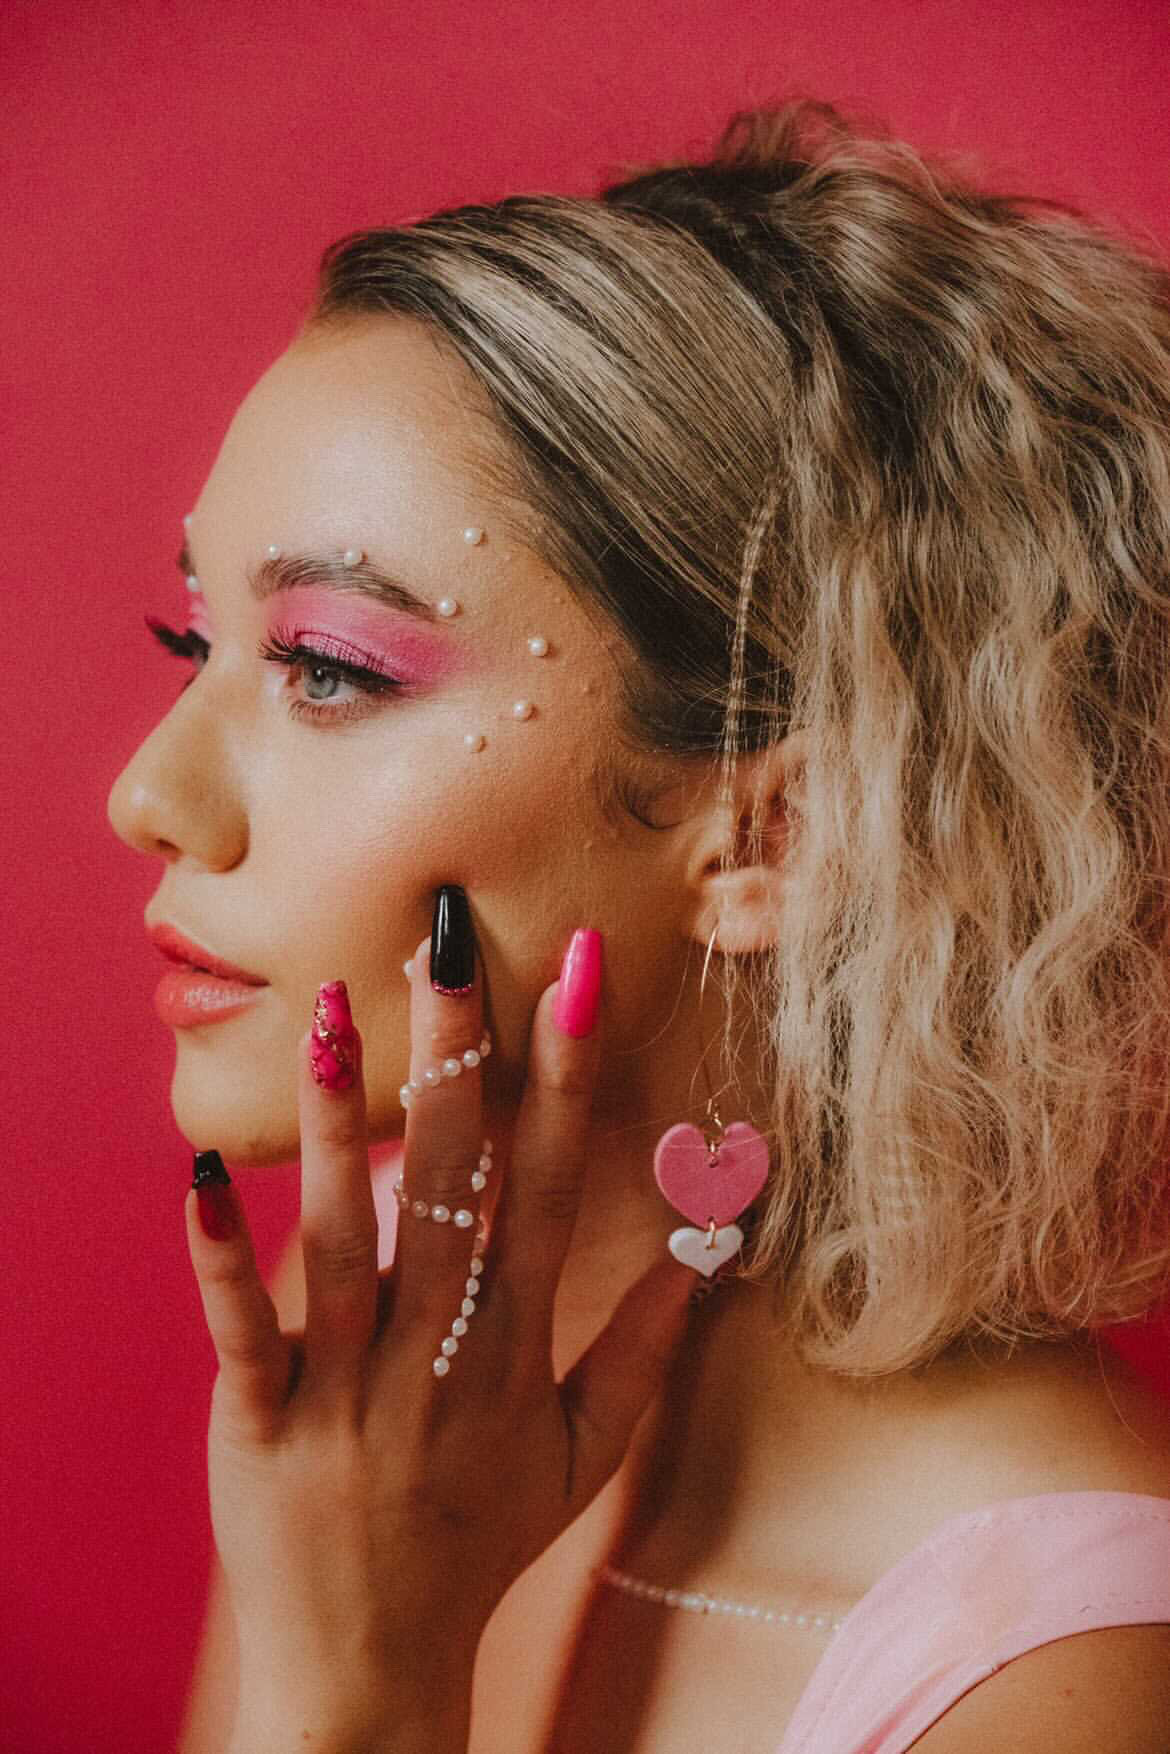
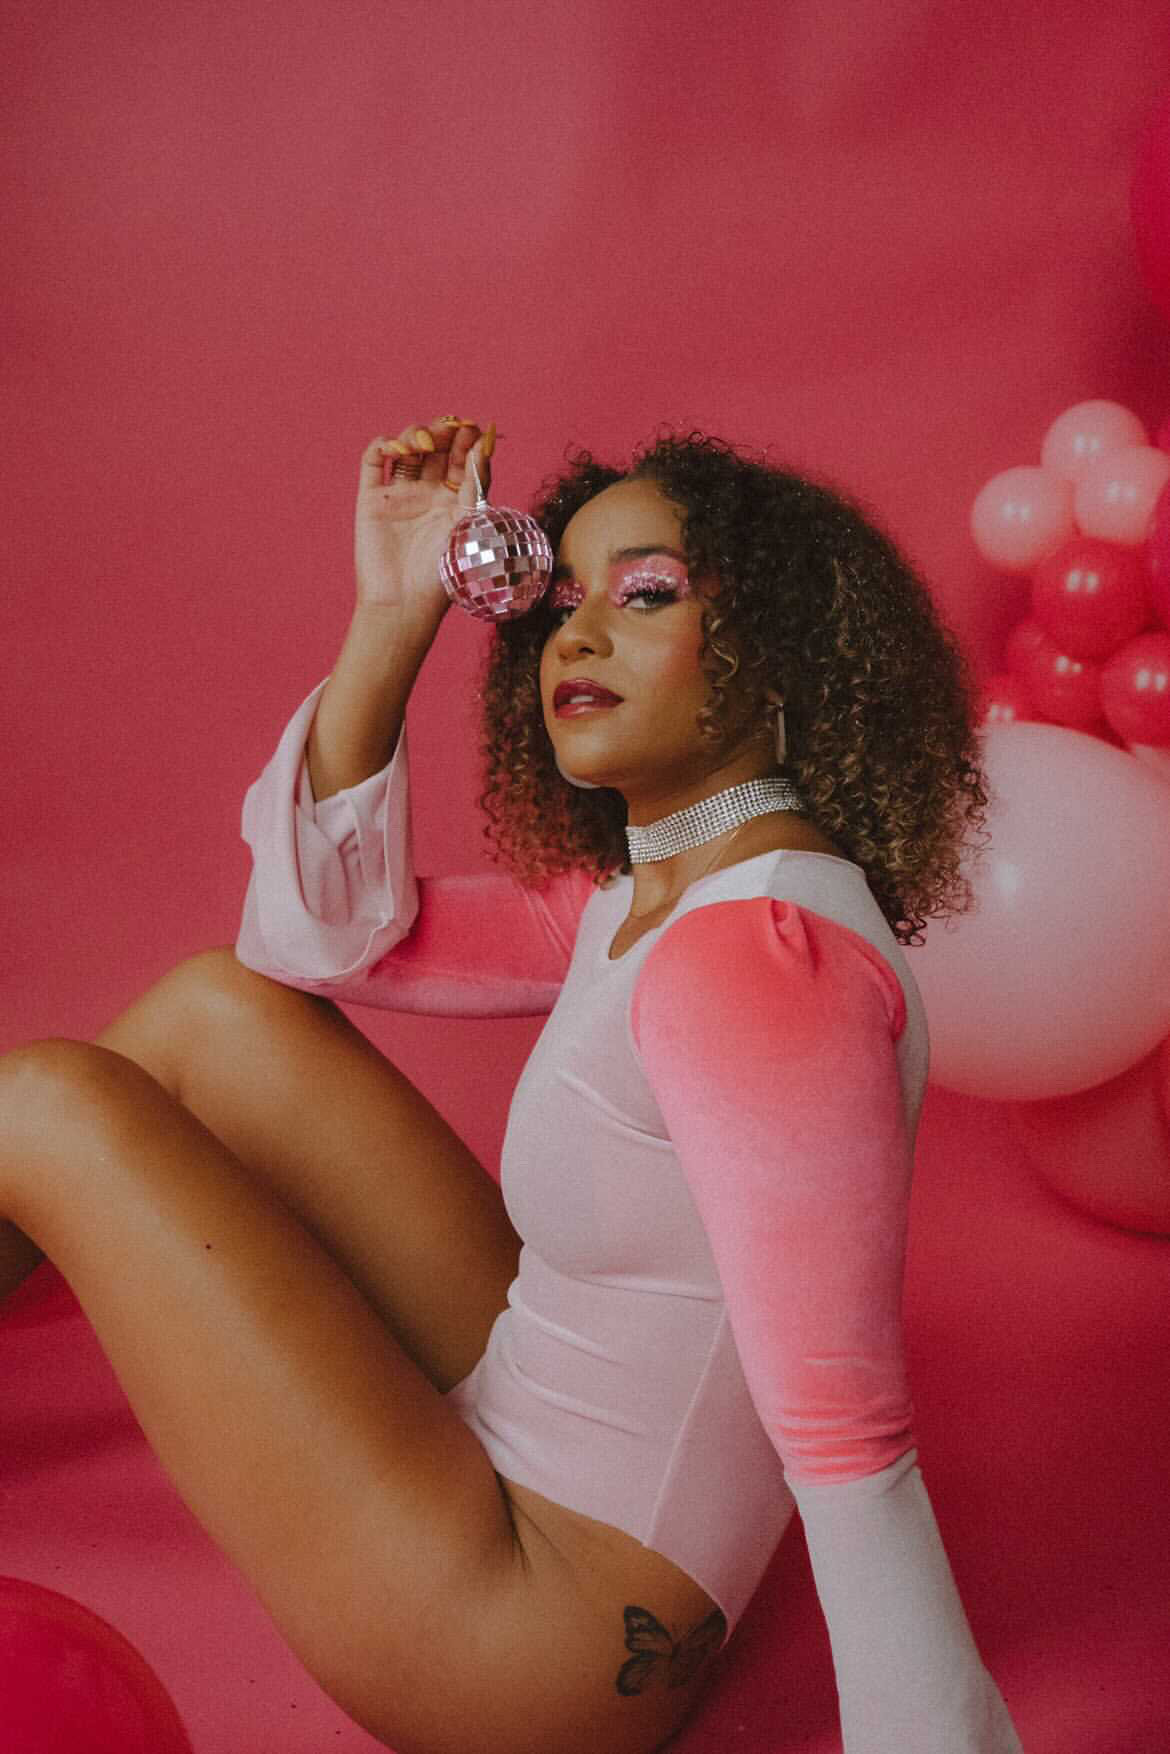
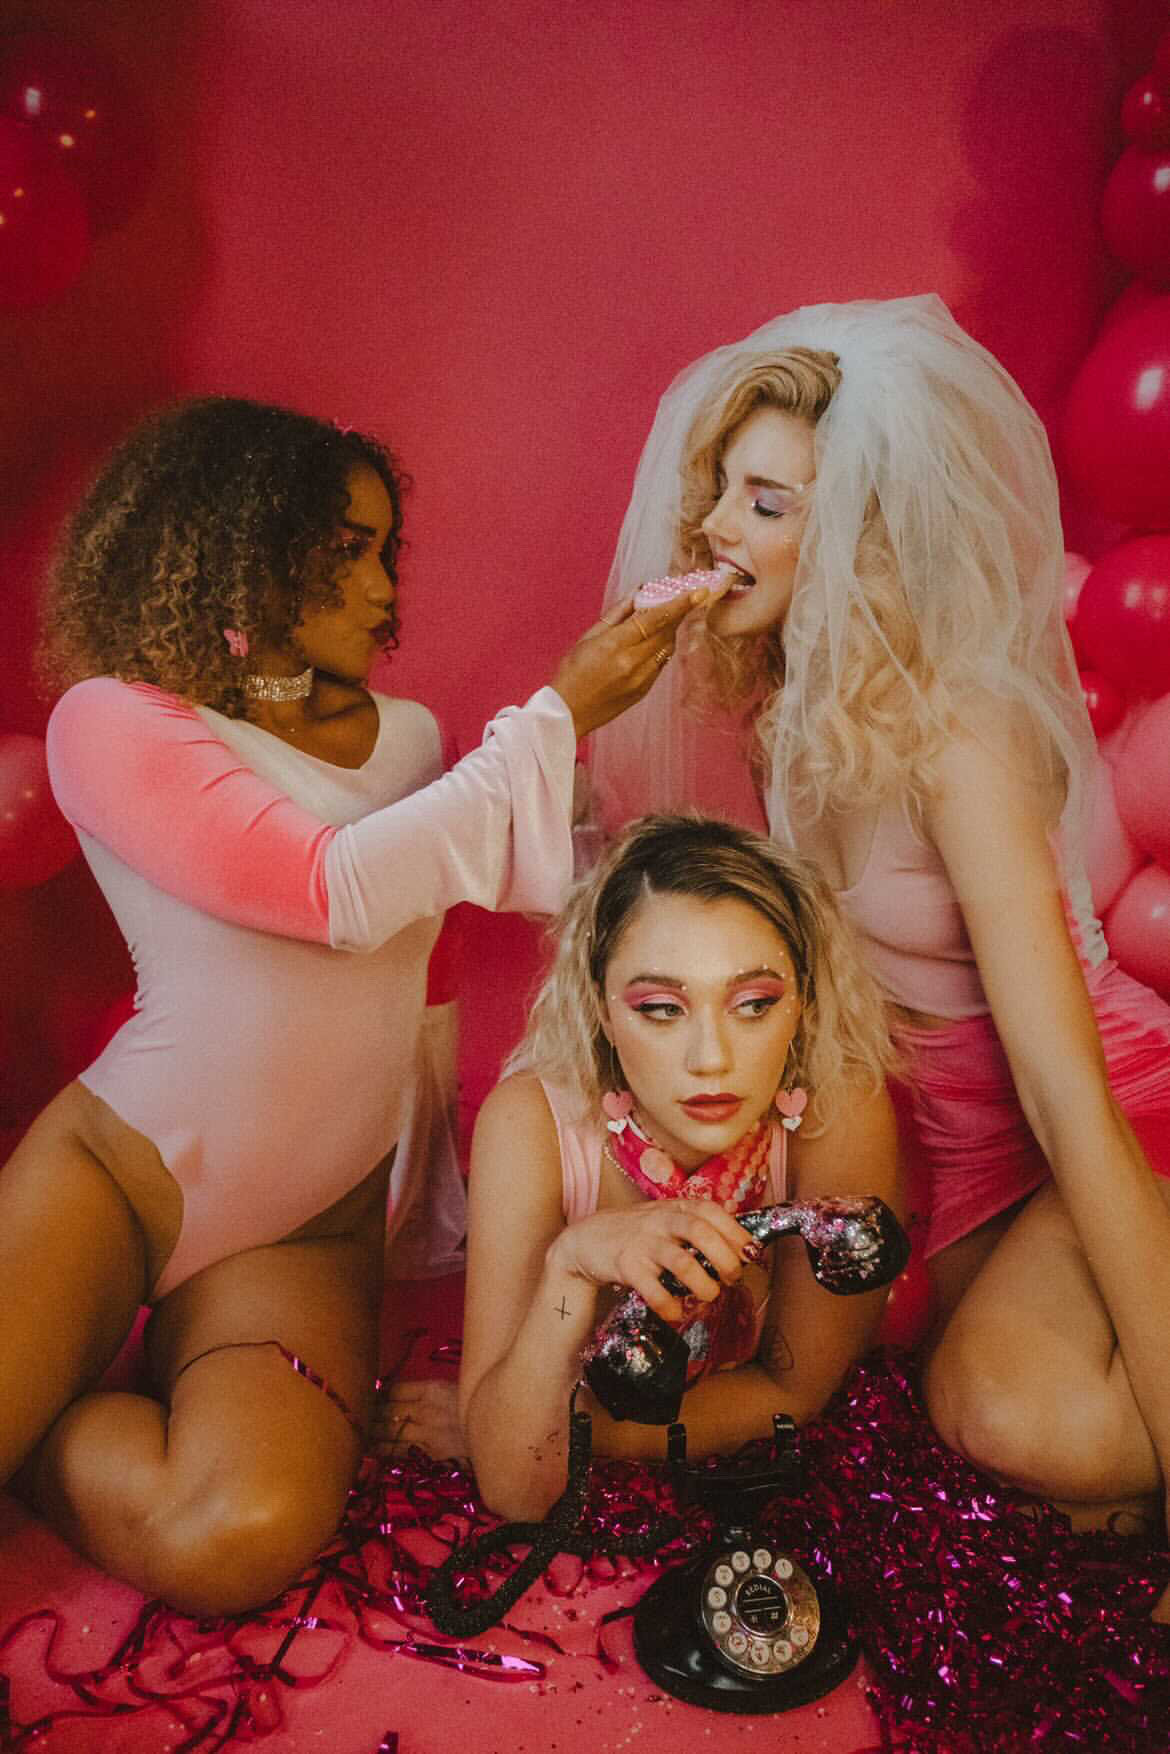
styled shoot, not your barbie girl.
the anti barbie inspiration you didn’t know you needed…
Styled shoots are when a group of creatives / vendors / professionals get together and each put forth a bit of their talent to set an awesome scene. There is a theme and normally one or two vendors “in charge” who come up with this theme and curate the whole look. They select which vendors would best suit the style they’re going for and give them direction. What comes our of these shoots, is magic. Why do we do styled shoots? To create new looks and styles that haven’t been done before, all for the purpose of inspiring and showing off our skills and what we’re capable of creating if you hire us. Also, they’re just the most fun for us ever.
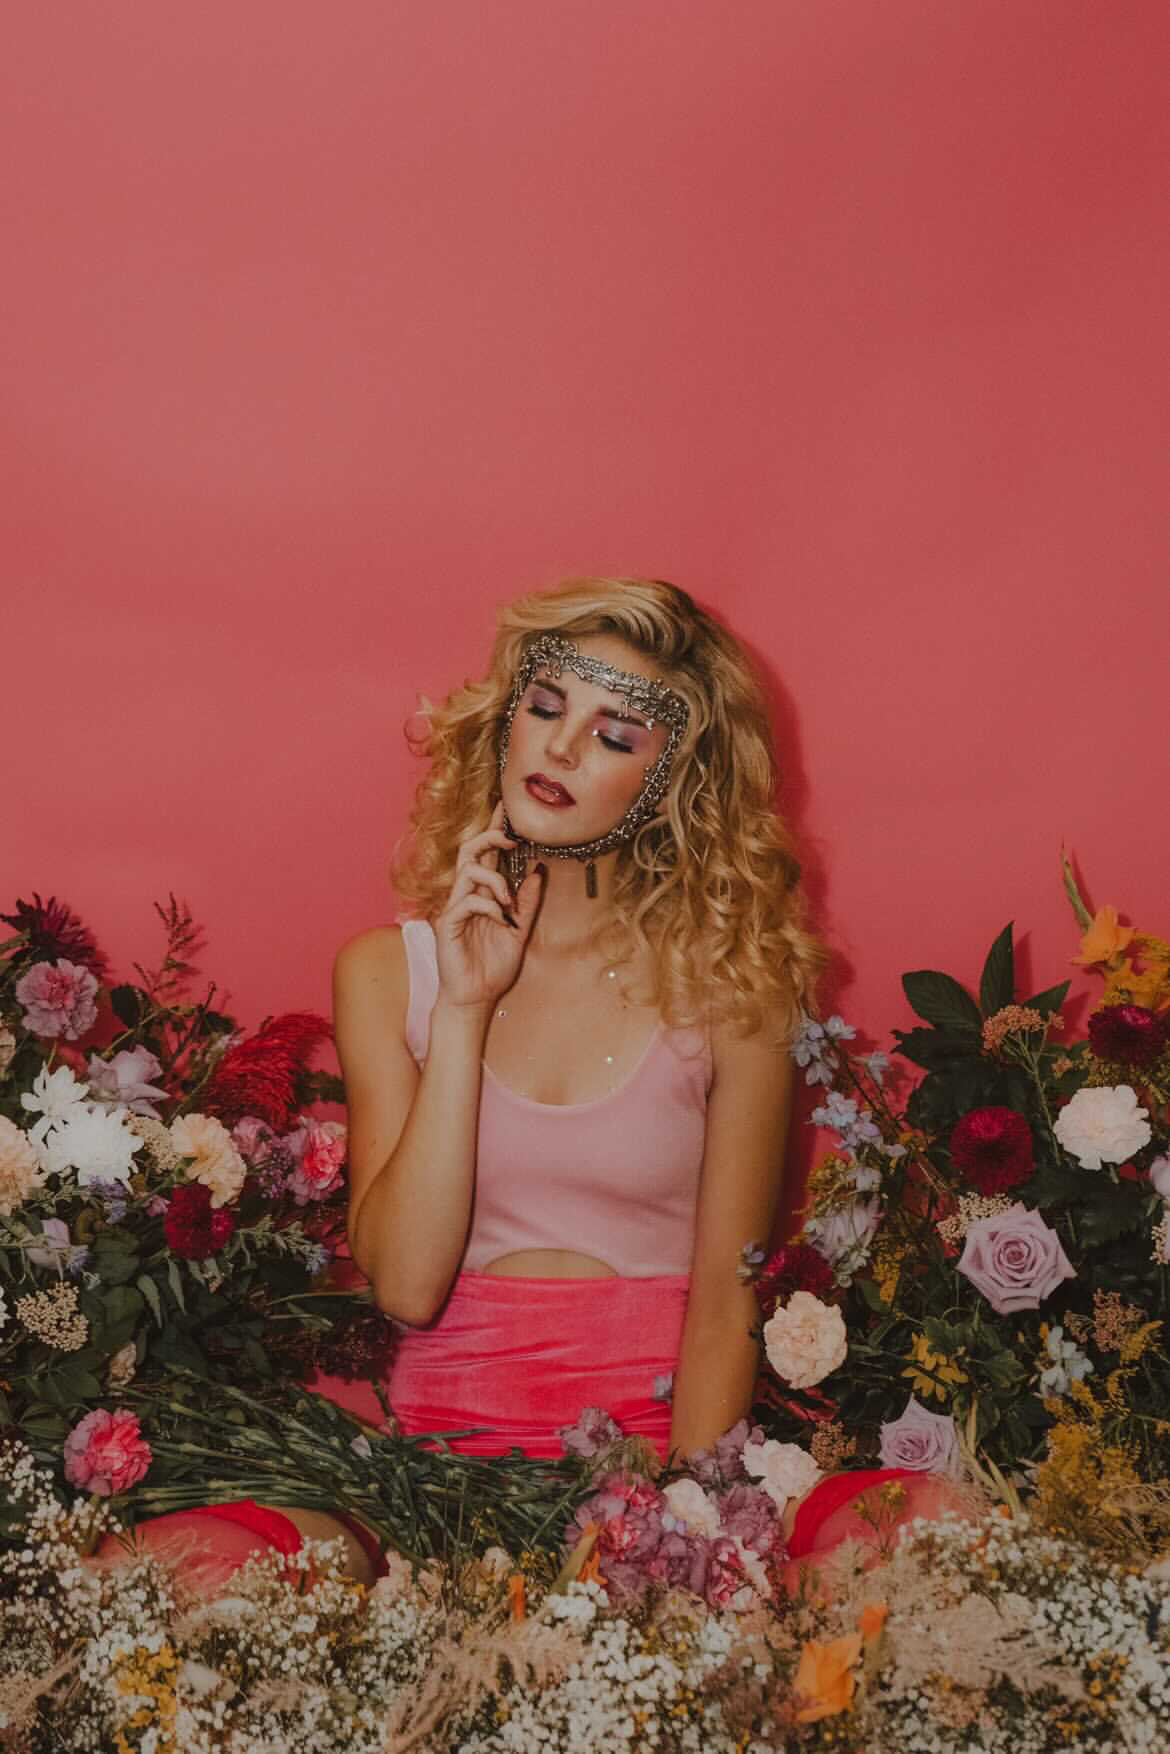
This shoot was inspired by the “anti-barbie” and when Dana, from Haus of Gravity came across the “not your barbie girl” song by Ava Max, we nearly lost our minds. We are all women who run our own businesses and a lot of us are also moms, too. So it’s just an all around, empowering theme meant to uplift women everywhere. Plus, these make for some bomb halloween costume ideas! …OR WAIT FOR IT…BARBIE GIRL BACHELORETTE PARTY OUTFITS! This is the ultimate badass bridal party girl gang inspiration you need right now!
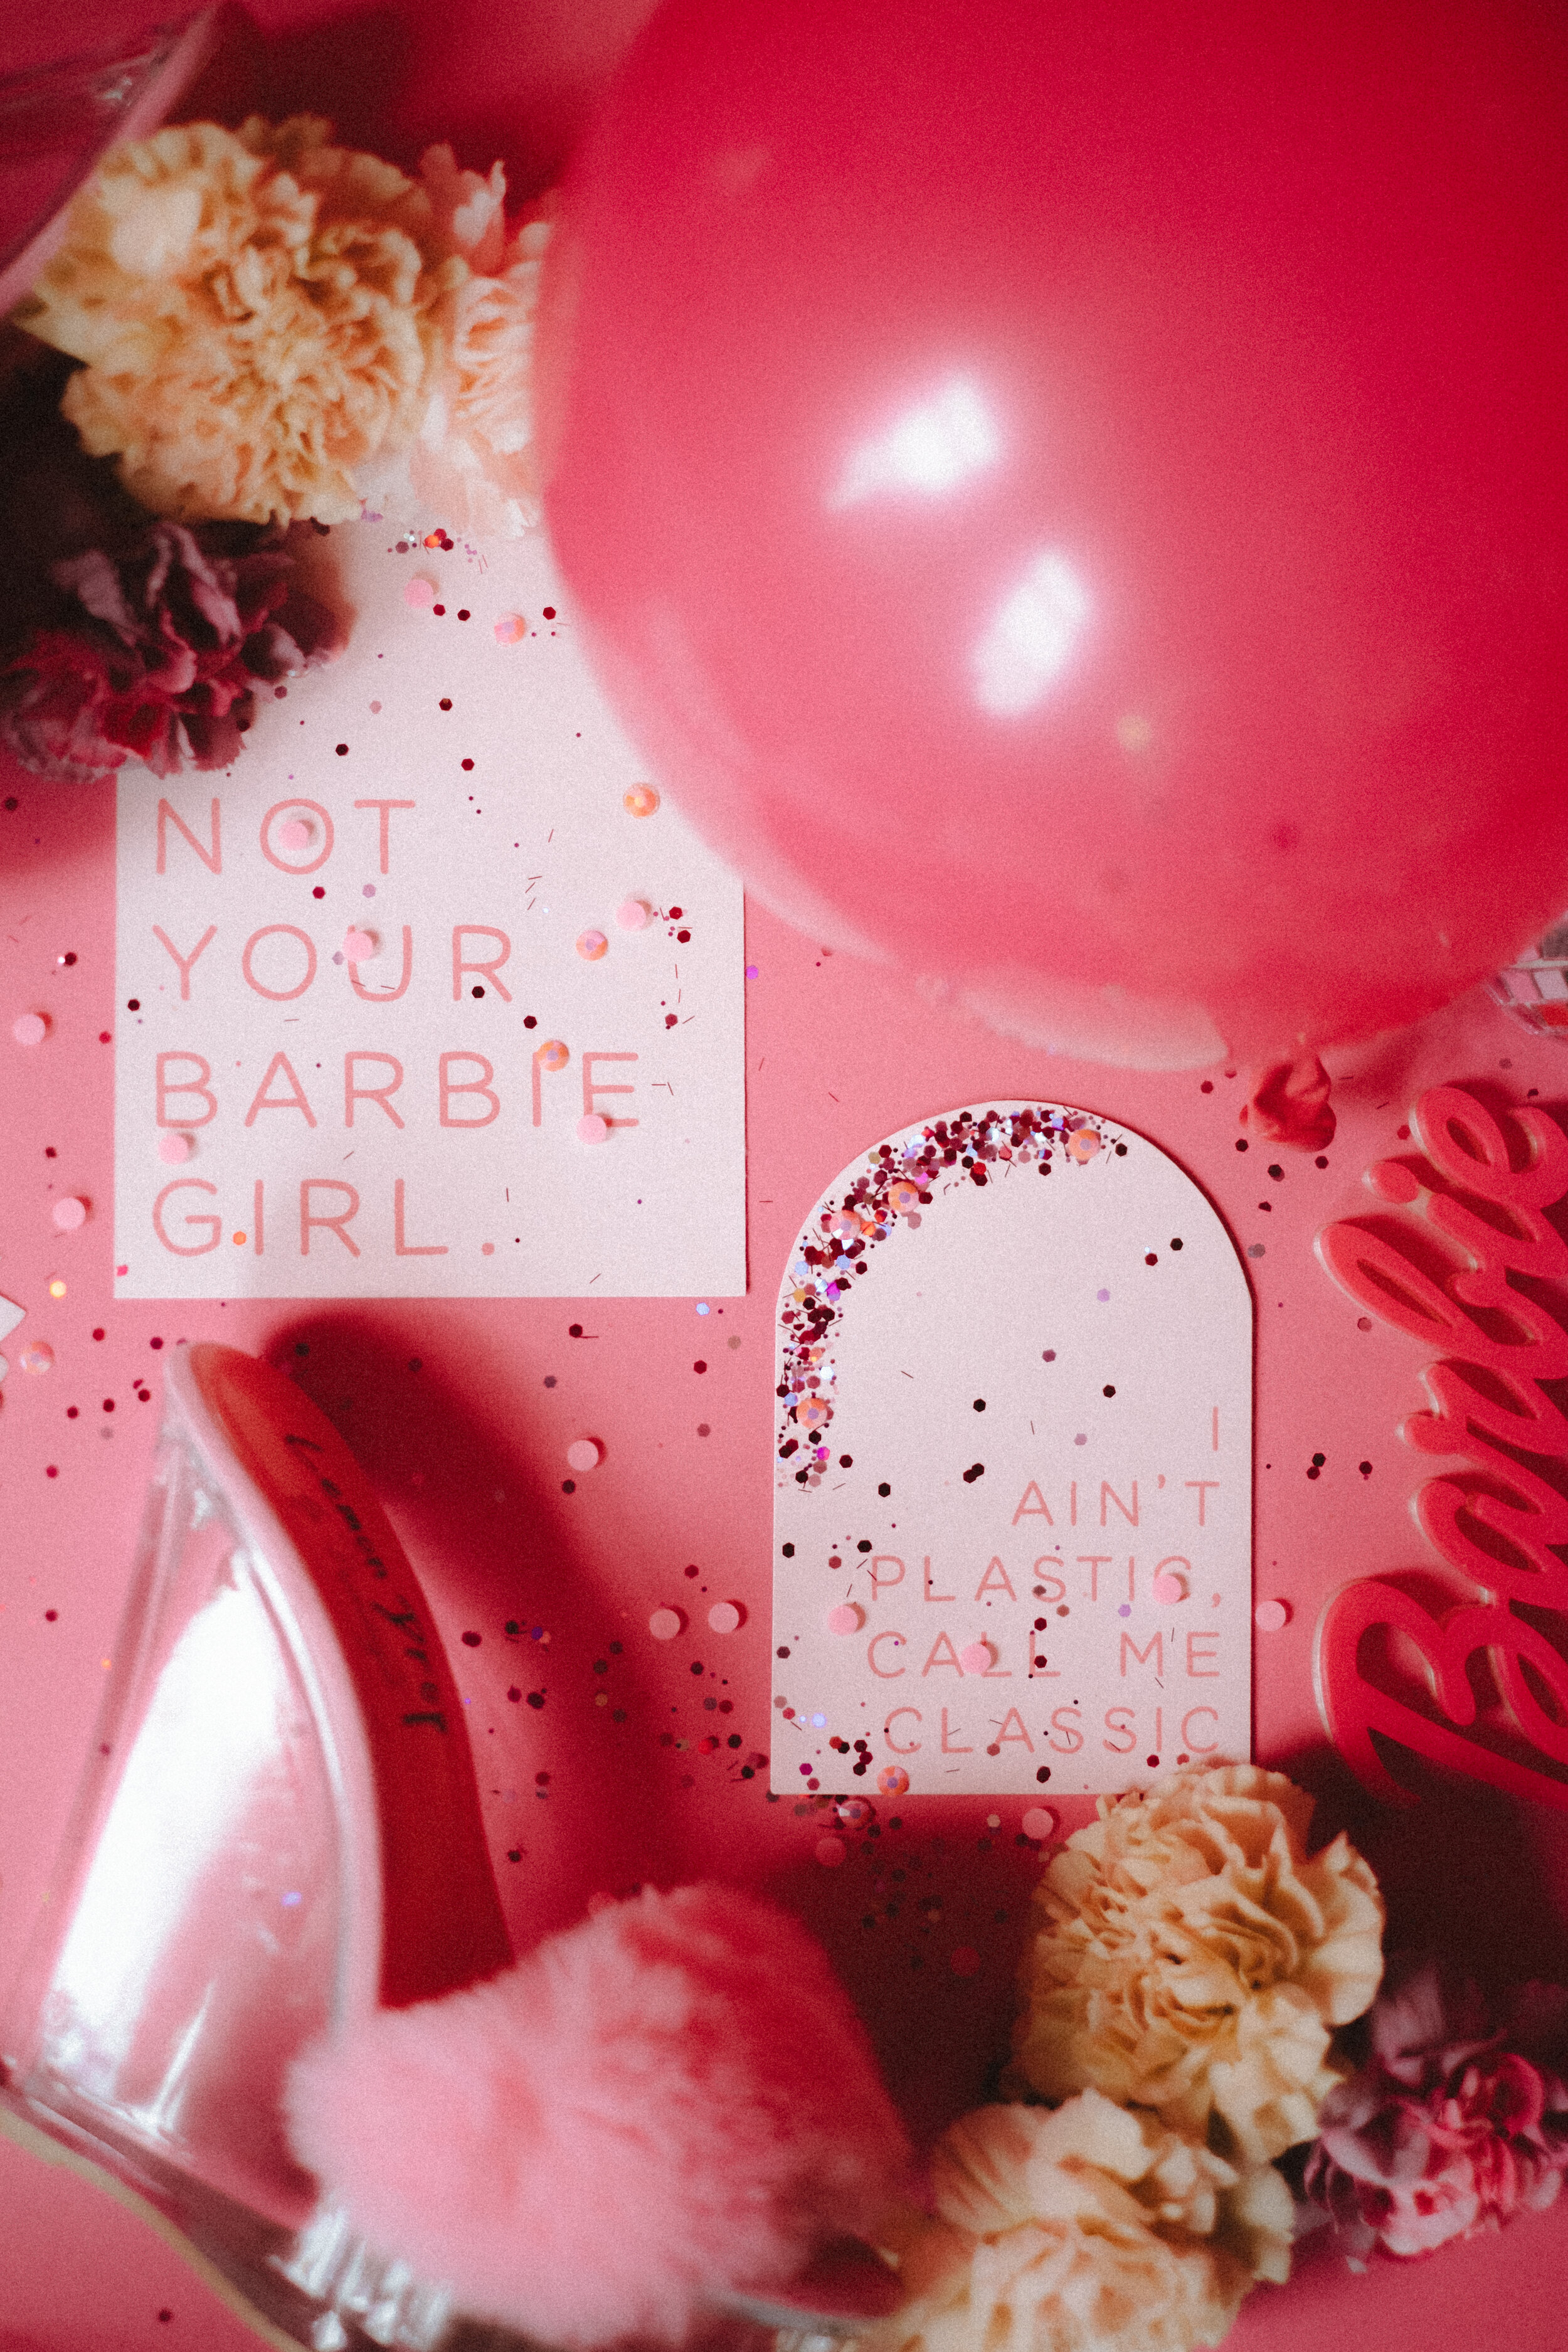
“I ain’t plastic, call me classic”
I of course, contribute the stationery pieces for these shoots and a lot of times they happen pretty far away from where I’m based so I mail the pieces off and don’t actually get to be there on the day. Dana does an amazing job of sharing behind the scenes videos so it feels like I actually was there! It’s such a cool process. I’ll share all the vendors who participated below along with some photos!
FABULOUS VENDOR TEAM LINEUP: click the handle to go directly to their website!
concept, planning + design: @hausofgravity
photography: @sydneykerbysonphotography
videography: @khfilm_
florist: @stemsnh
hair: @sam_sonite_
mua: @olindagbeauty
stationery: @stephanietarastationery
outfits: @revampd_
jewelry: @lorysunartistry
balloons: @polishedballoons
cookies: @eatxactlycakedesign
nails: @rebelgrrrlx
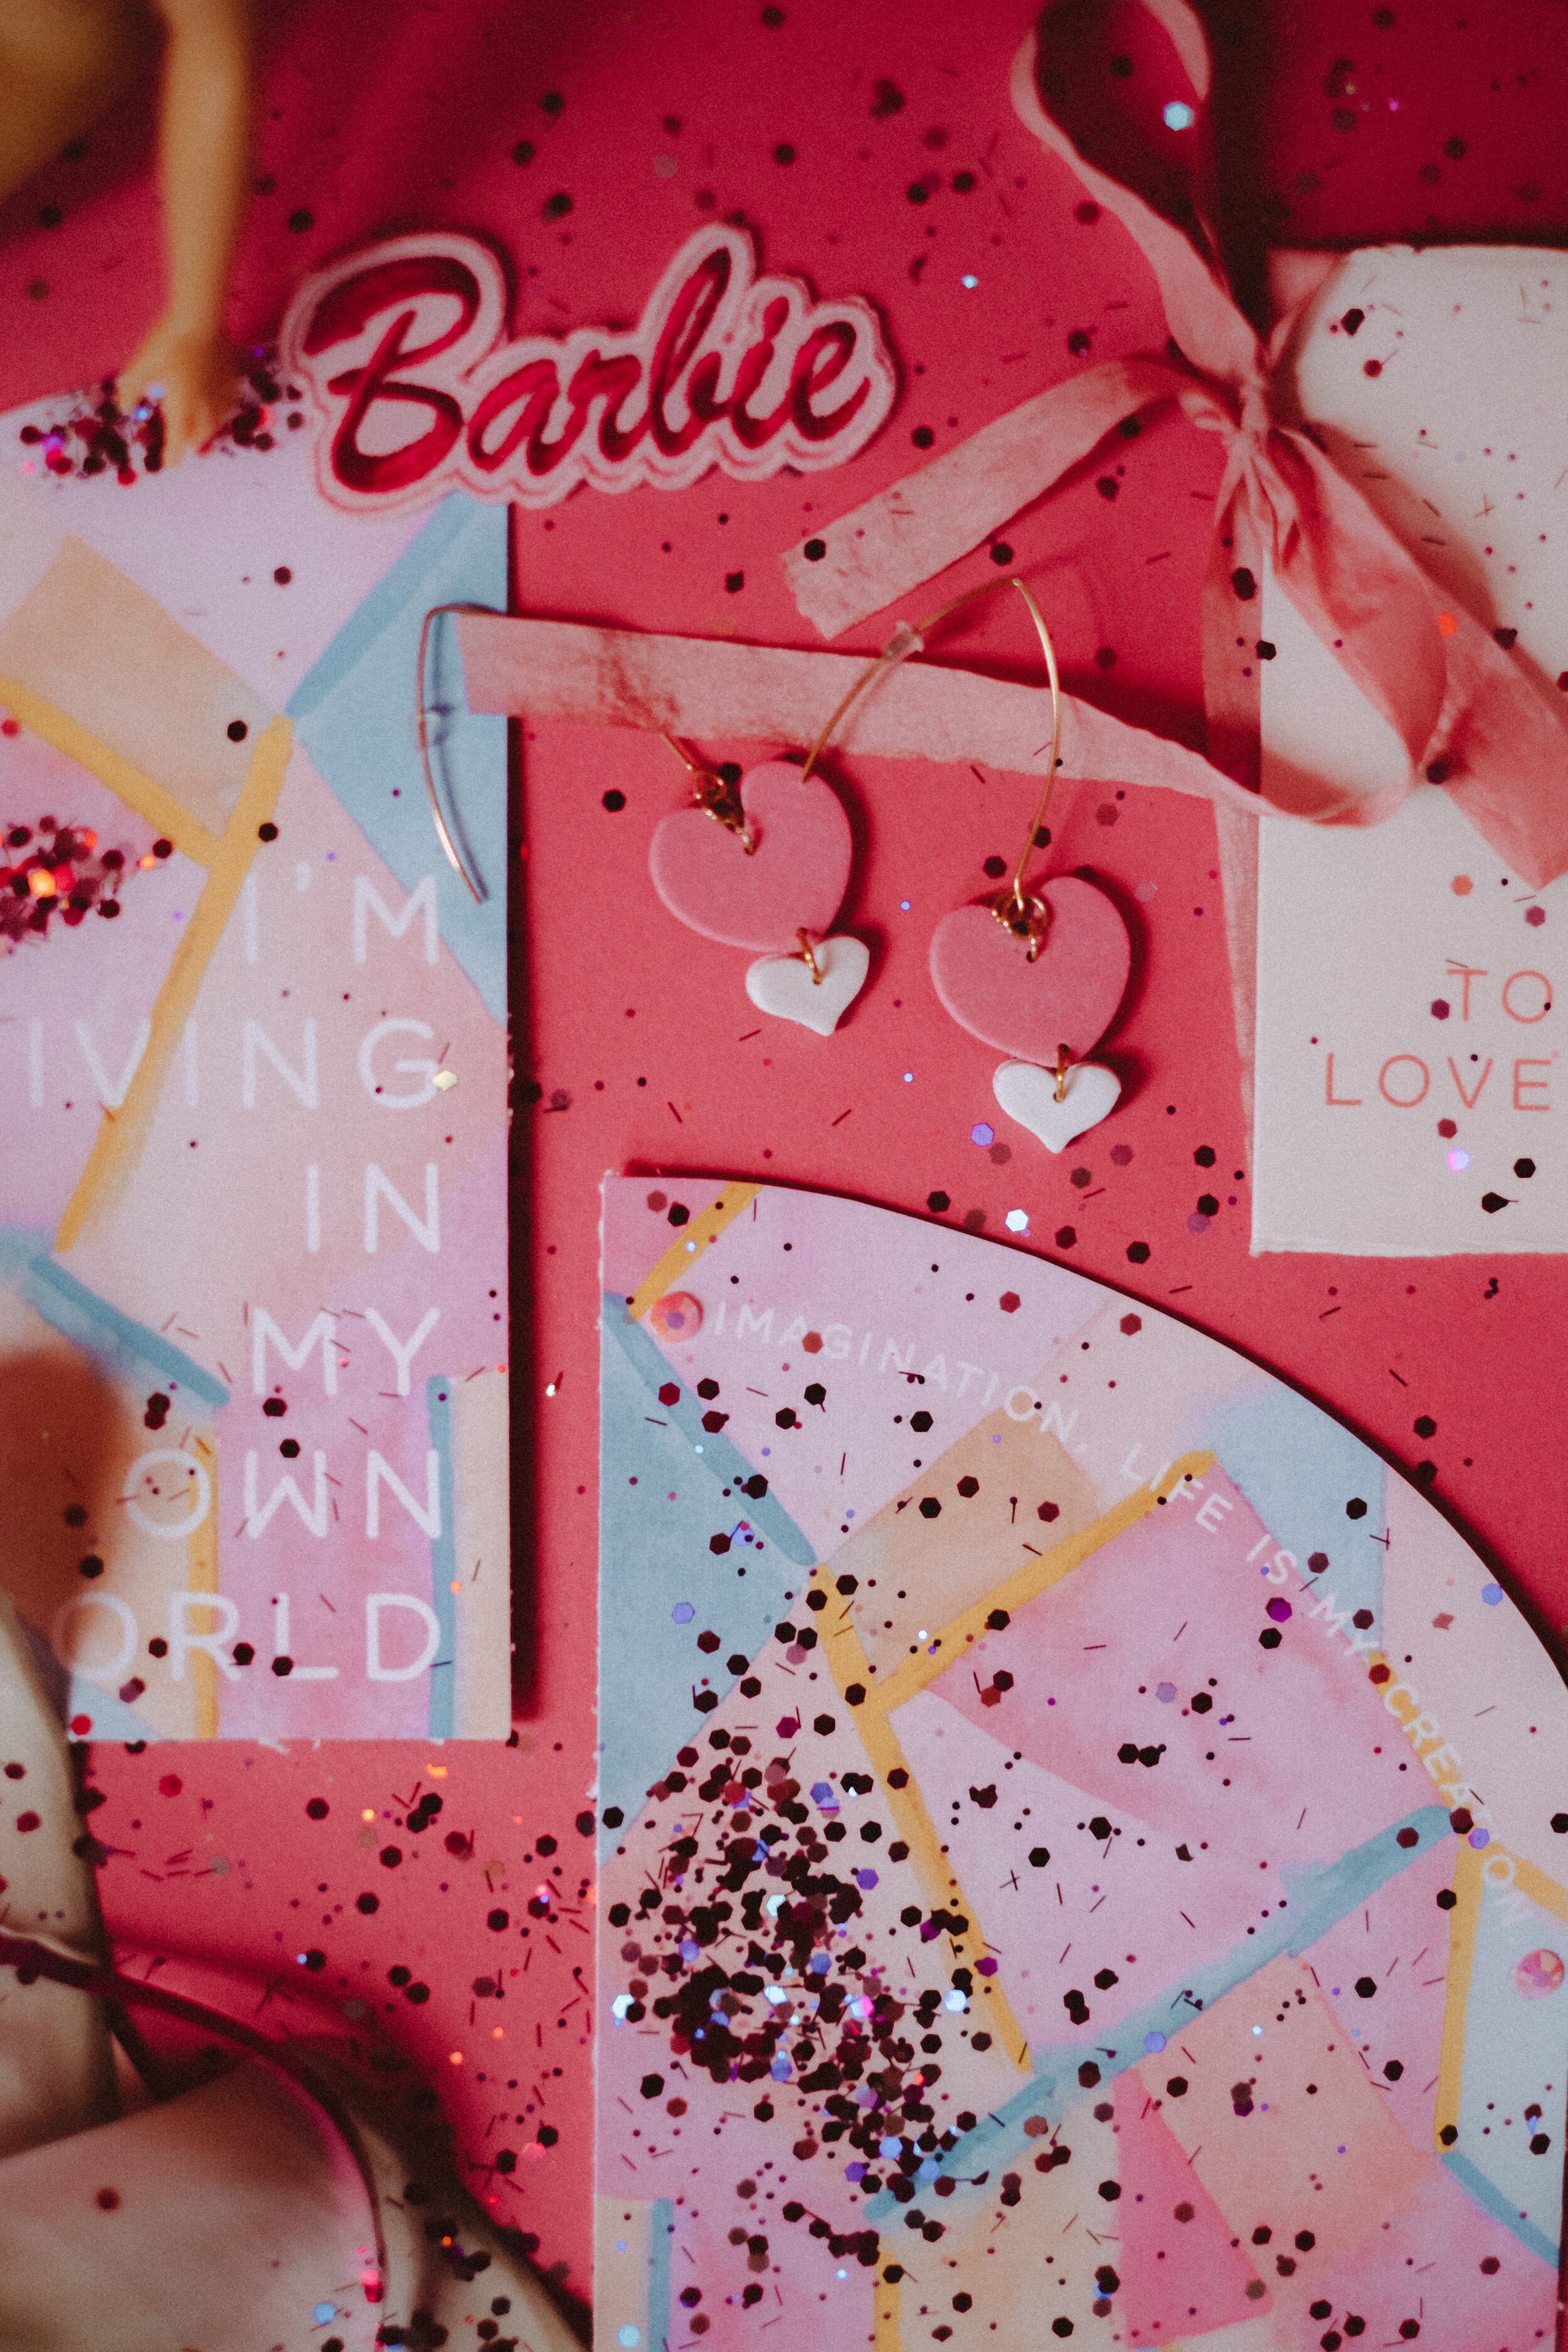
earrings: @clay.bykay
models: @lydia_bruce , @hailliealexys , @ooliviabreault


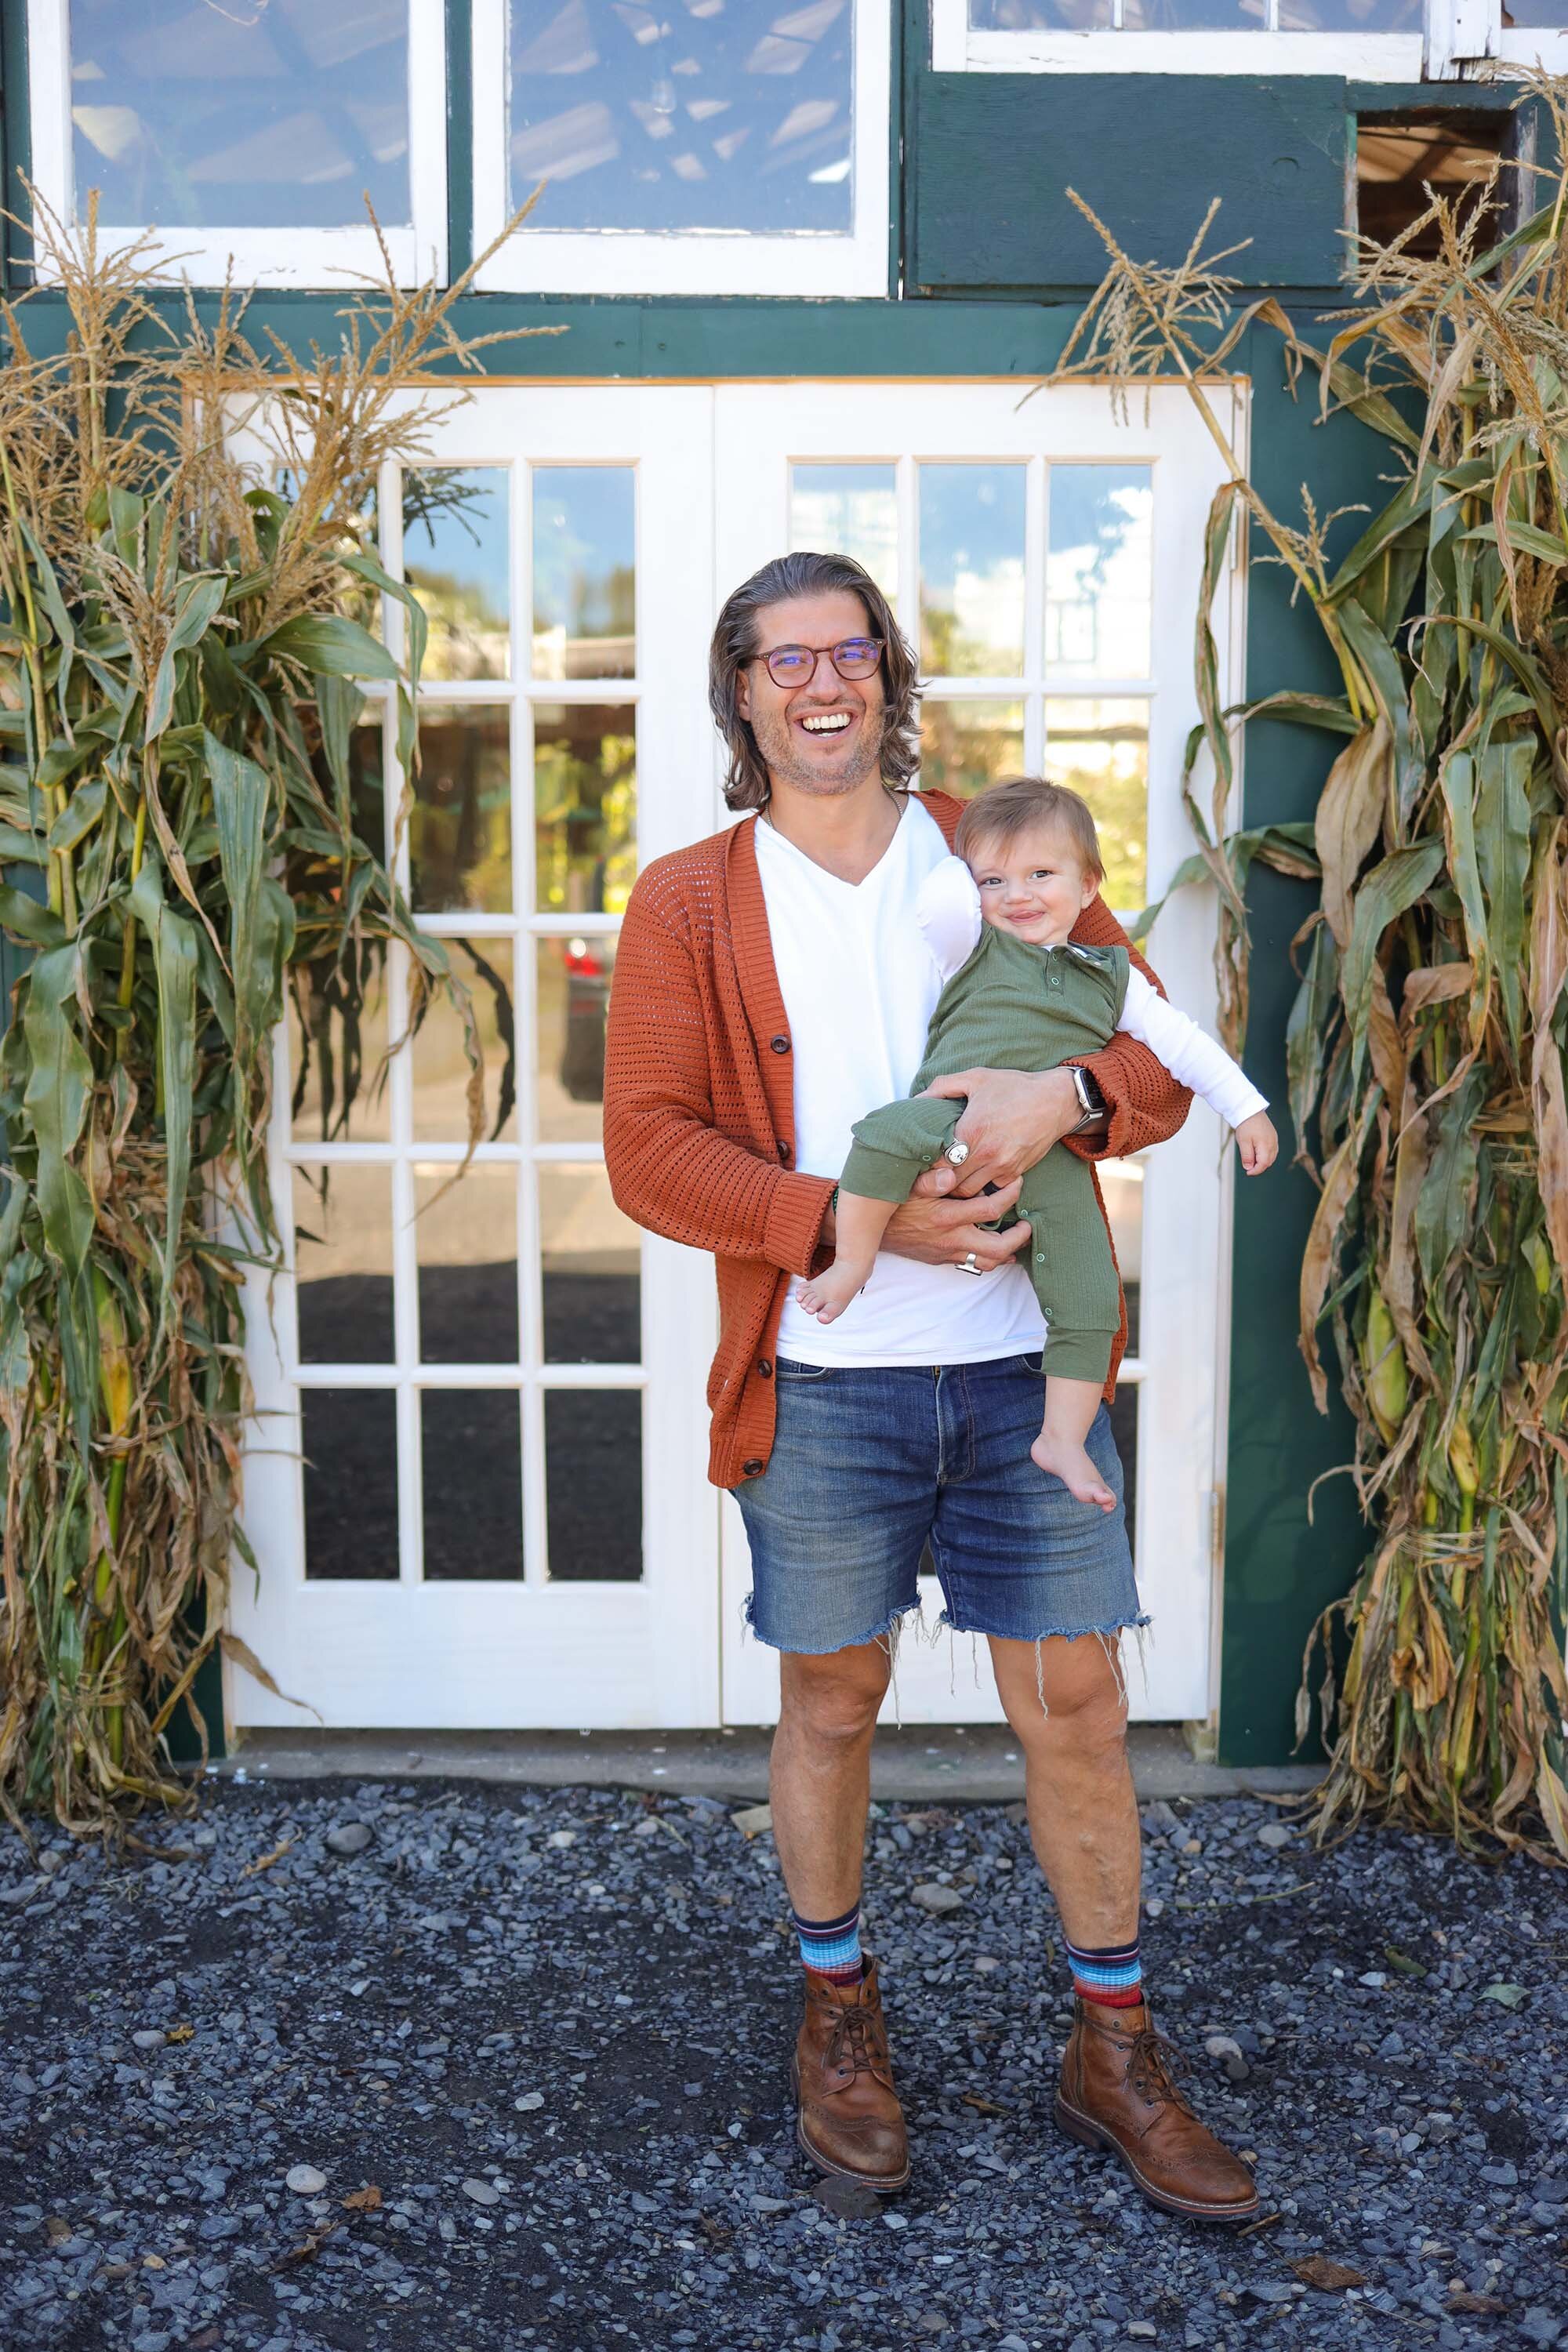
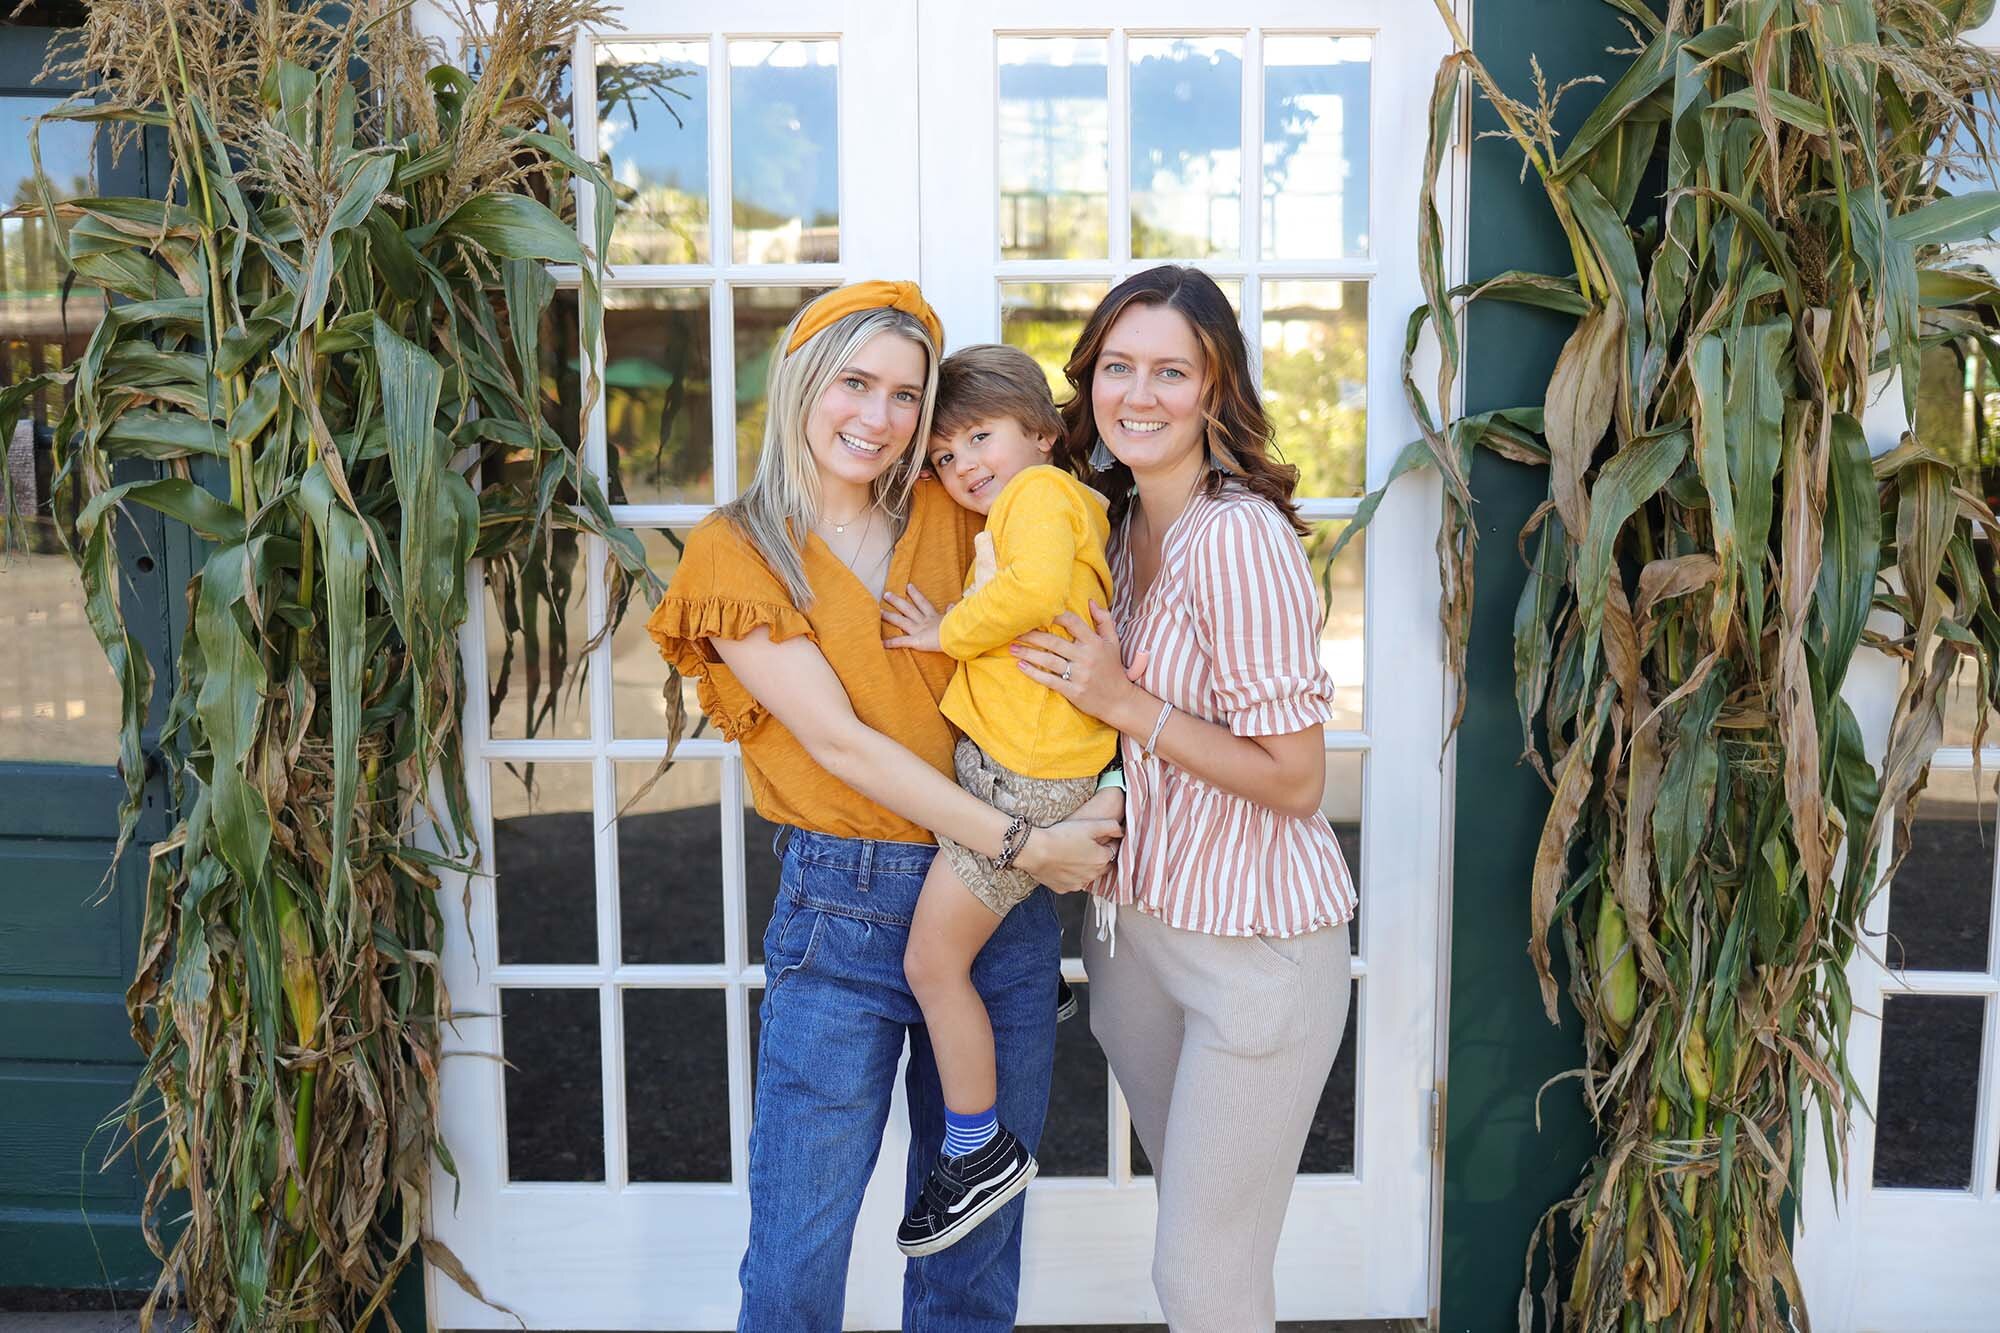
Hudson Valley adventures, part 1.
Family adventures, Hudson valley wedding venues and great food!

Hudson Valley adventures, part 1 - Bloominghill Farm in Monroe, NY
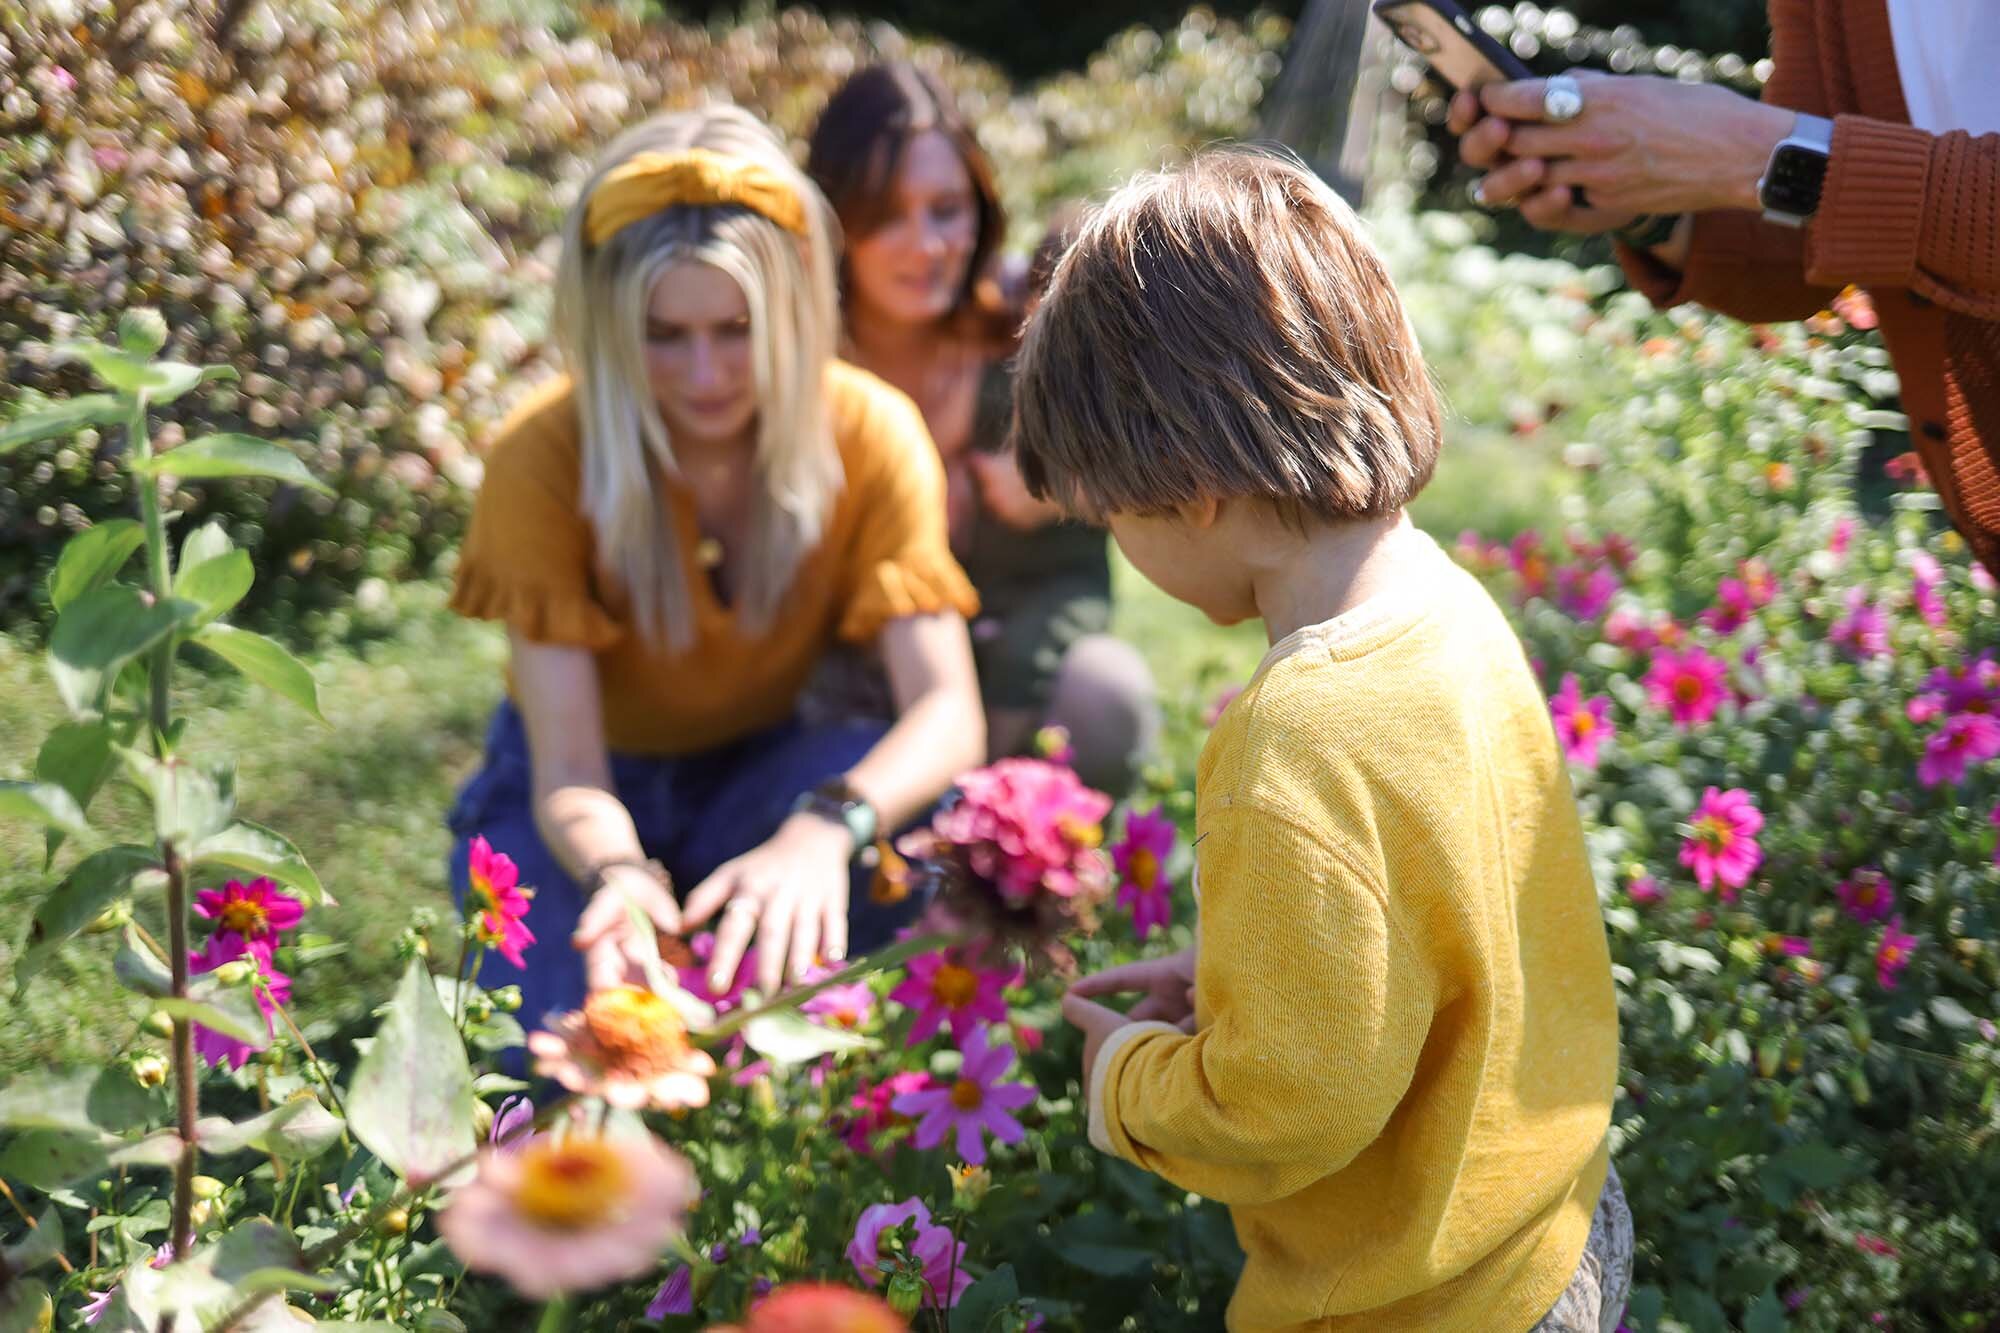
John and I have always loved adventuring, specifically for food. We live in the southern part of the Hudson Valley so just driving 30 minutes to an hour north brings you to so so so many great places. And if you venture further than an hour you have even more options. We are going to try to get to a bunch of them during the beautiful fall season to share with you all. And bonus, these will all be kid friendly! Because that is our life now and when the kids are happy (Logan), mom and dad are happy.
Bloominghill Farms. This place is so adorable and so delicious. John brought me years ago when we first started dating and it was just a big old piece of land with one building, one long farm table in the middle of a field and a little shack where they cooked up like 4 menu items. Brick oven pizza, egg dishes and a few others. And then they had a little bakery where I’ll never forget the homemade pop tart we indulged on that day.
Fast forward to the present, they revamped the entirety of the property while keeping its original charm. It’s not only a restaurant and a farm, it’s also a wedding venue! Some weekends you’ll see a big gorgeous sail tent set up in the back of the farmers market stand. (I’ll try to get a photo next time but you can certainly find it on their instagram here).
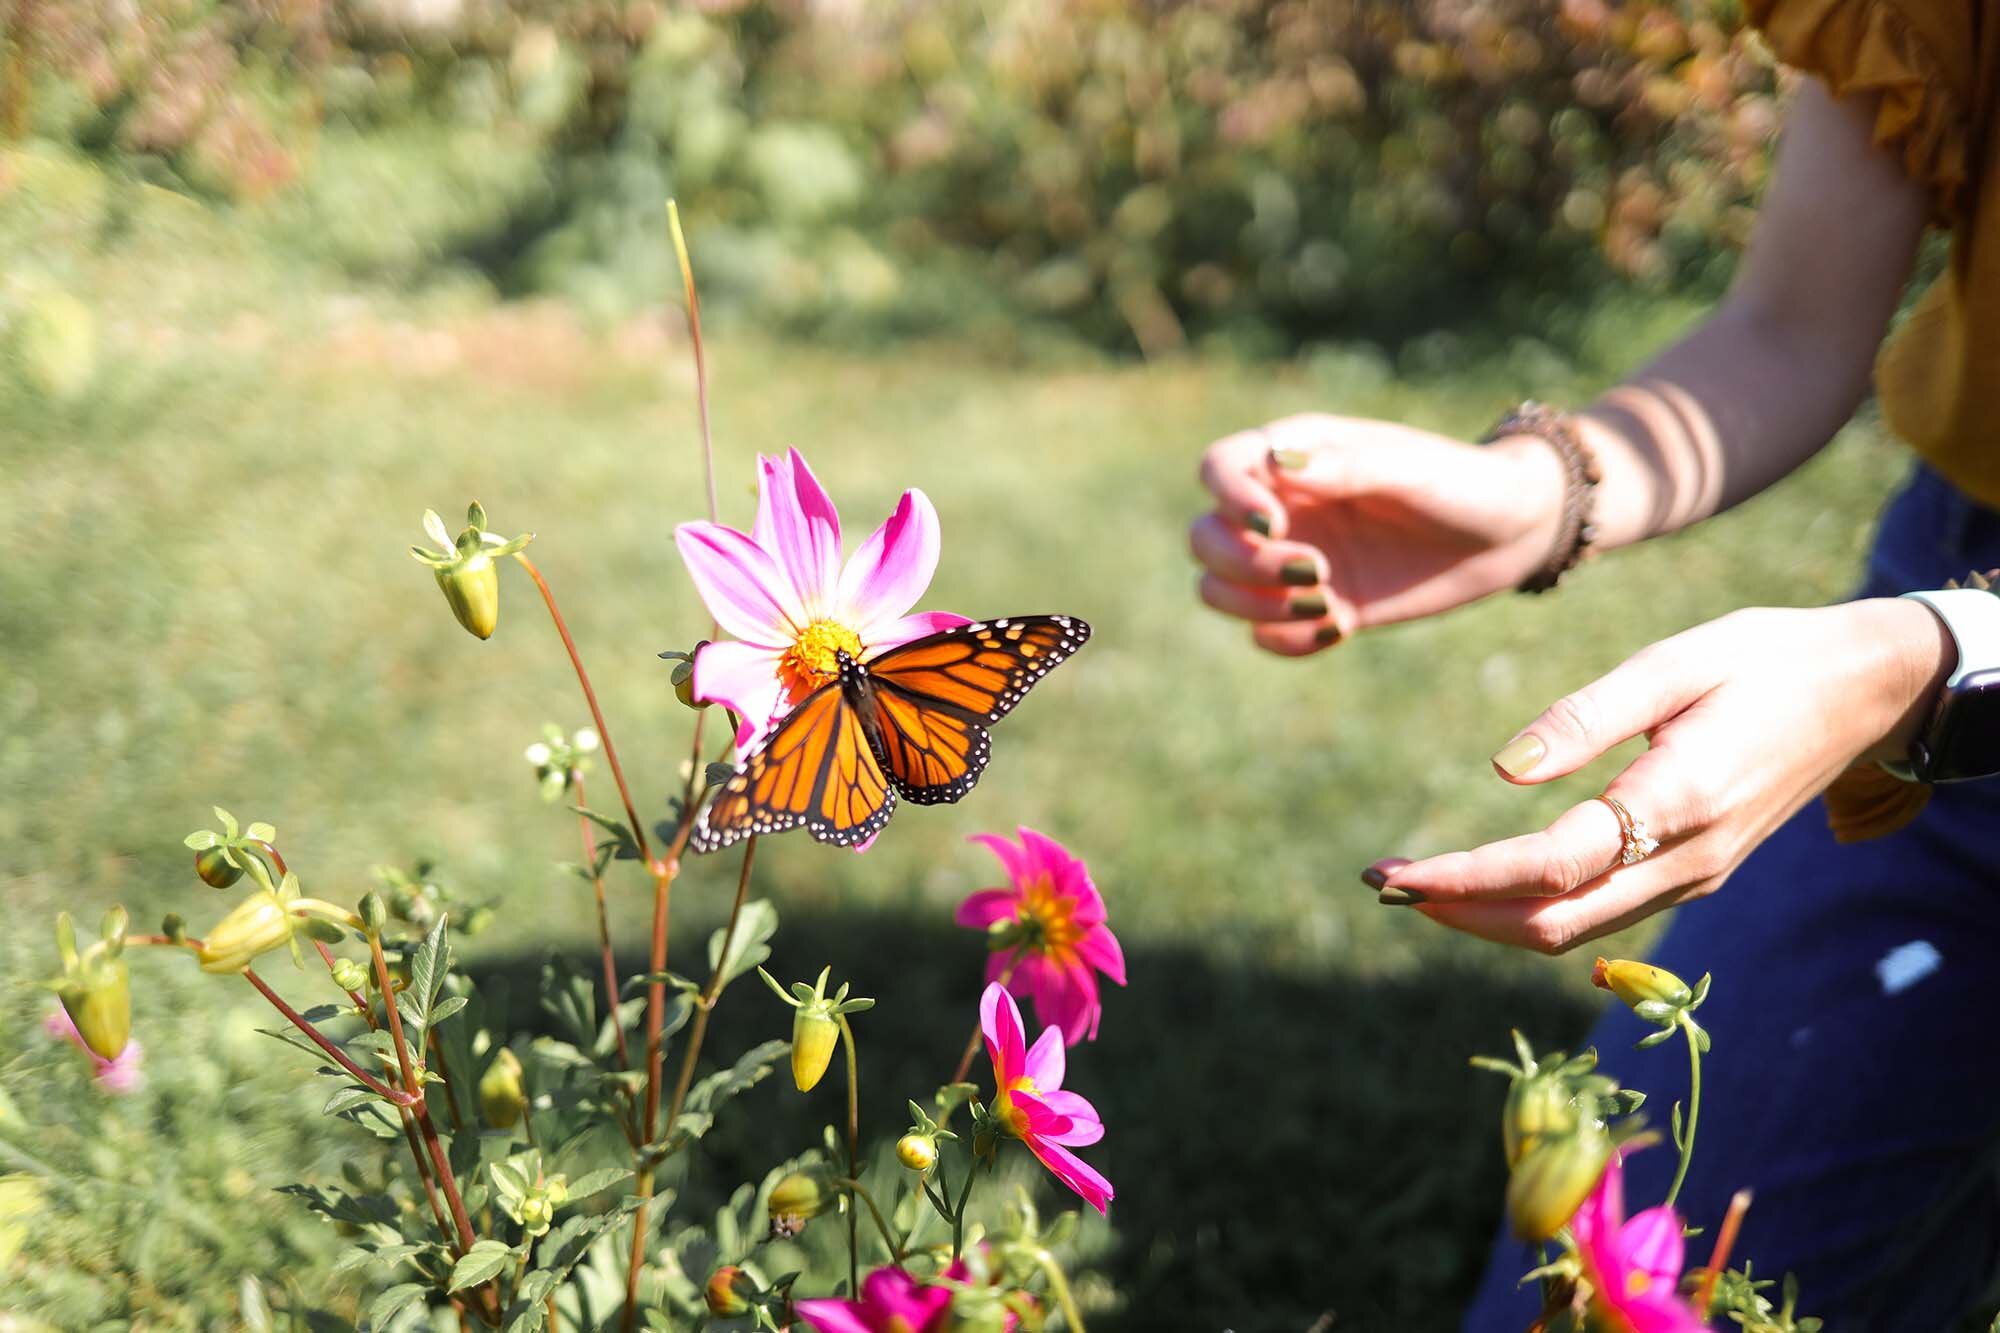
You park in front and take a cute little walk down a path to the property. To the left you can go shop their home grown farmers market and to the right is the restaurant where you will be disappointed with absolutely nothing on the menu. So freaking good. There’s wild flowers and butterflies which is where we spent a big chunk of time with our nature loving toddler. There’s very few things I love more than getting my kids outside in nature to just be in the dirt, with the flowers, searching for bugs and getting dirty. Those are my best childhood memories and I want the same for my kids!
Even when we were sitting down to eat, which Logan could not care less about, there was a big old farm fly on the wall that entertained him for 45 minutes. Just enough time to enjoy the meal and then get back to the adventure. We looked for and found, a praying mantis, multiple grasshoppers, and the ever exciting, rocks. 10 out of 10 experience, I couldn’t recommend it more! And then I brought home some local honey made there, obviously and some heirloom tomatoes that I will douse in my fave strawberry balsamic.
You can see photos below because we also used this awesome setup as the backdrop to some much needed family of now 4 photos! And our fave aunt Ali and Uncle Greg came along for the excursion.
If you go to Bloominghill Farms, let me know what you think!
xx Stephanie
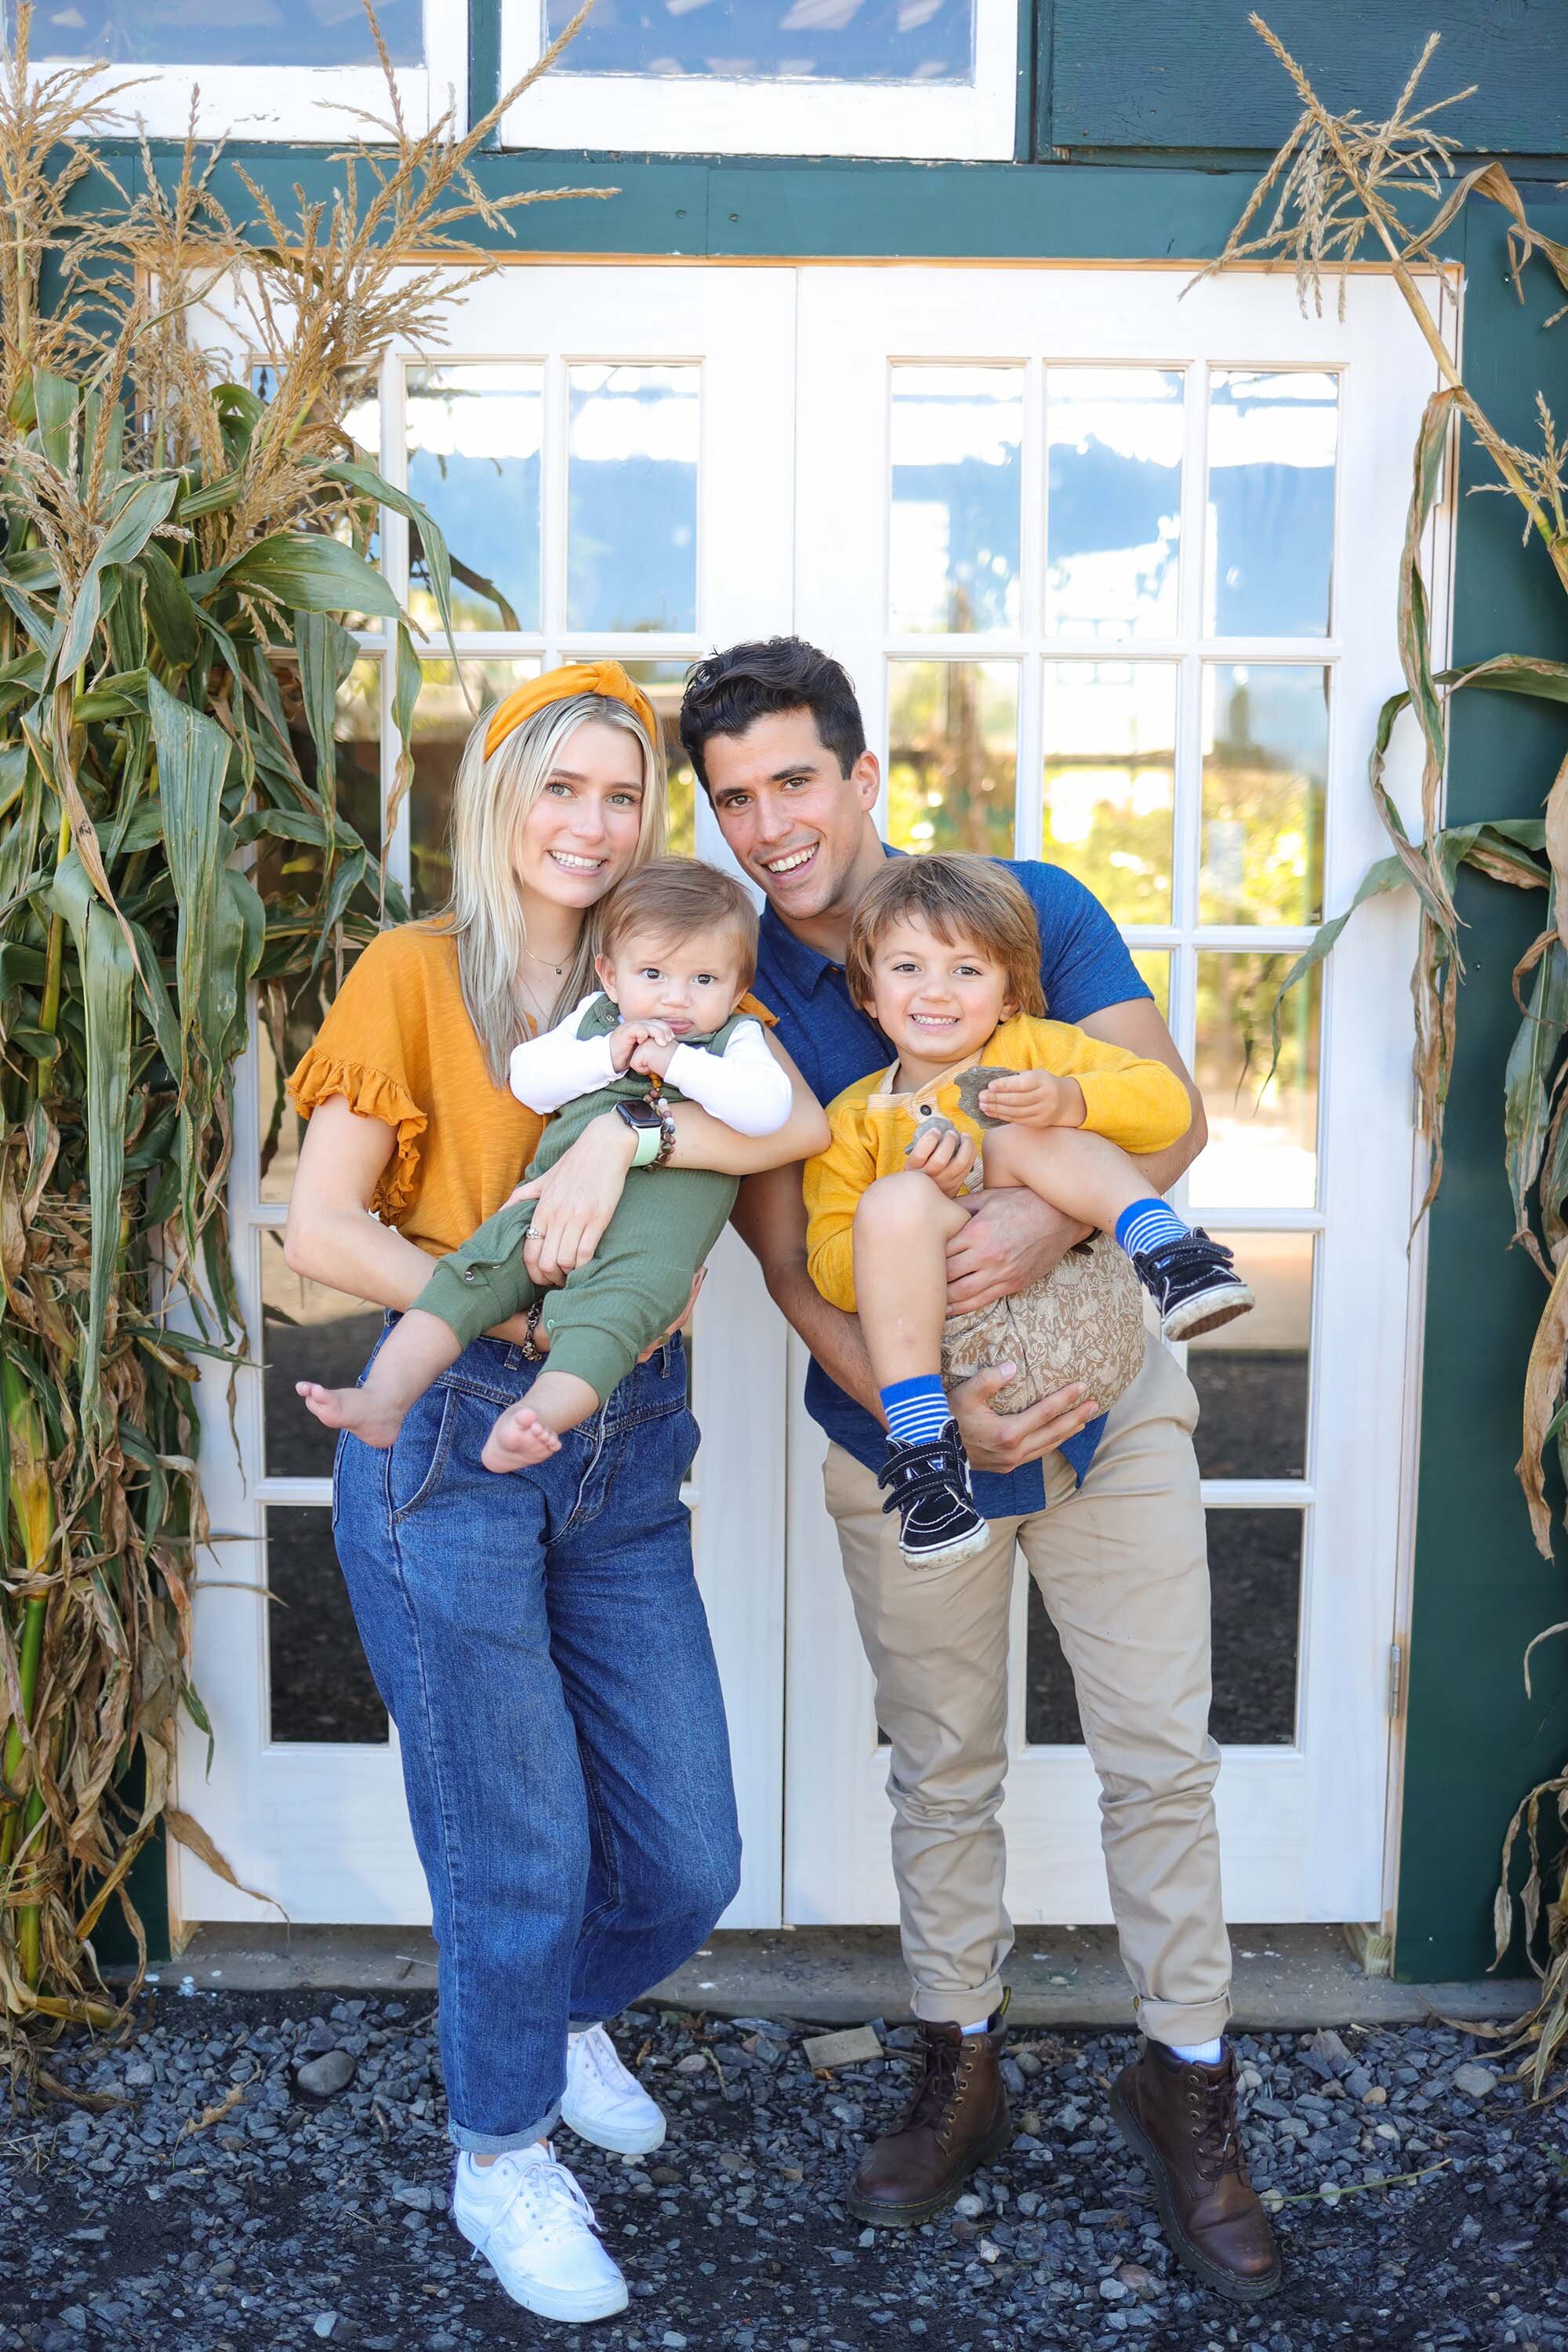
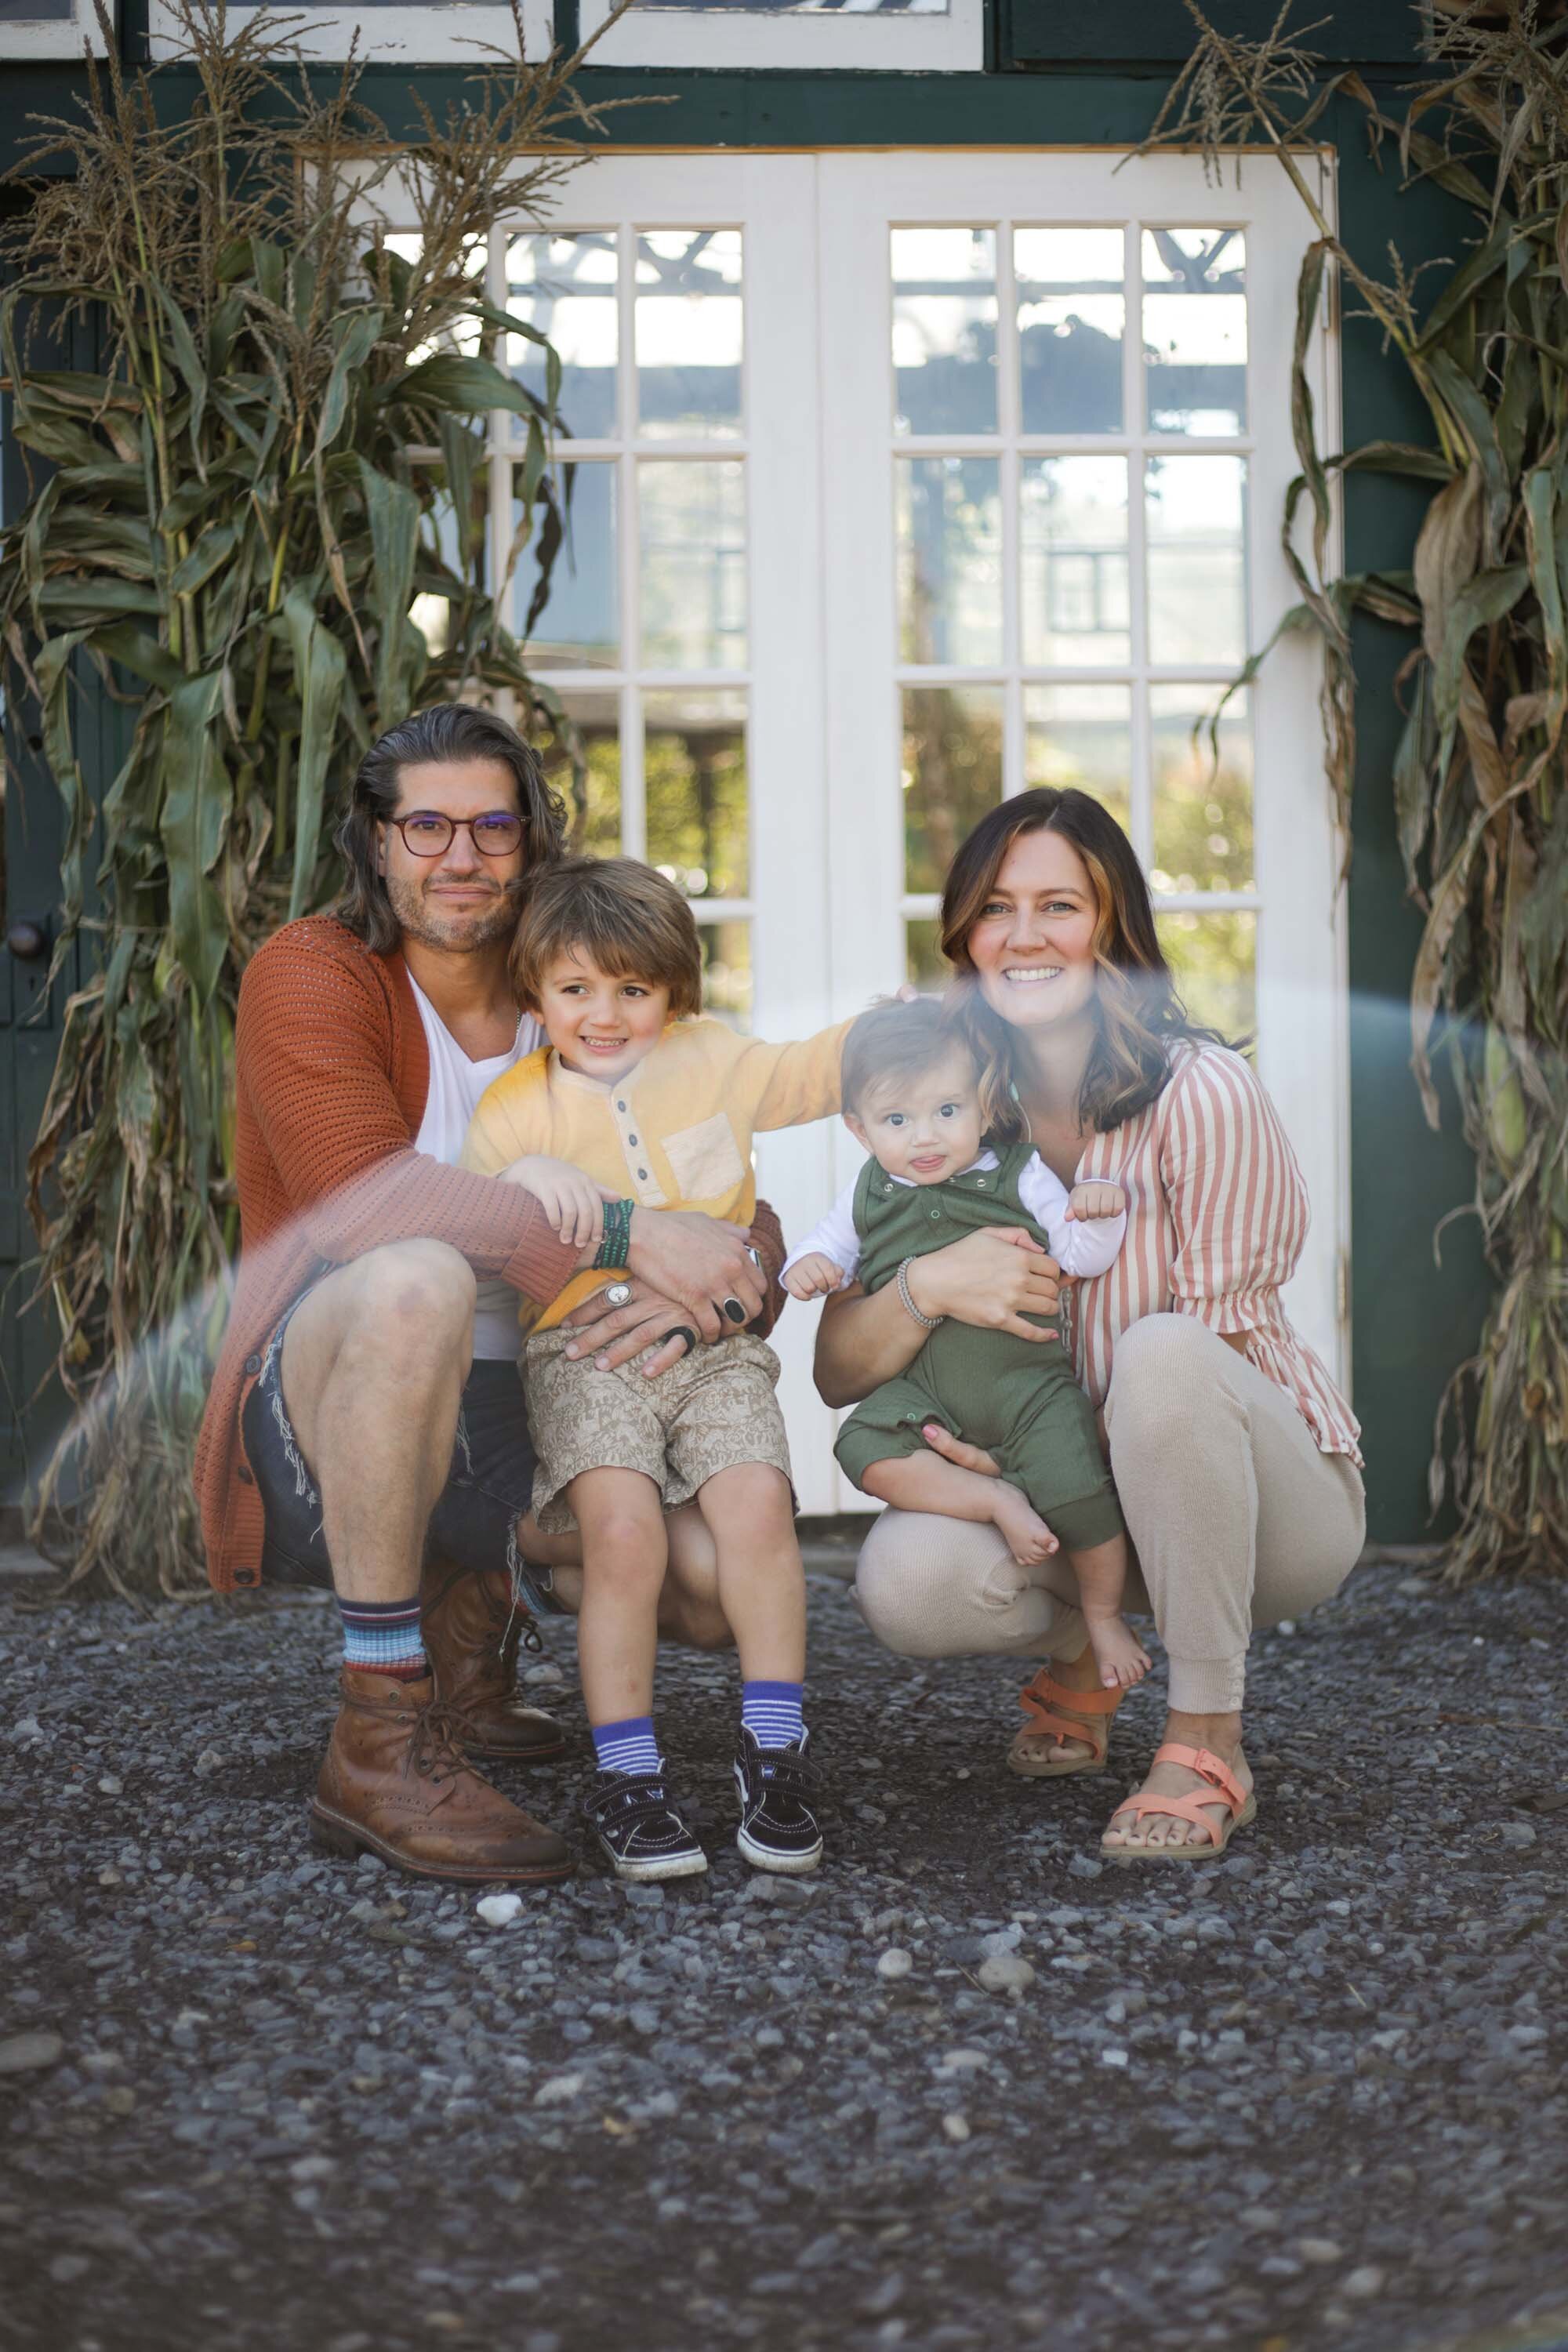
Greg and I both take most of the photos. If you remember Hudson Portrait (pre-pandemic), we love setting a cute scene and snapping family shots. But Greg did decide he had a higher calling and is going to school to become a nurse now! We bring him out of retirement for our personal use only ;)

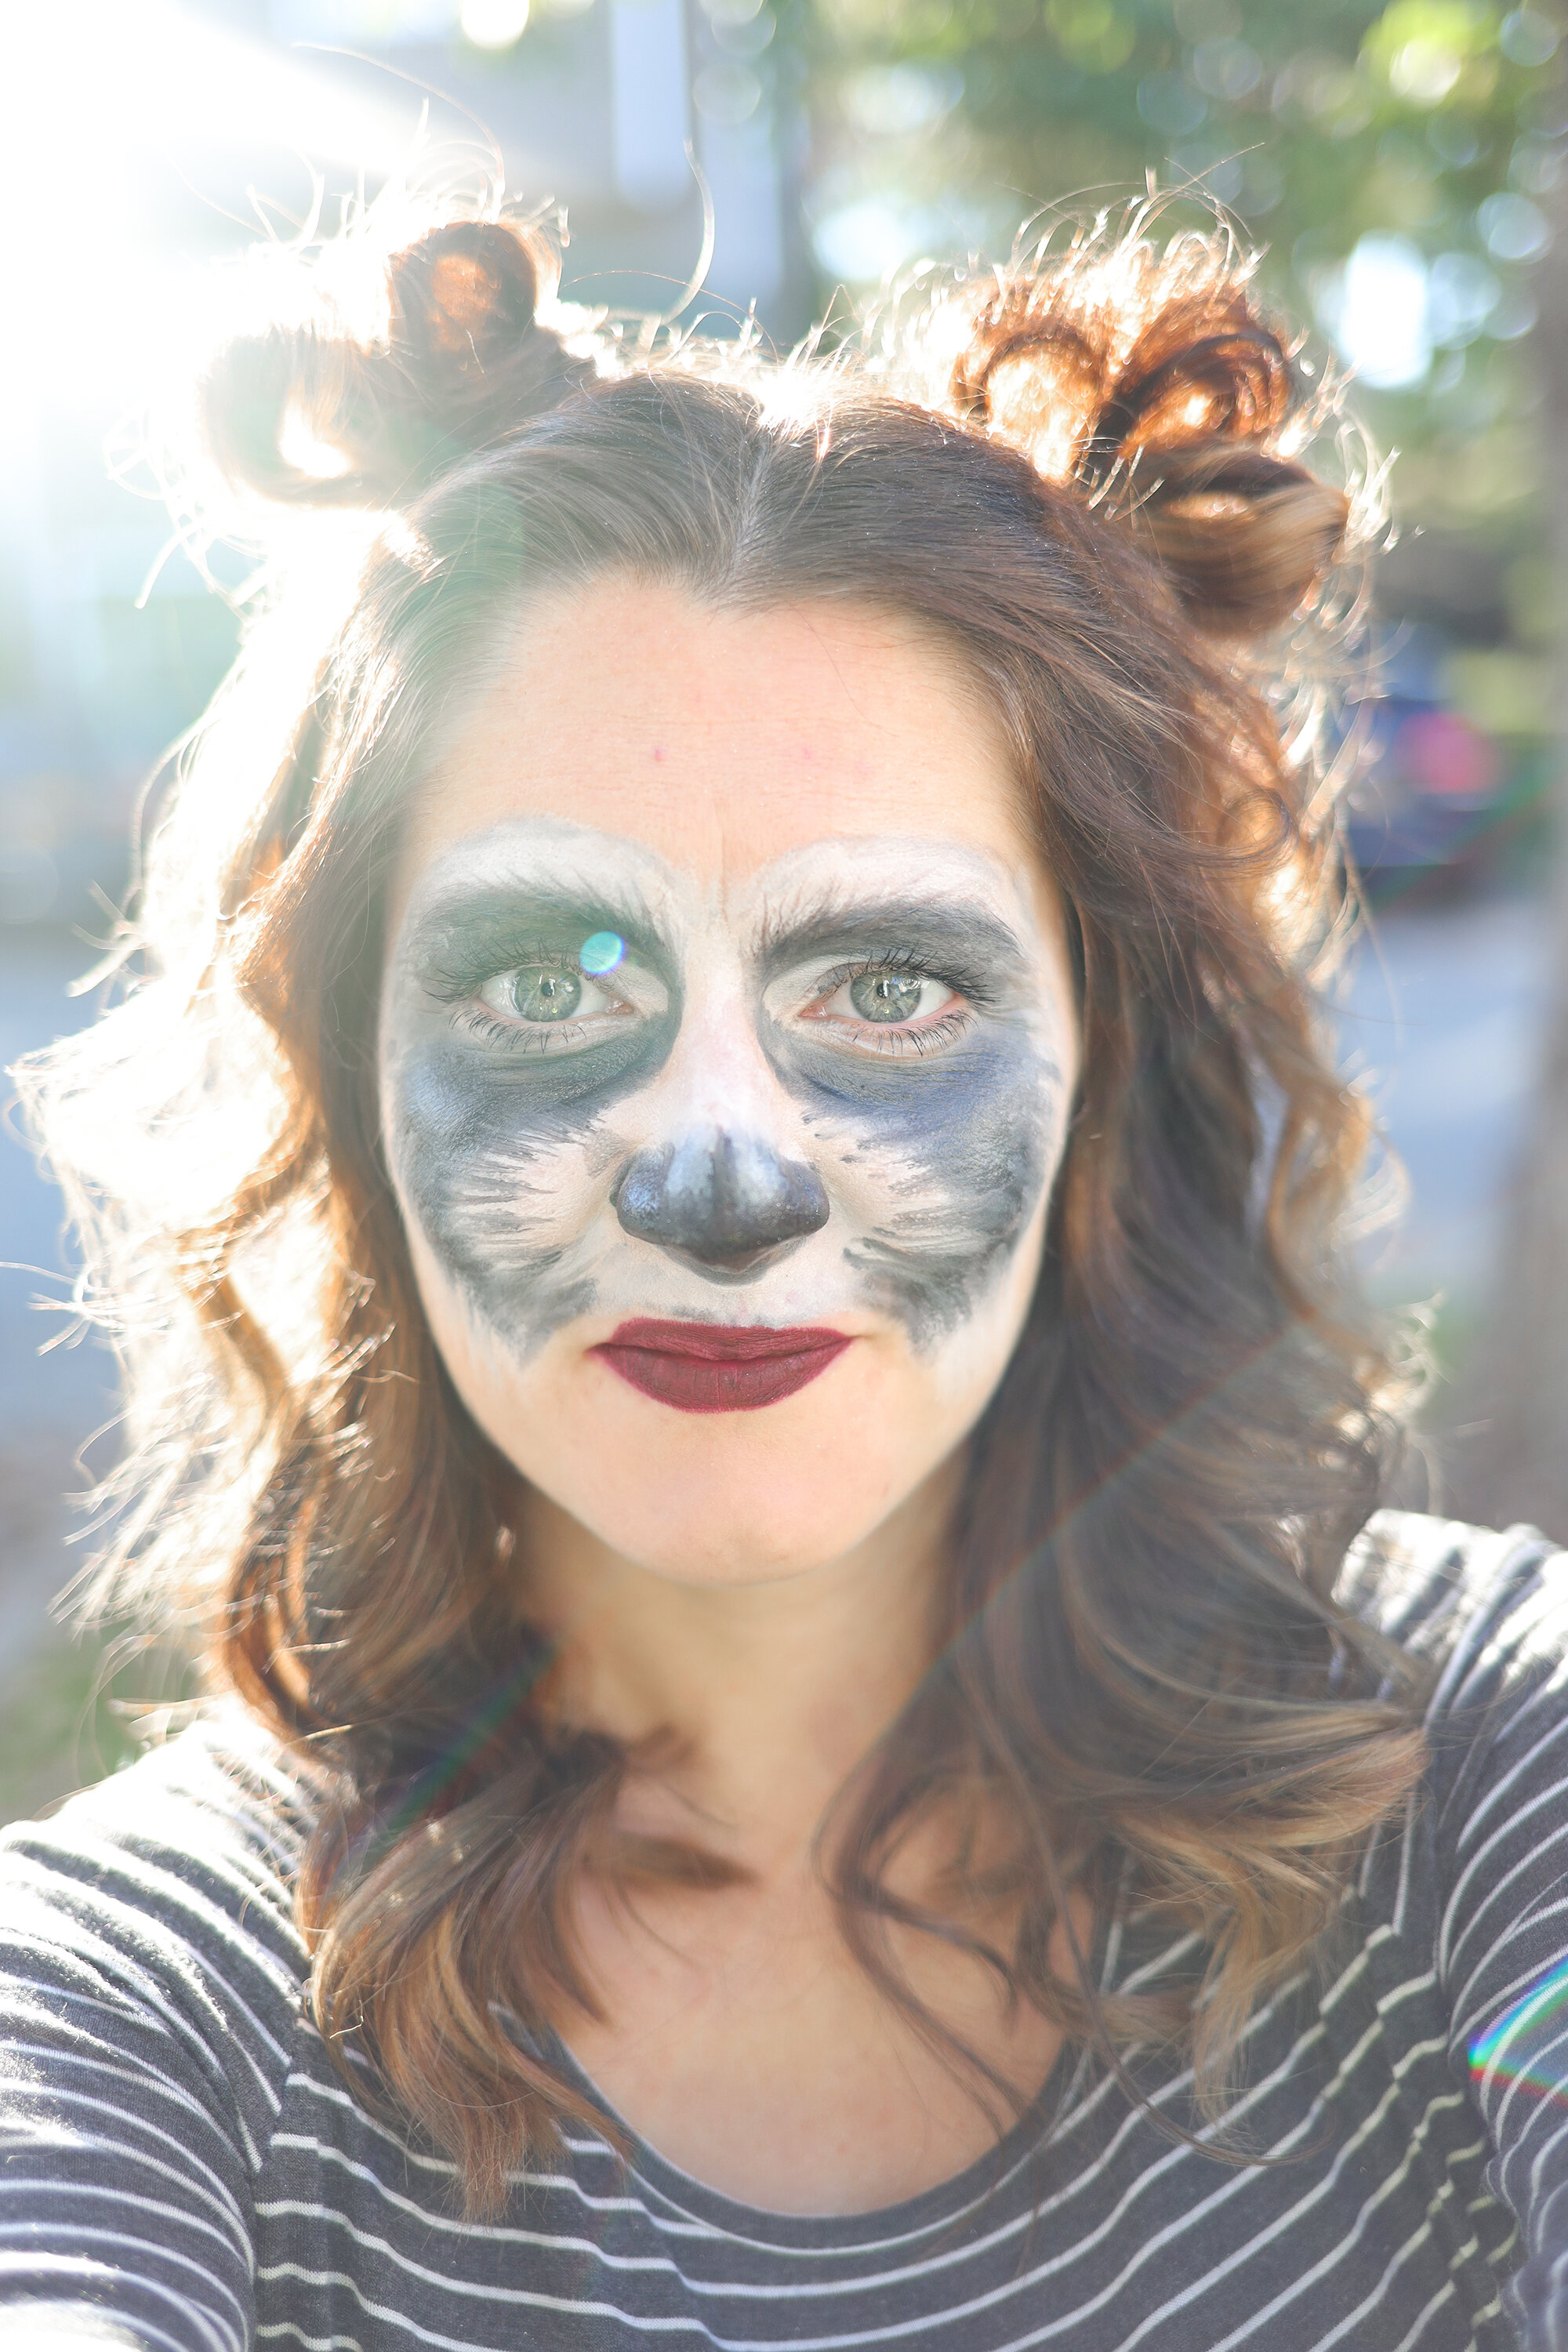
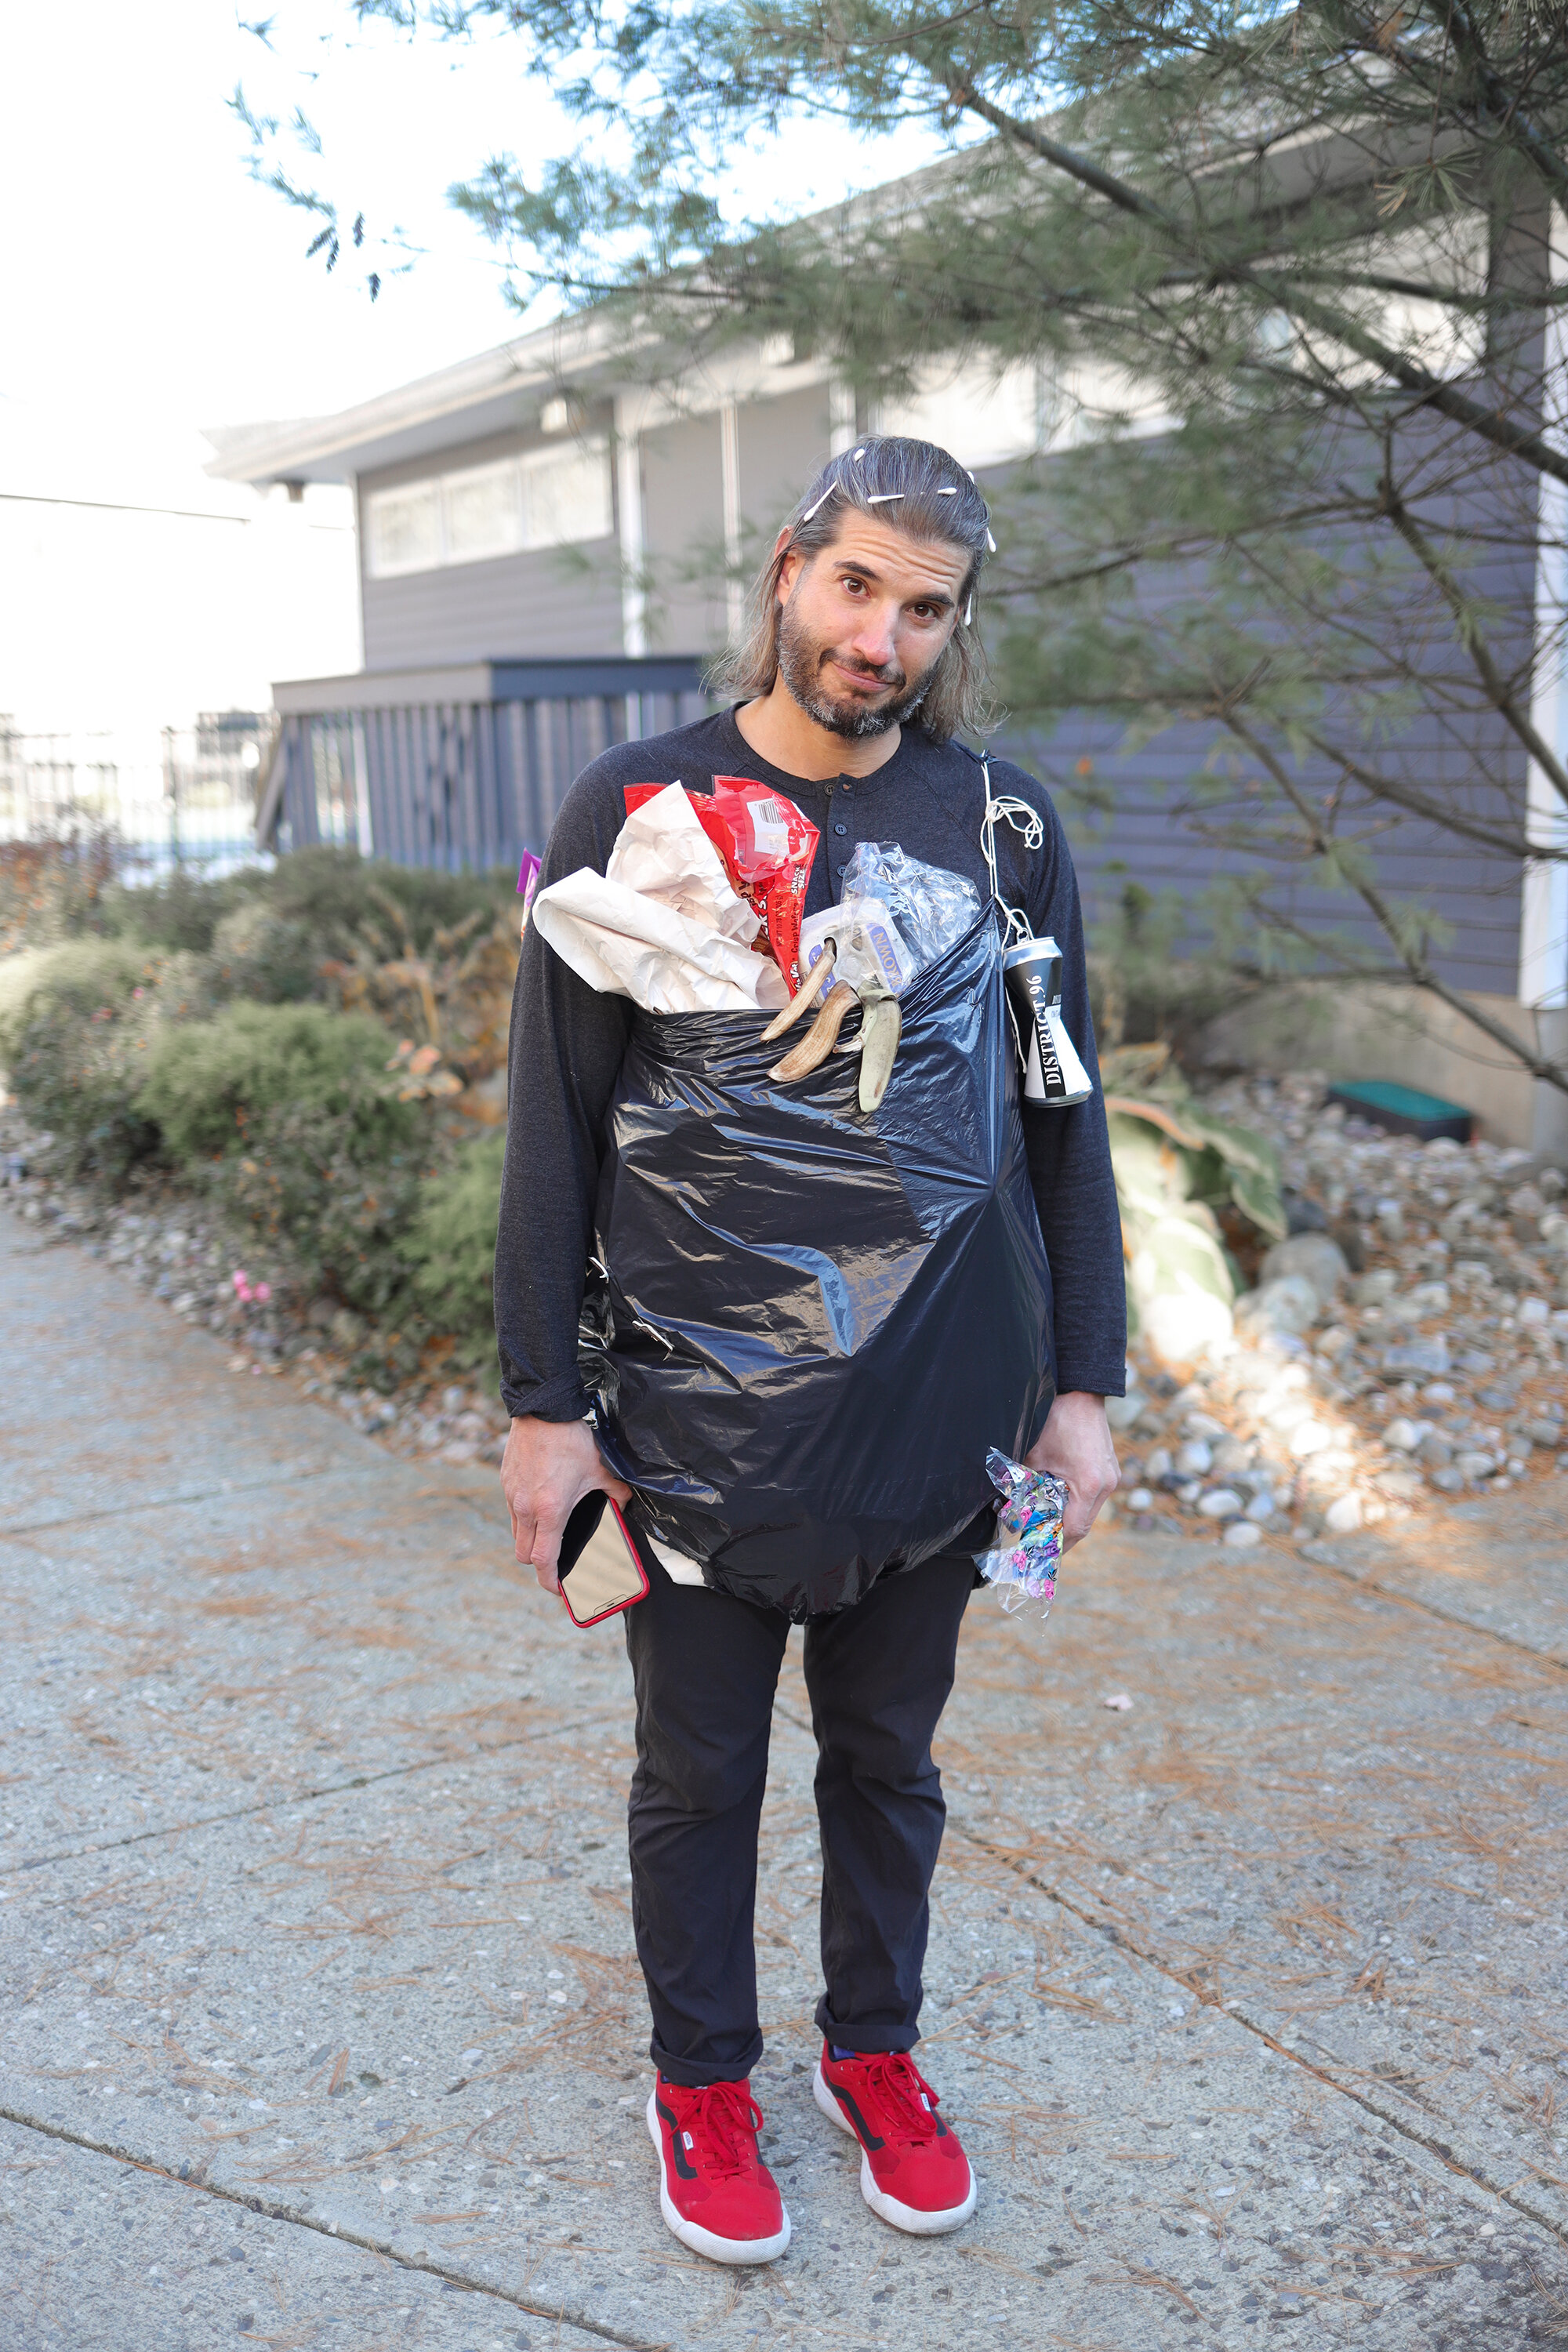
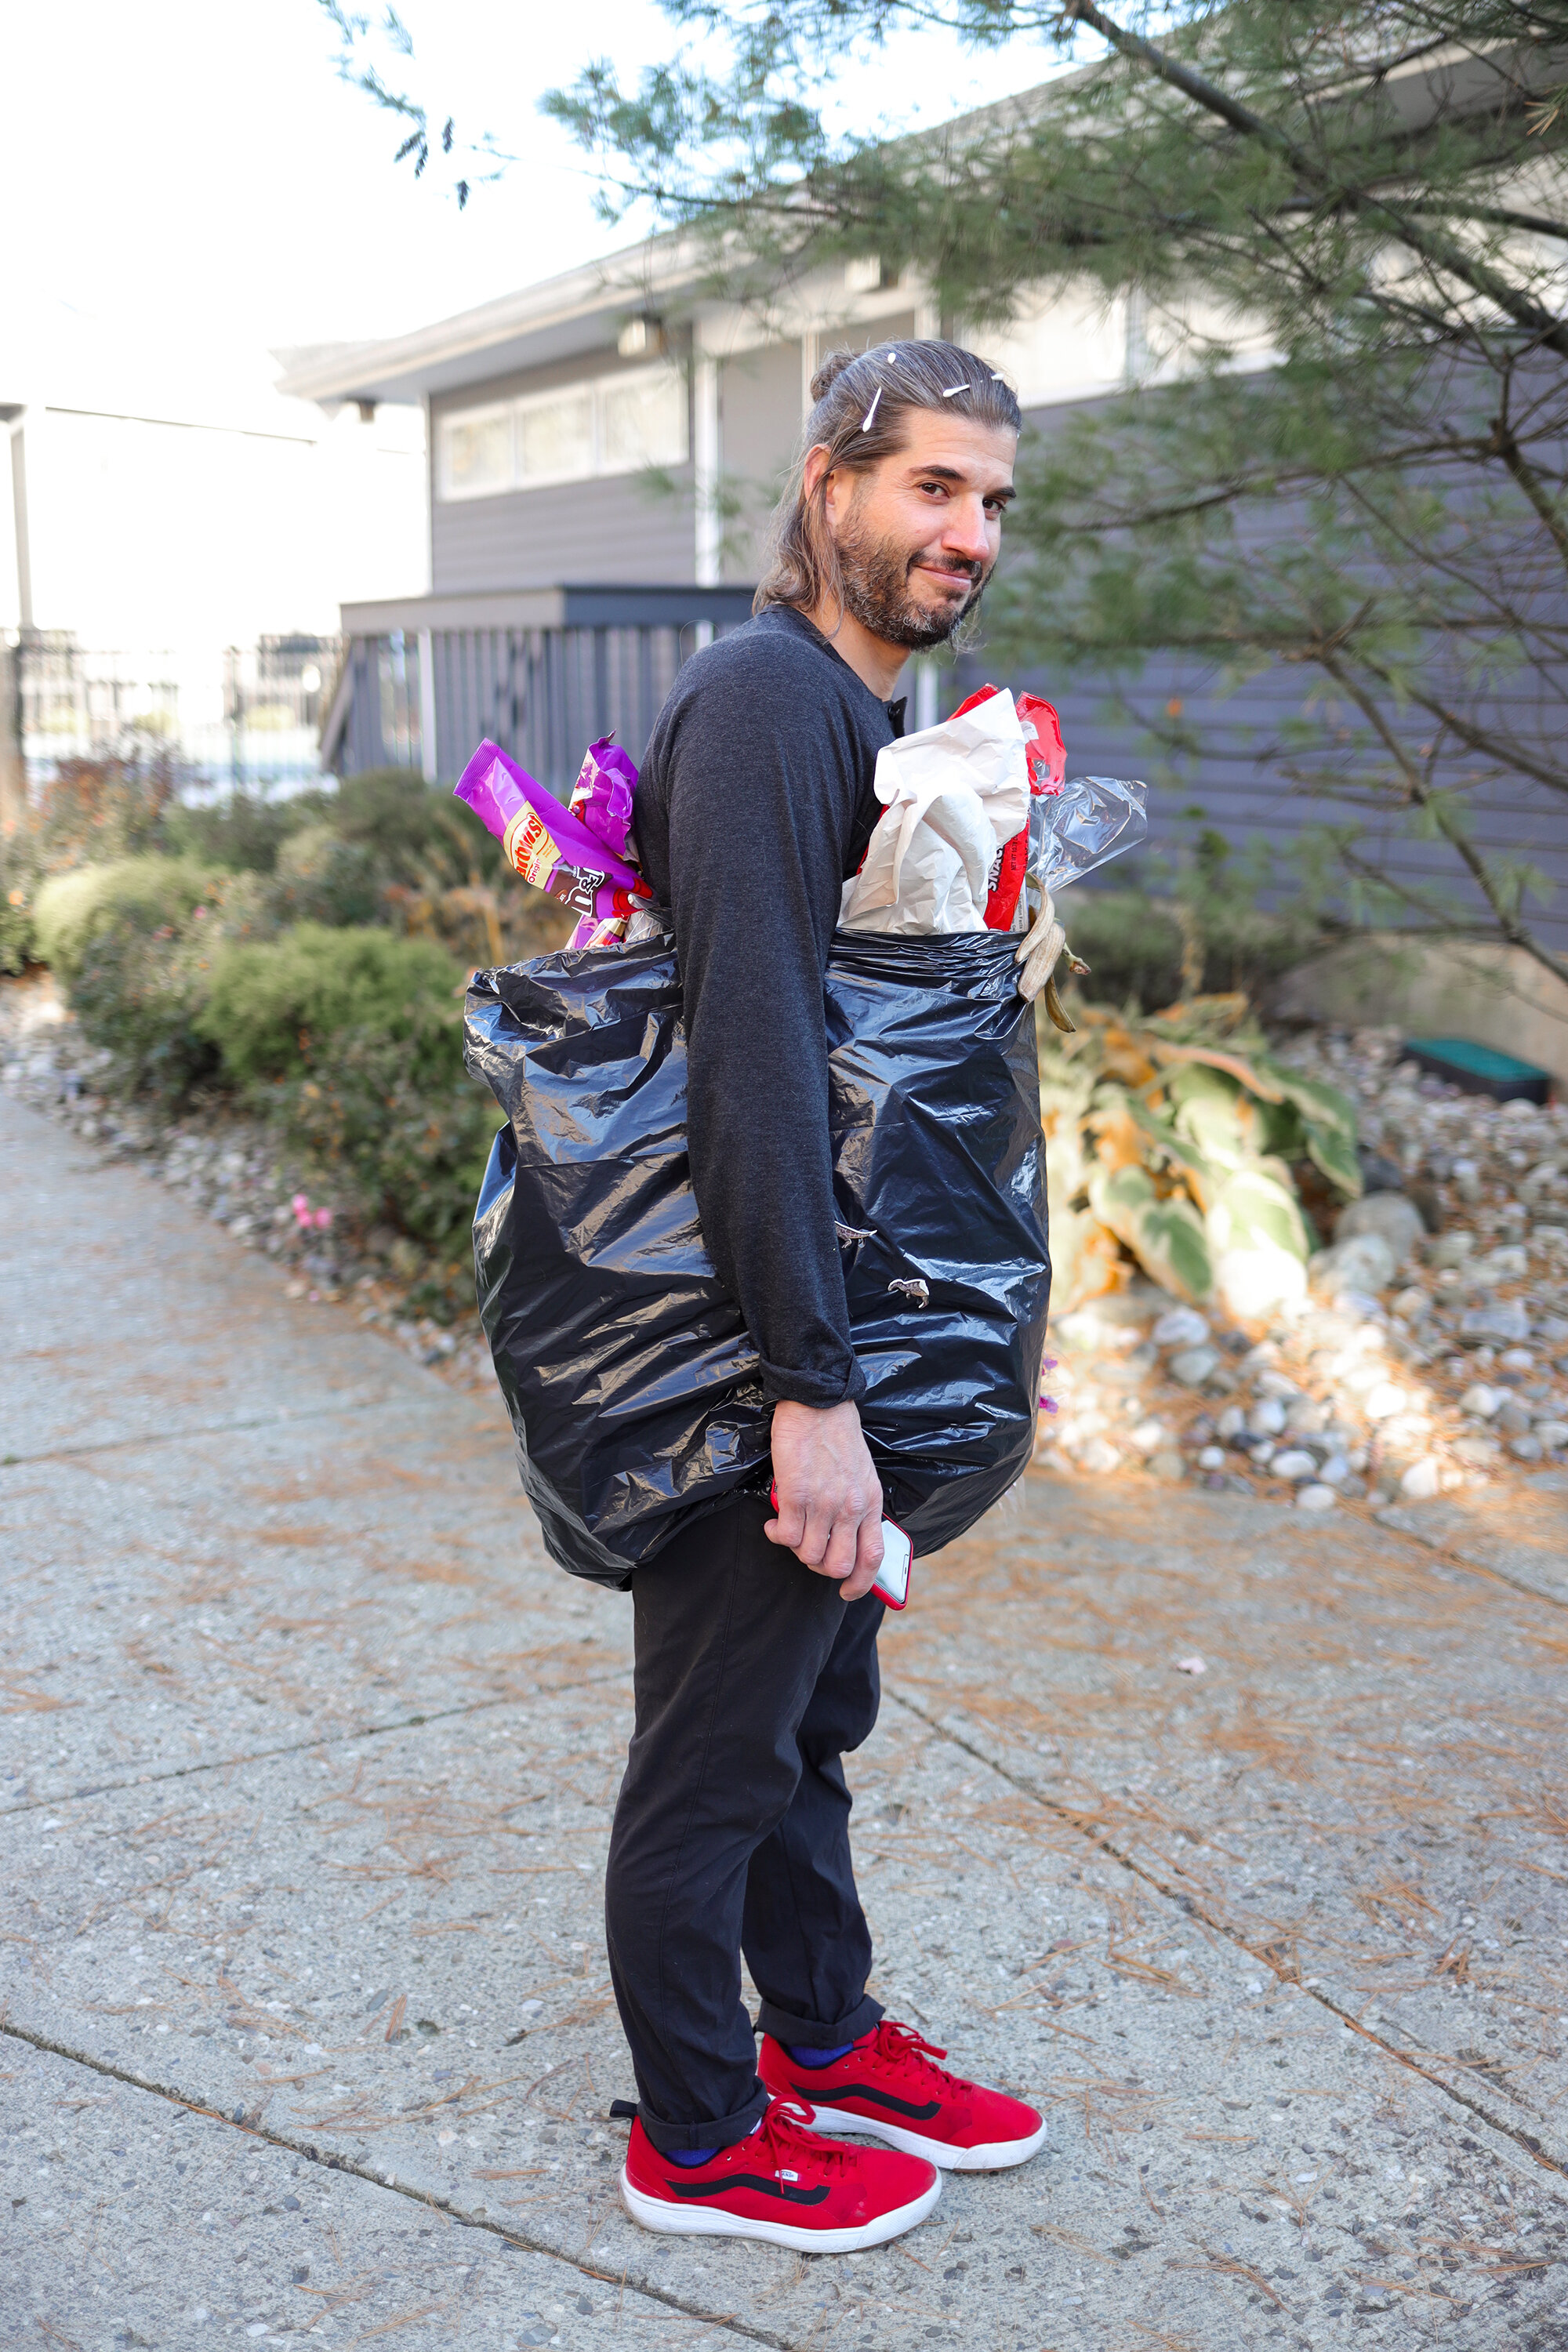
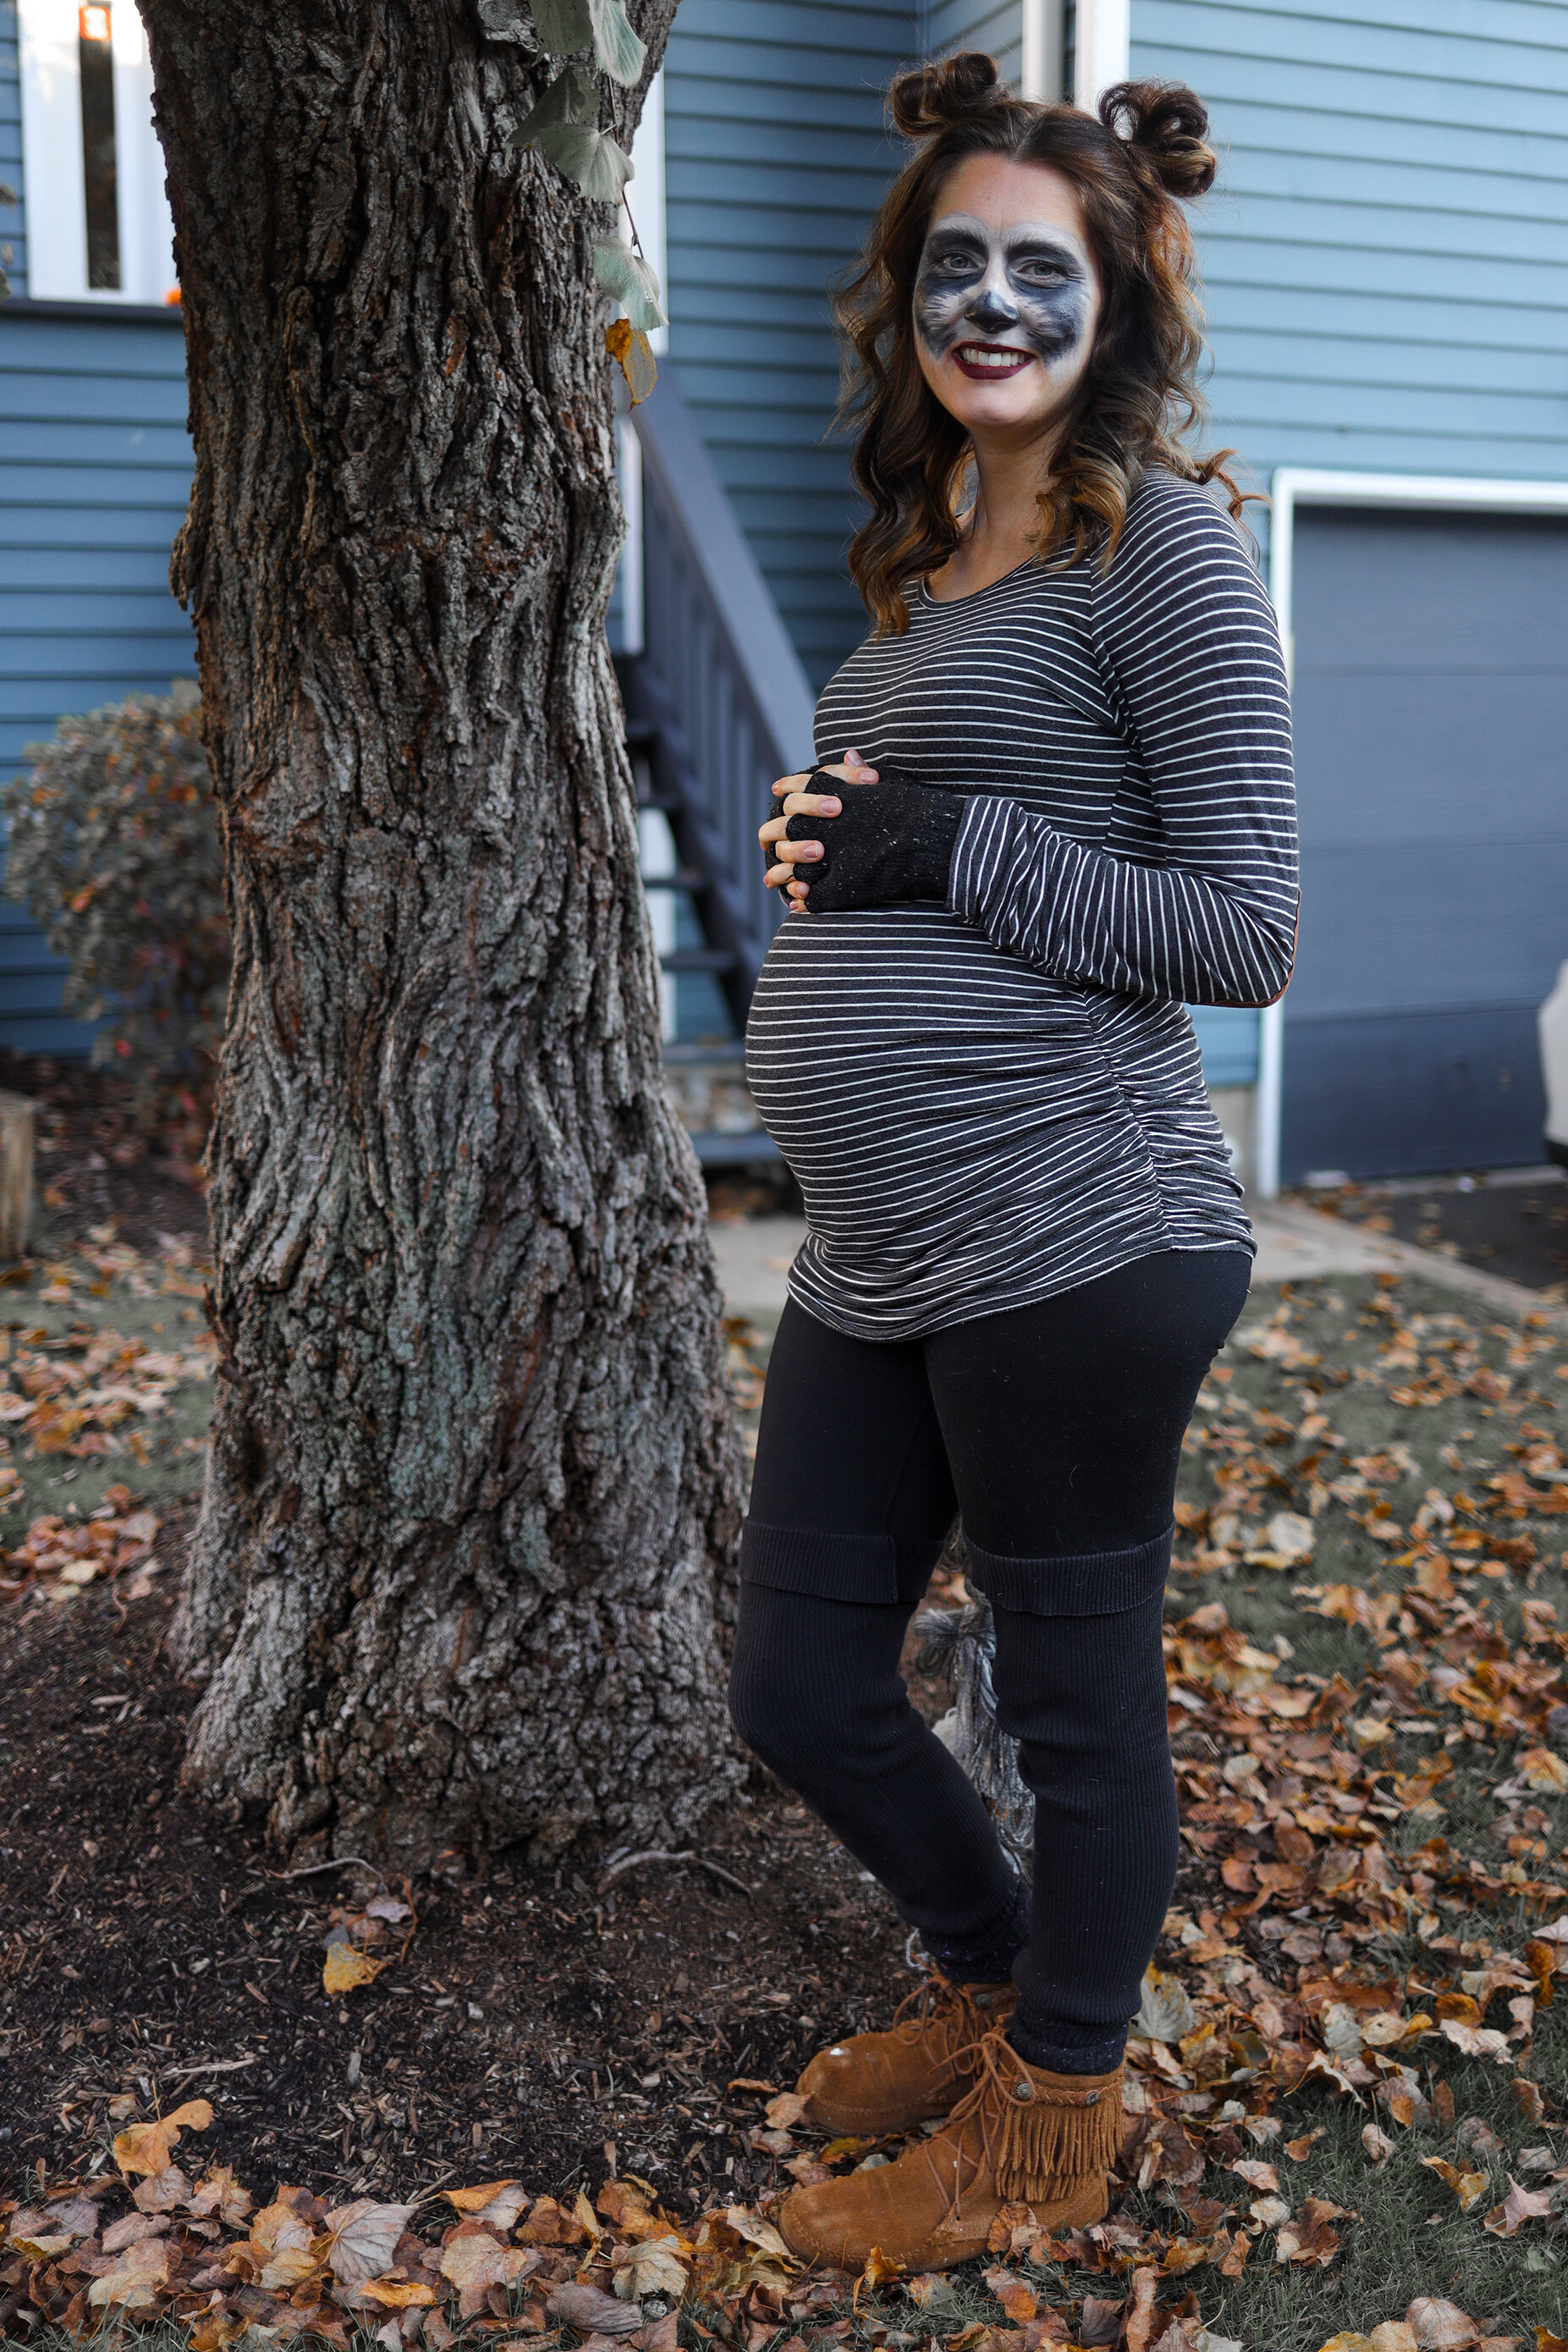
When we were garbage…
Logan had this thing with garbage…

Logan had this thing with garbage…
So I was pregnant. Logan was 3. And John was tired. Oh and the world had been shut down. Casual. I was personally proud as hell that we even pulled off this costume. Logan, the garbage man. Me, a raccoon. John, the garbage. LOL it makes me crack up looking at these photos. The best part was when Logan took off running down the street and John had to spring after him holding up his garbage bag outfit while little bits of trash started flying out and then the whole bag broke. I wouldn’t say it was the cutest costume year but we did have fun and that’s what counts for Logans memories.
This post is short because, well, how much can you say about garbage.
What will we be this year? And what about you guys? You can look back at our previous family costumes below!
xx Stephanie

halloweens past

Halloween 2019 | When we were jungle cats
Click the image above to read the post and see all the photos!

Halloween 2018 | When we were wolves
Click the image above to read the post and see all the photos!

wedding day stationery tips
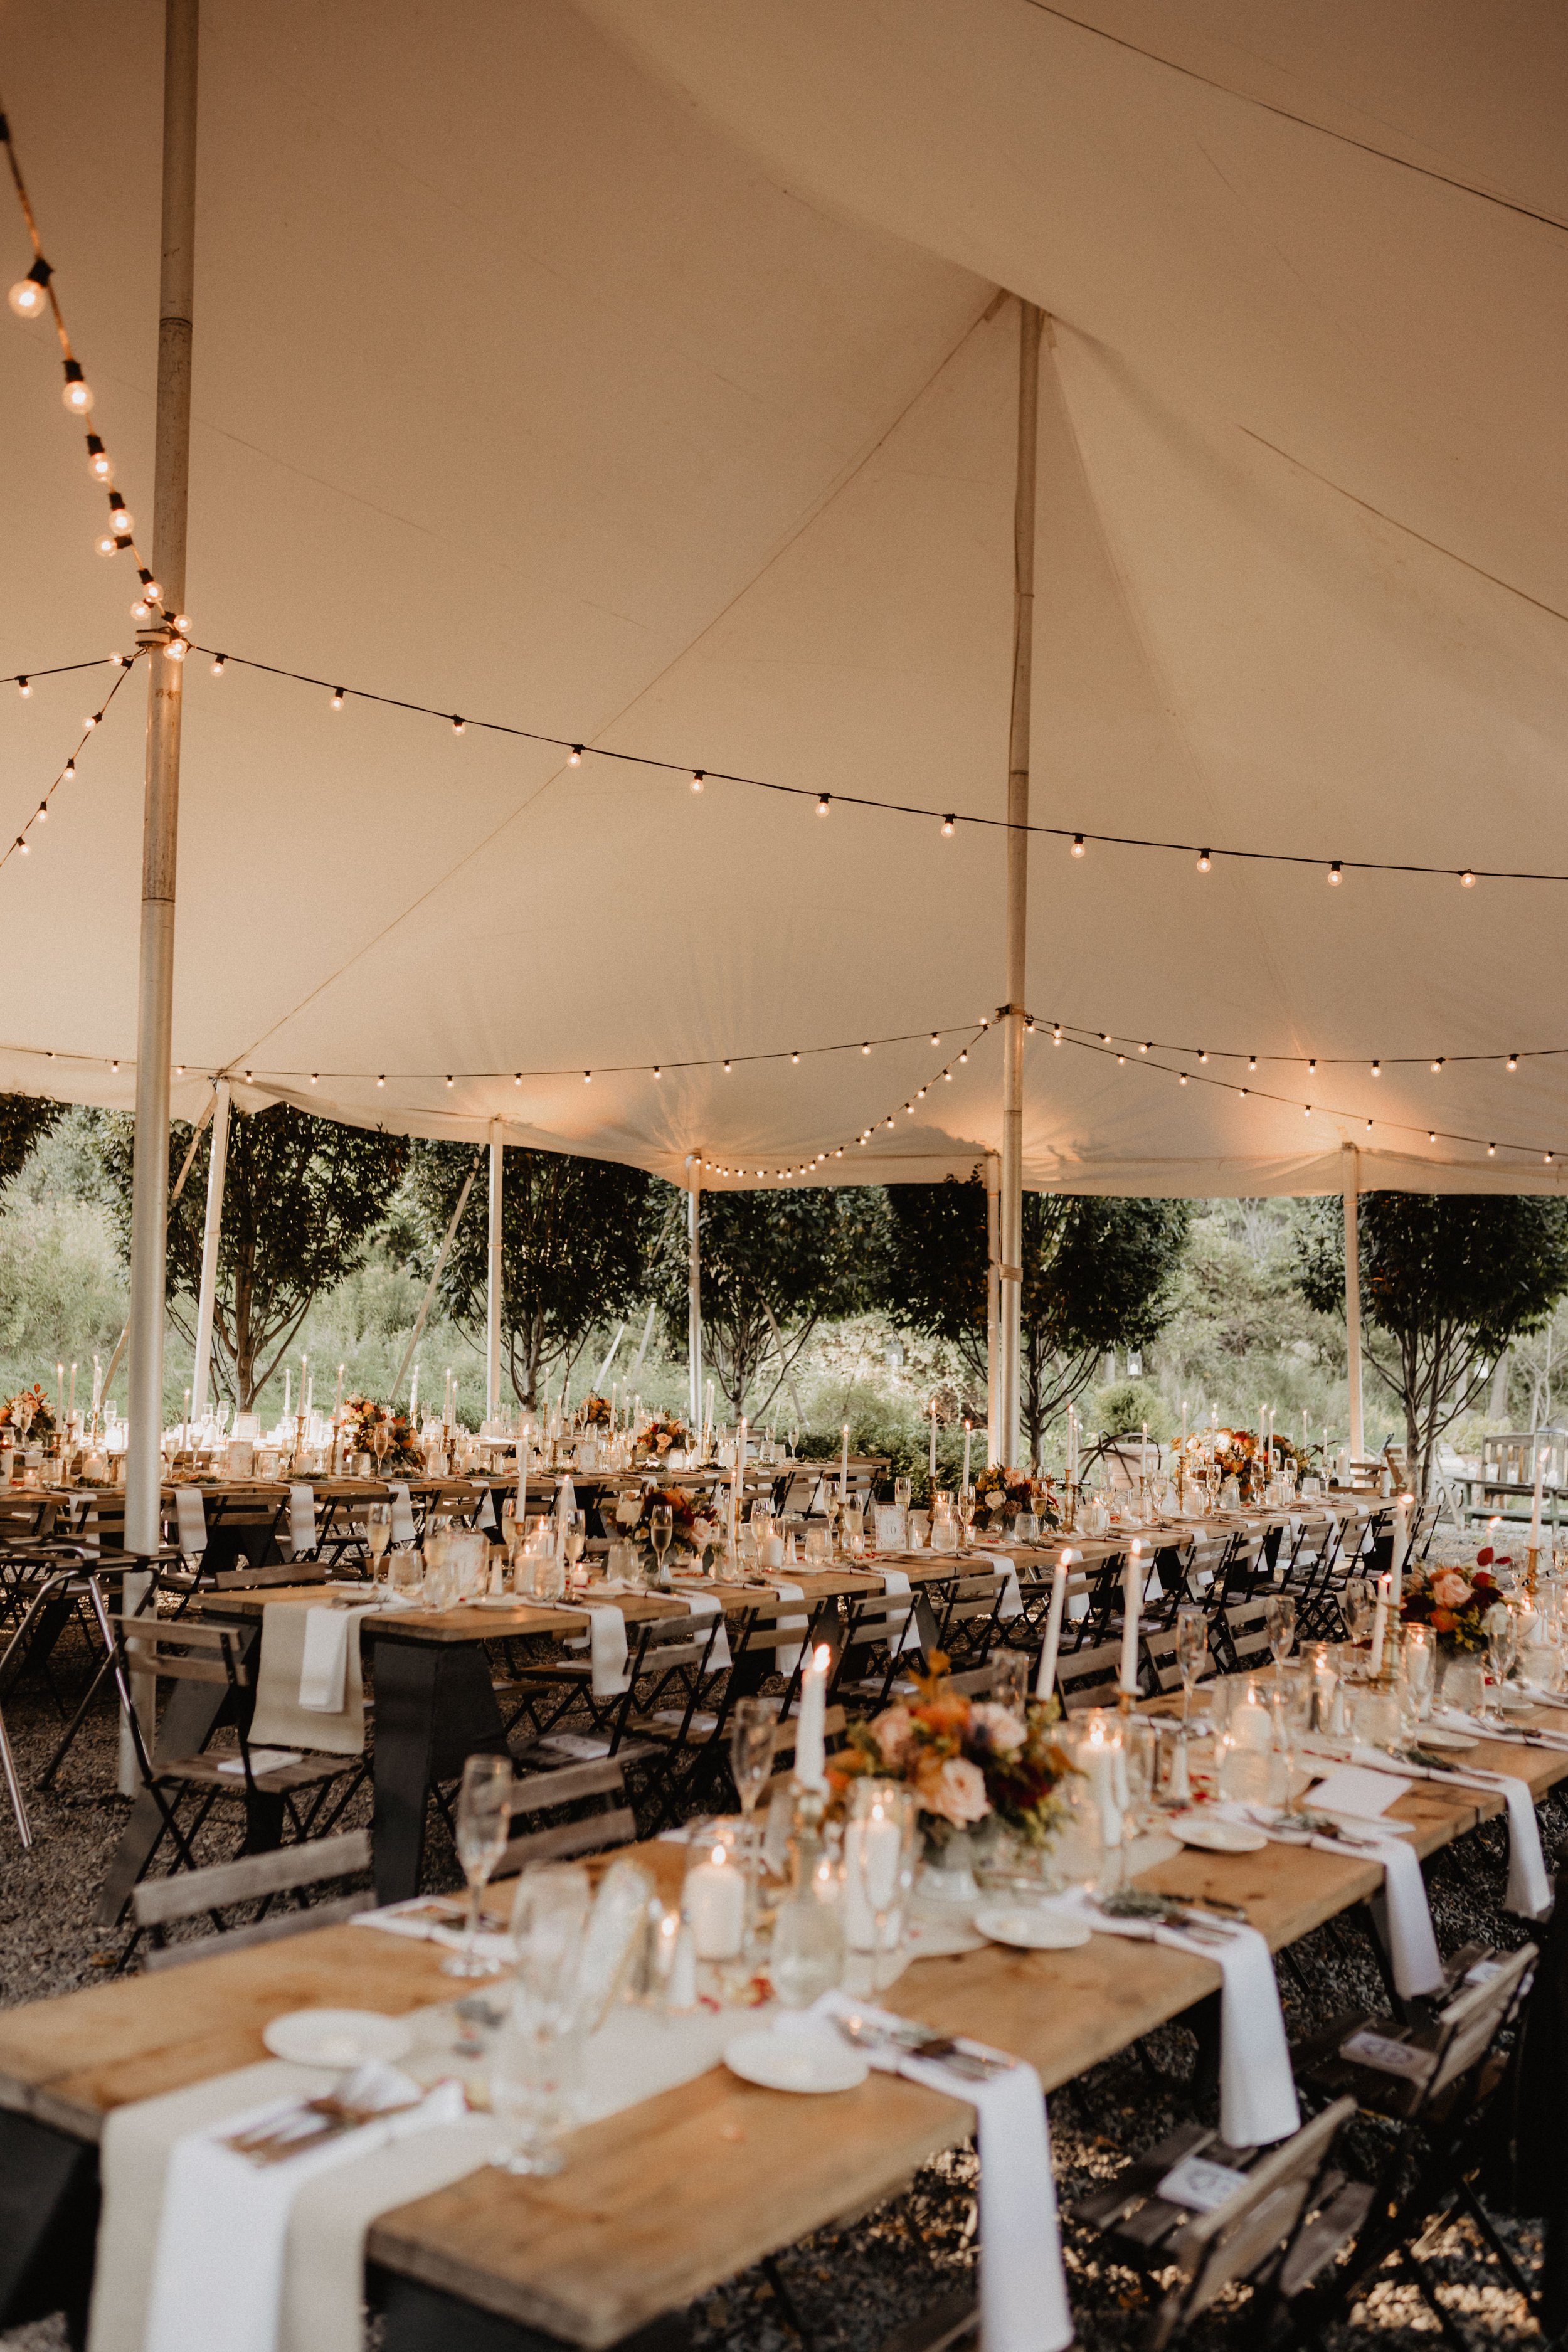
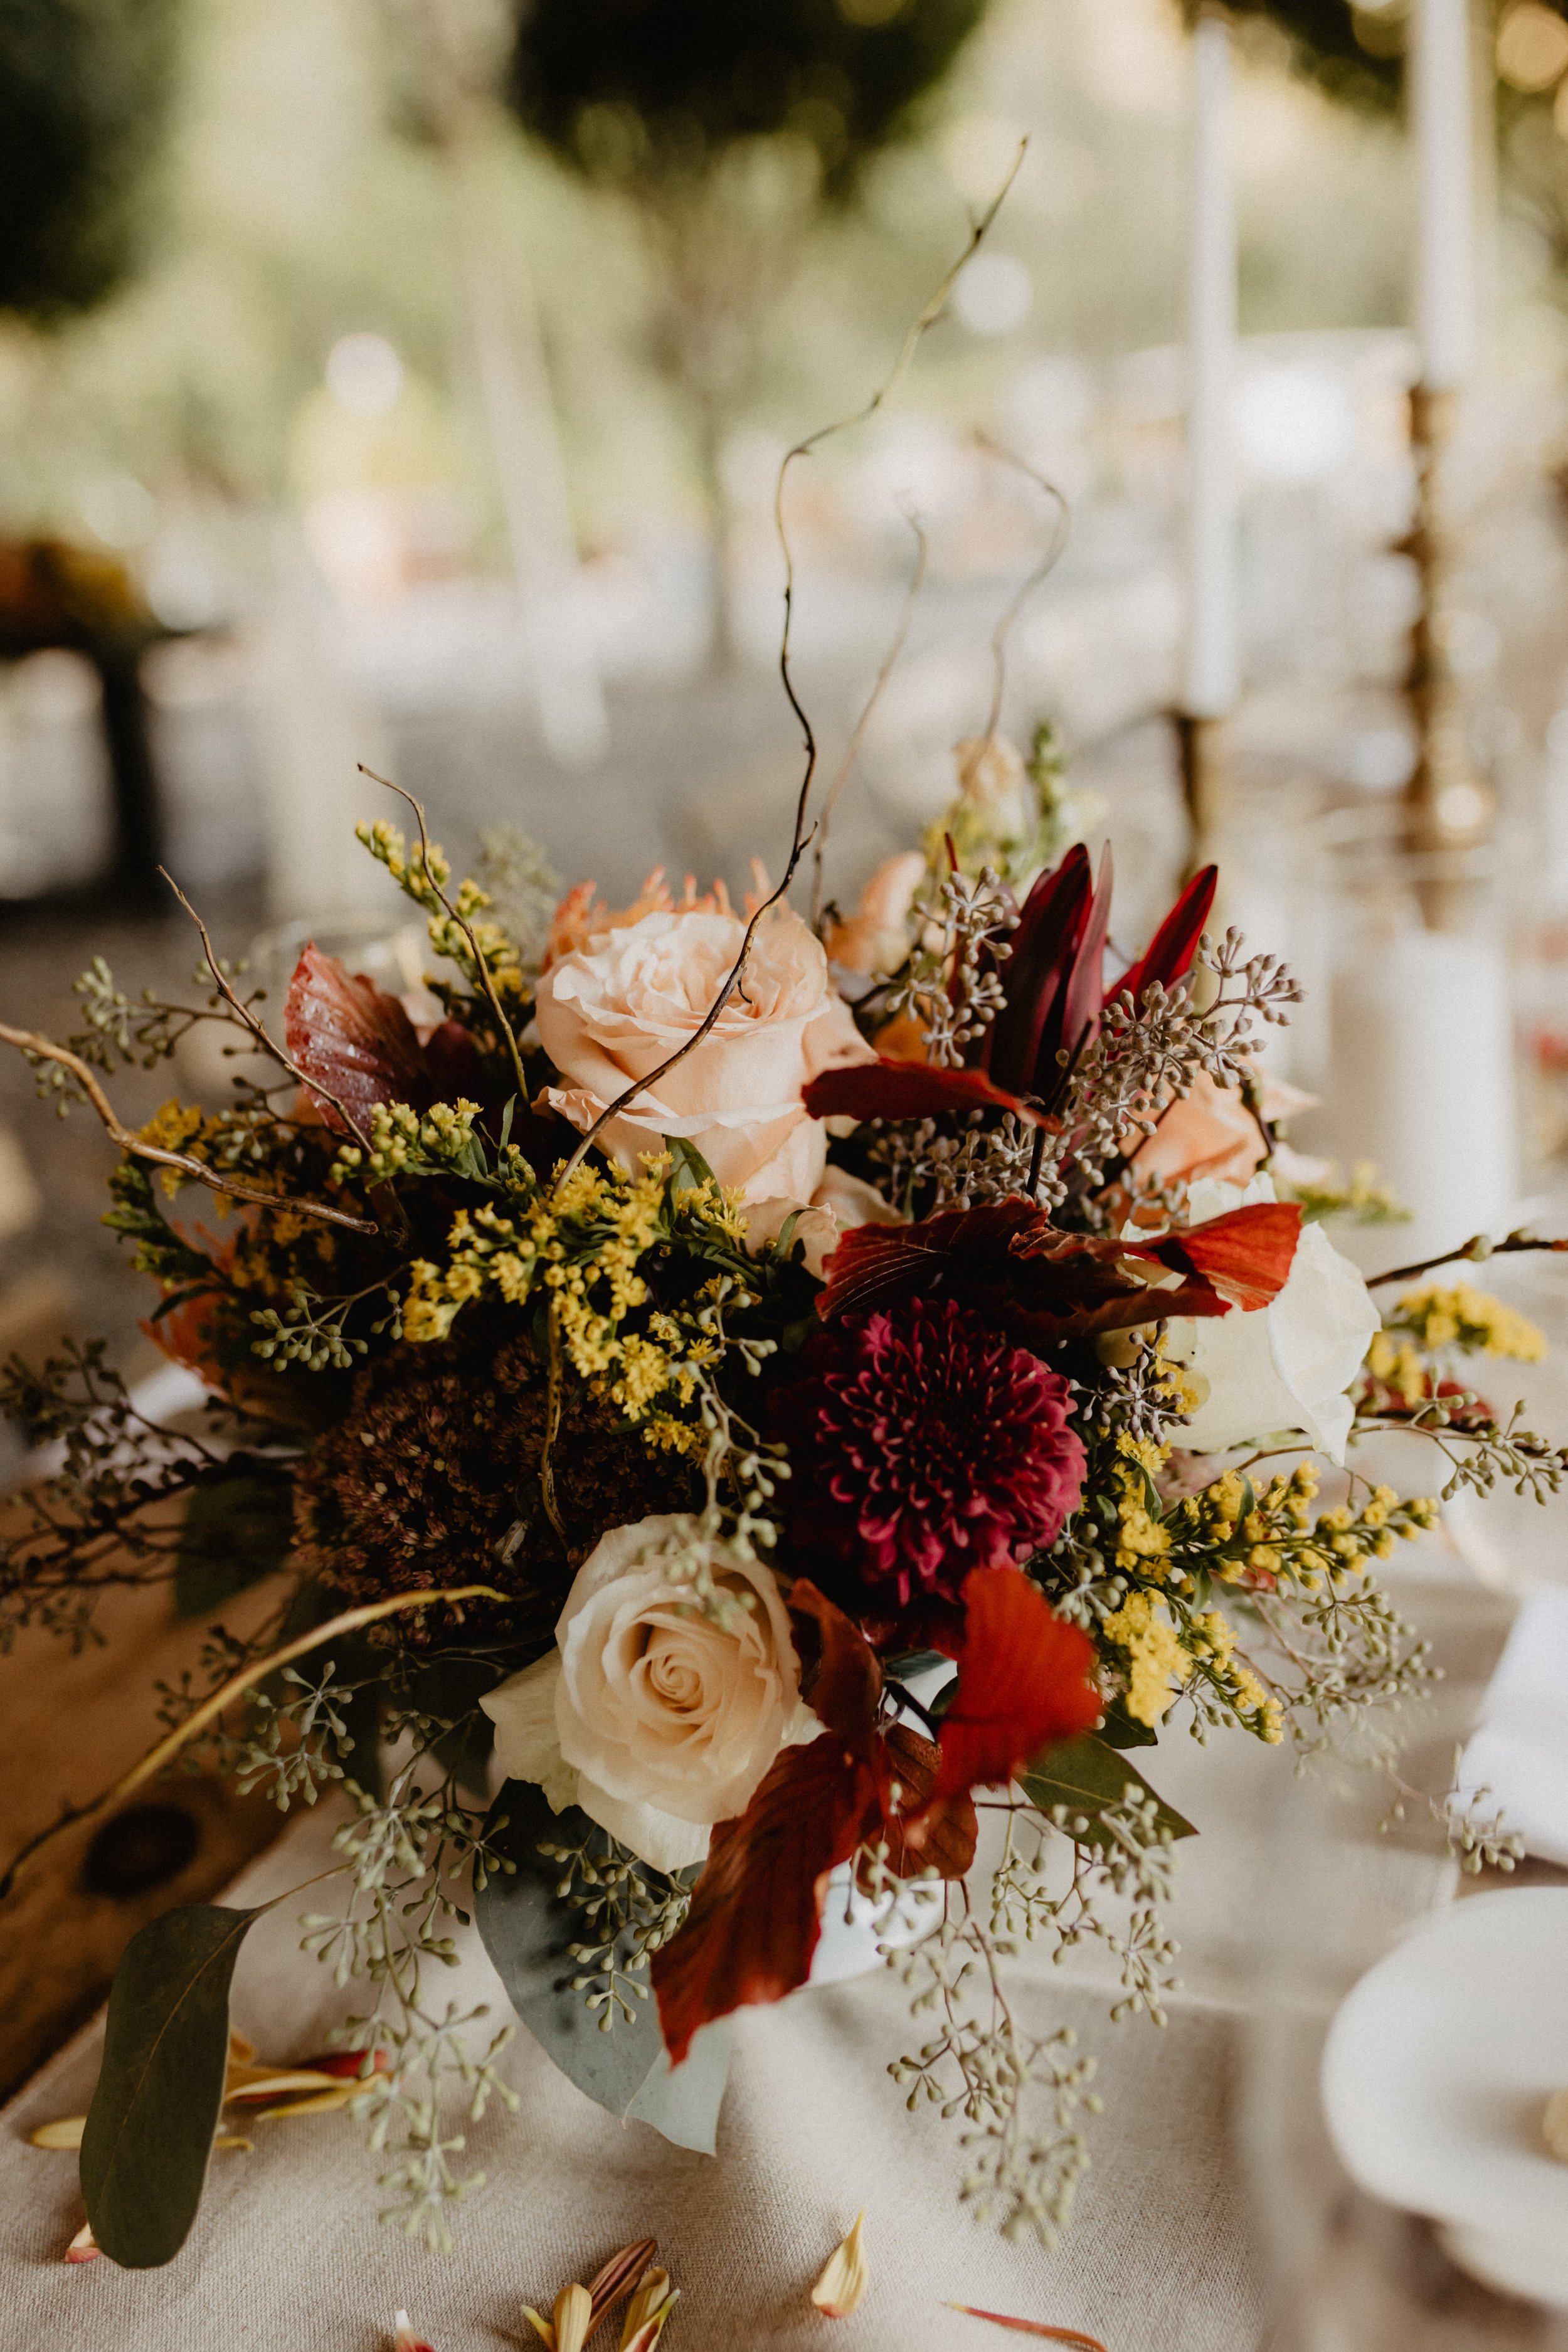
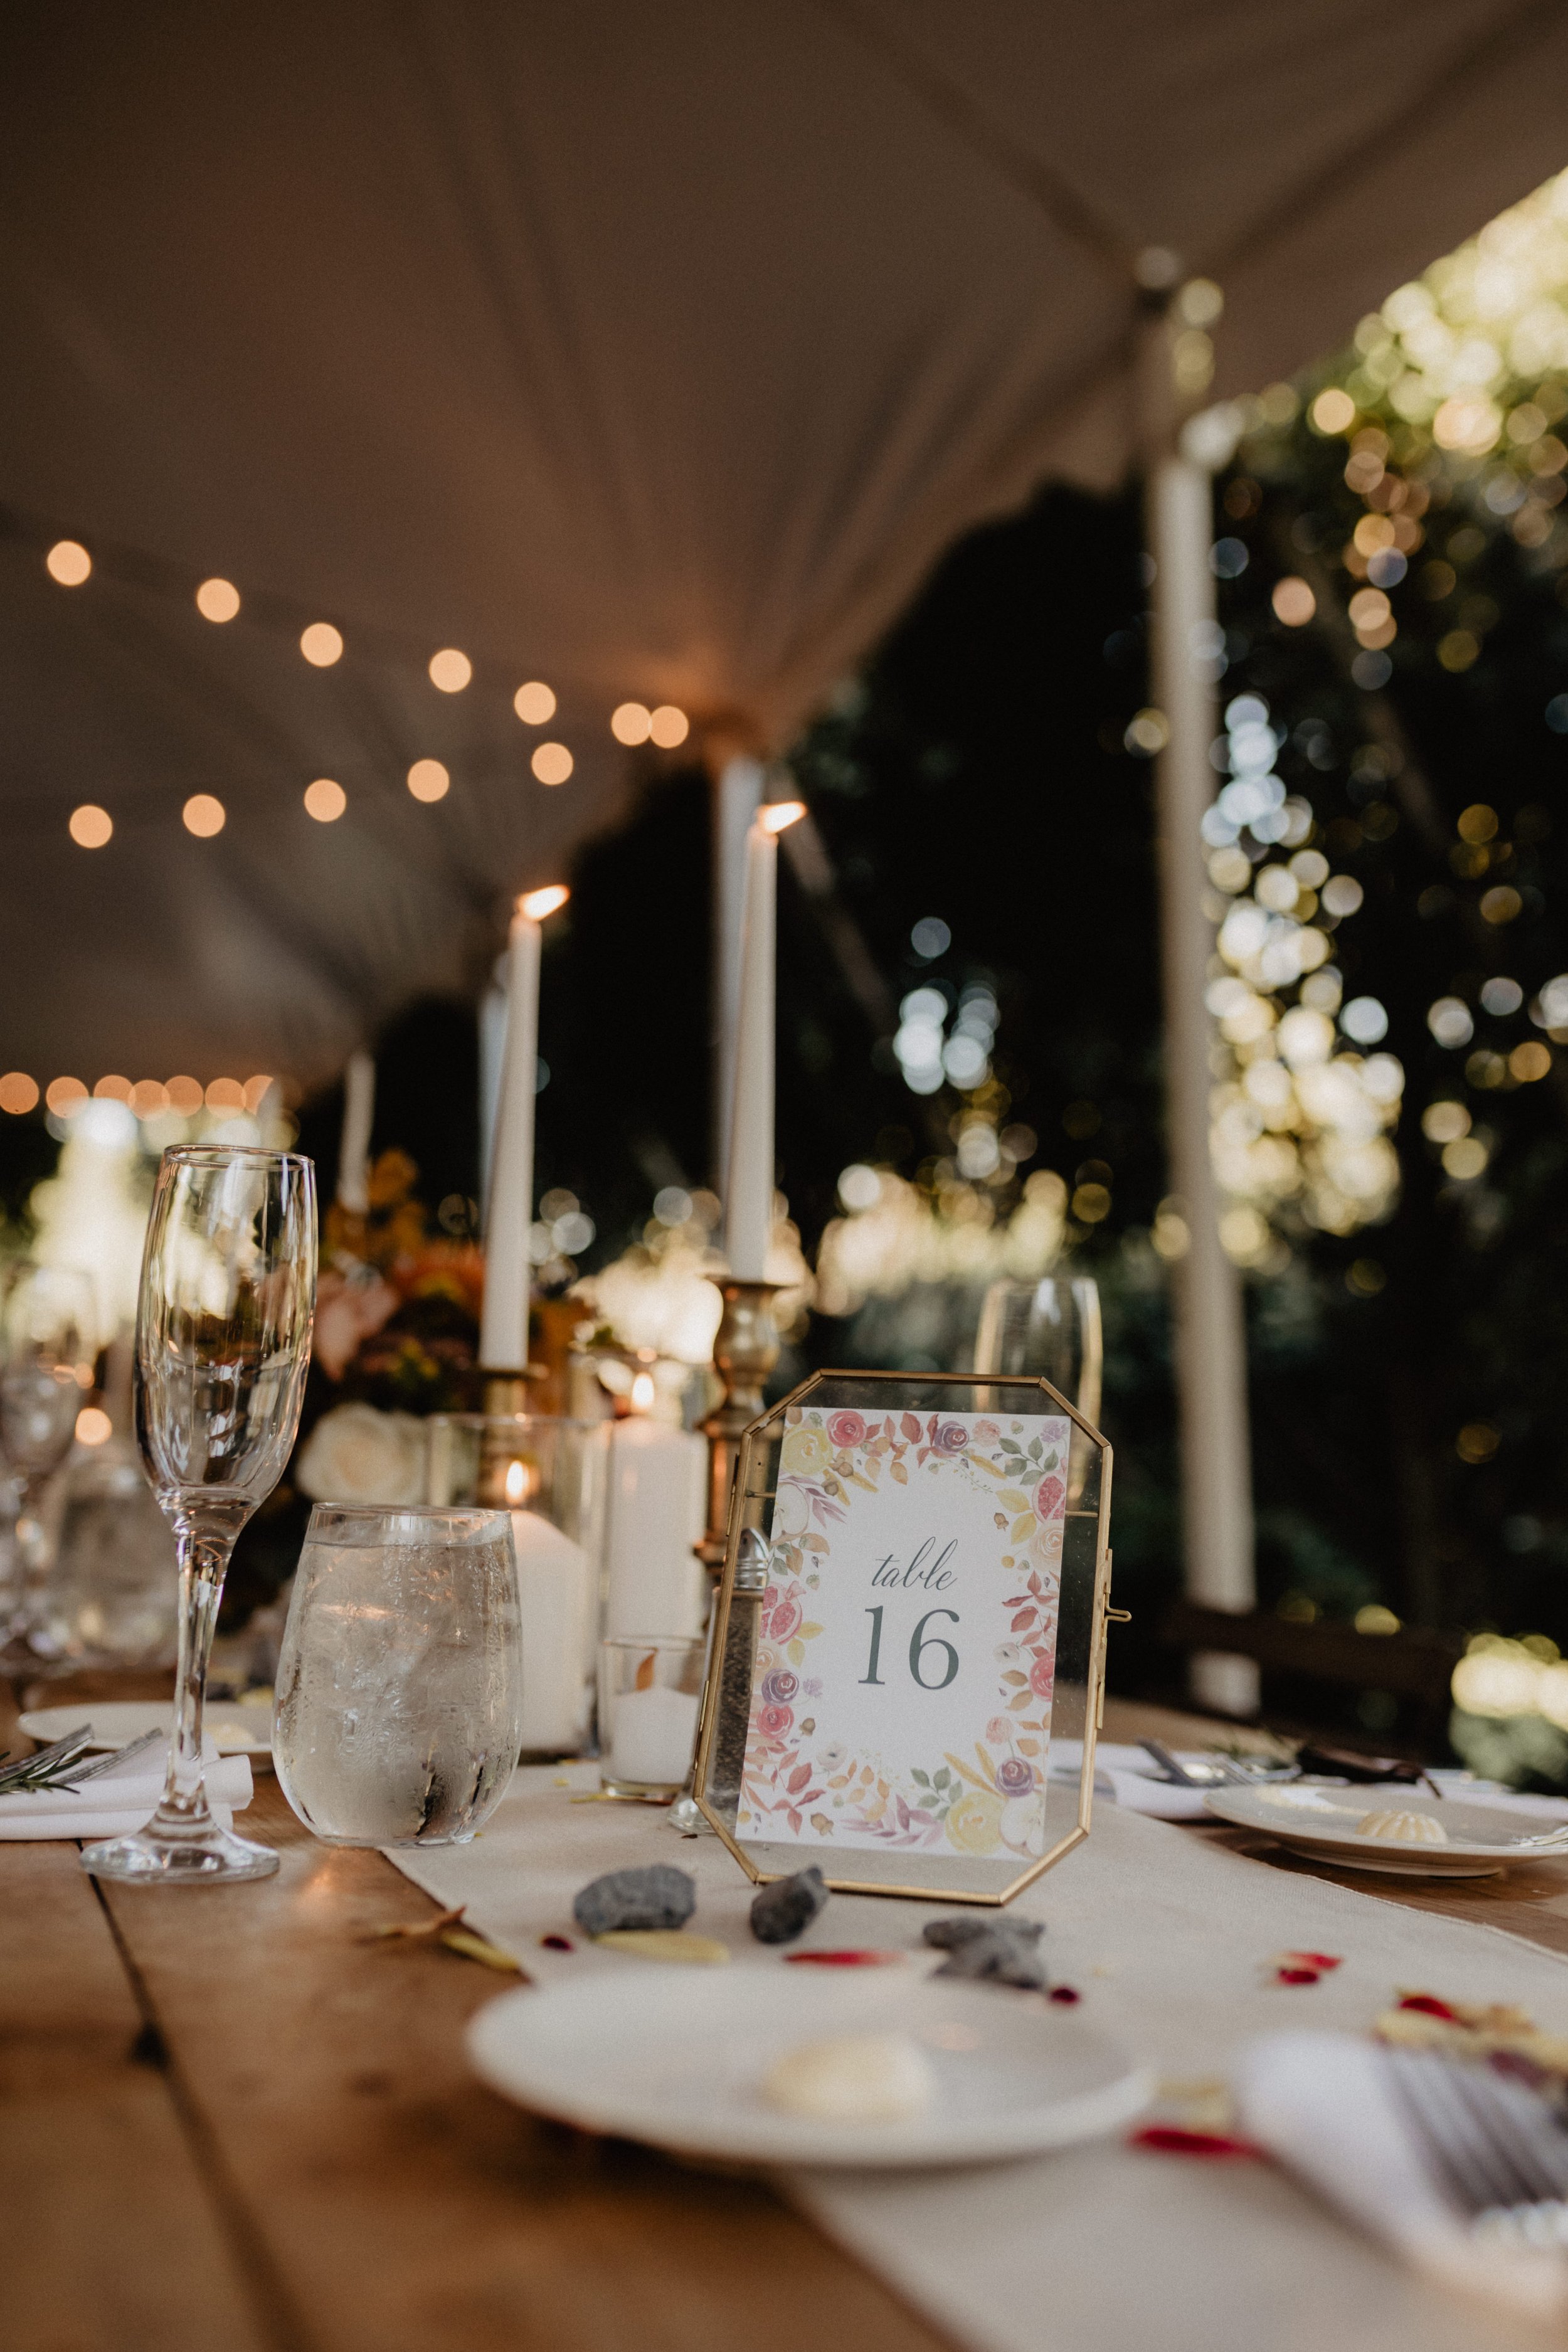
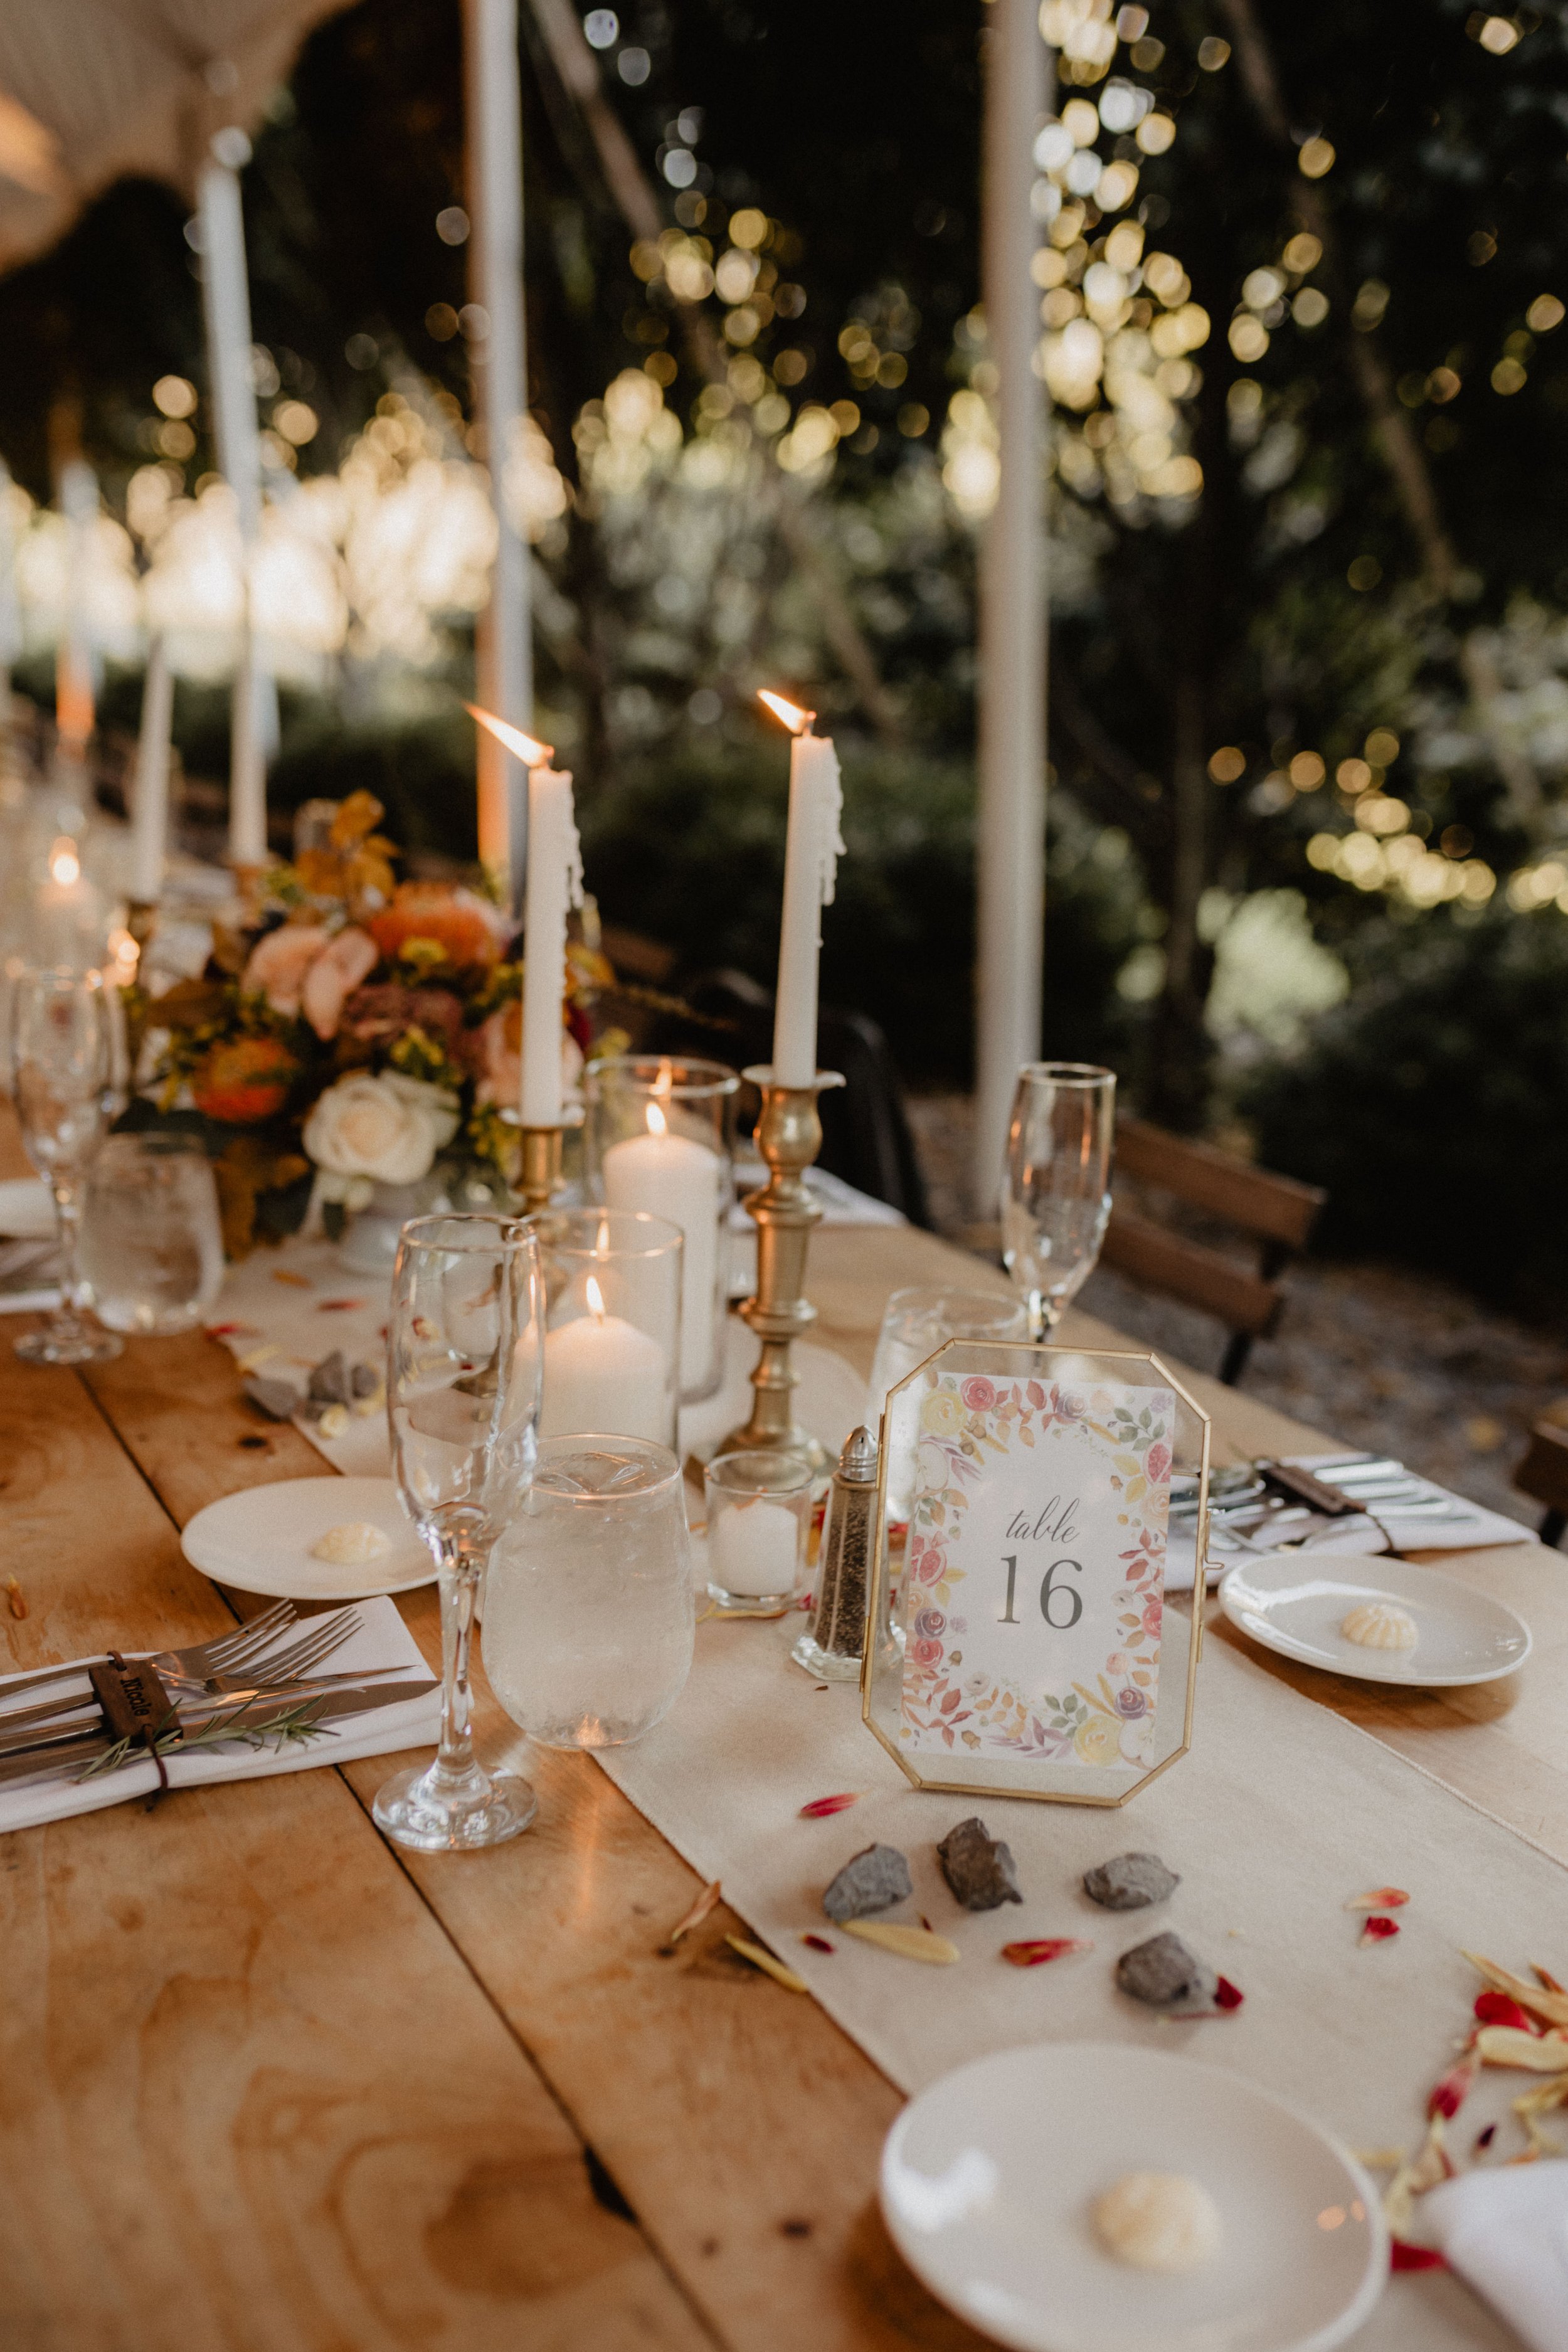
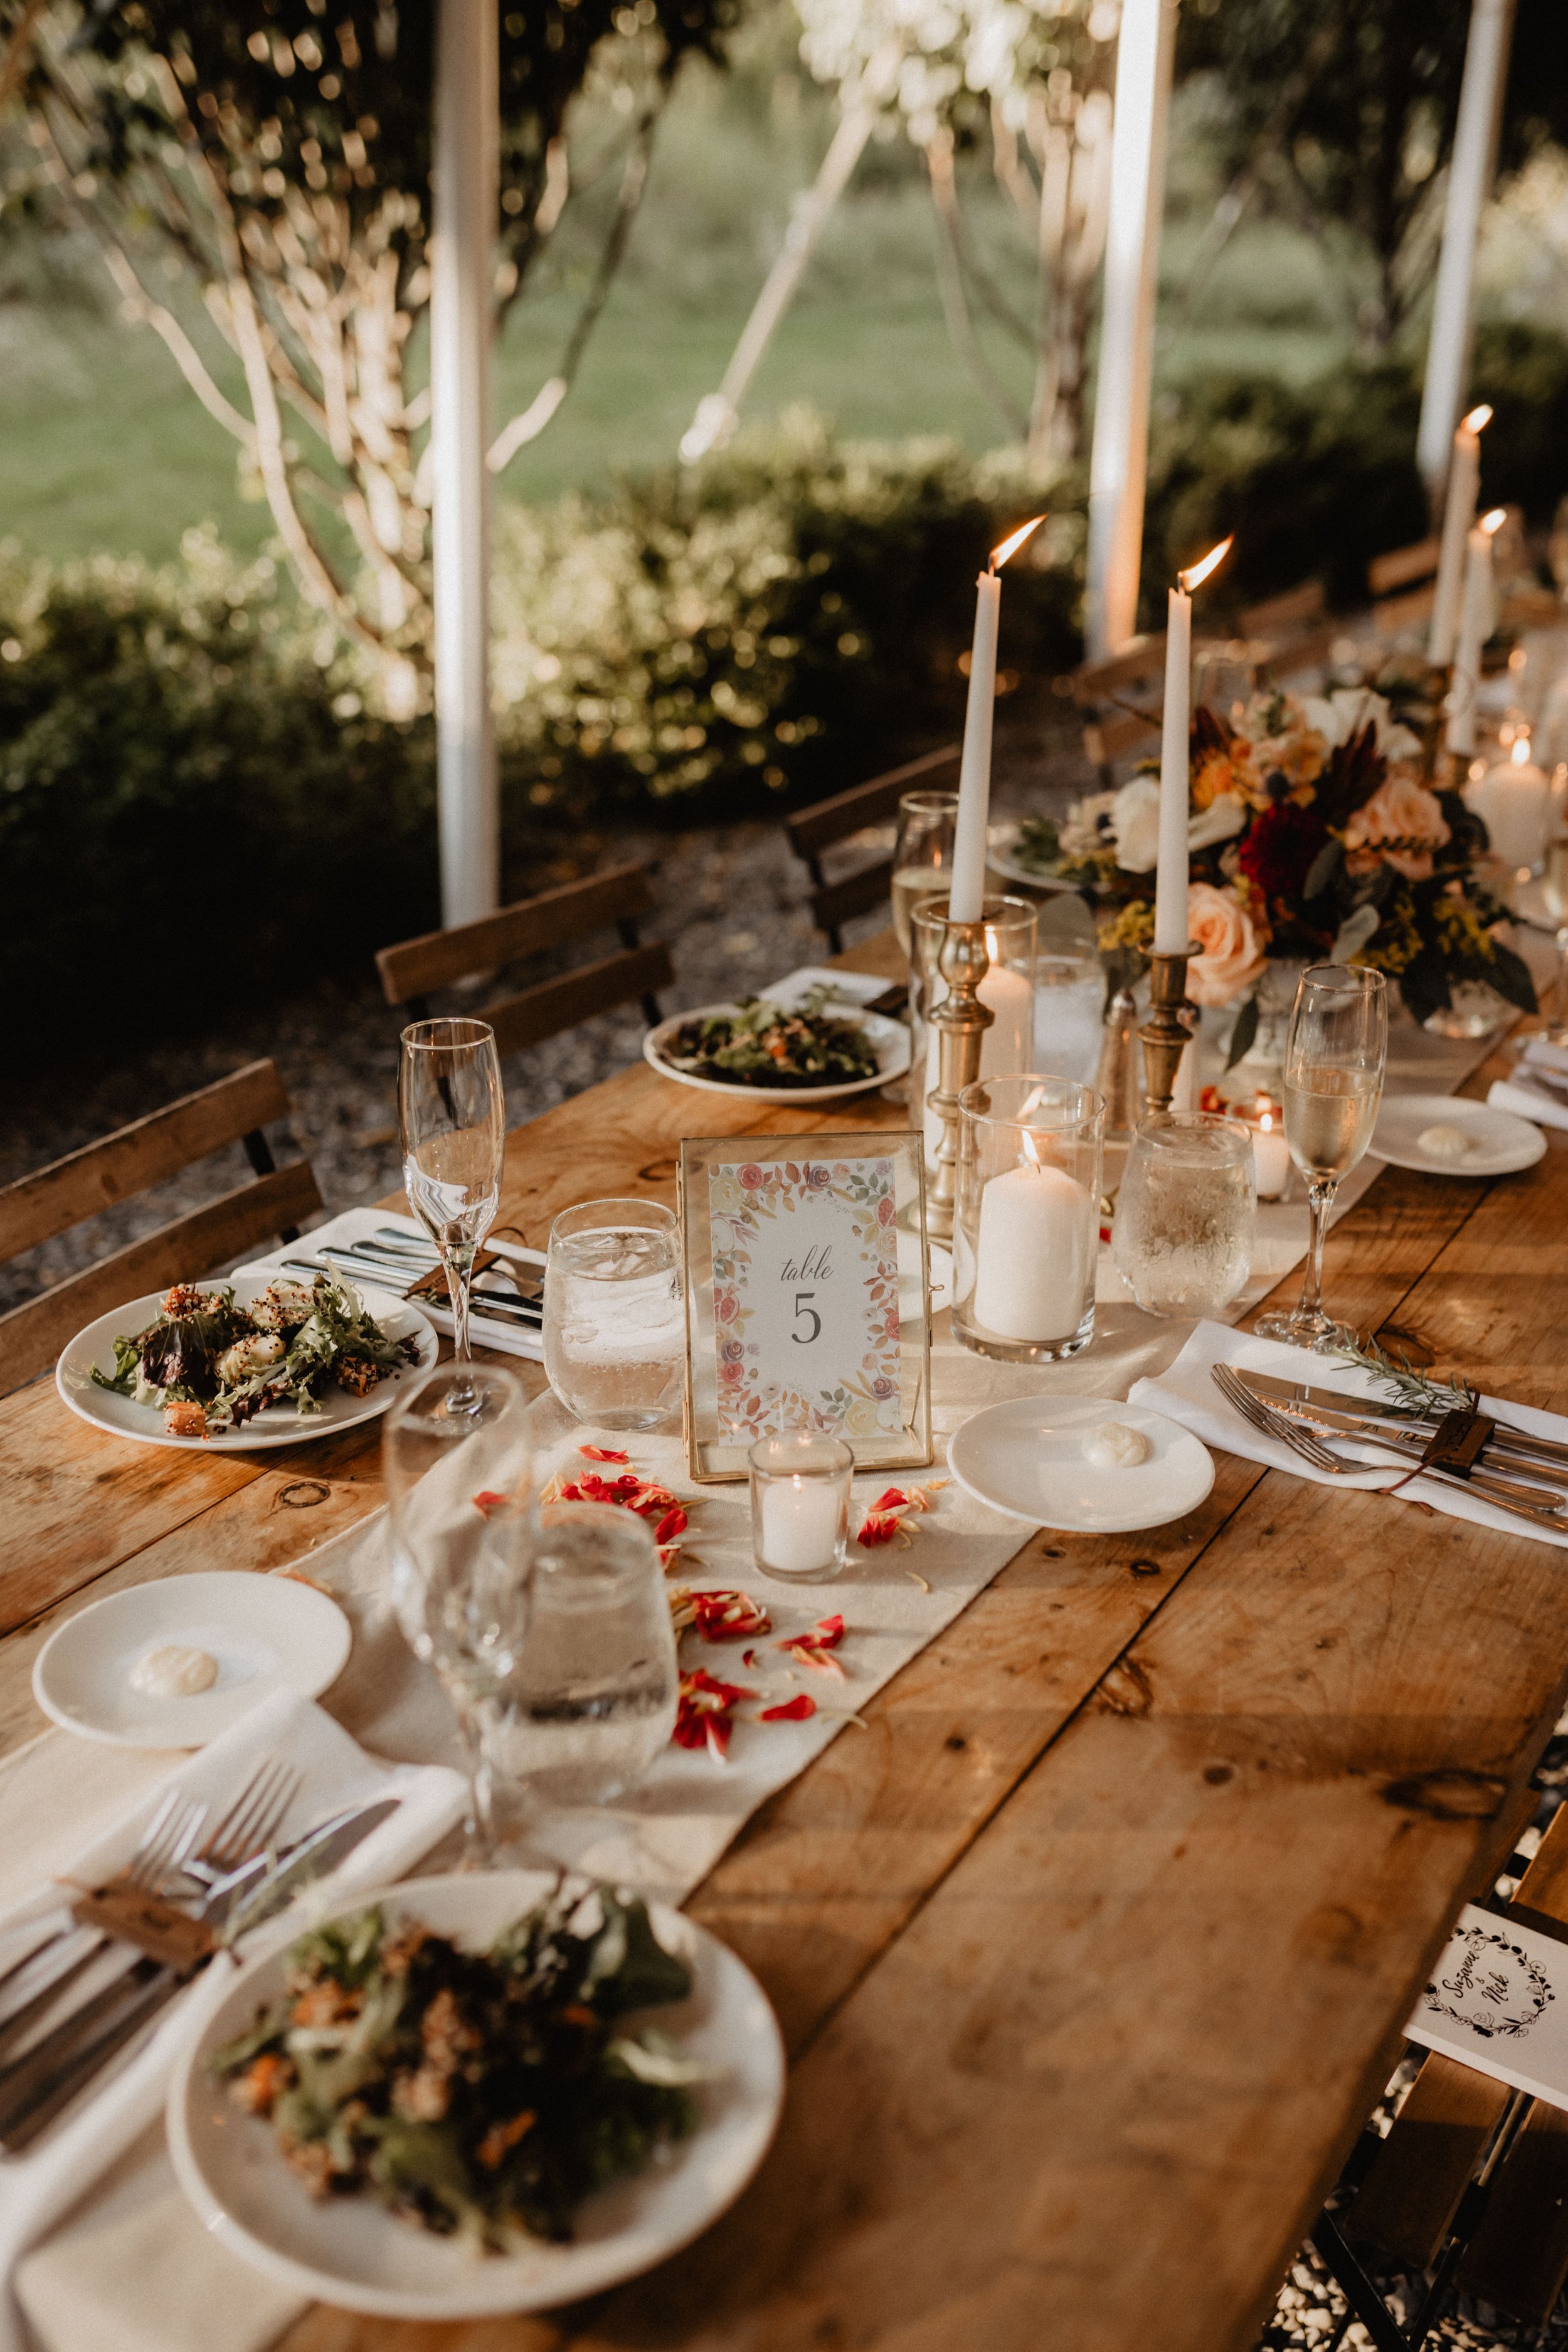
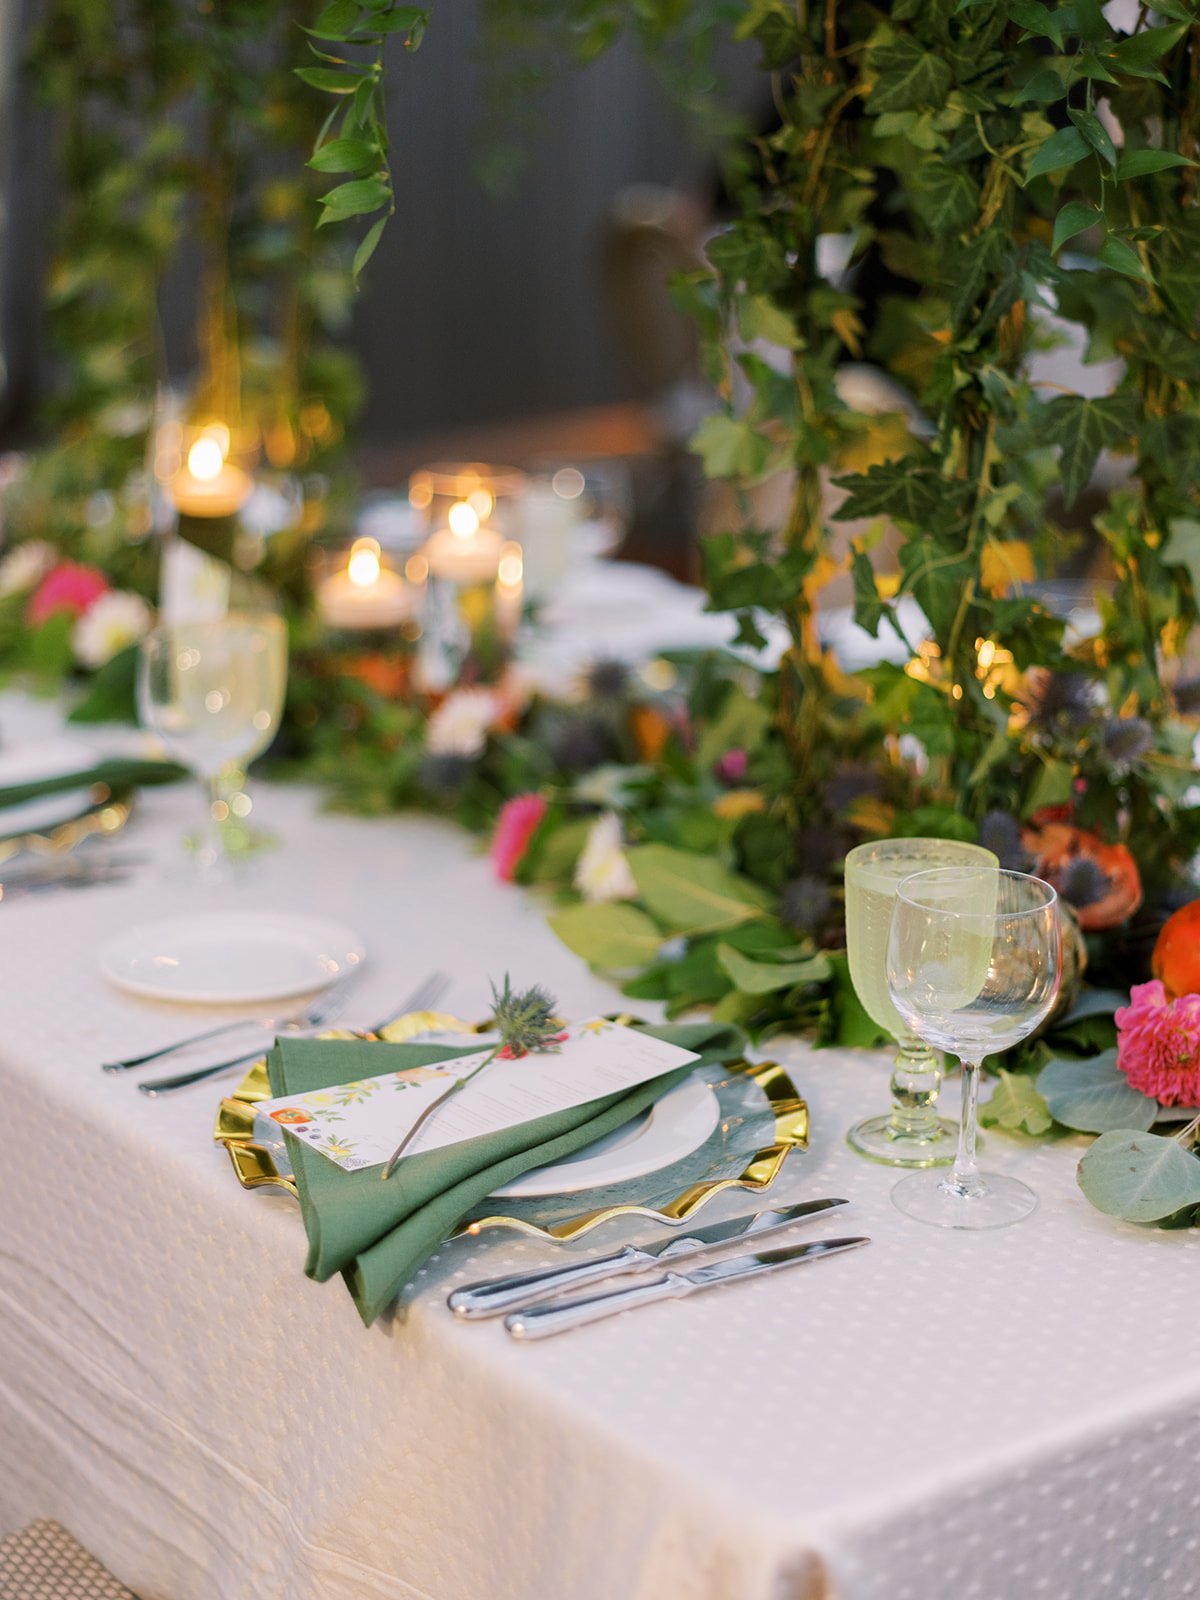
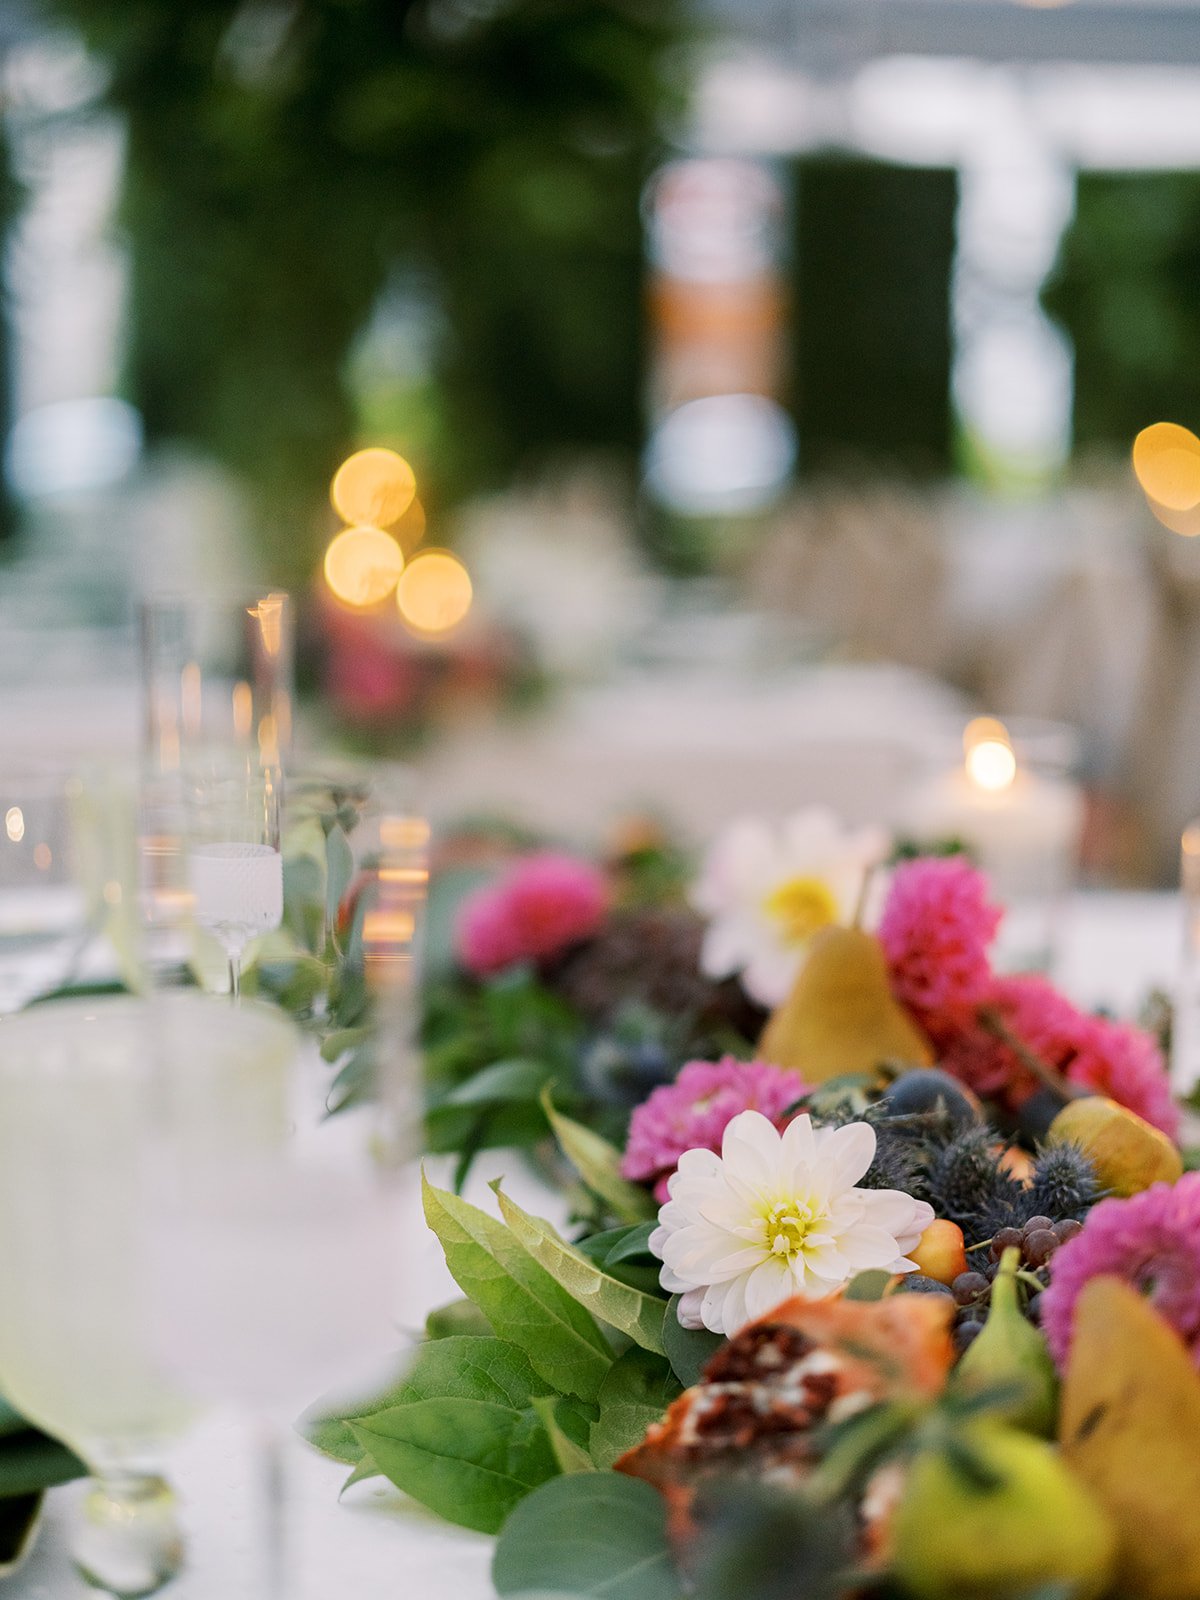
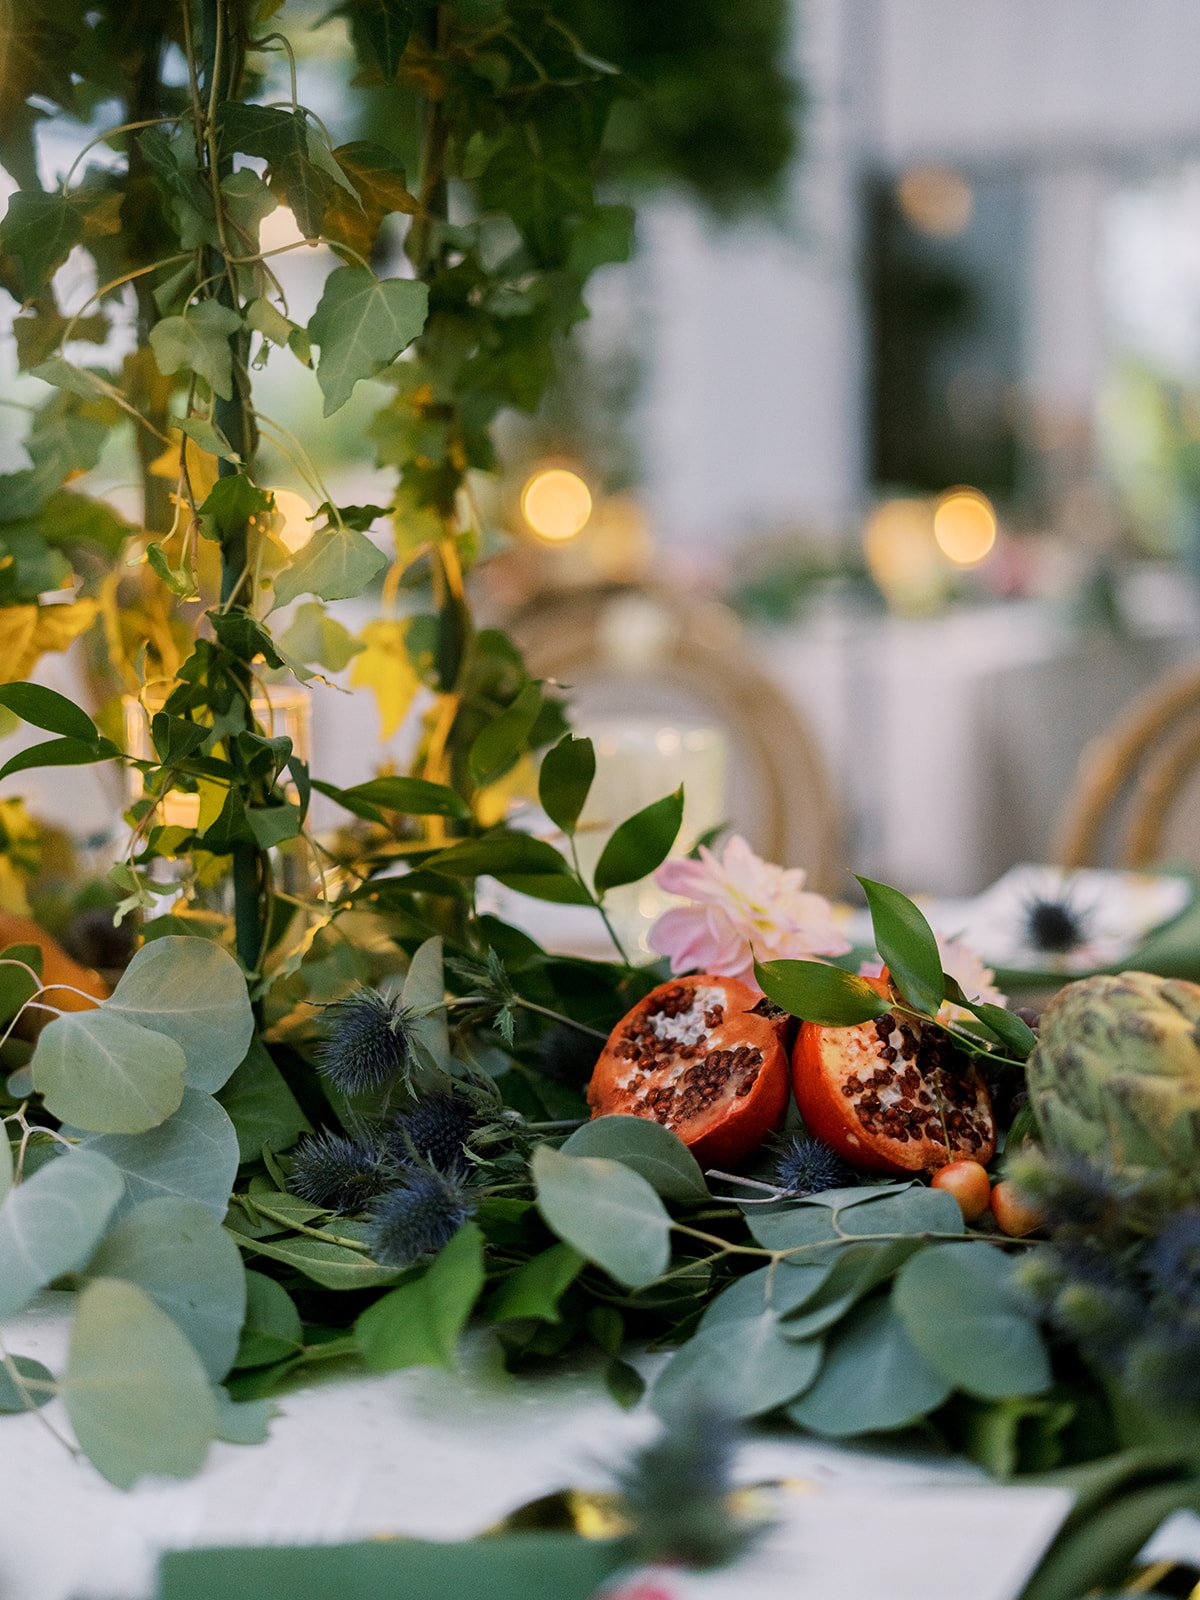
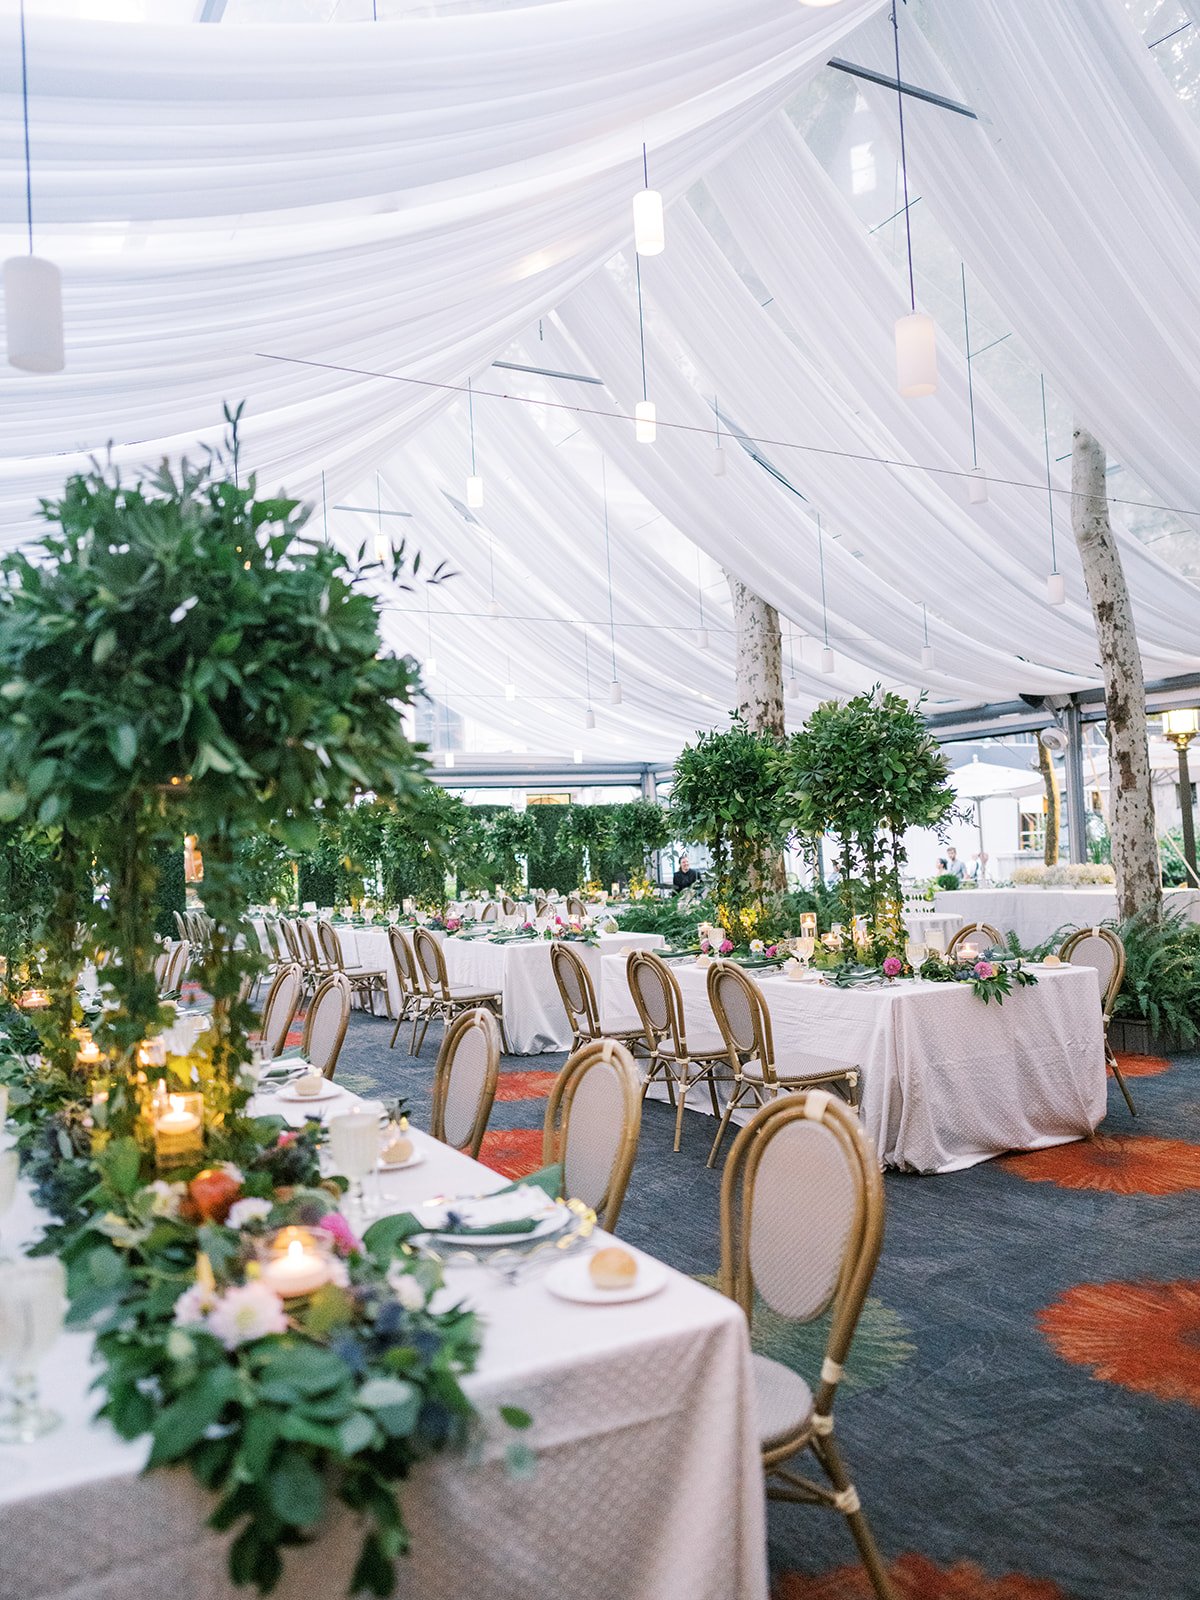
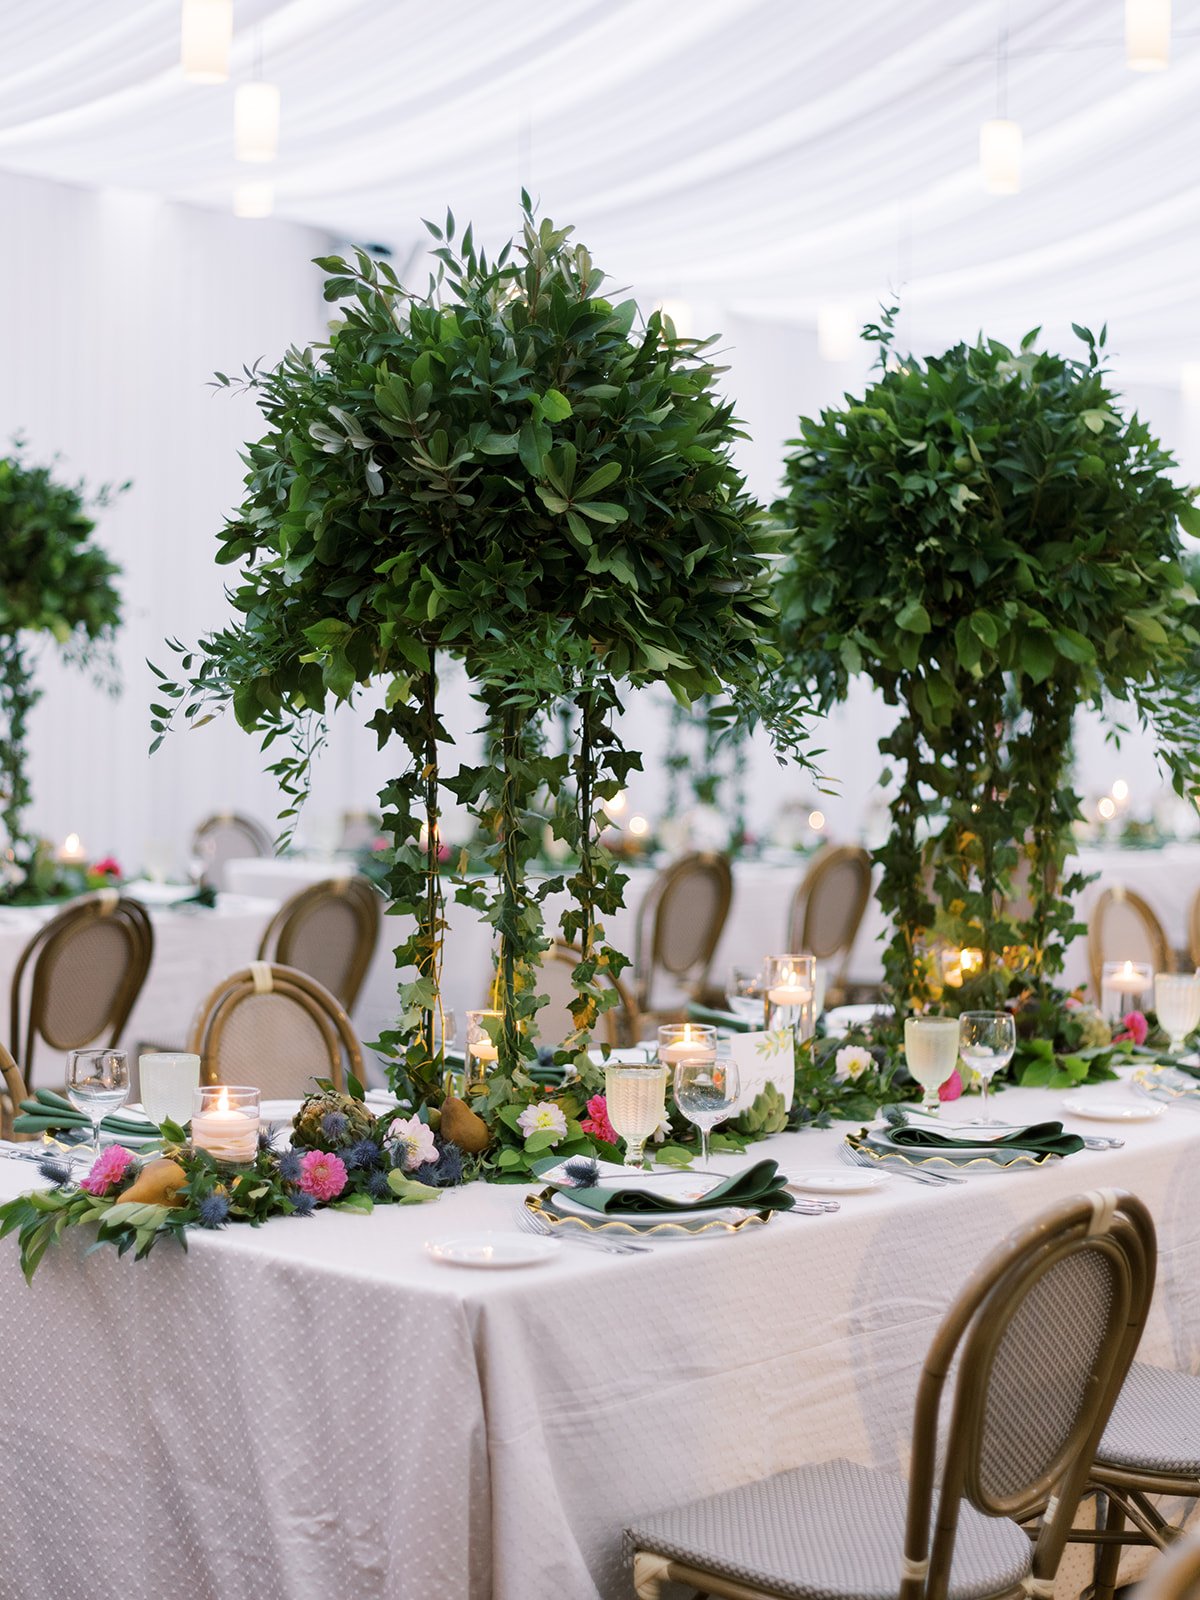
It’s the day of your wedding and you walk into the reception room. The dinner tables are lined with the most luscious flower arrangements and twinkling candlelight. Your florist nailed it. You float over to your sweetheart table with your newly beloved and look out at all your favorite people finding their seats, ready to eat and dance the night away in celebration of your marriage…when suddenly…oh no

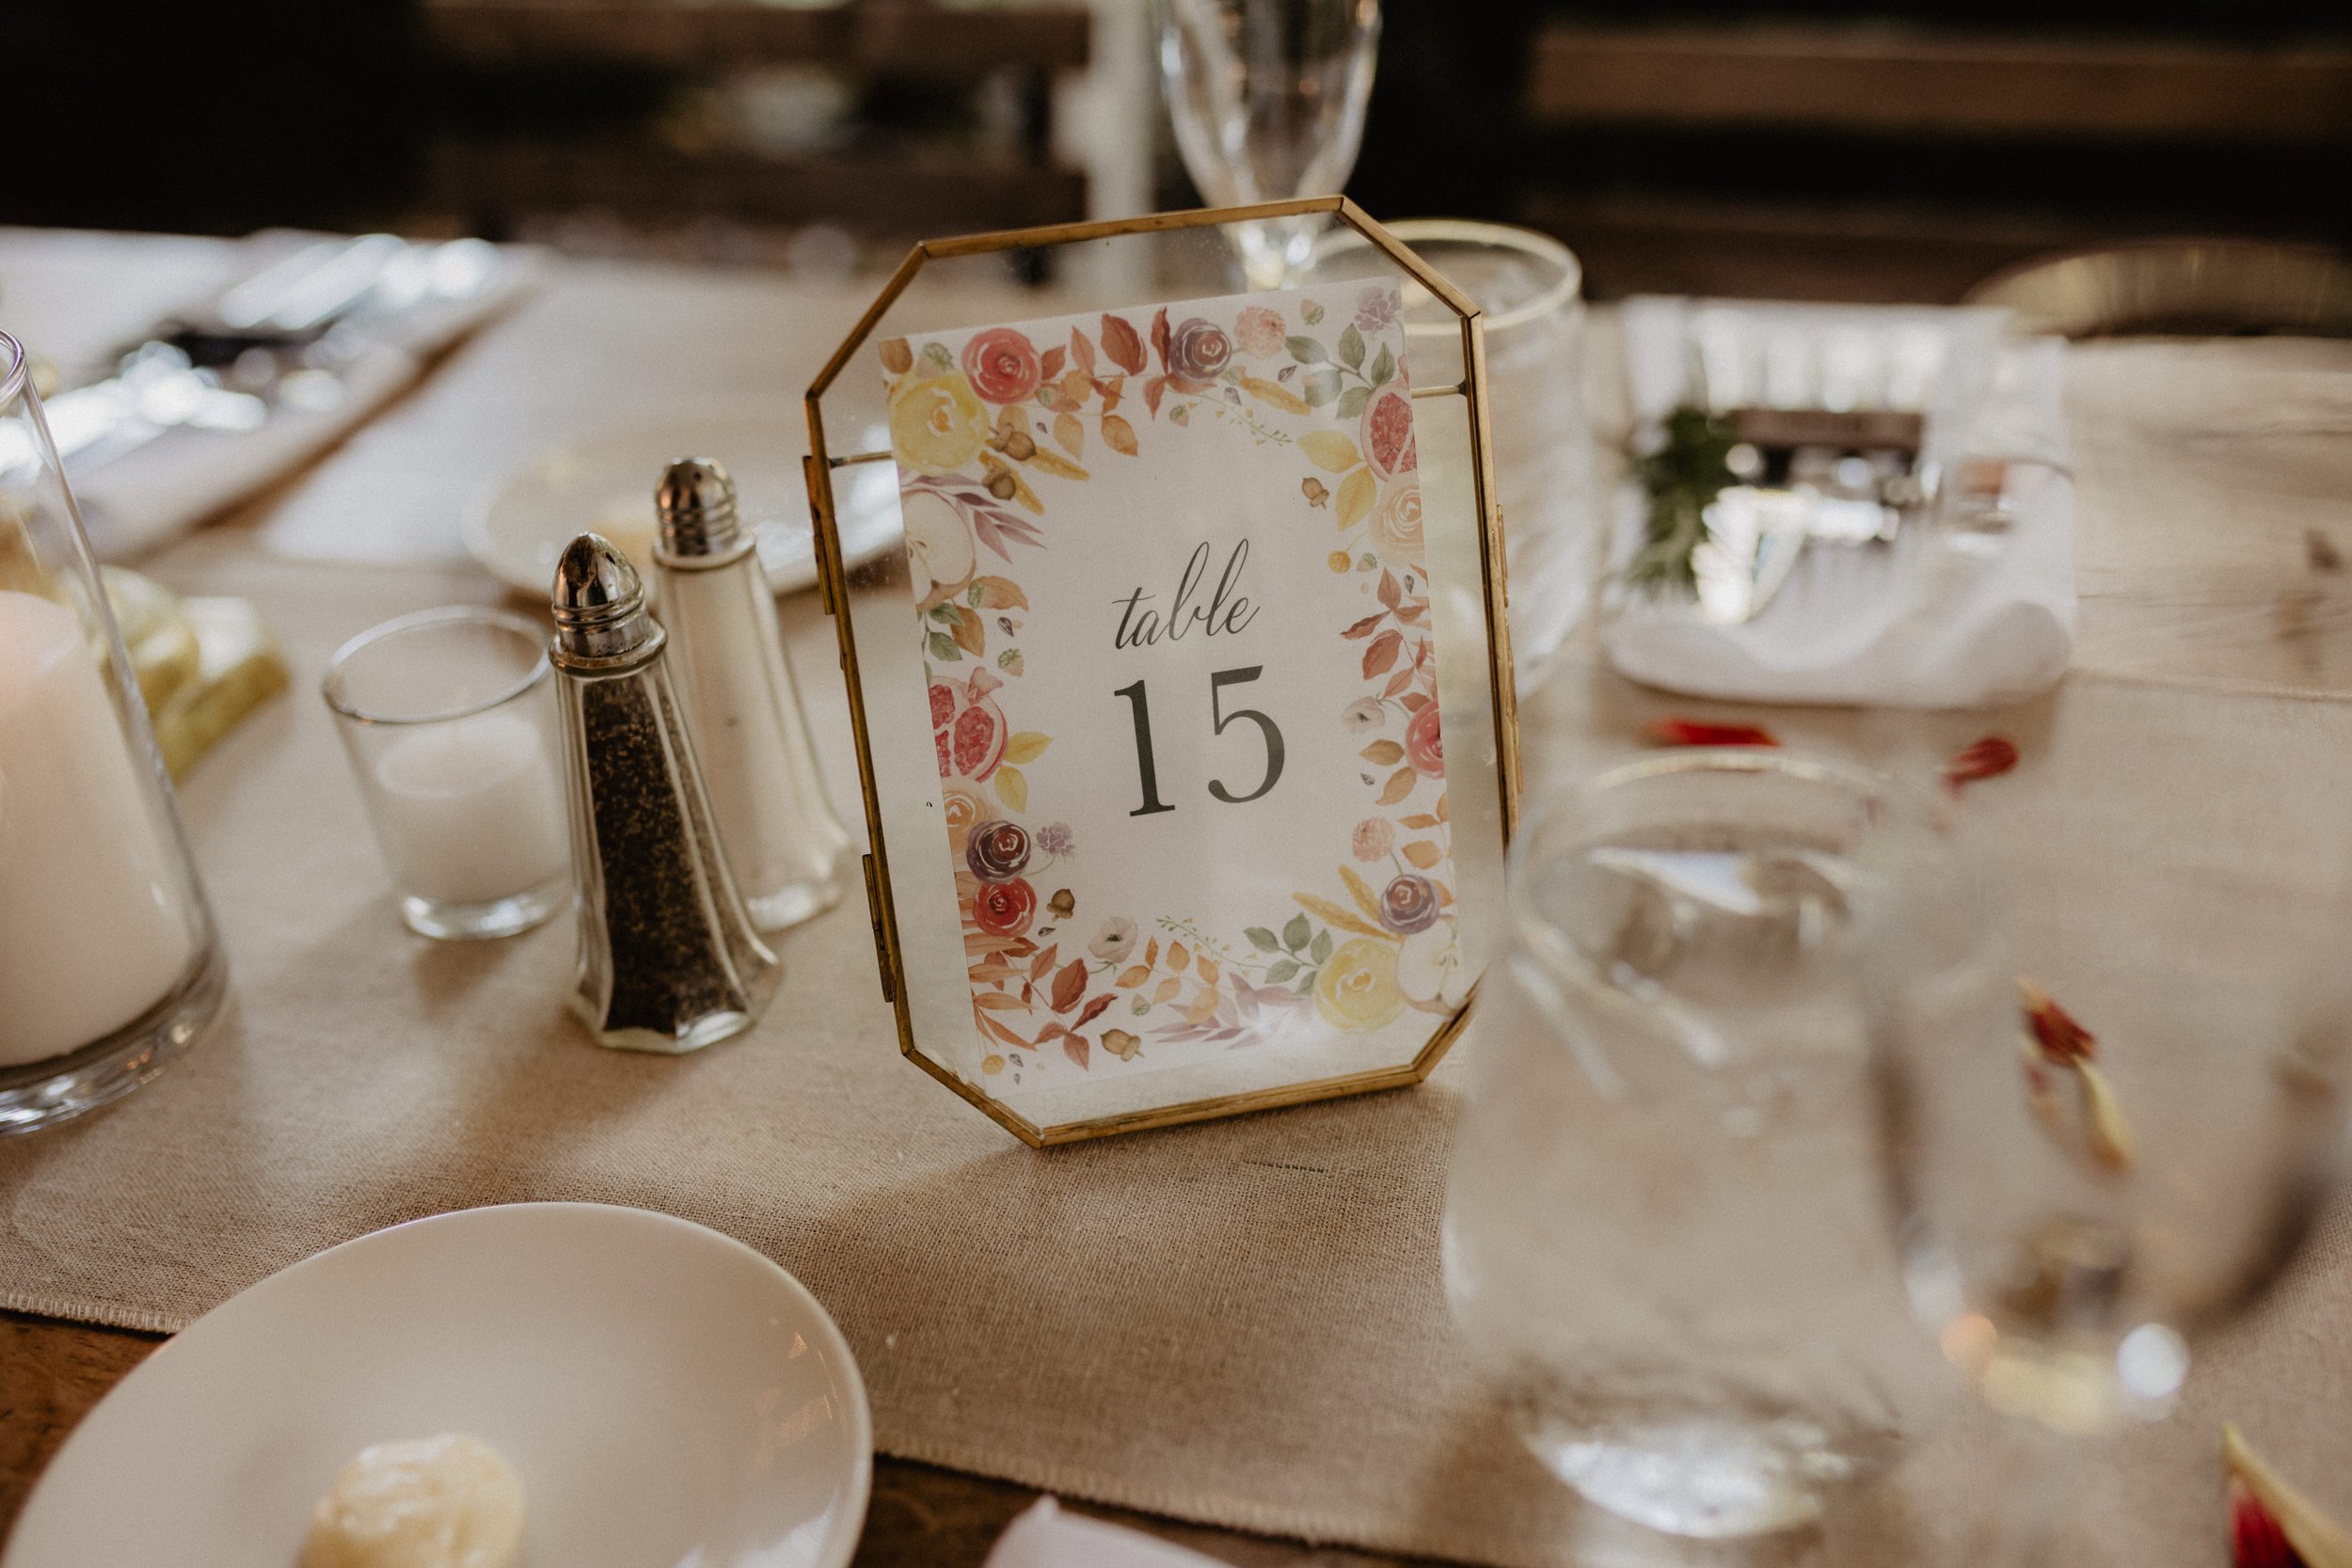
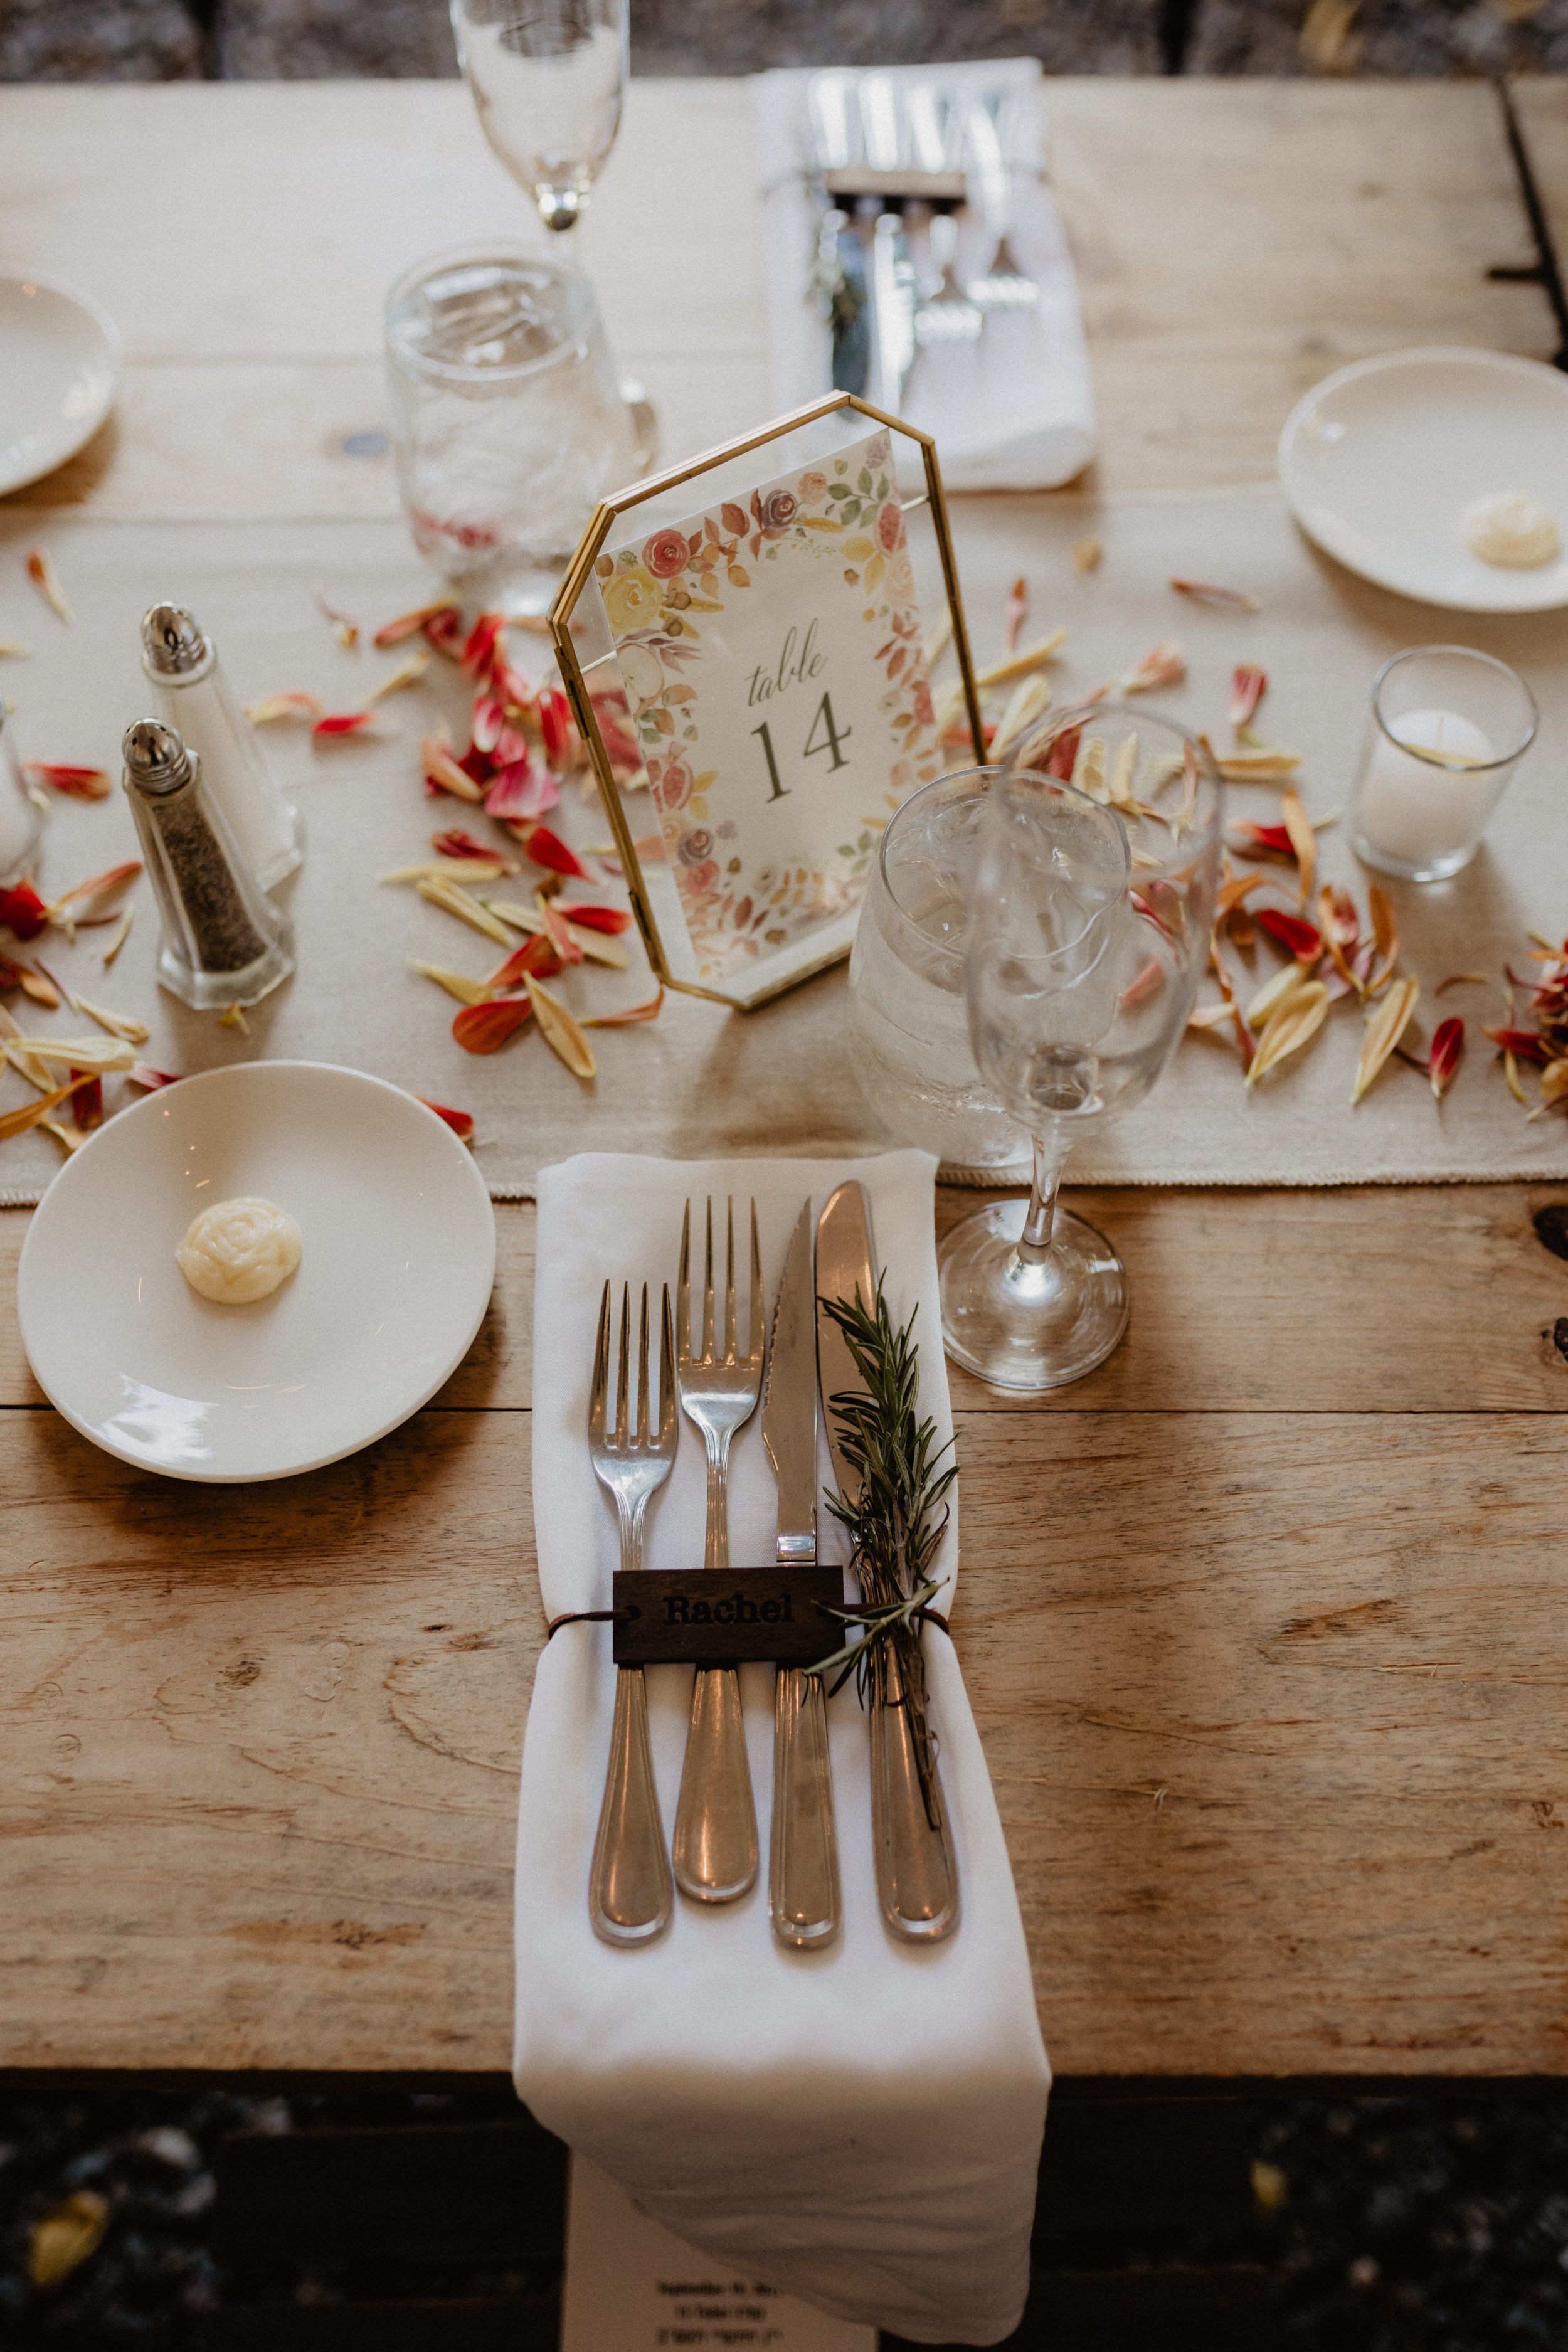
It’s the day of your wedding and you walk into the reception room. The dinner tables are lined with the most luscious flower arrangements and twinkling candlelight. Your florist nailed it. You float over to your sweetheart table with your newly beloved and look out at all your favorite people finding their seats, ready to eat and dance the night away in celebration of your marriage…when suddenly…oh no…the horror…there are no TABLE NUMBER CARDS ON THE TABLES! And wait, oh no it can’t be…THERE ARE NO MENU CARDS EITHER!! Your guests are in a panic. No one knows where to sit and no one knows what they should order for dinner. It’s a giant disaster and your wedding is RUINED!…
Okay this is a slightly exaggerated story. But the point has been made! There are very important stationery items you absolutely must think of for the big day to go smoothly. I am here to guide you so you have as little stress as possible when it comes to the paper goods for your wedding!
Step 1: Talk to your venue as soon as you book them! Questions you’ll want to ask them:
What stationery will be provided? ie menu cards, escort cards or seating chart sign, table number cards, bar signs?
Where does the venue recommend putting day of signage? ie welcome signs, seating chart sign, escort card display, guest book sign, bar signs?
Does the venue provide stands for any signage? ie easels, stands, frames?
When will the dinner menu items be finalized? This is so your stationery designer has ample time to design, print and ship the menu cards to the venue or directly to you for the big day!
Step 2: Choose a reply by date stated on your rsvp cards that allows enough time to receive them and then plan your tables! My advice, plan your tables in advance to the best of your ability and then make adjustments as the replies come in!
Additional day of items to consider:
Vow books - there are so many beautiful and creative options for these! Look into customizing a set for yourselves to make them extra special!
Signature bar signs - Is the venue concocting special cocktails for you and your SO? Have a stationery designer illustrate a fun menu sign to put on the bar for your guests to easily see and enjoy! I recommend 2-3 signs if the bar is very long.
Programs - they are placed on each seat to name all the important people who are part of the ceremony; they can include a memoir for late loved ones; they can include special readings or ceremonial steps.
A full list of day of stationery items to consider!
Welcome sign
Seating chart sign or escort cards (for assigned tables, which is a must!)
Place cards (for assigned seats only)
Guest book sign
Hashtag sign
Bar signs
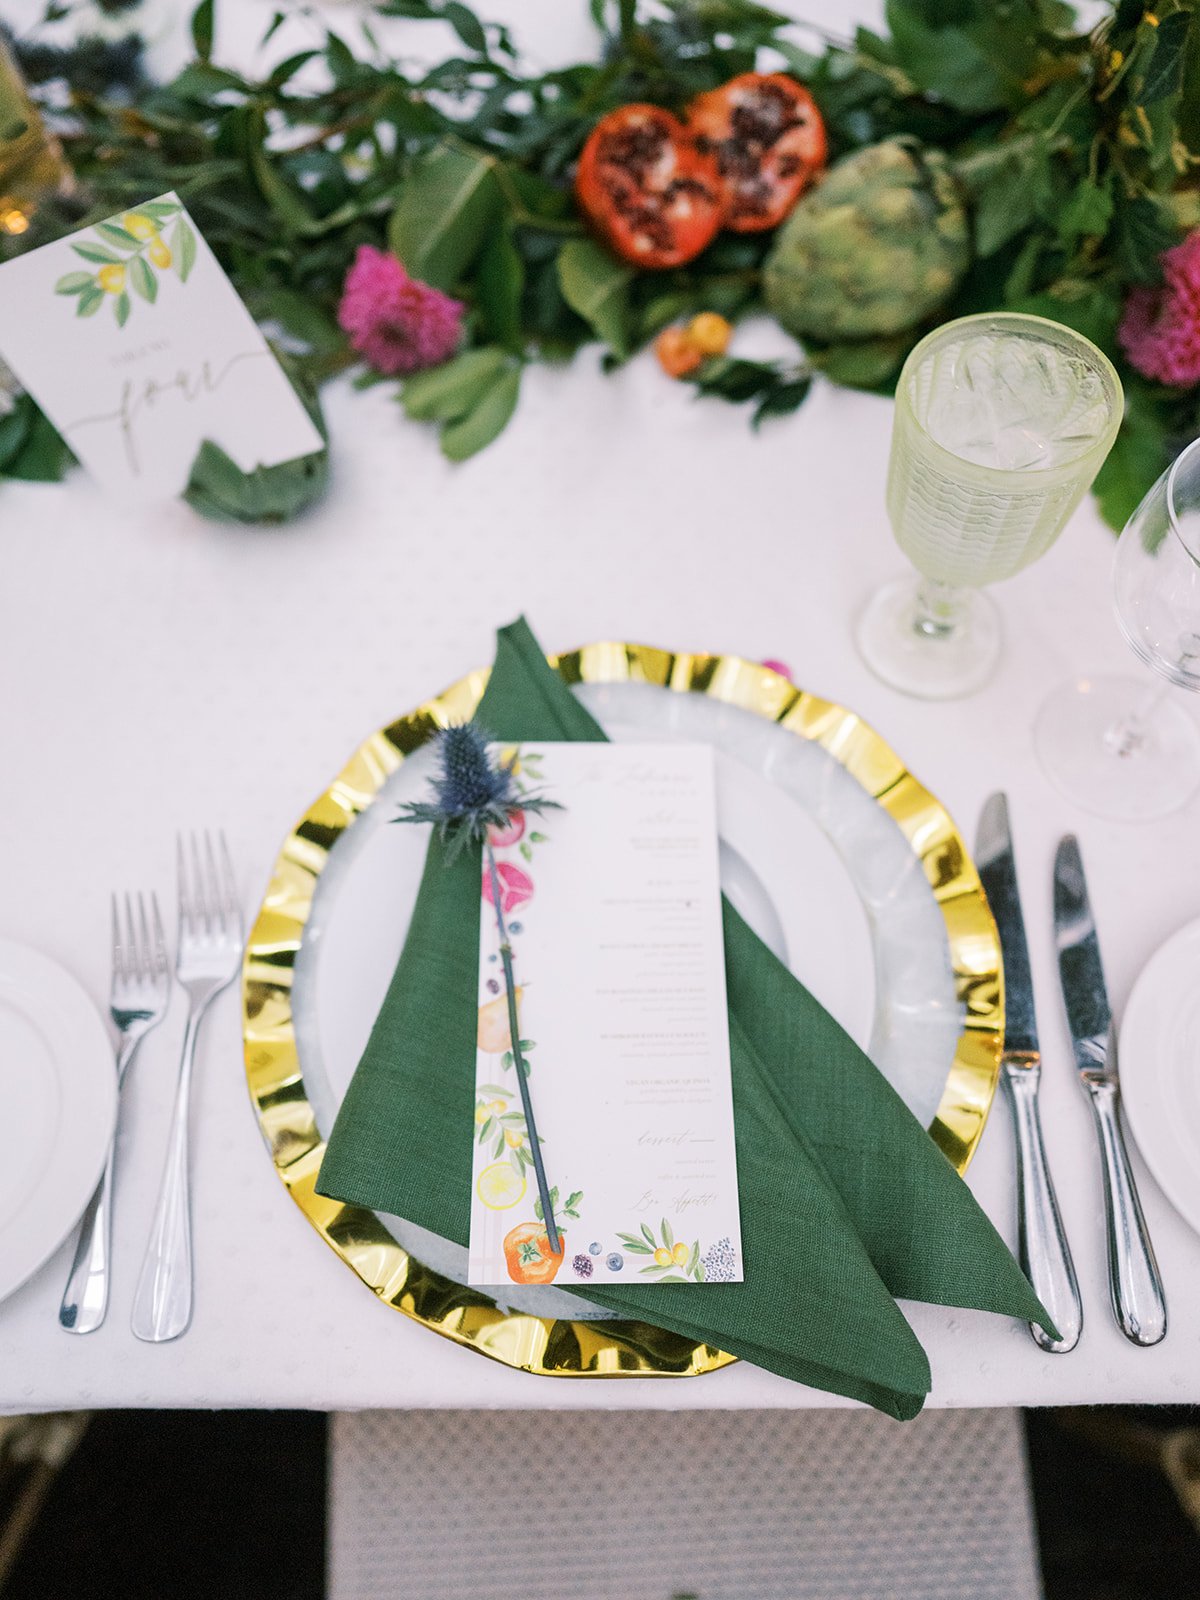
Menu cards
Table number cards
Vow Books
Programs
Ketubah (for Jewish wedding ceremonies!)
I hope this blog post helps you organize your day of stationery and as always, I’m here if you’re looking for customizations!
Fill out the inquiry form on the contact page or shoot me an email at info@stephanietara.com
xx Stephanie

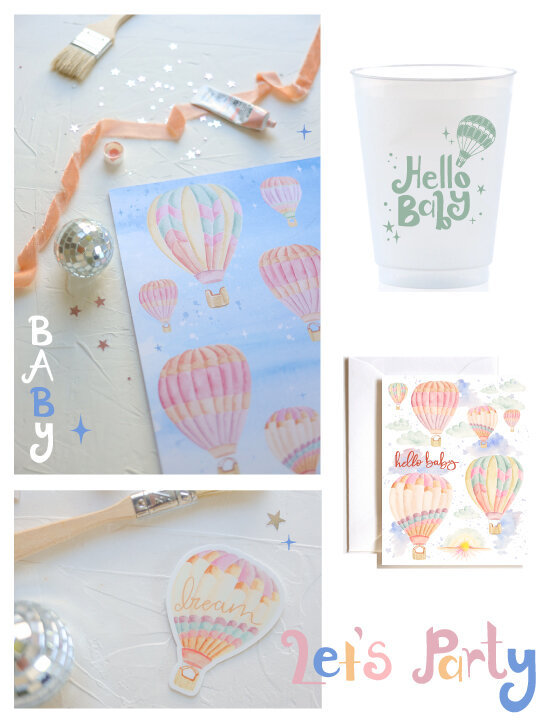
the cutest simple taco party!

Let’s talk about TACOS and TABLE DECOR!
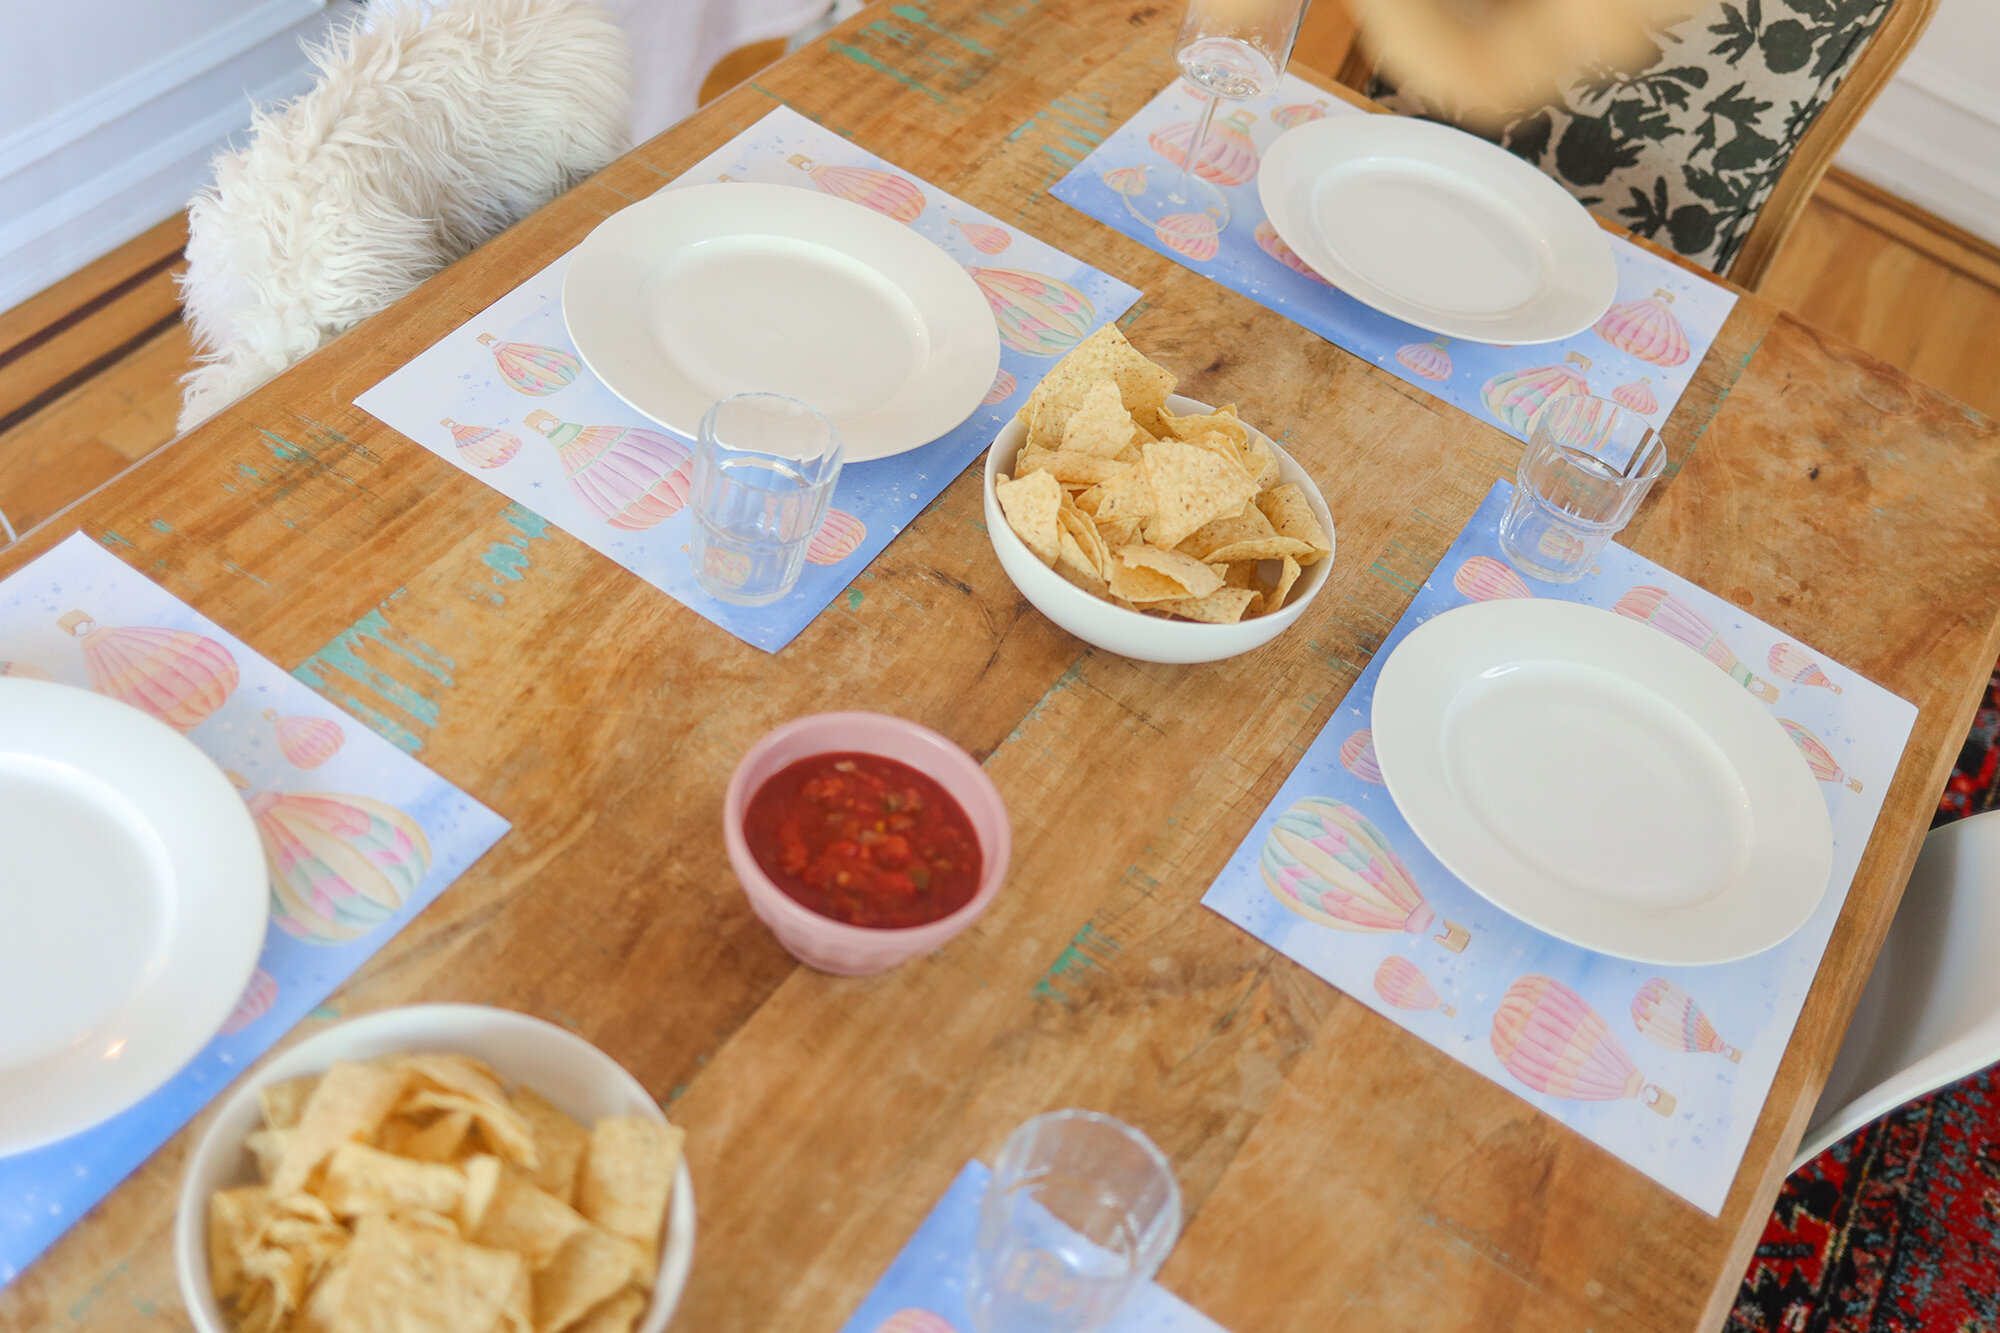
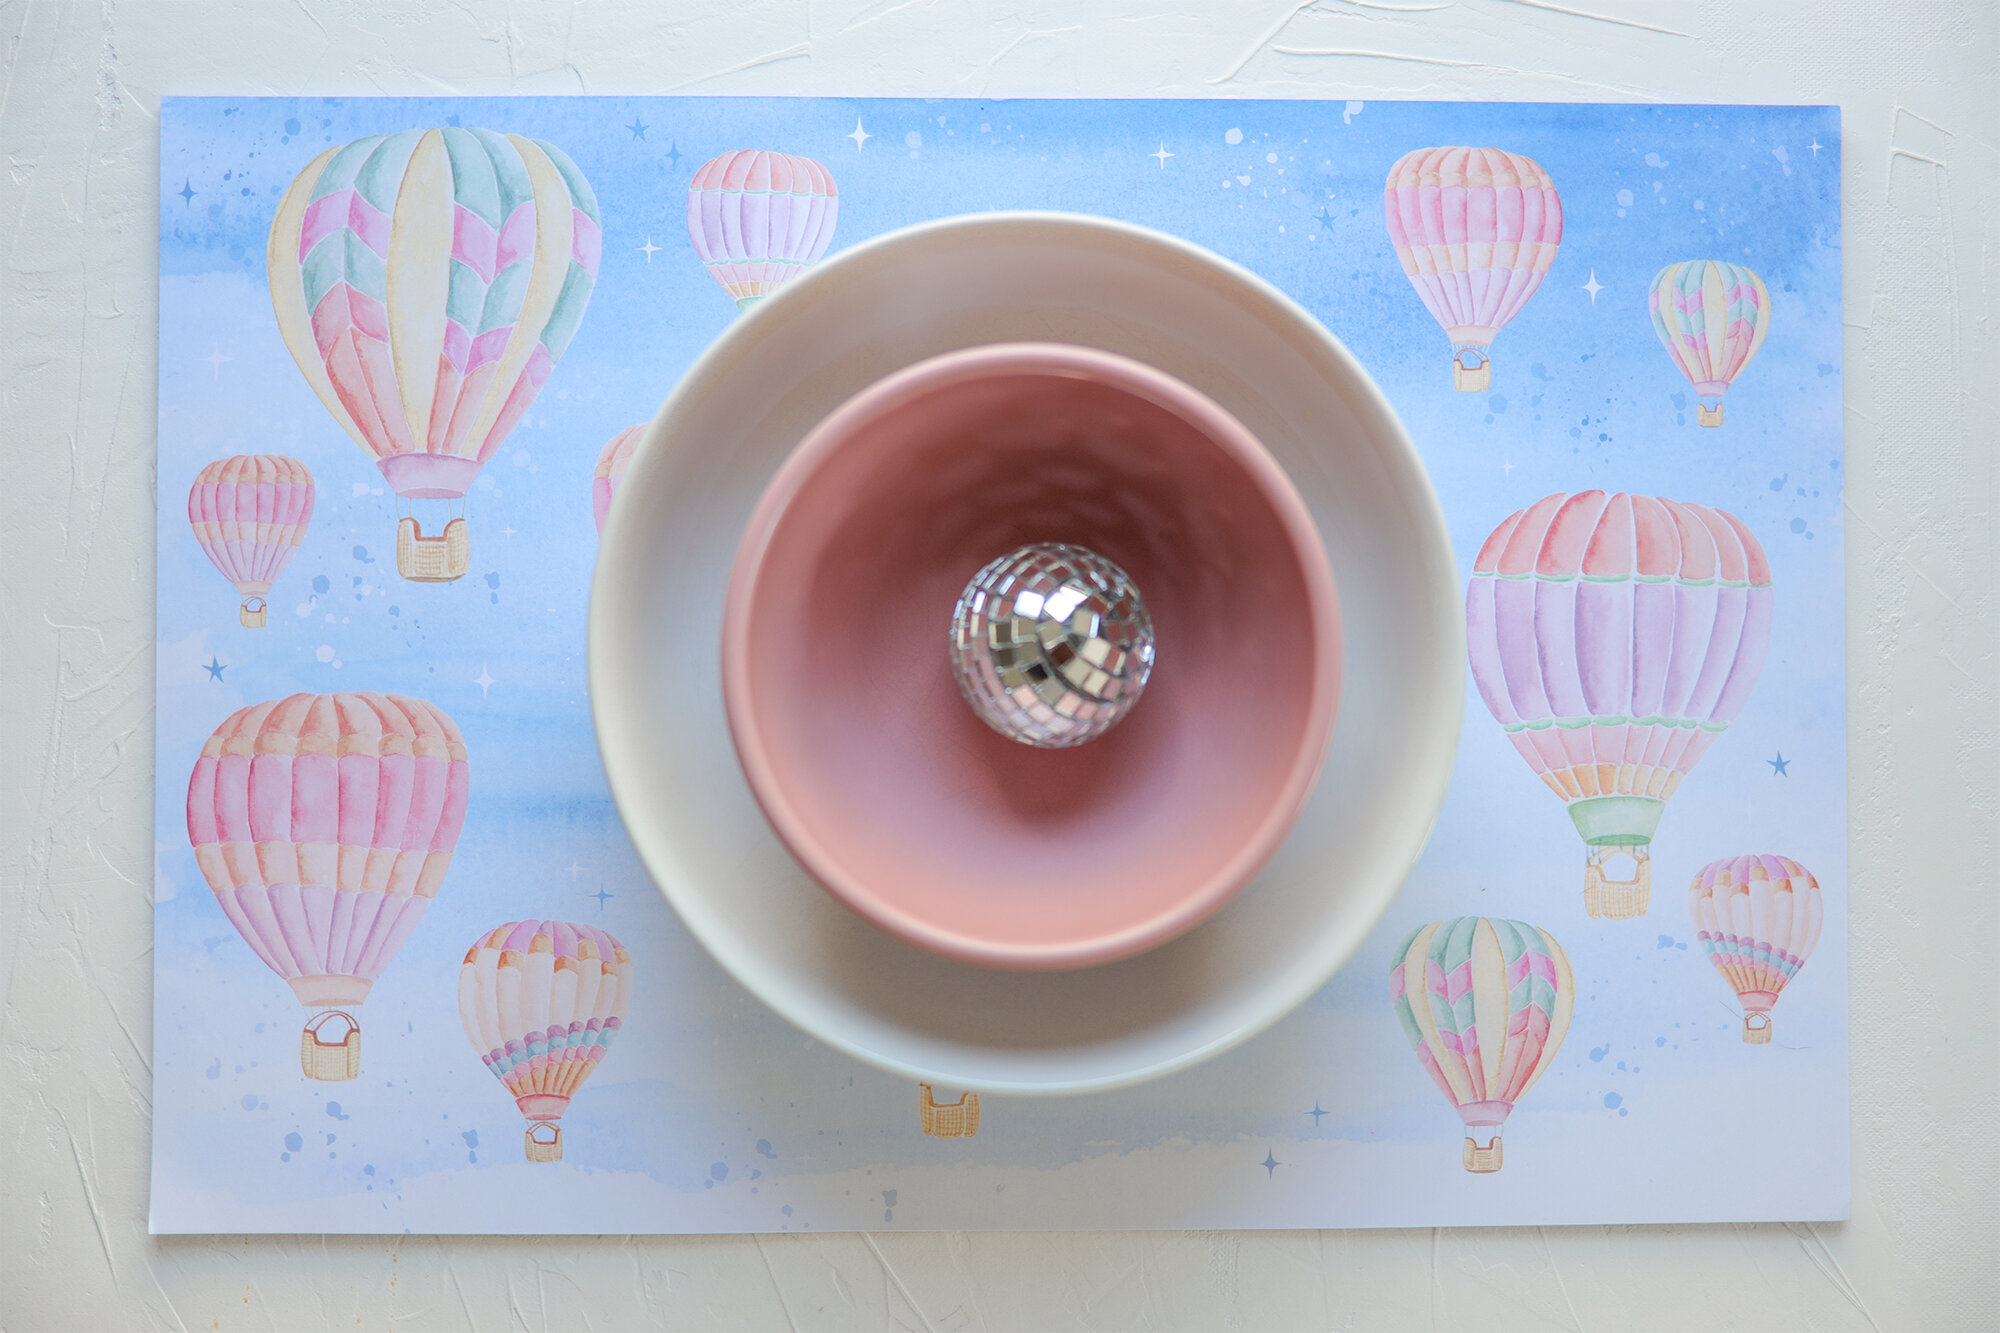
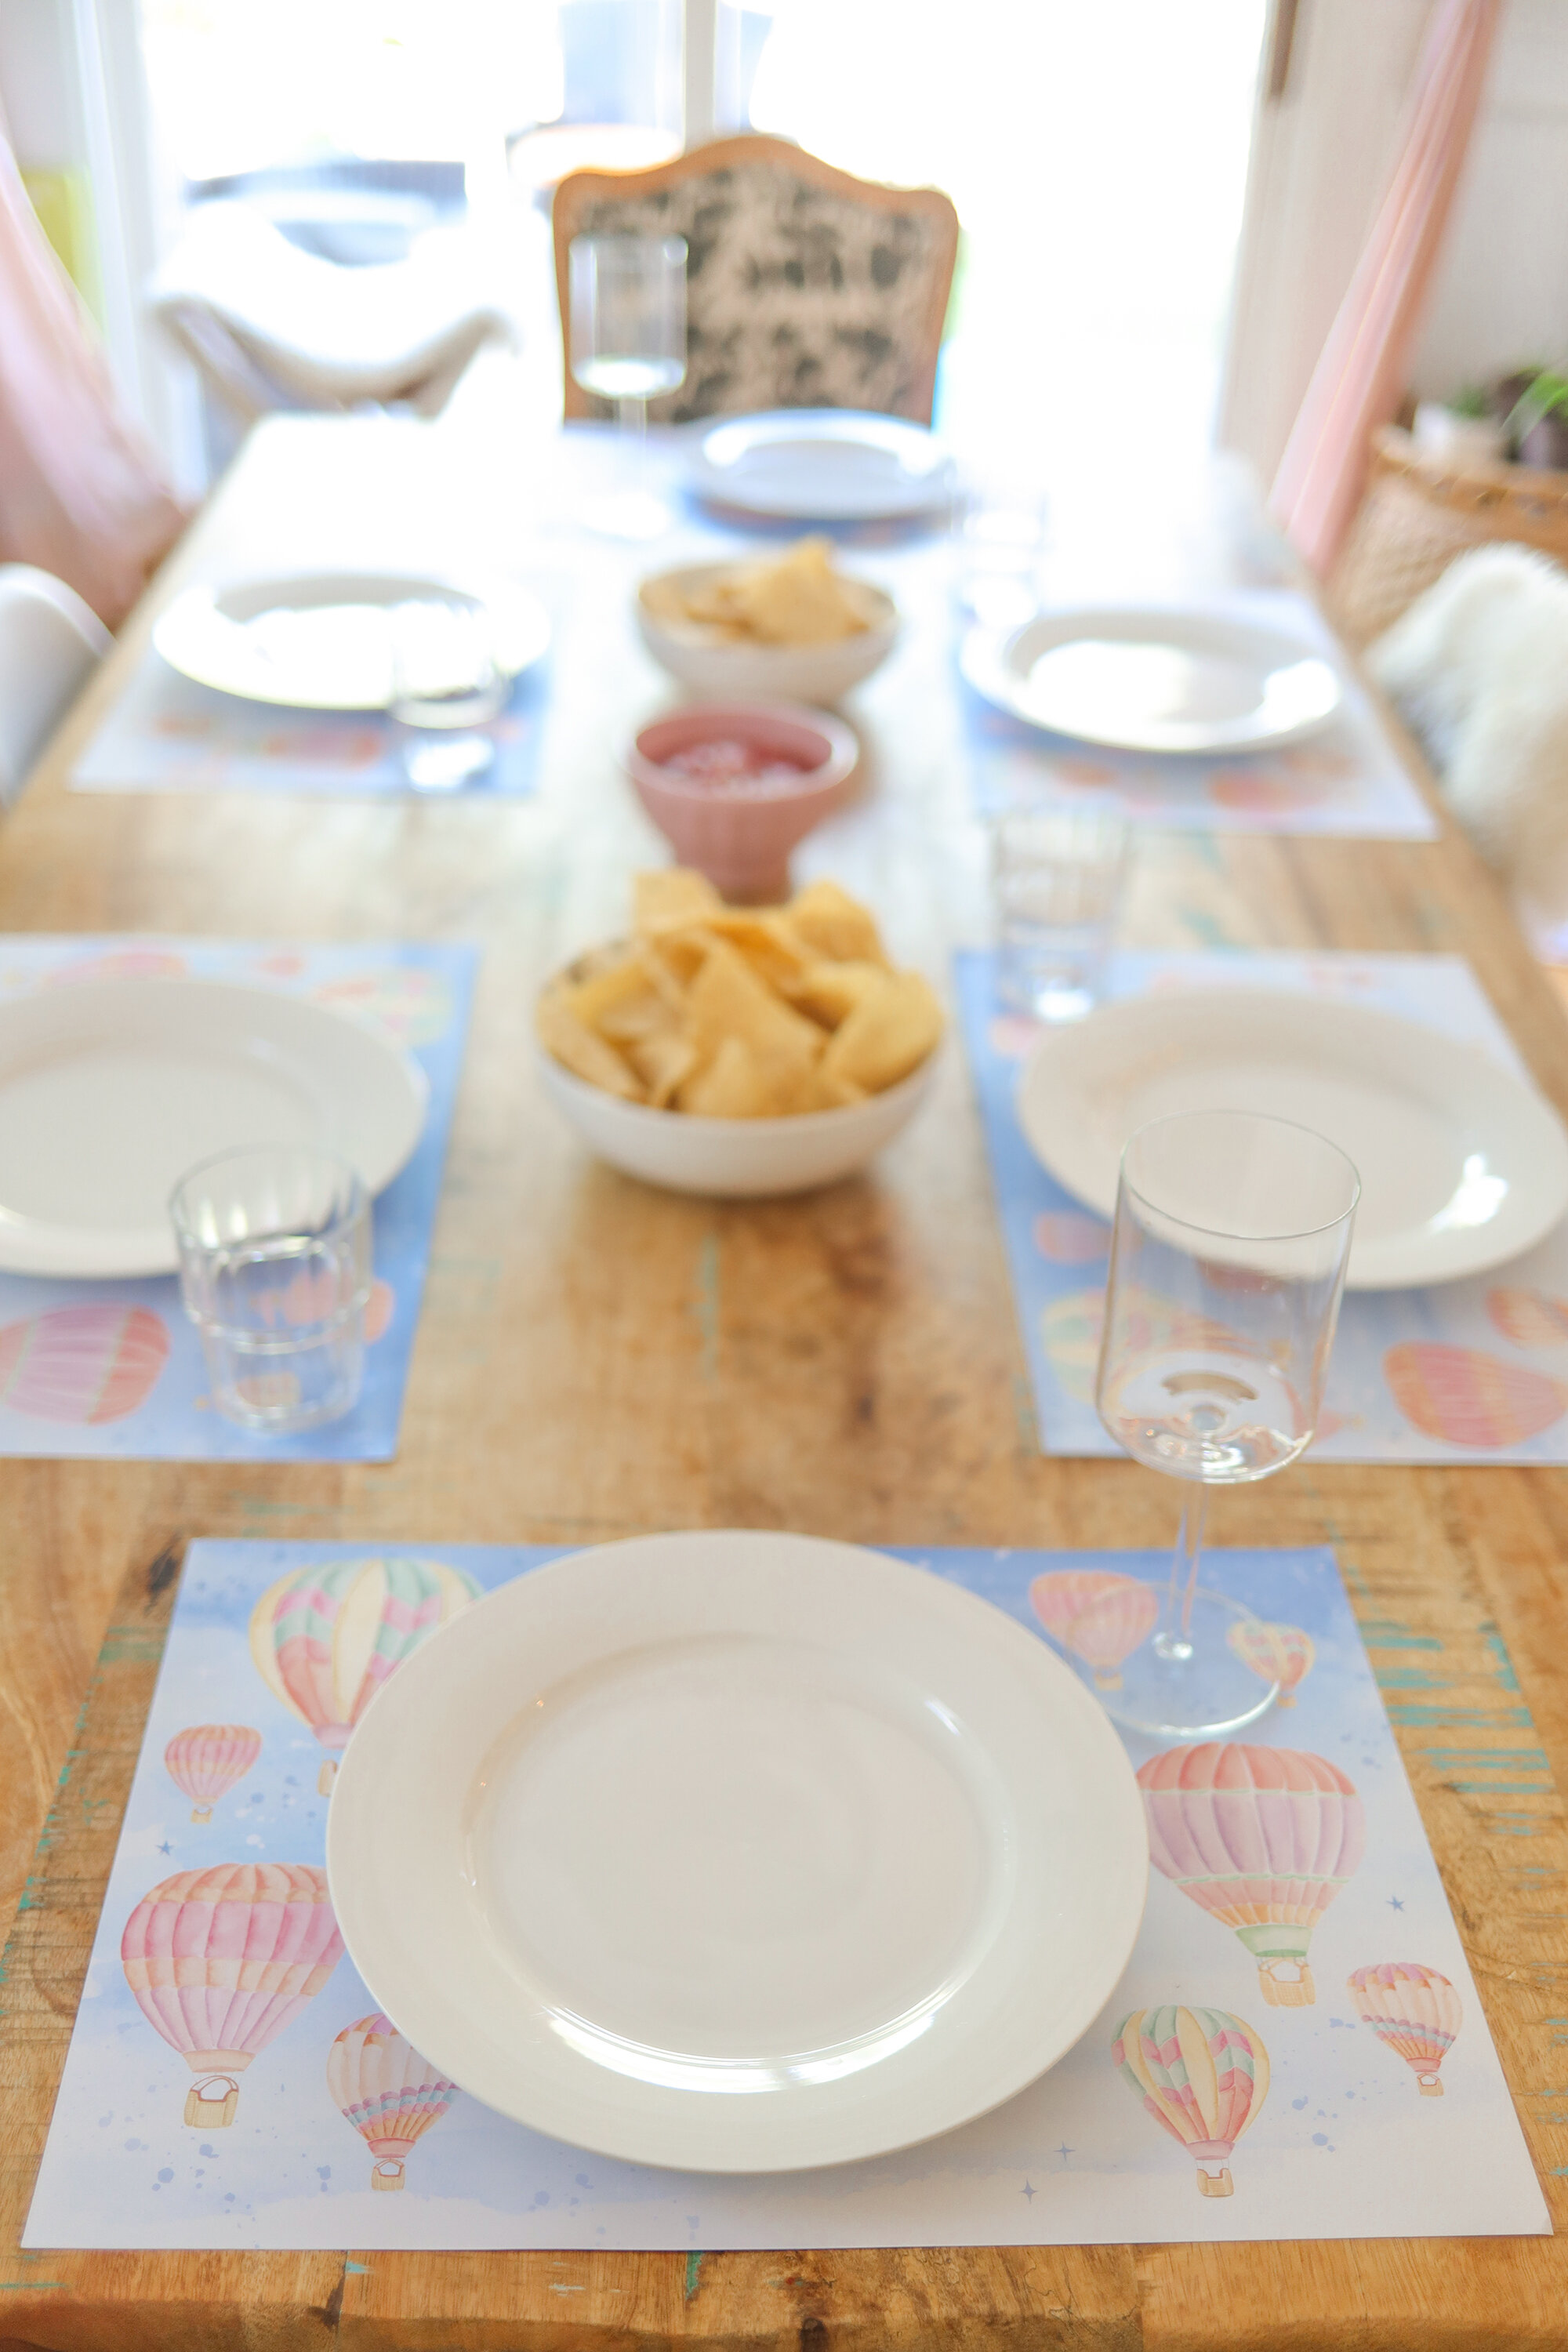
First the decor. I’m thinking of you momma’s who want to whip up something cute like you see on Pinterest but are like hello who has the time? I’m with you. I am you. Even as a creative person, I struggle with creativity at any event I throw because time. Frankly, there is just not enough.
This year I designed hand painted artwork for disposable placemat pads with the intent to provide you with an easy splash of color and fun to any table. Toss some plates, bowls and glasses on there and you have an instant bash. And the next best part, after everyone has made an absolute mess of the table, just TOSS THESE IN THE TRASH! I love it so much I could cry. I hate cleaning. Loathe it.
AND DID YOU SEE WHAT’S NEW FOR SHOWERS? the hello baby hot air balloon cups! 16oz frost flex, set of 8, throw away OR wash and keep. Gotta have options in life.
And now the TACO RECIPE! I am not a chef by any means but I’ve made these slow cooker tacos so many times I just got the itch to try out my own blend of herbs and spices to make them our absolute favorite so here you go…
Taco ingredients:
5.5 lbs pork shoulder, serves 8 people (maybe with some leftovers which we want)
3 tablespoons of chili powder
3 table spoons of kosher salt
2 teaspoons of oregano
2 teaspoons garlic powder
2 teaspoons inion powder
1 teaspoon of paprika
1 teaspoon of cinnamon
1 scant pinch / sprinkle of cloves
1 cup of chicken broth (read below before adding this ingredient!)
Pico de Gallo ingredients:
2 containers of heirloom tomatoes (the small, colorful ones)
half of a small onion
1 teaspoon oregano, or to taste
fresh squeezed juice from 2 limes, or to taste
2 teaspoons garlic salt
chopped up cilantro to taste
Directions:
Brown the pork shoulder in some olive oil or oil of your choosing. A few minutes on each side until it’s literally brown.
While your meat is browning, Mix your herbs and spices together. See measurements above.
Put the pork shoulder in the crock pot.
Sprinkle spice mixture on top of the meat and in the bottom of the crock pot. You cannot do this part wrong.
Add 1 cup of chicken broth for moisture. As you watch it cook throughout the day, if it looks dry, you can add more!
After about 5 hours, the pork should be cooked and you can pull it apart and then keep it in the gorgeous delicious marinade that has now formed. We take the meat out and cut it up with a knife. Cut it, shred it, whatever you want.
Take flour or corn tortillas, lay out on baking sheet, drizzle with a touch of olive oil, spread around the tortilla a bit and sprinkle some salt. Put in the oven on 200 degrees for 3-5 minutes / until warm. Edges will curl up slightly.
Put some delicious pulled pork taco meat on your tortilla, add the pico de Gallo and whatever other toppings you love (avocado) and devour.
I will make these tacos again asap and take some photos to add to this post, stay tuned! Enjoy and email me if you have questions :) info@stephanietara.com
Shop the paper goods collection below!
https://www.etsy.com/shop/DesignsByCooper


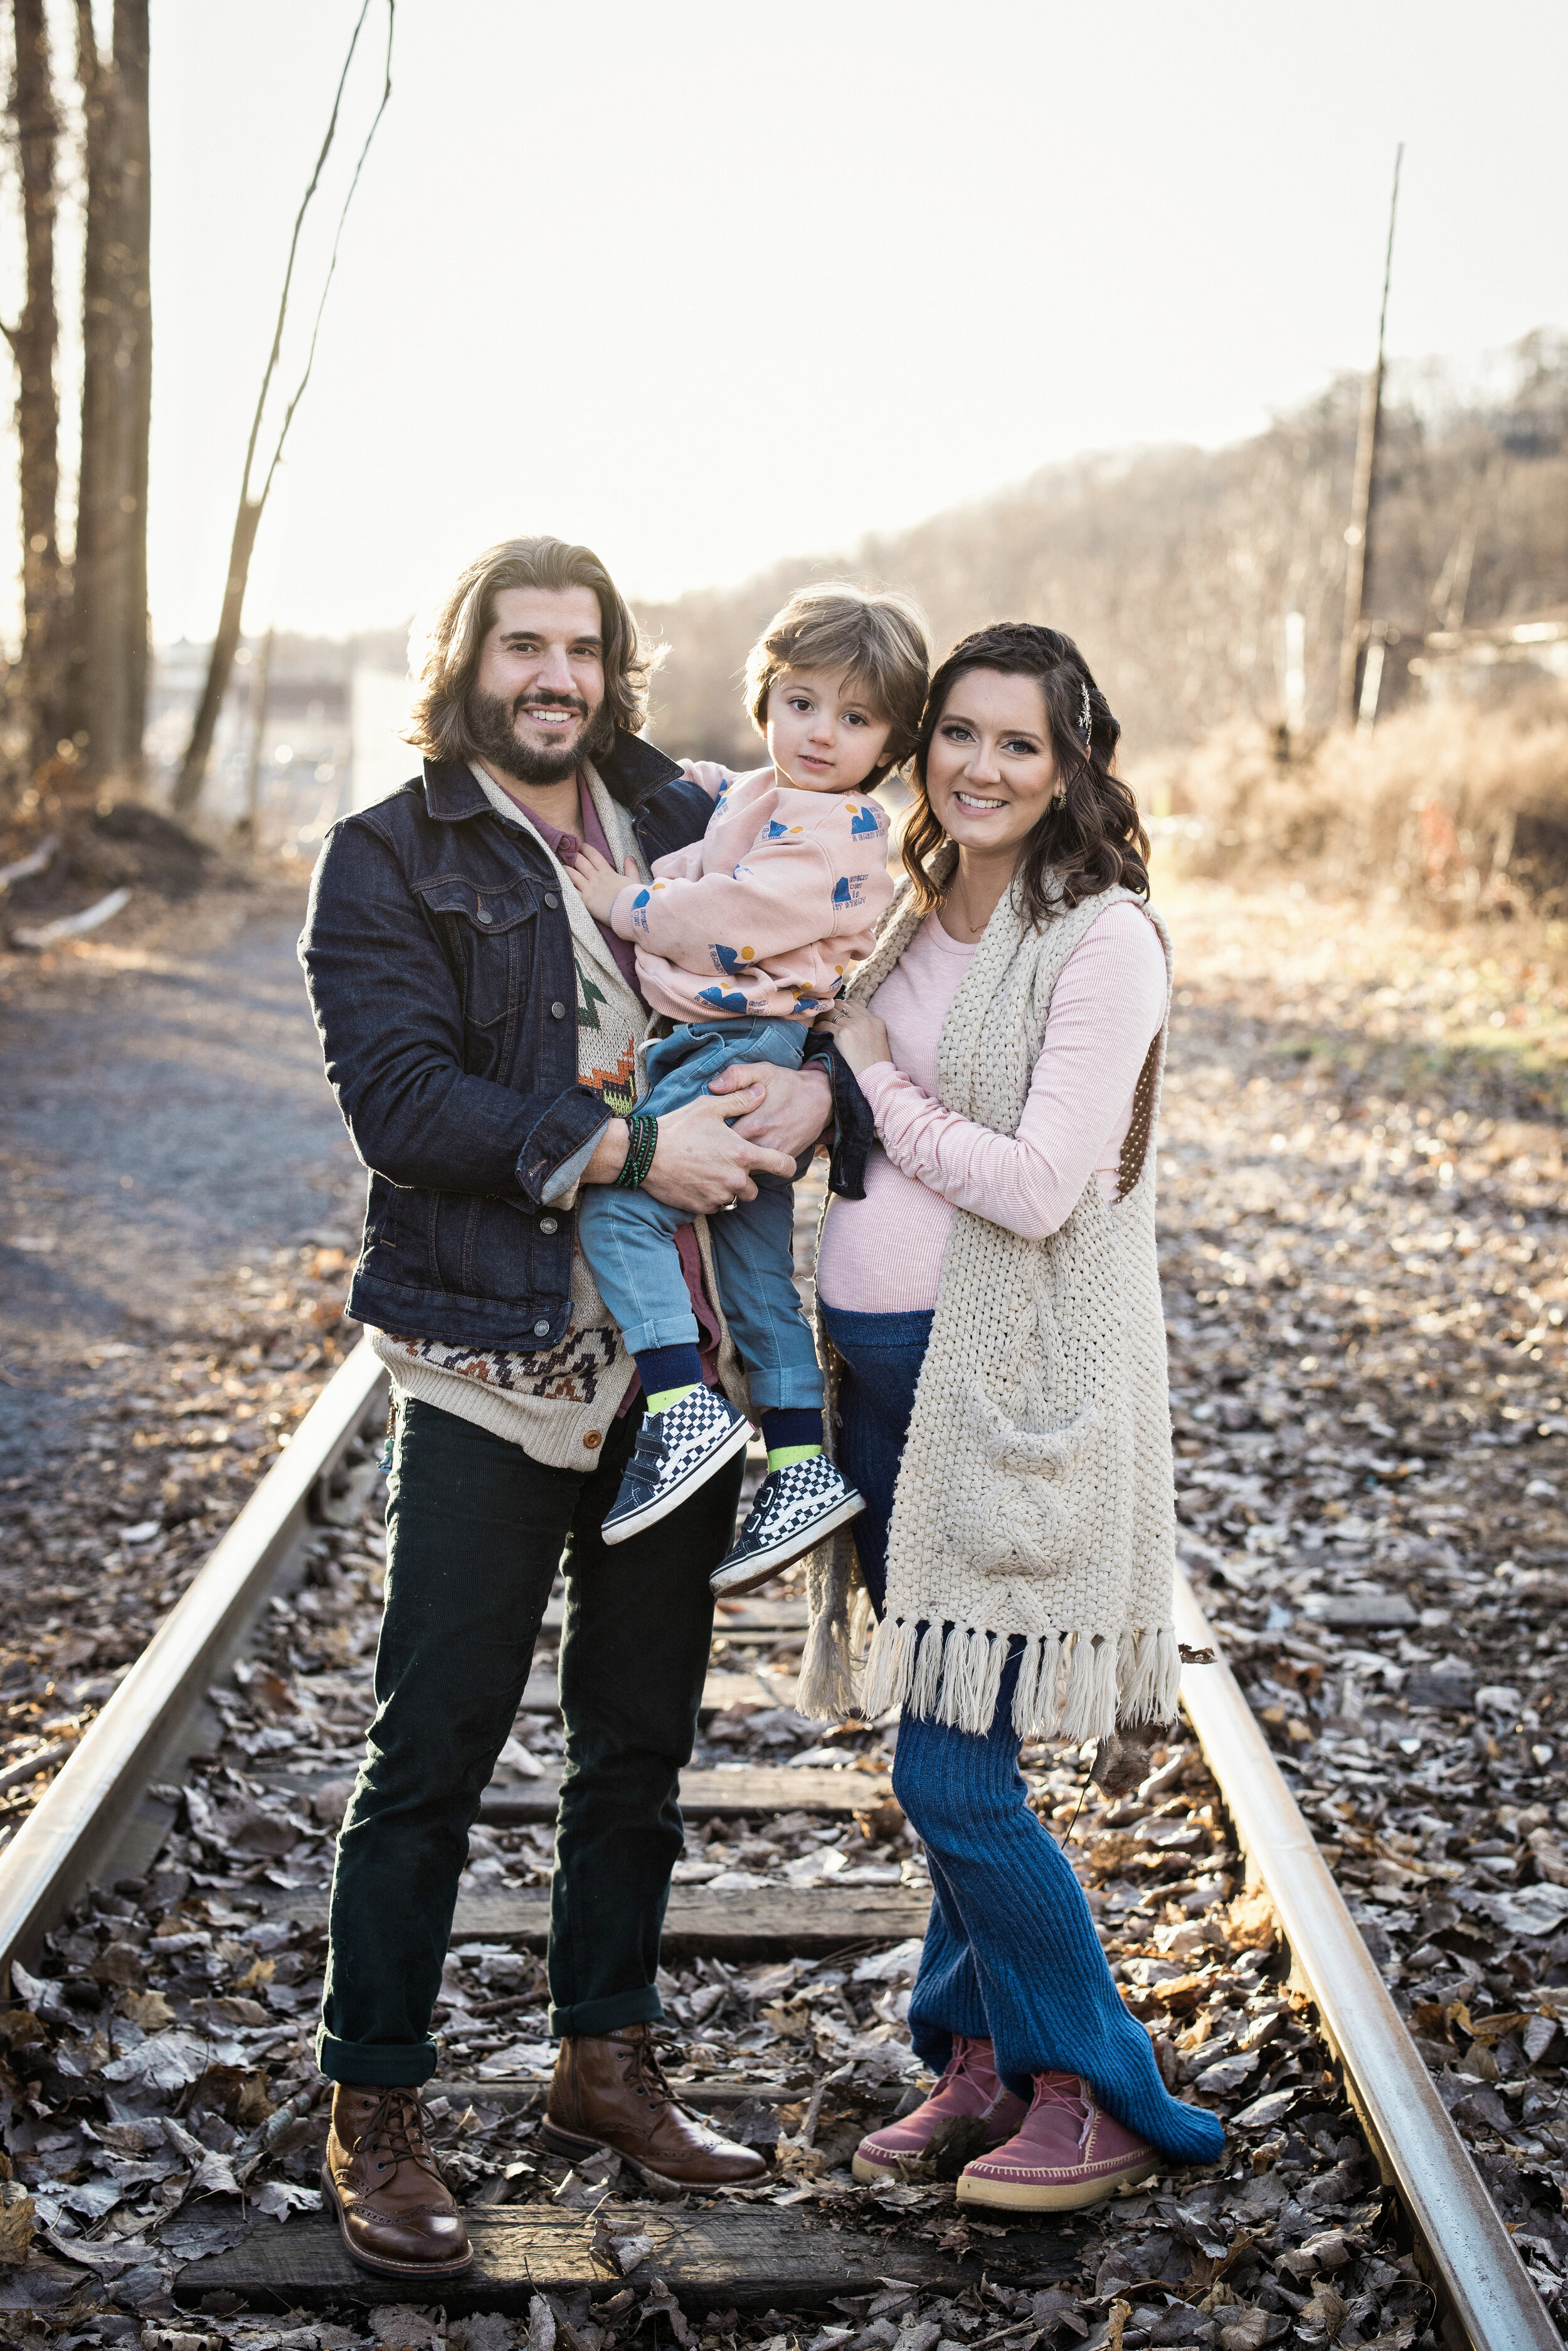
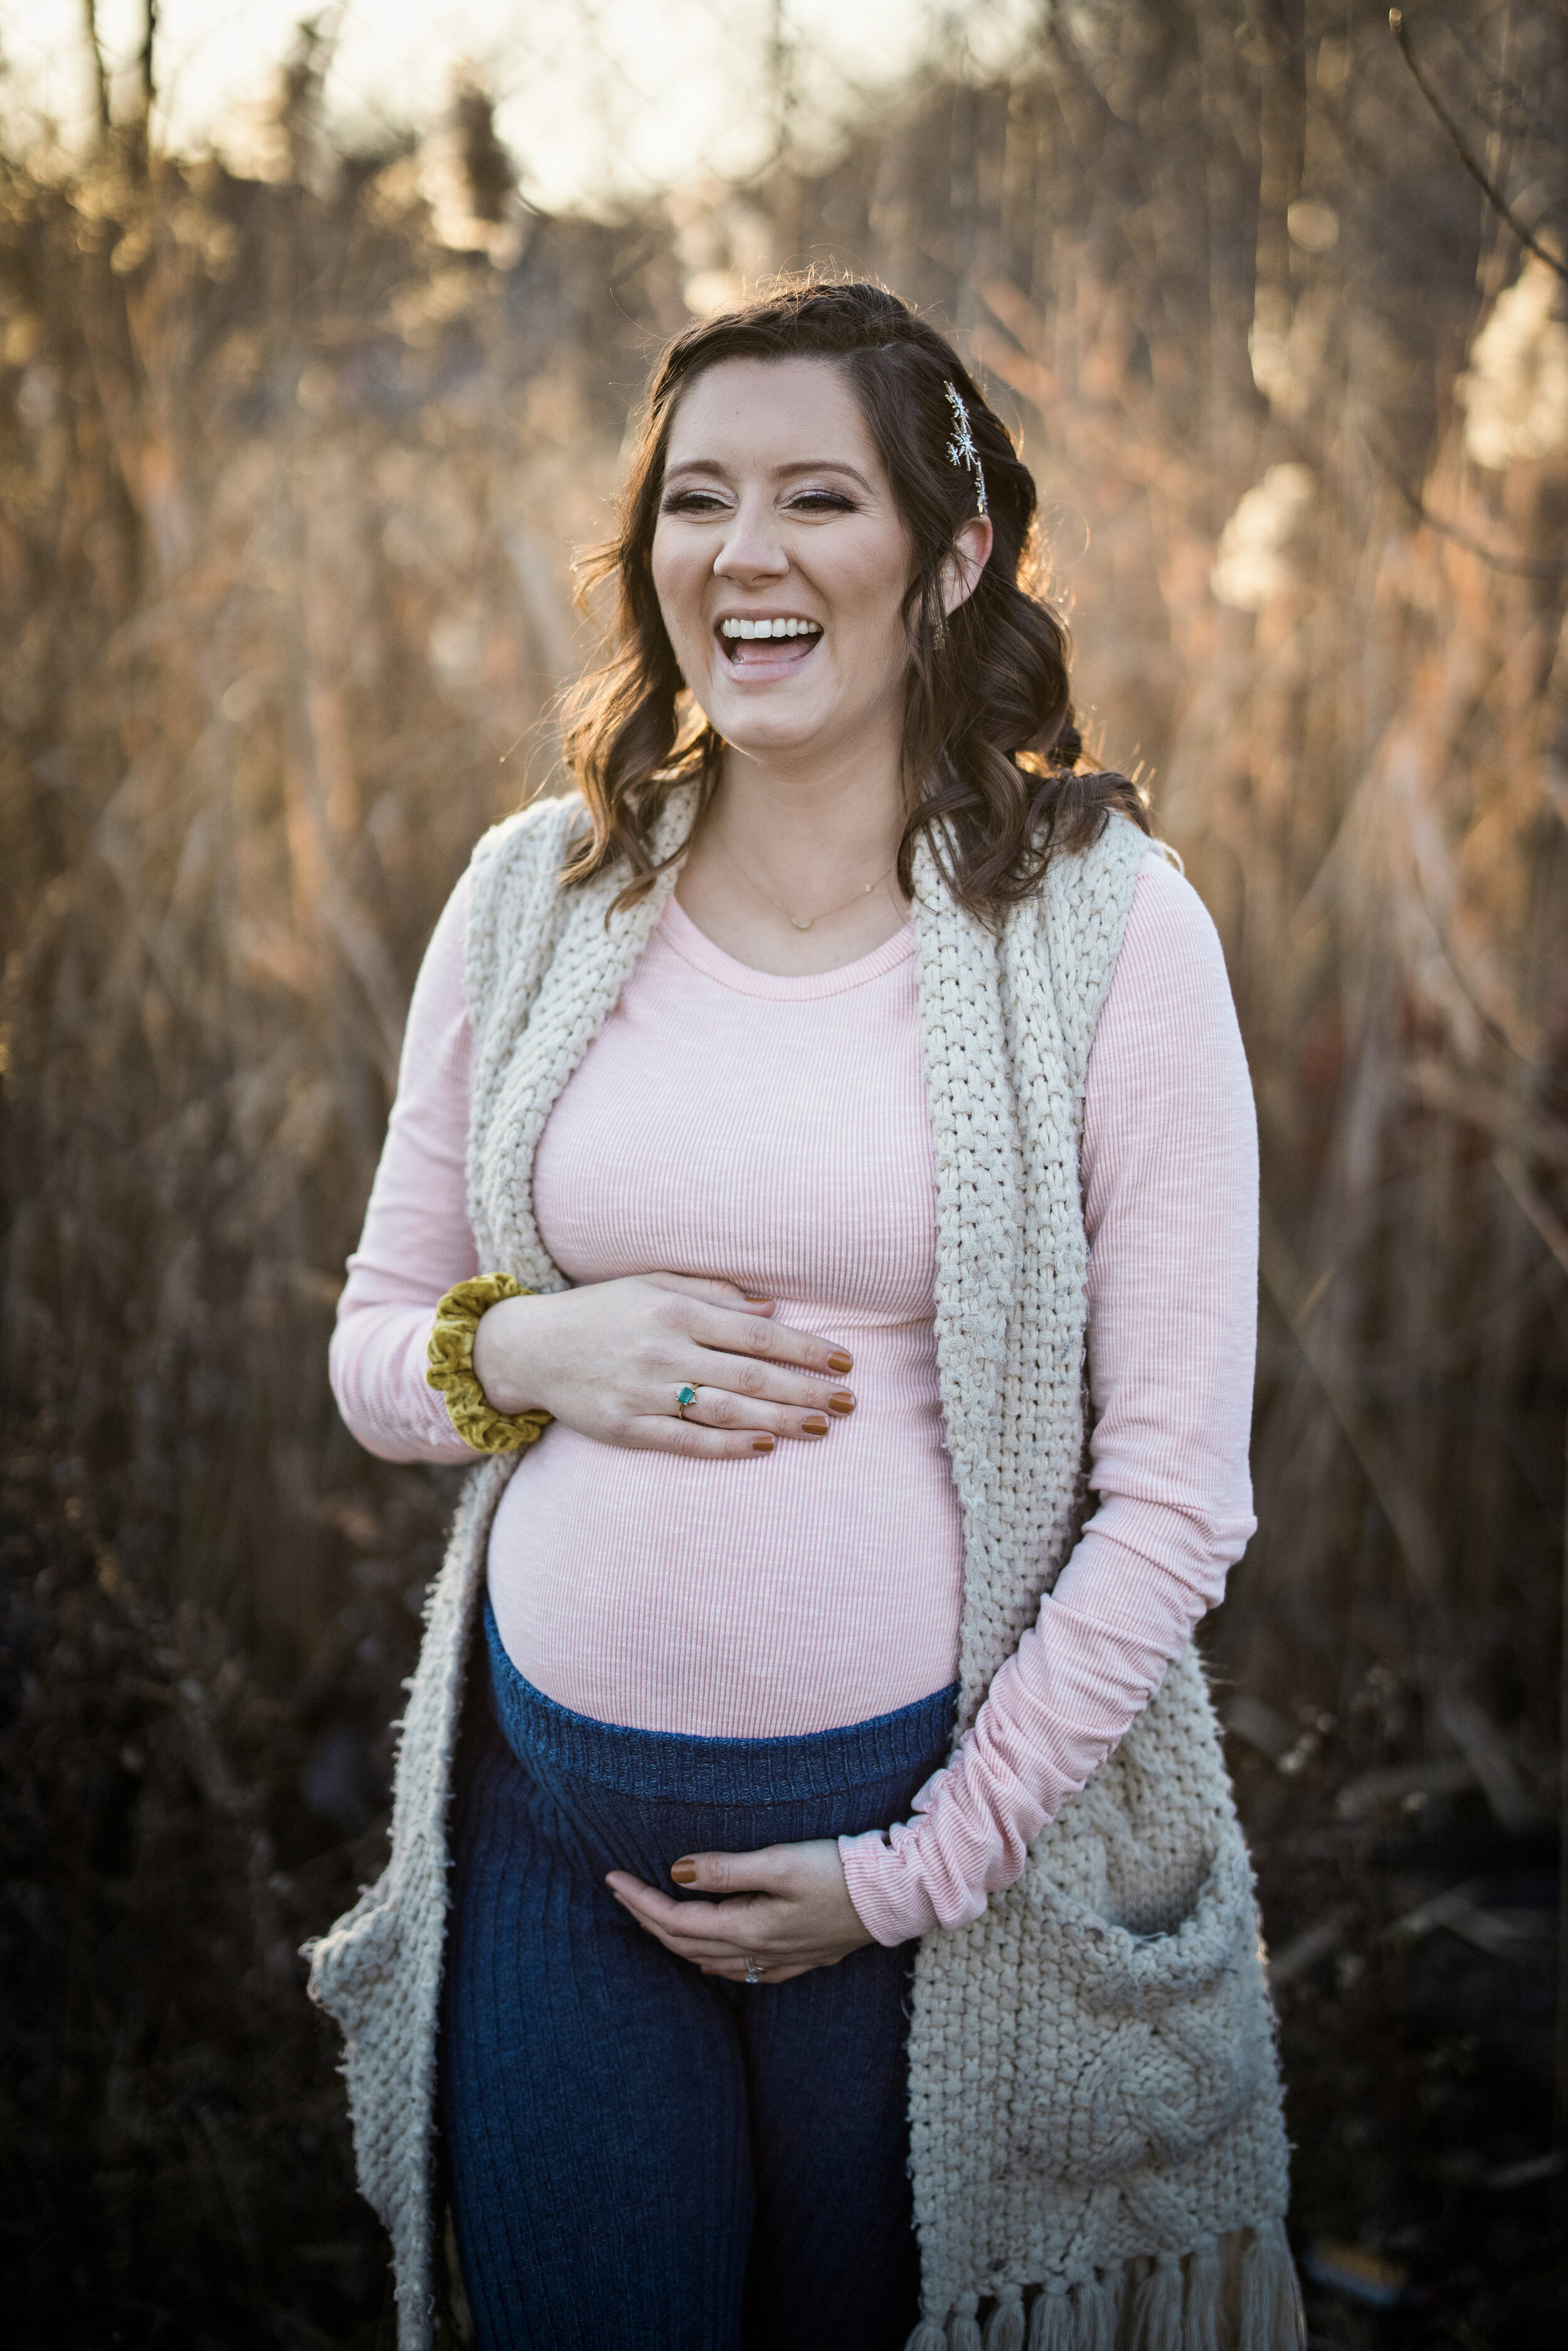
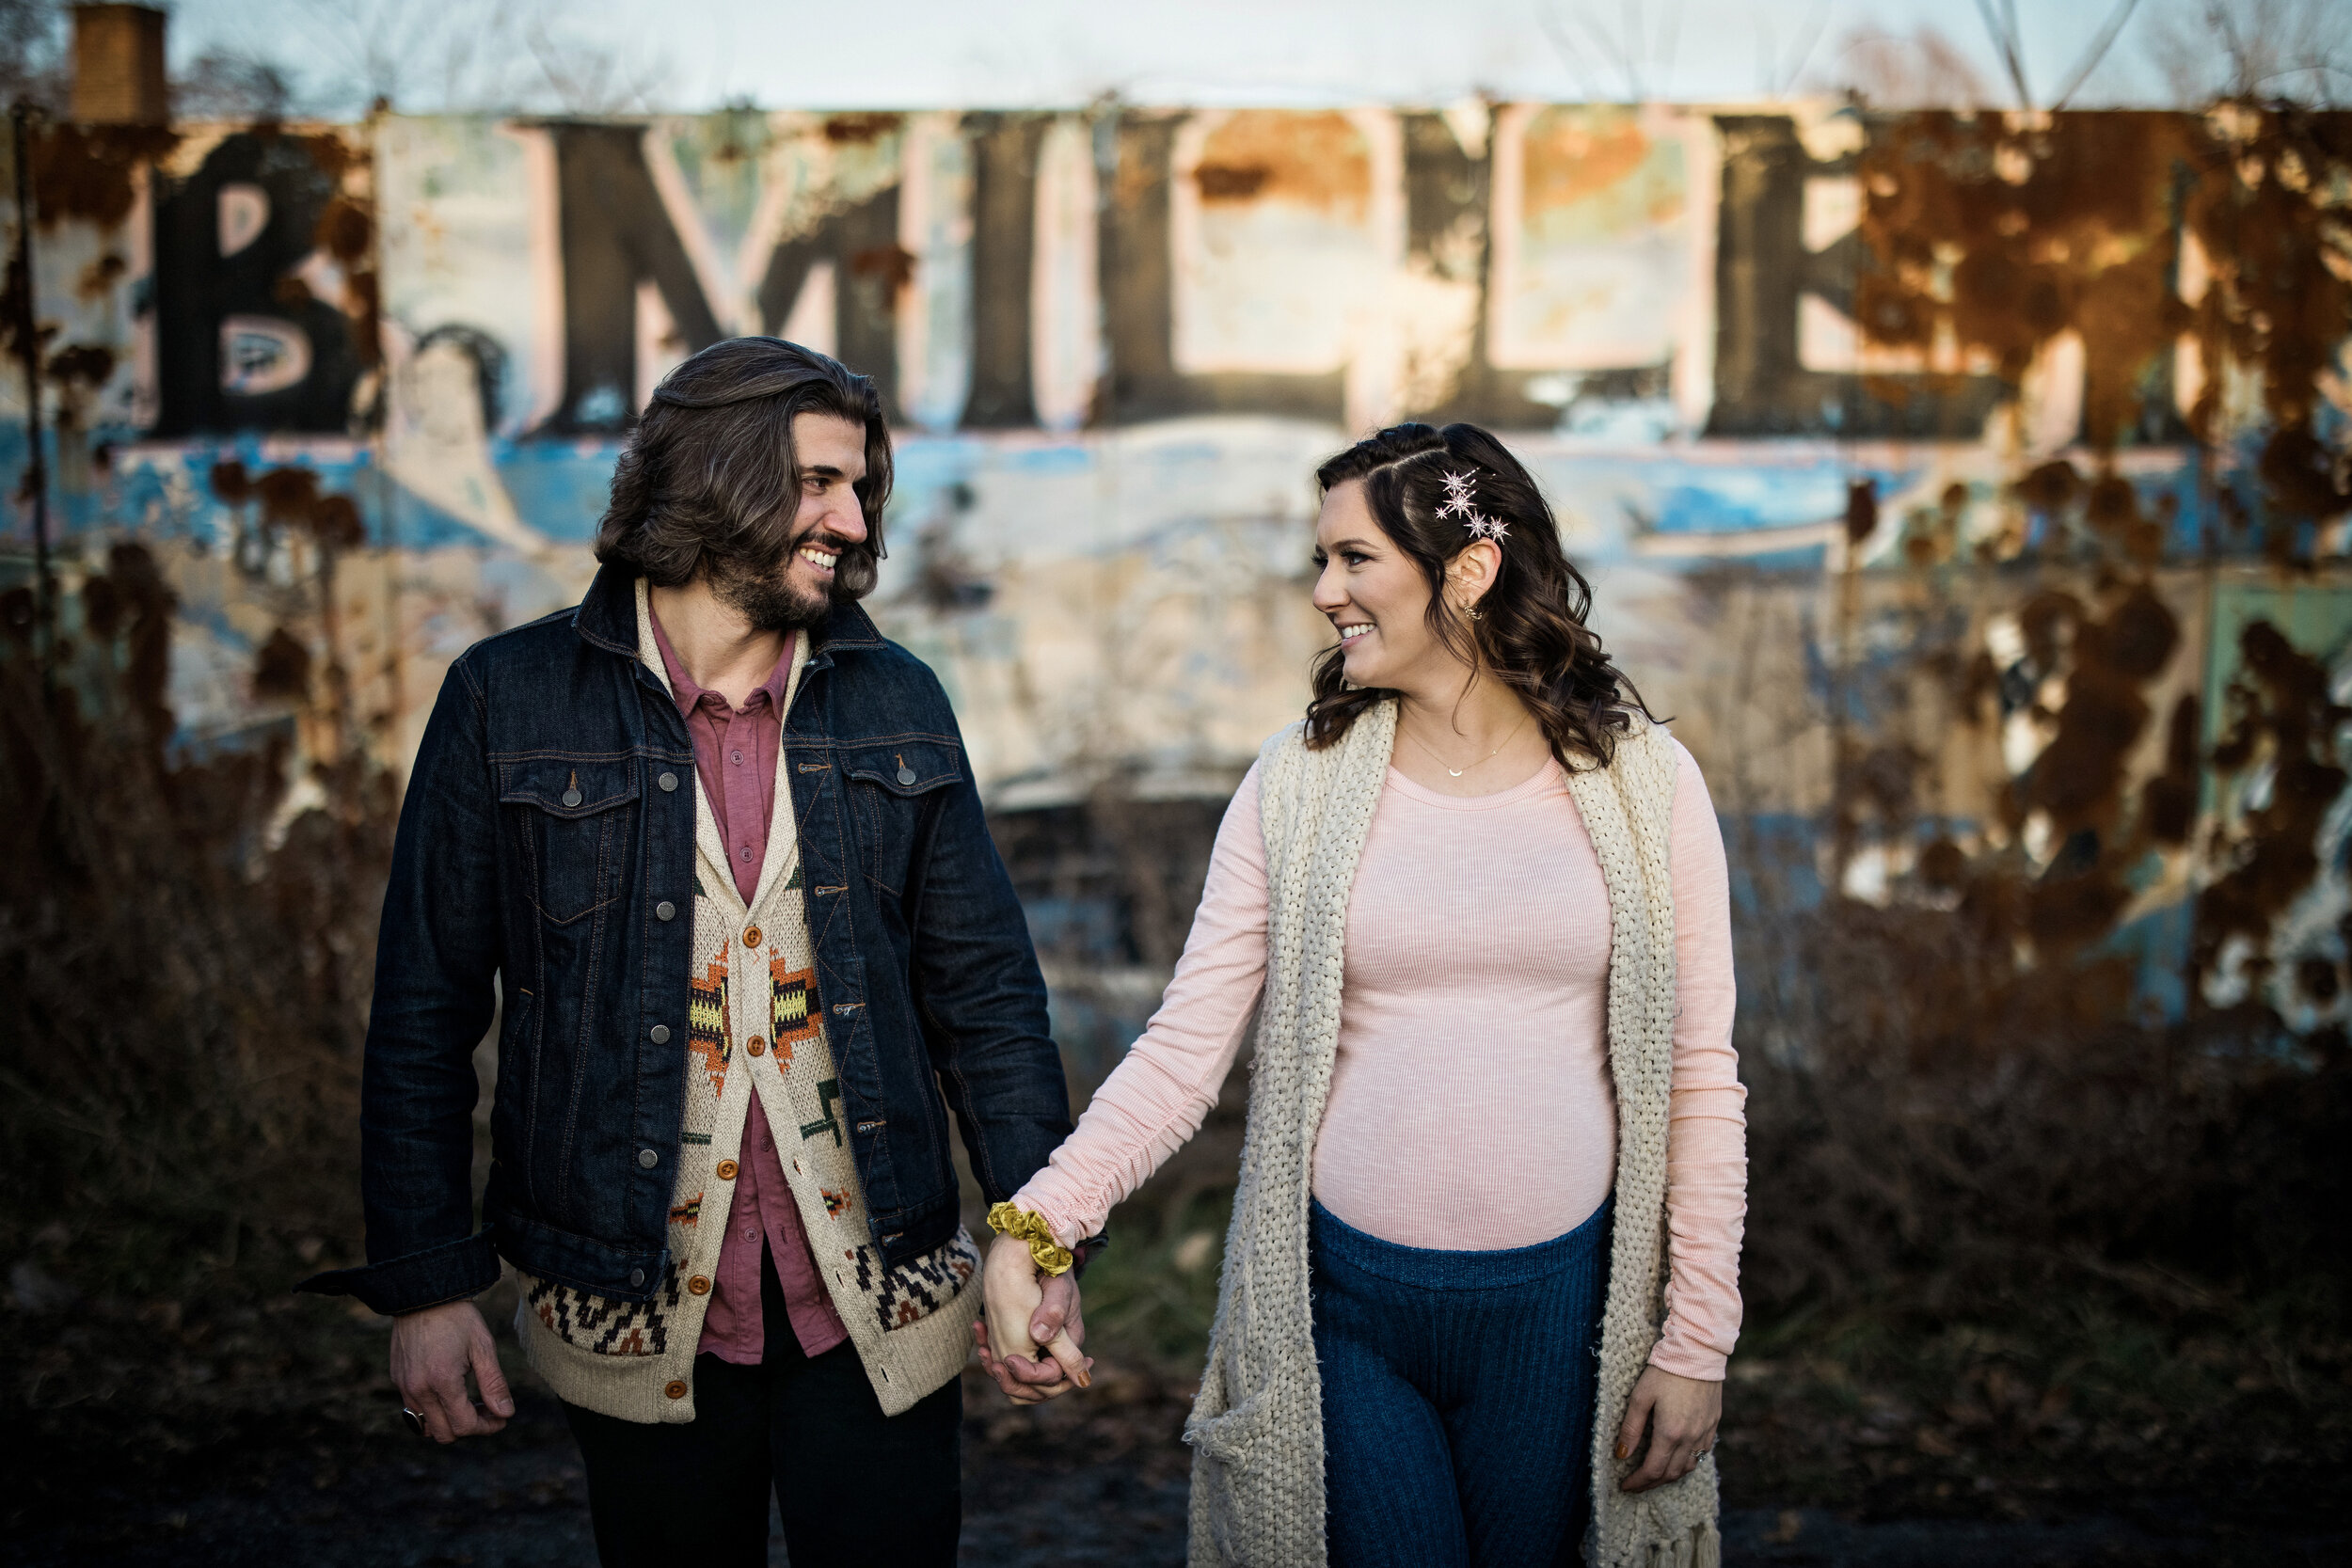
Our stationery family grows

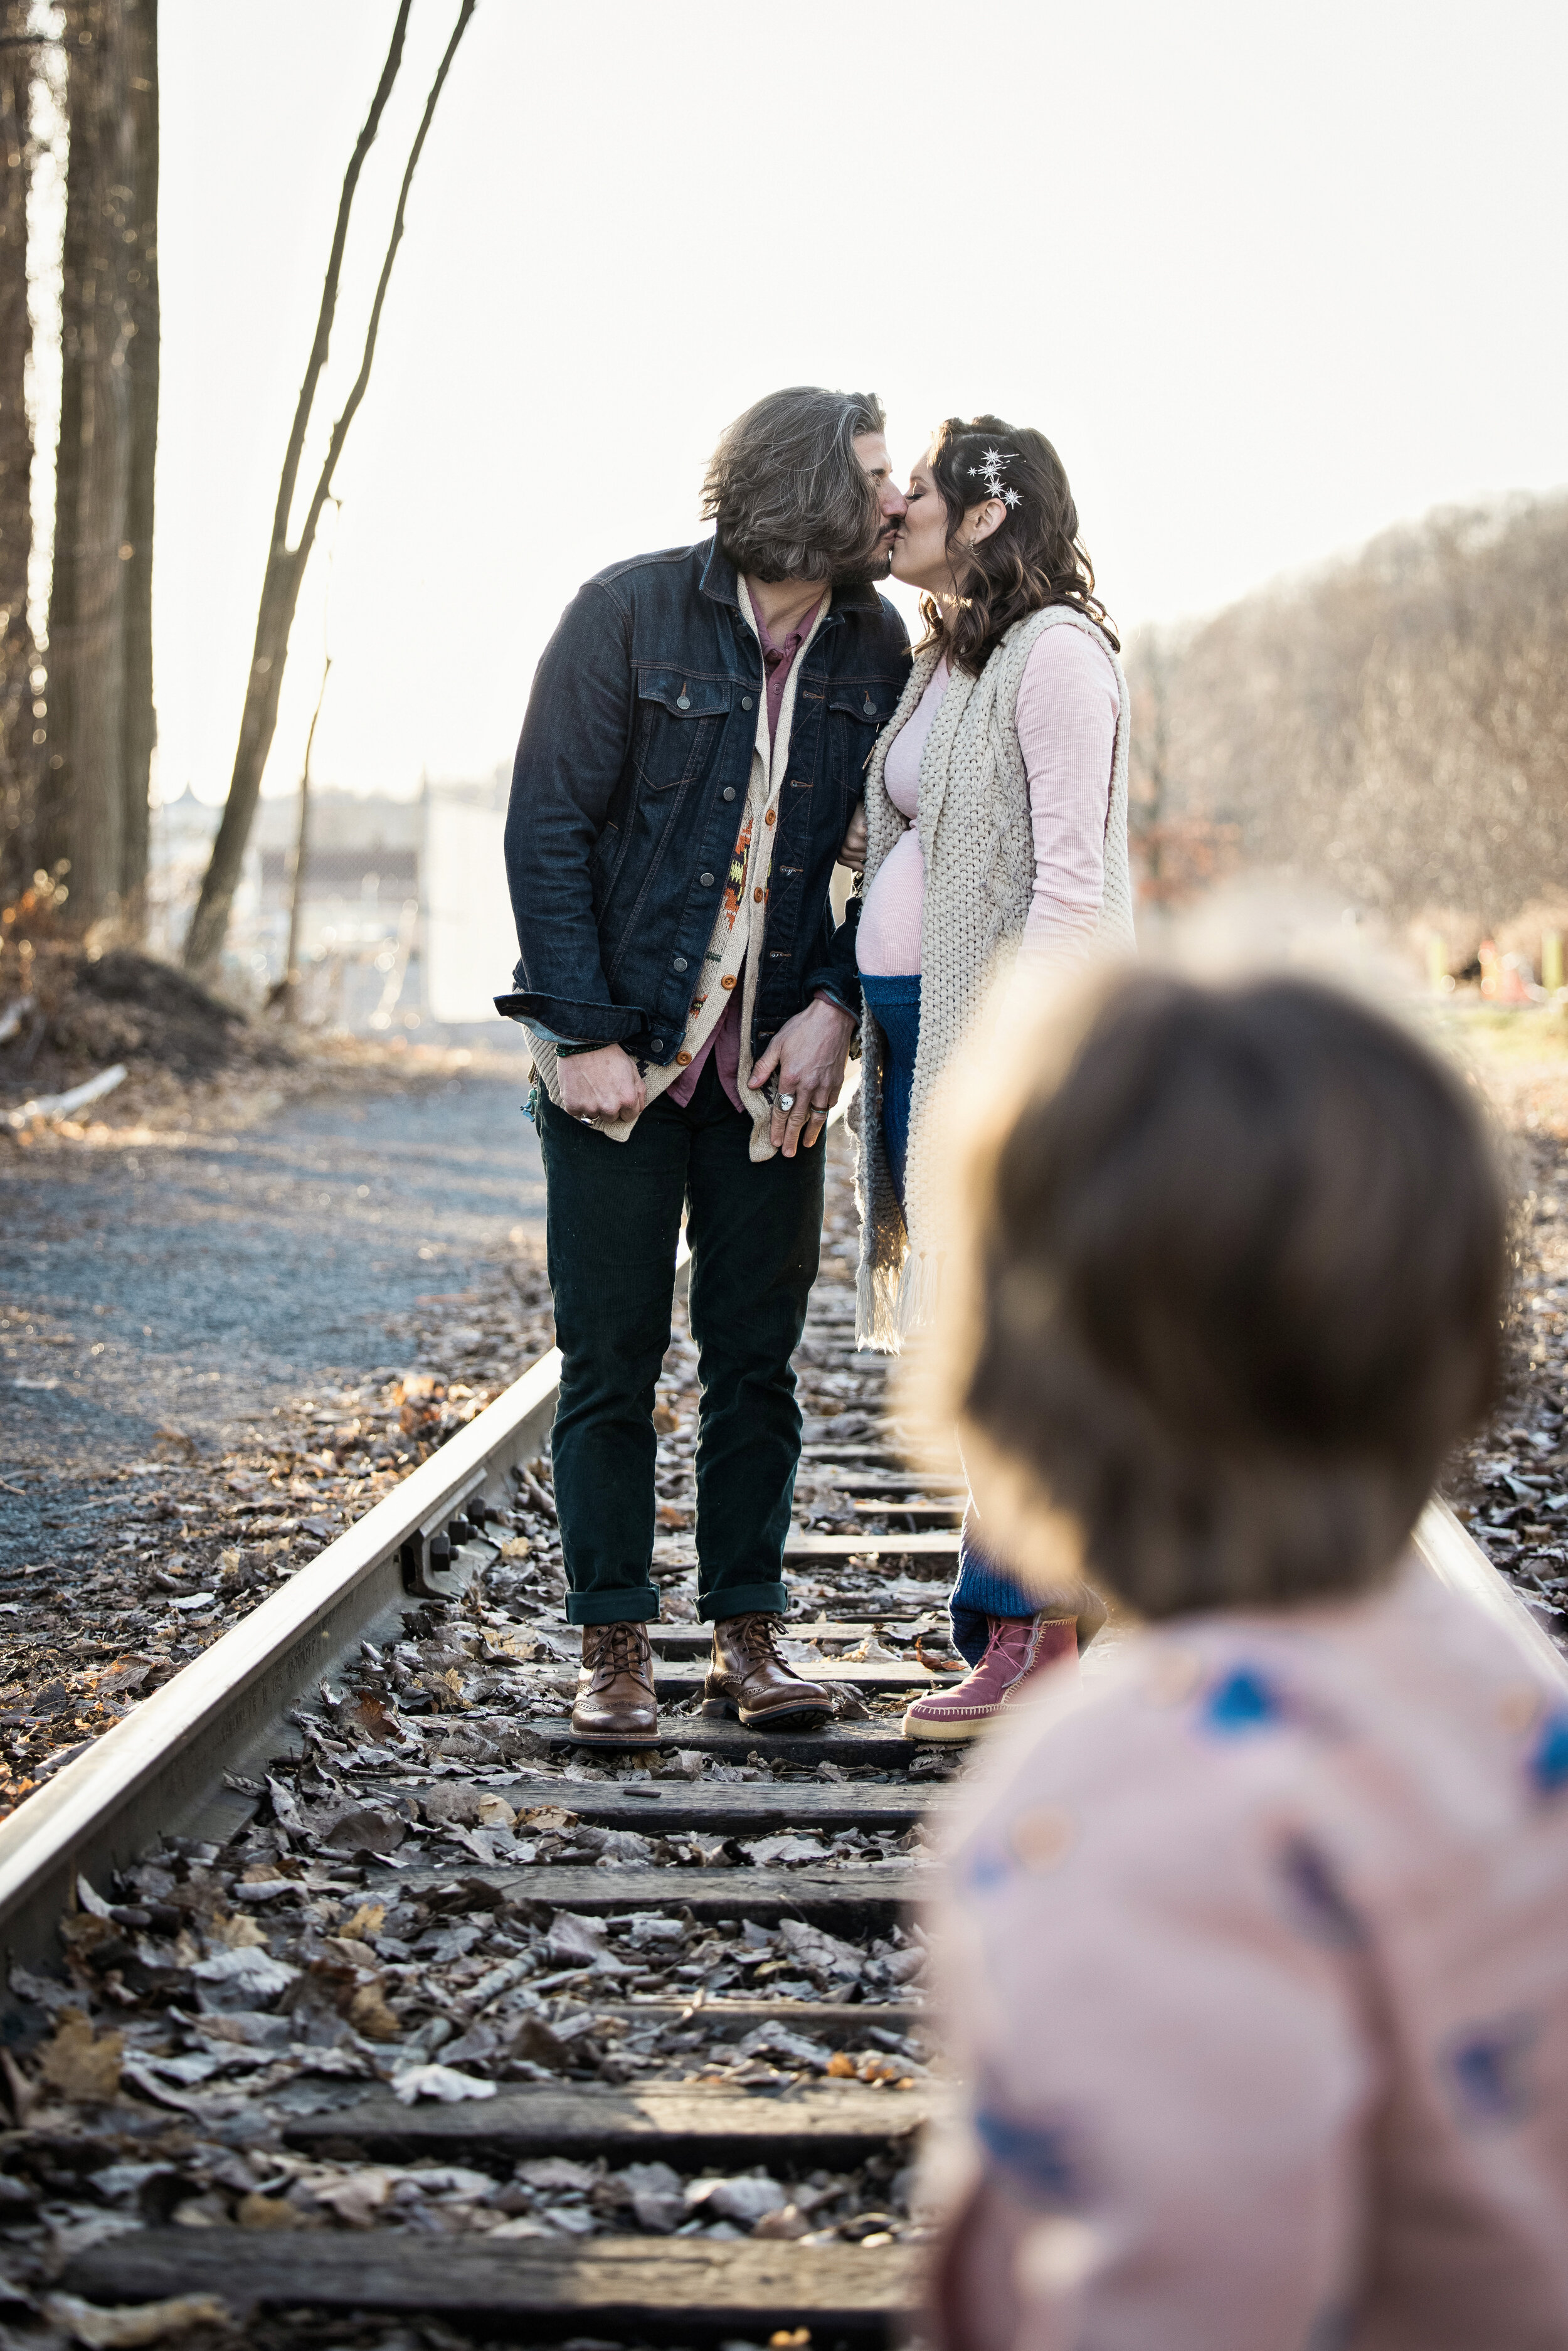
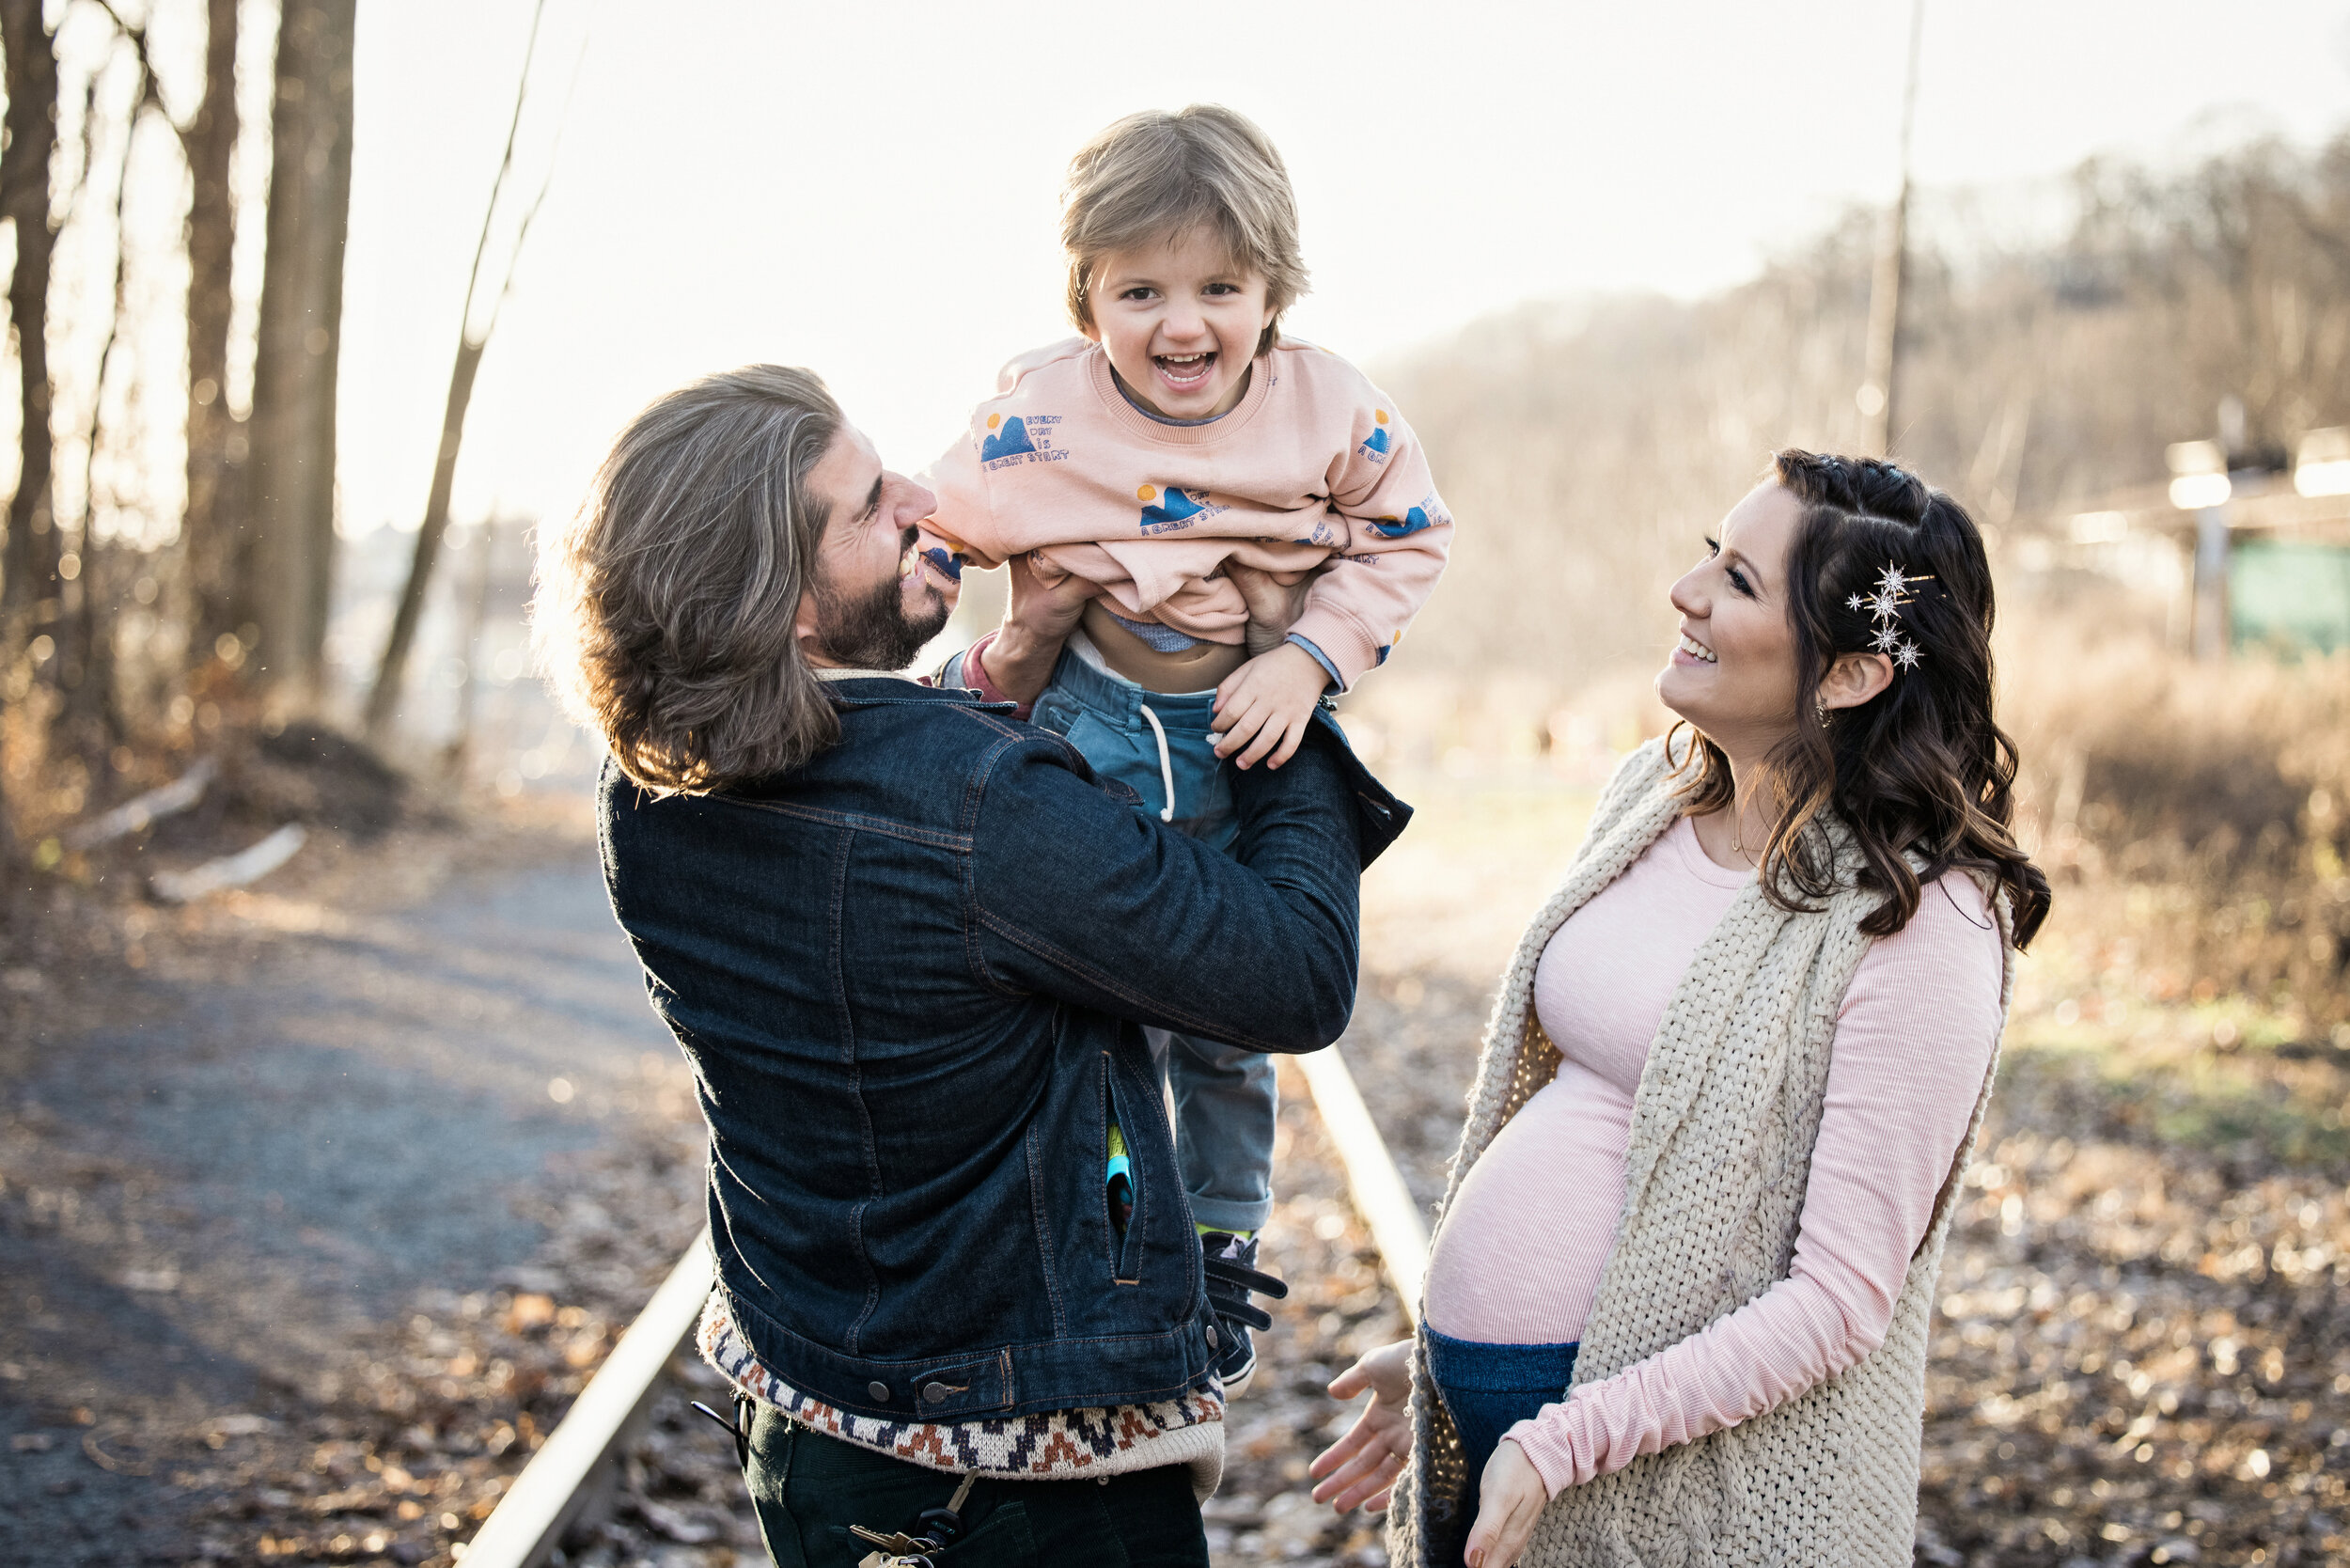
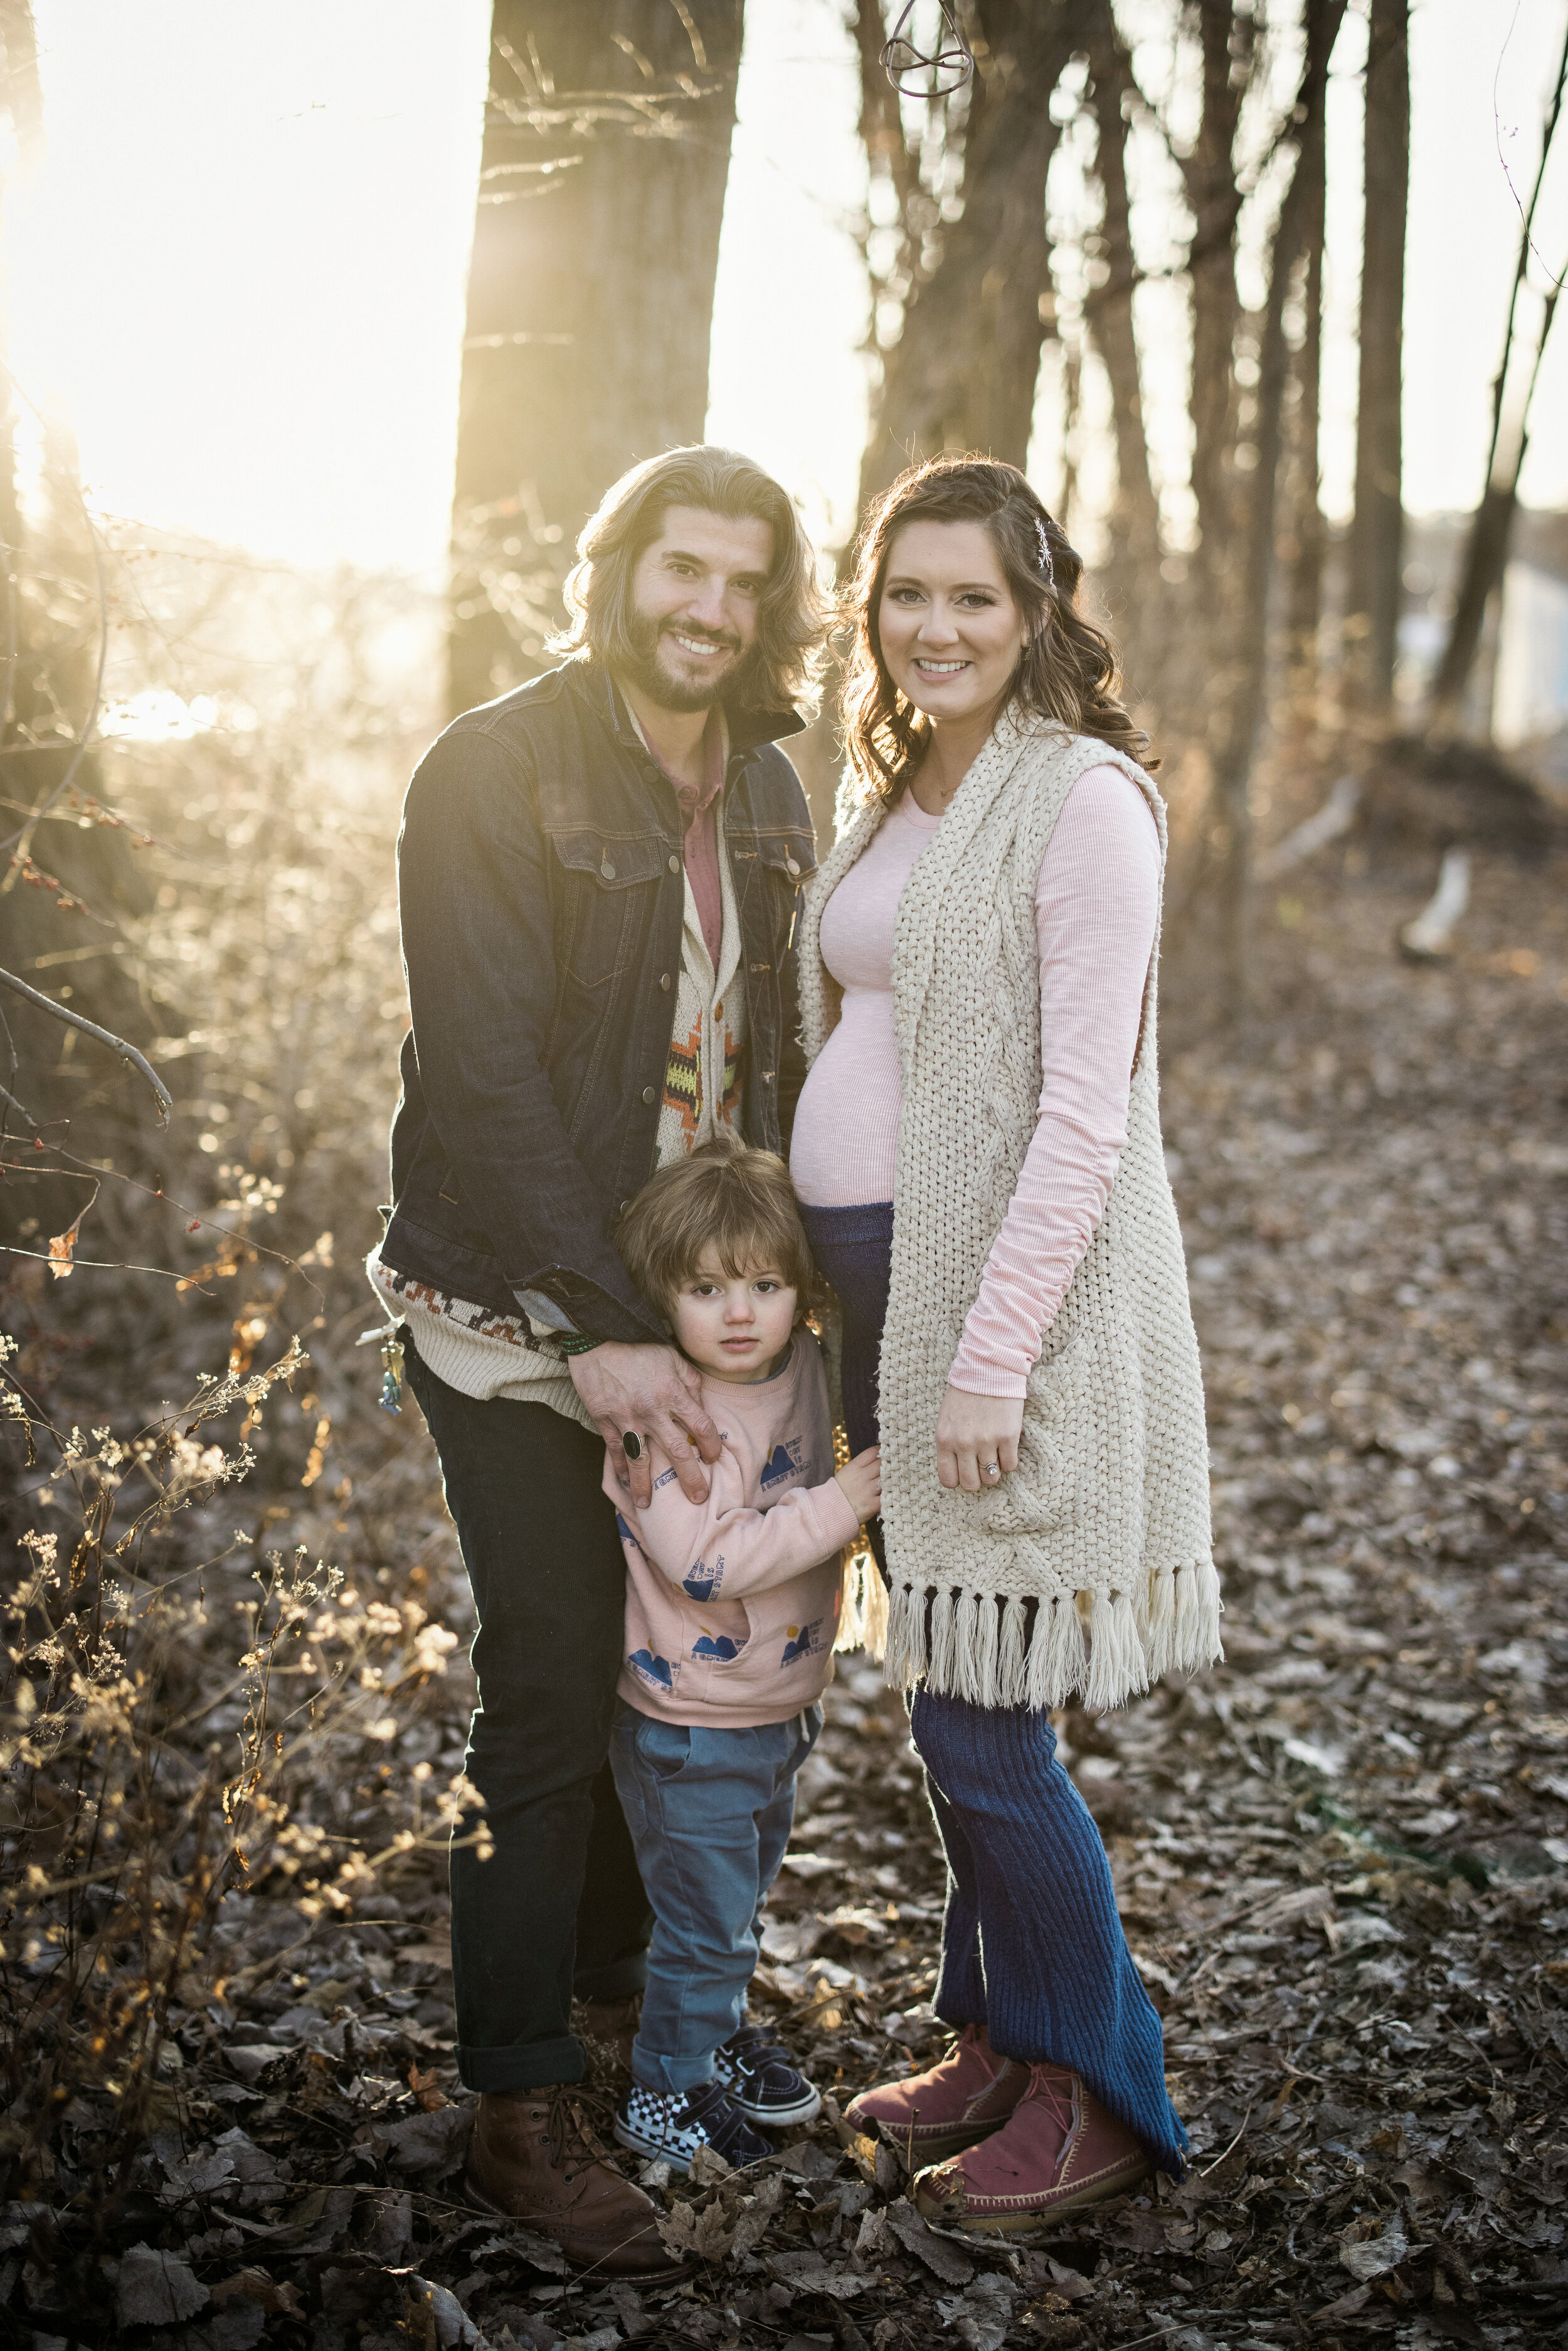
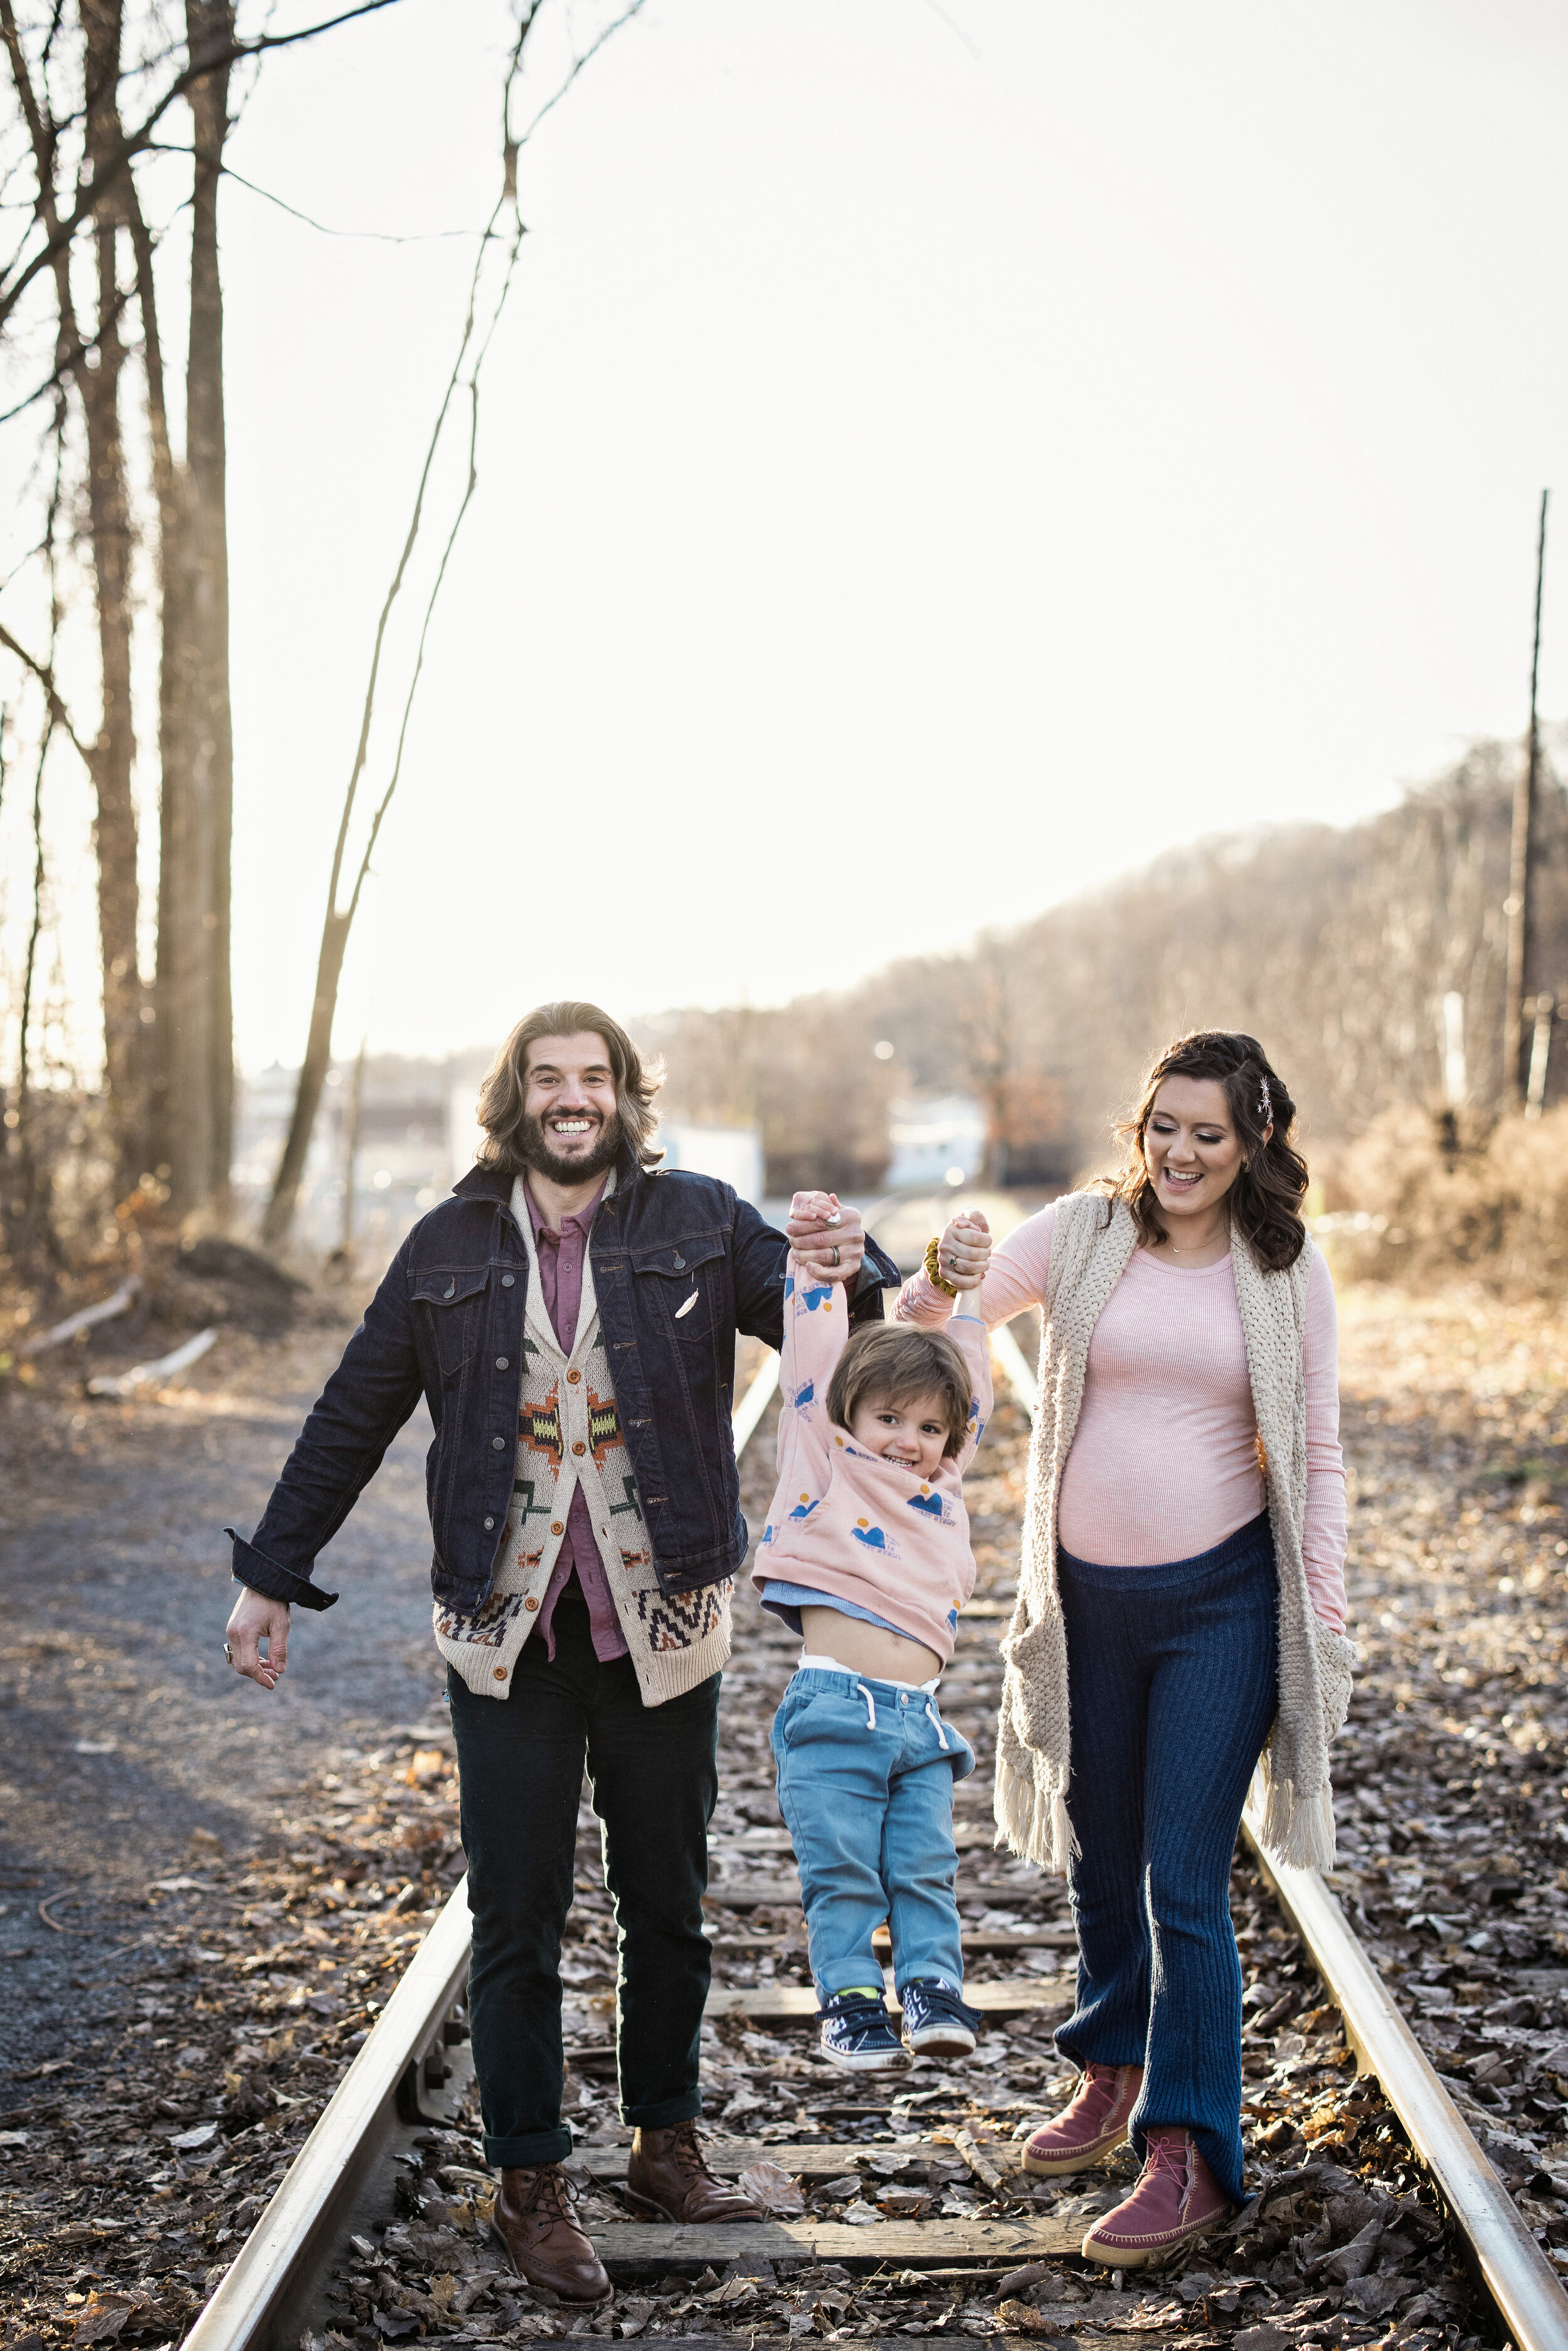
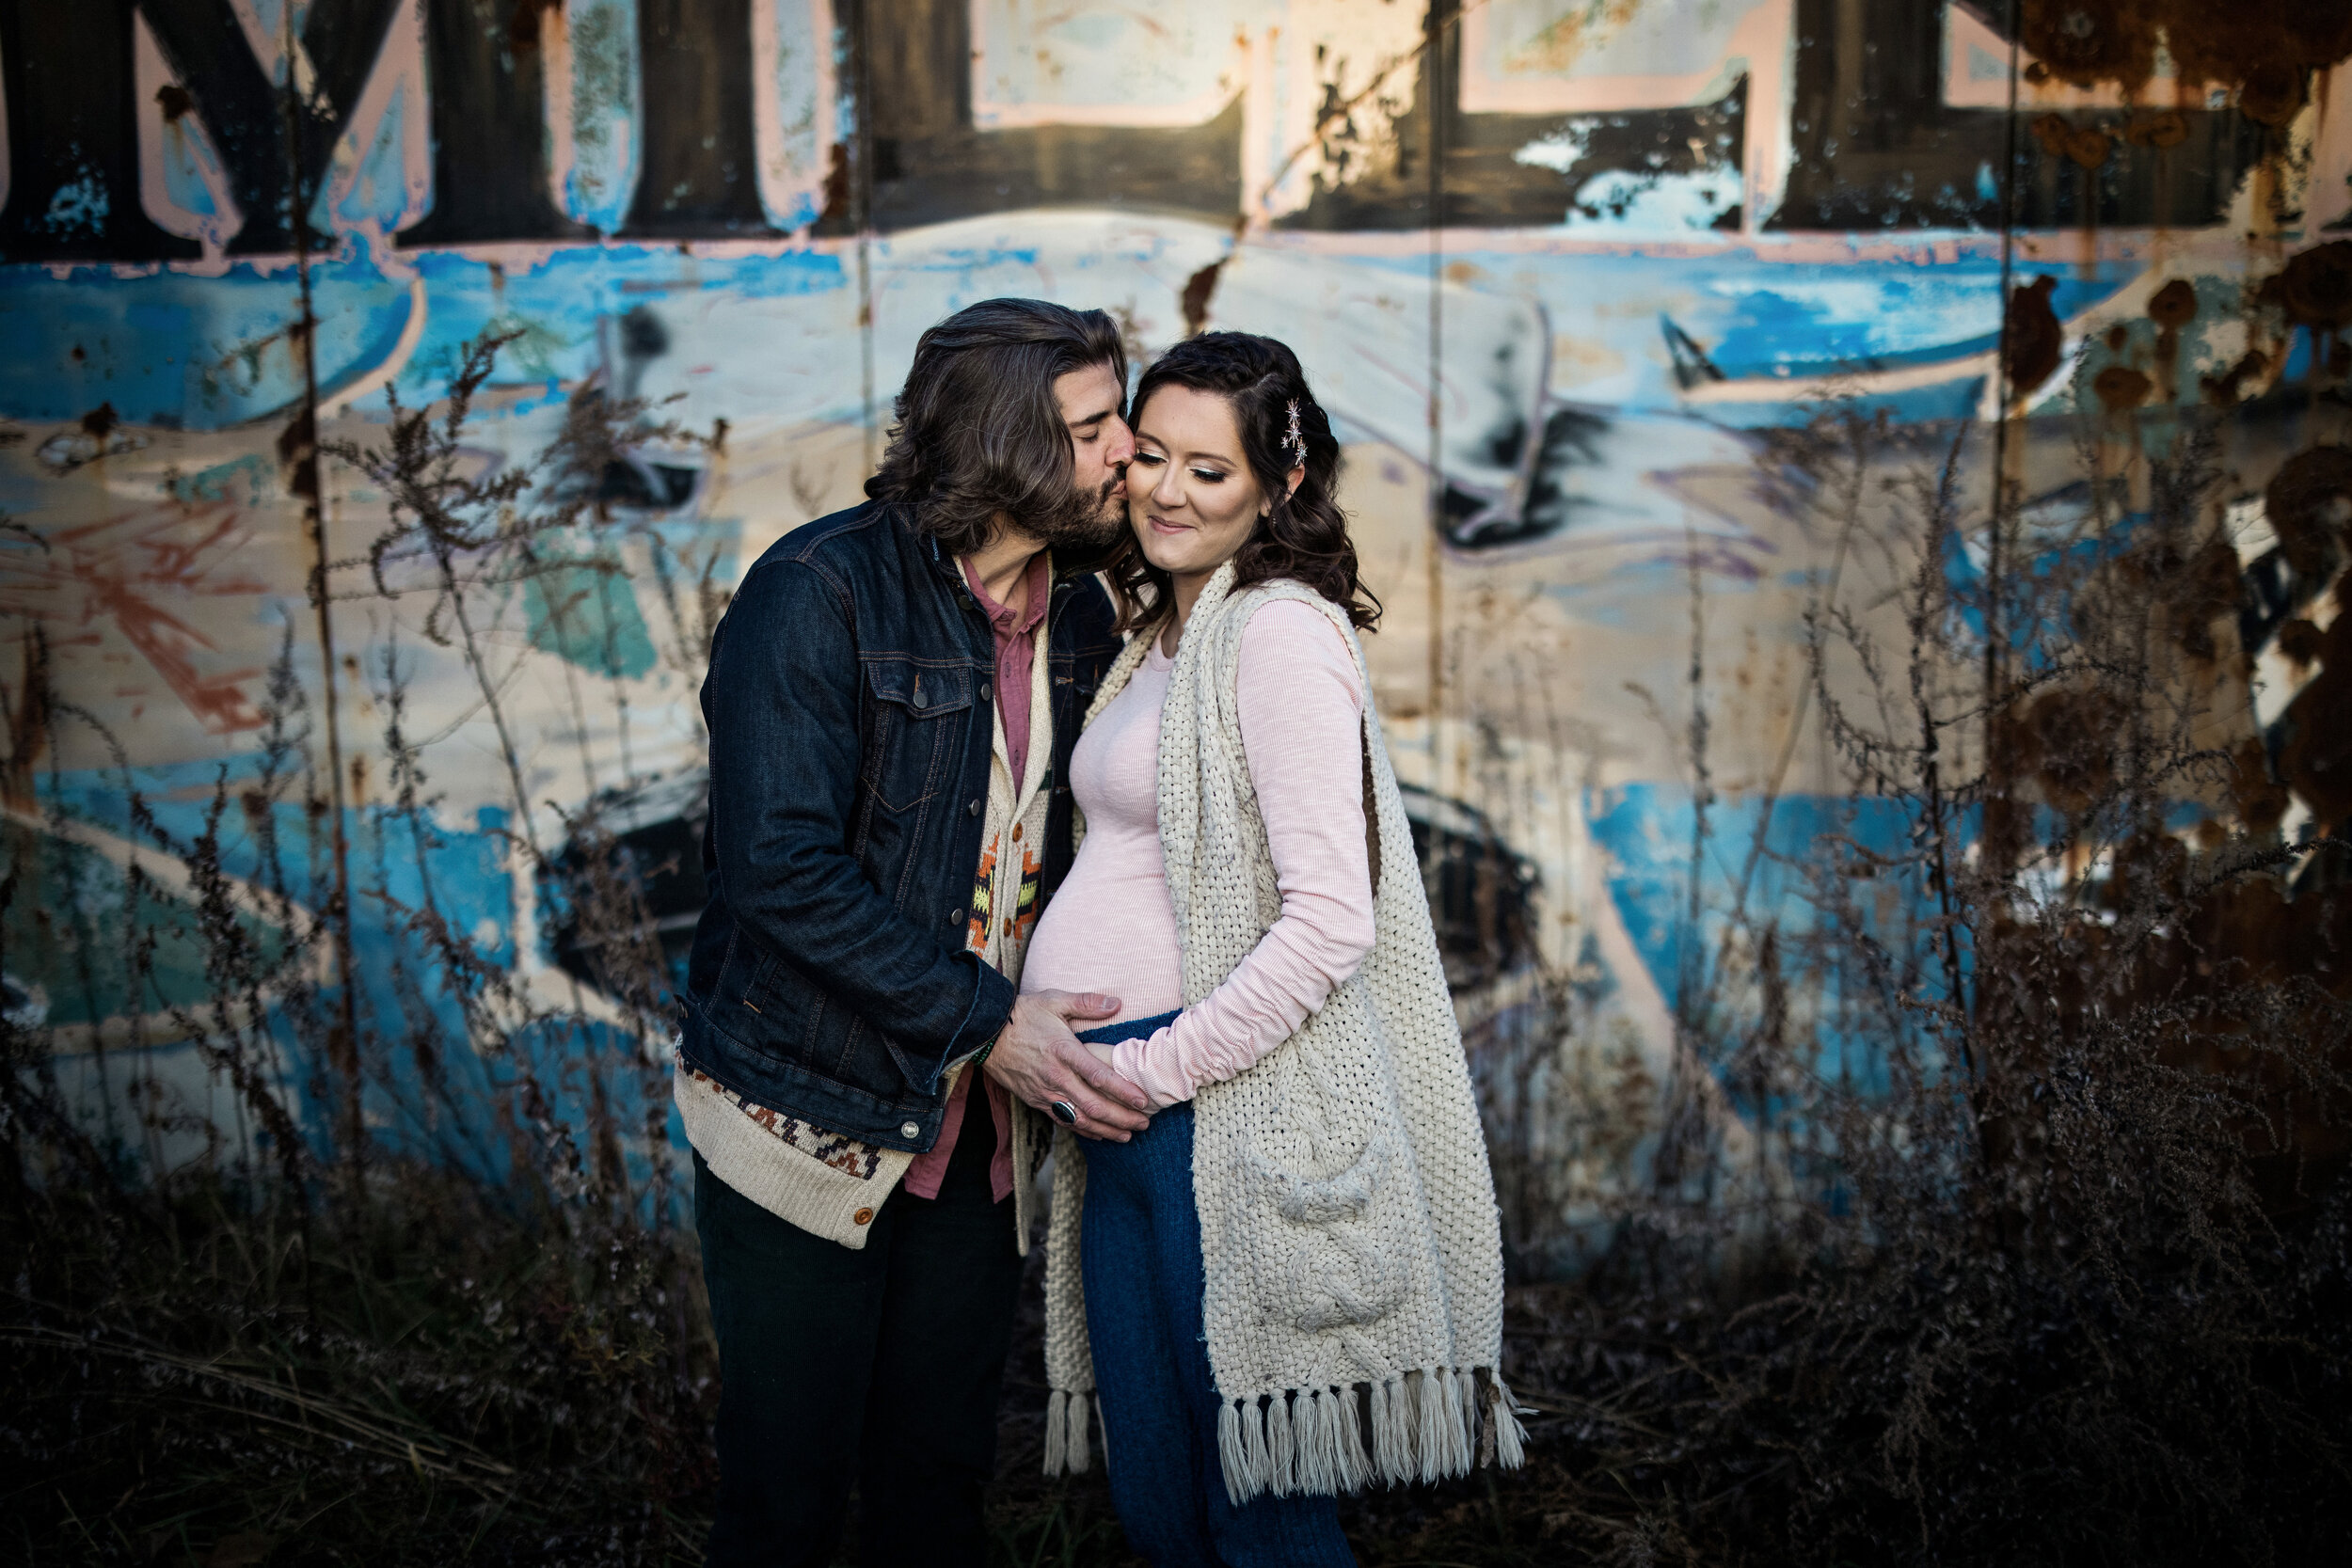
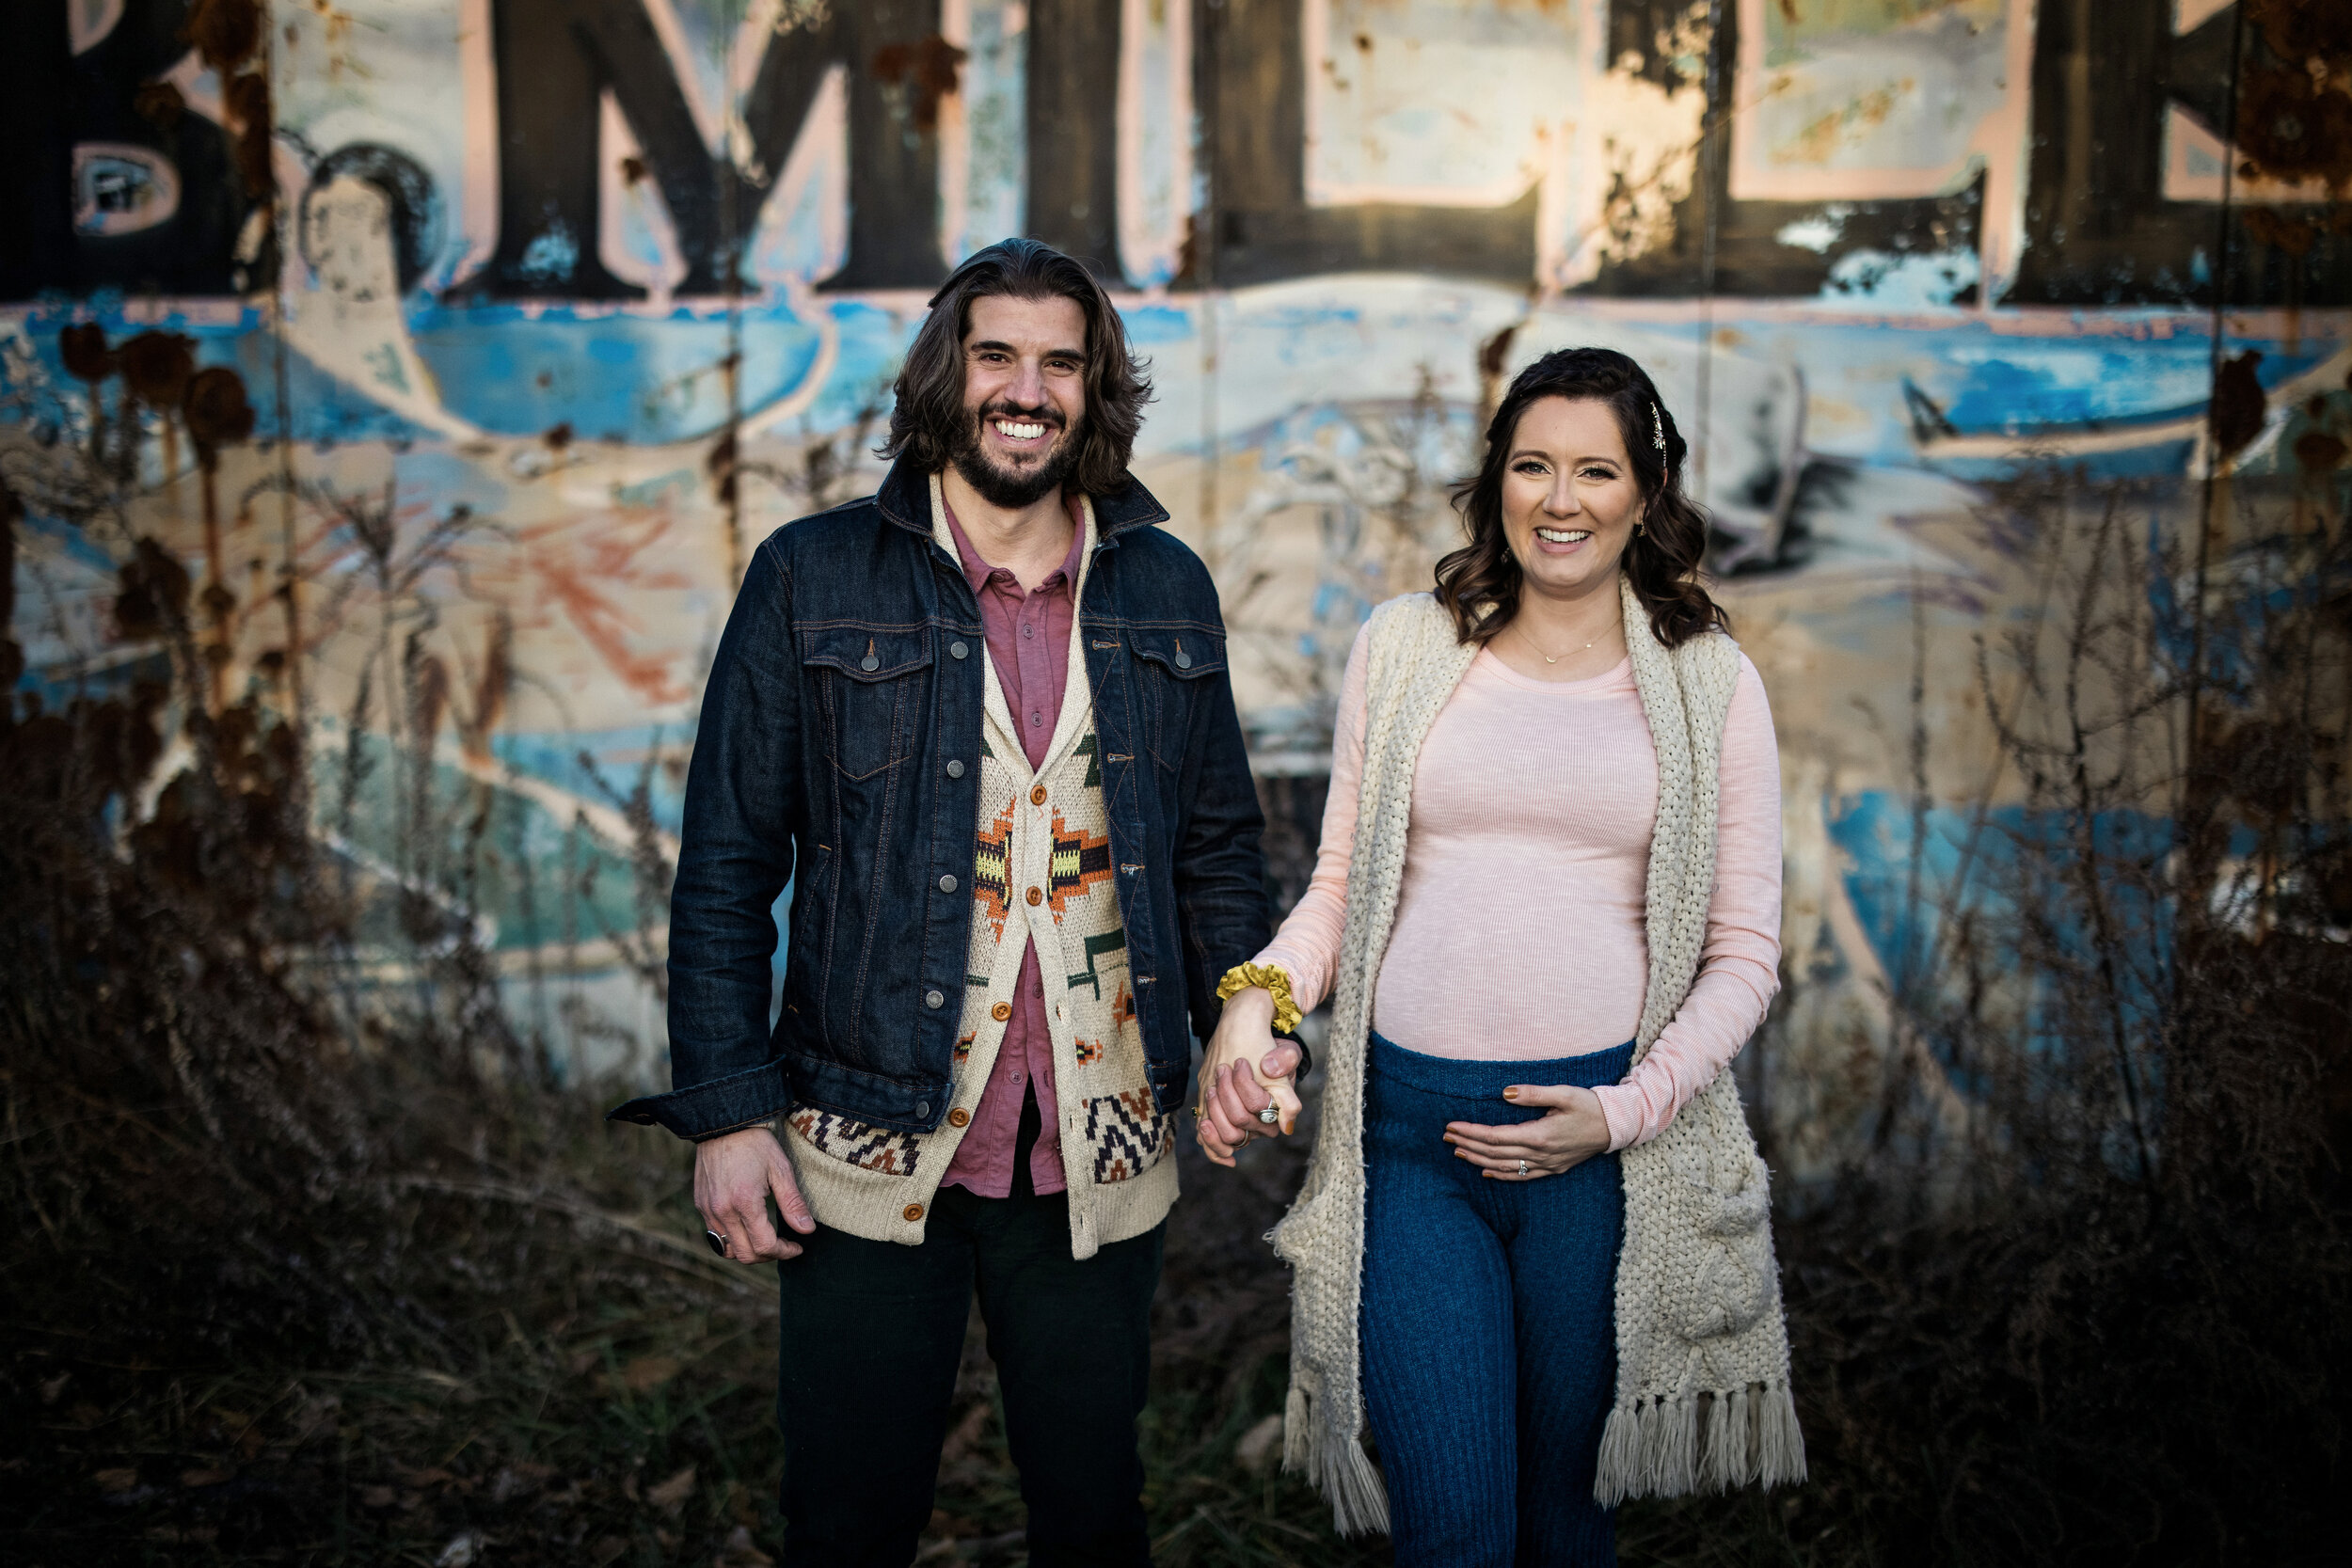
our beautiful family photos captured by clean plate pictures.
Somehow, it’s been 3 years since I became a mom. Logan will turn 3 on February 27, 2021 and just about a month before that we are expecting another baby boy. As I write this, it feels right but also surreal. I’m one of those people who has fairly “easy” pregnancies (from what I can tell from only doing it twice so far). However this second time around had a bit of drama. Long story short, I ended up with a 13cm cyst on my right ovary which was found at my first sonogram. In my second trimester it had to be removed, along with said ovary. So long lady. I’m told it won’t effect any attempts at a third child in the future so I’m not too worried. But I was very relieved to have that cyst removed and get back to having a normal, healthy pregnancy, Something I don’t take for granted!
This was the year of Covid. The pandemic. The year my business went from hitting the most growth it’s seen in five years to completely plummeting. Along with so many small businesses this year, the wedding industry was hit pretty hard. Gatherings became unheard of and so out went the need for custom wedding invitations. I knew it was out of my control and that I was one of many in this boat. I threw myself a little pity party, probably once a week in the beginning. And then I settled in a bit to what became the famous phrase, “pivoting.”
What could I do with all this time? How could I make the most of this time so that when my work started up again, I felt I had at least accomplished one thing? As an entrepreneur to my core, I’m always dreaming and planning. Listening to podcasts, reading articles, business books, studying businesses who I admire and what they’re doing. I love to learn about business in general and then figure out how to apply what I’m learning and observing to my own. It’s a lot of experimenting, trial and error. It requires all the patience. And I would never choose another way. I love what I do so deeply and I feel that love spark up even when just organizing my inventory. My stationery passion drives me.
Motherhood combined with entrepreneurship. Not an easy combination. It’s challenging enough to be a working mother, trying to find time for everything. We all deserve metals and cookies and hugs. We are all doing our best every day for ourselves, our kids, our partners, everyone. Feeling grateful for what we have and being so present where you are in each moment is so key. 2020 taught me this even more than I thought I knew. It forced me to slow down. Be where I am. Go with the flow. Stress a little less about money, success, growing. It will happen eventually. I truly believe when we work hard and put everything into achieving our goals we can get there. I believe that for anyone. What I needed the lesson in was grace. Having grace for myself and for time and for the things that are not in my control.
It took almost 2 years for me to feel like *myself* again after having Logan. I am an extremely introverted person, meaning I feel the most charged and energized when I’m alone. Pre-motherhood that time was usually spent painting, working, creating. Sometimes baking, reading or watching a movie. Post motherhood, well that needed to be learned. I needed to evolve into a new version. Stephanie 2.0. Being alone was not really a thing until bedtime and by then I was too exhausted to do anything but rest and sleep. But that 2 years went by. Many tears, lots of marital arguments, much therapy. I have a husband who is willing to fight and work towards being better and getting better. Wanting to grow and accepting the need to change is the first step to therapy really working for you. We are born knowing so little about the most important things. Emotion, communication, growing up. Learning those things in marriage is the best thing you can do for yourself and your family.
After 2 years we were ready for another baby. When I say ready, I mean as ready as one can be for the ultimate unknown. I was definitely not ready for my first baby. I thought I was but I was wrong. It’s okay though because kids have a way of making you see things differently and for the better. They make you less selfish and more proactive. I never knew how much I could accomplish in a one hour nap. I never knew how much genuine happiness I would feel watching a kid go down the slide at the park or drinking a bottle. It’s so awesome. And yes, I’m tired and I still feel like there’s never enough time for everything but that’s just how it is. There isn’t enough time for everything and we learn how to really prioritize and let go of some things.
As I prepare in these final weeks for my maternity leave, I’m having all the flashbacks of my first. I did not give myself a maternity leave that first time. I fully did not understand how greatly my life would change after bringing a baby home. I struggled to jump back into my “normal routine” with a newborn attached to me and while I healed from head to toe. It was the biggest mistake I ever made and I suffered from it. But a lot of times we learn things the hard way and that’s what forces us to grow and be smarter in the future. So this time, I’m being smart. And I’m being patient.
I will be on leave from February 1st - April 1st. It’s a weird sentence to type but I have been saying it now for 3 months on social media, in emails, to my family and friends. Almost like I’m convincing myself of it while informing them. It will without a doubt be the best decision for me and my family and also my clients. I can’t do my best work while adjusting to an entire new life. And if there’s one thing I learned from 2020, this pandemic, the work will come back. It just will.
I’m looking forward to resting, adjusting, MOVING! (oh yeah, we bought a house in September and renovations will begin sometime soon so before I know it, we’ll be packing up and settling into a brand new house). I’m also looking forward to dreaming up new ideas on my own terms. Sketching when I feel like it. Painting if I want to. Spending time with my new baby and my family and enjoying all of us experience this new child.
Thank you for reading and being. here. This post was mostly therapeutic for me. I like to share personal elements on here especially when they relate to life changes, mental health and therapy. It will be fascinating to look back one day and see the evolution of my life through the written word.
xx Stephanie


cookies but make em’ festive
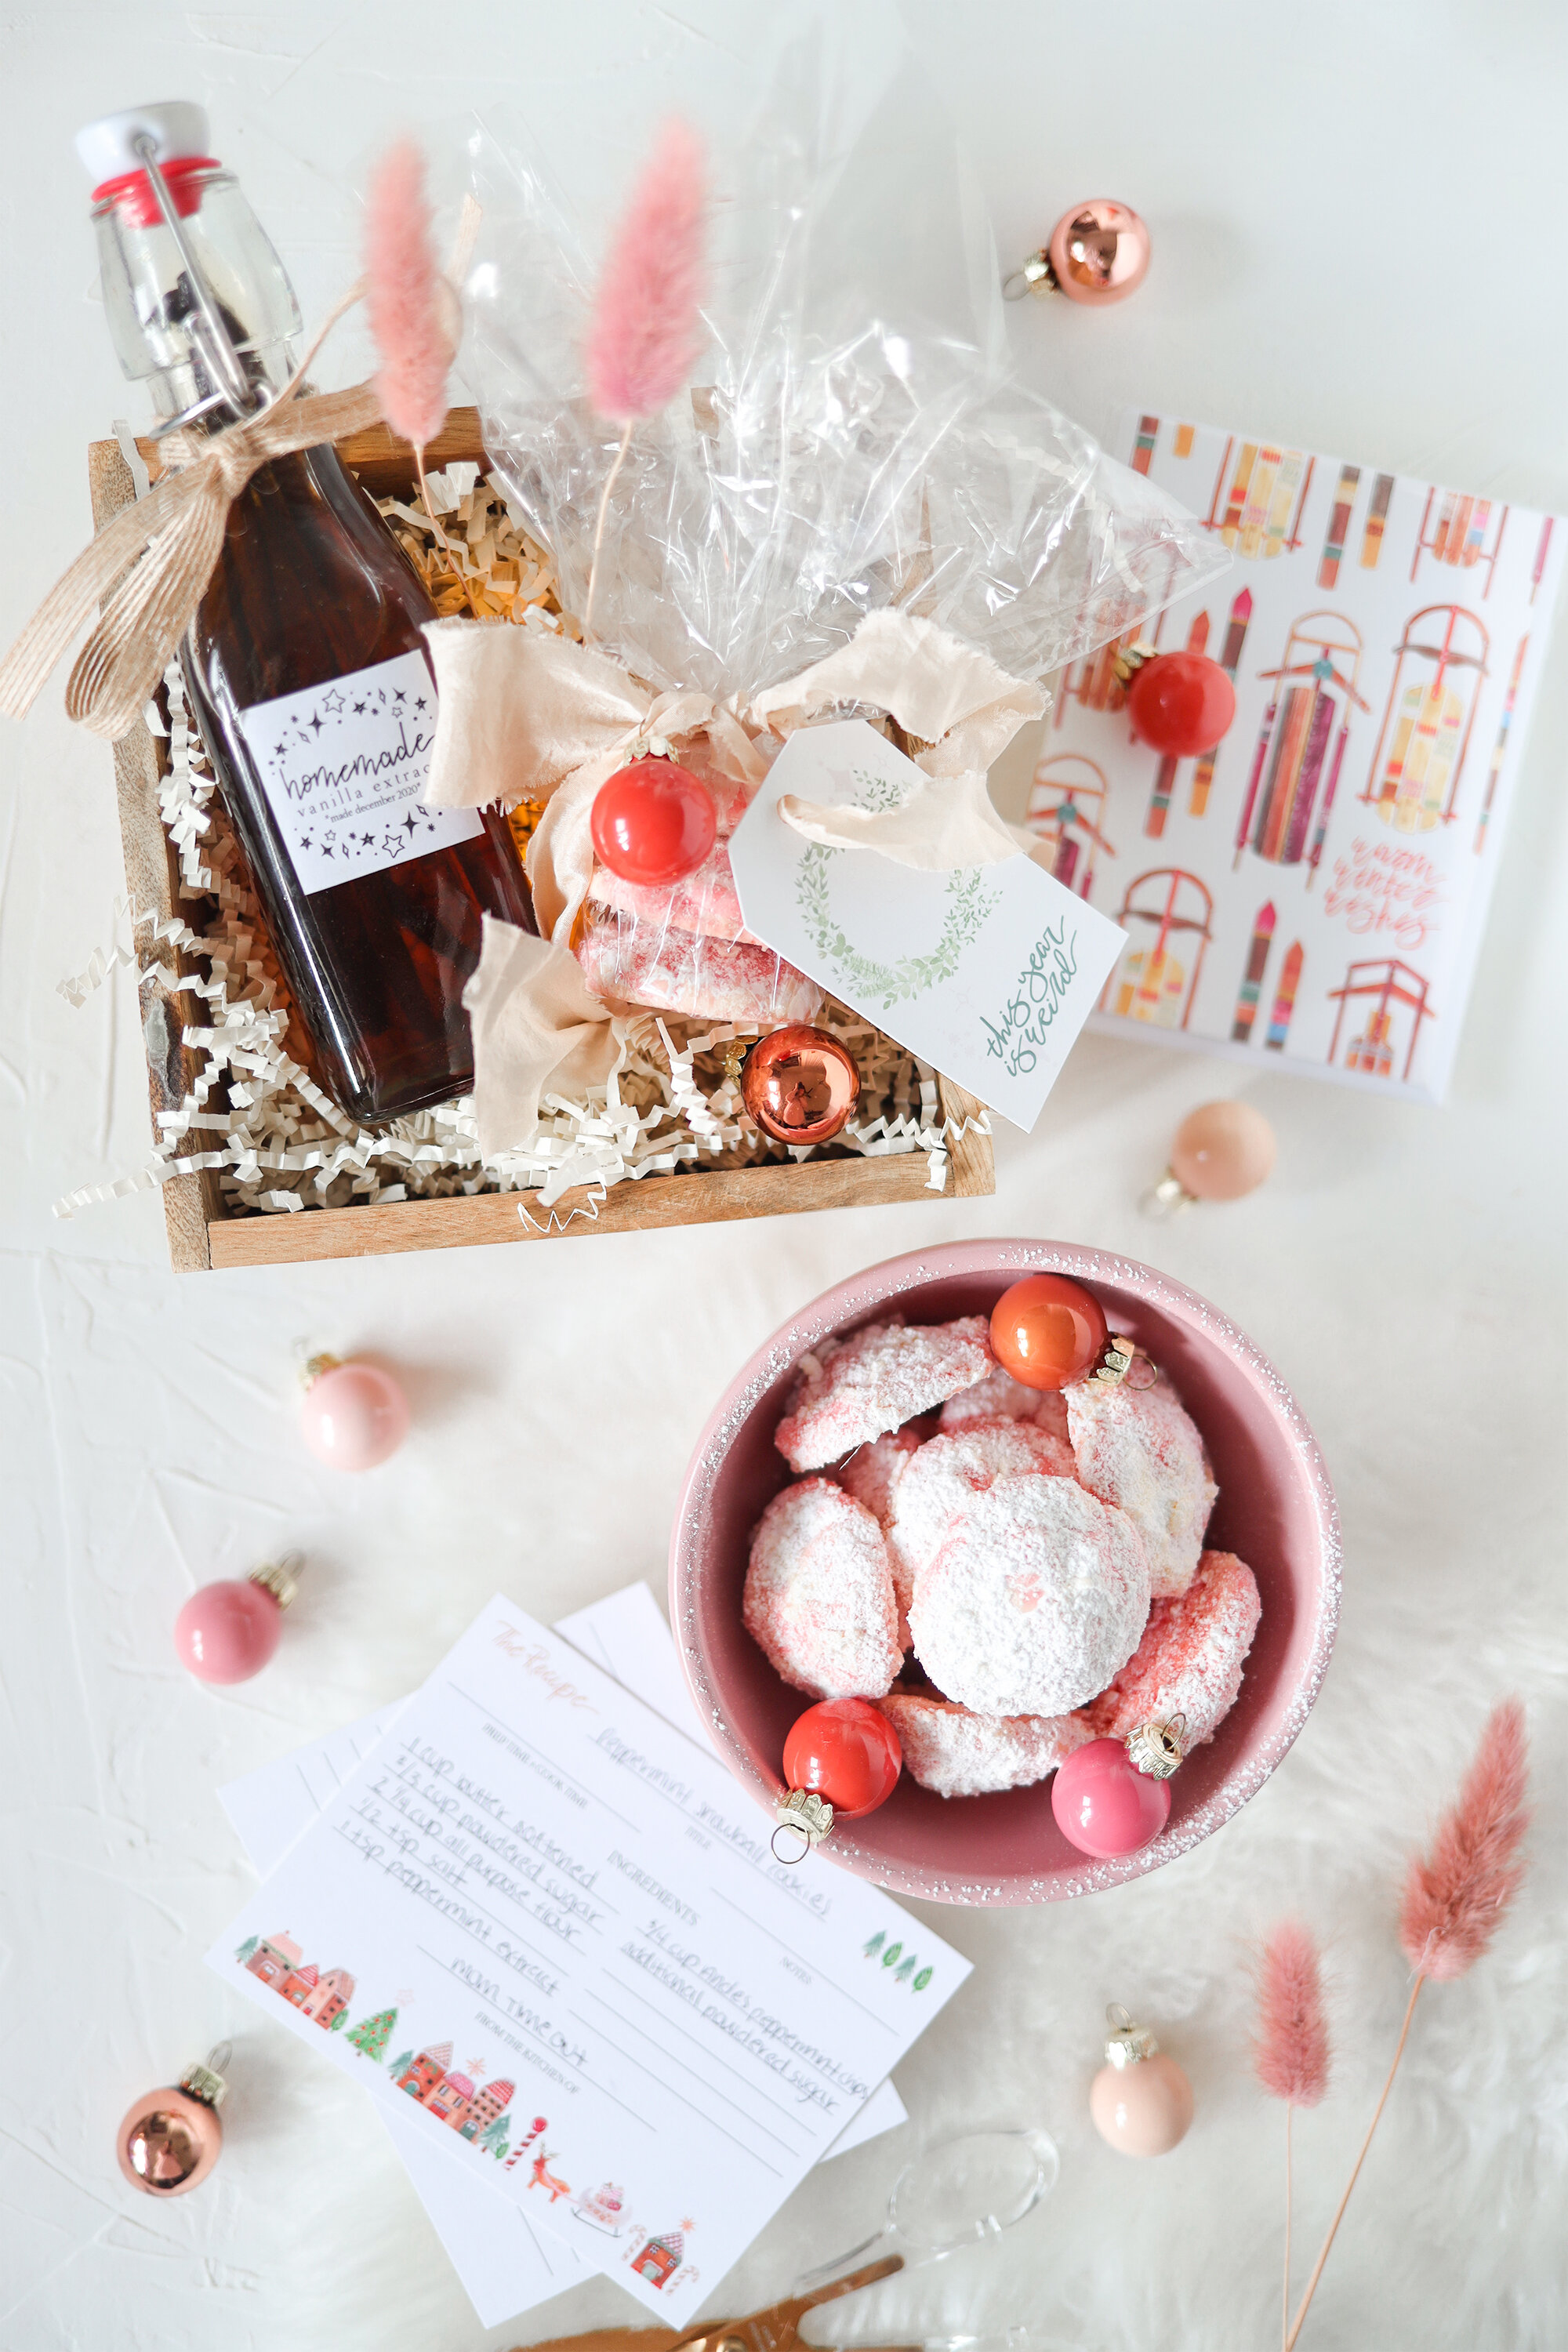
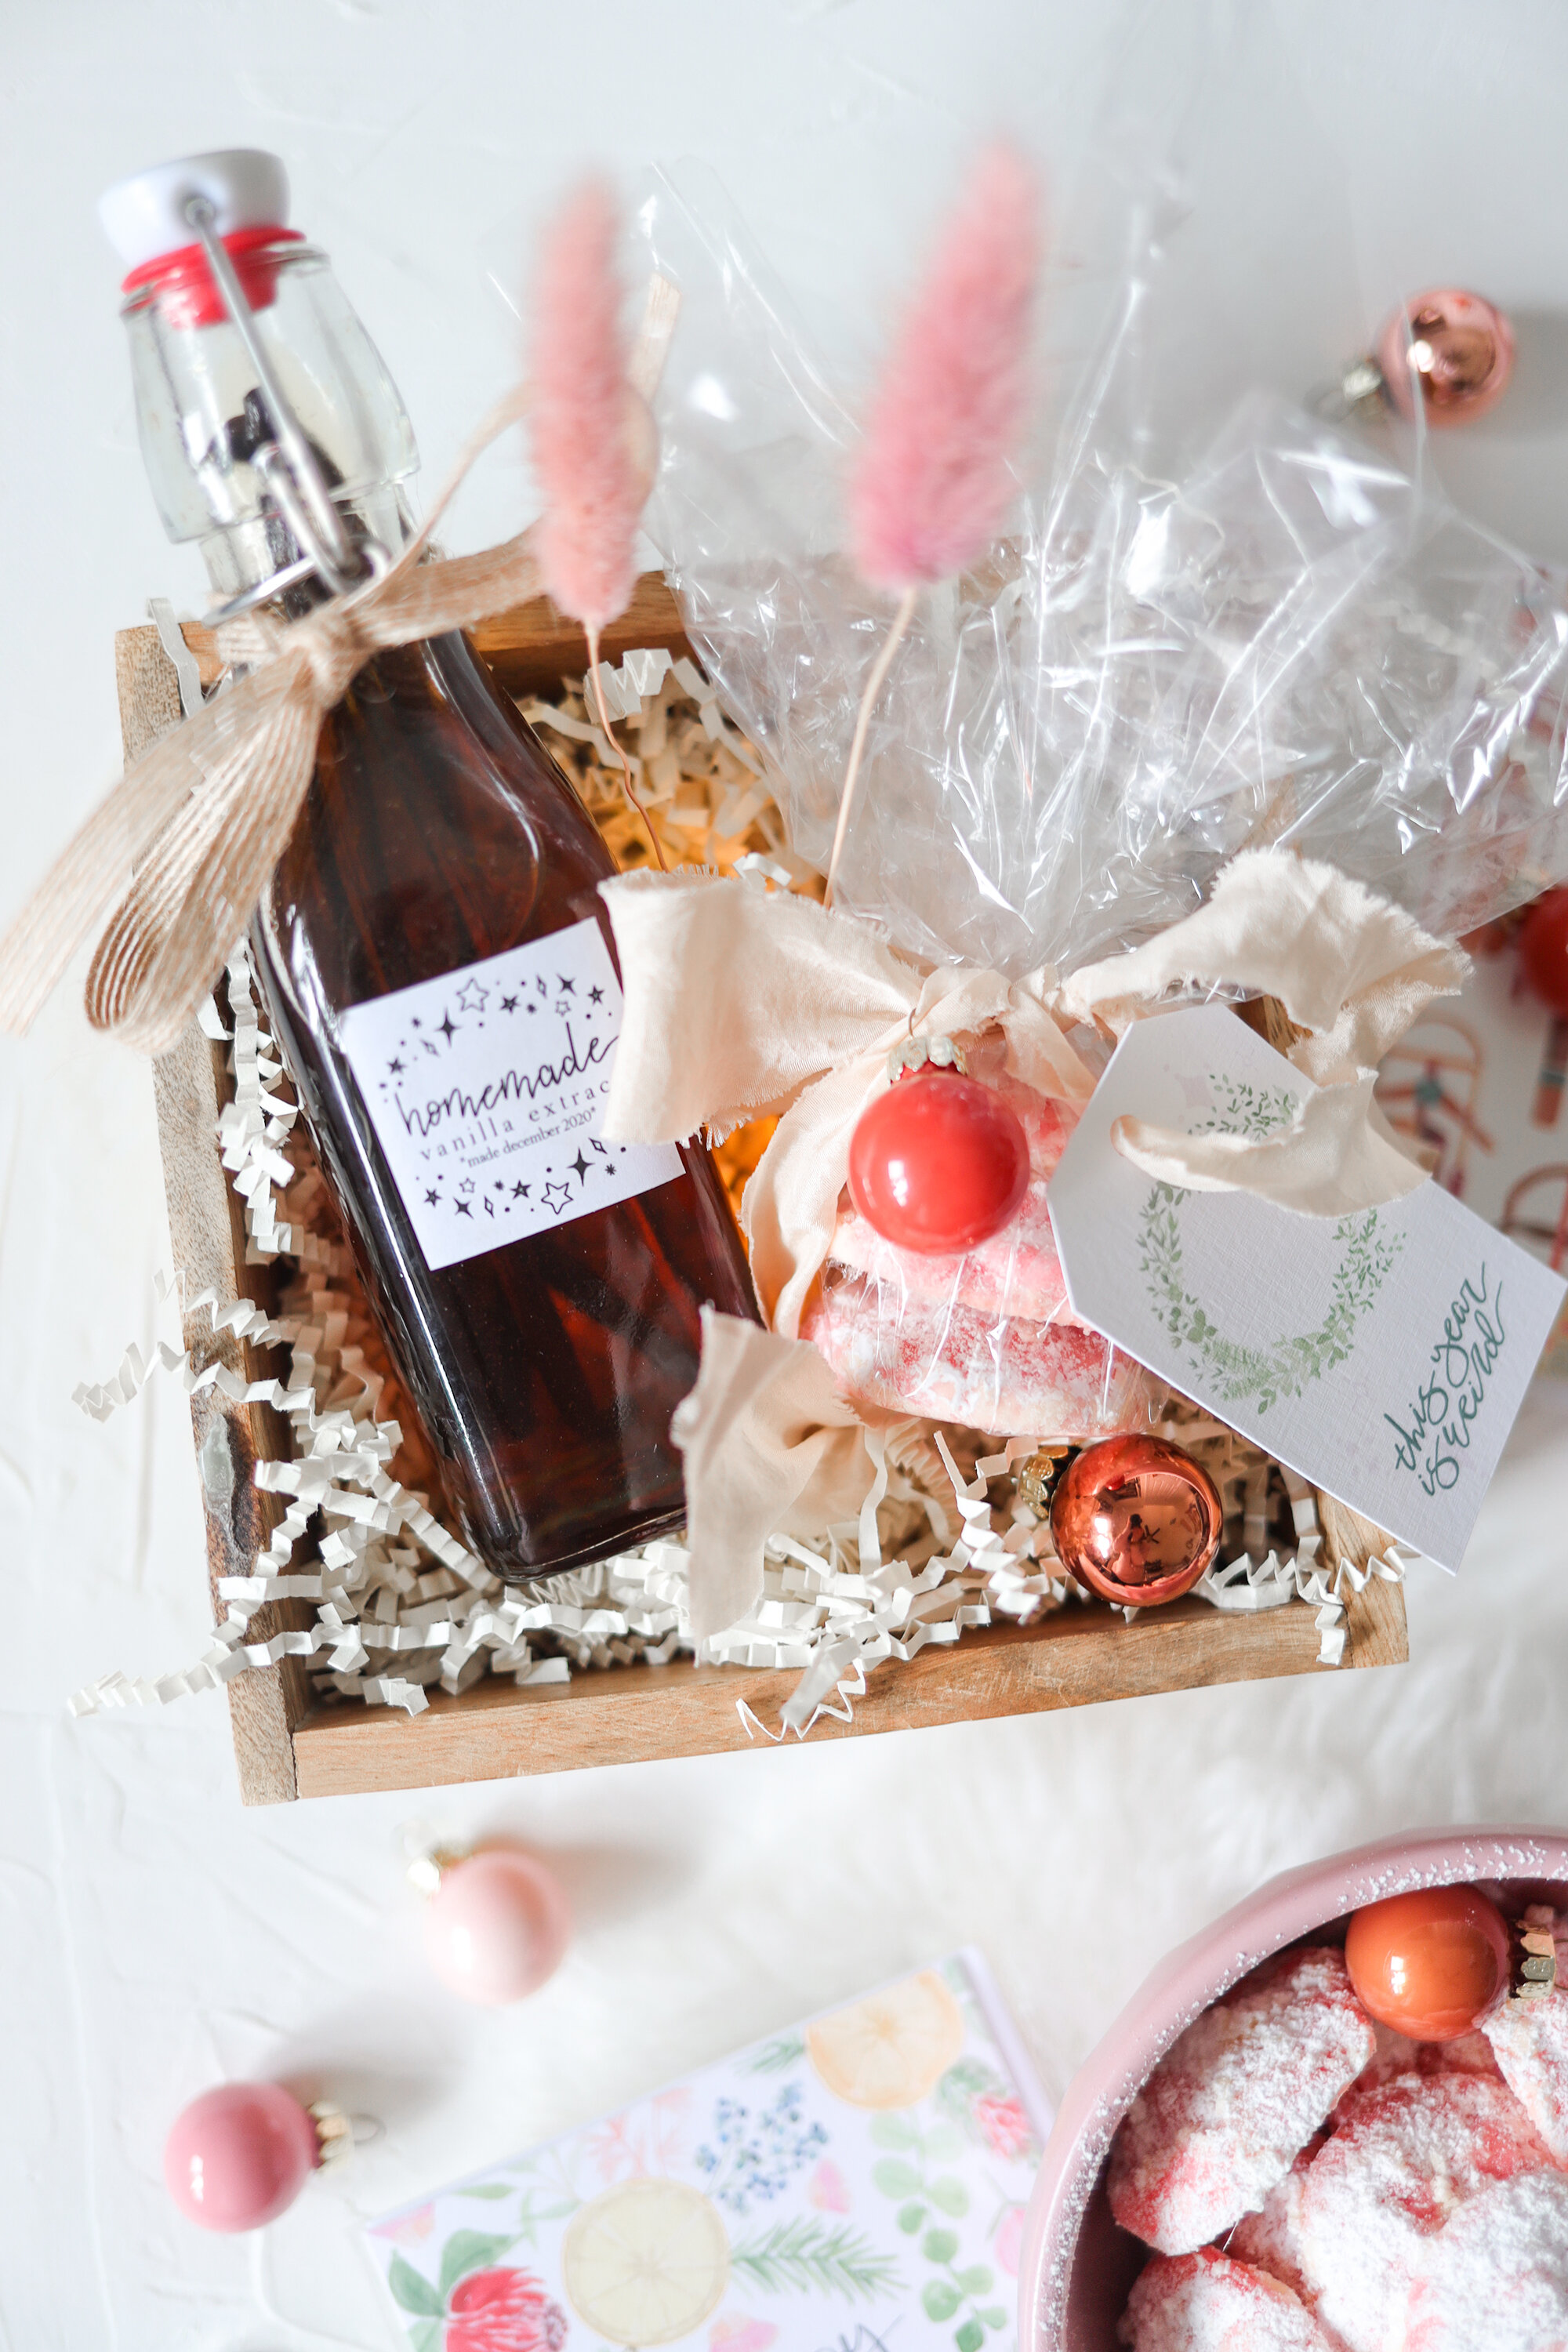
A holiday tradition I started…last year (lol) is giving cookie tins with homemade cookies

A holiday tradition I started…last year (lol) is giving cookie tins with homemade cookies and holiday treats inside! Something new I’m adding to it this year is including a recipe card with one of the cookie recipes for the recipient!
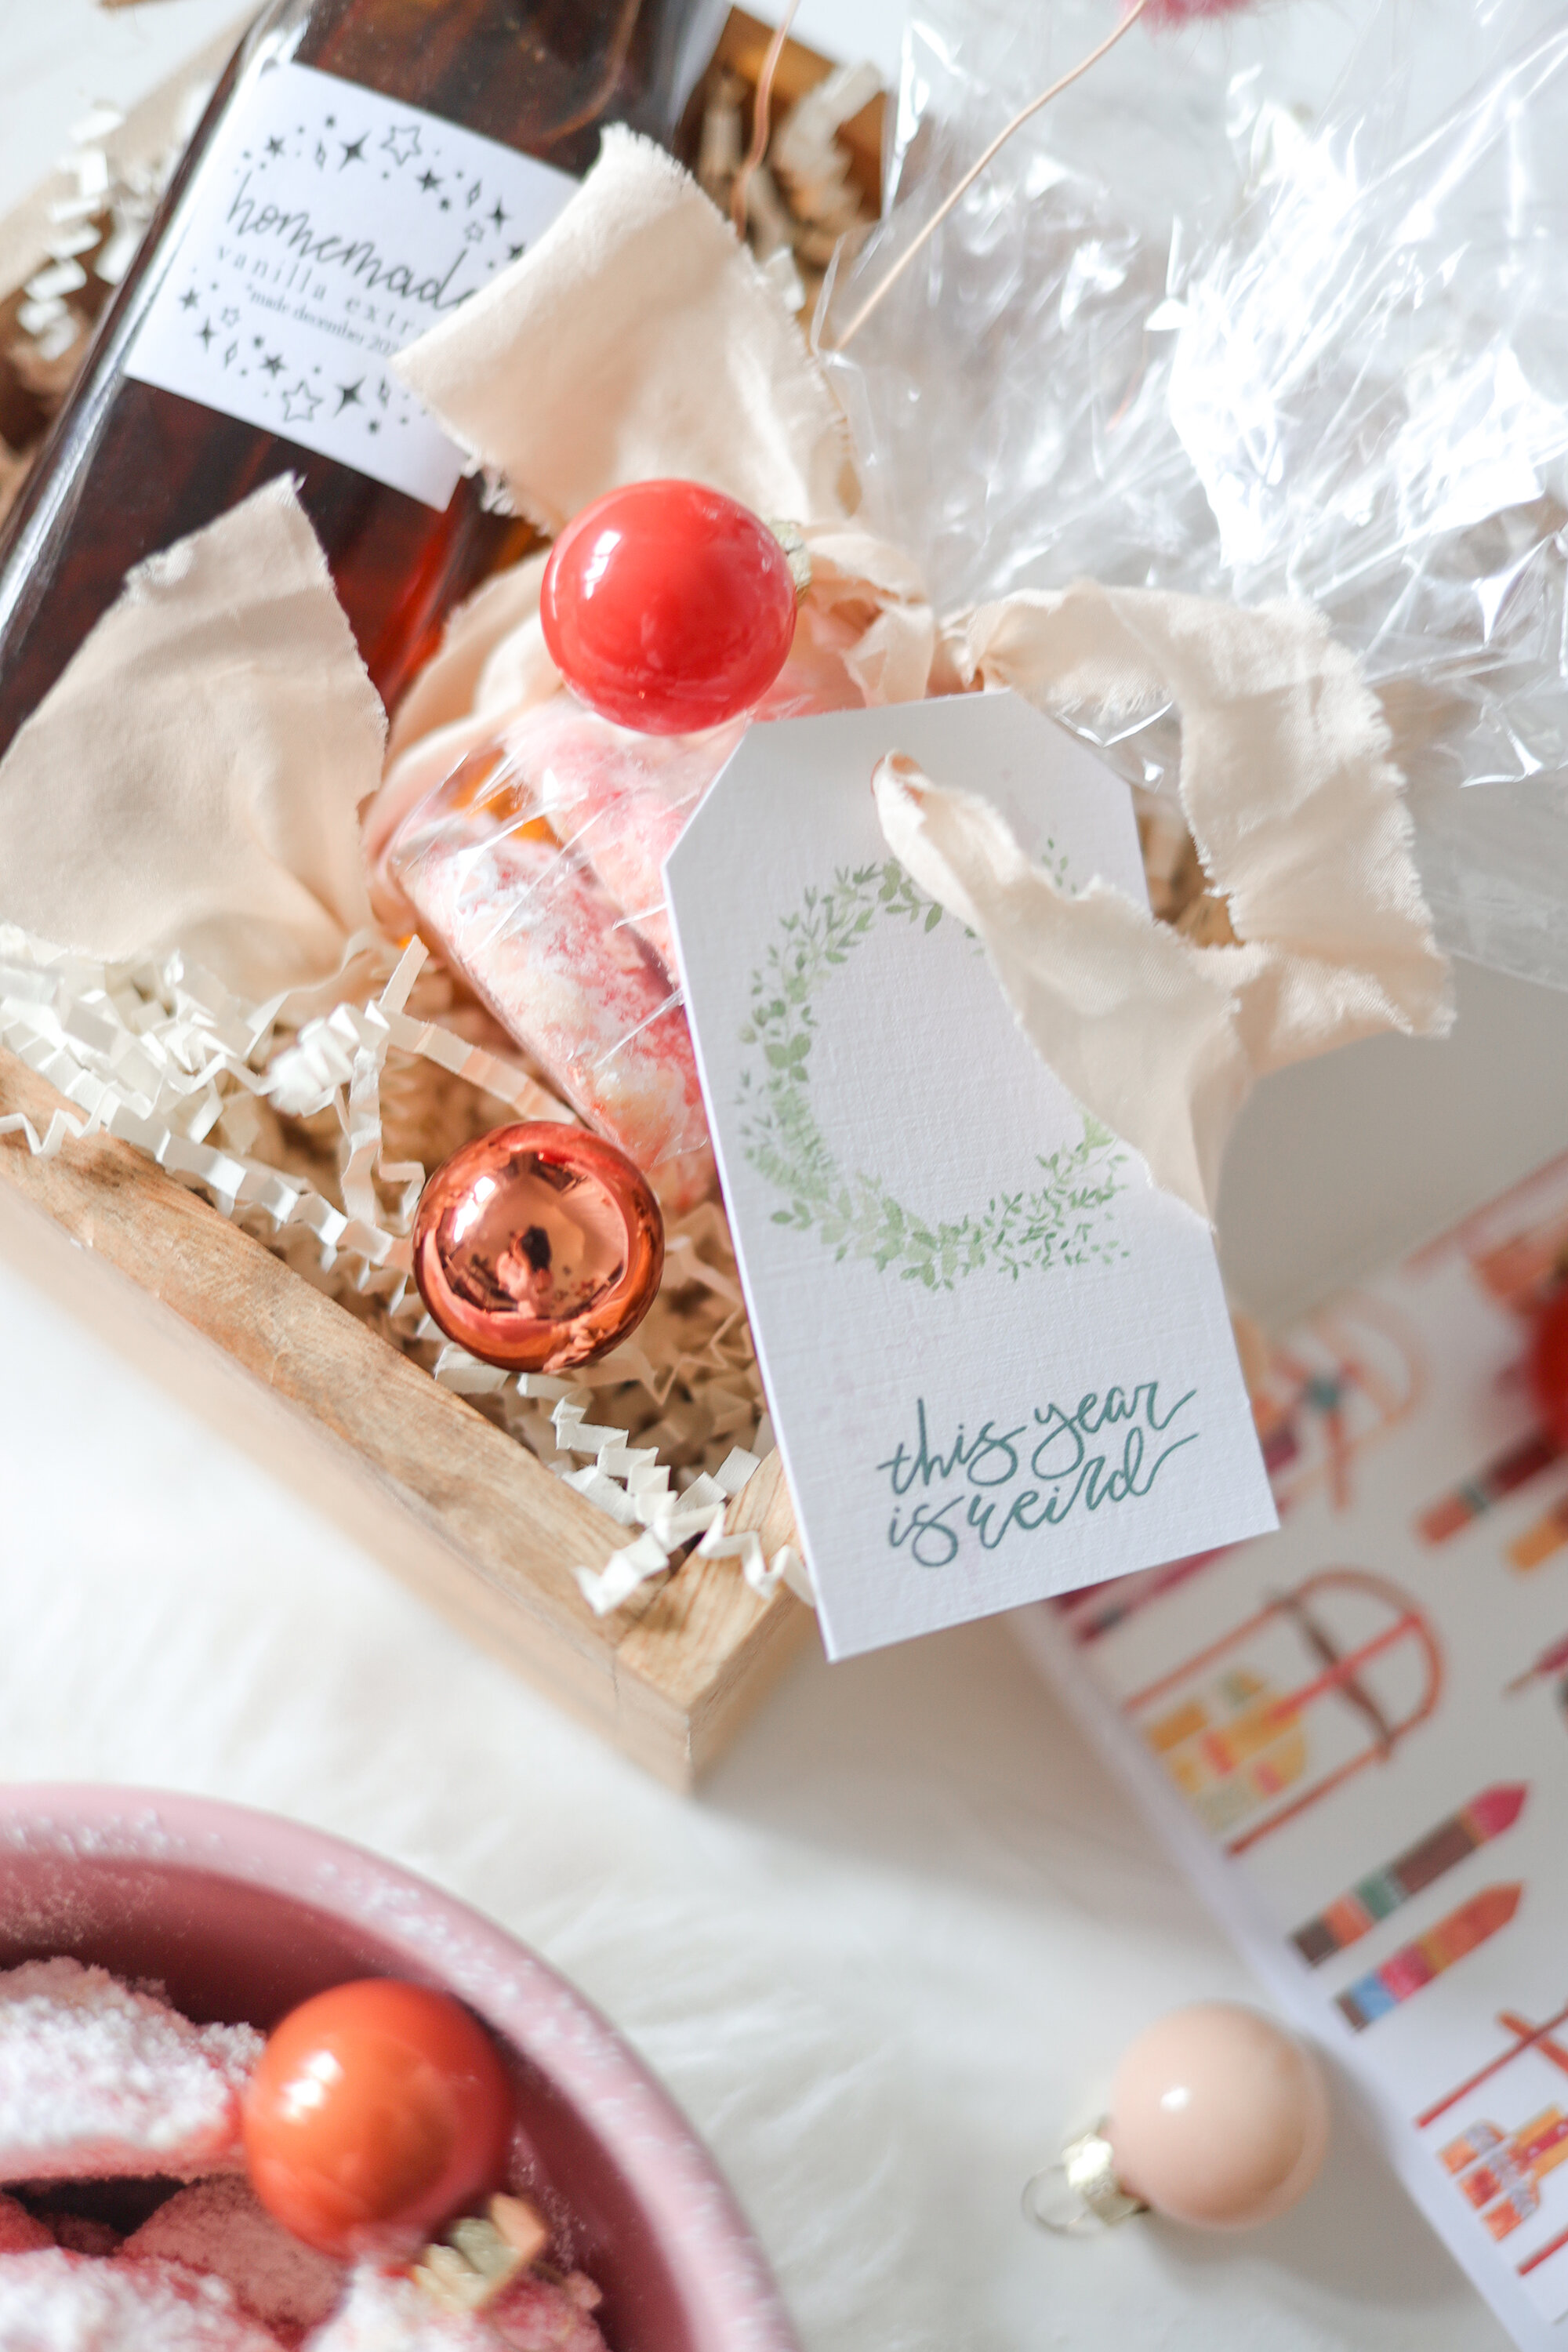
*Please be aware, I fully know I’m not holding a “tin” in this photo. I have not yet been able to go get them from my local dollar store BUT FRET NOT because I will. This random wood box was in my basement so it became the photo prop out of convenience. The tins are just as cute and actually more functional because they have lids. you can also just line them with some parchment paper and then the cookies don’t even need to get wrapped in anything!
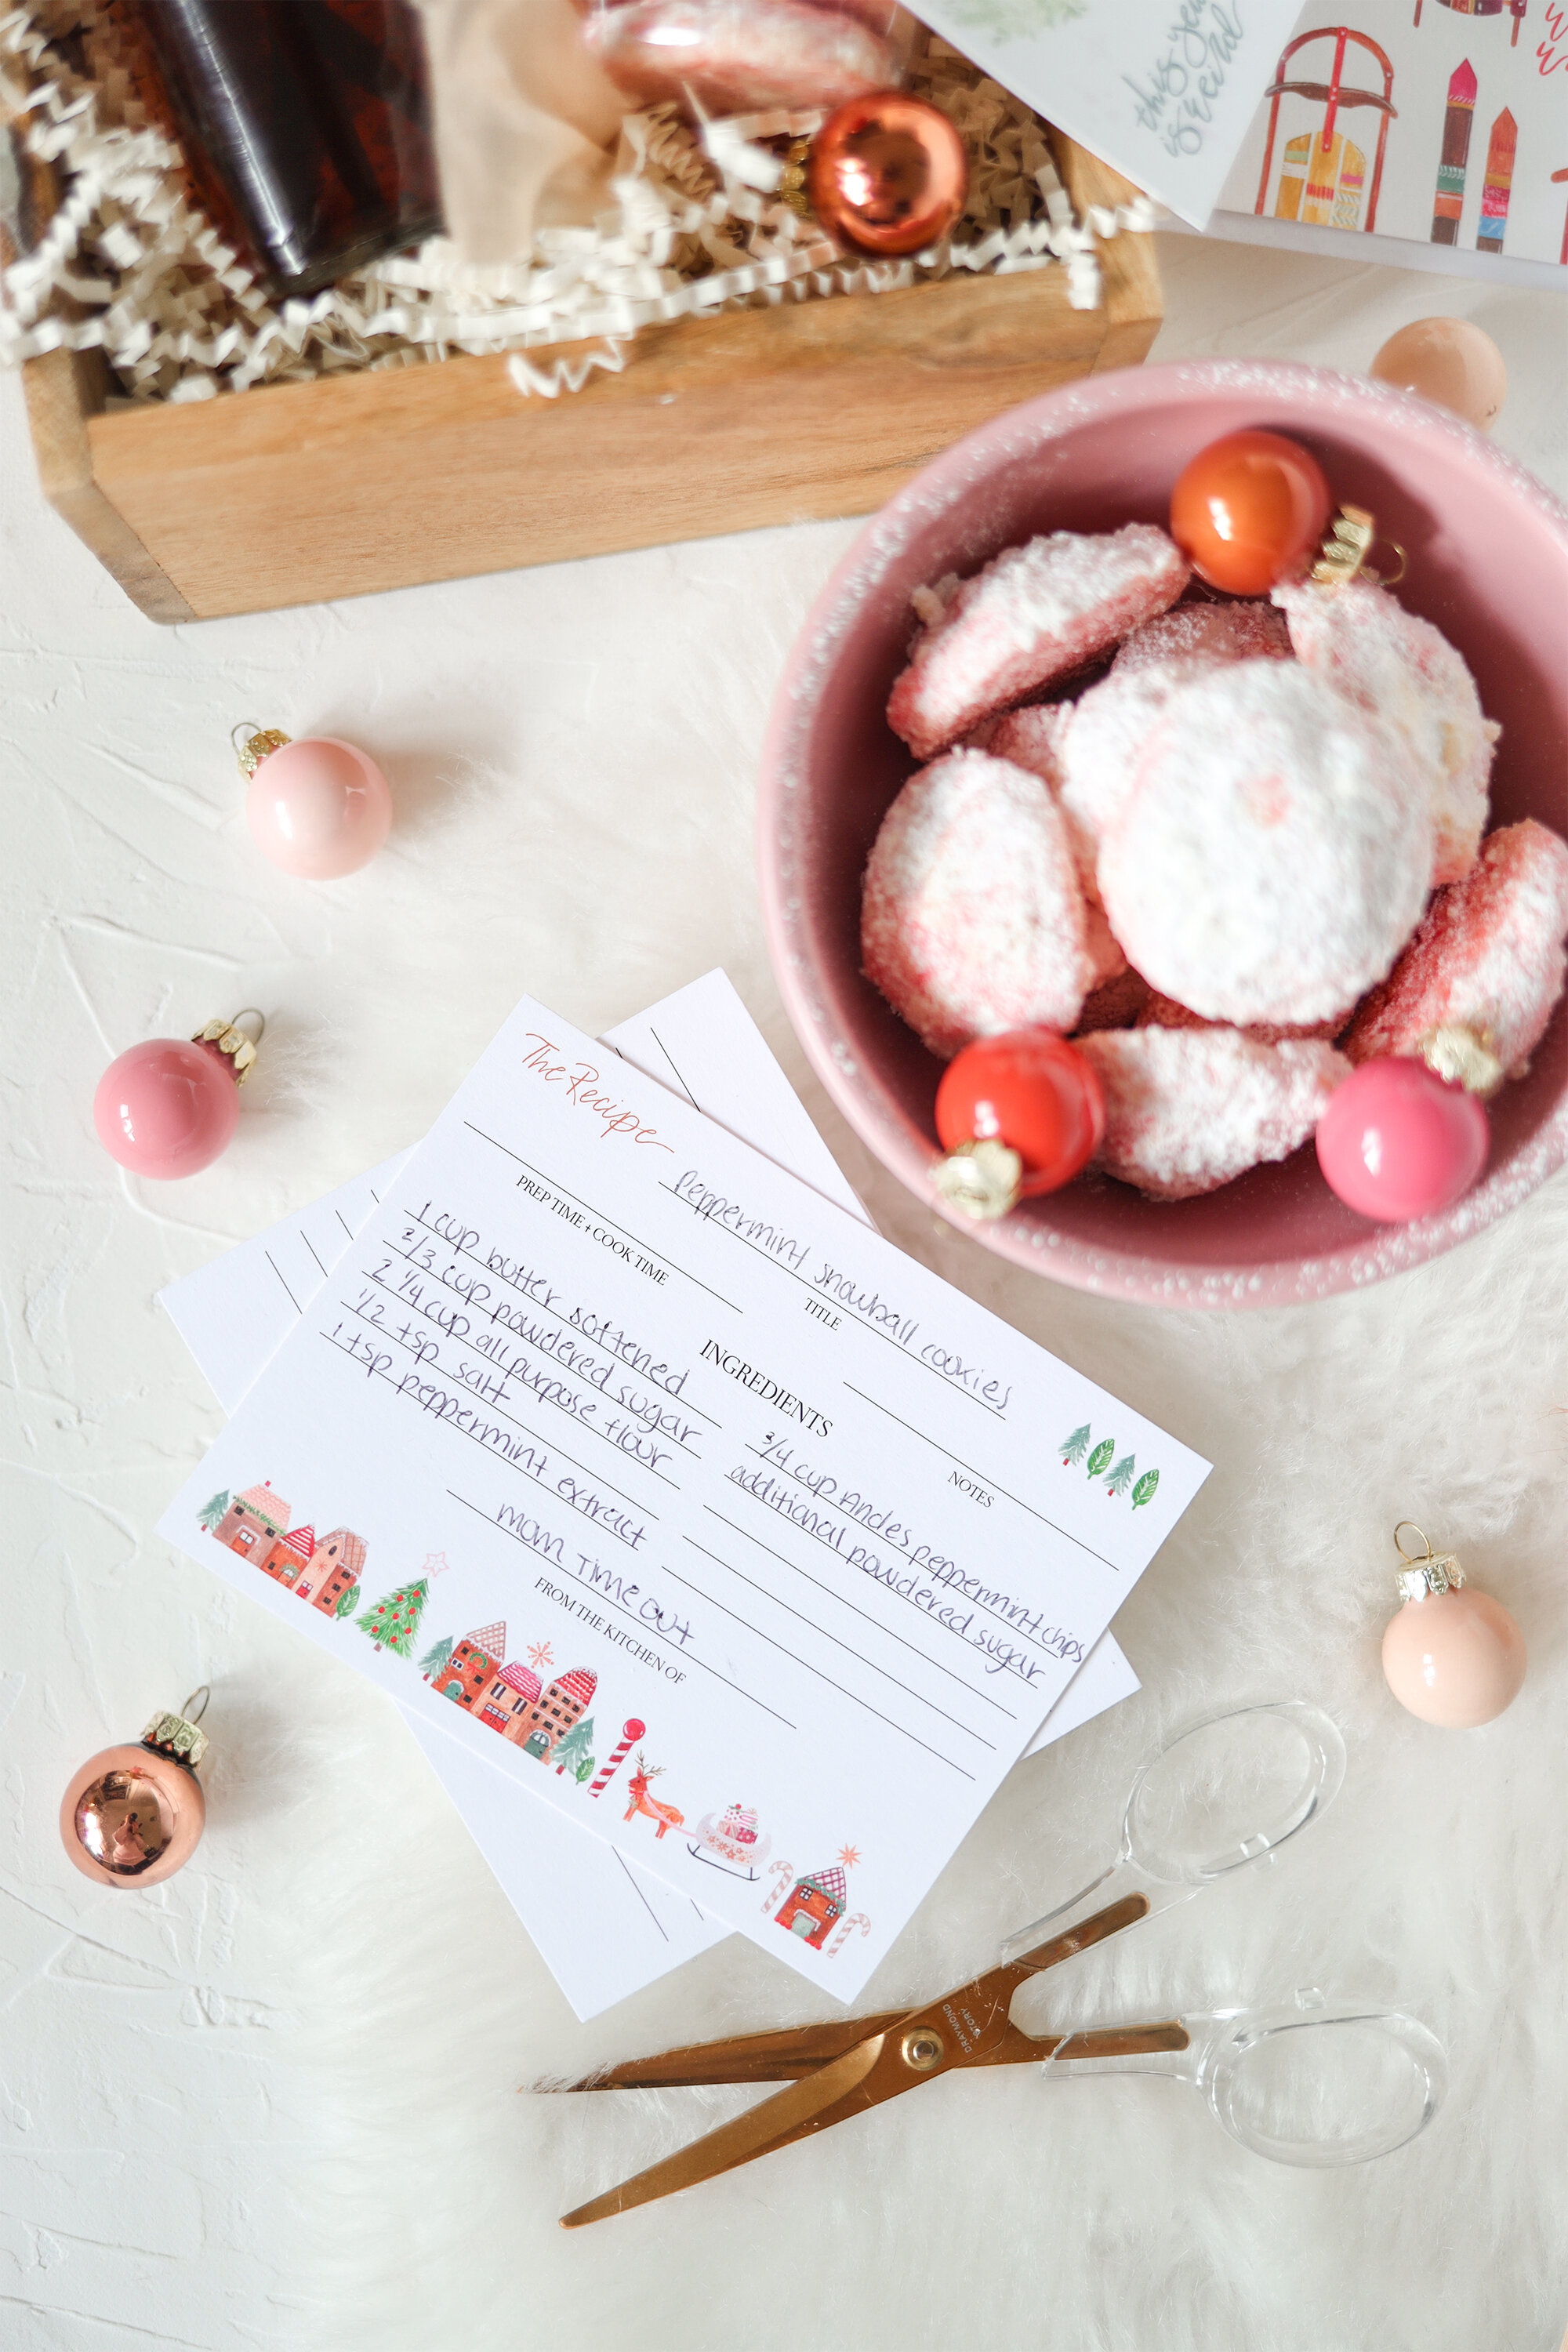
When I gave away the cookie tins last year, I included peppermint snowball cookies in each one. Every single person went NUTS or should I say, COOKIES, for them! They all asked me for the recipe and so I dreamed up my holiday recipe card design and thought, “this will go in each tin this year with that exact recipe!” I’m all about sharing a good recipe when I find it, especially for sweets.
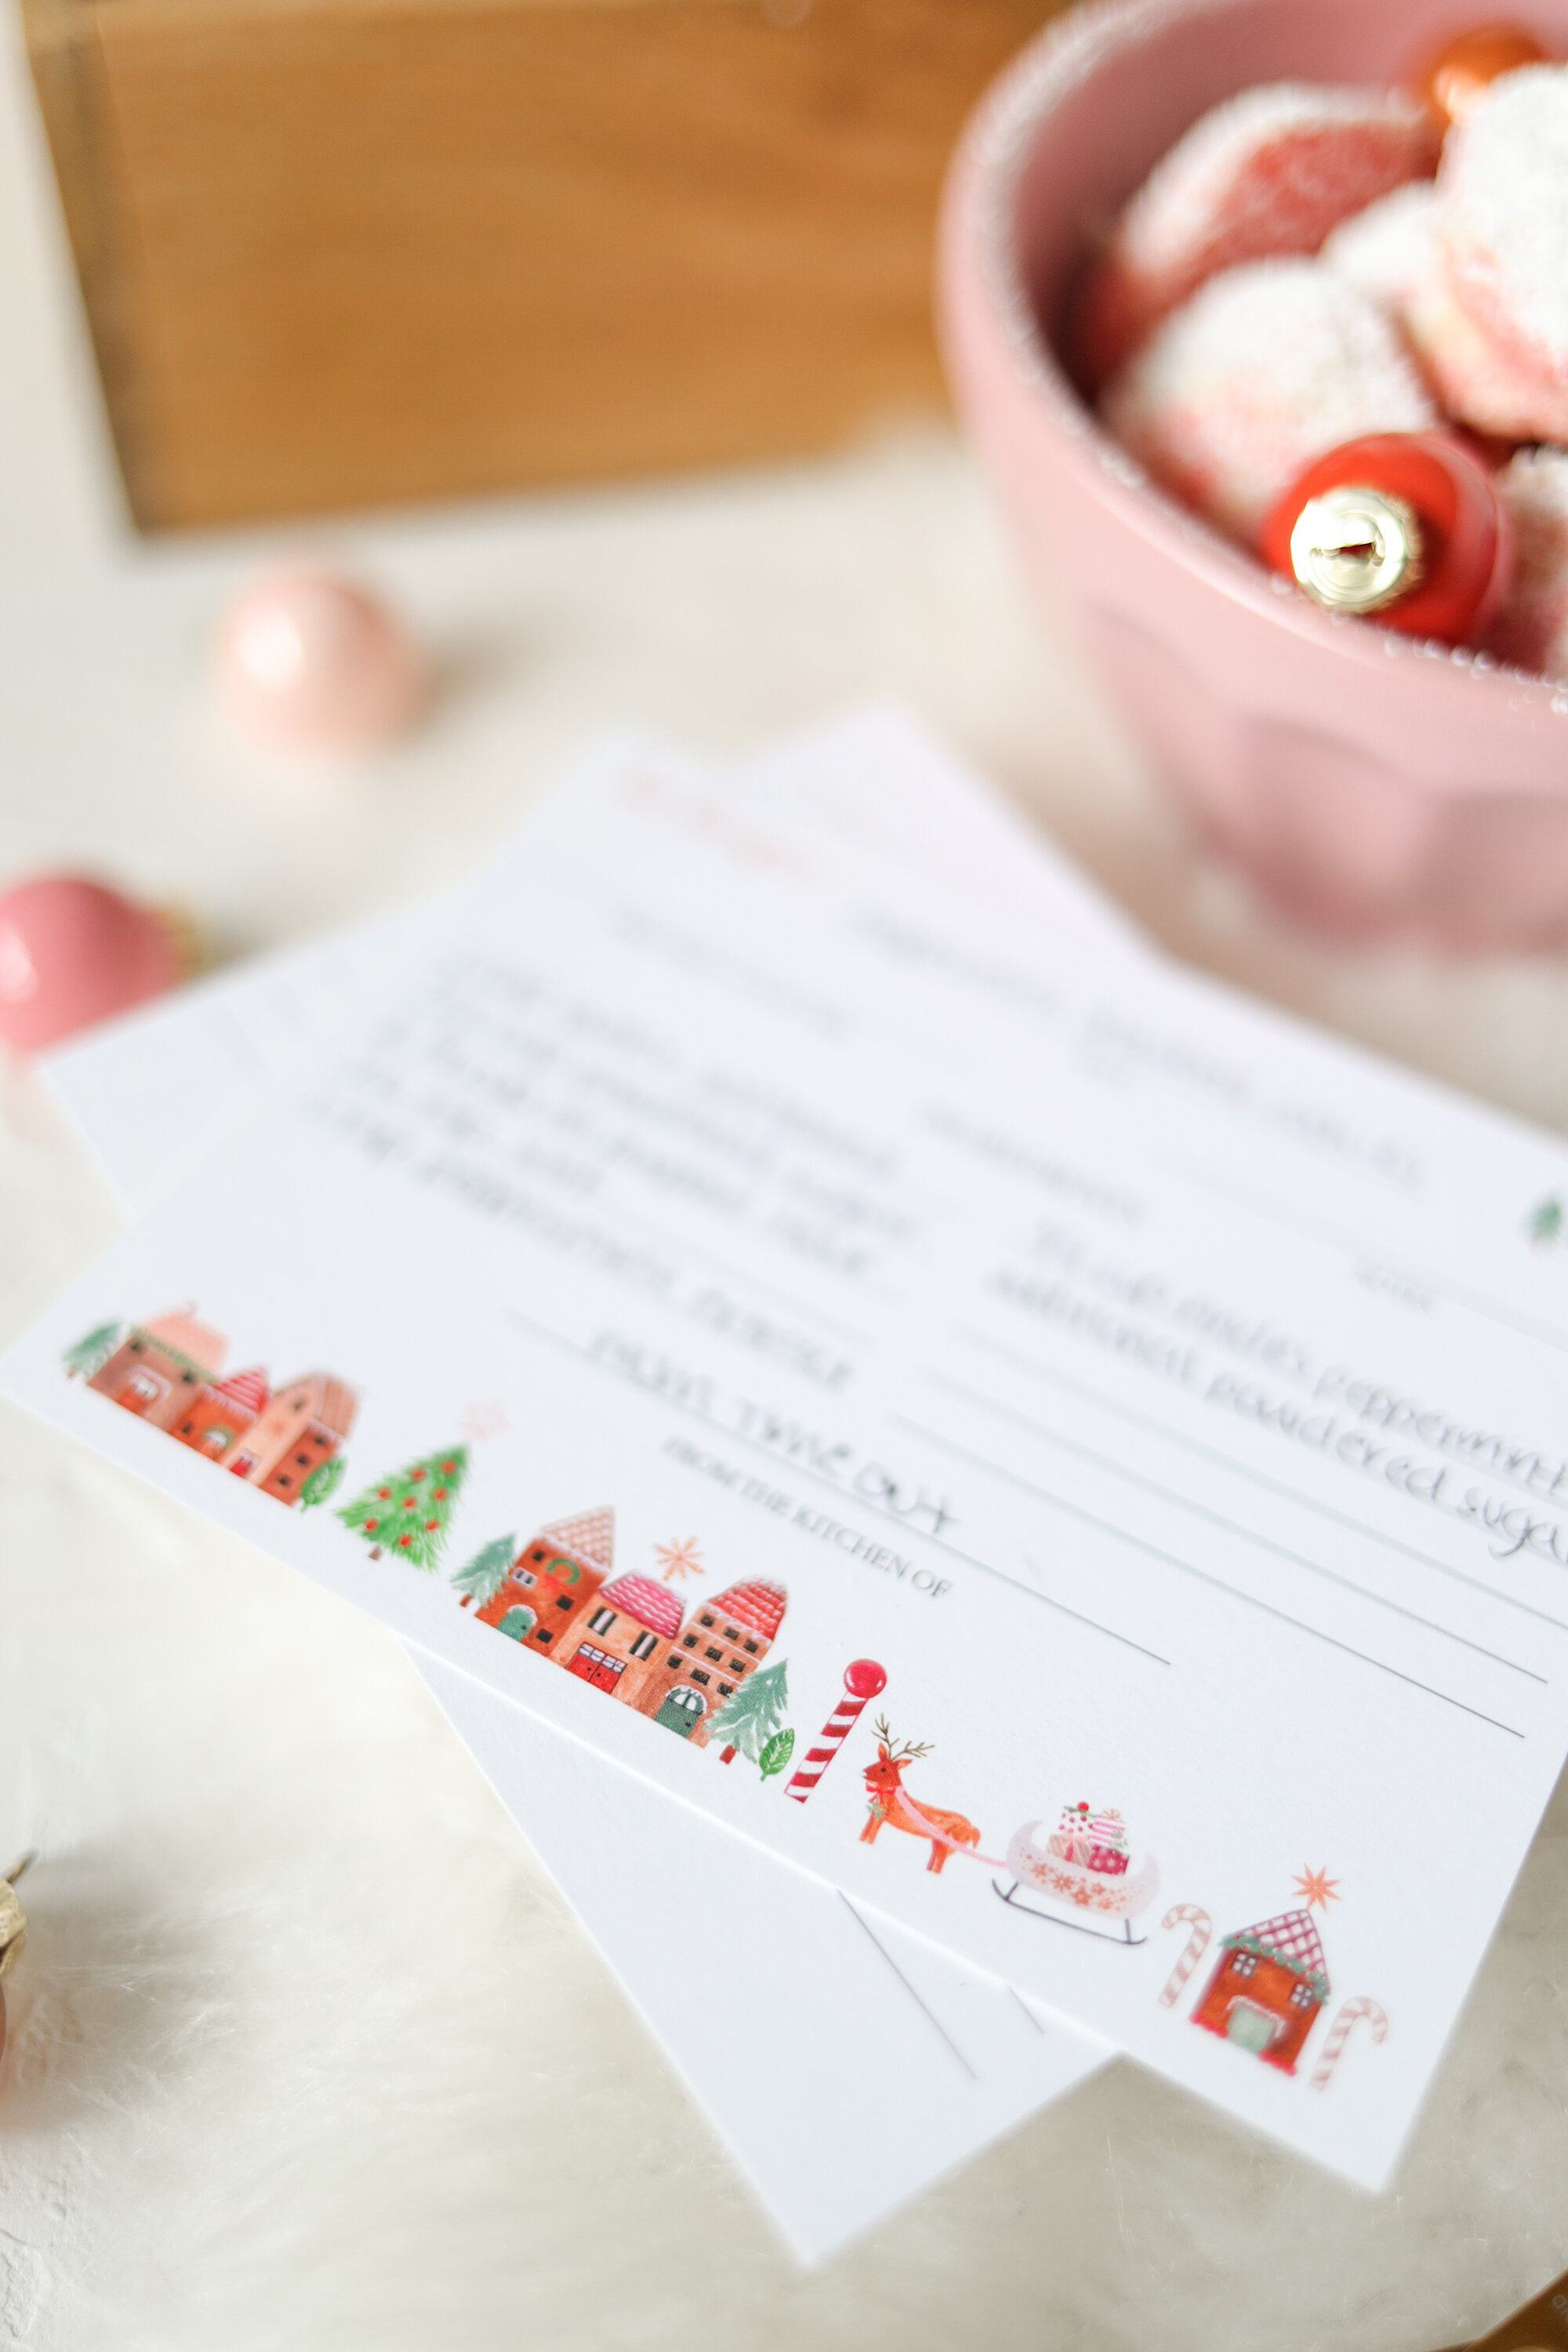
The peppermint snowball cookies are from Mom Timeout, and I found them through my baking girl, Sally’s Baking addition. I’ll link below the snowball cookie recipe along with Sally’s compiled list of 75 holiday cooke recipes! She’s the best and I love her. My other tried and true faves are the ‘soft molasses cookies.’ Think gingerbread, but chewy and better.
https://www.momontimeout.com/peppermint-snowball-cookies-recipe/
https://sallysbakingaddiction.com/75-christmas-cookies/
*HOT BAKING TIP: I have found that the BEST cookie recipes are ones where the dough needs to chill for at least 30 minutes before getting rolled / scooped and baked!
Thanks for reading!
xx Stephanie
*click on the furthest right picture to swipe for more photos!